# Welcome to the Cerby Help Center!
We're here to get you the answers you need. Find guides, references, and best practices for deploying, configuring, and governing disconnected applications with the Cerby identity automation platform.
Welcome to the Cerby Help Center!
Find guides, references, and best practices for deploying, configuring, and governing disconnected applications with the Cerby identity automation platform.
***
### Get started
New to Cerby? Choose your guide and get up and running in minutes.
Start as an admin
Set up your workspace, connect your identity provider, and add your first accounts to start managing secure access across your organization.
***
### Find your path
Deep-dive into the documentation that matches your role.
Using Cerby
For all users: Find guides to add and share items, and keep your accounts and secrets secure using the Cerby web app, browser extension, and mobile app.
***
### Our solutions
Apply the same level of security to disconnected applications as your identity program does to core apps. Secure credentials, automate identity lifecycles, extend PAM, and more.
Cover image
Credential management and SSO
Automate password management and enable SSO and MFA for disconnected applications that lack support for SAML or OIDC. Automatically rotate credentials and terminate sessions.
Extend your IGA or IdP’s provisioning, deprovisioning, and governance workflows to disconnected applications, including those without APIs or SCIM. Control roles and entitlements with precision.
Protect your brand’s most visible social accounts with secure shared access, centralized user management, and automated provisioning and deprovisioning.
# Explore Cerby
Cerby is an identity platform that helps organizations secure and manage applications that cannot be integrated with traditional identity systems.
Most identity and access management tools rely on standards like SAML or SCIM to automate access. However, the majority of enterprise applications do not support these standards. In fact, fewer than 7% of the roughly 10,000 commonly used enterprise applications support SCIM. Many others lack APIs entirely, making them impossible to connect to modern identity stacks.
These disconnected applications include cloud services, legacy software, and on-premises systems. Because they cannot be centrally managed in an automated way, IT and Security teams are forced to rely on manual processes for tasks like granting access, updating permissions, and removing users. This manual approach creates security gaps, slows down operations, and increases the risk of human error.
Cerby is built specifically to solve this problem. It extends identity security to disconnected applications by integrating with your existing Identity and Access Management (IAM), Identity Governance and Administration (IGA), and Privileged Access Management (PAM) systems. Instead of replacing your current stack, Cerby fills the gaps by bringing automation, centralized control, and governance to applications that were previously unmanaged.
With Cerby, organizations can apply consistent access policies across all applications, automate repetitive security tasks, and maintain full visibility into user activity. Therefore, Cerby helps reduce operational overhead while improving security and compliance.
### Key benefits
* **Reduce manual work and operational overhead:** Eliminate time-consuming, ticket-based processes for managing access. Free up IT and Security teams to focus on higher-value work instead of repetitive administrative tasks.
* **Close security gaps across disconnected applications:** Extend consistent access controls to applications that cannot be integrated with traditional identity tools, reducing risk and limiting exposure from unmanaged accounts.
* **Ensure timely and accurate access across the user lifecycle:** Grant users the right access when they need it and remove it immediately when they don’t. Minimize the risk of overprovisioning and orphaned accounts.
* **Protect high-risk and shared accounts:** Bring structure and accountability to social media and other shared accounts, reducing the likelihood of misuse, unauthorized access, or credential leakage.
* **Improve visibility and audit readiness:** Maintain a complete, centralized record of access activity across all applications. Simplify compliance and make it easier to demonstrate control during audits.
***
### Explore our client apps
Cerby is available across three client apps. Find documentation for each platform below:
Web app
The central platform for workspace administration, asset management, security policies, and integration configuration.
# Explore the Cerby web app
This article describes the key benefits of the Cerby web app to manage your workspace and items from your web browser.
The Cerby web app is the central management platform for your Cerby workspace. While the Cerby mobile app and browser extension are focused on providing secure, on-the-go access and streamlined logins, the web app serves as the command center where you configure security policies, trusted devices and sessions, and organize all your accounts, secrets, and collections.
The web app is the most complete Cerby client. While the mobile app and browser extension also let you add and manage accounts and secrets, the web app is the only client that provides you with full access to workspace administration, policies, and integrations such as IdLCM and business hubs. All three clients stay in sync, so changes to workspace items are reflected across all your devices in real time.
You can also use the web app independently. It provides all the tools you need to manage your workspace, from onboarding new members to monitoring the health of automation jobs, without needing to install any additional software.
With the Cerby web app, you can ensure that all disconnected apps, those not natively integrated with your corporate identity platform, are securely managed and properly maintained from a single, unified interface.
The Cerby web app: All Accounts page with the Add account details dialog open.
***
## Supported browsers
The Cerby web app is accessible from any modern web browser. The following browsers are recommended for the best experience:
* Google Chrome
* Mozilla Firefox
* Microsoft Edge
* Apple Safari
{% hint style="info" %}
To unlock the full potential of Cerby, including automated logins, account autosave, and in-browser security policy enforcement, install the [Cerby browser extension](https://help.cerby.com/cerby-browser-extension/installation/install-the-cerby-browser-extension) in your web browser.
{% endhint %}
***
## Key benefits
The Cerby web app is designed to provide complete visibility and control over your workspace, whether you are an IT administrator managing a large team or an end user keeping track of your own accounts.
The following are the key benefits of using the Cerby web app:
* **Centralized visibility:** Get a complete view of all corporate accounts, secrets, and collections in one place, making it easier to audit and manage your organization's digital assets.
* **Enhanced security control:** Enforce password policies and security rules across accounts that typically lack corporate oversight, reducing the risk of credential-based incidents.
* **Streamlined administration:** Invite guest users, organize users into teams, and assign them to the items they need, all from a single interface.
* **Real-time sync:** Accounts, secrets, and collections stay in sync across the web app, mobile app, and browser extension, keeping your information up to date regardless of which client you use.
* **Automation management:** Track the status of automation jobs, such as rotating passwords and turning on multi-factor authentication (MFA), and address issues before they affect your users' access.
***
## Key features
### Account and credential management
The following are the key account and credential management features of the Cerby web app:
* **Accounts:** Add, view, edit, and share corporate accounts. Each account stores login credentials and MFA settings, giving you a single source of truth for access.
* **Secrets:** Securely store sensitive information such as API keys, certificates, and other confidential data. All secrets are encrypted to ensure they remain private.
* **Collections:** Organize accounts and secrets into logical groups and share them with specific members or teams, making it easy to grant and revoke access at scale.
* **MFA management:** Turn MFA on or off, and manage access verification codes for your managed accounts directly from the web app.
### Security and compliance
The following are the key security and compliance features of the Cerby web app:
* **Security Hub:** Monitor the overall security health of your workspace, identify orphaned accounts, and address open automation task issues from a central dashboard.
* **Password policies:** Create and enforce password rules across accounts to ensure credentials meet your organization's security requirements.
* **Automation:** Track the status of automation jobs and review job history to keep access running smoothly.
* **Activity reports:** Review a full audit log of actions performed in your workspace to support compliance and incident response.
### Workspace administration
The following are the key workspace administration features of the Cerby web app:
* **Members and teams:** Update workspace roles, organize users into teams, and manage partnerships.
* **Identity Lifecycle Management (IdLCM):** Connect your identity platform to external applications to automate the identity journey through creation (joiner), modification (mover), and retirement (leaver), and manage entitlements. Keep access in sync as your team changes.
* **Business hubs:** Manage hierarchical business management platforms for social media, including connected accounts, external user assignments, and multi-level partner access.
* **Workspace settings:** Configure global workspace options, including general settings, IdP settings, privacy and security, trusted devices, API access, and extension settings.
* **Personal profile:** Manage your account information, set up MFA verification methods, register trusted devices, and access developer tools from your profile menu.
# Explore the Cerby browser extension
This article describes the key benefits of the Cerby browser extension to manage your items and log in to your accounts.
The Cerby browser extension is an add-on for your web browser designed to provide you with the most optimal user experience. While the core functionalities of the Cerby platform can be accessed via the web app, the browser extension unlocks the full potential of Cerby, significantly streamlining your daily activities.
The extension is strategic for performing automated logins to your accounts, identifying and autosaving your accounts, and enforcing security policies in your web browser, among other features. Additionally, it enables you to seamlessly manage your items: accounts, secrets, and collections.
The following are the four underlying services of the Cerby browser extension:
* **Autofill:** It consists of the services responsible for interacting with the web page’s content to enable auto and manual injection of login credentials.
* **Popup:** It consists of the main user interface (UI) service of the extension displayed when users click the Cerby icon in the web browser’s toolbar or add-ons section. Users interact with the popup to access and perform actions on their items, such as viewing the details of accounts, secrets, and collections.
* **Inline menu:** It consists of a complementary UI service of the extension displayed in input fields. Users interact with the inline menu to perform actions specific to the context of the input field, such as autofilling login credentials.
* **App setting restrictions:** It consists of the service responsible for enforcing security policies in the web browser to prevent users from changing user, password, and account settings.
* **Login credential capture:** It consists of the service responsible for identifying login and signup attempts and capturing the login credentials for autosaving accounts, either through a prompted or enforced flow.
{% hint style="danger" %}
**IMPORTANT:** The Cerby browser extension is not fully supported in incognito or private browsing windows\*\*.\*\* Some features may not work as expected, which can lead to a bad user experience. For the best performance and access to the full Cerby experience, use a standard browser window.
{% endhint %}
**Figure 1** shows how the Cerby browser extension popup looks.
Cerby browser extension popup
***
## Supported browsers
The Cerby browser extension is supported by the following web browsers:
* [Firefox](https://addons.mozilla.org/en-US/firefox/addon/cerby-s-browser-extension/)
* [Google Chrome](https://chrome.google.com/webstore/detail/cerbys-browser-extension/clccplmaaeihbagbefjinmclielobnkb)
* [Microsoft Edge](https://microsoftedge.microsoft.com/addons/detail/cerbys-browser-extension/bbaiiaogfdgpbapebajffliefkfipoif)
* [Safari](https://apps.apple.com/mx/app/cerby-web-extension/id1581820030?l=en\&mt=12)
{% hint style="danger" %}
**IMPORTANT:** While you can install the Cerby browser extension in Opera, being a Chromium-based web browser, you may experience issues with field detection. We’ll support Opera in the future.
{% endhint %}
It’s worth mentioning that Cerby provides the flexibility for organizations to decide whether to make the browser extension installation optional or to deploy it centrally via a Mobile Device Management (MDM) solution. For more information, read the article [Install the Cerby browser extension via an MDM service and a configuration file](https://help.cerby.com/setup-and-admin/client-app-deployment/install-the-cerby-browser-extension-via-an-mdm-service-and-a-configuration-file).
***
## Key benefits and operations
The following are the key benefits and operations of the Cerby browser extension:
* **Real-time sync:** Changes made on the Cerby web app, such as adding accounts, updating passwords, or organizing collections, are instantly reflected in the browser extension, ensuring your information is always up-to-date.
* **Streamlined login:** Experience auto-login to your accounts, eliminating the need to manually enter usernames, passwords, and multi-factor authentication (MFA) codes. Also, you can perform assisted manual logins with the inline menu.
* **Account onboarding:** Identify and autosave new accounts in Cerby as you log in or sign up for apps and service providers, maintaining a complete record of your digital footprint.
* **In-app access control:** For specific domains, the Cerby browser extension can enforce security policies, ensuring users only interact with allowed sections of the app settings.
* **Enterprise-first:** Leverage your MDM service to install the Cerby browser extension across all the endpoints in your organization. You can pre-seed your workspace in the extension for user convenience.
* **Password generation:** Use our password strength selectors to generate strong passwords that comply with your app requirements.
* **In-context alerts:** Let Cerby display important notifications in your web browser as the Cerby browser extension performs tasks for you, such as auto-login.
* **Item management:** Use the Cerby browser extension popup to view your accounts, secrets, and collections.
* **Auto-signing in to the extension:** Leverage the active session of your identity provider to automatically sign in to the Cerby browser extension. Currently, this feature is available for Okta-based workspaces.
***
# Explore the Cerby mobile app
This article describes the key benefits of the Cerby mobile app to manage your items and assets from your phone.
With the Cerby mobile app, you can manage your accounts, secrets, and collections, log in to your accounts, and perform multi-factor authentication (MFA) tasks directly from your iOS or Android phone.
If you are familiar with the Cerby web app, the mobile app acts as an extension. This client app enables you to access all the information, settings, and security features of your Cerby workspace from your phone.
You can also use the mobile app independently because it provides the features needed to manage your accounts, secrets, and collections while integrating security and ensuring that your sensitive information remains protected.
The Cerby mobile app is built using best practices for iOS and Android platforms, ensuring a secure and reliable experience regardless of your device.
The layout is designed to be user-friendly, ensuring that you can find what you need with just a few taps. Whether you're looking to quickly log in to an account or update your authentication methods, the dashboard makes it all accessible.
The Cerby mobile app, main dashboard with account cards and navigation options.
***
## Operating systems
The Cerby mobile app is available to download on the stores of iOS and Android, the two main operating systems:
* [App Store](https://apps.apple.com/us/app/cerby/id1533747684) (**minimum requirements:** iOS 18.0)
* [Google Play Store](https://play.google.com/store/apps/details?id=com.cerby\&hl=da\&gl=US)(**minimum requirements:** Android 11.0)
Read the articles in the [Cerby mobile app](https://help.cerby.com/cerby-mobile-app) to learn how to install the app.
***
## Key benefits
The Cerby mobile app is designed to provide flexibility, whether you use it as an extension of the web app or as a standalone client app for managing your accounts, secrets, and collections.
The following are the main benefits of using the Cerby mobile app:
* **Real-time sync:** Changes made on the web app, such as adding accounts, updating passwords, or organizing collections, are instantly reflected in the mobile app, ensuring your information is always up-to-date.
* **On-the-go access:** Whether you need to quickly log in to an account, approve an MFA request, or check a saved secret, the mobile app facilitates your access to Cerby anytime, anywhere. This feature is ideal for users who need secure access to their accounts while away from their primary device.
* **Zero-knowledge security:** The app follows the same Zero Knowledge principles as the Cerby web app, meaning that only you can access your encrypted data. You can rest assured knowing that your login credentials and other sensitive information remain private and secure.
***
## Key operations
The following are the key operations you can perform using the Cerby mobile app:
* **Logging in to your accounts:** You can safely and securely log in to your corporate accounts on your mobile device.
* **Account management:** You can add, edit, and share your accounts directly within the mobile app. It provides a streamlined interface for managing your login credentials, ensuring your accounts are secure and easily accessible.
* **Access to secrets:** You can use the app to securely store sensitive information in your workspace, such as passwords, API keys, and other confidential data. All your secrets are encrypted, ensuring that they remain private and secure.
* **Multi-factor authentication (MFA):** The app simplifies the management of MFA tasks, such as retrieving verification codes. You can set up and manage MFA for your accounts, adding an extra layer of security. The app supports various MFA methods, including time-based one-time passwords (TOTP) and push notifications, providing a seamless authentication process.
# Quick start guide for admins
This article describes the key initial steps to set up your Cerby workspace to securely store credentials and manage shared access in your organization.
Hi there, welcome to Cerby!
If you're reading this guide, it means you're ready to set up Cerby for your organization. After completing these steps, you'll have a workspace where you can securely store and organize application accounts, share access with the right people, and start applying controls that make access management easier and more secure as you scale.
***
## Before you begin
Before starting, make sure that you meet the following requirements to create and set up a Cerby workspace:
* An email invite sent by the Cerby team from our official email address, , to create a workspace.
* The authoritative source of user identity identified, whether an identity provider (IdP) or Cerby itself.
***
## Set up your Cerby workspace
Complete the following steps to create and configure your Cerby workspace, then add your application accounts to securely store credentials and manage shared access in your organization.
So, let's get started. We prepared the following steps to get you covered:
1. [Create your Cerby workspace](#id-1.-create-your-cerby-workspace)
2. [Add your items to Cerby](#id-2.-add-your-accounts-to-cerby)
The following sections describe each step.
### 1. Create your Cerby workspace
A Cerby **workspace** is the environment where your organization manages shared access to app accounts. It's where users access accounts to log in to other apps, and where Admins control access and workspace security settings.
When creating a Cerby workspace, you'll assign a name to it and choose how users will sign in and be provisioned. Cerby supports two workspace configurations:
* [IdP-managed workspace (SSO + directory sync)](#idp-managed-workspace-sso--directory-sync)
* [Local user workspace](#local-workspace)
The following sections describe each option.
#### IdP-managed workspace (SSO + directory sync)
Choose this option when you want Cerby to connect to your IdP to enable single sign-on (SSO) and user provisioning, and keep users aligned with your organization's directory.
To set up a new workspace and connect it with your IdP, you must complete the following steps:
1. [Configure SSO between Cerby and your IdP](#id-1.-configure-sso-between-cerby-and-your-idp)
2. [Enable user provisioning with SCIM](#id-2.-enable-user-provisioning-with-scim)
Each step is described in the following subsections.
**1. Configure SSO between Cerby and your IdP**
To set up an IdP-managed workspace, refer to the specific instructions for your IdP:
* **Okta:** Configure SSO Between Cerby and Okta with SAML
* **Entra ID:** Configure SSO between Cerby and Entra ID with SAML
* **Google Workspace:** Configure SSO between Cerby and Google Workspace with SAML
* **OneLogin:** Configure SSO between Cerby and OneLogin with SAML
* **JumpCloud:** Configure SSO between Cerby and JumpCloud with SAML
If your selected IdP is not listed above, refer to the article Configure SSO between Cerby and your IdP with SAML.
**2. Enable user provisioning with SCIM**
To automatically synchronize users (and, when supported, groups) from your IdP into Cerby, so onboarding and offboarding stay aligned without manual updates, enable SCIM provisioning.
To enable SCIM provisioning, refer to the specific instructions for your IdP:
* **Okta:** How to Enable Okta User Provisioning with SCIM
* **Entra ID:** Configure automatic user and group provisioning with Entra ID via SCIM
* **OneLogin:** Configure automatic user provisioning with OneLogin via SCIM
#### Local workspace
Choose this option when you need Cerby to manage user identity and authentication instead of using an IdP, such as Okta or Entra ID. Users sign in directly to Cerby using credentials managed by Cerby.
For instructions on how to create and configure a local user workspace, read the article Create and configure a local user workspace.
### 2. Add your items to Cerby
After creating and configuring your workspace, the next step is to add your accounts (login credentials for your corporate apps) and secrets (secure notes) to Cerby so that you can protect and manage access to them.
Cerby supports two ways to add items:
* [Add items manually](#add-items-manually)
* [Migrate items from your password manager](#migrate-items-from-your-password-manager)
The following sections describe each option.
#### Add items manually
Add your accounts and secrets manually if you have a small number of accounts and secure notes, you are starting with a pilot, or you need to create accounts that don't yet exist in an enterprise password manager (EPM).
For instructions on how to add items manually, read the articles [Add an account](https://help.cerby.com/cerby-web-app/accounts/managing-your-accounts/add-an-account) and [Add a secret](https://help.cerby.com/cerby-web-app/secrets/managing-your-secrets/add-a-secret).
#### Migrate items from your password manager
Migrate items if you already store corporate accounts and secure notes in an EPM and want to import them into Cerby in bulk.
You can migrate accounts and secrets (secure notes) using one of the following methods:
* [Password manager importer](#password-manager-importer)
* [CSV file importer](#csv-file-importer)
The following sections describe each option.
**Password manager importer**
To import items directly from a supported EPM, refer to the specific instructions for your EPM:
* [Migrate from LastPass to Cerby](https://help.cerby.com/cerby-web-app/item-importer/migrate-from-lastpass-to-cerby)
* [Migrate from 1Password to Cerby](https://help.cerby.com/cerby-web-app/item-importer/migrate-from-1password-to-cerby)
**CSV file importer**
If your password manager isn't directly supported, or if you prefer a universal import method, the CSV file importer lets you migrate items using a CSV export, so you can transition to Cerby without adding each account and secret manually.
For instructions on how to import your items, read the article [Import your items from a CSV file to Cerby](https://help.cerby.com/cerby-web-app/item-importer/import-your-items-from-a-csv-file-to-cerby) .
***
## What's next
Now that your workspace is created, users are onboarded, and your accounts and secrets are imported, you can start managing access and organizing credentials, applying security controls, connecting key apps, and monitoring activity across the workspace.
### Deploy the Cerby browser extension and mobile app
Deploy the Cerby browser extension and mobile app across your organization using a Mobile Device Management (MDM) platform to streamline installation and ensure a consistent user experience. For more information, see the [Client app deployment](https://help.cerby.com/setup-and-admin/client-app-deployment) section.
### Configure your workspace
You can further configure your workspace with the following options provided by Cerby:
* [**Set up a business email domain**](https://help.cerby.com/setup-and-admin/workspace-settings/set-up-a-business-email-domain)**:** Configure an Amazon SES integration so Cerby can send and receive email using your business domain.
* [**Extend accounts to your IdP**](https://help.cerby.com/setup-and-admin/workspace-settings/extended-account-access)**:** Enable the **Extended account access** feature so users can access Cerby-managed accounts from your IdP.
* [**App setting restrictions**](https://help.cerby.com/setup-and-admin/workspace-settings/extension-settings/app-setting-restrictions)**:** Encourage users to manage sensitive app settings through Cerby by applying recommendation-based or full-block restrictions.
* [**Vaults**](https://help.cerby.com/setup-and-admin/vault-management)**:** Store and manage account data and secrets in protected spaces designed to ensure privacy and security.
### Manage users and access in your workspace
Control who can access Cerby and how access is granted across accounts by assigning roles and organizing users through the following options provided by Cerby:
* **Members:** Workspace users with a Cerby account who can perform actions in your workspace based on their role and permissions.
* [**Guest users**](https://help.cerby.com/cerby-web-app/users/invite-a-guest-user-to-your-workspace)**:** Share items with external collaborators through Cerby by inviting them as guest users.
* [**Partners**](https://help.cerby.com/cerby-web-app/partners)**:** Collaborate with external parties (contractors, agencies, vendors, clients) in a secure and controlled way through Cerby.
* [**Teams**](https://help.cerby.com/cerby-web-app/teams)**:** Create groups of users to simplify sharing and access management to your Cerby items.
### Protect the accounts in your workspace
Use Cerby security controls to reduce risk and respond quickly to access issues with the following features provided by Cerby:
* [**Password policies**](https://help.cerby.com/setup-and-admin/security-governance/password-policies)**:** Set and enforce automated password rotation policies per app for the accounts in your workspace.
* [**Security Hub**](https://help.cerby.com/setup-and-admin/security-governance/security-hub)**:** Get a centralized view of the health and status of all accounts in your workspace, and take action on orphaned accounts.
* [**Universal logout**](https://help.cerby.com/setup-and-admin/security-governance/universal-logout)**:** Terminate user sessions from Cerby and your IdP.
### Manage your disconnected apps
Integrate your workspace with seat-based or paid social apps to simplify user and access management through **Business Hubs**. For more information, see the [Connecting your apps](https://help.cerby.com/setup-and-admin/business-hubs/connecting-your-apps) and [Connecting your paid social apps](https://help.cerby.com/setup-and-admin/business-hubs/connecting-your-paid-social-apps) sections.
### Monitor and audit your workspace
Track and analyze data related to user activity and security events in your workspace through the following options provided by Cerby:
* [**Automation Log**](https://help.cerby.com/getting-started/concepts/audit-and-activity/automation-log)**:** Review automation jobs to understand key benefits, settings, and outcomes of Cerby automation activity.
* [**Export analytics**](https://help.cerby.com/setup-and-admin/audit-and-activity/activity)**:** Export workspace analytics data to a SIEM solution via an integration.
# Quick start guide for users
This article describes the key steps you need to take to start using Cerby.
Hi there, welcome to Cerby!
If you're reading this guide, it means you're ready to start using our platform. Cerby is an identity automation platform that provides you with seamless, secure access to all the apps you need for work, without the hassle of managing individual passwords.
This guide covers the key steps you need to take to start using Cerby to add or access the accounts and secrets you need, and securely log in without manually sharing passwords.
***
## Before you begin
Before starting, make sure you meet the following requirements to start using Cerby:
* An email invite sent by the Cerby team from our official email address, `help@cerby.com`, to join a workspace
* The name of your Cerby workspace
***
## Start using Cerby
When your IT administrators grant you access to your Cerby workspace, you are ready to begin. Let's walk through the steps to get you started:
1. [Log in to your Cerby workspace](#id-1.-log-in-to-your-cerby-workspace)
2. [Install the Cerby browser extension](#id-2.-install-the-cerby-browser-extension)
3. [Log in to the Cerby browser extension](#id-3.-log-in-to-the-cerby-browser-extension)
4. [Install the Cerby mobile app](#id-4.-install-the-cerby-mobile-app)
5. [Log in to the Cerby mobile app](#id-5.-log-in-to-the-cerby-mobile-app)
The following sections describe each step.
### 1. Log in to your Cerby workspace
A Cerby workspace is the environment where your organization stores and accesses the items you need for work. From your workspace, you can streamline and protect your account logins.
To log in to your Cerby workspace, you must complete the following steps:
1. Open the Cerby login page with your browser.
2. Enter the name of your workspace.
3. Click the **Next** button.
4. Enter your corporate username and password in the corresponding fields.
5. Click the **Log in** button. The Cerby web app dashboard is displayed.
Now you are done.
### 2. Install the Cerby browser extension
For the most seamless experience, Cerby recommends installing its browser extension.
{% hint style="warning" %}
**IMPORTANT:** Your IT department may have already installed the Cerby browser extension for you. Before continuing, check whether it's already installed in your browser.
{% endhint %}
The Cerby browser extension is supported by the following web browsers:
* Firefox
* Google Chrome
* Microsoft Edge
* Safari
For instructions on how to install the Cerby browser extension on your computer, read the article [Install the Cerby browser extension](https://help.cerby.com/cerby-browser-extension/installation/install-the-cerby-browser-extension).
### 3. Log in to the Cerby browser extension
After installing the Cerby browser extension, log in to access your workspace and manage your items. For instructions on how to log in, read the article [Log in to the Cerby browser extension](https://help.cerby.com/cerby-browser-extension/installation/log-in-to-the-cerby-browser-extension).
### 4. Install the Cerby mobile app
With the Cerby mobile app, you can manage your accounts, secrets, and collections, log in to your accounts, and perform multi-factor authentication (MFA) tasks directly from your iOS or Android phone.
For instructions on how to install and configure the Cerby mobile app, refer to the specific instructions for your operating system:
* [**iOS**](https://help.cerby.com/cerby-mobile-app/installation/install-and-configure-the-cerby-mobile-app-on-ios)**:** Install and configure the Cerby mobile app on iOS
* [**Android**](https://help.cerby.com/cerby-mobile-app/installation/install-and-configure-the-cerby-mobile-app-on-android)**:** Install and configure the Cerby mobile app on Android
### 5. Log in to the Cerby mobile app
Access your workspace from your iOS or Android phone by following these steps:
1. Open the Cerby mobile app.
2. Enter your workspace name and tap **Next**.
3. Log in using your standard corporate credentials.
You are now ready to securely manage your accounts, collections, and multi-factor authentication (MFA) on the go.
***
## What's next
After you complete the setup steps above, you can start using Cerby to access and manage your items.
* [Add an account](#add-an-account)
* [Add a secret](#add-a-secret)
* [Create a collection](#create-a-collection)
* [Log in to your accounts](#log-in-to-your-accounts)
* [Protect your accounts](#protect-your-accounts)
### Add an account
An account contains your login information for a specific app or service, similar to a saved password in a standard password manager. Follow the next steps to add a new account to your Cerby workspace:
1. Log in to your Cerby workspace.
2. Click the **Add item** button located at the top right.
3. Select the **Account** option from the drop-down list.
4. Enter your account information in the corresponding fields, such as the **Account label**, **Username**, and **Current password**.
5. Click the **Add account** button. The new account details page is displayed.
To learn more about accounts in Cerby and the creation options, refer to the articles:
* [Explore Accounts](https://help.cerby.com/getting-started/concepts/credential-management/accounts)
* [Share an account](https://help.cerby.com/cerby-web-app/accounts/managing-access-to-your-accounts/share-an-account)
### Add a secret
A secret functions as a secure repository for sensitive, non-credential information. It functions the same as a secure note in a traditional password management platform. To add a new secret to your Cerby workspace, complete the following steps:
1. Log in to your Cerby workspace.
2. Select the **Secrets** option from the left menu.
3. Click the **Add secret** button.
4. Select the **Secret** option.
5. Enter the **Secret** label and your sensitive information into the **Notes** field (up to 45,000 characters). You can also upload file attachments.
* Optionally, set the secret to be temporary by specifying an expiration time (1, 2, 7, or 14 days).
To learn more about secrets in Cerby and the creation options, refer to the articles:
* [Explore Secrets](https://help.cerby.com/getting-started/concepts/credential-management/secrets)
* [Share a secret](https://help.cerby.com/cerby-web-app/secrets/managing-access-to-your-secrets/share-a-secret-or-secret-item)
### Create a collection
Collections enable you to group related accounts and secrets together for easier organization and sharing. To add a new collection to your Cerby workspace, complete the following steps:
1. Log in to your Cerby workspace.
2. Select the **Collections** option from the left menu.
3. Click the **Create collection** button. The **Create a collection** dialog box is displayed.
4. Enter a clear, identifiable name for your collection.
5. Click the **Next** button. The **Add items to your collection** dialog box is displayed.
6. Select the items you want to add to your collection.
7. Click the **Create collection** button to save your new collection.
To learn more about collections in Cerby and the creation options, refer to the articles:
* [Explore Collections](https://help.cerby.com/getting-started/concepts/credential-management/collections)
* [Share a collection](https://help.cerby.com/cerby-web-app/collections/managing-access-to-your-collections/share-a-collection)
### Log in to your accounts
Once your accounts are stored in Cerby, you can securely authenticate from any of the following supported devices:
* [Using the Cerby web app](#using-the-cerby-web-app)
* [Using the Cerby browser extension](#using-the-cerby-browser-extension)
* [Using the Cerby mobile app](#using-the-cerby-mobile-app)
#### Using the Cerby web app
To log in to an account from your web dashboard, follow these steps:
1. Log in to your Cerby workspace.
2. Click the **Log in** button that appears when hovering over an account card.
3. If you have more than one user account for the same app, the **Choose an account to log in** dialog box is displayed with a list of user accounts.
4. Click the **Log in** button of the corresponding user account.
Now you are done.
#### Using the Cerby browser extension
To log in using the browser extension, follow these steps:
1. Log in to your Cerby workspace with the browser extension.
2. Click the corresponding app card.
3. A page with your app's name displays the account cards for each user account.
4. Click the **View Details** button. A page with the details of your user account is displayed.
5. Click the **Log in** button.
Now you are done.
#### Using the Cerby mobile app
To securely log in to your apps on your phone using Cerby's autofill capabilities, follow these steps:
1. Open the login screen of the app you want to log in to on your mobile phone.
2. Tap the input field you want to autofill. a. If the **Allow Autofill** feature is correctly configured, your credentials saved in Cerby are displayed.
3. Select the corresponding account. The Cerby mobile app closes, and the login screen appears, with the input field already filled.
4. Tap the **Log in** button. For accounts with MFA turned on, the screen to enter an MFA code is displayed. a. Tap the verification code for this website - Cerby option displayed above the numerical keyboard. The corresponding field is filled out with the MFA code. b. Tap the button that verifies the code is correct.
Now you are done.
### Protect your accounts
With your apps added, you can now protect your accounts with the following options provided by Cerby:
* **Cerby-managed verification methods:** Use Cerby to manage account verification methods (including MFA) for supported apps.
* **Use Cerby as an MFA authenticator app:** Turn MFA on/off for supported accounts and complete verification flows using Cerby.
* **Cerby-managed email address and phone number:** Add a Cerby-managed email address or phone number to an account and use it for MFA verification (and view/forward messages from Cerby when needed).
* **RSA codes:** Set RSA tokens as an account verification method for apps that require RSA-based authentication.
* **Backup or recovery codes:** Store backup or recovery codes in Cerby to support account recovery.
### Share your accounts
Stop sharing login credentials over chat or email. Instead, share access securely with another user or team within Cerby by following the next steps:
1. Log in to your Cerby workspace.
2. Click the **Share account** icon that appears when hovering over an account card.
3. Select the **Share item** option. The **Share Access** dialog box is displayed.
4. Enter a user's or team's name in the search bar and select the corresponding match.
5. Select a role:
* **Owner:** Allow them to share access and manage settings.
* **Collaborator:** Allow them to log into the app only.
6. Click the **Confirm** button.
Now you are done.
# Credential management
Learn about the core objects Cerby uses to save, protect, and organize your login credentials and important information, such as accounts, secrets, collections, and vaults.
{% content-ref url="/pages/PRD14XniMOA8A5abCfSt" %}
[Accounts](/getting-started/concepts/credential-management/accounts)
{% endcontent-ref %}
{% content-ref url="/pages/TBk4sZc5fouK7zXUJ4Km" %}
[Secrets](/getting-started/concepts/credential-management/secrets)
{% endcontent-ref %}
{% content-ref url="/pages/gBMmjQrhrolBoF0UDBrN" %}
[Collections](/getting-started/concepts/credential-management/collections)
{% endcontent-ref %}
{% content-ref url="/pages/5GapjNTqkviBDN4ToSFn" %}
[Subcollections](/getting-started/concepts/credential-management/subcollections)
{% endcontent-ref %}
{% content-ref url="/pages/gMbrizunvaBAB1HKPdhB" %}
[Vaults](/getting-started/concepts/credential-management/vaults)
{% endcontent-ref %}
{% content-ref url="/pages/9DSkfQNC2qibu5Dm7w14" %}
[Trusted sessions and devices](/getting-started/concepts/credential-management/trusted-sessions-devices)
{% endcontent-ref %}
{% content-ref url="/pages/5d1fgiGLtlsBcHbC2nCu" %}
[Account autosave](/getting-started/concepts/credential-management/account-autosave)
{% endcontent-ref %}
{% content-ref url="/pages/rVSDNZPtqpnmyfMSwDei" %}
[Extended account access](/getting-started/concepts/credential-management/extended-account-access)
{% endcontent-ref %}
{% content-ref url="/pages/I0ykyvMxIJbAzHEfBNtH" %}
[Passkeys](/getting-started/concepts/credential-management/passkeys)
{% endcontent-ref %}
# Accounts
This article describes what accounts are in Cerby and the type of accounts you can add to your workspace.
At Cerby, accounts are digital records that contain user login information for a particular application or service provider. They are the equivalent of a password in a password management platform.
Typically, an account comprises a username, password, and login URL (optionally); however, it may contain additional information depending on the app, user needs, and Cerby product.
All users, except those with the **Login-only** or **Guest user** role, can add an account to their workspace to manage and secure access through Cerby. When you add an account, you automatically become the **Owner** of it, and when you share access with other workspace users or teams, you can assign them one of the following two roles:
* **Owner:** They can share access and manage the account configuration.
* **Collaborator:** They can log in to the account.
For more information about roles and the actions users can perform on an account, read the article [Roles and permissions](/getting-started/concepts/user-management/roles-and-permissions).
You can add your accounts to Cerby manually, at login, or import them from your password manager. For instructions, read the following articles:
* [Add an account](https://help.cerby.com/cerby-web-app/accounts/managing-your-accounts/add-an-account)
* [Autosave an account at login or signup](https://help.cerby.com/cerby-browser-extension/accounts/managing-account-autosave/autosave-an-account-at-login-or-signup)
* Import your items from [LastPass](https://help.cerby.com/cerby-web-app/item-importer/migrate-from-lastpass-to-cerby), [1Password](https://help.cerby.com/cerby-web-app/item-importer/migrate-from-1password-to-cerby), or a [CSV file](https://help.cerby.com/cerby-web-app/item-importer/import-your-items-from-a-csv-file-to-cerby).
Accounts are displayed as cards in your dashboard, whether you use the Cerby web app, browser extension, or mobile app. **Figure 1** shows different accounts on the **All accounts** page of the Cerby web app dashboard.
Figure 1. Account cards in the All accounts page of the Cerby web app dashboard
By interacting with account cards, you can trigger an automatic login, share access to the account, or open the account settings.
***
## Account types
The following are the account types you can add to Cerby:
* [Managed accounts](#managed-accounts)
* [Self-managed accounts](#self-managed-accounts)
* [No URL accounts](#no-url-accounts)
The following sections describe each account type.
### Managed accounts
Managed accounts are accounts for integrated apps with built-in support in Cerby, which means our Development team has identified their login flow, and they are available in our app catalog. When you add a managed account to Cerby, you can just select it from the catalog.
Logging in to your managed accounts from Cerby is a one-click experience: the login URL of your app opens in a new browser tab, and the Cerby browser extension automatically fills in your credentials. If you have multi-factor authentication (MFA) managed by Cerby, the verification codes are also automatically filled in.
In addition to automatic login, managed accounts also support the following hygiene security automated tasks triggered by one click in the Cerby web app:
* **Turn on or off MFA:** You can automatically turn on or off MFA for an account. When turning on MFA, you can also store the secret key for authentication in Cerby.
* **Check MFA status:** You can automatically verify if MFA is active and has the correct secret key.
* **Swap email:** You can change the current email registered in your accounts for a Cerby-managed email.
* **Swap phone:** You can change the current phone number registered in your accounts for a Cerby-managed phone number.
* **Rotate password:** You can automatically rotate your accounts' passwords to Cerby-generated secure passwords that comply with the password strength rules of each app.
{% hint style="info" %}
**NOTE:** Our Development team constantly adds new integrations to the app catalog. If you would like us to support a specific application or service provider, please send your request via email to the Customer Support team at .
{% endhint %}
### Self-managed accounts
Self-managed accounts are accounts for apps that you access through their website. When you add a self-managed account to Cerby, you must enter its login URL so the Cerby browser extension can identify the input fields and attempt to autofill them.
{% hint style="info" %}
**NOTE:** Cerby does its best to autofill your login credentials for self-managed accounts. Successful login attempts depend on having the correct login URL and on how complex the app’s user interface is. If you would like us to support a specific app or service provider, please send your request via email to the Customer Support team at .
{% endhint %}
Besides automatic login, Cerby doesn’t support additional security automated tasks for self-managed accounts.
### No URL accounts
No URL accounts are for non-integrated apps that you access locally, not through a website. Therefore, when you add them to Cerby, the login URL is not mandatory, and the rest of the account details are optional.
Some apps that can be accessed without a URL account are hardware devices and desktop applications. Cerby doesn’t support security automated tasks for these accounts. No URL accounts are identified visually in the Cerby dashboard, as shown in **Figure 2**.
Figure 2. No URL account card
# Secrets
This article describes the benefits of the Secrets feature to securely save and share important text-based information and file attachments.
With Cerby, you have a secure way to save and share your important corporate information through **Secrets**. This feature helps you write, edit, view, and share text-based information and attachments with other users and teams in Cerby.
Currently, Cerby supports the following secret items:
* **Secret:** It is the equivalent of a secure note in a password management platform. A secret contains sensitive and valuable information to which you want to restrict access.
* **WiFi:** It contains information about your WiFi network.
* **SSH keys:** They contain the Secure Shell (SSH) key pairs and details, such as passphrases, for secure remote access to servers and systems.
* **Database:** It contains the login credentials and details of a database, such as MySQL, Oracle, or SQL Server.
* **Server:** It contains the login credentials and details of a server.
* **Software license:** It contains vital information about a software license, such as the license key, the publisher, and support contact.
* **Custom item:** It contains customized information that doesn’t fit any of the other secret types.
{% hint style="info" %}
**NOTE:** You can add attachments to any secret item. For more information on the size limits and supported formats of secrets and attachments, read the [Attachment and input specifications](#attachment-and-input-specifications) section.
{% endhint %}
You can set up the following protection measures for your secrets:
* Set up an identity confirmation challenge for other workspace users who want to view or edit a secret that was shared with them. Identity challenges are also required for other actions. For more information, read the article [Confirm your identity with Cerby's MFA methods](https://help.cerby.com/tips-and-troubleshooting/best-practices/set-up-your-identity-with-cerby-s-mfa-methods).
* Make a secret temporary by setting up an expiration date, after which the secret is automatically deleted. For more information about this feature, read the [Temporary secrets](#temporary-secrets) section.
You can add your secret items and attachments to Cerby manually or import them from your [LastPass](https://help.cerby.com/cerby-web-app/item-importer/migrate-from-lastpass-to-cerby), [1Password](https://help.cerby.com/cerby-web-app/item-importer/migrate-from-1password-to-cerby), or a [CSV file](https://help.cerby.com/cerby-web-app/item-importer/import-your-items-from-a-csv-file-to-cerby). When you add a secret item manually, you automatically become its **Owner**, and when you share it with other workspace users or teams, you can assign them one of the following two roles:
* **Owner:** They can share access, edit, add attachments, and manage the secret item settings.
* **Collaborator:** They can only view the secret item and download the attachments.
For more information about roles and the actions users can perform on a secret item, read the article [Roles and permissions](/getting-started/concepts/user-management/roles-and-permissions).
All secret types are displayed as cards in your dashboard, whether you use the Cerby web app, browser extension, or mobile app. **Figure 1**, **Figure 2**, and **Figure 3** show secret cards on these client apps, respectively.
Figure 1. Secret cards in the Secrets page of the Cerby web app dashboard
Figure 2. Secret cards in the Secrets tab of the Cerby browser extension dashboard
Figure 3. Secret cards in the Secrets tab of the Cerby mobile app dashboard
***
## Attachment and input specifications
The following are the specifications on the size limits and supported formats of secrets, secret items, and attachments:
* **Notes field:** You can enter up to 45,000 characters in the **Notes** field of a secret and secret item.
* **Input fields** : You can enter up to 255 characters in the input fields, except the **Notes** field, of any secret and secret item.
* **Password field:** Secret items that support the **Password** field (such as server, database, and WiFi) have their value masked.
* **Attachments:** You can add as many file attachments as you want to a secret, and these files must not exceed 10 MB in size. The following are the supported file formats:
* CSV
* JSON
* DOC
* DOCX
* ODT
* PPT
* PPTX
* TXT
* LOG
* XLS
* XLSX
* PDF
* PNG
* JPG
* JPEG
* MPEG
* MP4
* M4A
* WAV
* AVI
* RTF
* HTML
* HTM
* MOV
* TIFF
* TIF
* WMV
* ZIP
* RAR
* KEY
* P7B
* P7C
* P7R
* P8
* P10
* P12
* CSR
* CER
* CRL
* CRT
* DER
* PEM
* PFX
* SPC
* CERT
***
## Temporary secrets
Secrets can be set as temporary to enhance protection and streamline secret management. Upon reaching the specified expiration time, they are automatically deleted.
Currently, you can only make a secret temporary when you are adding the secret to Cerby using the Cerby web app. Additionally, as a secret **Owner**, you can edit the expiration whenever and as many times as you want before reaching the expiration date.
The following rules apply to a temporary secret:
* Only secrets can be temporary; all other secret items, like databases and servers, don't support this feature.
* The expiration time is limited from one day to one month or 30 days.
* Temporary secret cards have a visual identifier in the dashboard indicating the remaining days until expiration, as shown in **Figure 4**. You can also view and edit the expiration time on the secret details page.
Figure 4. Temporary secret card in the Secrets page of the Cerby web app dashboard
* Deletion events after the expiration time are logged on the **Activity** page.
* When secrets are deleted after expiration, they are unrecoverable.
***
## Related articles
The following articles contain more information about the Secrets feature:
* [Add a secret](https://help.cerby.com/cerby-web-app/secrets/managing-your-secrets/add-a-secret)
* [Add a WiFi item](https://help.cerby.com/cerby-web-app/secrets/managing-your-secrets/add-a-wifi-item)
* [Add an SSH key item](https://help.cerby.com/cerby-web-app/secrets/managing-your-secrets/add-an-ssh-key-item)
* [Add a database item](https://help.cerby.com/cerby-web-app/secrets/managing-your-secrets/add-a-database-item)
* [Add a server item](https://help.cerby.com/cerby-web-app/secrets/managing-your-secrets/add-a-server-item)
* [Add a software license item](https://help.cerby.com/cerby-web-app/secrets/managing-your-secrets/add-a-software-license-item)
* [Add a custom item](https://help.cerby.com/cerby-web-app/secrets/managing-your-secrets/add-a-custom-item)
* [View a secret](https://help.cerby.com/cerby-web-app/secrets/managing-your-secrets/view-a-secret)
* [View a secret item](https://help.cerby.com/cerby-web-app/secrets/managing-your-secrets/view-a-secret-item)
* [Edit a secret](https://help.cerby.com/cerby-web-app/secrets/managing-your-secrets/edit-a-secret)
* [Edit a secret item](https://help.cerby.com/cerby-web-app/secrets/managing-your-secrets/edit-a-secret-item)
* [View the secret history and restore a secret](https://help.cerby.com/cerby-web-app/secrets/managing-your-secrets/view-the-secret-history-and-restore-a-secret)
* [Manage access to your secrets and secret items](https://help.cerby.com/cerby-web-app/secrets/managing-access-to-your-secrets/share-a-secret-or-secret-item)
* [Manage the attachments of a secret and secret item](https://help.cerby.com/cerby-web-app/secrets/managing-your-secrets/manage-the-attachments-of-a-secret-and-secret-item)
* [Delete a secret and secret item](https://help.cerby.com/cerby-web-app/secrets/managing-your-secrets/delete-a-secret-and-secret-item)
* [Monitor events on the Activity page](https://help.cerby.com/cerby-web-app/activity/monitor-events-in-the-activity-page)
# Collections
This article describes the benefits of using collections to group and share accounts, secrets, business hubs, and subcollections.
With **Collections**, you can group your accounts, secrets, business hubs, and subcollections for easy organization in your dashboard. Additionally, they enable you to efficiently share items in bulk with other workspace members and teams for collaborative access.
If you have used other password managers, like LastPass or 1Password, collections are the equivalent of a folder or vault.
The following are the characteristics and actions you can perform with the Collections feature:
* Group accounts, secrets, business hubs, assets, and subcollections in a hierarchical structure.
* Share items in bulk with other members and teams assigning predefined roles (**Owner** and **Collaborator** roles on collections and subcollections) based on Cerby’s role-based access control (RBAC) system.
* Subcollections inherit access permissions from their top-level collection, simplifying permission management.
* Share multiple business hub integrations and assets with other members and teams, letting them claim access to their external app accounts when they are ready. As part of this process, you specify the app role to assign to the users and teams. For more information, read the article [Manage access to business hubs and assets with collections](https://help.cerby.com/setup-and-admin/business-hubs/managing-your-business-hubs/manage-access-to-business-hubs-and-assets-with-collections).
* Improve organization and searchability of items.
* Streamline collaboration and knowledge sharing.
* Enhance security and control over access to sensitive information.
{% hint style="info" %}
**NOTE:** Only item **Owners** can add their items to a collection, and share this collection with other workspace members. For more information about the roles on collections, read the article [Roles and permissions](/getting-started/concepts/user-management/roles-and-permissions).
{% endhint %}
***
## The Collections page
The **Collections** page displays all the root collections you have created or to which you have been granted shared access. This page provides a convenient location to access and manage your accounts, secrets, business hubs, assets, and subcollections in a hierarchical structure.
You can perform the following actions from the **Collections** page:
* View and interact with collection cards, accounts, secrets, business hubs, assets, and nested subcollections.
* Search for collections and subcollections by their name.
* Create a collection through a wizard by clicking the **Create collection** button.
* Access the collection settings page that enables you to see the members who have access to it and the items within it, share a collection, assign a subcollection, delete a collection, and others.
**Figure 1** shows the **Collections** page that you can access from the left menu of the Cerby web app dashboard.
Figure 1. Collections page in the Cerby web app dashboard
**Figure 2** shows the **Collections** page that you can access from the Cerby browser extension popup.
Figure 2. Collections page in the Cerby browser extension popup
# Subcollections
This article describes the Subcollections feature to organize, import, and share your secrets, accounts, and other collections.
With **Subcollections**, you can efficiently organize your accounts and secrets under different collections called “parents.” Also, with Subcollections, you can easily complete the migration of nested folder-like entities from other password managers, such as LastPass, ensuring minimal disruption and maintaining productivity.
**Subcollections** in Cerby have the following characteristics:
* Visually represent the relationship between collections, secrets, and accounts, enabling easy navigation.
* Organize and enable easy management of multiple secrets and accounts with other members and teams in a workspace.
* Support up to six levels of nested subcollections from a parent collection.
* Easily propagate accesses and permissions on items to teams and individuals using role-based access control (RBAC).
**Figure 1** shows how secrets, accounts, and subcollections are displayed on the **Collections** page.
Figure 1. Collections page of the Cerby web app dashboard
{% hint style="info" %}
**NOTE:** Within the **Collections** page, you can see the collections and their nested subcollections and items. We use the term "root" to refer to the collections displayed at the highest level of the hierarchy. Depending on how a user received shared access to these collections, they might actually belong to a larger hierarchy of parent (top-level) collections and child (nested within parents) subcollections. For clarity, this document consistently uses the terms "parent" for top-level collections, "child" for nested subcollections, and "root" for the highest-level collection you see on the **Collections** page.
{% endhint %}
{% hint style="success" %}
**TIP:** You can use the global search field to search for a collection or subcollection.
{% endhint %}
With subcollections, you can perform the following actions:
* [Create a subcollection](https://help.cerby.com/cerby-web-app/collections/managing-your-subcollections/create-a-subcollection)
* [Add an existing collection as a subcollection](https://help.cerby.com/cerby-web-app/collections/managing-your-subcollections/add-an-existing-collection-as-a-subcollection)
* [Share a subcollection](https://help.cerby.com/cerby-web-app/collections/managing-access-to-your-subcollections/share-a-subcollection)
* [Remove user access to a subcollection](https://help.cerby.com/cerby-web-app/collections/managing-access-to-your-collections/remove-a-user-from-a-collection)
* [Remove a subcollection from a collection](https://help.cerby.com/cerby-web-app/collections/managing-your-subcollections/remove-a-subcollection-from-a-collection)
* [Delete a subcollection](https://help.cerby.com/cerby-web-app/collections/managing-your-subcollections/delete-a-subcollection)
Click the corresponding links to open the instructions for each action.
{% hint style="info" %}
**NOTE:** Our Development team continues working on the Subcollections feature. Refer to the [Known issues in subcollections](#known-issues-in-subcollections) section for a list of known issues. We will keep you posted when these issues are resolved.
{% endhint %}
***
## Known issues in subcollections
The following are the known issues in subcollections. Our Development team is already working on solving them, and we will update this list after they are resolved:
* It is not possible to see your subcollections in the Cerby mobile app yet.
* It is not possible to create an empty subcollection (a subcollection without items) yet.
* It is not possible to reassign a subcollection yet.
* If you get the following error when [adding an existing collection as a subcollection](https://help.cerby.com/cerby-web-app/collections/managing-your-subcollections/add-an-existing-collection-as-a-subcollection): “An unexpected error happened while adding to the collection,” as shown in **Figure 2.**
Figure 2. “An unexpected error happened while adding to the parent collection collection” error message
The following might have happened:
* You might have selected the parent collection as a subcollection. Please try again the assignment process.
* You surpassed the six-level nesting rule from a parent collection.
# Account autosave
This article describes the key benefits and configurations of the account autosave feature that captures login and signup credentials.
With the **Account autosave** feature, all workspace users can control how Cerby detects and saves credentials during login and signup events through the Cerby browser extension and web app. Workspace **Admins** and **Super Admins** can turn this feature on or off for all workspace users and specify the domains they want to include or exclude from the account autosave settings.
The following are the main benefits of the account autosave feature:
* Streamline adding accounts to Cerby by detecting login and signup events.
* Reduce the disruption of the Cerby browser extension screens for all or specific domains to improve the login and signup experience.
* Customize the saving behavior (enforced or prompted) to balance security and user control.
* Ensure a seamless user experience across the workspace at login and signup.
* Capture and automatically associate accounts to business hub integrations so Cerby can manage and secure access to their seat-based and paid social app
***
## Account autosave settings
Two account autosave settings determine the user experience during login and signup:
* [Prompted autosave](#prompted-autosave)
* [Enforced autosave](#enforced-autosave)
### Prompted autosave
The **Prompted autosave** setting displays the **Add your account to Cerby** dialog box, asking users whether they want to save their credentials to Cerby when they log in or sign up for accounts in domains configured in the workspace. Users can choose to save or skip the account autosave.
### Enforced autosave
The **Enforced autosave** setting automatically saves credentials without displaying a prompt when users log in or sign up for accounts in domains configured in the workspace. The goal is to ensure that credentials are captured and added to Cerby.
***
## Account autosave levels
The account autosave feature operates at two levels:
* [Individual level](#individual-level)
* [Workspace level](#workspace-level)
### Individual level
The individual level is available for the **Prompted autosave** setting only. The following are the actions all workspace users can perform to manage the account autosave settings:
* In the **Add your account to Cerby** dialog box for specific domains, select the Never save for this site option to prevent the Cerby browser extension from displaying the dialog box again.
* Remove domains from your list of denied domains to let the Cerby browser extension display the **Add your account to Cerby** dialog box again.
### Workspace level
The workspace level is available for both settings, **Prompted** and **Enforced autosave**. The following are the actions workspace **Admins** and **Super Admins** can perform to manage the account autosave settings at the workspace level:
* Turn on or off the account autosave settings for all workspace users.
* Manage which domains are allowed or denied for the account autosave settings for all workspace users.
***
## Account autosave role assignments
The following are the cases for which role assignments differ in account autosave:
* [Accounts](#accounts)
* [Business hubs](#business-hubs)
### Accounts
All users who create accounts through **Prompted** or **Enforced** **autosave** linked to a new account are automatically assigned the **Owner** role.
### Business hubs
For business hubs, when Cerby captures credentials via **Enforced** and **Prompted autosave** and the associated app account is later linked to a business hub through a sync, Cerby assigns user roles based on whether the user was already invited to the business hub before the sync. The following scenarios describe how roles are assigned in different situations:
* [The user is already invited to the business hub](#the-user-is-already-invited-to-the-business-hub)
* [The user is added to the business hub after account creation](#the-user-is-added-to-the-business-hub-after-account-creation)
#### The user is already invited to the business hub
A business hub integration **Owner** invites a user to the business hub and assigns them a role (**Owner** or **Collaborator**) before running a sync, and that same user logs in to an account that is captured via **Enforced** and **Prompted autosave**, Cerby performs the following:
* The captured account is associated with the business hub when the sync runs.
* Cerby keeps the role previously defined in the business hub (**Owner** or **Collaborator**) for the user on the associated account.
#### The user is added to the business hub after account creation
If a user creates an account for an app via **Enforced autosave** *before* being added to a business hub for that same app, and is later synced into the business hub without a specific role assignment, Cerby performs the following:
* Detects the email match between the user and the existing account.
* Automatically assigns the **Collaborator** role to the user in the business hub and the **Owner** role on the previously created account.
***
## Related articles
Refer to the following articles to learn more about Cerby’s account autosave settings:
* [Manage account autosave domains](https://help.cerby.com/setup-and-admin/workspace-settings/extension-settings/account-autosave/manage-account-autosave-domains)
* [Turn on prompted autosave in your workspace](https://help.cerby.com/setup-and-admin/workspace-settings/extension-settings/account-autosave/turn-on-prompted-autosave-in-your-workspace)
* [Turn on enforced autosave in your workspace](https://help.cerby.com/setup-and-admin/workspace-settings/extension-settings/account-autosave/turn-on-enforced-autosave-in-your-workspace)
* [Autosave an account at login or signup via the Cerby browser extension](https://help.cerby.com/cerby-browser-extension/accounts/managing-account-autosave/autosave-an-account-at-login-or-signup)
# Extended account access
This article describes the benefits of the Extended account access feature to access your apps from your IdP with Cerby's automated login.
With Cerby, you can centralize access to your disconnected apps in your identity provider (IdP) while still providing Cerby's automated login experience.
The **Extended account access** feature helps you sync and extend your accounts to your IdP, including user and team access grants to them. The goal is to allow you and your collaborators to trigger secure automated logins from your IdP’s user interface (UI) by leveraging the Cerby browser extension, which takes over the work of autofilling the credentials and verification codes when Cerby manages multi-factor authentication (MFA).
Additionally, to keep consistency, updates in user and team access to Cerby accounts propagate unidirectionally to your IdP as soon as they happen.
Cerby's role-based access control (RBAC) system is the source of truth for determining who sees an account in the UI of their IdP (whether it’s a dashboard, login portal, or app launcher) and if the Cerby browser extension can retrieve the user’s credentials. The following are the actions users can perform with this feature based on their workspace and item role in Cerby:
* Workspace **Admins**, **Super Admins**, and **Owners** can turn on and off this feature.
* Account and collection **Owners** can start syncing accounts and collections with their IdP.
* Account **Owners** and **Collaborators** can see the corresponding accounts in their IdP’s UI for logging-in purposes.
* Users with the **Login-only** workspace role cannot use this feature because they are unable to access an account’s credentials.
Currently, Cerby supports this feature for Okta. Therefore, Cerby accounts become applications in Okta with their corresponding chiclet on the main page of the dashboard, and user and team grants to the account become individual assignments in Okta.
According to the roles mentioned above, the chiclets are created in the Okta dashboard only for users with the **Owner** or **Collaborator** role on an account, as shown in **Figure 1**.
Figure 1. Chiclets in the Okta dashboard synced from accounts in Cerby
{% hint style="info" %}
**NOTE:** If you are interested in the Extended account access feature but don't see it available in your workspace, contact our Customer Support team via email at .
{% endhint %}
***
## Learn how the Extended account access feature works
When a workspace **Admin**, **Super Admin**, or **Owner** turns on the Extended account access feature and the Cerby Customer Support team enables it, all workspace members can start syncing and extending to Okta the accounts they own.
Data requests from Cerby to Okta are performed through API calls and only for users with a SCIM external ID assigned by Okta to ensure their identity is consistent. The first sync may take from minutes to hours, depending on the number of accounts and users with shared access to them, while subsequent syncs happen faster whenever an update is registered in Cerby.
Because Cerby’s RBAC is the source of truth, IT admins cannot update user and group assignments in Okta to propagate them to Cerby; if they do, Cerby overwrites these changes in the next sync. Additionally, if an IT admin assigns a synced application in Okta to a user who doesn’t have access in Cerby as **Owner** or **Collaborator**, the chiclet will be displayed, but the user will be unable to log in to the account.
The following are the actions synced with Okta as soon as they happen in Cerby:
* Share and remove access from an account to users or teams. This action includes assigning or unassigning users to Okta groups, which propagates to teams in Cerby with shared access to accounts.
* Updates to account labels.
User provisioning and deprovisioning events and account deactivation in Okta via SCIM can impact user access in Okta and Cerby as follows:
* When access to an account is shared via a team in Cerby, and that team is provisioned from an Okta group, new users assigned to the Okta group will see the corresponding Okta chiclet right after the data sync.
* Deprovisioned or deactivated users in Okta lose all access both to the Okta tenant and Cerby workspace; therefore, they lose access to all items. Additionally, Cerby performs automated password rotations for the security of the managed accounts.
{% hint style="danger" %}
**IMPORTANT:** No sensitive data is shared with Okta; all account data remains stored in the corresponding Cerby workspace so users can perform automated logins. The Cerby browser extension is required for the automated login to happen.
{% endhint %}
Each Okta chiclet serves as a bookmark that enables users to trigger an automated login in the Cerby browser extension without additional manual intervention. The automated login process is the following:
1. A user clicks the corresponding chiclet in the Okta dashboard.
2. Okta redirects the user to the Cerby platform. One of the following scenarios occurs depending on whether the user has an active session on the Cerby browser extension or not:
* **Active session:** The Cerby platform detects the active session and proceeds to step 3.
* **Inactive session:** The Cerby platform starts an authentication flow between Cerby and Okta to automatically log the user in to the browser extension, and proceeds to step 3.
3. The Cerby browser extension verifies in Cerby’s RBAC system if the user has access to the account as **Owner** or **Collaborator**. One of the following scenarios occurs depending on whether the user has access to the account or not:
* **Access:** The Cerby browser extension proceeds to step 4.
* **No access: The Cerby browser extension blocks the login process.**
4. The Cerby browser extension performs the automated login by autofilling the username, password, and verification code if Cerby manages multi-factor authentication (MFA).
{% hint style="danger" %}
**IMPORTANT:** Cerby always verifies the RBAC system to ensure users have access to an account through any type of share: account, collection, or team.
{% endhint %}
***
## Related articles
The following articles contain more information about the Extended account access feature:
* [Turn on Extended account access for Okta](https://help.cerby.com/setup-and-admin/workspace-settings/extended-account-access/turn-on-extended-account-access-for-okta)
* [Turn off Extended account access for Okta](https://help.cerby.com/setup-and-admin/workspace-settings/extended-account-access/turn-off-extended-account-access-for-okta)
* [Update the Extended account access settings for Okta](https://help.cerby.com/setup-and-admin/workspace-settings/extended-account-access/update-the-extended-account-access-settings-for-okta)
* [Log in to your extended accounts from Okta chiclets](https://help.cerby.com/cerby-web-app/accounts/extending-your-accounts-to-okta/log-in-to-your-extended-accounts-from-an-okta-chiclet)
* [Sync and extend an account to Okta](https://help.cerby.com/cerby-web-app/accounts/extending-your-accounts-to-okta/sync-and-extend-an-account-to-okta)
* [View the status of an extended account](https://help.cerby.com/cerby-web-app/accounts/extending-your-accounts-to-okta/view-the-status-of-an-extended-account)
* [Remove an account extended to Okta](https://help.cerby.com/cerby-web-app/accounts/extending-your-accounts-to-okta/remove-an-account-extended-to-okta)
* [Troubleshooting Extended account access](https://help.cerby.com/tips-and-troubleshooting/troubleshooting/extended-account-access/troubleshooting-extended-account-access)
# Trusted sessions and devices
This article describes trusted sessions and devices in Cerby.
Every time you access the Cerby platform, you are connecting from a device: the Cerby web app, browser extension, or mobile app. Trusted sessions and devices are the mechanism Cerby uses to verify that those connections come from authorized endpoints before granting access to your accounts, secrets, and vaults.
Think of a trusted session as a handshake between you and Cerby. When you set up a trusted session on a device, Cerby registers that device as a known and authorized access point for your account. From that moment, interactions with the Cerby platform originating from that device are treated as verified.
***
## Why trusted sessions matter
Trusted sessions add a meaningful layer of security on top of your login credentials. Even if someone obtains your password, they cannot access your Cerby workspace from an unregistered device. Each device must be explicitly verified before it can be used.
For users working with local vaults, trusted sessions are especially critical. Local vaults store encryption keys on the device itself, meaning the trusted session is not just an access gate, it is also the holder of the cryptographic keys needed to decrypt your data. Without a trusted session on that device, the vault content is inaccessible, even to Cerby.
***
## How trusted sessions work
Any of the three Cerby client apps can be registered as a trusted device:
* The Cerby web app (each browser is treated as a separate device)
* The Cerby browser extension (each browser installation is treated as a separate device)
* The Cerby mobile app
When you log in to Cerby for the first time on a new device, you are automatically prompted to set up a trusted session. The verification process confirms your identity using a code sent to your email, or by approving the session from a device you have already registered.
Users can register up to 20 trusted devices. When that limit is reached, an existing device must be disabled before a new one can be added.
***
## What happens when a user leaves
Trusted sessions are tied to individual user accounts. When a user is deprovisioned from a workspace, all of their registered trusted sessions and devices are automatically disabled. This ensures that former employees cannot retain access through previously trusted endpoints, even if they still have their physical device.
Workspace **Admins** can view and manage trusted sessions for all users in the workspace from the Cerby web app. For more information, see the [Trusted sessions and devices](https://help.cerby.com/setup-and-admin/workspace-settings/trusted-devices) section.
# Passkeys
This article describes the passkeys feature available for the Cerby mobile app and browser extension.
With the Cerby mobile app or browser extension, you can log in to your accounts using passkeys; no passwords are required.
This feature enhances your security by using your device's biometric or security key verification to authenticate, instead of storing and entering a password. This makes it nearly impossible for attackers to access your credentials.
Passkeys are supported only for a subset of apps; they are listed in [Passkeys.directory](https://passkeys.directory/). Even when an app is listed there, it must also have passkeys fully enabled on its own end for Cerby to support it end-to-end. For example, Amazon and X (Twitter) are fully supported, but TikTok isn't yet, since TikTok hasn't enabled its global passkeys option on web. If you have any issues with a supported app, contact the Cerby Support team at .
***
## Supported features
The following are the supported features of passkeys with the Cerby mobile app:
* Add passkeys to existing accounts in your workspace.
* (For iOS only) Create a new account in your Cerby workspace while also creating a passkey for an app.
* Log in to your accounts using passkeys with the Cerby mobile app on your mobile device or combined with another device.
* Update your passkeys whenever necessary.
The following are the supported features of passkeys with the Cerby browser extension:
* Add a passkey to an existing account in your workspace when you register a passkey on an app.
* Log in to your accounts using a saved passkey.
* Replace an existing passkey when you register a new one for the same account.
* Delete a passkey from an account.
***
## Supported versions
The following are the supported operating systems (OS) and Cerby mobile app versions for using passkeys with the Cerby mobile app:
* **Cerby mobile app:** From version 1.0.X onwards
* **iOS:** From version 17 onwards
* **Android:** From version 14 onwards
{% hint style="info" %}
**NOTE:** To read a more detailed list of passkey support on different devices, read the article [Can I use passkeys on my devices?](https://www.passkeys.io/compatible-devices)
{% endhint %}
Passkeys with the Cerby browser extension are supported on Chrome, Edge, and Safari.
***
## Considerations
Note the following important considerations for using passkeys in Cerby:
* Cross-device login is supported for devices that do not have passkey support, such as laptops or desktops, by using the Cerby mobile app on your mobile device. **NOTE:** The Bluetooth function could be required for this login type.
* You must enable biometric verification using the Cerby mobile app. Passkeys require user verification, which is confirmed through the biometric hardware on your mobile device. **NOTE:** To learn how to enable the biometric login in your Cerby mobile app, read the article [Turn on the Biometrics Login feature](https://help.cerby.com/cerby-mobile-app/app-customization/turn-on-the-biometrics-login-feature).
* Currently, Android does not support account creation when creating a new passkey for an app.
* The Cerby web app doesn't support passkeys.
***
## Related articles
The following articles contain more information about passkeys:
**Cerby mobile app:**
* [Create a passkey for an account using the Cerby mobile app](https://help.cerby.com/cerby-mobile-app/accounts/protecting-your-accounts/passkeys/create-a-passkey-for-an-account)
* [Log in to an account with a passkey with the Cerby mobile app](https://help.cerby.com/cerby-mobile-app/accounts/protecting-your-accounts/passkeys/log-in-to-an-account-with-a-passkey)
* [Update the passkey of an account using the Cerby mobile app](https://help.cerby.com/cerby-mobile-app/accounts/protecting-your-accounts/passkeys/update-the-passkey-of-an-account)
* [Delete a passkey from an account in the Cerby mobile app](https://help.cerby.com/cerby-mobile-app/accounts/protecting-your-accounts/passkeys/delete-a-passkey-from-an-account)
* [Remove a passkey from an account](https://help.cerby.com/cerby-mobile-app/accounts/protecting-your-accounts/passkeys/remove-a-passkey-from-an-account-in-an-app)
**Cerby browser extension:**
* [Add a passkey to an account](https://help.cerby.com/cerby-browser-extension/accounts/protecting-your-accounts/passkeys/add-a-passkey-to-an-account)
* [Log in to an account with a passkey](https://help.cerby.com/cerby-browser-extension/accounts/protecting-your-accounts/passkeys/log-in-to-an-account-with-a-passkey)
* [View the passkey details of an account](https://help.cerby.com/cerby-browser-extension/accounts/protecting-your-accounts/passkeys/view-the-passkey-details-of-an-account)
* [Delete a passkey from an account](https://help.cerby.com/cerby-browser-extension/accounts/protecting-your-accounts/passkeys/delete-a-passkey-from-an-account)
# Vaults
This article describes the benefits of the Vaults feature to ensure the privacy and security of your stored data.
At Cerby, vaults are protected spaces for storing and managing your account data and sensitive information (secrets). They provide an additional layer of security by implementing encryption and access controls, ensuring that only authorized users can access the stored data.
You can create additional local vaults to leverage a Zero-Knowledge architecture. The following are the characteristics of Cerby's vault strategy:
* **Cloud vault:** Cerby stores and manages the encryption keys, and all automated tasks are supported.
* **Local vault:** Users hold the encryption keys in trusted devices, which are not accessible to Cerby. This vault strategy has limited automated tasks.
When you no longer need a vault, you can disable it. With this status, users and teams with shared access to the vault cannot add more items (accounts or secrets). Still, the existing items remain active and accessible to them.
***
## User visibility
When creating a vault, you can choose its visibility and determine whether it should be the default vault. The visibility options are the following:
* **User visibility:** The vault is only accessible to specific users via an access share.
* **Workspace visibility:** Vault access is automatically shared with all the workspace users.
{% hint style="warning" %}
**IMPORTANT:** Currently, Cerby only supports vaults with workspace visibility; in a future release, user visibility will be supported.
{% endhint %}
***
## Default vault
Selecting a default vault makes it the predetermined vault when adding accounts and secrets to your workspace. It is also where all the items are stored when you migrate them to Cerby from your enterprise password manager (EPM), such as [LastPass](https://help.cerby.com/cerby-web-app/item-importer/migrate-from-lastpass-to-cerby) and [1Password](https://help.cerby.com/cerby-web-app/item-importer/migrate-from-1password-to-cerby), via the **Password Manager Importer**.
***
## Recovery key
After creating a vault, you can generate a recovery key. With this key, you can regain access to encrypted vaults if all the devices with the private keys are lost or unavailable. For more information about recovery keys, read the article [Generate and manage the recovery keys for your vault](https://help.cerby.com/setup-and-admin/vault-management/generate-and-manage-the-recovery-keys-for-your-vault).
***
## Trusted sessions on devices
Setting up a trusted session on a device is a requirement for creating a vault. With this setup, you ensure that all interactions with the Cerby platform come from authorized devices that meet corporate security standards.
In local vaults, trusted sessions on any of your devices are vital because they hold the corresponding encryption and decryption keys to access and decrypt the data of your accounts and secrets stored in your vaults. Also, encryption and decryption operations happen decentralized on such devices.
# Password generator
This article describes the key benefits of the Password Generator feature that enables you to generate strong and secure passwords anytime.
**Release date:** October 2, 2023
We already had it, and now you can use it whenever you want for your accounts. The Password Generator is here.
We eagerly counted the days until we released this feature, which enables you to generate strong and secure passwords anytime. Previously, the agent in charge of the password rotations via automation tasks was the only one using the Password Generator.
Now, you can use the Cerby browser extension to generate passwords that meet the password requirements of your applications and service providers. You only need to select the applicable password strength rules:
* Length
* Uppercase letters
* Lowercase letters
* Digits
* Symbols
Based on your selection, the Password Generator also lets you know how weak or strong the generated password is.
{% hint style="danger" %}
**IMPORTANT:** A password is stronger the more rules you select and the longer the password is. According to [Hive Systems](https://www.hivesystems.io/password), it would take 226 years to hack a 12-character password that comprises numbers, upper and lowercase letters, and symbols.
{% endhint %}
Check out the Password Generator in the Cerby browser extension, as shown in **Figure 1**.
Figure 1. Password generator page in the Cerby browser extension popup
***
## Can’t wait, let’s start
If you are as excited as us about this new feature, here’s what you have to do next:
1. Open the Cerby browser extension popup
2. Open the Password generator
3. Start generating passwords
For detailed instructions, read the [How to generate secure passwords using the Cerby browser extension](https://help.cerby.com/cerby-browser-extension/accounts/protecting-your-accounts/generate-secure-passwords) article.
***
## Hold on. There's more?
Sit tight. Our Development team is currently working on the following features to be released soon:
* The ability to generate passwords when saving your credentials at signup and login
* The ability to generate passwords via the inline extension
# Identity Lifecycle Management (IdLCM)
Understand how Cerby automates identity provisioning and deprovisioning through IdLCM integrations and business hubs.
Managing who has access to what, across dozens of apps, is one of the most time-consuming and error-prone tasks in IT. Cerby's Identity Lifecycle Management (IdLCM) solution eliminates that burden by connecting your disconnected apps to your identity platform, so the same automated workflows that govern your core systems can now govern every app in your portfolio.
Together, business hubs and IdLCM integrations give you complete lifecycle coverage: from the apps your marketing team uses every day to the enterprise tools your engineering and operations teams depend on.
{% content-ref url="/pages/A60YJUwoMrenKszAy0wj" %}
[Business hubs](/getting-started/concepts/identity-lifecycle-management-idlcm/business-hubs)
{% endcontent-ref %}
{% content-ref url="/pages/JoLpEsQ3J5CxFctiHj9b" %}
[IdLCM integrations](/getting-started/concepts/identity-lifecycle-management-idlcm/idlcm-integrations)
{% endcontent-ref %}
# Business hubs
This article describes the key benefits of the Business Hubs feature to manage the users and assets of your external seat-based and paid social apps
With Cerby's **Business Hubs**, you can connect all your external seat-based and paid social apps — even disconnected or nonfederated apps — to your workspace for centralized user and asset management.
Business hub integrations enable data synchronization between your apps and Cerby, so you can use only one platform to automate the following user and access management tasks:
* Add users to your app
* Remove users from your app
* Update user roles in your app
When you have a Cerby workspace configured with an identity provider (IdP), such as Okta or Entra ID, user and group provisioning and deprovisioning events can trigger these management tasks.
The main goal is to ensure your employees and even your external collaborators (contractors, agencies, or partners) have the right access at the right time and with the least privileges. The following are other benefits of the Business Hubs feature:
* Extend single sign-on (SSO) to disconnected or nonfederated apps.
* Track the progress of user management automated tasks.
* Secure user access by requiring accounts to have multi-factor authentication (MFA) turned on and setting up password rotation policies.
* Retrieve full audit trails for governance.
Business hub integrations are intended for apps that have collaboration spaces (workspaces, teams, or dashboards) to which users access with different roles and permissions. Some examples of seat-based and paid social apps are Meta Business Manager, TikTok for Business, Apple, Asana, Atlassian, Calendly, and GitHub.
## The Business Hubs page
The **Business Hubs** page in the Cerby web app dashboard is the centralized view of all your connected integrations, as shown in **Figure 1**. Through this interface, you can manage user access to your external seat-based and paid social apps.
Figure 1. Business Hubs page in the Cerby web app dashboard
## How business hub integrations work
Cerby's business hub integrations connect Cerby and your external apps, centralizing user access management for all your apps and assets (if supported) in a single interface.
The general flow for a business hub integration is the following:
1. A workspace member connects a seat-based or paid social app to Cerby through a business hub integration.
2. Cerby retrieves information about who has access to the app, which roles they have, and, when supported, which assets are assigned to them.
3. Cerby associates the app’s users with their Cerby user accounts, whether they come from your IdP or are managed directly in Cerby, such as guest users and local partners.
**NOTE:** For apps supporting the native partners feature, you can also gain visibility on the users who access your assets to run ad campaigns on your partner's side.
4. Depending on their business hub integration role, users can do the following through Cerby:
* Collaborators can connect their app accounts to Cerby so they can log in through Cerby and benefit from security policies such as MFA and password rotations.
* Owners can use Cerby to add, update, or remove users from the external app.
## What you can do from your business hub
The main functionalities of a business hub integration are the following:
* [User and access management tasks](#user-and-access-management-tasks)
* [Extended user and access management from your IdP](#extended-user-and-access-management-from-your-idp)
* [Business hub integration management in Cerby](#business-hub-integration-management-in-cerby)
* [Connected account management and login methods](#connected-account-management-and-login-methods)
The following sections describe each functionality.
### User and access management tasks
The following are the user and access management tasks you can perform on your external apps via a business hub integration:
{% hint style="info" %}
**NOTE:** The availability of management tasks varies from app to app. For example, for some external apps, it is not possible to update roles because they only support one role natively.
{% endhint %}
* **Check for updates:** Retrieves information about the users, roles, and assets in your external app.
* **Add users:** Creates the user accounts in your external app with the specified roles, including assets (if supported).
* **Update user roles:** Updates the native user roles in your external app and its assets (if supported).
* **Remove users:** Removes the user accounts from your external app, including assets (if supported).
Additionally, Cerby supports the following tasks for partners that natively exist on paid social apps, such as Meta Business Manager or TikTok For Business:
* **Monitor partners:** View which native partner’s users have access to the assets you own or that a partner shared with your paid social app, including their roles and the list of assets.
* **Manage partner assets:** Assign roles and assets to the users of a specific native partner in your app.
### Extended user and access management from your IdP
When you have a workspace configured with an IdP, such as Okta or Entra ID, you can use business hubs to extend your existing user provisioning and deprovisioning to the external apps you connect.
In this setup, you can base access decisions on IdP groups and use business hubs to ensure that the users who belong to those groups have the appropriate access to the external apps. As users join, move between, or leave groups in your IdP, business hubs help ensure their access to the external apps is up to date.
### Business hub integration management in Cerby
A business hub integration is like other regular accounts you add, protect, and manage through Cerby because users and teams are granted access to them.
**Owners** can share a business hub integration and assign one of the following Cerby roles to other users and teams:
* **Owner:** It enables users and teams to perform the supported [user and access management tasks](#user-and-access-management-tasks) via the business hub. They can also update the business hub settings and log in to the external app through Cerby.
* **Collaborator:** It enables users and teams to log in to the external app through Cerby.
* **Manager:** It enables users and teams to perform the supported user and access management tasks via the business hub and log in to the external app through Cerby.
This lets you separate responsibilities between users who configure and manage access, and users who simply use the external app.
For more information about roles on business hubs, read the article [Roles and permissions](https://help.cerby.com/getting-started/concepts/user-management/roles-and-permissions).
### Connected account management and login methods
The user management and login method of a business hub integration is the way your users log in to the external app. This method also determines whether they must save their login credentials as a Cerby account connected to the business hub.
You can select one of two user management and login methods depending on the setup of your app:
* **Single sign-on (SSO):** Access is managed via your IdP, and users log in via SSO authentication. In this case, users are not asked to save their credentials in Cerby, and they continue accessing their seat-based and paid social apps as usual.
* **Username and password:** Account security and access are managed from Cerby, and users log in to their external apps through Cerby. In this case, users are asked to save their credentials in Cerby and connect them to the business hub integration; therefore, you can apply the following security policies to user accounts:
* Turn on MFA
* Rotate passwords
Business hub integrations rely on connected accounts for logins to external apps. A connected account links a user’s Cerby account to their individual account on an external app, allowing seamless and secure access.
# IdLCM integrations
Bridge the gap between your identity platform and the apps it can't reach. Cerby's Identity Lifecycle Management (IdLCM) solution connects your disconnected apps to your IdP or IGA platforms so you can automate user provisioning, deprovisioning, and role synchronization across your entire app portfolio from a single place.
Most organizations rely on IdPs and IGA systems to govern enterprise identities, yet a growing number of apps fall outside their reach. IdLCM closes that gap by acting as an intelligent intermediary: it receives lifecycle events from your IdP, translates them, and pushes the right actions to each connected app automatically, covering the full joiner-mover-leaver cycle without manual intervention.
Beyond provisioning, IdLCM extends your security posture to disconnected apps by enforcing multi-factor authentication (MFA), password rotation, and single sign-on (SSO), even for apps that don't natively support these standards. The result is consistent access control, a clean audit trail, and less overhead for your IT and Security teams.
{% hint style="info" %}
Documentation for IdLCM is available upon request. Contact us at to get access.
{% endhint %}
# User management
Explore how Cerby manages roles, permissions, and the different types of members in your workspace.
{% content-ref url="/pages/Rzs0tTV5B6BsV0WMlPCt" %}
[Roles and permissions](/getting-started/concepts/user-management/roles-and-permissions)
{% endcontent-ref %}
{% content-ref url="/pages/1QukflIxpqXNIP68RNhp" %}
[Members](/getting-started/concepts/user-management/members)
{% endcontent-ref %}
{% content-ref url="/pages/vhmfjpoLb0odNY4PAs9A" %}
[Guest users](/getting-started/concepts/user-management/guest-users)
{% endcontent-ref %}
{% content-ref url="/pages/xwodDP8F80MFqmwNbhey" %}
[Teams](/getting-started/concepts/user-management/teams)
{% endcontent-ref %}
{% content-ref url="/pages/TtIKDu7JKnFhHMkioGc5" %}
[Partners](/getting-started/concepts/user-management/partners)
{% endcontent-ref %}
# Roles and permissions
This article describes the existing roles in Cerby under the RBAC system and how they are managed.
At Cerby, we have implemented roles to determine the tasks, functions, or activities each workspace member can or cannot perform on our platform.
These roles comprise sets of permissions that are part of a role-based access control (RBAC) system, designed to maintain data security, streamline access management, enhance collaboration, comply with regulations, and ensure that sensitive information is protected.
The advantage of using role-based access management is that, after logging in to a Cerby workspace, members are automatically granted permissions depending on their role. For more information, read the [Benefits of RBAC](#benefits-of-rbac) section.
Cerby manages roles at multiple levels. This article contains the description of each role, which we have categorized as follows:
* [Workspace-level roles](#workspace-level-roles)
* [Item-level roles](#item-level-roles)
* [Business hub-level roles](#business-hub-level-roles)
* [Team-level roles](#team-level-roles)
* [Partnership-level roles](#partnership-level-roles)
***
## Workspace-level roles
Workspace-level roles determine the features of the Cerby platform available to the users, their access privileges, and their responsibilities. The actions users can perform within a workspace according to their role can be categorized as follows:
* [Workspace setup](#workspace-setup)
* [Workspace management](#workspace-management)
* [User management](#user-management)
* [Security hygiene tasks](#security-hygiene-tasks)
* [Item management](#item-management)
The following sections describe the actions for each category.
### Workspace setup
**Table 1** shows the actions users can perform to set up a workspace depending on their role.
| **Action** | **Guest User** | **Login-Only** | **User** | **Admin** | **Super Admin** | **Owner** |
| ------------------------------------------------------------------------------------------- | :------------: | :------------: | :------: | :-------: | :-------------: | :-------: |
| Perform the initial workspace setup from an invite. | | | | | Yes | |
| Set up single sign-on (SSO) and user provisioning with a corporate identity provider (IdP). | | | | Yes\* | Yes\* | Yes |
| Access and update the workspace configuration. | | | | | Yes | Yes |
\*\* Read-only permissions
**Table 1.** Workspace setup actions
{% hint style="danger" %}
**IMPORTANT:** A workspace can only have one **Owner**. In the case of user deprovisioning or account deactivation, this role must be reassigned. For more information, read the section [Workspace continuity: Reassign a workspace Owner](https://help.cerby.com/setup-and-admin/user-management/update-the-role-of-a-workspace-member#workspace-continuity-reassign-a-workspace-owner).
{% endhint %}
### Workspace management
**Table 2** shows the actions users can perform to manage a workspace depending on their role.
| **Action** | **Guest User** | **Login-Only** | **User** | **Admin** | **Super Admin** | **Owner** |
| ------------------------------------------------------------------------------------- | :------------: | :------------: | :------: | :-------: | :-------------: | :-------: |
| Access the **Activity** page. | Yes | Yes | Yes | Yes | Yes | Yes |
| View all events within the workspace and for all users through the **Activity** page. | | | Yes | Yes | Yes | Yes |
| View the events for the items they are **Owners** of through the **Activity** page. | Yes | Yes\*\* | Yes | Yes | Yes | Yes |
| View the billable accounts through the **Billing** page. | | | | Yes | Yes | Yes |
| Access the **Automation** page. | Yes | Yes | Yes | Yes | Yes | Yes |
| View all automation notifications through the **Automation** page. | | | | Yes | Yes | Yes |
| Turn on and manage **account autosave** in the workspace. | | | | | Yes | Yes |
\*\* They are displayed in the **User** column as **Unknown**.
**Table 2.** Workspace management actions
### User management
**Table 3** shows the actions users can perform to manage other users depending on their role.
| **Action** | **Guest User** | **Login-Only** | **User** | **Admin** | **Super Admin** | **Owner** |
| -------------------------------------------------------------------------------------------------------------------------------------------------------------------------------------------------------------------------------------- | :------------: | :------------: | :------: | :-------: | :-------------: | :-------: |
| Assign Cerby products available to users through the **Teams** page. | | | | Yes | Yes | Yes |
| Assign or update the workspace-level role of other users. | | | | Yes | Yes | Yes |
| Access the **All Members** page. | | | Yes\* | Yes | Yes | Yes |
| View all workspace **Users**, **Guest Users**, and **Login-only** users through the **All Members** page. | | | | Yes | Yes | Yes |
| Export a report of users and their accounts through the **All Members** page. | | | | Yes | Yes | Yes |
| View and invite **Guest Users**. | Yes | | Yes | Yes | | |
| Remove any **Guest User**. | | | | Yes | Yes | Yes |
| Access the **Teams** page. | Yes | | Yes | Yes | Yes | Yes |
| View all teams and **Team Members** within a workspace. | | | Yes | Yes | Yes | Yes |
| View the teams to which they have been assigned and the **Team Members**. | Yes | Yes | Yes | Yes | Yes | Yes |
| Create and manage a self-managed team. | | | Yes | Yes | Yes | Yes |
| Assign **Team Admins** for any self-managed team. | | | | Yes | Yes | Yes |
| Access the **Distribution Lists** page. | | | Yes | Yes | Yes | Yes |
| Create a distribution list. | | | | Yes | Yes | Yes |
| View all distribution lists within a workspace. | | | Yes | Yes | Yes | Yes |
| Remove distribution lists to which they are **Owners**. | | | Yes | Yes | Yes | Yes |
| Update the name of a distribution list, add or remove members, and delete distribution lists to which they are **Owners**. | | | Yes | Yes | Yes | Yes |
| Access the **Partners** page. | | | Yes | Yes | Yes | Yes |
| View all partnerships within the workspace. | | | Yes | Yes | Yes | Yes |
| Add a host-guest partnership. | | | | Yes | Yes | Yes |
| Approve a host-guest partnership request in the host workspace. | | | | Yes | Yes | Yes |
| Accept a host-guest partnership request in the guest workspace. | | | | Yes | Yes | Yes |
| View all guest workspace members with access to the accounts shared through the partnership. | | | | | Yes | Yes |
| Add and remove a local partner. | | | | Yes | Yes | Yes |
|
Manage users in a local user workspace: • Add new users. • Update the workspace-level role of other users. • Reset multi-factor authentication (MFA). • Force password reset. • Remove users from the workspace.
| | | | Yes | Yes | Yes |
| Invite guest users to join Cerby through the **All Members** page or the Password Manager Importer. | | | Yes | Yes | Yes | Yes |
\* Workspace **Users** can access the **All Members** page, but only to view and invite **Guest Users**, not the list of workspace members (see the next row). Workspace **Guest Admins** can also access the page to view the guest users list, and must invite guest users through the local partner flow instead of from this page.
**Table 3.** User management actions
### Security hygiene tasks
**Table 4** shows the security hygiene tasks users can perform depending on their role.
| **Action** | **Guest User** | **Login-Only** | **User** | **Admin** | **Super Admin** | **Owner** |
| ----------------------------------------------------------------------------------------- | :------------: | :------------: | :------: | :-------: | :-------------: | :-------: |
| Automate turning on MFA for all Cerby-managed accounts through the **Policies** page. | | | | Yes | Yes | Yes |
| Automate rotating passwords for all Cerby-managed accounts through the **Policies** page. | | | | Yes | Yes | Yes |
**Table 4.** Security hygiene tasks
### Item management
**Table 5** shows the actions users can perform to manage items depending on their role.
| **Action** | **Guest User** | **Login-Only** | **User** | **Admin** | **Super Admin** | **Owner** |
| ---------------------------------------------------------------------------------------------------------------------------------------------------- | :------------: | :------------: | :------: | :-------: | :-------------: | :-------: |
| Access the **Import report** page. | | | Yes | Yes | Yes | Yes |
| Import items into Cerby through the [Password Manager Importer](https://help.cerby.com/cerby-web-app/item-importer/migrate-from-lastpass-to-cerby). | | | Yes | Yes | Yes | Yes |
| Add an account, secret, or collection to Cerby. | Yes | | Yes | Yes | Yes | Yes |
| Save accounts at login and signup. | | | Yes | Yes | Yes | Yes |
| Access the **Business Hubs** page. | Yes | Yes | Yes | Yes | Yes | Yes |
| Connect a business hub integration to Cerby. | | | | Yes | Yes | Yes |
| Share items to which they have the **Owners** role and assign the item role to other users (read the [Item-level roles](#item-level-roles) section). | | | Yes | Yes | Yes | Yes |
| Share items to which they have the **Owner** role with any **Guest User** of a local partner. | Yes\*\*\* | Yes | Yes | Yes | Yes | Yes |
| Receive shared access to items as **Owners** and **Collaborators**. | Yes\*\*\*\* | Yes\*\*\*\* | Yes | Yes | Yes | Yes |
| Turn on **All-Access Mode** to view all accounts within the workspace and recover accounts by reassigning account **Owners**. | | | | | Yes | Yes |
| View all the items shared with all teams. | | | | Yes | Yes | Yes |
\*\*\* Only when accounts are shared with the **Manager** role \*\*\*\* They can only be granted the **Collaborator** role on items
**Table 5.** Item management actions
***
## Item-level roles
Item-level roles determine the actions users can perform on items, and they can be categorized as follows according to the item type:
* [Accounts](#accounts)
* [Secrets](#secrets)
* [Collections](#collections)
* [Business hubs](#h-1ce2efa84c)
The following sections describe the actions for each item type.
### Accounts
**Table 6** shows the actions users can perform on accounts depending on their role.
| **Action** | **Account Collaborator** | **Account Owner** |
| ------------------------------------------------------------------------------------------------------------------------------------------------------------------------------------------------------------------------------------------------------------------------------------ | :----------------------: | :---------------: |
| Log in to an account. | Yes | Yes |
| View the account details. | Yes | Yes |
| View the [account notes](https://help.cerby.com/cerby-web-app/accounts/managing-your-accounts/save-and-manage-account-notes) and [custom fields](https://help.cerby.com/cerby-web-app/accounts/managing-your-accounts/add-and-manage-custom-fields-for-your-accounts) of an account. | Yes | Yes |
| View the password of an account. | Yes\*\*\*\*\* | Yes |
| Copy the password of an account. | Yes | Yes |
| Update the account details. | | Yes |
| Share an account with other users. | | Yes |
|
Manage shared access to accounts: • View the members and teams with shared access to an account. • Add and remove Collaborators from an account. • Change the role of other users and teams on an account.
| | Yes |
| Manage the account security by turning on MFA or rotating passwords automatically from Cerby. | | Yes |
| Manage second factors (Cerby-managed email address and phone number) for an account. | | Yes |
| View the **Shared Inbox**. | Yes | Yes |
| View account activity. | | Yes |
| Delete an account. | | Yes |
\*\*\*\*\* Cerby has different access methods for each user: **Collaborators** can only view passwords through API responses to enable account login, whereas **Owners** can view passwords through the user interface and API responses.
**Table 6.** Actions on accounts
{% hint style="danger" %}
**IMPORTANT:** Account **Collaborators** cannot create other Cerby grants on the accounts and cannot edit the password for manipulation in Cerby's systems.
{% endhint %}
### Secrets
**Table 7** shows the actions users can perform on secrets depending on their role.
| **Action** | **Secret Collaborator** | **Secret Owner** |
| ------------------------------------------------------------------------------------------------------------------------------------------------------------------------------------------------------------------------------------------------------------------------ | :---------------------: | :--------------: |
| View the content of a secret. | Yes | Yes |
| Update the details of a secret (name, body, and attachments). | | Yes |
|
Manage shared access to secrets: • View the users and teams with shared access to a secret. • Share a secret with other users. • Add and remove Collaborators from a secret. • Change the role of other users and teams on a secret.
| | Yes |
| Delete a secret. | | Yes |
**Table 7.** Actions on secrets
### Collections
**Table 8** shows the actions users can perform on collections depending on their role.
| **Action** | **Collection Collaborator** | **Collection Owner** |
| -------------------------------------------------------------------------------------------------------------------------------------------------------------------------------------------------------------------------------------------------------------------------------------------- | :-------------------------: | :------------------: |
| View the accounts and secrets within a collection. | Yes | Yes |
| View the collection details. | Yes | Yes |
| Update the collection details. | | Yes |
|
Manage shared access to collections: • View the users and teams with shared access to a collection. • Share a collection with other users. • Add and remove Collaborators from a collection. • Change the role of other users and teams on a collection.
| | Yes |
| Delete a collection. | | Yes |
**Table 8.** Actions on collections
***
## Business hub-level roles
**Table 9** shows the actions users can perform on business hubs depending on their role.
| **Action** | **Business hub Collaborator** | **Business hub Owner** |
| ------------------------------------------------------------------------------------------------------------------------------------------------------------------------------------------------------------------------------------------------------- | :---------------------------: | :--------------------: |
| Log in to the external app. | Yes | Yes |
| View the business hub details. | Yes | Yes |
| Update the business hub details. | | Yes |
| Manage the business hub service account. | | Yes |
| View the users and teams who have access to manage the business hub integration. | Yes | Yes |
| Change the role of other users and teams on the business hub. | | Yes |
| View the users and teams with access to the external app. | Yes | Yes |
|
Manage user access to the external app: • Add and remove users and teams from the external app. • Change the role of other users and teams on the external app. • Check for user updates between the external app and the business hub.
| | Yes |
| View the available assets. | Yes | Yes |
|
Manage user access to assets in the external app: • Add and remove users and teams from the assets. • Change the role of other users and teams on the assets.
| | Yes |
| Manage the user account connected to the business hub integration. | Yes | Yes |
|
Manage the security of all user accounts from Cerby through automated tasks: • Turn on 2FA. • Rotate passwords.
| | Yes |
| Delete a business hub. | | Yes |
**Table 9**. Actions on business hubs
***
## Team-level roles
Team-level roles determine the actions users can perform on a self-managed team. **Table 10** shows these actions.
| **Action** | **Team Member** | **Team Admin** |
| -------------------------------------------------------------------------------------------------------------------------------------------------------------------- | :-------------: | :------------: |
| Receive access as **Owner** or **Collaborator** to the items shared through the team. | Yes | Yes |
| View all the accounts, secrets, and collections shared with the team. | Yes | Yes |
|
Manage the Team Members of a self-managed team: • Add and remove Team Members. • Assign Team Admins.
| | Yes |
| Remove a self-managed team. | | Yes |
**Table 10.** Actions on teams
***
## Partnership-level roles
Partnership-level roles determine the actions users can perform on host and guest workspaces and on local partners. **Table 11** shows the actions on a host-guest partnership:
| **Action** | **Manager** | **Guest workspace Admin** | **Host workspace Admin** | **Partnership Owner** |
| ------------------------------------------------------------------------------------------------- | :---------: | :-----------------------: | :----------------------: | :-------------------: |
| Share accounts to which they have the **Owner** role with a guest workspace. | Yes | | | |
| Remove accounts shared with a guest workspace. | Yes | | | |
| Receive access as **Collaborator** or **Manager** to the accounts shared through the partnership. | Yes | Yes | | |
| View all guest workspace members with access to the accounts shared through the partnership. | | Yes | Yes | Yes |
| Manage users in the host workspace. | | | Yes | |
| Manage users in the guest workspace. | | Yes | | |
| Send requests to item **Owners** from the host workspace asking them to share an account. | | | Yes | |
| Remove a host-guest partnership. | | | Yes | Yes |
**Table 11.** Actions on host-guest partnerships
**Table 12** shows the actions users can perform on a local partner:
| **Action** | **Manager** | **Guest User** | **Guest Admin** | **User** | **Host Admin** |
| ---------------------------------------------------------------------------------------------------------------------------------------------------------------------------------------------------------------------------------------- | :---------: | :------------: | :-------------: | :------: | :------------: |
| Share items to which they have the **Owner** role with a local partner. | Yes | | | | |
| Receive access as **Collaborator** or **Manager** to the accounts shared through a local partner. | Yes | Yes | Yes | | |
| Send requests to item **Owners** asking them to share an account. | Yes | | Yes | | |
| Invite **Guest Users** to a local partner. | | | Yes | | |
| Assign a **Host Admin** to a local partner. | | | | | Yes |
|
Manage guest members of a local partner: • Update the role of Guest Admins and Guest Users. • Remove Guest Admins and Guest Users from a local partner.
| | | | Yes | Yes |
**Table 12.** Actions on local partners
***
## Benefits of RBAC
The following are the benefits of using the RBAC system in Cerby:
* **Enhanced security:** Access to sensitive data and features is restricted. Only users with specific roles can perform critical actions, reducing the risk of unauthorized access and data breaches.
* **Access control:** Fine-grained control over what users can and cannot do. Administrators can assign roles and permissions according to each user's job responsibilities.
* **Compliance and auditing:** Organizations can implement access controls and audit trails, which are essential for demonstrating data security and compliance with industry and legal standards.
* **Streamlined onboarding and offboarding:** New employees can be quickly assigned the appropriate roles and permissions while departing employees can have their access revoked just as easily.
* **Efficient collaboration:** Users have the necessary access to work together effectively. RBAC allows organizations to balance the need for collaboration with the need for data security.
* **Resource management:** RBAC assists in optimizing resource allocation. It ensures that resources are used efficiently and that access to costly or limited resources is restricted to only those who require them.
* **Transparency:** RBAC offers transparency in access control, making it clear who has access to what resources and why. This transparency can foster trust and accountability within an organization.
# Members
This article describes what members are in Cerby and the actions they can perform in your workspace.
At Cerby, members are individuals with a user account to access an organization’s workspace.
When a workspace is connected to an identity provider (IdP), such as Okta or Entra ID, user accounts are synced with the corporate directory. Therefore, their access to Cerby can be automatically granted or revoked by IT admins based on provisioning and deprovisioning events, respectively, in the IdP.
Meanwhile, user accounts in local workspaces are provisioned by Cerby and managed by IT admins. For more information, read the article [Create a local workspace](https://help.cerby.com/setup-and-admin/workspace-identity-federation/local-workspace/create-and-configure-a-local-workspace).
***
## The All Members page
The **All Members** page, as shown in **Figure 1**, contains tables with all the workspace members and guest users. Workspace **Admins**, **Super Admins**, and **Owners** can access both tables. Workspace **Users** can also access the page, but only the **Guests** tab is available to them. For the full list of roles and their access to this page, read the article [Roles and permissions](/getting-started/concepts/user-management/roles-and-permissions).
Figure 1. All Members page in the Cerby web app dashboard
The table in the **All Members** tab provides information about workspace members in the following columns:
* **Account members:** It lists the username and email address of each member.
* **Workspace role:** It lists the workspace role of each member:
* **Owner**
* **Super Admin**
* **Admin**
* **User**
* **Login-Only**
For more information about roles, read the article [Roles and permissions](/getting-started/concepts/user-management/roles-and-permissions).
* **Accounts:** It lists a More button for each member to view all the accounts to which the member has shared access as **Owner** or **Collaborator**.
* **Team:** It lists a **More** button for each member to view all the teams to which the member belongs.
* **Status:** It lists the status of the member:
* **Active:** It means the Cerby user account was created and configured.
* **Pending:** It means the Cerby user account was created, but the member has not configured it.
* **Removed:** It means the Cerby user account was removed from the Cerby workspace.
* **Joined date:** It lists the date when each member’s Cerby user account was configured.
* **Last activity:** It lists the date when each member was last active in the workspace.
* **Unnamed column:** The table contains an unnamed column that lists a **More options** (...) icon for each member with the following options in a drop-down menu:
* **Export:** It exports the member details in a CSV file.
* **Trigger Universal Logout:** It triggers the [Cerby Universal Logout](https://help.cerby.com/setup-and-admin/security-governance/universal-logout/trigger-cerby-universal-logout) feature.
* **Remove from workspace:** It removes the member from the workspace by disabling their user account.
The table in the **Guests** tab provides information about users with the **Guest User** workspace role. It contains the same columns as the table in the **Members** tab, except for **Workspace role** ; additionally, in the **More options** (...) drop-down menu, you can select the **Reset** **MFA** and **Force Password Reset** options.
The **All Members** page also contains a search bar to look up workspace members by their name or email address.
An **Export** () icon located at the top right of the page enables you to export the information of the members table in a CSV file. For more information, read the article Export the workspace members.
# Guest users
This article describes the key benefits of guest users, a role that enables you to share items with external collaborators through Cerby.
With Cerby, you have a secure way to collaborate closer with external parties through guest users. This role enables you to invite any collaborator who doesn't belong to your domain or corporate directory to join your Cerby workspace.
Unlike a [host-guest partnership](/getting-started/concepts/user-management/partners#host-guest-partnership), where you must establish a connection with another Cerby workspace to share accounts, with the guest user role, you can directly share items (accounts, secrets, and collections) because your external collaborators are part of your workspace, using an identity and account provided and managed by Cerby. Therefore, they are searchable through the item-sharing dialog boxes.
Management of guest users is performed by **Workspace Owners**, **Super Admins**, and **Admins**, and invites can be sent by any workspace member in three ways:
* From the Password Manager Importer, to persist the imported user access permissions on[LastPass](https://help.cerby.com/cerby-web-app/item-importer/migrate-from-lastpass-to-cerby) or [1Password](https://help.cerby.com/cerby-web-app/item-importer/migrate-from-1password-to-cerby) folders, passwords, and secure notes to Cerby collections, accounts, and secrets.
* From the [**All Members**](https://help.cerby.com/cerby-web-app/users/invite-a-guest-user-to-your-workspace#from-the-all-members-page) page, via a direct invite.
* From the [**Partners**](/getting-started/concepts/user-management/partners#partners) page, when external collaborators belong to a local partner.
{% hint style="danger" %}
**IMPORTANT:** If your external collaborators are already managed by your identity provider (such as Okta or Entra ID), contact your Cerby Admin or IT team to assign them to Cerby as regular workspace members.
{% endhint %}
After joining Cerby, all of the workspace members from your organization who have the **Owner** role on collections, accounts, and secrets can share their items directly with guest users or via a local partnership. However, they can only grant them the **Collaborator** role.
Guest users are displayed on a table within the **Guest** tab of the **All Members** page, as shown in **Figure 1**.
Figure 1. **Guest** tab within the **All Members** page
Access of guest users to the following workspace features is limited as follows:
* They cannot access the **All members** page.
* They cannot access the **Distribution Lists** page.
* They cannot use the Password Manager Importer.
* They can only view the teams to which they belong.
* They can only view their user activity through the **Activity** page.
* They cannot invite other guest users.
For more information about roles and supported features, read the article [Roles and permissions](/getting-started/concepts/user-management/roles-and-permissions).
If you are interested in this feature but don't see it available in your workspace, contact your **Admin** or our Customer Support team via email at .
***
## Related articles
The following articles contain more information about invitations and management of guest users:
* [Invite a guest user to your workspace](https://help.cerby.com/cerby-web-app/users/invite-a-guest-user-to-your-workspace)
* [Join Cerby from a guest user invite](https://help.cerby.com/cerby-web-app/users/join-cerby-from-a-guest-user-invite)
* [Log in to Cerby as a guest user](https://help.cerby.com/cerby-web-app/users/log-in-to-cerby-as-a-guest-user)
* [Remove a guest user from your workspace](https://help.cerby.com/cerby-web-app/users/remove-a-guest-user-from-your-workspace)
* [Remove guest user access to an item](https://help.cerby.com/cerby-web-app/users/remove-guest-user-access-to-an-item)
# Teams
This article describes teams in Cerby, how they work, and how they simplify access management for groups of users.
Teams are a user grouping mechanism in Cerby that allow you to manage access to accounts, collections, and secrets for multiple users at once. Instead of sharing resources with each user individually, you share them with a team and all members automatically receive the access level assigned to that team.
Teams exist at the workspace level and come in two types: self-managed teams that you create and maintain directly in Cerby, and identity provider (IdP)-synced teams that are automatically replicated from your corporate directory. Both types let you assign resources with a single action and keep access up to date as your organization changes.
## Key benefits
* **Simplified access management:** Share accounts, collections, and secrets with an entire group in one action instead of configuring access for each user separately.
* **Automatic access provisioning:** When a user joins a team, they immediately gain access to all resources already shared with that team. When they leave, their access is revoked automatically.
* **IdP synchronization:** Teams synced from your identity provider stay current without manual effort. Membership changes in Okta propagate to Cerby automatically, so your Cerby teams always reflect your corporate directory.
* **Granular role control:** Assign the **Owner** or **Collaborator** role to a team when sharing a resource, giving all team members a consistent level of access.
## Key features
### Team types
* **Self-managed teams:** Created manually in Cerby by any workspace user. You add and remove members individually, and the creator automatically becomes the Team Admin. Self-managed teams offer full flexibility and can be renamed, updated, and deleted within Cerby.
* **IdP-synced teams:** Created automatically when an Okta group is pushed to Cerby via the SCIM Group Push feature. Membership is managed entirely in Okta; the team appears as read-only in Cerby. Workspace Admins can assign Team Admins, but member changes must be made in the IdP.
{% hint style="info" %}
**NOTE:** Cerby currently supports syncing groups from Okta. Support for additional identity providers may be added in the future.
{% endhint %}
### Team roles
* **Team Member:** The default role for users who belong to a team. Team Members can view other members and the resources shared with the team. Their level of access to each resource is determined by the role assigned to the team when the resource was shared (**Owner** or **Collaborator**).
* **Team Admin:** An elevated role with permissions to manage team membership, rename the team, share resources with the team, and delete self-managed teams. The user who creates a self-managed team is automatically assigned the team Admin role. For IdP-synced teams, a workspace Admin must assign this role manually.
{% hint style="info" %}
**NOTE:** Guest users can be team Members but cannot be assigned the Team Admin role.
{% endhint %}
### Resource sharing
* **Accounts:** Share individual credential stores with a team. All Team Members gain access based on the role assigned at the time of sharing.
* **Collections:** Share groupings of accounts with a team so members can access multiple accounts at once.
* **Secrets:** Share secure secret entries with a team for centralized secrets management.
When you share a resource with a team, you assign one of the following roles:
| Role | Permissions |
| ---------------- | -------------------------------------------------------------------------------------------- |
| **Owner** | Log in to the account, manage settings, share the resource, view passwords in the UI and API |
| **Collaborator** | Log in to the account, view passwords via API only |
# Partners
This article describes the key benefits of the Partners feature that enables you to collaborate with external parties through Cerby.
With Cerby, you have a secure and controlled way to collaborate with external parties, such as contractors, agencies, vendors, and clients, through **Partners**.
This feature helps you and your company support sharing access to your items and business hub integrations with collaborators who don't belong to your domain and don’t have access to your Cerby workspace through your identity provider (IdP), such as Okta or Entra ID.
After adding a partner to your Cerby workspace, access to your items and seat-based and paid social apps is centralized in Cerby. Therefore, your company retains control over these items and apps, and gains visibility into their usage by external collaborators. We understand that, for you, having visibility of end-user actions is a significant effort in preventing security risks and facilitating effective collaboration.
**Figure 1** shows the **Partners** page in the Cerby web app dashboard, where you can manage your partnerships.
Figure 1. Partners page in the Cerby web app dashboard
Currently, Cerby supports the following ways to add and collaborate with your partners:
* [Host-guest partnership](#host-guest-partnership)
* [Local partner](#local-partner)
* [Native partner](#native-partner)
The following sections describe each way.
***
## Host-guest partnership
A host-guest partnership enables you to establish a secure connection between an existing host workspace and a guest workspace created for this purpose. Both workspaces are managed by their respective **Admins**, and the guest workspace is configured as a [local workspace](https://help.cerby.com/setup-and-admin/workspace-identity-federation/local-workspace/create-and-configure-a-local-workspace).
Through this connection, you can share accounts with external collaborators invited as users in the guest workspace. With this partnership type, you retain complete control over the shared accounts and gain visibility on their usage.
With this partnership type, Cerby introduces the following roles, as described in **Table 1**.
| Role | Description |
| ------------------------- | ---------------------------------------------------------------------------------------------------------------------------------------------------------------------------------------------------------------------------------------------------------------------------------------------------------------------------------------------------------------------------------------------------------------------------------------------------------------------------------------------------------------------- |
| Partnership **Owner** |
It is a role assigned automatically to the user from the host workspace who adds the partnership. With this role, they can perform the following actions:
Manage the partnership they own.
Share accounts with the guest workspace.
|
| Host workspace **Admin** |
It is a user from the host workspace who has the Admin role. With this role, they can perform the following actions:
Manage any partnership.
Approve or decline any attempt to add a host-guest partnership.
|
| Guest workspace **Admin** |
It is a user from the guest workspace who has the Admin role. With this role, they can perform the following actions:
Manage users in the guest workspace.
Accept or decline any partnership request from the host workspace.
|
| Account **Manager** |
It is an account-level role assigned by the partnership Owner when sharing an account with the guest workspace; by default, it is assigned to the guest workspace Admin. With this role, they can perform the following actions:
Log in to accounts shared with them.
Request access to accounts for other guest workspace members.
IMPORTANT: Account Managers cannot manage the account security settings.
|
**Table 1.** Host-guest partnership roles and their descriptions
Any user in the host workspace can add a host-guest partnership. To establish the connection, you send a partnership request that must be approved by a host workspace **Admin** and accepted by a guest workspace **Admin**.
After adding the partnership, only you as a partnership **Owner** can share accounts with the guest workspace and assign one of the following roles over the accounts:
* **Collaborator:** Guest workspace members can only log in to shared accounts.
* **Manager:** Guest workspace members can log in to shared accounts and request access to these accounts for other members.
For more information about roles, read the article [Roles and permissions](/getting-started/concepts/user-management/roles-and-permissions).
{% hint style="danger" %}
**IMPORTANT:** A host workspace can have multiple host-guest partnerships. However, they can only establish one connection with the same guest workspace.
{% endhint %}
***
## Local partner
A local partner enables you to invite external collaborators who don't belong to your domain directly to your workspace, without creating a separate guest workspace. These collaborators become a subgroup or organization of guest users to whom you can share your accounts.
In this partnership type, you retain full control over the accounts you share, and you can perform user management tasks on the guest users. For example, you can add or remove external collaborators from your workspace as needed.
Additionally, as guest users are part of your workspace, using an identity provided and managed by Cerby, you can share your accounts either with the local partner or directly with the guest users.
With this partnership type, Cerby introduces the following roles, as described in **Table 2**.
| Role | Description |
| ------------------- | -------------------------------------------------------------------------------------------------------------------------------------------------------------------------------------------------------------------------------------------------------------------------------------------------------------------------------------------------------------------------------------------------------------------------------------------------------------------------------------------------------------------------------------------------------------------------------- |
| **Host Admin** |
It is a role assigned by the workspace Admin to another workspace user when adding a local partner. With this role, they can perform the following actions:
Manage the local partner and its guest users.
Overlook the activities the local partner’s users do in your workspace.
Assign the Host Admin role to other workspace users.
Share accounts with the local partner.
|
| **Guest Admin** |
It is a role assigned by the workspace Admin to a guest user when adding a local partner. With this role, they can perform the following actions:
Manage other Guest Users and their access to the workspace.
Propagate access to the accounts that Host Admins shared with them as account Managers.
NOTE:Guest Admins can’t add other local partners, import items from LastPass, or view workspace users, policies, or settings.
|
| **Guest User** | It is a role assigned to an external collaborator invited to join a Cerby workspace with limited access to items and assets, enough to perform their activities. |
| Account **Manager** |
It is an account-level role assigned by the Host Admin when sharing an account with the local partner; by default, the role is assigned to the Guest Admin. With this role, they can perform the following actions:
Log in to accounts shared with them.
Propagate shared access to the accounts with other Guest Users.
|
**Table 2.** Local partner roles and their descriptions
Only as a workspace **Admin**, you can add a local partner to your workspace. While adding it, you can designate any workspace user, including you, as the **Host Admin**, granting you control over who can manage the partnership and external collaborators.\*\*\*\* Also, you must designate and invite a **Guest Admin** to join your workspace.
The following are the benefits of having **Host** and **Guest Admins** :
* **Delegate ownership:** **Host Admins** can invite and assign other workspace users as **Host Admins**, sharing control and responsibility over the partnership.
* **Expand collaboration:** **Host Admins** can invite external collaborators from the partner's organization, selecting between granting them **Guest Admin** privileges for management capabilities within the partnership only or **Guest User** access for limited access, visibility, and interaction.
* **Delegate user invites:** **Guest Admins** can invite external collaborators to your workspace as **Guest Users**.
* **Propagate access to accounts:** With the account **Manager** role, **Guest Admins** can share with other **Guest Users** the accounts that were initially shared with them by **Host Admins**.
For more information about roles, read the article [Roles and permissions](/getting-started/concepts/user-management/roles-and-permissions).
***
## Native partner
A native partner is a business or organization (agency, media planner, or consultant) already existing as a partner in your paid social apps for collaboration purposes in ad campaigns.
By connecting your partner to Cerby, you gain visibility on the users who access your assets from your partner's side. This level of visibility is not even achievable through the business manager of your paid social app, such as Meta Business Manager or TikTok for Business.
With this partnership, Cerby does not introduce any new role because it is a read-only capability. The user who connects a native partner is the App Owner in Cerby.
After establishing the partnership, you can sync and import the information of the partner’s users with shared access to your assets, providing you with a granular and centralized oversight of your business manager.
{% hint style="danger" %}
**IMPORTANT:** You can only add a native partner in Cerby if you have shared at least one asset with a partner in your paid social app or vice versa.
{% endhint %}
Unlike a local partner, where external collaborators exist in your workspace using an identity and account managed by Cerby, the user management capabilities remain in the paid social apps when you connect with a native partner. Therefore, your partners don’t have to use Cerby.
Currently, Cerby supports the Native Partner feature for the following paid social apps:
* Meta Business Manager
* TikTok For Business
* Pinterest Business Manager
# Security posture
Learn about the tools Cerby provides to enforce security standards across your workspace, including password policies, universal logout, and the security hub.
{% content-ref url="/pages/EVqjtUSiYFON5hrDVGpO" %}
[Password Policies](/getting-started/concepts/security-posture/password-policies)
{% endcontent-ref %}
{% content-ref url="/pages/oneX4np0QegkIrCJOr9b" %}
[Universal Logout](/getting-started/concepts/security-posture/universal-logout)
{% endcontent-ref %}
{% content-ref url="/pages/7FJ8srZ9rKpDjbdnLJ4M" %}
[Security Hub](/getting-started/concepts/security-posture/security-hub)
{% endcontent-ref %}
{% content-ref url="/pages/8swAd2KeeeATNRQznwVg" %}
[Push notifications](/getting-started/concepts/security-posture/push-notifications)
{% endcontent-ref %}
# Password Policies
This article describes the Password Policies feature that enables you to configure password rotation policies per app.
With Cerby, you can implement more granular security controls on your accounts based on your corporate policies and the sensitivity level of your apps.
The **Password Policies** feature enables workspace **Admins** to set up and enforce password rotation policies for all the accounts belonging to an app. Unlike workspace-wide policies enforced to all users and all accounts, you can balance security best practices and workflow efficiency in your organization with app-specific policies.
The automation approach of Cerby makes the policy implementation and execution more seamless and less manual. You just need to create and set up the policy, specifying the event that will start the policy and trigger the automated password rotation execution. Currently, the following are the supported events:
* **User login:** The policy starts when Cerby identifies a user login event to an account using autofill with the Cerby browser extension or mobile app. You select the schedule interval for the execution of automated password rotations.
* **Schedule:** The policy starts on the date you select, and you specify the frequency and time window for the execution of automated password rotations.
Nonstandard apps have varied password policies, and some of them, such as those handling sensitive data (personal information, financial data, or proprietary information), may require more frequent password rotations. With Cerby's Password Policies, you can schedule rotations to meet the specific needs of each app.
Additionally, by centralizing access to your accounts in Cerby, you can ensure uninterrupted access while maintaining a high level of security.
{% hint style="info" %}
**NOTE:** You can only configure password policies for managed apps that support the password rotation automated task.
{% endhint %}
The following are some of the benefits of the Password Policies feature:
* **Enhanced security:** Cerby generates strong and unique passwords according to the app policies and password strength rules.
* **Reduced risk of breaches:** Regular password rotations minimize the impact of potential data breaches because they typically terminate all active user sessions.
* **Compliance adherence:** Password policies can help organizations comply with corporate and industry regulations and standards.
* **Complementary protection:** On-demand password rotations and rotations based on deprovisioning events in your corporate identity provider (IdP) are not blocked by this feature.
* **Improved visibility:** Cerby has a dedicated user interface to show the status of the policy and the affected accounts: the **Password Policies** page in the Cerby web app dashboard, described in the following section.
{% hint style="info" %}
**NOTE:** For any new account belonging to an app with an active policy, Cerby verifies if the account must be affected by the policy.
{% endhint %}
***
## The Password Policies page
The **Password Policies** page displays a table with all the policies you have created for your apps in Cerby. This view provides a convenient location to manage your policies and see all the accounts affected by them.
**Figure 1** shows what the **Password Policies** page looks like.
Figure 1. Password Policies page in the Cerby web app dashboard
This view provides the following information about your policies in a table:
* **App provider:** It is the app for which the policy is implemented.
* **Name:** It is the name of the policy.
* **Total accounts:** It is the total count of accounts affected by the policy.
* **Type:** It is the event type that triggers the automated password rotation. Currently, the possible values are the following:
* **User login:** The automated password rotation is executed in a specified interval after a user logs in to an account using autofill with the Cerby browser extension or mobile app.
* **Schedule:** The automated password rotation is executed within a time window at a specified recurring date and time.
* **Schedule interval:** It is the time to wait to execute the automated password rotation after a login event in user login-based policies or the password rotation frequency in schedule-based policies.
* **More options:** It is a drop-down menu with the following options:
* View all accounts
* Edit policy
* Delete policy
When clicking the **View all accounts** () icon or selecting the **View all accounts** option from the **More options** (...) drop-down menu, the policy details page is displayed, as shown in **Figure 2**.
Figure 2. Policy details page in the Cerby web app dashboard
This page lists the following information about the accounts affected by the policy:
* **Account:** It contains the account name and username associated with the account.
* **Last attempt:** It is the date and time of the last password rotation attempt.
* **Last status:** It is the status of the last automated password rotation attempt. The possible values are the following:
* **Scheduled:** The event has started the policy, but the automated password rotation execution is waiting for the specified time to elapse.
* **Queued:** The automated password rotation is in the queue, waiting to be executed.
* **Excluded:** The account was excluded from the password policy.
* **Started:** The password policy has started based on the specified event.
* **Not started:** The password policy is waiting for the event to start.
* **Running:** The automated password rotation is being executed.
* **Completed:** The automated password rotation was completed successfully.
* **Not completed:** The last automated password rotation attempt was not completed.
* **Next attempt:** It is the date and time of the next automated password rotation attempt. For user login-based policies, this column is only populated after the event triggered the rotation execution.
* **More options:** It is a drop-down menu with the following options:
* **Include in policy:** This option is displayed for accounts with the **Excluded** status to include them in the policy.
* **Exclude from policy:** This option excludes an account from the policy; therefore, the account status changes to **Excluded**.
***
## Related articles
The following articles contain more information about the Password Policies feature:
* [Create a password policy](https://help.cerby.com/setup-and-admin/security-governance/password-policies/create-a-password-policy)
* [View all accounts with a password policy](https://help.cerby.com/setup-and-admin/security-governance/password-policies/view-all-accounts-with-a-password-policy)
* [Edit a password policy](https://help.cerby.com/setup-and-admin/security-governance/password-policies/edit-a-password-policy)
* [Exclude an account from a password policy](https://help.cerby.com/setup-and-admin/security-governance/password-policies/exclude-an-account-from-a-password-policy)
* [Include an account in a password policy](https://help.cerby.com/setup-and-admin/security-governance/password-policies/include-an-account-in-a-password-policy)
* [Delete a password policy](https://help.cerby.com/setup-and-admin/security-governance/password-policies/delete-a-password-policy)
# Universal Logout
This article describes the benefits of Cerby Universal Logout and Okta’s Universal Logout through Cerby.
With Cerby Universal Logout, you can rapidly terminate user access when security or operational needs arise. With a single action, workspace administrators can ensure that a user no longer has access to accounts protected and managed through Cerby. This feature protects sensitive information, supports incident response procedures, and helps maintain a clean and compliant access environment.
Universal Logout is designed to work seamlessly across identity providers and Cerby's supported application ecosystem, allowing teams to take decisive action when needed.
***
## Key benefits
The following are the main benefits of using Cerby Universal Logout:
* **Unified access revocation:** End-user access to accounts managed through Cerby is terminated through a single, centralized control.
* **Consistent security response:** Administrators can take immediate action without needing to manage each application individually when access needs to be removed for operational events.
* **Integrated with Okta:** Universal Logout can be initiated directly from identity providers (IdPs) or a Cerby workspace, depending on your organization's setup.
* **Compliance and governance support:** Helps teams maintain strong access hygiene and reduces exposure from accounts that may otherwise remain active unintentionally.
***
## How Universal Logout works
Cerby Universal Logout operates across the Cerby platform and connected identity ecosystems to terminate access efficiently and consistently. The following happens when triggered:
* The user’s active access across Cerby-supported surfaces is terminated.
* Cerby coordinates secure access changes across the applications that the user can access through the platform.
* Administrators are informed of the action to support transparency and governance.
Cerby aligns with identity best practices by respecting IdP-initiated logout signals and organizational lifecycle events. Universal Logout can be initiated from Cerby or, when configured, from your IdP’s administrative interface.
***
## When to use Universal Logout
Universal Logout is recommended for scenarios such as:
* **Security risk events:** When organizations have concerns about a compromised or misused user account.
* **Employee or contractor offboarding:** When users leave the organization or transition out of access roles.
* **Access hygiene reviews:** During cleanup efforts or compliance activities.
* **Centralized incident response:** When rapid action is required across multiple applications.
***
## Who can trigger Universal Logout
Users with elevated administrative authority, such as the following roles, can trigger universal Logout:
* Workspace **Owners**
* Workspace **Super Admins**
* Workspace **Admins**
* IdP administrators (when configured)
The goal is to ensure only trusted roles can initiate access revocation actions.
***
## Triggering Universal Logout from Cerby
Administrators can initiate Universal Logout directly from the Cerby workspace. The action is available in the workspace’s user management area, allowing teams to select a user and initiate the logout process.
Cerby provides clear confirmation prompts to ensure administrators understand the impact of their actions before they are executed.
***
## Triggering Universal Logout from IdPs
For organizations that integrate Cerby with IdPs, Universal Logout can also be initiated from the IdP’s administrative console. This capability enables teams to incorporate Cerby into their identity-centric workflows and lifecycle management processes.
For example, when a logout or access revocation action is triggered from your IdP for a user, Cerby will participate in that workflow and enforce logout for the corresponding accounts managed through Cerby.
***
## Visibility and notifications
After Universal Logout is initiated, the following occurs at a high level:
* Workspace administrators are notified that an access revocation event has occurred.
* Cerby records the action for visibility and governance.
* The workspace’s audit and monitoring tools will reflect the change, supporting compliance and reporting needs.
***
## Related articles
The following articles contain more information about the Universal Logout feature:
* [Trigger Cerby Universal Logout](https://help.cerby.com/setup-and-admin/security-governance/universal-logout/trigger-cerby-universal-logout)
* [Enable Okta Universal Logout for Cerby](https://help.cerby.com/setup-and-admin/security-governance/universal-logout/enable-okta-universal-logout-for-cerby)
* [Trigger Okta Universal Logout and extend it to Cerby](https://help.cerby.com/setup-and-admin/security-governance/universal-logout/trigger-okta-universal-logout-and-extend-it-to-cerby)
# Security Hub
This article describes the key benefits of the Security Hub feature, which offers a unified view of the health and status of the accounts in your workspace.
{% hint style="info" %}
**Who can use this feature?**
* Workspace **Owners**, **Super Admins**, and **Admins**
* Only supported using the Cerby web app
{% endhint %}
With Cerby’s **Security Hub**, you gain a centralized view of the current health and status of your accounts and automation jobs, enabling you to stay on top of any issues that could compromise the security of your workspace.
By aggregating data and presenting it in a single, user-friendly dashboard, the Security Hub highlights any risky behavior and misconfigurations in your workspace accounts so you can take action as follows:
* Spot and address potential vulnerabilities before they escalate.
* Make proactive decisions.
* Reduce the likelihood of breaches and maintain a secure workspace.
***
## The Security Hub page
**Figure 1** displays the Security Hub page, which contains a dashboard with the total number of accounts and the number of orphaned accounts within the workspace.
Figure 1. Security Hub page in the Cerby web app dashboard
The **Security Hub** page centralizes the following elements and information:
* The time when the **Security Hub** page was last updated is displayed in the top-right corner.
* The **Refresh** button enables you to update the view with the latest information.
* The [**Automation tasks issues**](#the-automation-tasks-issues-card) card is the main card on the dashboard. It displays the automation tasks that had issues in the last seven days.
* The [**Total number of accounts**](#the-total-number-of-accounts-card) is displayed on the first card on the right side.
* The [**Orphaned accounts**](#the-orphaned-accounts-card) card indicates the number of accounts in the workspace that do not have an **Owner**.
The following sections describe the main elements of the dashboard.
***
## The Automation tasks issues card
The **Automation tasks issues** card displays the list and number of automation tasks that had issues in the last seven days and are blocking automation. This information is retrieved from the [Automation Log](/getting-started/concepts/audit-and-activity/automation-log) and grouped by the following issue types:
* User access termination
* User access management
* Routine user data sync
From this card, you can address automation task issues that need attention. Refer to the article [Address the automation task issues displayed in the Security Hub ](https://help.cerby.com/setup-and-admin/security-governance/security-hub/address-automation-task-issues-in-the-security-hub)to learn more about automation task issues and how to acknowledge them.
**Figure 2** shows the composition of the **Address the** **issues blocking automation** card.
Figure 2. Automation task issues displayed in the Address the issues blocking automation card
To quickly access the individual cards for each automation task issue that needs your attention in each category, click the right arrow within the issue type categories. A side drawer is displayed, as shown in **Figure 3**.
Figure 3. Automation task issues side drawer displayed per category in the Security Hub
The side drawer contains the following tabs at the top:
* **Unread issues:** It displays the automation task issues that require acknowledgment and have not yet been marked as *read*. Their status changes to *read* only when you click the **Mark as read** button individually or in bulk.
**NOTE:** *Unread* reflects status only. It does not imply fault or severity on its own.
* **Read issues:** It displays the automation task issues that were previously Unread and have been marked as read (acknowledged).
{% hint style="info" %}
**NOTES:**
* Read issues under the **Read issues** tab and do not contribute to **Unread** counts. If a new related activity occurs later, a new *unread* issue is created.
* You can mark automation task issues as read in the following ways:
* Individually
* In bulk
{% endhint %}
Both the **Unread** and **Read issues** tabs contain individual automation task issue cards if the issue is recognizable and belongs to an established category. These cards include the name of the related account, a description of the issue and its solution, and buttons for taking actionable next steps.
**Figure 4** shows an example of an issue card displayed within the side drawer.
Figure 4. Example of an individual automation task issue card displayed in the Security Hub
Consider the following notes regarding individual automation task issue cards:
* The **Under review by Cerby** chip appears only on cards where the Cerby team has acknowledged the issue and is working on it.
* All individual issue cards contain the **Mark as read** button. Additional buttons might be displayed for actionable next steps, such as redirecting you to the corresponding page in the Cerby web app or opening a Cerby help center article.
* When provided, you can also contact the Cerby support team directly from the card by clicking the **Contact our Support team** link.
By clicking the right arrow on the issue card, you can access the issue details screen that includes the following information and elements:
* The issue name, the status chip, and the date and time when it occurred.
* The issue description, a link to the Cerby Support team, and any available action.
* The screenshot captured when the automation stopped, and the error occurred, if available.
* The automation identifier.
* The name of the user who triggered the automation task, the trigger source, and the date and time when it started.
* Multiple issue cards are generated if Cerby encounters issues in multiple nested jobs.
***
## The Total number of accounts card
The **Total number of accounts** card indicates the total number of accounts in the workspace. You can access the **Total accounts** dashboard by clicking the **See all accounts** link.
**Figure 5** shows the information displayed on the card.
Figure 5. The Total workspace accounts card
The **Total Accounts** dashboard displays the total number of accounts across all statuses. Refer to the article [View the details of all accounts in your workspace](https://help.cerby.com/setup-and-admin/security-governance/security-hub/view-the-details-of-all-accounts-in-your-workspace) to learn more about the **Total workspace accounts** page.
***
## The Orphaned accounts card
The **Orphaned accounts** card helps you quickly identify any accounts that should be assigned to one or more **Owners**. Refer to the article [Assign Owners to orphaned accounts in your workspace](https://help.cerby.com/setup-and-admin/security-governance/security-hub/assign-owners-to-orphaned-accounts-in-your-workspace) to learn more about orphaned accounts.
An account is marked as *orphaned* when no active user is assigned as its **Owner**. The following are some of the common ways an account is orphaned:
* The only **Owner** was deprovisioned, suspended, or left the workspace.
* Ownership was removed or transferred incorrectly during role changes.
* The account was imported without an assigned **Owner**.
* Teams still have access, but no individual **Owner** is assigned (known issue).
Orphaned accounts create unmonitored access, increasing the risk of misuse or unauthorized entry. So, you must have at least one active **Owner** or disable the account if it’s no longer needed. This restores accountability and reduces security risk.
***
## Get started
As a workspace **Owner**, **Admin**, or **Super Admin**, you must complete the next steps to start getting the most benefits of the Security Hub:
1. Log in to your [Cerby](https://app.cerby.com/) workspace.
2. Select the **Security Hub** option from the left navigation drawer. The **Security Hub** page is displayed.
3. Select the card you want to act on.
Now, you are ready to make your workspace safer.
***
## Related articles
Refer to the following articles to learn more about the **Security Hub** page:
* [View the details of all accounts in Cerby](https://help.cerby.com/setup-and-admin/security-governance/security-hub/view-the-details-of-all-accounts-in-your-workspace)
* [Assign Owners to orphaned accounts in your workspace](https://help.cerby.com/setup-and-admin/security-governance/security-hub/assign-owners-to-orphaned-accounts-in-your-workspace)
* [Address the automation task issues displayed in the Security Hub](https://help.cerby.com/setup-and-admin/security-governance/security-hub/address-automation-task-issues-in-the-security-hub)
# Push notifications
This article describes Cerby's push notifications and how they help you stay informed about critical access events and security changes in your workspace.
Cerby's push notifications deliver real-time alerts directly to your mobile device, keeping you informed about critical access events, credential usage, and changes to your workspace's security posture. By enabling notifications, you can take immediate action, such as approving a new trusted device or reviewing an unrecognized login, with just a tap, ensuring you always maintain secure control over your accounts.
Cerby uses a flexible configuration system that gives workspace administrators control over which notification types are active across the workspace, while still allowing individual users to manage their personal preferences within those boundaries.
{% hint style="info" %}
**Who can use this feature?**
* Workspace **Owners**, **Super Admins**, **Admins**, and **Users**
* Supported using the Cerby web app and Cerby mobile app
{% endhint %}
{% hint style="danger" %}
**IMPORTANT:** If a workspace **Admin** has enforced a notification at the workspace level, users cannot turn it off.
{% endhint %}
***
## Key benefits
* **Immediate visibility:** Get instant alerts for critical events rather than discovering them later through manual review.
* **Actionable alerts:** Quickly review event details and approve or deny requests directly from the notification, without opening the app.
* **Enhanced security posture:** Stay ahead of potential unauthorized access with proactive warnings about new devices and login locations.
***
## How push notifications work
Cerby separates notification control between workspace administrators and individual users:
* **Workspace Owners, Super Admins, and Admins** can enable, disable, and enforce specific notification types for the entire workspace using the Cerby web app.
* **Workspace Users** can manage their personal notification preferences in the Cerby mobile app by navigating to their profile settings.
When an admin enforces a notification type at the workspace level, that notification is always delivered to users regardless of their personal settings.
***
## Available notification types
You can configure the following notification types for your workspace:
* **Identity verification requests:** Prompts the user when an identity check, such as multi-factor authentication (MFA) confirmation, is required.
* **New trusted device requests:** Notifies the user when a new device requests to be added to their trusted devices list.
* **Account sharing alerts:** Alerts the user when an account or resource is shared with them.
* **OTP code received:** Notifies the user when a one-time password is captured for their account.
***
## Related articles
**Setup guides:**
* [Turn on workspace push notification settings](https://help.cerby.com/setup-and-admin/workspace-settings/turn-on-workspace-push-notification-settings)
* [Turn off mobile notifications](https://help.cerby.com/cerby-mobile-app/app-customization/turn-off-mobile-notifications)
# Audit and activity
Understand how Cerby tracks and logs activity across your workspace, including account activity and the automation log.
{% content-ref url="/pages/OJSmK0kUbJNLocehdaed" %}
[Activity](/getting-started/concepts/audit-and-activity/activity)
{% endcontent-ref %}
{% content-ref url="/pages/wV1mlQoMhFgdUt5oaugj" %}
[Automation Log](/getting-started/concepts/audit-and-activity/automation-log)
{% endcontent-ref %}
# Activity
This article describes the benefits of the Activity page to monitor and analyze activity on your Cerby workspace in real time.
With the **Activity** page, you can monitor and analyze activity on your Cerby workspace in real time. This view contains information about events on accounts, partners, teams, integrations, secrets, and automated tasks.
The **Activity** page offers different filtering options, enabling you to customize displayed data to focus on specific events, accounts, or users, ensuring you only see the most relevant information.
The data displayed on the view is organized into the following columns:
* The time when each event was registered
* A description or category of the activity
* The associated account
* The application where the event occurred
* The user involved in the event
* The geographical location
* The operating system in use
* The originating device
You can monitor events in real time and get immediate insights that support quick, informed decision-making, enabling you to respond to potential issues as they arise, thus enhancing workspace security and control.
Furthermore, the **Activity** page also includes a report download feature to export activity data as a CSV file for deeper analysis, record-keeping, and sharing insights with team members or stakeholders, making it a powerful tool for maintaining and optimizing workspace performance.
**Figure 1** shows the **Activity** page that you can access from the left navigation drawer of the Cerby web app dashboard.
Figure 1. Activity page in the Cerby web app dashboard
***
## Related articles
Refer to the following articles to learn more about the **Activity** page:
* [Filter events in the Activity page](https://help.cerby.com/cerby-web-app/activity/filter-events-on-the-activity-page)
* [Monitor events in the Activity page](https://help.cerby.com/cerby-web-app/activity/monitor-events-in-the-activity-page)
# Automation Log
This article describes the key benefits and settings for using and understanding Cerby’s Automation Log best.
With Cerby, you can use the **Automation Log** to trace every critical step of each automation job triggered to perform identity, account, and user management tasks, from provisioning users in an app to rotating your account passwords.
This log shows the precise automation status in the target app, so you always know how your users, credentials, and security settings are being protected and synchronized.
The following are the benefits of Cerby’s Automation Log:
* **Transparency:** You can see exactly what is running, where it came from, and why it was triggered.
* **Speed:** You can quickly identify stalled or incomplete jobs that Cerby triggers.
* **Accountability:** You can trace every update to its source, helping you audit changes across all apps.
As a workspace **Owner**, **Super Admin**, or **Admin**, you can view all automation jobs in your workspace; as a **User**, you can only view the jobs you have triggered for the accounts and business hubs you own.
***
## Key concepts
**Table 1** contains the key concepts that are essential for understanding the Automation Log.
| **Concept** | **Description** |
| --------------- | -------------------------------------------------------------------------------------------------------------------------------------------------------------------------------------------------------------------------------------------------------------------------------------------------------------------------------------------------------------------------------------------------------------------------------------------------------------------------------------------------------------------------------------------------------------------------------------------------------------- |
| Automation job | An automation job is a single execution of an automated process. It includes details such as when it started, its current status, and related logs. Jobs can be scheduled to run at specific times or triggered by system events or user actions; also, they can trigger nested jobs to accomplish a task. Automation jobs perform identity, account, and access management tasks. For example, provisioning a user like John Doe in an app or rotating the password for a Marketing account. In the Automation Log, each recorded execution is called an automation job, and a specific ID is assigned to it. |
| Nested job | Some automation jobs involve executing one or more jobs as part of the process. All jobs are nested into one and called nested jobs for those cases. |
| Execution group | An execution group is the top-level entry in the Automation Log that represents a single operation from start to finish. It contains the parent automation job and any nested jobs that were triggered as part of the same process, and its status always reflects the overall progress of all its jobs. |
**Table 1.** Automation Log key concepts
***
## The Automation Log page
The **Automation Log** page in the Cerby web app dashboard is the centralized view of all the automation jobs triggered within your Cerby workspace, as shown in **Figure 1**.
Figure 1. Automation Log page in the Cerby web app dashboard
The following is the information you can find in each column of the Automation Log:
* **Status:** The current phase of each automation job. For more information, refer to the [Status types](#status-types) section.
* **Target:** The specific resource affected by the job. For example, accounts, business hubs, and teams.
* **Actor:** The entity that triggered the job. For example, Cerby or a user.
* **Task:** The identity, account, or user management action to be accomplished with the job. For more information, refer to the [Task types](#task-types) section.
* **Trigger:** The underlying rule or context that triggered the job. For more information, refer to the [Trigger types](#trigger-types) section.
* **Created at:** The date and time when the job was triggered.
* **Updated at:** The date and time of the most recent status change.
### Task types
To provide valuable insights within your workspace, the Automation Log captures the following tasks:
* Identity lifecycle management
* **Adding users:** It involves creating a user account and inviting a new user to an external app connected to Cerby.
* **Adding users to Cerby:** It involves adding users to a Cerby workspace without provisioning them in the external app in the same step.
* **Syncing users:** It involves retrieving the user and asset data from an external app connected to Cerby.
* **Updating user roles:** It involves updating the existing role of a user within an external app connected to Cerby.
* **Updating user assets:** It involves updating the asset assignments of a user in an external app connected to Cerby.
* **Syncing asset access:** It involves synchronizing the access permissions of users on assets in an external app connected to Cerby.
* **Syncing asset ownership:** It involves propagating the ownership of assets within a business hub integration.
* **Removing users:** It involves removing users from an external app connected to Cerby.
* **Removing workspace user:** It involves removing a user account from the Cerby workspace.
* **Matching users:** It involves matching users found in an external app to their corresponding Cerby user accounts.
* **Claiming access:** It involves a user claiming access to an external app connected to Cerby.
* **Claiming asset access:** It involves a user claiming access to an asset for an external app connected to Cerby.
* **Canceling user invite:** It involves canceling a pending invite for a user to an external app connected to Cerby.
* **Resending user invite:** It involves resending a pending invitation for a user to an external app connected to Cerby.
* **Updating team members:** It involves updating the membership of a Cerby team in response to access management changes.
* **Updating team:** It involves updating the configuration or structure of a Cerby team.
* Native partner management
* **Syncing native partners' users:** It involves retrieving the users and roles of native partners in a paid social app connected to Cerby.
* **Adding native partners' users:** It involves adding users to an asset on behalf of a native partner in a paid social app connected to Cerby.
* **Removing native partners' users:** It involves removing users from an asset on behalf of a native partner in a paid social app connected to Cerby.
* **Applying partner user sync report:** It involves applying the results of a native partner user sync to the corresponding assets in Cerby.
* Security posture
* **Rotating password:** It involves rotating the password of an account.
* **Setting up MFA:** It involves turning on multi-factor authentication (MFA) for an account with a Cerby-managed method.
* **Turning off MFA:** It involves turning off MFA for an account.
* **Checking MFA health:** It involves verifying that MFA is correctly configured and active for an account managed by Cerby.
* Universal Logout
* **Executing Cerby logout:** It involves logging a user out from all active sessions managed by Cerby.
* **Executing Okta logout:** It involves logging a user out from all active sessions via an Okta Universal Logout event.
* System tasks
* **System actions:** It involves an internal process performed by Cerby that does not correspond to a specific user-facing task.
### Trigger types
The following are the sources that add a new log entry displayed in the Automation Log:
* **Web app:** A manual action performed by a user via the Cerby web app.
* **Web extension:** A manual action performed by a user via the Cerby browser extension.
* **Workspace policy:** A workspace-level policy that schedules automations, such as recurring syncs for business hub integrations.
* **Account policy:** A policy configured for an account that enforces automations, such as password rotations, for all accounts belonging to the same app within a workspace.
* **Account event:** An event triggered by a change in the state or configuration of an account.
* **SCIM event:** An event triggered by an identity provider (IdP) and propagated to Cerby via the System for Cross-domain Identity Management (SCIM) protocol.
* **Team event:** A change in the structure, roles, or permissions of a Cerby team.
* **Collection event:** A change in a Cerby collection.
* **Universal Logout:** A manual action performed by a user via the Cerby interface or an Okta Universal Logout event extended to a workspace that initiates Cerby’s Universal Logout.
* **Cerby API:** A call made to the platform using the [Cerby API](https://developer.cerby.com/#welcome-to-the-cerby-developer-portal).
* **Cerby Admin API:** A call made to the platform to perform manual admin actions in customer workspaces.
### Status types
The following are the statuses for each log entry displayed in the Automation log:
* **Not started:** It is the state of individual nested jobs that have not yet begun when a main automation is first created.
* **Not completed:** It is the state that applies when even a single nested job fails.
* **Retrying:** It is the state where a single nested job is retrying.
* **Running:** It is the state where a single nested job is still running.
* **Started:** It is the state where nothing is running, but at least one nested job has started.
* **Queued:** It is the default state if no jobs have started.
* **Completed:** It is the state where all nested jobs finished successfully.
***
## The Automations tray
The **Automations** tray is a floating panel anchored to its trigger icon in the top navbar that provides you quick access to your most recent automation jobs without leaving the current page, as shown in **Figure 2**. The automations in this tray are the top-level operations within an execution group, and they are triggered by user actions in the Cerby web app, with status updates and a direct link to each entry in the Automation Log.
This tray displays automations in two tabs: **All recent automations** and **Not completed**. Each listed automation contains the item name, app name, item type, the created and updated date for the automation, and the automation job status.
As a workspace **Owner**, **Super Admin**, **Admin**, **User**, **Login-Only**, or **Guest User**, you can only view the automation jobs you have triggered for the accounts and business hubs you own.
For instructions on how to view the automations in this tray, read the article [View your recent automations in the Automations tray](https://help.cerby.com/cerby-web-app/automation-log/view-your-recent-automations-in-the-automations-tray).
***
## Related articles
The following articles contain more information about the Automation Log:
* [Filter jobs in the Automation Log](https://help.cerby.com/cerby-web-app/automation-log/filter-jobs-in-the-automation-log)
* [View the details of a nested job in the Automation Log](https://help.cerby.com/cerby-web-app/automation-log/view-the-details-of-a-nested-job-in-the-automation-log)
* [View your recent automations in the Automations tray](https://help.cerby.com/cerby-web-app/automation-log/view-your-recent-automations-in-the-automations-tray)
# Glossary
This article describes the basic definitions of terms that are commonly used in Cerby.
This glossary contains the basic definitions of terms that are commonly used in Cerby:
[A](#a) | [B](#b) | [C](#c) | [D](#d) | [E](#e) | [F](#f) | [I](#i) | [L](#l) | [M](#m) | [O](#o) | [P](#p) | [R](#r) | [S](#s) | [V](#v) | [W](#w)
***
## A
### Account
It is a digital record containing the user login information for a particular application or service provider. In the context of identity and access management, accounts are essential for authenticating and granting users access to applications, systems, or service providers such as Mailchimp, Facebook, Twitter, or TikTok.
Accounts usually comprise a username and a password. However, depending on the application default credentials and user needs, additional information could be saved in a Cerby account, such as the following:
* Email address
* Phone number
* Application or service provider name
* Login URL
* [Account notes](#account-note)
* [Account custom fields](#account-custom-field)
In the context of a Cerby workspace, all users, except the ones with the **Login-only** or **Guest user** role, can add an account to manage and secure access to it through Cerby. When you add an account to Cerby, you automatically become its **Owner**, and when you share it with other workspace members, teams, or guest users, you can assign them one of the following three roles:
* [**Owner**](#account-owner)**:** They can share access, manage the account configuration, and log in to the account.
* [**Manager**](#account-manager)**:** They can request access to account **Owners** for other external users in the context of [local partners](/getting-started/concepts/user-management/partners#local-partner) and [host-guest partnerships](/getting-started/concepts/user-management/partners#host-guest-partnership).
* [**Collaborator**](#account-collaborator)**:** They can only log in to the account.
For more information about roles and the actions users can perform on an account added to Cerby, read the article [Roles and permissions](/getting-started/concepts/user-management/roles-and-permissions).
### Account autosave
It is a feature in the Cerby web app and browser extension that enables you to save login and signup credentials automatically, streamlining the process of adding accounts.
Workspace **Admins**, **Super Admins**, and **Owners** can set up and turn on this feature for all workspace users and control if specific website domains should be allowed or excluded. For more information, read the article [account autosave](/getting-started/concepts/credential-management/account-autosave).
### Account card
It is a graphical component in the user interface (UI) of the Cerby web app, mobile app, and browser extension that consists of card-type buttons representing the accounts added to Cerby. These cards redirect users to log in to their applications, perform account management and configuration, and trigger security actions.
### Account Collaborator
It is a role in Cerby with basic permissions to log in to an account added to Cerby and view its details, such as [account notes](#account-note) and [account custom fields](#account-custom-field). [Account Owners](#account-owner) can assign this role to workspace members, teams, or guest users when sharing their accounts with them.
For more information about this role, read the article [Roles and permissions](/getting-started/concepts/user-management/roles-and-permissions).
### Account custom field
It is an input field users can create as needed to save text-based information related to an account. The following three types of fields are available for customization and categorization of account details:
* URL link
* Short text
* Long text
These fields can only be created and updated by account **Owners** when editing the account details. Both account **Owners** and **Collaborators** can view the information saved in them.
Cerby supports up to 140 custom fields per account. For more information about this feature, read the article [How to add and manage custom fields for your accounts](https://help.cerby.com/cerby-web-app/accounts/managing-your-accounts/add-and-manage-custom-fields-for-your-accounts).
### Account details page or screen
It is a section in the UI where the details and settings of an account are centralized. You can access the account details page or screen using the Cerby web app, browser extension, and mobile app.
Account **Owners** can edit the details of an account and update its configuration through the account details page or screen. Account **Collaborators** can only view the account details.
### Account Manager
It is a role in Cerby in the context of [local partners](/getting-started/concepts/user-management/partners#local-partner) and [host-guest partnerships](/getting-started/concepts/user-management/partners#host-guest-partnership) with permissions to request access to accounts for other external users.
Account **Managers** send requests to account **Owners** in a host workspace to share their accounts with specific guest workspace members or guest users. However, **Managers** cannot perform user management tasks (remove, edit, or see members' information) and cannot access account security settings.
For more information about this role, read the article [Roles and permissions](/getting-started/concepts/user-management/roles-and-permissions).
### Account note
It is an input field where users can save additional text-based information related to their accounts. By default, notes are available to all accounts; they are the equivalent of a password note in LastPass or 1Password, and you can import them to Cerby when migrating your items from your password manager.
Account notes can only be updated by account **Owners** when editing the account details. However, both account **Owners** and **Collaborators** can view the information saved in them.
For more information, read the article [How to save and manage account notes](https://help.cerby.com/cerby-web-app/accounts/managing-your-accounts/save-and-manage-account-notes).
### Account Owner
It is a role in Cerby with permissions to manage the accounts added to Cerby, including their security, configuration, and shared access for other members, teams, or guest users. They can also enter and update account details, such as [account notes](#account-note) and [account custom fields](#account-custom-field).
Account **Owners** can assign the **Owner** or **Collaborator** role to workspace members, teams, or guest users when sharing their accounts with them. For the detailed permissions of this role, read the article [Roles and permissions](/getting-started/concepts/user-management/roles-and-permissions).
### All-Access Mode
It is a workspace-level mode with permissions to see all of the existing accounts at a workspace level, except accounts stored in local vaults. They can also see the names of members and teams with shared access to these accounts, and reassign account **Owners** for recovery purposes.
This role is enabled and disabled on demand. For more information, read the article [Roles and permissions](/getting-started/concepts/user-management/roles-and-permissions).
### Asset
It is a resource, entity, or subproduct associated with and managed by seat-based and paid social apps for specific purposes, like advertising and marketing.
Assets are typically categorized as paid (such as ad accounts) and organic (such as pages, pins, videos, and stories). For example, Pages and Ad Accounts are assets of a Meta Business Manager. Assets can also support organizational use cases, such as managing projects, teams, or other internal structures that exist within a larger business account.
When you connect a [business hub](/getting-started/concepts/identity-lifecycle-management-idlcm/business-hubs), you can sync and import the assets of your seat-based and paid social apps to centrally manage access to them from Cerby. After importing them, assets become sub-accounts of a parent business hub in Cerby.
### Asymmetric encryption
It is a cryptographic system also known as public-key encryption that uses a pair of related keys to encrypt and decrypt data: a public and private key. The goal of using this system is to enable the secure exchange of confidential data over insecure channels, such as the Internet.
The public key is used as a data encryption key (DEK) to encrypt the data inside a vault by any agent on the server or the client side. This public key is openly distributed; however, only the intended recipient of the encrypted data, who owns the private key, can access and decrypt the data.
### Authentication
It is a security process that determines users' identities by verifying their login credentials (such as user ID, username, and password) on directories, servers, or databases. The goal is to ensure that only authorized users can access sensitive data, services, or apps.
### Authorization
It is a security process that determines users' roles and access levels based on their identities. Users are granted permission to perform actions and access specific resources with these roles. The goal is to ensure that authenticated users have appropriate and limited access to sensitive data or app functionalities.
### Autofill
It is a feature of the Cerby browser extension and mobile app that automatically fills in login credentials (username, password, and verification codes) into the corresponding fields of a login page or mobile app. Autofill is used for automated and manual logins.
### Auto-login or automated login
It is one of Cerby's automated tasks that enables users to log in to their accounts automatically without manually filling in their credentials. When multi-factor authentication (MFA) is on and managed by Cerby, verification codes are also filled in automatically.
This feature is enabled for all [managed accounts](/getting-started/concepts/credential-management/accounts#managed-accounts); for [self-managed accounts](/getting-started/concepts/credential-management/accounts#self-managed-accounts), Cerby performs its best attempt to autofill credentials based on the available account details. The credentials saved in the Cerby workspace must be correct for successful automated logins.
***
## B
### Bearer token
It is a security token with a limited lifespan that Cerby requires to authenticate users with its server or API. It comprises a string of characters that is typically passed in the request headers of HTTP requests or in the login command for the [Cerby CLI](#cerby-command-line-interface-\(cli\)).
This token determines the endpoints and data you can access depending on your workspace and item role.
### Business hub
It is an integration that enables users to connect their seat-based and paid social apps to Cerby, aiming to centrally manage users and [assets](#asset) from Cerby.
Business hubs (formerly tenants or Apps) are connected to the collaboration spaces of your apps (workspaces, teams, or dashboards) via API- or automation-based integrations. To perform user and asset management tasks, the Cerby bot typically uses a service account with an admin role.
For more information about business hubs and the user and asset management tasks you can perform, read the article [Explore Business hubs](/getting-started/concepts/identity-lifecycle-management-idlcm/business-hubs).
### Business ID
It is the unique identifier assigned to the collaboration space (workspace, team, dashboard, business manager, or business center) of a seat-based or paid social app. Depending on the app, this identifier may have different names, such as organization or team ID.
Providing this value is crucial when connecting a [business hub](#business-hub) to Cerby.
***
## C
### Cerby browser extension
It is a [client app](#cerby-client-app) designed to complement the functionalities of the Cerby web app, with features such as automated login, password generation, and account autosave. The extension has a dashboard where users can view the details of their accounts, secrets, business hubs, collections, and subcollections.
### Cerby client app
It is any of the apps with which the users interact for accessing the Cerby platform, their workspace, and the items saved within the workspace. Currently, Cerby has the following client apps available: [web app](#cerby-web-app), [browser extension](#cerby-browser-extension), [mobile app](#cerby-mobile-app), and [CLI](#cerby-command-line-interface-\(cli\)).
### Cerby Command Line Interface (CLI)
It is a [client app](#cerby-client-app) that enables users to interact with their accounts and secrets via the command line interface on Linux, Windows, and MacOS. It simplifies command execution, provides enhanced data retrieval from secrets and accounts, and supports the automation of repetitive tasks for efficient data management.
For more information about this client app, read the article [Explore the Cerby CLI](https://help.cerby.com/developer-tools/cerby-cli/explore-the-cerby-cli).
### Cerby mobile app
It is a [client app](#cerby-client-app) designed to let users manage their accounts, secrets, business hubs, collections, subcollections, and trusted devices directly from their phone. This app supports item management, facilitates MFA setup, and ensures native secure access to sensitive data.
Additionally, the push notifications in the Cerby mobile app serve as an identity confirmation method for multi-factor authentication (MFA). For more information about this client app, read the article [Explore the Cerby mobile app](/getting-started/our-client-apps/explore-the-cerby-mobile-app).
### Cerby platform
It is how Cerby refers to its solution as a whole. The platform comprises the [client apps](#cerby-client-app) that work together to provide users with the best experience.
### Cerby user account
It is the digital identity created in Cerby for each user that enables them to access the Cerby platform and their workspace. When an [identity provider (IdP)](#identity-provider-\(IdP\)) is configured for a Cerby workspace to leverage single sign-on (SSO) authentication and user provisioning, Cerby user accounts are associated with the users’ identities in their corporate directory.
### Cerby web app
It is a [client app](#cerby-client-app) that enables users to securely create, manage, and share their accounts, secrets, collections, subcollections, business hubs, and assets with other workspace members, teams, and external users.
The Cerby web app is the central management interface for workspace **Admins**, **Super Admins**, and **Owners**. They can view all user activity, automation reports, billable accounts, and manage users, among other tasks and actions.
### Cloud encryption
It is one of Cerby's cryptographic strategies to protect user data stored in cloud-based vaults. Encryption keys are generated, stored, and managed in the cloud, and Cerby fully manages the key management system and recovery procedures.
For more information, read the article [How Cerby protects your data with cloud and local encryption](https://help.cerby.com/setup-and-admin/vault-management/how-cerby-protects-your-data-with-cloud-and-local-encryption).
### Collection
It is a feature that enables users to group the items they have saved in their workspace: accounts, secrets, business hubs, assets, and subcollections. The goal is to let users organize their items and share them in bulk with other workspace members, teams, and external users.
Only item **Owners** can add their items to a collection, and when they share it, they can assign the following roles to other members, teams, and guest users: [collection Owner](#collection-owner) or [**Collaborator**](#collection-collaborator). For more information about this feature, read the article [Collections](/getting-started/concepts/credential-management/collections).
### Collection card
It is a graphical component in the UI of the Cerby web app, browser extension, and mobile app that consists of card-type buttons representing the collections created in Cerby.
On the Cerby web app, these cards can be expanded, whereas on the browser extension and mobile app, they redirect users to a new screen to view all the items and navigate through its nested subcollections.
### Collection details page or screen
It is a section in the UI where the details and configuration of a collection are centralized. You can access the collection details page or screen using the Cerby web app or mobile app.
Collection **Owners** can edit the details of a collection and update its configuration through the collection details page or screen. Account **Collaborators** can only view the collection details and all the nested items and subcollections.
### Collection Collaborator
It is a role in Cerby with basic permissions to view a collection and the items within. This role is inherited bottom-down on all the nested accounts, secrets, business hubs, assets, and subcollections.
### Collection Owner
It is a role in Cerby with permissions to manage a collection, including its settings and shared access for other members, teams, or guest users. This role is inherited bottom-down on all the nested accounts, secrets, business hubs, assets, and subcollections.
Collection **Owners** can assign the **Owner** or **Collaborator** role to workspace members, teams, or guest users when sharing their collections. For the detailed permissions of this role, read the article [Roles and permissions](/getting-started/concepts/user-management/roles-and-permissions).
### Context menu
It is the pop-up menu of a web browser that appears when a user right-clicks on a specific element within a web page or application. It provides quick access to actions relevant to the selected element or the current state of the UI.
When right-clicking on an input field of a login or signup page, users can select the **Open Cerby** option to show the Cerby icon of the inline menu if it was not displayed. Also, you can select to enable or disable Cerby for a specific field.
***
## D
### Dark mode
It is an appearance preference on the Cerby mobile app that changes the UI from light to dark shades. Dark mode is designed to reduce eye strain in low-light conditions, improve readability, and potentially extend battery life. Cerby inherits this setting from the mobile phone on Android, but users can customize it on iOS independently from their phone settings.
For more information, read the article [Change the theme of the Cerby mobile app](https://help.cerby.com/cerby-mobile-app/app-customization/change-the-theme).
### Dashboard
It is the graphical interface of the Cerby web app, browser extension, and mobile app that integrates information about users, accounts, secrets, vaults, business hubs, automated tasks, trusted devices, configuration, and services.
### Dev Tools
It is a Cerby module available per request for workspace **Admins**,**Super Admins**, and **Owners** that enables developers to obtain a bearer token and download the [Cerby CLI](#cerby-command-line-interface-\(cli\)) client app.
### Distribution list
It is a list of email addresses grouped to facilitate forwarding emails from Cerby’s Shared Inbox to multiple recipients simultaneously, streamlining access to verification codes sent to Cerby-managed email addresses or phone numbers.
***
## E
### Encryption scheme
It is a method used to encode information, ensuring that it remains confidential and secure from unauthorized access. It involves using algorithms and cryptographic keys to transform plaintext data into ciphertext, which can only be deciphered by trusted devices with the appropriate decryption key.
For more information, read the article [How Cerby protects your data with cloud and local encryption](https://help.cerby.com/setup-and-admin/vault-management/how-cerby-protects-your-data-with-cloud-and-local-encryption).
### End-to-end encryption
It is one of Cerby's techniques for guaranteeing data remains encrypted throughout its lifecycle, from origin to destination, preventing unauthorized access even during transit.
***
## F
### Flagged account
It is an app’s user account that has been temporarily or permanently restricted due to excessive failed login attempts within a specified timeframe.
***
## I
### Identity provider (IdP)
It is a system entity that creates, stores, maintains, and manages identity information for users, services, or systems. It provides authentication services to other service providers within a federation or distributed network. Cerby connects with the IdP of an organization to retrieve information from its directory and centralize the user provisioning and deprovisioning processes.
### Import report
It is a detailed summary provided by the Cerby platform after data has been imported from another system. This report is organized into a user-friendly view that includes a progress bar and several sections detailing the status of imported items.
### In-context alerts
It is a notification or warning displayed directly within the user's current workflow or interface. It provides immediate and relevant information without requiring users to navigate away from their current task.
### Inline menu
It is a context-sensitive interface of the Cerby browser extension that appears within input fields in a web page. It enables users to perform immediate actions relative to the field they are interacting with, such as autofilling login credentials, generating secure passwords, or suggesting an email address.
***
## L
### Local encryption
It is one of Cerby's cryptographic strategies where data encryption and decryption processes are carried out locally on the user's device rather than on a central server or in the cloud.
For more information, read the article [How Cerby protects your data with cloud and local encryption](https://help.cerby.com/setup-and-admin/vault-management/how-cerby-protects-your-data-with-cloud-and-local-encryption).
### Local user
It is a user that authenticates directly into Cerby with a username and password managed by Cerby. This process is as opposed to authenticating into a configured [IdP](#identity-provider-\(IdP\)) such as Okta.
### Local workspace
It is an environment in which Cerby directly manages users' identities and authentication rather than utilizing an external [IdP](#identity-provider-\(IdP\)), such as Okta or Entra ID, for user provisioning. Users are added to a workspace through direct invitations sent to their email addresses from the **All members** page.
For more information, read the article [How to create and configure a local user workspace](https://help.cerby.com/setup-and-admin/workspace-identity-federation/local-workspace/create-and-configure-a-local-workspace).
***
## M
### Migration ID
It is the unique identifier in the Import report used to track the status of a migration using the [Password Manager Importer](https://help.cerby.com/updates-and-releases/marketing-articles/migrate-your-items-from-your-enterprise-password-manager-to-cerby). You can share the Migration ID with the Cerby Customer Support team for troubleshooting. You also receive an email with this ID.
### Multi-factor authentication (MFA)
It is a security process that involves two identification points to authenticate users. The first factor is a password and the second is a verification code sent to different verification methods, such as SMS, email, or mobile application. MFA is configured for the app accounts added on Cerby that support this authentication method.
***
## O
### One-time password (OTP)
It is a password valid for only one login session or transaction on a computer system or other digital device. OTP is also known as a dynamic password or authentication code.
### OpenID Connect (OIDC)
It is an authentication protocol that enables services and applications to verify the identity of a user using an ID token.
***
## P
### Permission
It consists of the specific actions that users are enabled to perform in a system, solution, or application. At Cerby, permissions are determined inside the code and work at a workspace and account level.
***
## R
### Role
It consists of a set of permissions that represent the tasks, activities, or functions that users can perform. Users can have none, one, or multiple (in some cases overlapping) roles.
Cerby manages roles at a workspace and account level, and roles are also inherited from the configuration of your apps.
The following are the different roles in Cerby depending on your access level:
* Workspace-level roles
* [Workspace Owner](#workspace-owner)
* [Workspace Admin](#workspace-admin)
* [Workspace User](#workspace-user)
* Account-level roles
* [Account Owner](#account-owner)
* [Account Collaborator](#account-collaborator)
**NOTE:** Regardless of their role, all users can add accounts to a workspace and then introduce the account roles, and they can only share the accounts they are owners of. Also, all users can create collections.
For the detailed permissions of each role, read the [Workspace-level roles](/getting-started/concepts/user-management/roles-and-permissions#workspace-level-roles) and [Item-level roles](/getting-started/concepts/user-management/roles-and-permissions#item-level-roles) sections in the article [Roles and permissions](/getting-started/concepts/user-management/roles-and-permissions).
### RSA key
It is a 4096-bit asymmetric keypair that Cerby generates and stores alongside an account for service-to-service authentication with external systems. Some external systems, such as data warehouses, require RSA key authentication for programmatic and service account access instead of passwords.
When you generate an RSA key for an account, Cerby stores three values: the public key (PEM), the encrypted private key (PEM), and the passphrase used to decrypt the private key. RSA keys are only supported for accounts stored in cloud vaults.
For more information, read the article [Generate an RSA key for an account](https://help.cerby.com/cerby-web-app/accounts/protecting-your-accounts/generate-an-rsa-key-for-an-account).
***
## S
### Security Assertion Markup Language (SAML)
It is a standard that enables [IdPs](#identity-provider-\(IdP\)) and service providers to exchange data to authenticate and authorize users. With this standard, service providers can enable SSO processes for users across applications that support SAML.
### Service provider
It is an entity that provides services, solutions, or applications to end users and organizations. For example, Twitter, Mailchimp, or Instagram.
### Shared Inbox
It is a feature that enables you and your team members to receive and store the messages sent to the phone numbers and email addresses provisioned and managed by Cerby and configured in your app accounts.
Cerby leverages the **Shared Inbox** to provide you with automatic logging-in processes to your accounts, including verification codes for [MFA](#multi-factor-authentication-\(mfa\)).
### Single sign-on (SSO)
It is an authentication method that enables users to log in to multiple applications or services using a single set of credentials.
### System for Cross-Domain Identity Management (SCIM)
It is a standard for automating the interchange of user identity information between IdPs and service providers. At Cerby, this standard enables automation for provisioning and deprovisioning users.
***
## V
### Verification code
It is a security code provided by authenticators when users try to complete tasks (such as recovering a password or turning on MFA) or logging in to a service or application. It ensures that only authorized users gain access or perform the actions. At Cerby, verification codes are sent to the mobile application.
### Voice over Internet Protocol (VoIP)
It is a communication protocol that enables users to access phone services through IP. At Cerby, VoIP is commonly used to deliver verification messages for user authentication.
***
## W
### Workspace
It is the environment in which organizations and users can access a set of shared accounts to log in to other apps. For example, an organization can leverage a Cerby workspace to log in to their social media accounts and manage the overall security of these accounts.
Through a Cerby workspace, organizations and users can also manage their accounts and perform the following actions:
* Manage user permissions.
* Manage app accounts.
* Onboard multi-factor authentication (MFA) and rotate passwords for accounts.
* Manage user provisioning and deprovisioning.
* Configure authentication with an identity provider (IdP).
* Retrieve analytics for account usage and user activity.
Organizations may have one or multiple workspaces depending on their needs. Though usually, one organization has one workspace.
Currently, you can only create a workspace from an invitation sent by the Cerby team from our official email address, . After creating your workspace, its name is displayed and identified as follows **< workspace name>.cerby.com**.
### Workspace Admin
It is a workspace-level role with permissions to manage accounts and configure their security and also manage users within Cerby, including their permission level. For the detailed permissions of this role, read the [Workspace-level roles](/getting-started/concepts/user-management/roles-and-permissions#workspace-level-roles) section in the article [Roles and permissions](/getting-started/concepts/user-management/roles-and-permissions).
### Workspace Owner
It is a workspace-level role with permissions to perform the same actions as **Workspace** **Admins**, as well as configure the IdP settings and create and configure a workspace. For the detailed permissions of this role, read the [Workspace-level roles](/getting-started/concepts/user-management/roles-and-permissions#workspace-level-roles) section in the article [Roles and permissions](/getting-started/concepts/user-management/roles-and-permissions).
### Workspace User
It is a workspace-level role with basic permissions to log in to the accounts registered in Cerby, see other users from their organization, and configure the security of accounts. For the detailed permissions of this role, read the [Workspace-level roles](/getting-started/concepts/user-management/roles-and-permissions#workspace-level-roles) section in the article [Roles and permissions](/getting-started/concepts/user-management/roles-and-permissions).
***
# Setup and admin
Everything workspace Owners, Admins, and Super Admins need to configure, secure, and scale their Cerby environment.
You're the one keeping your organization's identity infrastructure running. This space has everything you need to configure your workspace, connect your identity provider, enforce security policies, and automate the full user lifecycle, from onboarding to offboarding.
***
## What you can do here
Workspace identity federation
Connect your IdP to enable SSO authentication and automatic user provisioning in Cerby.
# Okta
Connect Cerby to Okta to enable single sign-on via SAML and automate user provisioning and deprovisioning via SCIM.
{% content-ref url="/pages/sAAsk4wY9rOMHumgyk88" %}
[Set up SSO using SAML](/setup-and-admin/workspace-identity-federation/okta/configure-sso-between-cerby-and-okta-with-saml)
{% endcontent-ref %}
{% content-ref url="/pages/UvAUvkd1WswFbpGc7xvF" %}
[Set up user provisioning using SCIM](/setup-and-admin/workspace-identity-federation/okta/how-to-enable-okta-user-provisioning-with-scim)
{% endcontent-ref %}
# Set up SSO using SAML
This article describes how to configure Okta to enable SSO with the Cerby application using a SAML integration.
All Cerby users are able to configure a default Identity Provider (IdP) such as Okta to leverage the Single Sign-On (SSO) authentication feature to securely authenticate to Cerby using a single set of credentials.
This article describes how to configure Okta as the primary IdP to enable SSO with the Cerby application using a Security Assertion Markup Language (SAML) integration.
***
## Supported features
The following are the supported features of configuring SSO between Cerby and Okta with SAML:
* **Service provider-initiated authentication flow.** This authentication flow occurs when users attempt to log in to the application from Cerby.
* **Automatic user account creation in Cerby.** This provisioning flow in Cerby occurs automatically on the initial SSO.
***
## Requirements
The following are the requirements to configure SSO between Cerby and Okta:
* An Okta tenant
* A user account in Okta with privileges to manage an app integration in your Okta tenant
* A user account in Cerby with the **Workspace Owner** role
* An invitation sent from Cerby Support via email to create a workspace
{% hint style="warning" %}
**IMPORTANT:** If you have not received an invitation, send an email to with your request.
{% endhint %}
* Users and groups created beforehand in your Okta directory. Follow the corresponding instructions in the Okta Help Center to manage users and groups:
* [Manage users](https://help.okta.com/en/prod/Content/Topics/users-groups-profiles/usgp-people.htm)
* [Manage groups](https://help.okta.com/en/prod/Content/Topics/users-groups-profiles/usgp-groups-main.htm)
***
## Configuring SSO between Cerby and Okta with SAML
To configure SSO between Cerby and Okta with a SAML integration, you must complete four main steps:
1. [Set up a workspace in Cerby](#id-1.-set-up-a-workspace-in-cerby)
2. [Add the SAML-based app to Okta](#id-2.-add-the-saml-based-app-to-okta)
3. [Assign users and groups to the Cerby app](#id-3.-assign-users-and-groups-to-the-cerby-app)
4. [Retrieve the metadata information from Okta](#id-4.-retrieve-the-metadata-information-from-okta)
{% hint style="info" %}
**NOTE:** Depending on the use case, you may be redirected to Okta for authentication if a session has not been established.
{% endhint %}
The following sections describe each step.
### 1. Set up a workspace in Cerby
To set up a workspace in Cerby, complete the following steps:
1. Click the **Create your Workspace** button from the invitation email you received from Cerby. The **Welcome to Cerby** page is displayed.
2. Click the **Set up Okta** button, as shown in **Figure 1.** The **Let's create your workspace** page is displayed.
Figure 1. Welcome to Cerby Page
3. Enter the name of your workspace in the **Workspace name** field, as shown in **Figure 2**.
Figure 2. Let's Create Your Workspace Page
**NOTE:** Remember the workspace name that you have entered. You need it later.
4. Click the **Create Workspace** button. The **Configure SSO through Okta SAML App** page is displayed with instructions to configure the Cerby app in your Okta tenant.
{% hint style="warning" %}
**IMPORTANT:** Keep the **Configure SSO through Okta SAML App** page open because it contains the required values that you must provide to Okta and Cerby to complete the configuration.
{% endhint %}
The next step is [2. Add the SAML-based app to Okta](#id-2.-add-the-saml-based-app-to-okta).
***
### 2. Add the SAML-based app to Okta
To add the SAML-based app to Okta, complete the following steps:
1. Log in to the [Okta Admin Console](https://developer.okta.com/login/) of your organization.
2. Select the **Applications** option from the **Applications** drop-down list located in the left navigation drawer. The **Applications** page is displayed, as shown in **Figure 3**.
Figure 3. Applications Page in the Okta Admin Console
3. Search for the Cerby app by performing the following actions:
1. Click the **Browse App Catalog** button. The **Browse App Integration Catalog** page is displayed.
2. Enter **Cerby** in the search bar above the **All Integrations** section. A list of apps is displayed below the search bar.
3. Select the **Cerby** option from the list, as shown in **Figure 4**. The **Cerby Overview** page is displayed.
Figure 4. Apps List in the Browse App Integration Catalog Page
4. Click the **Add Integration** button. The **Add Cerby** page is displayed with the **General Settings** tab activated.
4. Enter the name of the app in the **Application label** field of the **General Settings** tab, as shown in **Figure 5**. For example, you can enter **Cerby**.
Figure 5. General Settings Tab in the Add Cerby Page
5. Click the **Next** button. The **Sign-On Options** tab is activated.
6. Select the **SAML 2.0** option located in the **Sign on methods** section.
7. Enter the corresponding values in the **SubDomain** and **Pool ID** fields of the **Advanced Sign-on Settings** section, as shown in **Figure 6**. These values are located in the **Configure SSO through Okta SAML App** page that you left open in Cerby.
**TIP:** You can use the **Copy** button in the **Configure SSO through Okta SAML App** page in Cerby to copy the values to the clipboard.
Figure 6. Advanced Sign-On Settings Section in the Sign-On Options Tab
8. Click the **Done** button located at the bottom of the **Add Cerby** page. The **Cerby** app page is displayed.
The next step is [3. Assign users and groups to the Cerby app](#id-3.-assign-users-and-groups-to-the-cerby-app).
***
### 3. Assign users and groups to the Cerby app
To assign the users and groups you already created to the Cerby app integration, complete the following steps:
{% hint style="warning" %}
**IMPORTANT:** Users must have a profile created in Okta and groups must be configured before adding them to the Cerby app.
{% endhint %}
1. Activate the **Assignments** tab of the **Cerby** app page, as shown in **Figure 7**. The users of your Okta directory are displayed in a table.
Figure 7. Assignments Tab
2. Assign individually the users from your directory to the Cerby app by performing the following steps:
1. Select the **Assign to People** option from the **Assign** drop-down list. The **Assign Cerby to People** dialog box is displayed.
2. Click the **Assign** button of the user you want to add to the Cerby app, as shown in **Figure 8**. A dialog box is displayed to assign a user name to the user.
Figure 8. Assign Cerby to People Dialog Box
3. Enter the user name in the **User Name** field.
**IMPORTANT:** Make sure that the user name is a valid email address.
4. Click the **Save and Go Back** button. The dialog box closes.
5. Click the **Done** button. The **Assign Cerby to People** dialog box closes.
3. Assign the groups you have already created to the Cerby app by performing the following steps:
1. Select the **Assign to Groups** option from the **Assign** drop-down list. The **Assign Cerby to Groups** dialog box is displayed with a list of groups, as shown in **Figure 9**.
Figure 9. Assign Cerby to Groups Dialog Box
2. Click the **Assign** button for each group you want to assign the Cerby app integration to. The **Assign** button changes to an **Assigned** status.
3. Click the **Done** button when you complete assigning groups. The dialog box closes.
{% hint style="info" %}
**TIP:** To verify the groups are successfully assigned to the Cerby app integration, click the **Groups** button from the **Filters** column of the table. The groups you assigned are displayed in the table.
{% endhint %}
The next step is [4. Retrieve the metadata information from Okta](#id-4.-retrieve-the-metadata-information-from-okta).
***
### 4. Retrieve the metadata information from Okta
To retrieve the metadata information from Okta, complete the following steps:
1. Activate the **Sign On** tab on the **Cerby** app integration page in Okta.
2. Click the **Actions** drop-down list in the **SAML Signing Certificates** section. A drop-down list is displayed with the **View IdP metadata** and **Download certificate** options.
3. Right-click the **View IdP metadata** option. A context menu is displayed, as shown in **Figure 10**.
Figure 10. Context Menu for the View IdP metadata option
4. Select the **Copy Link Address** option from the context menu.
5. Paste the link address in the **Okta Identity Provider metadata** field of the **Configure SSO through Okta SAML App** page that you left open in Cerby, as shown in **Figure 11**. The link address must look like the following example: `https://**< OKTA_TENANT>**.okta.com/app/**< okta-generated-id>**/sso/saml/metadata`
Figure 11. Configure SSO Through Okta SAML App Page in Cerby
6. Select the **I have already assigned users or groups to the application** option.
7. Click the **Finish Configuration** button. A page is displayed with a message telling you that your workspace has been successfully created.
8. Click the **Login** button. Your new Cerby workspace is displayed.
Now you are done.
{% hint style="danger" %}
**IMPORTANT:** Currently, after creating a workspace, you cannot change its name or update the IdP settings.
{% endhint %}
***
{% hint style="info" %}
**NOTE 1:** Assigned users via group or individually can now log in to Cerby via SSO through the Cerby app integration displayed on their Okta dashboard. In Cerby, accounts are automatically created after the initial SSO login.
{% endhint %}
{% hint style="info" %}
**NOTE 2:** The SAML-based integration leverages Okta only for authentication. To assign permissions for Cerby, users must do so directly in Cerby.
{% endhint %}
{% hint style="info" %}
**NOTE 3:** This integration does not currently support IdP-initiated login from Okta. To log in to Cerby from an Okta dashboard, a bookmark app must be created. The bookmark app must point to your workspace, which would be **``**`.cerby.com`. For example, if your workspace name is **`cerby`**, the bookmark app should point to **`cerby.cerby.com`**. For more information on creating a bookmark in Okta, see the [How to Create a Bookmark App](https://support.okta.com/help/s/article/How-do-you-create-a-bookmark-app?language=en_US) article.
{% endhint %}
# Set up user provisioning using SCIM
This article describes how to enable automatic user provisioning via SCIM with your Okta tenant.
With Cerby, you can configure automatic user provisioning for Okta using the System for Cross-domain Identity Management (SCIM) specification to manage the creation and synchronization of user accounts based on the user and group assignments. This feature is available to all users who have both a valid Okta tenant and a Cerby workspace.
When you enable user provisioning in an Okta app integration, you can automate multiple critical tasks to downstream user management, ensuring that configuration is performed once and propagated throughout the Cerby platform.
This article describes how to enable Okta user provisioning for the Cerby platform with SCIM.
***
## Supported features
The following are the supported features of enabling Okta user provisioning with SCIM:
* **Push users:** Users assigned to the Cerby application in Okta are automatically able to access the Cerby clients (web app, mobile app, and browser extension); they are available to other users in Cerby for account sharing purposes.
* **Update user attributes:** The following user attributes are automatically synchronized with the corresponding record in Cerby:
* First name
* Last name
* Primary email
* **Push groups:** Users who are members of a group in Okta and assigned to the Cerby application are pushed in batches to the Cerby clients, and this grouping structure and its members are replicated in Cerby.
* **Deactivate users:** Deactivated users in Okta are automatically detected in Cerby, and their associated access grants in Cerby are removed. In some cases, additional follow-up actions, like password rotation, may occur in Cerby for privileged identities to which the deprovisioned user had access grants. See the [Troubleshooting: Deactivated Users](#troubleshooting-deactivated-users) section for more information on the support that Cerby provides for this feature.
* **Reactivate users:** Reactivated users in Okta will reappear as valid users in Cerby; however, account access grants must be reassigned in Cerby.
* **Assign workspace roles:** Okta can set and update a user's Cerby workspace role at provisioning time and on every sync.
{% hint style="info" %}
**NOTE:** Cerby applies the following rules when a role is included in a SCIM payload:
* Sending a role is optional. If you don't include one, Cerby assigns the default workspace role, **User**.
* If the role value is not recognized, Cerby ignores it. The user is still provisioned or updated normally, and no error is returned.
* The workspace **Owner** role can never be assigned through SCIM, even if it is included in the payload.
{% endhint %}
***
## Requirements
The following are the requirements to enable Okta user provisioning with SCIM:
* An Okta tenant
* A user account in Okta with privileges to manage the Cerby app in your Okta tenant
* A user account in Cerby with the **Workspace Owner** role
* Users or groups from your directory already assigned to the Cerby app integration in Okta. You must have already done the assignments as part of the [How to Configure SSO Between Cerby and Okta with SAML](/setup-and-admin/workspace-identity-federation/okta/configure-sso-between-cerby-and-okta-with-saml) article
* The Cerby SAML-based app integration must be set up and deployed. You must have already deployed the app as part of the [How to Configure SSO Between Cerby and Okta with SAML](/setup-and-admin/workspace-identity-federation/okta/configure-sso-between-cerby-and-okta-with-saml) article
* A SCIM API authentication token. Follow the instructions in the [How to Retrieve the SCIM API Authentication Token from Cerby](/setup-and-admin/workspace-identity-federation/retrieve-the-scim-api-authentication-token-from-cerby) article to retrieve the token
**NOTE:** If you need to regenerate the SCIM API authentication token, see the [Regenerating the SCIM API authentication token](#regenerating-the-scim-api-authentication-token) section.
***
## Enabling Okta User Provisioning with SCIM
To configure automatic Okta user provisioning, you must complete three main steps:
1. [Configure Cerby to support provisioning with Okta](#id-1.-configure-cerby-to-support-provisioning-with-okta)
2. [Configure automatic user provisioning to Cerby](#id-2.-configure-automatic-user-provisioning-to-cerby)
3. [Configure Group Push between Okta and Cerby](#id-3.-configure-group-push-between-okta-and-cerby)
The following sections describe each main step.
### 1. Configure Cerby to Support Provisioning with Okta
Cerby has enabled by default the provisioning support for Okta. You must only follow the instructions from the [How to Retrieve the SCIM API Authentication Token from Cerby](/setup-and-admin/workspace-identity-federation/retrieve-the-scim-api-authentication-token-from-cerby) article to retrieve the SCIM API authentication token.
The next step is [2. Configure automatic user provisioning to Cerby](#id-2.-configure-automatic-user-provisioning-to-cerby).
***
### 2. Configure Automatic User Provisioning to Cerby
To configure automatic user provisioning to Cerby, you must complete the following steps:
1. Log in to the [Okta Admin Console](https://developer.okta.com/login/) of your organization.
2. Click the **Applications** button from the **Applications** drop-down list located in the left navigation drawer. The **Applications** page is displayed, as shown in **Figure 1**.
Figure 1. Applications Page in the Okta Admin Console
3. Select the **Cerby** option from the list of applications. The **Cerby** application page is displayed with the **General** tab activated, as shown in **Figure 2**.
Figure 2. General Tab in the Cerby Page
4. Configure the provisioning integration by performing the following actions:
1. Activate the **Provisioning** tab.
2. Click the **Integration** button located in the left panel. The **Integration** section is displayed in the main panel, as shown in **Figure 3**.
Figure 3. Integration Section in the Provisioning Tab
3. Select the **Enable API integration** option.
4. Paste the SCIM API authentication token in the **API Token** field. You retrieved this token in step [1. Configure Cerby to support provisioning with Okta](#id-1.-configure-cerby-to-support-provisioning-with-okta).
5. Click the **Save** button.
5. Configure the sign-on settings by performing the following actions:
1. Activate the **Sign On** tab. A success message box is displayed.
2. Click the **Edit** button from the **Settings** section. The input fields in the **Sign on methods** and **Credentials details** sections are enabled.
3. Select the **Email** option from the **Application username format** drop-down list.
4. Click the **Save** button. A success message box is displayed.
6. Configure the application username format by performing the following actions:
1. Activate the **Provisioning** tab.
2. Click the **To App** button located in the left panel. The **Provisioning to App** section is displayed in the main panel, as shown in **Figure 4**.
Figure 4. Provisioning to App Section in the Provisioning Tab
3. Select the **Enable** checkbox of the following options:
* **Create Users**
* **Update User Attributes**
* **Deactivate Users**
**IMPORTANT:** Make sure that the username and email values for the user being pushed to Cerby are the same.
4. Click the **Save** button. A success message box is displayed.
To send a Cerby workspace role from Okta, you must map a `roles` attribute for the Cerby app; it is not included by default.
{% hint style="info" %}
**NOTE:** Cerby's `roles` attribute is multi-valued. Add a custom Okta user profile attribute to hold the role value, then in Profile Editor for the Cerby app, add an attribute using the expression `roles.^[primary==true].value` against the SCIM core `roles` schema.
{% endhint %}
The next step is [3. Configure Group Push between Okta and Cerby](#id-3.-configure-group-push-between-okta-and-cerby).
### 3. Configure Group Push between Okta and Cerby
To configure the Group Push feature between Okta and Cerby, you must complete the following steps from the **Cerby** application page in Okta:
1. Activate the **Push Groups** tab. The Push Groups to Cerby page is displayed, as shown in **Figure 5**.
Figure 5. Push Groups Tab
2. Select the **Find groups by name option** from the **Push Groups** drop-down list. The **Push groups by name** section is displayed in the main panel.
**TIP:** You can select the **Find groups by rule** option to search among multiple groups when they meet a specific rule.
3. Enter the name of the group you want to push to Cerby in the **Enter a group to push…** field. The group is displayed automatically below the input field.
4. Select the group. The **Group** section is displayed below, as shown in **Figure 6**.
Figure 6. Group Section
5. Select the corresponding option from the **Match result & push action** drop-down list:
* **Create Group:** Select this option when the group does not exist in Cerby, so it is pushed from Okta.
* **Link Group:** Select this option when the group exists in Cerby and is already linked to Okta. Use the drop-down to find the existing group.
6. Click the **Save** button. The panel closes and the **Push Groups to Cerby** page is displayed. When the group is pushed to Cerby, an **Active** status is displayed in the **Push Status** column.
**NOTE:** To verify if the group was successfully pushed to Cerby, access the **Teams** page in your Cerby dashboard. The group and its members are displayed in the main section of the **Teams** page.
Now you are done.
***
## Troubleshooting: Deactivated Users
Deactivated users in Okta are also deactivated in Cerby. It means that these users are not able to log in to the application, but their data remains available to other Cerby admins as disabled users.
To permanently delete the users' data, contact Cerby by sending an email to .
***
## Troubleshooting: Reprovisioned users
After configuring Okta user provisioning with the Cerby app integration through the SCIM specification, some existing users might not be reprovisioned automatically. Instead, their usernames are removed and added under the new email address.
When this scenario occurs, the following error message is displayed on the **Assignments** tab of the **Cerby** application page: “User was assigned this application before Provisioning was enabled and not provisioned in the downstream application. Click Provision User.”
To solve the user reprovisioning problem, you can complete the steps of one of the following two alternatives:
* Retry the failed tasks
1. Click the **Tasks** button from the **Dashboard** drop-down list located in the left navigation drawer. The **Tasks** page is displayed.
2. Identify the tasks with the failed\*\*\*\* status.
3. Select the group assigned to the Cerby app integration.
4. Click the **Retry Tasks** button.
* Remove and add users manually
1. Open the **Cerby** application page.
2. Activate the **Provisioning** tab.
3. Click the **To App** button located in the left panel. The **Provisioning to App** section is displayed in the main panel.
4. Click the **Edit** button to activate the checkboxes.
5. Deselect the **Enable** checkbox of the **Deactivate Users** option, as shown in **Figure 11**.
Figure 11. Deactivate Users Option in the Provisioning to App Section
6. Click the **Save** button located at the bottom of the page.
7. Remove the users with the error from the Okta group assigned to the Cerby app integration.
8. Add the corresponding users back to the Okta group.
9. Repeat steps 4, 5, and 6 to select the **Enable** checkbox of the **Deactivate Users** option.
***
## Troubleshooting: Users can’t log in to Cerby; invalid SAML configuration
If users can’t log in to Cerby while getting the “Invalid SAML configuration” error, it might be due to a SAML assertion. You can verify if the error is caused by a SAML assertion by following the steps in the [Capturing a SAML Assertion](https://support.hashicorp.com/hc/en-us/articles/1500005371682-Capturing-a-SAML-Assertion) article. If you find that it is a SAML assertion issue, contact us at , and we'll guide you through the resolution process.
***
## Regenerating the SCIM API Authentication Token
To regenerate the SCIM API authentication token, complete the following steps:
1. Send an email with your request to . The Cerby team regenerates the SCIM API authentication token.
2. Receive the response email from Cerby to confirm that the token was successfully regenerated.
3. Complete the instructions from the [How to Retrieve the SCIM API Authentication Token from Cerby](/setup-and-admin/workspace-identity-federation/retrieve-the-scim-api-authentication-token-from-cerby) article to retrieve the new token.
**NOTE:** The Cerby team is currently developing a self-service solution for regenerating the SCIM API authentication token. To regenerate the token, the Cerby team members must validate their identity.
# Entra ID
Connect Cerby to Microsoft Entra ID to enable single sign-on via SAML and automate user and group provisioning via SCIM.
{% content-ref url="/pages/IYFLUKeZSzy19Bwy7OOh" %}
[Set up SSO using SAML](/setup-and-admin/workspace-identity-federation/entra-id/configure-sso-between-cerby-and-entra-id-with-saml)
{% endcontent-ref %}
{% content-ref url="/pages/UeG3yiVTkg4Os9NIJAXf" %}
[Set up user provisioning using SCIM](/setup-and-admin/workspace-identity-federation/entra-id/configure-automatic-user-and-group-provisioning-with-entra-id-via-scim)
{% endcontent-ref %}
# Set up SSO using SAML
This article describes how to configure Entra ID as your IdP to enable SSO for Cerby using a SAML integration.
With Cerby, you can configure Entra ID (formerly Azure AD) as your identity provider (IdP) to provide single sign-on (SSO) authentication for the users of your corporate directory. This integration enables seamless authentication, as users securely log in to Cerby with one set of credentials.
This article describes how to configure Entra ID as the primary IdP for your Cerby workspace using the Security Assertion Markup Language (SAML) v2.0 integration.
***
## Supported features
The following are the supported features of configuring SSO in Cerby with Entra ID:
* Control who has access to Cerby from Entra ID.
* **Service provider-initiated authentication flow:** This authentication flow occurs when users attempt to log in to the application from Cerby.
***
## Requirements
The following are the requirements to configure SSO in Cerby with Entra ID:
* An Entra ID tenant
* A user account in Entra ID with privileges to configure an enterprise application, such as the following:
* **Application Administrator**
* **Cloud Application Administrator**
* **Application Owner**
* **Global Administrator**
* An invitation sent from Cerby Support via email to create a workspace
**IMPORTANT:** If you have not received an invitation, send an email to with your request. After you create the workspace, you are automatically granted the **Owner** role on it
* Users and groups created beforehand in your Entra ID directory. Follow the corresponding instructions in Microsoft’s official documentation to manage users and groups:
* [How to create, invite, and delete users](https://learn.microsoft.com/en-us/entra/fundamentals/how-to-create-delete-users)
* [Manage Microsoft Entra groups and group membership](https://learn.microsoft.com/en-us/entra/fundamentals/how-to-manage-groups)
***
## Configure SSO in Cerby with Entra ID
To configure SSO in Cerby with Entra ID, you must complete the following main steps:
1. [Set up a new workspace in Cerby](#id-1.-set-up-a-new-workspace-in-cerby)
2. [Add the Cerby enterprise application in Entra ID](#id-2.-add-the-cerby-enterprise-application-in-entra-id)
3. [Configure SSO in Entra ID](#id-3.-configure-sso-in-entra-id)
4. [Assign users and groups to the Cerby enterprise application in Entra ID](#id-4.-assign-users-and-groups-to-the-cerby-enterprise-application-in-entra-id)
5. [Retrieve metadata information from Entra ID and enter it in Cerby](#id-5.-retrieve-metadata-information-from-entra-id-and-enter-it-in-cerby)
**NOTE:** Depending on the use case, you may be redirected to Entra ID for authentication if a session has not been established.
The following sections describe each main step.
### 1. Set up a new workspace in Cerby
To set up a new workspace in Cerby, you must complete the following steps:
1. Click the **Create my workspace** button from the invitation email you received from Cerby. The **Welcome to Cerby** page is displayed, as shown in **Figure 1**.
2. Click the **Set up Azure AD** button. The **Let's create your workspace** page is displayed, as shown in **Figure 2**.
3. Enter the name of your workspace in the **Workspace name** field.
**NOTE:** Remember the workspace name that you have entered. You need it later.
4. Click the **Create Workspace** button. The **Configure SSO through Azure AD Gallery App** page is displayed with instructions to configure the Cerby app in your Entra ID tenant, as shown in **Figure 3.**
{% hint style="danger" %}
**IMPORTANT:** Keep the **Configure SSO through Azure AD Gallery App** page open because it contains the required values you must enter in Entra ID by copying and pasting them to complete the configuration.
{% endhint %}
The next step is [2. Add the Cerby enterprise application in Entra ID](#id-2.-add-the-cerby-enterprise-application-in-entra-id).
### 2. Add the Cerby enterprise application in Entra ID
To add the SAML-based Cerby enterprise application in Entra ID, you must complete the following steps:
1. Log in to your [Microsoft Azure](https://portal.azure.com) account in a new browser tab.
2. Click the **Menu** icon at the top left of the page. A drop-down menu is displayed.
3. Select the **Microsoft Entra ID** option from the drop-down menu. The **Overview** page is displayed.
4. Select the **Enterprise applications** option from the left navigation drawer. The **All applications** page is displayed.
5. Click the **New application** button located at the top horizontal menu. The **Browse Microsoft Entra Gallery** page is displayed.
6. Enter **Cerby** in the search bar above the **Cloud platforms** section. A list of applications is displayed below the search bar.
7. Select the **Cerby** option from the list, as shown in **Figure 4**. A side panel is displayed on the right.
8. Click the **Create** button from the right side panel. A success message box and the **Overview** page of the Cerby enterprise application are displayed.
The next step is [3. Configure SSO in Entra ID](#id-3.-configure-sso-in-entra-id), which you must complete from the **Overview** page of the Cerby enterprise application.
### 3. Configure SSO in Entra ID
To configure SSO for the Cerby enterprise application, you must complete the following steps from the **Overview** page of the Cerby enterprise application:
1. Click the **Get Started** button from the **Set up single sign on** card of the **Getting Started** section. The **Single sign-on** page is displayed, as shown in **Figure 5**.
2. Click the **SAML** card from the **Select a single sign-on** **method** section. The **SAML-based Sign-on** page is displayed.
3. Click the **Edit** button from the **Basic SAML Configuration** section. The **Basic SAML Configuration** side panel is displayed on the right.
4. Copy the values from the browser tab you left open when completing step [1. Set up a new workspace in Cerby](#id-1.-set-up-a-new-workspace-in-cerby) to paste them into their corresponding field, as shown in **Figure 6** :
* **Identifier (Entity ID)**
* **Reply URL (Assertion Consumer Service URL)**
**IMPORTANT:** Click the **Add reply URL** button to display the input field.
* **Sign on URL**
5. Click the **Save** button at the side panel's top left. A success message box is displayed.
6. Click the **Close** icon at the side panel's top right. The side panel closes, and the **Test single sign-on with Cerby** message box is displayed.
**NOTE:** You can click the **Yes** button from the message box to test the single sign-on integration.
7. Click the **Overview** option from the left navigation drawer. The **Overview** page of the Cerby enterprise application is displayed.
The next step is [4. Assign users and groups to the Cerby enterprise application in Entra ID](#id-4.-assign-users-and-groups-to-the-cerby-enterprise-application-in-entra-id), which you must complete from the **Overview** page of the Cerby enterprise application.
### 4. Assign users and groups to the Cerby enterprise application in Entra ID
To assign users and groups to the Cerby enterprise application in Entra ID, you must complete the following steps from the **Overview** page:
1. Select the **Users and groups** option from the left navigation drawer. The **Users and groups** page is displayed.
2. Click the **Add user/group** button. The **Add Assignment** page is displayed.
3. Assign existing users and groups to Cerby as you normally do for any other enterprise application. For more instructions, read the article [Manage users and groups assignment to an application](https://learn.microsoft.com/en-us/entra/identity/enterprise-apps/assign-user-or-group-access-portal?pivots=portal).
4. Click the **Overview** option from the left navigation drawer. The **Overview** page of the Cerby enterprise application is displayed.
{% hint style="danger" %}
**IMPORTANT:** The following attributes *must* be populated in Entra ID for users to be provisioned correctly in Cerby:
* User principal name (the email with which the user will log in to Cerby).
* First name
* Last name
* Email
{% endhint %}
The next step is [5. Retrieve metadata information from Entra ID and enter it in Cerby](#id-5.-retrieve-metadata-information-from-entra-id-and-enter-it-in-cerby), which you must complete from the **Overview** page of the Cerby enterprise application.
### 5. Retrieve metadata information from Entra ID and enter it in Cerby
To retrieve metadata information from Entra ID and enter it in Cerby, you must complete the following steps from the **Overview** page of the Cerby enterprise application:
1. Select the **Single sign-on** option from the left navigation drawer. The **SAML-based Sign-on** page is displayed.
2. Copy the value from the **App Federation Metadata Url** field located in the **SAML Certificates** section, as shown in **Figure 7**.
3. Switch to the browser tab where you left open the **Configure SSO through Azure AD Gallery App** page.
4. Paste the value you have copied in the **App Federation Metadata URL** field, as shown in **Figure 8**.
5. Select the **I have already assigned users or groups to the application** option.
6. Click the **Finish Configuration** button. A page displays a message telling you your workspace has been created successfully.
7. Click the **Login** button. The corresponding Entra ID login screen is displayed.
8. Enter your credentials to log in to Entra ID. Your new Cerby workspace is displayed.
Now you are done.
{% hint style="info" %}
**NOTE:** The SAML-based integration leverages Entra ID only for authentication. To assign permissions for Cerby, users must do so directly within Cerby.
{% endhint %}
{% hint style="danger" %}
**IMPORTANT:**
* After configuring SSO with Entra ID via SAML in a new workspace, it might take up to 45 minutes for Entra ID to propagate changes across all services. During this window, you might briefly be redirected to the fallback Cerby sign‑in page or notice that recently added users and settings haven’t appeared yet. This is the expected behavior. Please wait until the propagation is complete, then sign in again.
* Currently, after creating a workspace, you cannot change its name or update the IdP settings.
* The first user to log in to Cerby is assigned the [workspace **Owner** role](https://help.cerby.com/getting-started/concepts/user-management/roles-and-permissions#h-e203df23da).
{% endhint %}
# Set up user provisioning using SCIM
This article describes how to configure automatic user and group provisioning with your Entra ID tenant via SCIM.
With Cerby, you can configure automatic provisioning with Entra ID (formerly Azure AD) using the System for Cross-domain Identity Management (SCIM) specification to manage the creation and synchronization of user accounts and teams based on user and group assignments.
This article describes how to configure both the Cerby enterprise application and Entra ID. When configured, Entra ID automatically provisions and deprovisions users and groups to Cerby using the Entra ID provisioning service. For more information on what this service does, how it works, and frequently asked questions, read the article [What is app provisioning in Microsoft Entra ID?](https://docs.microsoft.com/en-us/azure/active-directory/app-provisioning/user-provisioning)
***
## Supported features
The following are the supported features of automatic user and group provisioning with Entra ID:
* **Push users:** Users assigned to the Cerby enterprise application in Entra ID are automatically able to access the Cerby clients (web app, mobile app, and browser extension); they are available to other users in Cerby for account sharing purposes.
* **Push groups:** Users who are members of a group in Entra ID and assigned to the Cerby enterprise application are pushed to Cerby, and this grouping structure and its members are replicated in Cerby as [teams](https://help.cerby.com/cerby-web-app/teams/how-to-use-teams).
* Remove users in Cerby when they no longer require access.
* Keep user attributes synced between Entra ID and Cerby.
* **Disable or delete users:** Disabled or deleted users in Entra ID are automatically detected in Cerby, and their associated access grants in Cerby are removed. In some cases, additional follow-up actions, such as password rotation, may occur in Cerby for privileged identities to which the deprovisioned user had been granted access.
* **Reactivate users:** Reactivated users in Entra ID will reappear as valid users in Cerby; however, account access grants must be reassigned in Cerby.
* **Assign workspace roles:** Entra ID can set and update a user's Cerby workspace role at provisioning time and on every sync, based on the attribute mapping you configure in [**Table 1**](#table-1.-user-attribute-mappings-in-entra-id).
{% hint style="danger" %}
**IMPORTANT:** SCIM provisioning from Microsoft Entra ID currently does not support provisioning of nested subgroups (subgroups within groups). Only top-level groups and their direct members will be provisioned. For more details on scoping and provisioning behavior in Microsoft Entra ID, see Microsoft’s documentation on [Scoping users or groups to be provisioned with scoping filters](https://learn.microsoft.com/en-us/entra/identity/app-provisioning/define-conditional-rules-for-provisioning-user-accounts?pivots=app-provisioning).
{% endhint %}
***
## Requirements
The following are the requirements to configure automatic user and group provisioning with Entra ID:
{% hint style="danger" %}
**IMPORTANT:** Make sure you have the automated group provisioning to apps feature included in your Entra ID plan level (P1 or P2 license plan).
{% endhint %}
* An Entra ID tenant. For more information, read the article [Quickstart: Set up a tenant](https://docs.microsoft.com/en-us/azure/active-directory/develop/quickstart-create-new-tenant)
* A user account in Entra ID with privileges to configure provisioning, such as the following:
* **Application Administrator**
* **Cloud Application Administrator**
* **Application Owner**
* **Global Administrator**
* A user account in Cerby with any of the following roles:
* **Workspace Owner**
* **Workspace Super Admin**
* **Workspace Admin**
* The Cerby SAML2-based integration must be set up and deployed. You must have already deployed the integration as part of the article [Configure SSO in Cerby with Entra ID via SAML](/setup-and-admin/workspace-identity-federation/entra-id/configure-sso-between-cerby-and-entra-id-with-saml)
* Users and groups from your directory already assigned to the Cerby enterprise application in Entra ID. You must have done the assignments as part of the article [Manage users and group assignments for an application](https://learn.microsoft.com/en-us/entra/identity/enterprise-apps/assign-user-or-group-access-portal?pivots=portal).
* A SCIM API authentication token. Follow the instructions in the article [Retrieve the SCIM API authentication token from Cerby](/setup-and-admin/workspace-identity-federation/retrieve-the-scim-api-authentication-token-from-cerby) to copy the token
**NOTE:** If you need to regenerate the SCIM API authentication token, read the article [Regenerate the SCIM API authentication token](/setup-and-admin/workspace-identity-federation/regenerate-the-scim-api-authentication-token)
***
## Configure automatic provisioning with Entra ID
To configure automatic user provisioning for Azure AD, you must complete the following main steps:
1. [Plan your provisioning deployment](#id-1.-plan-your-provisioning-deployment)
2. [Configure Cerby to support provisioning with Azure AD](#id-2.-configure-cerby-to-support-provisioning-with-entra-id)
3. [Add Cerby from the Entra ID application gallery](#id-3.-add-cerby-from-the-entra-id-application-gallery)
4. [Define the scope for provisioning](#id-4.-define-the-scope-for-provisioning)
5. [Configure automatic user provisioning to Cerby](#id-5.-configure-automatic-user-and-group-provisioning-to-cerby)
6. [Monitor your deployment](#id-6.-monitor-your-deployment)
The following sections describe each main step.
### 1. Plan your provisioning deployment
To plan your provisioning deployment with Entra ID, you must complete the following steps:
1. Learn about how the provisioning service works. For more information, read the article [What is app provisioning in Microsoft Entra ID?](https://docs.microsoft.com/en-us/azure/active-directory/app-provisioning/user-provisioning)
2. Determine who will be in scope for provisioning. For more information, read the article [Scoping users or groups to be provisioned with scoping filters](https://docs.microsoft.com/en-us/azure/active-directory/app-provisioning/define-conditional-rules-for-provisioning-user-accounts).
3. Determine what data to map between Entra ID and Cerby. For more information, read the article [Tutorial - Customize user provisioning attribute-mappings for SaaS applications in Microsoft Entra ID](https://docs.microsoft.com/en-us/azure/active-directory/app-provisioning/customize-application-attributes).
The next step is [2. Configure Cerby to support provisioning with Entra ID](#id-2.-configure-cerby-to-support-provisioning-with-entra-id).
### 2. Configure Cerby to support provisioning with Entra ID
Cerby has enabled the provisioning support for Entra ID by default. You must follow the instructions from the article [Retrieve the SCIM API authentication token from Cerby](/setup-and-admin/workspace-identity-federation/retrieve-the-scim-api-authentication-token-from-cerby) to copy the SCIM API authentication token.
The next step is [3. Add Cerby from the Entra ID application gallery](#id-3.-add-cerby-from-the-entra-id-application-gallery).
### 3. Add Cerby from the Entra ID application gallery
You must add the Cerby enterprise application from the Entra ID application gallery to manage provisioning to Cerby.
You can use the same application if you have previously set up Cerby for SSO. However, we recommend you create a separate app when initially testing the integration. For more information about adding an application from the gallery, read the article [Quickstart: Add an enterprise application](https://docs.microsoft.com/en-us/azure/active-directory/manage-apps/add-application-portal).
The next step is [4. Define the scope for provisioning](#id-4.-define-the-scope-for-provisioning).
### 4. Define the scope for provisioning
The Entra ID provisioning service enables you to scope who will be provisioned based on assignment to the Cerby enterprise application and or based on user and group attributes.
* **Scope based on assignment:** Follow the instructions from the article [Manage users and groups assignment to an application](https://docs.microsoft.com/en-us/azure/active-directory/manage-apps/assign-user-or-group-access-portal) to assign users and groups to the application.
* **Scope based on user and group attributes:** Use a scoping filter as described in the article [Scoping users or groups to be provisioned with scoping filters](https://docs.microsoft.com/en-us/azure/active-directory/app-provisioning/define-conditional-rules-for-provisioning-user-accounts).
The following are some recommendations when defining the scope:
* Start small. Test with a small set of users and groups before rolling out to everyone:
* When the scope for provisioning is set to assigned users and groups, you can start by assigning one or two users or groups to the application.
* When the scope is set to all users and groups, you can specify an attribute-based scoping filter, according to the article [Scoping users or groups to be provisioned with scoping filters](https://docs.microsoft.com/en-us/azure/active-directory/app-provisioning/define-conditional-rules-for-provisioning-user-accounts).
* If you need additional roles, you can update the application manifest. For more information, read the article [Add app roles to your application and receive them in the token](https://docs.microsoft.com/en-us/azure/active-directory/develop/howto-add-app-roles-in-azure-ad-apps). You need this configured if you also want Entra ID to assign a Cerby workspace role to each user, using the mapping in [**Table 1**](#table-1.-user-attribute-mappings-in-entra-id).
The next step is [5. Configure automatic user provisioning to Cerby](#id-5.-configure-automatic-user-and-group-provisioning-to-cerby).
### 5. Configure automatic user and group provisioning to Cerby
To configure automatic user and group provisioning to Cerby, you must complete the following steps:
1. Log in to your [Microsoft Azure](https://portal.azure.com) account.
2. Select your Cerby enterprise application by performing the following actions:
1. Click the **Menu** icon at the top left of the page. A drop-down menu is displayed.
2. Select the **Microsoft Entra ID** option from the drop-down menu. The **Overview** page is displayed.
3. Select the **Enterprise applications** option from the left navigation drawer. The **All applications** page is displayed.
4. Select the **Cerby** option from the list of enterprise applications. The **Overview** page of your Cerby application is displayed.
3. Configure automatic provisioning by performing the following actions:
1. Select the **Provisioning** option from the **Manage** section of the left navigation drawer, as shown in **Figure 1**. The **Get started with application provisioning** page of the Cerby enterprise application is displayed with an empty state for provisioning.
Figure 1. Overview page of the Cerby application in Entra ID
2. Click the **Get started** button in the top menu. The **New provisioning configuration** page is displayed.
3. Enter the following information in the corresponding fields of the **Admin Credentials** section:
* Enter `https://api.cerby.com/v1/scim/v2` in the **Tenant URL** field.
* Paste the SCIM API authentication token in the **Secret Token** field. You copied this token previously from the Cerby web app by following the instructions in the article [Retrieve the SCIM API authentication token from Cerby](/setup-and-admin/workspace-identity-federation/retrieve-the-scim-api-authentication-token-from-cerby).
4. Click the **Test Connection** button to validate the admin credentials by connecting to the SCIM endpoint. A success message box is displayed.
**NOTE:** If the connection fails, ensure your Cerby account has the workspace **Admin, Owner**, or **Super Admin** role and try again.
5. Click the **Save** button located at the top left of the page. The **Overview** page is displayed with information about the provisioning configuration.
4. Click the **Attribute mapping (Preview)** option in the left navigation menu under the **Manage** section. The **Attribute mapping (Preview)** page is displayed.
5. Review the user attributes that are synced between Entra ID and Cerby by performing the following actions:
1. Click the **Provision Microsoft Entra ID Users** button. The **Attribute Mapping** page is displayed.
2. Select the **Yes** option from the **Enabled** switch.
3. Verify that the attributes and information from [**Table 1**](#table-1.-user-attribute-mappings-in-entra-id) are configured correctly in the **Attribute Mappings** section.
**NOTE:** The attributes selected as **Matching precedence** properties are used to match the user accounts in Cerby for update operations. If you change the matching target attribute, you must ensure that the Cerby API supports filtering users based on that attribute. For more information, read the article [Tutorial - Customize user provisioning attribute-mappings for SaaS applications in Microsoft Entra ID](https://docs.microsoft.com/en-us/azure/active-directory/app-provisioning/customize-application-attributes).
4. Click the **Save** button. The **Attribute Mapping** page closes, and a success message box is displayed.
6. Enable group provisioning from Entra ID to Cerby by performing the following actions:
1. Click the **Provision Microsoft Entra ID Groups** button. The **Attribute Mapping** page is displayed.
2. Select the **Yes** option from the **Enabled** switch.
3. Verify that the attributes and information from [**Table 2**](#table-2.-group-attribute-mappings-in-entra-id) are configured correctly in the **Attribute Mappings** section.
4. Click the **Save** button. The **Attribute Mapping (Preview)** page is displayed again, and a success message box is displayed.
7. Configure the email address for notifications and the scope in the **Settings** section by performing the following actions:
1. Activate the **Properties** tab on the page. The **Basics** page is displayed.
2. Click the **Edit** option. The **Basics** side panel is displayed.
3. Enter the email address of the person or group who must receive the provisioning error notifications in the **Notification Email** field.
4. Select the option from the **Scope** drop-down list that corresponds to the scoping that you defined in step [4. Define the scope for provisioning](#id-4.-define-the-scope-for-provisioning).
**NOTE:** For more information on how to configure scoping filters, read the article [Scoping users or groups to be provisioned with scoping filters](https://docs.microsoft.com/en-us/azure/active-directory/app-provisioning/define-conditional-rules-for-provisioning-user-accounts).
5. Click the **Apply** button to save the configuration.
8. Click the **Start provisioning** button.
{% hint style="info" %}
**NOTE:** This configuration starts the initial sync cycle of all users and groups defined in the **Scope** drop-down list from the **Settings** section. The initial cycle takes longer to complete than the next cycles, which occur approximately every 40 minutes, as long as the Entra ID provisioning service is running. Any group assigned to the Cerby application in Entra ID is pushed automatically as a team in the corresponding Cerby workspace.
{% endhint %}
The next step is [6. Monitor your deployment](#id-6.-monitor-your-deployment).
### 6. Monitor your deployment
Monitor your deployment by using the following resources:
* Use the provisioning logs to determine which users have been provisioned successfully or unsuccessfully. For more information, read the article [What are the Microsoft Entra user provisioning logs?](https://docs.microsoft.com/en-us/azure/active-directory/reports-monitoring/concept-provisioning-logs)
* Verify the progress bar of the provisioning cycle synchronization to see how close it is to completion. For more information, read the article [Check the status of user provisioning](https://docs.microsoft.com/en-us/azure/active-directory/app-provisioning/application-provisioning-when-will-provisioning-finish-specific-user).
* Verify the provisioning configuration health. If it is in an unhealthy state, the application goes into quarantine. For more information about quarantine states, read the article [Application provisioning in quarantine status](https://docs.microsoft.com/en-us/azure/active-directory/app-provisioning/application-provisioning-quarantine-status).
Now you are done.
***
## **Table 1.** User attribute mappings in Entra ID
The following table shows the user attribute mappings you must configure in Entra ID as part of step [5. Configure automatic user provisioning to Cerby](#id-5.-configure-automatic-user-and-group-provisioning-to-cerby):
| **Cerby attribute** | **Microsoft Entra ID attribute** | **Matching precedence** |
| -------------------------------- | ----------------------------------------------- | ----------------------- |
| `userName` | `userPrincipalName` | 1 |
| `emails[type eq "work"].value` | `mail` | 2 |
| `active` | `Not([IsSoftDeleted])` | |
| `name.givenName` | `givenName` | |
| `name.familyName` | `surname` | |
| `externalId` | `objectId` | |
| `roles[primary eq "True"].value` | An Entra App Role assigned to the user or group | |
{% hint style="info" %}
**NOTE:** To send a role in this attribute, create an Entra App Role for each Cerby workspace role you want to assign: `workspace_admin`, `workspace_user`, `workspace_guest_admin`, `workspace_guest_user`, and `workspace_login_only`. For instructions, read the article [Add app roles to your application and receive them in the token](https://docs.microsoft.com/en-us/azure/active-directory/develop/howto-add-app-roles-in-azure-ad-apps) referenced in step [4. Define the scope for provisioning](#id-4.-define-the-scope-for-provisioning). You can then assign each app role directly to a user, or to a group so every member is assigned that role.
{% endhint %}
{% hint style="info" %}
**NOTE:** Cerby applies the following rules when a role is included in a SCIM payload:
* Sending a role is optional. If you don't include one, Cerby assigns the default workspace role, **User**.
* If the role value is not recognized, Cerby ignores it. The user is still provisioned or updated normally, and no error is returned.
* The workspace **Owner** role can never be assigned through SCIM, even if it is included in the payload.
{% endhint %}
***
## **Table 2.** Group attribute mappings in Entra ID
The following table shows the group attribute mappings you must configure in Entra ID as part of step [5. Configure automatic user provisioning to Cerby](#id-5.-configure-automatic-user-and-group-provisioning-to-cerby):
| **Cerby attribute** | **Microsoft Entra ID attribute** | **Matching precedence** |
| ------------------- | -------------------------------- | ----------------------- |
| `displayName` | `displayName` | 1 |
| `members` | `members` | |
| `externalId` | `objectId` | |
# Google Workspace
Connect Cerby to Google Workspace to enable single sign-on via SAML.
{% content-ref url="/pages/wrn6pnG6dFkDRnZTGpXj" %}
[Set up SSO using SAML](/setup-and-admin/workspace-identity-federation/google/configure-sso-between-cerby-and-google-workspace-with-saml)
{% endcontent-ref %}
# Set up SSO using SAML
This article describes how to configure Google Workspace as your IdP to enable SSO for Cerby using a custom SAML app.
When you create a Cerby workspace, you can configure Google as your identity provider (IdP) to provide single sign-on (SSO) authentication for the users of your corporate directory. This integration enables seamless authentication, as users securely log in to Cerby with one set of credentials.
This article describes how to configure your Google Workspace as the primary IdP to enable SSO using a custom security assertion markup language (SAML) app for Cerby.
***
## Supported features
The following are the supported features of configuring SSO between Cerby and Google Workspace:
* Control who has access to Cerby from Google Workspace.
* **Service provider-initiated authentication flow:** This authentication flow occurs when users attempt to log in to the app from Cerby.
***
## Requirements
The following are the requirements to configure SSO between Cerby and Google:
* A Google Workspace tenant
* A user account in Google Workspace with the **Super Administrator** role in your tenant
* A user account in Cerby with the workspace **Owner** role
* An invitation sent from Cerby Support via email to create a workspace
{% hint style="warning" %}
**IMPORTANT:** If you have not received an invitation, send an email to with your request.
{% endhint %}
***
## Configure SSO between Cerby and Google Workspace with SAML
To configure SSO between Cerby and Google Workspace with a custom SAML app, you must complete the following main steps:
1. [Set up a workspace in Cerby](#id-1.-set-up-a-new-workspace-in-cerby)
2. [Add a custom SAML app in Google Workspace](#id-2.-add-a-custom-saml-app-in-google-workspace)
3. [Retrieve metadata information from Google Workspace and enter it in Cerby](#id-3.-retrieve-metadata-information-from-google-workspace-and-enter-it-in-cerby)
{% hint style="info" %}
**NOTE:** Depending on the use case, you may be redirected to the Google authentication portal if a session has not been established.
{% endhint %}
The following sections describe each main step.
### 1. Set up a new workspace in Cerby
To set up a new workspace in Cerby, complete the following steps:
1. Click the **Create my workspace** button from the invitation email you received from Cerby. The **Welcome to Cerby** page is displayed, as shown in **Figure 1**.
Figure 1. Welcome to the Cerby page
{% hint style="warning" %}
**IMPORTANT:** Cerby supports two different Google-based login options: **Google** and **Google Workspace**, and they behave differently during setup:
* **Continue with Google:** Uses personal Google accounts, for example, @gmail.com. This option does not require SAML configuration and only asks for a workspace name.
* **Continue with Google Workspace:** Uses company-managed Google Workspace accounts, for example, @company.com. This option requires SAML configuration, since authentication and security are managed by the organization’s IT admin.
You must select **Continue with Google Workspace** and complete the SAML setup steps.
{% endhint %}
2. Click the **Continue with Google Workspace** button. The **Create your workspace** page is displayed, as shown in **Figure 2**.
Figure 2. Create your workspace page
3. Enter the name of your workspace in the **Workspace name** field.
4. Click the **Create workspace** button. The **Configure SSO through Google Workspace App** page is displayed with instructions to configure the Cerby app in your Google Workspace tenant, as shown in **Figure 3**.
Figure 3. Configure SSO through Google Workspace App page
{% hint style="danger" %}
**IMPORTANT:** Keep the **Configure SSO through Google Workspace App** page open because it contains the required values that you must provide to Google and Cerby to complete the configuration.
{% endhint %}
The next step is [2. Add a custom SAML app in Google Workspace](#id-2.-add-a-custom-saml-app-in-google-workspace).
### 2. Add a custom SAML app in Google Workspace
To add a custom SAML app in Google Workspace, complete the following steps:
1. Log in to the [Google Admin Console](https://admin.google.com/) of your organization in a new browser tab.
2. Select the **Web and mobile apps** option from the **Apps** drop-down list in the left menu. The **Web and mobile apps** page is displayed.
3. Add a custom SAML app by completing the following steps:
1. Select the **Add custom SAML app** option from the **Add app** drop-down menu. The **Add custom SAML app** page is displayed with a wizard on the **App details** step, as shown in **Figure 4**.
Figure 4. Add custom SAML app page in the Google Admin Console
2. Enter **Cerby** in the **App name** field.
3. Upload the Cerby logo in the **App icon** section by completing the following steps:
4. Download to your computer the logo shown in **Figure 5**.
Figure 5. Cerby logo
2. Click the **Camera** icon.
3. Select the Cerby logo file from your computer.
4. Click the **CONTINUE** button. The **Google Identity Provider details** step of the wizard is displayed.
5. Click the **DOWNLOAD METADATA** button to download an XML file that contains all the information Cerby needs to configure the SAML connection.
{% hint style="warning" %}
**IMPORTANT:** Make sure you download the XML file, because you need it later.
{% endhint %}
6. Click the **CONTINUE** button. The **Service provider details** step of the wizard is displayed.
7. Copy the values from the browser tab you left open when completing step [1. Set up a new workspace in Cerby](#id-1.-set-up-a-new-workspace-in-cerby) to paste them into their corresponding fields in the Google Admin Console, as shown in **Figure 6** :
* **ACS URL**
* **Entity ID**
Figure 6. Required values in the Service provider details step
8. Enter **`https://app.cerby.com`** in the **Start URL (optional)** field.
9. Click the **CONTINUE** button. The **Attribute mapping** step of the wizard is displayed.
10. Map the required attributes from [Table 1. Attribute mappings in Google Directory](#table-1.-attribute-mappings-in-google-directory) by completing the following steps:
1. Click the **ADD MAPPING** button. A new row is displayed with a drop-down menu and an empty field.
2. Select the corresponding option from the drop-down menu in the **Google Directory attributes** column.
3. Enter the corresponding value in the empty field of the **App attributes** column. **Figure 7** shows how the page looks with all the mapping attributes.
Figure 7. Attribute mappings in Google Directory
11. Click the **FINISH** button. The page closes, and the **Cerby** SAML app details page is displayed.
12. Turn on the Cerby SAML app for all users or specific organizations by following the instructions in the section [Step 2: Turn on your SAML app](https://support.google.com/a/answer/6087519#zippy=%2Cstep-turn-on-your-saml-app) of the official Google Workspace documentation.
The next step is [3. Retrieve metadata information from Google Workspace and enter it in Cerby](#id-3.-retrieve-metadata-information-from-google-workspace-and-enter-it-in-cerby).
### 3. Retrieve metadata information from Google Workspace and enter it in Cerby
To retrieve metadata information from Google Workspace and enter it in Cerby, complete the following steps from the **Configure SSO through Google Workspace App** page you left open:
1. Upload the XML file you downloaded previously in the **Metadata XML file** section.
2. Select the **I have already assigned users or groups to the application** option.
3. Click the **Finish Configuration** button. A success message is displayed.
Now you are done. You can proceed to log in to your [Cerby](https://app.cerby.com/) workspace.
{% hint style="info" %}
**NOTE:** The SAML-based integration leverages Google only for authentication. To assign permissions for Cerby, users must do so directly in Cerby.
{% endhint %}
{% hint style="danger" %}
**IMPORTANT**: This integration does not currently support IdP-initiated login from Google, so the tile in the Google Workspace dashboard created automatically after completing the configuration will not work. You can add a bookmark for all users and enrolled browsers pointing to your Cerby workspace. Just follow the instructions to add a bookmark in the official documentation [Manage bookmarks](https://support.google.com/chrome/a/answer/10265060?hl=en\&sjid=9969570391997900493-NC). The bookmark URL is **`https://.cerby.com`**, where you must include your workspace name; for example, if your workspace name is **Cerby**, the bookmark URL must be **`https://cerby.cerby.com`**.
{% endhint %}
***
## Table 1. Attribute mappings in Google Directory
The following table shows the attribute mappings in Google Directory you must configure as part of step [2. Add a SAML-based custom app to your Google Workspace](#id-2.-add-a-custom-saml-app-in-google-workspace):
| **Google Directory attributes** | **App attributes** |
| ------------------------------- | ------------------------------------------------------------------------ |
| **Name** | **`http://schemas.xmlsoap.org/ws/2005/05/identity/claims/name`** |
| **Family Name** | **`http://schemas.xmlsoap.org/ws/2005/05/identity/claims/surname`** |
| **Email Address** | **`http://schemas.xmlsoap.org/ws/2005/05/identity/claims/emailaddress`** |
| **Given Name** | **`http://schemas.xmlsoap.org/ws/2005/05/identity/claims/givenname`** |
**Table 1.** Attribute mappings in Google Directory
{% hint style="info" %}
**NOTE:** Mapping **Given Name** is optional. Cerby uses it only if the **Name** attribute isn't present in the assertion.
{% endhint %}
***
## Troubleshooting: “Error: app\_not\_configured\_for\_user” message
When you complete the configuration described in this article and immediately try to access your Cerby workspace, you may encounter the “Error: app\_not\_configured\_for\_user” message, as shown in **Figure 7**.
Figure 7. “Error: app_not_configured_for_user” message in your web browser
This issue happens because changes in the Google Admin console take time to propagate across services and users. For more information, read the official documentation [How changes propagate to Google services](https://support.google.com/a/answer/7514107?sjid=17262937684630672603-NC).
To solve the issue, refresh the page or log out and then log in to your Google account.
# OneLogin
Connect Cerby to OneLogin to enable single sign-on via SAML and automate user provisioning via SCIM.
{% content-ref url="/pages/fr1cxe0yjvLUxrtj9VfB" %}
[Set up SSO using SAML](/setup-and-admin/workspace-identity-federation/onelogin/configure-sso-between-cerby-and-onelogin-with-saml)
{% endcontent-ref %}
{% content-ref url="/pages/Z0RZpuz2Tk6sNK8qzAir" %}
[Set up user provisioning using SCIM](/setup-and-admin/workspace-identity-federation/onelogin/configure-automatic-user-provisioning-with-onelogin-via-scim)
{% endcontent-ref %}
# Set up SSO using SAML
This article describes how to configure OneLogin to enable SSO with Cerby using a custom SAML application.
All Cerby users are able to configure a default Identity Provider (IdP) such as OneLogin to leverage the single sign-on (SSO) authentication feature to securely authenticate using a single set of credentials.
OneLogin supports a Security Assertion Markup Language (SAML) application to integrate with other service providers easily. In this case, the integration is with Amazon Cognito, and the SAML application is customized and points to a specific Cerby workspace.
This article describes how to configure OneLogin as the primary IdP to enable SSO with the Cerby platform using a SAML integration.
***
## Supported features
The following are the supported features of configuring SSO in Cerby with OneLogin:
* Control who has access to Cerby from OneLogin.
* **Service provider-initiated authentication flow.** This authentication flow occurs when users attempt to log in to the application from Cerby.
* **Automatic user account creation in Cerby.** This provisioning flow in Cerby occurs automatically on the initial SSO.
***
## Requirements
The following are the requirements to configure SSO in Cerby with OneLogin:
* A user account in OneLogin with admin privileges to configure an application
* You must have received an invitation from Cerby Support via email to create a workspace.
{% hint style="warning" %}
**IMPORTANT:** If you have not received an invitation, send an email to with your request
{% endhint %}
***
## Configure SSO in Cerby with OneLogin
To configure SSO in Cerby with OneLogin, you must complete the following main steps:
1. [Set up a workspace in Cerby](#id-1.-set-up-a-workspace-in-cerby)
2. [Add a SAML-based application to OneLogin](#id-2.-add-a-saml-based-application-to-onelogin)
3. [Configure SAML for Cerby in OneLogin](#id-3.-configure-saml-for-cerby-in-onelogin)
4. [Assign users to the application](#id-4.-assign-users-to-the-application)
5. [Finish the workspace creation in Cerby](#id-5.-finish-the-workspace-creation-in-cerby)
The following sections describe each main step.
### 1. Set up a workspace in Cerby
To set up a workspace in Cerby, complete the following steps:
1. Click the **Create your Workspace** button from the invitation email. The **Welcome to Cerby** page is displayed, as shown in **Figure 1.**
Figure 1. Welcome to Cerby page
2. Click the **Continue with Generic SAML** button. The **Create your workspace** page is displayed, as shown in **Figure 2**.
Figure 2. Create your Workspace page
3. Enter the name of your workspace in the **Workspace name** field. **NOTE:** Remember the workspace name that you have entered. You need it later.
4. Click the **Create workspace** button. The **Configure SSO through Your Generic SAML App** page is displayed, as shown in **Figure 3**. This page contains information to configure the Cerby application in your OneLogin tenant.
Figure 3. Configure SSO through Your Generic SAML App page
**IMPORTANT:** Keep the **Configure SSO through Your Generic SAML App** page open because it contains the required values that you must provide to OneLogin and Cerby to complete the configuration.
The next step is [2. Add a SAML-based application to OneLogin](#id-2.-add-a-saml-based-application-to-onelogin), which you must complete from OneLogin.
### 2. Add a SAML-based application to OneLogin
To add a SAML-based application to OneLogin, complete the following steps:
1. Log in to [OneLogin](https://cerby-test.onelogin.com/admin2) as an administrator.
2. Select the Applications options that appear when hovering over the Applications tab. The **Applications** page is displayed, as shown in **Figure 4.**
Figure 4. Applications page in OneLogin
3. Click the **Add App** button located at the top right. The **Find Application** page is displayed.
4. Enter **SCIM** in the search bar. A list of applications is displayed.
5. Select the **SCIM Provisioner with SAML (SCIM v2 Core)** option. The **Add SCIM Provisioner with SAML (SCIM v2 Core)** page is displayed, as shown in **Figure 5.**
Figure 5. Add SCIM Provisioner with SAML (SCIM v2 Core) page in OneLogin
6. (Optional) Update the name for your OneLogin SAML application in the **Display Name** field.
7. Click the **Save** button. A success message is displayed.
The next step is [3. Configure SAML for Cerby in OneLogin](#id-3.-configure-saml-for-cerby-in-onelogin), which you must complete from OneLogin.
### 3. Configure SAML for Cerby in OneLogin
To configure OneLogin to provide SSO for Cerby using SAML, complete the following steps:
1. Select the **Configuration** option from the left menu. The configuration details page is displayed, as shown in **Figure 6.**
2. Enter the following information in the **Application details** section using the values from the browser tab you left open when completing step [1. Set up a workspace in Cerby](#id-1.-set-up-a-workspace-in-cerby):
* **SAML Audience URL:** Copy and paste the **Entity ID** value.
* **SAML Consumer URL:** Copy and paste the **ACS URL** value.
3. Enter `https://api.cerby.com/v1/scim/v2` in the **SCIM Base URL** field of the **API Connection** section.
4. Click the **Save** button. A success message is displayed, and the **Info** details page activates.
5. Select the **Parameters** option from the left menu. The parameters details page is displayed, as shown in **Figure 7**.
Figure 7. The parameters details page in OneLogin
6. Map the user identity SAML attributes by completing the following steps using the values listed in **Table 1** :
1. Click the plus icon. The **New Field** dialog box is displayed, as shown in **Figure 8.**
Figure 8. New Field dialog box in OneLogin
2. Copy and paste the URI from [**Table 1**](#table-1.-user-identity-saml-attributes) into the **Field name** field. For example, **`http://schemas.xmlsoap.org/ws/2005/05/identity/claims/name`**
3. Select the **Include in SAML assertion** option.
4. Click the **Save** button. The **Value** field is displayed.
5. Copy and paste the attribute from [**Table 1**](#table-1.-user-identity-saml-attributes) into the **Value** field, then select the matching option that appears in the drop-down list.
6. Click the **Save** button. The dialog box closes.
7. Repeat steps **a** to **f** for each attribute listed in [**Table 1**](#table-1.-user-identity-saml-attributes)**.**
7. Update the attribute assigned to the **scimusername** field by completing the following steps:
1. Click the **scimusername** field. The **Edit Field scimusername** dialog box is displayed, as shown in **Figure 9**.
Figure 9. Edit Field scimusername dialog box in OneLogin
2. Select the **Email** option from the **Value** drop-down menu\*\*.\*\*
3. Click the **Save** button. The dialog box closes.
8. Click the **Save** button. A success message is displayed, and the **Info** details page activates.
9. Click the **More Actions** menu located at the top right. A drop-down menu is displayed.
10. Select the **SAML Metadata** option. An XML metadata file is automatically downloaded to your computer.
The next step is [4. Assign users to the application](#id-4.-assign-users-to-the-application), which you must complete from OneLogin.
### 4. Assign users to the application
You can assign users to the newly created application in the following ways:
* **Manually assigning apps to individual users**. For instructions, read the official OneLogin documentation [Manually Assigning Apps to Users](https://onelogin.service-now.com/support?id=kb_article\&sys_id=e5e35e0047ccbd509d8dfd1f536d43c2\&kb_category=e9866930db185340d5505eea4b9619b7).
* **Assigning apps to users in batches**. The most efficient way to assign apps to users is to batch-apply them in collections, using roles and mappings. For instructions, read the official OneLogin documentation [Roles](https://onelogin.service-now.com/support?id=kb_article\&sys_id=cc2e602a973b2150c90c3b0e6253af3c\&kb_category=566ffd6887332910695f0f66cebb3556).
The next step is [5. Finish the workspace creation in Cerby](#id-5.-finish-the-workspace-creation-in-cerby), which you must complete in Cerby.
### 5. Finish the workspace creation in Cerby
To finish the workspace creation in Cerby, complete the following steps from the **Configure SSO through Your Generic SAML App** page that you left open:
1. Upload the XML file that you downloaded recently in the **2. Upload the metadata information** section. The name of the file is displayed below the **Metadata XML file** field when it is uploaded. **TIP:** You can drag the file from another window or click the button below the **Metadata XML file** field to look for the file on your computer.
2. Select the **I have already assigned users or groups to the application** option located in the **3. Assign People or Groups** section\*\*.\*\*
3. Click the **Finish Configuration** button located at the bottom of the page. The **Your Workspace** page is displayed confirming that your workspace has been created successfully.
4. Click the **Login** button. Your new Cerby workspace is displayed.
Now you are done.
{% hint style="info" %}
**NOTE:** After completing the SSO setup in this guide, you can also configure automatic user provisioning via SCIM between OneLogin and Cerby.
To enable automatic creation, updates, and deactivation of user accounts in Cerby based on user assignments in OneLogin, see the article [Configure automatic user provisioning with OneLogin via SCIM.](/setup-and-admin/workspace-identity-federation/onelogin/configure-automatic-user-provisioning-with-onelogin-via-scim)
{% endhint %}
***
## Table 1. User identity SAML attributes
The following table shows the user identity SAML attributes you must configure in OneLogin as part of step [3. Configure SAML for Cerby in OneLogin](#id-3.-configure-saml-for-cerby-in-onelogin):
| **URI** | **Attribute** |
| -------------------------------------------------------------------- | ------------- |
| `http://schemas.xmlsoap.org/ws/2005/05/identity/claims/name` | Name |
| `http://schemas.xmlsoap.org/ws/2005/05/identity/claims/surname` | Last Name |
| `http://schemas.xmlsoap.org/ws/2005/05/identity/claims/emailaddress` | Email |
| `http://schemas.xmlsoap.org/ws/2005/05/identity/claims/givenname` | First Name |
**Table 1.** User identity SAML attributes
# Set up user provisioning using SCIM
This article describes how to configure automatic user provisioning with your OneLogin integration via SCIM.
With Cerby, you can configure automatic provisioning with OneLogin using the System for Cross-domain Identity Management (SCIM) specification to manage the creation and synchronization of user accounts based on user assignments.
When you enable user provisioning in a OneLogin application, you can automate multiple critical tasks for downstream user management, ensuring that configuration is performed once and propagated throughout the Cerby platform.
This article describes how to enable OneLogin user provisioning for the Cerby platform with SCIM.
***
## Supported features
The following are the supported features of automatic user provisioning with OneLogin:
* **Push users:** Users assigned to the Cerby application in OneLogin are automatically able to access the Cerby clients (web app, mobile app, and browser extension); they are available to other users in Cerby for account sharing purposes.
* **Update user attributes:** The user attributes are automatically synchronized between Cerby and OneLogin.
* **Suspend or delete users:** Suspended or deleted users in OneLogin are automatically detected in Cerby, and their associated access grants in Cerby are removed. In some cases, additional follow-up actions, like password rotation, may occur in Cerby for privileged identities to which the deprovisioned user had access grants.
* **Assign workspace roles:** OneLogin can set and update a user's Cerby workspace role at provisioning time and on every sync.
{% hint style="info" %}
**NOTE:** Cerby applies the following rules when a role is included in a SCIM payload:
* Sending a role is optional. If you don't include one, Cerby assigns the default workspace role, **User**.
* If the role value is not recognized, Cerby ignores it. The user is still provisioned or updated normally, and no error is returned.
* The workspace **Owner** role can never be assigned through SCIM, even if it is included in the payload.
{% endhint %}
\* \* \*
## Requirements
The following are the requirements to enable OneLogin user provisioning with SCIM:
* A user account in Cerby with the workspace **Owner** role
* The Cerby SAML-based app integration must be set up and deployed. You must have already deployed the integration as part of the article [Configure SSO between Cerby and OneLogin with SAML](/setup-and-admin/workspace-identity-federation/onelogin/configure-sso-between-cerby-and-onelogin-with-saml).
* Users from your directory already assigned to the Cerby application in OneLogin. You must have done the assignments as part of the article [Configure SSO between Cerby and OneLogin with SAML](/setup-and-admin/workspace-identity-federation/onelogin/configure-sso-between-cerby-and-onelogin-with-saml).
* A SCIM API authentication token. Follow the instructions in the article [Retrieve the SCIM API authentication token from Cerby](/setup-and-admin/workspace-identity-federation/retrieve-the-scim-api-authentication-token-from-cerby) to copy the token. **NOTE:** If you need to regenerate the SCIM API authentication token, read the article[ Regenerate the SCIM API authentication token](/setup-and-admin/workspace-identity-federation/regenerate-the-scim-api-authentication-token)
***
## Configure automatic provisioning with OneLogin
To configure automatic user provisioning with OneLogin, you must complete the following steps:
1. Log in to[ OneLogin](https://cerby-test.onelogin.com/admin2) as an administrator.
2. Select the **Applications** options that appear when hovering over the **Applications** tab. The **Applications** page is displayed, as shown in **Figure 1.**
Figure 1. Applications page in OneLogin
3. Search and select your SCIM Provisioner with SAML (SCIM v2 Core) app. You created this application by following the instructions in the article [Configure SSO between Cerby and OneLogin with SAML](/setup-and-admin/workspace-identity-federation/onelogin/configure-sso-between-cerby-and-onelogin-with-saml).
4. Select the **Configuration** option from the left menu. The configuration details page is displayed, as shown in **Figure 2.**
Figure 2. Configuration details page in OneLogin
5. Paste the SCIM API authentication token in the **SCIM Bearer Token** field. You copied this token previously from the Cerby web app by following the instructions in the article[ Retrieve the SCIM API authentication token from Cerby](/setup-and-admin/workspace-identity-federation/retrieve-the-scim-api-authentication-token-from-cerby).
6. Click the **Enable** button in **API Status** label. The status changes to **Enabled.**
7. Select the **Provisioning** option from the left menu. The provisioning details page is displayed, as shown in **Figure 3.**
Figure 3. Provisioning details page in OneLogin
8. Select the **Enable** **provisioning** option in the **Workflow** section. **NOTE:** When the\*\*\*\* options in the **Require admin approval before this action is performed** section are selected, OneLogin will create provisioning tasks that will require admin approval. If you’d rather approve all tasks automatically, you can deselect those options.
9. Click the **Save** button. A success message is displayed, and the **Info** details page activates.
Now you are done.
***
## Configure workspace role assignment
Optionally, you can configure OneLogin to assign a Cerby workspace role to each user at provisioning time and on every sync.
To configure workspace role assignment, you must complete the following steps:
1. Select the **Parameters** option from the left menu of your SCIM Provisioner with SAML (SCIM v2 Core) app. The parameters page is displayed.
2. Click the **Role** field. The field configuration dialog box is displayed.
3. Select the **Include in User Provisioning** option. The field is now sent during provisioning.
4. Select the OneLogin value you want to map to the **Role** field.
5. Click the **Save** button. The field configuration dialog box closes, and the mapping is saved.
Now you are done.
# JumpCloud
Connect Cerby to JumpCloud to enable single sign-on via SAML.
{% content-ref url="/pages/yY7gXR8aqWElcCXCZ3YA" %}
[Set up SSO using SAML](/setup-and-admin/workspace-identity-federation/jumpcloud/configure-sso-between-cerby-and-jumpcloud-with-saml)
{% endcontent-ref %}
# Set up SSO using SAML
This article describes how to configure JumpCloud to enable SSO with Cerby using a custom SAML application.
All Cerby users are able to configure a default Identity Provider (IdP) such as JumpCloud to leverage the Single Sign-On (SSO) authentication feature to securely authenticate using a single set of credentials.
JumpCloud uses a Security Assertion Markup Language (SAML) application to integrate with other service providers easily. In this case, the integration is with Amazon Cognito, and the SAML application is customized and points to a specific Cerby workspace.
This article describes how to configure JumpCloud as the primary IdP to enable SSO with the Cerby platform using a SAML integration.
***
## Supported features
The following are the supported features of configuring SSO between Cerby and JumpCloud with SAML:
* **Service provider-initiated authentication flow:** This authentication flow occurs when users attempt to log in to the application from Cerby.
* **Automatic user account creation in Cerby:** This provisioning flow in Cerby occurs automatically on the initial SSO.
***
## Requirements
The following are the requirements to configure SSO between Cerby and JumpCloud:
* You must have administrator access to a JumpCloud tenant account.
* You must have an internal JumpCloud user who can get an application assigned via groups.
* You must have a user group to assign the application to. This group must have users already assigned as members.
* You must have received an invitation from Cerby Support via email to create a workspace.
**IMPORTANT:** If you have not received an invitation, send an email to with your request.
***
## Configuring SSO between Cerby and JumpCloud with SAML
To configure SSO between Cerby and JumpCloud with a SAML integration, you must complete four main steps:
1. [Set up a workspace in Cerby](#id-1.-set-up-a-workspace-in-cerby)
2. [Create an application in JumpCloud](#id-2.-create-an-application-in-jumpcloud)
3. [Configure the connection settings](#id-3.-configure-the-connection-settings)
4. [Finish the workspace creation in Cerby](#id-4.-finish-the-workspace-creation-in-cerby)
The following sections describe each step.
### 1. Set up a workspace in Cerby
To set up a workspace in Cerby, complete the following steps:
1. Click the **Create your Workspace** button from the invitation email. The **Welcome to Cerby** page is displayed, as shown in **Figure 1**.
Figure 1. Welcome to Cerby Page
2. Click the **Set up Generic SAML** button. The **Let's create your workspace** page is displayed.
3. Enter the name of your workspace in the **Workspace name** field, as shown in **Figure 2**. For example, **Contentzilla**.
Figure 2. Let's Create Your Workspace Page
**NOTE:** Remember the workspace name that you have entered. You need it later.
4. Click the **Create Workspace** button. The **Configure SSO through Your Generic SAML App** page is displayed, as shown in **Figure 3**. This page contains information to configure the Cerby application in your JumpCloud tenant.
Figure 3. Configure SSO through Your Generic SAML App Page
**IMPORTANT:** Keep the **Configure SSO through Your Generic SAML App** page open because it contains the required values that you must provide to JumpCloud and Cerby to complete the configuration.
The next step is [2. Create an application in JumpCloud](#id-2.-create-an-application-in-jumpcloud), which you must complete from JumpCloud.
***
### 2. Create an application in JumpCloud
To create an application in JumpCloud, complete the following steps:
1. Log in to the [JumpCloud Console](https://console.jumpcloud.com/login/admin) as an administrator.
2. Click the **SSO** button from the **USER AUTHENTICATION** drop-down list located in the left navigation drawer. The **SSO** page is displayed, as shown in **Figure 4**.
Figure 4. SSO Page
3. Click the **Add app** icon located to the left of the **Search** bar. The **Configure New SSO Application** dialog box is displayed, as shown in **Figure 5**.
Figure 5. Configure New SSO Application Dialog Box
4. Click the **Custom SAML App** button located at the bottom of the dialog box. The **New Application** dialog box is displayed with the **General Info** tab activated, as shown in **Figure 6**.
Figure 6. General Info Tab in the New Application Dialog Box
5. Enter a name for your JumpCloud SAML application in the **Display Label** field. For example, **Cerby SAML Contentzilla**.
The next step is [3. Configure the connection settings](#id-3.-configure-the-connection-settings), which you must complete from the **New Application** dialog box.
***
### 3. Configure the connection settings
To configure the connection settings of the SAML application with Cerby, complete the following steps:
1. Activate the **SSO** tab, as shown in **Figure 7**.
Figure 7. SSO Tab in the New Application Dialog Box
2. Enter the following information in the corresponding fields:
* Enter **`https://jumpcloud.com`** in the **IdP Entity ID** field.
* Enter the corresponding values in the **SP Entity ID** and **ACS URL** fields from the **Configure SSO through Your Generic SAML App** page that you left open.
3. Select the **Declare Redirect Endpoint** option located below on the page.
4. Enter the attribute metadata required by Amazon Cognito by performing the following actions:
1. Click three times the **add attribute** button of the **USER ATTRIBUTE MAPPING** field located at the bottom of the dialog box in the **Attributes** section. The **Service Provider Attribute Name** field and **JumpCloud Attribute Name** drop-down list are displayed with three rows, as shown in **Figure 8**.
Figure 8. Attributes Section
2. Select the **email** option from the **JumpCloud Attribute Name** drop-down list in the first row.
3. Enter **`http://schemas.xmlsoap.org/ws/2005/05/identity/claims/emailaddress`** in the **Service Provider Attribute Name** field for the first row.
4. Select the **lastname** option from the **JumpCloud Attribute Name** drop-down list in the second row.
5. Enter **`http://schemas.xmlsoap.org/ws/2005/05/identity/claims/surname`** in the corresponding **Service Provider Attribute Name** field for the second row.
6. Select the **firstname** option from the **JumpCloud Attribute Name** drop-down list in the third row.
7. Enter **`http://schemas.xmlsoap.org/ws/2005/05/identity/claims/name`** in the corresponding **Service Provider Attribute Name** field for the third row.
5. Activate the **User Groups** tab, as shown in **Figure 9**.
Figure 9. User Groups Tab in the New Application Dialog Box
6. Select the option of the user group you want to assign the SAML application.
7. Click the **activate** button located at the bottom of the dialog box. The **Please confirm your new SSO connector instance** dialog box is displayed.
8. Click the **continue** button. The dialog box closes, and the **SSO** page is displayed with the SAML application you added recently and a success message box.
9. Open the SAML application you added. The **SAML 2.0** dialog box is displayed.
10. Activate the **SSO** tab, as shown in **Figure 10**.
Figure 10. SSO Tab in the SAML 2.0 Dialog Box
11. Click the **Export Metadata** button below the **JumpCloud Metadata** field. An XML metadata file is automatically downloaded to your computer.
The next step is [4. Finish the workspace creation in Cerby](#id-4.-finish-the-workspace-creation-in-cerby).
***
### 4. Finish the workspace creation in Cerby
To finish the workspace creation in Cerby, complete the following steps from the **Configure SSO through Your Generic SAML App** page that you left open:
1. Upload the XML that you downloaded recently. The name of the file is displayed below the **Metadata XML file** field when it is uploaded.
**TIP:** You can drag the file from another window or click the button below the **Metadata XML file** field to look for the file on your computer.
2. Select the **I have already assigned users or groups to the application** option located in the **4. Assign People or Groups** section.
3. Click the **Finish Configuration** button located at the bottom of the page. The **Your Workspace** page is displayed confirming that your workspace has been created successfully.
4. Click the **Login** button. The login page of JumpCloud is displayed.
5. Authenticate with the credentials (email address and password) you use for JumpCloud. The Cerby dashboard is displayed.
Now you are done.
{% hint style="danger" %}
**IMPORTANT:** Currently, after creating a workspace, you cannot change its name or update the IdP settings.
{% endhint %}
# Custom SAML app
Connect Cerby to any identity provider that supports SAML by configuring a custom SAML application.
{% content-ref url="/pages/5n7FeupIFJ7LzPKyLGER" %}
[Set up SSO using SAML](/setup-and-admin/workspace-identity-federation/custom-saml-app/configure-sso-between-cerby-and-your-idp-with-saml)
{% endcontent-ref %}
# Set up SSO using SAML
This article describes how to configure your identity provider to enable SSO for Cerby using a custom SAML integration.
With Cerby, you can configure your identity provider (IdP), such as Okta and Entra ID, to provide single sign-on (SSO) authentication for the users of your corporate directory. This integration facilitates a seamless login experience, enabling users to securely access Cerby with a single set of credentials.
Cerby utilizes the Security Assertion Markup Language (SAML) 2.0 standard for this purpose and leverages Amazon Cognito as its underlying identity service. Therefore, a custom SAML application must be configured to point to a specific Cerby workspace.
This article describes how to configure a primary IdP for your Cerby workspace using a SAML integration, as well as the authentication flow. For configuration guides of specific IdPs, read the following articles:
* [Configure SSO between Cerby and Okta with SAML](/setup-and-admin/workspace-identity-federation/okta/configure-sso-between-cerby-and-okta-with-saml)
* [Configure SSO between Cerby and Entra ID with SAML](/setup-and-admin/workspace-identity-federation/entra-id/configure-sso-between-cerby-and-entra-id-with-saml)
* [Configure SSO between Cerby and Google Workspace with SAML](/setup-and-admin/workspace-identity-federation/google/configure-sso-between-cerby-and-google-workspace-with-saml)
* [Configure SSO between Cerby and OneLogin with SAML](/setup-and-admin/workspace-identity-federation/onelogin/configure-sso-between-cerby-and-onelogin-with-saml)
* [Configure SSO between Cerby and JumpCloud with SAML](/setup-and-admin/workspace-identity-federation/jumpcloud/configure-sso-between-cerby-and-jumpcloud-with-saml)
***
## The SAML authentication flow
With SSO using the SAML standard, you centralize access control, ensuring that only authenticated users in your corporate directory can access the Cerby workspace and the disconnected or nonfederated apps managed through Cerby.
Cerby sits in the middle of the authentication flow, acting as a service provider (SP) to your corporate IdP while functioning as an access controller for your target applications.
The following is the authentication flow:
1. **Request:** A user attempts to log in to Cerby (SP-initiated flow).
2. **Redirect:** Cerby redirects the user to your IdP for authentication.
3. **Assertion:** The IdP authenticates the user and sends a signed SAML assertion back to Cerby’s assertion customer service (ACS) URL.
4. **Access:** Cerby validates the assertion and grants the user access to the Cerby workspace. Within the workspace, Cerby facilitates secure access to the target apps.
**Table 1** describes the responsibilities of the IdP and Cerby in the authentication flow.
| **Feature** | **IdP** | **Cerby** |
| -------------- | ------------------------------------------------------------------------------------------------------------------------------------- | ------------------------------------------------------------------------------------------------------------- |
| Authentication | Primary source of truth for user identity. Handles user login credentials, multi-factor authentication (MFA), and conditional access. | Validates the SAML assertion received from the IdP; does not store user login credentials for the IdP. |
| Authorization | Defines *who* can access a Cerby workspace via group or user assignments. | Defines *what* those users can do inside Cerby, according to Cerby’s Role-Based Access Control (RBAC) system. |
| Attributes | Provides user metadata required to identify the user. | Uses attributes to create and sync user accounts. |
**Table 1.** Responsibilities in the authentication flow
***
## Supported features
The following are the supported features of configuring SSO between Cerby and your IdP with SAML:
* Control who has access to Cerby from your IdP.
* **SP-initiated authentication flow:** This authentication flow occurs when users attempt to log in to the application from Cerby.
* **Automatic user account creation in Cerby:** This provisioning flow in Cerby occurs automatically on the initial SSO.
***
## Requirements
The following are the requirements to configure SSO in Cerby with your IdP:
* A tenant in your IdP that supports SAML 2.0 with the following required user attributes ready for mapping:
* **Email**
* **Name**
* **First name**
* **Last name**
* A user account in your IdP tenant with privileges to create and configure a SAML application. Commonly, you need an administrator role
* An invitation sent from Cerby Support via email to create a workspace
{% hint style="warning" %}
**IMPORTANT:** If you have not received an invitation, send an email to with your request
{% endhint %}
* Users and groups created beforehand in the corporate directory integrated with your IdP. Follow the official instructions of your IdP to manage users and groups
***
## Configure SSO between Cerby and your IdP with SAML
To configure SSO in Cerby with your IdP, you must complete the following main steps:
1. [Set up a workspace in Cerby](#id-1.-set-up-a-workspace-in-cerby)
2. [Create a SAML application in your IdP](#id-2.-create-a-saml-application-in-your-idp)
3. [Configure SSO and the connection settings in your IdP](#id-3.-configure-sso-and-the-connection-settings-in-your-idp)
4. [Assign users and groups to the SAML application in your IdP](#id-4.-assign-users-and-groups-to-the-saml-application-in-your-idp)
5. [Finish the workspace creation in Cerby](#id-5.-finish-the-workspace-creation-in-cerby)
{% hint style="info" %}
**NOTE:** Depending on the use case, you may be redirected to your IdP for authentication if a session has not been established.
{% endhint %}
The following sections describe each main step.
### 1. Set up a workspace in Cerby
To set up a workspace in Cerby, complete the following steps:
1. Click the **Create my workspace** button from the invitation email you received from Cerby. The **Welcome to Cerby** page is displayed, as shown in **Figure 1**.
2. Click the **Continue with Generic SAML** button. The **Create your workspace** page is displayed, as shown in **Figure 2**.
3. Enter the name of your workspace in the **Workspace name** field. **NOTE:** Remember the workspace name that you have entered. You need it later.
4. Click the **Create workspace** button. The **Configure SSO through Your Generic SAML App** page is displayed, as shown in **Figure 3**.
{% hint style="danger" %}
**IMPORTANT:** Keep the **Configure SSO through Your Generic SAML App** page open because it contains the required values, **SP Entity ID** and **ACS URL**, that you must provide to your IdP to complete the configuration.
{% endhint %}
The next step is [2. Create a SAML application in your IdP](#id-2.-create-a-saml-application-in-your-idp), which you must complete from your IdP.
### 2. Create a SAML application in your IdP
To create a SAML application in your IdP, complete the following steps:
1. Log in to your IdP admin console with the role that enables you to create and configure a SAML application.
2. Create a new application and select SAML 2.0.
3. Enter a name for the SAML application. For example, **Cerby SAML**.
4. Specify **`https://app.cerby.com`** as the start URL, if required.
The next step is [3. Configure SSO and the connection settings in your IdP](#id-3.-configure-sso-and-the-connection-settings-in-your-idp), which you must complete from your IdP.
### 3. Configure SSO and the connection settings in your IdP
To configure SSO and the connection settings of the SAML application with Cerby, complete the following steps:
1. Go to the SSO settings page in your IdP.
2. Copy the following values from the **Configure SSO through Your Generic SAML App** page that you left open in step [1. Set up a workspace in Cerby](#id-1.-set-up-a-workspace-in-cerby):
* **SP Entity ID**
* **ACS URL**
3. Paste the values in the corresponding fields of your SSO settings. These fields vary by IdP, so take the following into consideration:
* The common equivalents of **SP Entity ID** are the **Audience**, **Identifier**, or **Entity ID** fields
* The common equivalents of **ACS URL** are **Single Sign-On URL**, **Reply URL**, or **Consumer URL**
4. Map the required attributes from [Table 2. Attribute mapping reference](#table-2.-attribute-mapping-reference).
5. Test the SAML application, if this feature is available, to make sure the provided values and attributes are correct.
6. Save your configuration.
7. Go to the SAML metadata page or section. For more instructions, read the official documentation of your IdP.
8. Download or export an XML file to your computer with the IdP metadata.
{% hint style="danger" %}
**IMPORTANT:** If you enter incorrect values and attributes in your IdP, you and the users in your organization won’t be able to log in to Cerby.
{% endhint %}
The next step is [4. Assign users to the SAML application in your IdP](#id-4.-assign-users-and-groups-to-the-saml-application-in-your-idp), which you must complete from your IdP.
### 4. Assign users and groups to the SAML application in your IdP
To assign users and groups to the SAML application in your IdP, complete the following steps:
1. Go to the user assignment settings page in your IdP.
2. Assign existing users to the SAML application. For more instructions, read the official documentation of your IdP.
3. Go to the group assignment settings page in your IdP.
4. Assign existing groups to the SAML application. For more instructions, read the official documentation of your IdP.
The next step is [5. Finish the workspace creation in Cerby](#id-5.-finish-the-workspace-creation-in-cerby), which you must complete in Cerby.
### 5. Finish the workspace creation in Cerby
To finish the workspace creation in Cerby, complete the following steps from the **Configure SSO through Your Generic SAML App** page that you left open:
1. Upload the XML file that you downloaded recently. The name of the file is displayed below the **Metadata XML file** field when it is uploaded. **TIP:** You can drag the file from another window or click the button below the **Metadata XML file** field to look for the file on your computer.
2. Select the **I have already assigned users or groups to the application** option located in the **4. Assign People or Groups** section.
3. Click the **Finish Configuration** button located at the bottom of the page. A success message is displayed.
Now you are done. You can proceed to log in to your [Cerby](https://app.cerby.com/) workspace with the same login credentials of your IdP.
{% hint style="danger" %}
**IMPORTANT:**
* After configuring SSO in a new workspace, it might take some time to propagate changes across all services. During this window, you might briefly be redirected to the fallback Cerby login page or notice that recently added users and settings haven’t appeared yet. This is the expected behavior. Please wait until the propagation is complete, then log in again.
* Currently, after creating a workspace, you cannot change its name or update the IdP settings.
* The first user to log in to Cerby is assigned the workspace **Owner** role. For more information about roles, read the article [Roles and permissions](https://help.cerby.com/getting-started/concepts/user-management/roles-and-permissions#h-e203df23da).
{% endhint %}
{% hint style="info" %}
**NOTE:** The SAML-based integration leverages your IdP only for authentication. To assign permissions for Cerby, users must do so directly in Cerby.
{% endhint %}
***
## Table 2. Attribute mapping reference
Attribute names are case-sensitive and vary by provider. Some IdPs require a simple string (for example, email), while others require a full URI (for example, a schema URL).
**Table 2** provides a reference for the most common attribute mappings. Use these values to ensure your IdP communicates correctly with Cerby for user provisioning and identification.
| **Cerby required attribute** | **Equivalent attribute in your IdP** | **Common URI or claim name** |
| ---------------------------- | ------------------------------------ | -------------------------------------------------------------------- |
| email | User email or NameID | `http://schemas.xmlsoap.org/ws/2005/05/identity/claims/emailaddress` |
| name | Full name or Display name | `http://schemas.xmlsoap.org/ws/2005/05/identity/claims/fullname` |
| firstName | Given name | `http://schemas.xmlsoap.org/ws/2005/05/identity/claims/givenname` |
| lastName | Surname | `http://schemas.xmlsoap.org/ws/2005/05/identity/claims/surname` |
**Table 2.** Common attribute mapping
{% hint style="danger" %}
**IMPORTANT:** Refer to the map user attributes section of your IdP’s official documentation to ensure you are using the correct values for your specific environment. If these attributes are missing or misconfigured, users may be able to authenticate but will fail to create a profile within the Cerby workspace.
{% endhint %}
***
## Troubleshooting common authentication issues
**Table 3** shows the common authentication issues, the potential cause, and the proposed solution after configuring SSO between Cerby and your IdP with SAML.
| **Issue** | **Potential cause** | **Solution** |
| ---------------------------------- | ------------------------- | ------------------------------------------------------------------------------------------------------------------------------------------------------------------------------------------- |
| Invalid SAML response | Certificate mismatch | Contact the Cerby Support team through email () or the help chat to ensure the metadata XML file uploaded to Cerby matches the current signing certificate in your IdP |
| User access denied after login | User not assigned in IdP | Verify the user is assigned to the SAML application within your IdP's user assignments |
| Profile missing first or last name | Attribute mapping failure | Ensure the attributes in your IdP exactly match Cerby's requirements, according to [Table 2. Attribute mapping reference](#table-2.-attribute-mapping-reference) |
| Entity ID mismatch | Incorrect audience URI | Contact the Cerby Support team through email () or the help chat to ensure that the **Entity ID** in your IdP matches the one provided by Cerby during the configuration |
**Table 3.** Common authentication issues and their solutions
# Local workspaces
Create and manage local user workspaces for users who authenticate directly in Cerby without an external identity provider.
{% content-ref url="/pages/5cTfpQIvTVLmg1dBlFKt" %}
[Create a local workspace](/setup-and-admin/workspace-identity-federation/local-workspace/create-and-configure-a-local-workspace)
{% endcontent-ref %}
{% content-ref url="/pages/0k5TLWSNi1W8tEaHweJC" %}
[Edit the name of a local workspace](/setup-and-admin/workspace-identity-federation/local-workspace/edit-the-name-of-a-local-workspace)
{% endcontent-ref %}
{% content-ref url="/pages/1mxssesUoF322INzF7ev" %}
[Add a local user](/setup-and-admin/workspace-identity-federation/local-workspace/add-a-local-user)
{% endcontent-ref %}
{% content-ref url="/pages/58A8VrtNPfuFdWWLUD2V" %}
[Reset MFA for a local user](/setup-and-admin/workspace-identity-federation/local-workspace/reset-mfa-for-a-local-user)
{% endcontent-ref %}
{% content-ref url="/pages/9oeVdVXOuUzPpAqg7jAL" %}
[Force password reset for a local user](/setup-and-admin/workspace-identity-federation/local-workspace/force-password-reset-for-a-local-user)
{% endcontent-ref %}
{% content-ref url="/pages/Eq3xxriqhQJ1fj0IWVpu" %}
[Remove a local user](/setup-and-admin/workspace-identity-federation/local-workspace/remove-a-local-user)
{% endcontent-ref %}
# Create a local workspace
This article describes how to create and configure a local workspace in which Cerby manages the identity and authentication of users.
With Cerby, you can configure a local workspace when you need Cerby to manage the identity and authentication of users instead of leveraging an identity provider (IdP) such as Okta or Azure AD.
In local workspaces, users are added via direct invites from Cerby to their email addresses, and user management is performed through the **All members** page. In regular workspaces, the IdP acts as the authoritative source of user identity, and changes in user accounts, attributes, or permissions are synchronized downstream to Cerby via the System for Cross-Domain Identity Management (SCIM) specification.
Regarding authentication, users authenticate directly to Cerby with credentials, username and password, managed by Cerby in local workspaces. In regular workspaces, users are redirected to their IdP's authentication page to log in to Cerby.
The user who creates and configures a local workspace becomes the **Workspace Owner**. They can add users to the workspace and assign them the **Workspace Admin** or **Workspace User** roles. For more information about roles, read the article [Roles and permissions](https://help.cerby.com/getting-started/concepts/user-management/roles-and-permissions).
In addition to editing the workspace details, **Workspace Admins** can perform the following user management tasks in local workspaces:
* Add new users to the workspace.
* Remove users from the workspace.
* Edit the workspace-level role of users.
* Reset multi-factor authentication and password for users.
Local workspaces can be used when businesses collaborate with external parties who don’t belong to their business domain, such as contractors, agencies, partners, vendors, and clients. With the Partners feature, a regular workspace can securely share accounts, secrets, and collections with a local workspace. For more information about this feature, read the [How to use Partners](https://help.cerby.com/cerby-web-app/partners/host-guest/add-a-host-guest-partnership) article.
This article describes how to configure a local workspace.
***
## Requirements
The following are the requirements to create and configure a local workspace:
* An email invite sent by the Cerby team to create a workspace
* An authentication app installed on your mobile phone, such as Google Authenticator, Okta Verify, Microsoft Authenticator, Duo Mobile, or Authy
**NOTE:** Ask your IT or Security department for the authorized authentication app.
***
## Create and configure a local workspace
To create and configure a local workspace, you must complete the following main steps:
1. [Create your Cerby account and workspace](#id-1.-create-your-cerby-account-and-workspace)
2. [Install the Cerby mobile app and browser extension](#id-2.-install-the-cerby-mobile-app-and-browser-extension)
3. [Turn on MFA for your Cerby account](#id-3.-turn-on-mfa-for-your-cerby-account)
The following sections describe each main step.
### 1. Create your Cerby account and workspace
To create your Cerby account and the local workspace, you must complete the following steps:
1. Click the **Create your Workspace** button from the invite that Cerby sent to your email address. The **Welcome to Cerby** page is displayed, as shown in **Figure 1**.
Figure 1. Welcome to Cerby page
2. Click the **Sign in with Cerby** button. The **Let’s create your workspace** page is displayed.
3. Enter the name of your workspace in the **Workspace name** field.
4. Click the **Create Workspace** button. The **Create your account** page is displayed.
5. Create your Cerby account by entering the following information in the corresponding fields:
* **Name**
* **Last name**
* **Email**
* **Confirm Email**
* **Password**
* **Confirm Password**
6. Click the **Create my account** button. The **Your Workspace** page is displayed with a success message and the domain of your workspace, for example, **contentzilla.cerby.com**.
7. Click the **Login** button. The authentication page for Cerby is displayed, as shown in **Figure 2**.
Figure 2. Authentication page for Cerby
8. Enter your Cerby account credentials in the corresponding fields:
* Your email address in the **Username** field
* Your password in the **Password** field
9. Click the **Sign in** button. The homepage of the Cerby dashboard is displayed, as shown in **Figure 3**.
Figure 3. Homepage of the Cerby dashboard
Your local workspace is now created. The next step is [2. Install the Cerby mobile app and browser extension](#id-2.-install-the-cerby-mobile-app-and-browser-extension).
### 2. Install the Cerby mobile app and browser extension
To install the Cerby mobile app and browser extension for an optimal experience with the platform, you must complete the instructions from the corresponding articles:
* [Install the Cerby browser extension](https://help.cerby.com/cerby-browser-extension/installation/install-the-cerby-browser-extension)
* [Install and configure the Cerby mobile app on Android](https://help.cerby.com/cerby-mobile-app/installation/install-and-configure-the-cerby-mobile-app-on-android)
* [Install and configure the Cerby mobile app on iOS](https://help.cerby.com/cerby-mobile-app/installation/install-and-configure-the-cerby-mobile-app-on-ios)
The next step is [3. Turn on MFA for your Cerby account](#id-3.-turn-on-mfa-for-your-cerby-account).
### 3. Turn on MFA for your Cerby account
To turn on multi-factor authentication (MFA) for your Cerby account with an authentication app, you must complete the instructions in the article [Turn on MFA for your Cerby account](https://help.cerby.com/cerby-web-app/users/turn-on-mfa-for-your-cerby-account).
When you are done. It’s time to start adding your accounts to Cerby and sharing them with your colleagues.
***
## Join Cerby from an invite
After being added to a local workspace by a **Workspace Owner** or **Workspace Admin**, all users receive an invite through email to join Cerby and set up their account.
To join Cerby from an invite, you must complete the following steps:
1. Open the message Cerby sent to your email address. The message contains the following information:
* Workspace name
* Username
* Temporary password
2. Click the **Join now** button from the message. The Cerby authentication page is displayed.
3. Enter your username and temporary password in the corresponding fields.
4. Click the **Sign in** button. The **Change Password** page is displayed.
5. Enter a new password for your Cerby account and your profile information in the corresponding fields:
* **New Password**
* **Enter New Password Again**
* **Name**
* **Family name**
6. Click the **Send** button. The Cerby dashboard is displayed.
To start using Cerby, all users must complete the following steps from the [Create and configure a local workspace](#create-and-configure-a-local-workspace) section:
1. [Install the Cerby mobile app and browser extension](#id-2.-install-the-cerby-mobile-app-and-browser-extension)
2. [Turn on MFA for your Cerby account](#id-3.-turn-on-mfa-for-your-cerby-account)
***
## Troubleshooting: “We couldn’t turn MFA on for your profile” message
When you try to turn on MFA for a Cerby account that belongs to a local workspace, and you haven’t set your mobile phone time as automatic, the “We couldn’t turn MFA on for your profile” message may appear, as shown in **Figure 5**.
Figure 5. “We couldn’t turn MFA on for your profile” message
The error message is displayed when you verify the authentication code that your authentication app provides after scanning the QR code. This error occurs because the authentication app generates time-based codes that expire; therefore, when your mobile phone has a different time, the code could have expired or is not yet valid.
To solve this problem, set the time settings to automatic on your mobile phone by following the corresponding instructions:
* [Set time, date & time zone](https://support.google.com/android/answer/2841106?hl=en) (Android)
* [Change the date and time on iPhone](https://support.apple.com/guide/iphone/change-the-date-and-time-iph65f82af3e/ios) (iOS)
Now, try again turning on 2FA by following the instructions in the article [Turn on MFA for your Cerby account](https://help.cerby.com/cerby-web-app/users/turn-on-mfa-for-your-cerby-account).
***
## Related articles
The following articles describe the actions and steps to manage local workspaces:
* [Add a local user](/setup-and-admin/workspace-identity-federation/local-workspace/add-a-local-user)
* [Edit the name of a local workspace](/setup-and-admin/workspace-identity-federation/local-workspace/edit-the-name-of-a-local-workspace)
* [Reset MFA for a local user](/setup-and-admin/workspace-identity-federation/local-workspace/reset-mfa-for-a-local-user)
* [Force password reset for a local user](/setup-and-admin/workspace-identity-federation/local-workspace/force-password-reset-for-a-local-user)
* [Remove a local user](/setup-and-admin/workspace-identity-federation/local-workspace/remove-a-local-user)
# Edit the name of a local workspace
This article describes how to edit the display name of a local user workspace in Cerby.
Users with the **Workspace Owner** and **Workspace Admin** role can edit the workspace display name for a local user workspace. To do so, you must complete the following steps:
1. Select the **Settings** option from the left navigation drawer. The **Workspace Configuration** page is displayed with the **General** tab activated.
2. Activate the **IdP Settings** tab.
3. Click the **Edit IdP Details** button located at the top right of the **Identity Provider Settings** section.
4. The **Confirm your identity to continue** dialog box is displayed. An identity challenge is issued in your Cerby mobile app.
5. Click the **It's me!** button in the **Confirmation Request** screen of the Cerby mobile app to confirm your identity. The dialog box in the Cerby web app closes.
6. Enter a new name in the **Workspace display name** field.
7. Click the **Save Changes** button. A success message box is displayed.
Now you are done.
{% hint style="danger" %}
**IMPORTANT:** You cannot edit the **Workspace name** and **Client Id** fields. If you want to edit these fields, contact the Cerby Customer Support team.
{% endhint %}
# Add a local user
This article describes how to add a user to a local user workspace in Cerby.
Users with the **Workspace Owner** and **Workspace Admin** roles can add users to a local user workspace. To add a user, you must complete the following steps:
1. Select the **All members** option from the left navigation drawer. The **All Members** page is displayed.
2. Click the **Add member** button located at the top right of the page. The **Add a team member** dialog box is displayed.
3. Enter the email address of the user you want to add.
4. Click the **Next** button. The user is added to a list in the **MEMBER** section.
{% hint style="info" %}
**NOTE:** To add multiple users, enter each email address individually and press Enter. Each one is added to the list in the **MEMBER** section.
{% endhint %}
5. Select the workspace-level role of the user:
* **Admin:** They can invite and manage users in the workspace.
* **User:** They can add and manage permissions per account.
{% hint style="info" %}
**NOTE:** If you added multiple users, the role you select will be assigned to all of them.
{% endhint %}
6. Click the **Send Invite** button. The dialog box closes, a success message box is displayed, and an email is sent to the user to join Cerby with a temporary password.
Now you are done.
{% hint style="warning" %}
**IMPORTANT:** The temporary password expires in 48 hours. After this time, users need a new invite.
{% endhint %}
# Reset MFA for a local user
This article describes how to reset MFA for a user in a local user workspace in Cerby.
Users with the **Workspace Owner** and **Workspace Admin** roles can reset MFA for users in a local user workspace. To reset MFA for a user, you must complete the following steps:
1. Select the **All members** option from the left navigation drawer. The **All Members** page is displayed.
2. Click the **More options** (...) icon of the corresponding user. A drop-down list is displayed.
3. Select the **Reset MFA** option from the list. A message box is displayed, and an email is sent to the user to reset their MFA device.
Now you are done.
# Force password reset for a local user
This article describes how to force a password reset for a user in a local user workspace in Cerby.
Users with the **Workspace Owner** and **Workspace Admin** roles can force a password reset for users in a local user workspace. To force a password reset, you must complete the following steps:
1. Select the **All members** option from the left navigation drawer. The **All Members** page is displayed.
2. Click the **More options** (...) icon of the corresponding user. A drop-down list is displayed.
3. Select the **Force Password Reset** option from the list. A message box is displayed, and an email is sent to the user to reset their password with a code.
Now you are done.
# Remove a local user
This article describes how to remove a user from a local user workspace in Cerby.
Users with the **Workspace Owner** and **Workspace Admin** roles can remove users from a local user workspace. To remove a user, you must complete the following steps:
1. Select the **All members** option from the left navigation drawer. The **All Members** page is displayed.
2. Click the **More options** (...) icon of the corresponding user. A drop-down list is displayed.
3. Select the **Remove from Workspace** option from the list. The **Remove \?** dialog box is displayed.
4. Click the **Remove from Workspace** button. The dialog box closes, and a success message box is displayed.
Now you are done.
{% hint style="info" %}
**NOTE:** For reporting purposes, the account of removed users is disabled; however, they will no longer be able to access Cerby.
{% endhint %}
# Retrieve a SCIM auth token
This article describes how to retrieve the SCIM API authentication token to configure automatic provisioning with your IdP tenant.
{% hint style="info" %}
**Who can use this feature?**
* Workspace **Owners**, **Super Admins**, and **Admins**
* Only supported using the Cerby web app
{% endhint %}
Cerby uses the System for Cross-domain Identity Management (SCIM) specification to configure automatic user and group provisioning between identity providers (IdPs), such as Okta and Entra ID (formerly Azure AD), and the multiple applications that companies use.
By enabling automatic provisioning, Cerby can manage the creation and synchronization of user accounts and teams based on the user and group assignments in your corporate IdP. To configure automatic provisioning and authenticate SCIM provisioning requests, you need a SCIM API authentication token generated by Cerby.
To retrieve the SCIM API authentication token, complete the following steps:
{% hint style="danger" %}
**IMPORTANT:** To view the SCIM API authentication token, you must verify your identity. Therefore, you must have installed and logged in to the Cerby mobile application to receive push notifications.
{% endhint %}
1. Log in to your corresponding [Cerby](https://app.cerby.com/) workspace.
2. Select the **Settings** option from the left navigation drawer. The **Workspace Configuration** page is displayed.
3. Activate the **IdP Settings** tab. The details of your IdP and the **Directory Sync** section are displayed, as shown in **Figure 1**.
Figure 1. Directory Sync section in the IdP Settings tab
4. Click the **View Token** button located in the **Directory Sync** section. The **Confirm your identity to continue** dialog box is displayed, and a push notification is sent to your Cerby mobile app.
5. Confirm your identity by using one of [Cerby's multi-factor authentication methods](https://help.cerby.com/tips-and-troubleshooting/best-practices/set-up-your-identity-with-cerby-s-mfa-methods). The **Confirm your identity to continue** dialog box closes in the Cerby web app, and the **Show Token** dialog box is displayed, as shown in **Figure 2**.
Figure 2. Show Token dialog box
6. Click the **Copy** button to copy the SCIM API authentication token to the clipboard.\
**TIP:** Keep the **Show Token** dialog box open, as shown in **Figure 2**, to copy the token at any time. You need the token to configure automatic provisioning with your IdP tenant.
Now you’re done.
# Regenerate the SCIM API auth token
This article describes how to regenerate the SCIM API authentication token to configure automatic provisioning with your IdP tenant.
When configuring automatic user and group provisioning with your IdP, you may need to regenerate the SCIM API authentication token for security, token expiration compliance, audit standards, or configuration changes in your IdP.
To regenerate the SCIM API authentication token, complete the following steps:
1. Send an email with your request to the Customer Support team at . We’ll regenerate the token for you and notify you via email.
2. Open the response email from Cerby to confirm that the token was successfully regenerated.
3. Complete the instructions in the article [Retrieve the SCIM API authentication token from Cerby](/setup-and-admin/workspace-identity-federation/retrieve-the-scim-api-authentication-token-from-cerby) to retrieve the new SCIM API authentication token.
{% hint style="info" %}
**NOTE:** We are currently developing a self-service solution for regenerating the SCIM API authentication token. To regenerate the token, the Cerby team members must verify their identity.
{% endhint %}
# Connecting your apps
Connect business hubs to grant and revoke user access to third-party applications directly from Cerby. Each article below walks you through the steps to connect a specific app.
| App |
| ---------------------------------------------------------------------------------------------------------------------------------------------------------------------------- |
| [10bis](/setup-and-admin/business-hubs/connecting-your-apps/connect-a-business-hub-for-10bis) |
| [1Password Business](/setup-and-admin/business-hubs/connecting-your-apps/connect-a-business-hub-for-1password-business) |
| [6sense](/setup-and-admin/business-hubs/connecting-your-apps/connect-a-business-hub-for-6sense) |
| [Acsense](/setup-and-admin/business-hubs/connecting-your-apps/connect-a-business-hub-for-acsense) |
| [Ada](/setup-and-admin/business-hubs/connecting-your-apps/connect-a-business-hub-for-ada) |
| [AddEvent](/setup-and-admin/business-hubs/connecting-your-apps/connect-a-business-hub-for-addevent) |
| [Adobe Creative Cloud](/setup-and-admin/business-hubs/connecting-your-apps/connect-a-business-hub-for-adobe-creative-cloud) |
| [Adyen](/setup-and-admin/business-hubs/connecting-your-apps/connect-a-business-hub-for-adyen) |
| [Affinity](/setup-and-admin/business-hubs/connecting-your-apps/connect-a-business-hub-for-affinity) |
| [Ahrefs](/setup-and-admin/business-hubs/connecting-your-apps/connect-a-business-hub-for-ahrefs) |
| [Alta](/setup-and-admin/business-hubs/connecting-your-apps/connect-a-business-hub-for-alta) |
| [Amazon Seller](/setup-and-admin/business-hubs/connecting-your-paid-social-apps/amazon-demand-seller-platform/connect-a-business-hub-for-amazon-seller) |
| [American Express Merchant Account](/setup-and-admin/business-hubs/connecting-your-apps/connect-a-business-hub-for-american-express-merchant-account) |
| [Apollo](/setup-and-admin/business-hubs/connecting-your-apps/connect-a-business-hub-for-apollo) |
| [Appetize](/setup-and-admin/business-hubs/connecting-your-apps/connect-a-business-hub-for-appetize) |
| [Appfigures](/setup-and-admin/business-hubs/connecting-your-apps/connect-a-business-hub-for-appfigures) |
| [AppsFlyer](/setup-and-admin/business-hubs/connecting-your-apps/connect-a-business-hub-for-appsflyer) |
| [Appsmith](/setup-and-admin/business-hubs/connecting-your-apps/connect-a-business-hub-for-appsmith) |
| [Artisan](/setup-and-admin/business-hubs/connecting-your-apps/connect-a-business-hub-for-artisan) |
| [Artlist](/setup-and-admin/business-hubs/connecting-your-apps/connect-a-business-hub-for-artlist) |
| [Asana](/setup-and-admin/business-hubs/connecting-your-apps/connect-a-business-hub-for-asana) |
| [Astrix](/setup-and-admin/business-hubs/connecting-your-apps/connect-a-business-hub-for-astrix) |
| [AstroPay](/setup-and-admin/business-hubs/connecting-your-apps/connect-a-business-hub-for-astropay) |
| [Autodesk](/setup-and-admin/business-hubs/connecting-your-apps/connect-a-business-hub-for-autodesk) |
| [Auvik](/setup-and-admin/business-hubs/connecting-your-apps/connect-a-business-hub-for-auvik) |
| [Backbox](/setup-and-admin/business-hubs/connecting-your-apps/connect-a-business-hub-for-backbox) |
| [Backslash](/setup-and-admin/business-hubs/connecting-your-apps/connect-a-business-hub-for-backslash) |
| [Bigleaf](/setup-and-admin/business-hubs/connecting-your-apps/connect-a-business-hub-for-bigleaf) |
| [Bitrise](/setup-and-admin/business-hubs/connecting-your-apps/connect-a-business-hub-for-bitrise) |
| [Braintree](/setup-and-admin/business-hubs/connecting-your-apps/connect-a-business-hub-for-braintree) |
| [Braze](/setup-and-admin/business-hubs/connecting-your-apps/connect-a-business-hub-for-braze) |
| [BrowserStack](/setup-and-admin/business-hubs/connecting-your-apps/connect-a-business-hub-for-browserstack) |
| [BuildBuddy](/setup-and-admin/business-hubs/connecting-your-apps/connect-a-business-hub-for-buildbuddy) |
| [Built In](/setup-and-admin/business-hubs/connecting-your-apps/connect-a-business-hub-for-built-in) |
| [BuyMe Business](/setup-and-admin/business-hubs/connecting-your-apps/connect-a-business-hub-for-buyme-business) |
| [BuzzSumo](/setup-and-admin/business-hubs/connecting-your-apps/connect-a-business-hub-for-buzzsumo) |
| [Cadena](/setup-and-admin/business-hubs/connecting-your-apps/connect-a-business-hub-for-cadena) |
| [Calendly](/setup-and-admin/business-hubs/connecting-your-apps/connect-a-business-hub-for-calendly) |
| [ChatGPT](/setup-and-admin/business-hubs/connecting-your-apps/connect-a-business-hub-for-chatgpt) |
| [Chili Piper](/setup-and-admin/business-hubs/connecting-your-apps/connect-a-business-hub-for-chili-piper) |
| [Chili Piper New Dashboards](/setup-and-admin/business-hubs/connecting-your-apps/connect-a-business-hub-for-chili-piper-new-dashboards) |
| [Clay](/setup-and-admin/business-hubs/connecting-your-apps/connect-a-business-hub-for-clay) |
| [Clockwise](/setup-and-admin/business-hubs/connecting-your-apps/connect-a-business-hub-for-clockwise) |
| [CloudAlly](/setup-and-admin/business-hubs/connecting-your-apps/connect-a-business-hub-for-cloudally) |
| [Coda](/setup-and-admin/business-hubs/connecting-your-apps/connect-a-business-hub-for-coda) |
| [CoderPad](/setup-and-admin/business-hubs/connecting-your-apps/connect-a-business-hub-for-coderpad) |
| [CoderPad Screen](/setup-and-admin/business-hubs/connecting-your-apps/connect-a-business-hub-for-coderpad-screen) |
| [Conjointly](/setup-and-admin/business-hubs/connecting-your-apps/connect-a-business-hub-for-conjointly) |
| [CookieHub](/setup-and-admin/business-hubs/connecting-your-apps/connect-a-business-hub-for-cookiehub) |
| [Cronitor](/setup-and-admin/business-hubs/connecting-your-apps/connect-a-business-hub-for-cronitor) |
| [Cross River Bank](/setup-and-admin/business-hubs/connecting-your-apps/connect-a-business-hub-for-cross-river-bank) |
| [CyberArk](/setup-and-admin/business-hubs/connecting-your-apps/connect-a-business-hub-for-cyberark) |
| [CyberGRX](/setup-and-admin/business-hubs/connecting-your-apps/connect-a-business-hub-for-cybergrx) |
| [Cypress](/setup-and-admin/business-hubs/connecting-your-apps/connect-a-business-hub-for-cypress) |
| [Datorama](/setup-and-admin/business-hubs/connecting-your-apps/connect-a-business-hub-for-datorama) |
| [Decagon](/setup-and-admin/business-hubs/connecting-your-apps/connect-a-business-hub-for-decagon) |
| [DeepL](/setup-and-admin/business-hubs/connecting-your-apps/connect-a-business-hub-for-deepl) |
| [Definitiv](/setup-and-admin/business-hubs/connecting-your-apps/connect-a-business-hub-for-definitiv) |
| [DFIN Active Disclosure](/setup-and-admin/business-hubs/connecting-your-apps/connect-a-business-hub-for-dfin-active-disclosure) |
| [Discord](/setup-and-admin/business-hubs/connecting-your-paid-social-apps/discord/connect-a-business-hub-for-discord) |
| [Disqus](/setup-and-admin/business-hubs/connecting-your-apps/connect-a-business-hub-for-disqus) |
| [Dock](/setup-and-admin/business-hubs/connecting-your-apps/connect-a-business-hub-for-dock) |
| [Dovetail](/setup-and-admin/business-hubs/connecting-your-apps/connect-a-business-hub-for-dovetail) |
| [Eight](/setup-and-admin/business-hubs/connecting-your-apps/connect-a-business-hub-for-eight) |
| [Embedly](/setup-and-admin/business-hubs/connecting-your-apps/connect-a-business-hub-for-embedly) |
| [Employment Hero (KeyPay)](/setup-and-admin/business-hubs/connecting-your-apps/connect-a-business-hub-for-employment-hero-keypay) |
| [Enterpret](/setup-and-admin/business-hubs/connecting-your-apps/connect-a-business-hub-for-enterpret) |
| [Everest (BMS)](/setup-and-admin/business-hubs/connecting-your-apps/connect-a-business-hub-for-everest-bms) |
| [Evinced](/setup-and-admin/business-hubs/connecting-your-apps/connect-a-business-hub-for-evinced) |
| [Firebase](/setup-and-admin/business-hubs/connecting-your-apps/connect-a-business-hub-for-firebase) |
| [Frame.io](/setup-and-admin/business-hubs/connecting-your-apps/connect-a-business-hub-for-frame-io) |
| [Frase](/setup-and-admin/business-hubs/connecting-your-apps/connect-a-business-hub-for-frase) |
| [Frontitude](/setup-and-admin/business-hubs/connecting-your-apps/connect-a-business-hub-for-frontitude) |
| [FullStory](/setup-and-admin/business-hubs/connecting-your-apps/connect-a-business-hub-for-fullstory) |
| [Gainsight (Insided)](/setup-and-admin/business-hubs/connecting-your-apps/connect-a-business-hub-for-gainsight-insided) |
| [Gearset](/setup-and-admin/business-hubs/connecting-your-apps/connect-a-business-hub-for-gearset) |
| [Gem](/setup-and-admin/business-hubs/connecting-your-apps/connect-a-business-hub-for-gem) |
| [Gente](/setup-and-admin/business-hubs/connecting-your-apps/connect-a-business-hub-for-gente) |
| [GitHub](/setup-and-admin/business-hubs/connecting-your-apps/connect-a-business-hub-for-github) |
| [GoCardless](/setup-and-admin/business-hubs/connecting-your-apps/connect-a-business-hub-for-gocardless) |
| [Google Ads Manager account](/setup-and-admin/business-hubs/connecting-your-paid-social-apps/google-marketing-suite/connect-a-business-hub-for-a-google-ads-manager-account) |
| [Google ADH](/setup-and-admin/business-hubs/connecting-your-paid-social-apps/google-marketing-suite/connect-a-business-hub-for-google-adh) |
| [Google Analytics](/setup-and-admin/business-hubs/connecting-your-paid-social-apps/google-marketing-suite/connect-a-business-hub-for-google-analytics) |
| [Google Marketing Platform](/setup-and-admin/business-hubs/connecting-your-paid-social-apps/google-marketing-suite/connect-a-business-hub-for-google-marketing-platform) |
| [Google Play](/setup-and-admin/business-hubs/connecting-your-apps/connect-a-business-hub-for-google-play) |
| [Google Tag Manager](/setup-and-admin/business-hubs/connecting-your-paid-social-apps/google-marketing-suite/connect-a-business-hub-for-google-tag-manager) |
| [Campaign Manager 360](/setup-and-admin/business-hubs/connecting-your-paid-social-apps/google-marketing-suite/connect-a-business-hub-for-campaign-manager-360) |
| [DV360](/setup-and-admin/business-hubs/connecting-your-paid-social-apps/google-marketing-suite/connect-a-business-hub-for-dv360) |
| [YouTube Brand Account](/setup-and-admin/business-hubs/connecting-your-paid-social-apps/youtube/connect-a-business-hub-for-youtube-brand-account) |
| [YouTube Studio](/setup-and-admin/business-hubs/connecting-your-paid-social-apps/youtube/connect-a-business-hub-for-youtube-studio) |
| [Govly](/setup-and-admin/business-hubs/connecting-your-apps/connect-a-business-hub-for-govly) |
| [Gridly](/setup-and-admin/business-hubs/connecting-your-apps/connect-a-business-hub-for-gridly) |
| [Habu](/setup-and-admin/business-hubs/connecting-your-apps/connect-a-business-hub-for-habu) |
| [Heroku](/setup-and-admin/business-hubs/connecting-your-apps/connect-a-business-hub-for-heroku) |
| [Hootsuite](/setup-and-admin/business-hubs/connecting-your-paid-social-apps/hootsuite/connect-a-business-hub-for-hootsuite) |
| [Hotel Effectiveness](/setup-and-admin/business-hubs/connecting-your-apps/connect-a-business-hub-for-hotel-effectiveness) |
| [Hotjar](/setup-and-admin/business-hubs/connecting-your-apps/connect-a-business-hub-for-hotjar) |
| [Hubspot](/setup-and-admin/business-hubs/connecting-your-apps/connect-a-business-hub-for-hubspot) |
| [Humata](/setup-and-admin/business-hubs/connecting-your-apps/connect-a-business-hub-for-humata) |
| [Hyperwallet](/setup-and-admin/business-hubs/connecting-your-apps/connect-a-business-hub-for-hyperwallet) |
| [JetBrains](/setup-and-admin/business-hubs/connecting-your-apps/connect-a-business-hub-for-jetbrains) |
| [Josys](/setup-and-admin/business-hubs/connecting-your-apps/connect-a-business-hub-for-josys) |
| [JP Morgan PaymentNet](/setup-and-admin/business-hubs/connecting-your-apps/connect-a-business-hub-for-jp-morgan-paymentnet) |
| [JustJoin.it](/setup-and-admin/business-hubs/connecting-your-apps/connect-a-business-hub-for-justjoin-it) |
| [Kahoot](/setup-and-admin/business-hubs/connecting-your-apps/connect-a-business-hub-for-kahoot) |
| [Kapa.ai](/setup-and-admin/business-hubs/connecting-your-apps/connect-a-business-hub-for-kapa-ai) |
| [Kinsta](/setup-and-admin/business-hubs/connecting-your-apps/connect-a-business-hub-for-kinsta) |
| [LG Lugar de Gente](/setup-and-admin/business-hubs/connecting-your-apps/connect-a-business-hub-for-lg-lugar-de-gente) |
| [Lyssna](/setup-and-admin/business-hubs/connecting-your-apps/connect-a-business-hub-for-lyssna) |
| [Mailchimp](/setup-and-admin/business-hubs/connecting-your-apps/connect-a-business-hub-for-mailchimp) |
| [Make](/setup-and-admin/business-hubs/connecting-your-apps/connect-a-business-hub-for-make) |
| [Malt](/setup-and-admin/business-hubs/connecting-your-apps/connect-a-business-hub-for-malt) |
| [Massive.io](/setup-and-admin/business-hubs/connecting-your-apps/connect-a-business-hub-for-massive-io) |
| [MaxMind](/setup-and-admin/business-hubs/connecting-your-apps/connect-a-business-hub-for-maxmind) |
| [Maze](/setup-and-admin/business-hubs/connecting-your-apps/connect-a-business-hub-for-maze) |
| [Mercury](/setup-and-admin/business-hubs/connecting-your-apps/connect-a-business-hub-for-mercury) |
| [Microsoft 365 Enterprise](/setup-and-admin/business-hubs/connecting-your-apps/connect-a-business-hub-for-microsoft-365-enterprise) |
| [Mixpanel](/setup-and-admin/business-hubs/connecting-your-apps/connect-a-business-hub-for-mixpanel) |
| [Mobbin](/setup-and-admin/business-hubs/connecting-your-apps/connect-a-business-hub-for-mobbin) |
| [Monday Community](/setup-and-admin/business-hubs/connecting-your-apps/connect-a-business-hub-for-monday-community) |
| [MongoDB Cloud](/setup-and-admin/business-hubs/connecting-your-apps/connect-a-business-hub-for-mongodb-cloud) |
| [ngrok](/setup-and-admin/business-hubs/connecting-your-apps/connect-a-business-hub-for-ngrok) |
| [OneSignal](/setup-and-admin/business-hubs/connecting-your-apps/connect-a-business-hub-for-onesignal) |
| [OpenAI](/setup-and-admin/business-hubs/connecting-your-apps/connect-a-business-hub-for-openai) |
| [Password Link](/setup-and-admin/business-hubs/connecting-your-apps/connect-a-business-hub-for-password-link) |
| [PayPal](/setup-and-admin/business-hubs/connecting-your-apps/connect-a-business-hub-for-paypal) |
| [PeopleCert](/setup-and-admin/business-hubs/connecting-your-apps/connect-a-business-hub-for-peoplecert) |
| [Playable](/setup-and-admin/business-hubs/connecting-your-apps/connect-a-business-hub-for-playable) |
| [Postman](/setup-and-admin/business-hubs/connecting-your-apps/connect-a-business-hub-for-postman) |
| [Prezi](/setup-and-admin/business-hubs/connecting-your-apps/connect-a-business-hub-for-prezi) |
| [Prism HR](/setup-and-admin/business-hubs/connecting-your-apps/connect-a-business-hub-for-prism-hr) |
| [Process Pay](/setup-and-admin/business-hubs/connecting-your-apps/connect-a-business-hub-for-process-pay) |
| [Productboard](/setup-and-admin/business-hubs/connecting-your-apps/connect-a-business-hub-for-productboard) |
| [Qgiv](/setup-and-admin/business-hubs/connecting-your-apps/connect-a-business-hub-for-qgiv) |
| [Readme Enterprise](/setup-and-admin/business-hubs/connecting-your-apps/connect-a-business-hub-for-readme-enterprise) |
| [Readme Projects](/setup-and-admin/business-hubs/connecting-your-apps/connect-a-business-hub-for-readme-projects) |
| [Recall.ai](/setup-and-admin/business-hubs/connecting-your-apps/connect-a-business-hub-for-recall-ai) |
| [Reflect](/setup-and-admin/business-hubs/connecting-your-apps/connect-a-business-hub-for-reflect) |
| [RiskLedger](/setup-and-admin/business-hubs/connecting-your-apps/connect-a-business-hub-for-riskledger) |
| [Rollbar](/setup-and-admin/business-hubs/connecting-your-apps/connect-a-business-hub-for-rollbar) |
| [Salesforce](/setup-and-admin/business-hubs/connecting-your-apps/connect-a-business-hub-for-salesforce) |
| [Scappman](/setup-and-admin/business-hubs/connecting-your-apps/connect-a-business-hub-for-scappman) |
| [Sensor Tower](/setup-and-admin/business-hubs/connecting-your-apps/connect-a-business-hub-for-sensor-tower) |
| [SheerID](/setup-and-admin/business-hubs/connecting-your-apps/connect-a-business-hub-for-sheerid) |
| [Shippo](/setup-and-admin/business-hubs/connecting-your-apps/connect-a-business-hub-for-shippo) |
| [Shopify](/setup-and-admin/business-hubs/connecting-your-apps/connect-a-business-hub-for-shopify) |
| [Similarweb](/setup-and-admin/business-hubs/connecting-your-apps/connect-a-business-hub-for-similarweb) |
| [Smartling](/setup-and-admin/business-hubs/connecting-your-apps/connect-a-business-hub-for-smartling) |
| [Sohar](/setup-and-admin/business-hubs/connecting-your-apps/connect-a-business-hub-for-sohar) |
| [Stack Exchange](/setup-and-admin/business-hubs/connecting-your-apps/connect-a-business-hub-for-stack-exchange) |
| [Stark](/setup-and-admin/business-hubs/connecting-your-apps/connect-a-business-hub-for-stark) |
| [StatusGator](/setup-and-admin/business-hubs/connecting-your-apps/connect-a-business-hub-for-statusgator) |
| [StatusPage](/setup-and-admin/business-hubs/connecting-your-apps/connect-a-business-hub-for-statuspage) |
| [Streamline Icons](/setup-and-admin/business-hubs/connecting-your-apps/connect-a-business-hub-for-streamline-icons) |
| [Stripe](/setup-and-admin/business-hubs/connecting-your-apps/connect-a-business-hub-for-stripe) |
| [Superwise](/setup-and-admin/business-hubs/connecting-your-apps/connect-a-business-hub-for-superwise) |
| [Superwise Portal](/setup-and-admin/business-hubs/connecting-your-apps/connect-a-business-hub-for-superwise-portal) |
| [SurveyMonkey](/setup-and-admin/business-hubs/connecting-your-apps/connect-a-business-hub-for-surveymonkey) |
| [Tableau](/setup-and-admin/business-hubs/connecting-your-apps/connect-a-business-hub-for-tableau) |
| [TextExpander](/setup-and-admin/business-hubs/connecting-your-apps/connect-a-business-hub-for-textexpander) |
| [Tower](/setup-and-admin/business-hubs/connecting-your-apps/connect-a-business-hub-for-tower) |
| [Tremendous](/setup-and-admin/business-hubs/connecting-your-apps/connect-a-business-hub-for-tremendous) |
| [Trullion](/setup-and-admin/business-hubs/connecting-your-apps/connect-a-business-hub-for-trullion) |
| [Trustpilot](/setup-and-admin/business-hubs/connecting-your-apps/connect-a-business-hub-for-trustpilot) |
| [Twilio](/setup-and-admin/business-hubs/connecting-your-apps/connect-a-business-hub-for-twilio) |
| [Typeform](/setup-and-admin/business-hubs/connecting-your-apps/connect-a-business-hub-for-typeform) |
| [Uber for Business](/setup-and-admin/business-hubs/connecting-your-apps/connect-a-business-hub-for-uber-for-business) |
| [Upwork](/setup-and-admin/business-hubs/connecting-your-apps/connect-a-business-hub-for-upwork) |
| [UserGems](/setup-and-admin/business-hubs/connecting-your-apps/connect-a-business-hub-for-usergems) |
| [Usersnap](/setup-and-admin/business-hubs/connecting-your-apps/connect-a-business-hub-for-usersnap) |
| [Voices](/setup-and-admin/business-hubs/connecting-your-apps/connect-a-business-hub-for-voices) |
| [Watershed](/setup-and-admin/business-hubs/connecting-your-apps/connect-a-business-hub-for-watershed) |
| [Webflow](/setup-and-admin/business-hubs/connecting-your-apps/connect-a-business-hub-for-webflow) |
| [Wise](/setup-and-admin/business-hubs/connecting-your-apps/connect-a-business-hub-for-wise) |
| [Wisestamp](/setup-and-admin/business-hubs/connecting-your-apps/connect-a-business-hub-for-wisestamp) |
| [Wix](/setup-and-admin/business-hubs/connecting-your-apps/connect-a-business-hub-for-wix) |
| [Wizer](/setup-and-admin/business-hubs/connecting-your-apps/connect-a-business-hub-for-wizer) |
| [Wolters Kluwer](/setup-and-admin/business-hubs/connecting-your-apps/connect-a-business-hub-for-wolters-kluwer) |
| [Worknet](/setup-and-admin/business-hubs/connecting-your-apps/connect-a-business-hub-for-worknet) |
| [Workwize](/setup-and-admin/business-hubs/connecting-your-apps/connect-a-business-hub-for-workwize) |
| [WP Engine](/setup-and-admin/business-hubs/connecting-your-apps/connect-a-business-hub-for-wp-engine) |
# Connect a business hub for your app
This article describes how to connect a business hub to centrally manage the users of your seat-based and paid social apps from Cerby.
{% hint style="info" %}
**Who can use this feature?**
* Workspace **Owners**, **Super** **Admins**, **Admins**, and **Users**
* Only supported using the Cerby web app
{% endhint %}
As a user with any workspace role in Cerby, except **Guest User** and **Login-Only**, you can connect a business hub integration to centrally manage the users and assets of your seat-based and paid social apps.
When you connect the business hub, you become its **Owner**, and you can perform the following user and access management tasks from Cerby:
* Check for updates
* Add users
* Update user roles
* Remove users
This article provides generic instructions on how to connect a business hub to Cerby. For app-specific articles and videos, visit the [Connecting business hubs for your apps](https://help.cerby.com/setup-and-admin/business-hubs/connecting-your-apps) and [Connecting business hubs for your paid social apps](https://help.cerby.com/setup-and-admin/business-hubs/connecting-your-paid-social-apps) sections in the Cerby Help Center.
***
## Requirements
The following are the requirements to connect a business hub:
* A Cerby workspace
* A Cerby user account with the workspace **Owner**, **Super** **Admin**, **Admin**, or **User** role
* A collaboration space (workspace, team, or dashboard) in your app
* A group assignment configured in your identity provider (IdP) if you want to leverage automatic user provisioning and deprovisioning for your apps based on IdP events. For more information, read the articles available in the [Managing users via an IdP and business hub](https://help.cerby.com/setup-and-admin/business-hubs/managing-users-and-assets-via-a-business-hub) section in the Cerby Help Center
* An automation account, meaning an active user account with a native admin role in your seat-based or paid social app. For instructions and recommendations on how to create this account, read the article [Create a service account for your business hub](/setup-and-admin/business-hubs/connecting-your-apps/create-a-service-account-for-your-business-hub)
* The user management and login method for your business hub identified. For more information, read the **User management and login method** section of the article [Business hub catalog](https://help.cerby.com/setup-and-admin/business-hubs/business-hub-catalog)
* A business or organization ID. Commonly, you can find the ID in the following ways:
* **From the address bar:** When you are logged in to your app, sometimes the ID is displayed in the address bar as part of the URL. For example, **`https://business.app.com/settings/&business_id=1234567890`**. Just copy the value and paste it when connecting the business hub.
* **From the business information or settings:** When you are logged in to your app, navigate to the settings or business information page. The ID is usually displayed in an information section for you to copy.
**NOTE:** Not all business hubs require a business or organization ID; Cerby displays an input field when applicable to your app. For more information, read the article [Retrieve the business ID from your app](https://help.cerby.com/setup-and-admin/business-hubs/connecting-your-apps/retrieve-the-business-id-from-your-app).
***
## Connect a business hub for your app
To connect a business hub for your seat-based or paid social app, you must complete the following main steps from the Cerby web app dashboard:
1. [Add a business hub and connect it to your external app](#id-1.-add-a-business-hub-and-connect-it-to-your-external-app)
2. [Check for updates to import users, roles, and assets to Cerby](#id-2.-check-for-updates-to-import-users-roles-and-assets-to-cerby)
3. [Connect your external app user account to the business hub (optional)](#id-3.-connect-your-external-app-user-account-to-the-business-hub-\(optional\))
4. [Manage unmatched users](#id-4.-manage-unmatched-users)
The following sections describe each main step.
### 1. Add a business hub and connect it to your external app
To add a business hub and connect it to your seat-based or paid social app, you must complete the following steps:
1. Log in to your corresponding [Cerby](https://app.cerby.com/) workspace.
2. Select the **Business Hubs** option from the left menu. The **Business Hubs** page is displayed.
3. Click the **Connect Business Hub** button located at the top right of the page. The **Connect your Business Hubs to Cerby** dialog box is displayed. **TIP:** You can select the **Don’t show this again option** to skip this step the next time you connect a new business hub.
4. Click the **Get started** button. A wizard is displayed on the **Select app** page.
5. Select the corresponding app from the catalog. The **Enter app details** page is displayed on the wizard.
6. Enter and select your app information in the corresponding fields:
* **Label in Cerby:** It is the name to assign to your business hub in Cerby, and it will be displayed on the business hub card.
* **Business ID:** It is the unique identifier of your business or organization within the seat-based or paid social app. This value may exist or not depending on the app and might have different names, such as **Organization ID** or **Team ID**. For generic instructions on how to find the ID, read the [Requirements](#requirements) section.
* **User management and login method** : It is the way your users log in to the app and determines if they must save their credentials in Cerby. You must select one of the following methods:
* **Single sign-on (SSO)** : Access is managed by your identity provider, and users log in with SSO authentication.
* **Username and password:** Account security and access are managed by Cerby, and users log in with their credentials.
**NOTE:** Other input fields relevant to your app might be required.
7. Click the **Next** button. The **Select automation account** page is displayed. One of the following scenarios occurs:
* If you already have an account for the external app, a list of accounts is displayed.
1. Select the corresponding automation account.
2. Click the **Connect app** button.
* If you don’t have an account for the external app, you are prompted to add it:
1. Enter your account details in the corresponding fields:
* **Account label in Cerby** : It is the name to assign to your account in Cerby, and it is displayed on the account card.
* **App** : It is the name of the app or service provider to which the account belongs or the login URL. **NOTE:** The app you selected in step 5 is displayed on this field, and you cannot change it.
* **Username** : It is the username you use to log in to your account. Sometimes, the username is your email address.
* **Current password** : It is the password you use to log in to your account.
* **Phone Number Linked to Account**: It is the phone number associated with your account
* Click the **Add account** button.
The wizard closes, and a success message box is displayed. The corresponding business hub is also displayed on the **Business Hubs** page.
The next step is [2. Check for updates to import users, roles, and assets to Cerby](#id-2.-check-for-updates-to-import-users-roles-and-assets-to-cerby).
### 2. Check for updates to import users, roles, and assets to Cerby
To check for updates in your app to identify and import users, roles, and assets to Cerby, you must complete the following steps:
1. Select the **Business Hubs** option from the left menu. The **Business Hubs** page is displayed.
2. Click the More options icon of the corresponding business hub card. A drop-down menu is displayed.
3. Select the **Settings** option from the menu. The business hub details page is displayed with the **Settings** tab activated.
4. Click the **Sync** button located at the top right of the page. A message box is displayed with information about the process. **NOTE:** The check and import process may take a few minutes depending on the number of users and assets.
5. Confirm that the check for updates automated task has the “Completed” status by performing any of the following actions:
1. Click the **More details** button from the message box.
2. Select the **Automation** option from the left menu to open the **Automation** page.
{% hint style="info" %}
**NOTE:** Cerby runs syncs regularly for all business hubs, but you can trigger them manually, as described above in steps 1 to 4. For more information, read the article [Sync your app users with your business hub](/setup-and-admin/business-hubs/managing-users-and-assets-via-a-business-hub/sync-your-business-hub-with-your-external-app).
{% endhint %}
The next step is [3. Connect your external app user account to the business hub (optional)](#id-3.-connect-your-external-app-user-account-to-the-business-hub-optional).
### 3. **Connect your external app user account to the business hub (optional)**
As an integration **Owner**, you can access the external app using the service account associated with the business hub. However, to avoid potential conflicts and ensure smooth access, Cerby recommends connecting your external app user account to the business hub, especially if you actively work in the external app.
To connect your external app user account to the business hub so Cerby can manage and protect it, you must complete the following steps:
1. Select the **Accounts** option from the left menu. The **Accounts** page is displayed.
2. Click the **Log in** button of the corresponding business hub card. The \*\*Connect your Hub Account \*\*dialog box is displayed.
3. Enter the login credentials of your external app user account.\
**NOTE:** If you have already added user accounts to Cerby, the dialog box displays these accounts on a list, and you must select one of them to connect it to the app.
4. Click the **Connect account** button. The dialog box closes, and a success message box and a new account card for your user account are displayed.
The next step is [4. Manage unmatched users](#id-4.-manage-unmatched-users), which you must complete from your Cerby dashboard.
### 4. Manage unmatched users
After a check for updates, Cerby matches app members to their Cerby user accounts, including existing guest users and local partners. Manual matching is required for users who cannot be matched automatically.
To view the status of the imported external app users, you must complete the following steps:
1. Select the **Business Hubs** option from the left menu. The **Business Hubs** page is displayed.
2. Click the **More options** (...) icon of the corresponding business hub card. A drop-down menu is displayed.
3. Select the **View Members** option from the menu. The business hub details page is displayed with the **Members** tab activated. The app users are displayed in the following tabs of the **User Overview** section:
* **Unmatched users:** This tab displays the users who were not automatically matched.
* **Onboarded users:** This tab displays the users matched to their Cerby user account.
* **Guest users:** This tab displays the users who were matched to a user account that doesn’t exist in the corporate directory, such as external collaborators.
For unmatched users, you can perform one of the following actions:
* [Match users](#match-users)
* [Remove unmatched users](#remove-unmatched-users)
* [Exempt unmatched users](#exempt-unmatched-users)
The following sections describe each action.
#### Match users
To match users to their corresponding Cerby user account, you must complete the following steps from the **Unmatched users** tab of the business hub details page:
1. Click the **Match user** button of the corresponding user. The **Match user** dialog box is displayed.
2. Enter the Cerby username or email address of the user you want to match and invite in the **Match with** field. The user is displayed on a list.
3. Select the user from the list.
4. Click the **Next** button. The **Select Cerby role** dialog box is displayed.
5. Select the corresponding role of the user on the business hub integration from the Cerby role drop-down menu:
* **Owner**: This role enables sharing access and managing the business hub integration settings in Cerby.
* **Collaborator**: This role enables only logging in to the app through Cerby.
6. Click the **Match user** button. The dialog box closes, and a success message box is displayed. The user is moved to the **Onboarded users** tab.
#### Remove unmatched users
To remove unmatched users from the seat-based or paid social app, you must complete the following steps from the **Unmatched users** tab of the business hub details page:
**IMPORTANT:** When removing an unmatched user, Cerby revokes the user’s seat and permissions in the external app.
1. Click the **More options** (...) icon of the corresponding user. A drop-down menu is displayed.
2. Select the **Remove user** option from the menu. The **Remove user?** dialog box is displayed.
3. Click the **Remove user** button. The dialog box closes, and a success message box is displayed. The user is removed from the external app.
#### Exempt unmatched users
Exempted users keep their user accounts active for the seat-based or paid social app, but you cannot manage them through Cerby.
To exempt unmatched users, you must complete the following steps from the **Unmatched users** tab of the business hub details page
1. Click the **More options** (...) icon of the corresponding user. A drop-down menu is displayed.
2. Select the **Exempt user** option from the menu. The **Exempt user** dialog box is displayed.
3. Enter a reason for exempting the user in the **Provide a reason** field.
4. Click the **Exempt member** button. The dialog box closes, and a success message box is displayed. The user is moved to the **Exempted users** tab.
***
### Use your business hub
The following are the supported features of business hubs you can use:
* [Join your external app and set up your business hub access](https://help.cerby.com/cerby-web-app/business-hubs/join-your-external-app-and-set-up-your-business-hub-access)
* [Add users to your app via a business hub](/setup-and-admin/business-hubs/managing-users-and-assets-via-a-business-hub/add-users-and-teams-to-your-apps-via-a-business-hub)
* [Provision users to your apps via an IdP and business hub](/setup-and-admin/business-hubs/managing-users-and-assets-via-a-business-hub/provision-users-to-your-apps-via-an-idp-and-business-hub)
* [Remove users from your app via a business hub](/setup-and-admin/business-hubs/managing-users-and-assets-via-a-business-hub/remove-users-from-your-app-via-a-business-hub)
* [Remove teams from your app via a business hub](/setup-and-admin/business-hubs/managing-users-and-assets-via-a-business-hub/remove-teams-from-your-app-via-a-business-hub)
* [Deprovision users from your apps via an IdP and business hub](/setup-and-admin/business-hubs/managing-users-and-assets-via-a-business-hub/deprovision-users-from-your-apps-via-an-idp-and-business-hub)
* [Update user roles in your apps via an IdP and business hub](/setup-and-admin/business-hubs/managing-users-and-assets-via-a-business-hub/update-user-roles-in-your-apps-via-an-idp-and-business-hub)
* [Update user roles in your app via a business hub](/setup-and-admin/business-hubs/managing-users-and-assets-via-a-business-hub/update-user-roles-in-your-app-via-a-business-hub)
* [Sync your app users with your business hub](/setup-and-admin/business-hubs/managing-users-and-assets-via-a-business-hub/sync-your-business-hub-with-your-external-app)
* [Protect your app users via a business hub](/setup-and-admin/business-hubs/managing-users-and-assets-via-a-business-hub/protect-your-app-user-accounts-via-a-business-hub)
* [Log in to your app via a business hub](https://help.cerby.com/cerby-web-app/business-hubs/log-in-to-your-app)
* [Track the activity of business hub users](/setup-and-admin/business-hubs/managing-users-and-assets-via-a-business-hub/track-activity-on-app-members-user-accounts)
* [Remove a business hub](/setup-and-admin/business-hubs/managing-your-business-hubs/remove-a-business-hub)
* [Troubleshooting Business Hubs](https://help.cerby.com/tips-and-troubleshooting/troubleshooting/business-hubs/troubleshooting-business-hubs)
# Create a service account for your business hub
This article describes how to create a service account in your app to connect it to your business hub.
{% hint style="info" %}
**Who can use this feature?**
* Workspace **Owners**, **Super Admins**, **Admins**, and **Users**
* Supported using the Cerby web app
{% endhint %}
Service accounts (also known as automation accounts) are user accounts configured in your app with enough permissions to manage users, groups, and roles. These accounts are saved in Cerby and associated with a business hub so that Cerby can use them to perform the following tasks on your behalf:
* Check for updates
* Invite app members
* Update app members’ roles
* Remove app members
{% hint style="danger" %}
**IMPORTANT:** Make sure you create an account with enough management permissions in your app; otherwise, Cerby cannot perform any user and access management tasks.
{% endhint %}
Cerby recommends having dedicated user accounts not tied to a person or human identity to associate them with a business hub as service accounts. The following are some of the reasons why it is not advised to use personal accounts:
* **Operational continuity:** Service accounts are not tied to specific employees, ensuring that integrations remain functional even if personnel changes occur. This stability is crucial for maintaining uninterrupted operations.
* **Enhanced security:** By assigning distinct service accounts for integrations, you can enforce precise access controls and permissions, limiting exposure to sensitive data and reducing the risk of unauthorized access.
* **Improved accountability:** Dedicated service accounts enable better tracking and auditing of integration activities, as actions can be attributed to specific accounts rather than being obscured by shared user credentials.
* **Simplified maintenance:** Service accounts facilitate easier management of credentials and permissions, streamlining the process of updating or rotating passwords without disrupting user access.
This article describes how to create a service account in your app to connect it to your business hub. The following are the different ways in which you can configure the account, depending on your app’s characteristics, user management strategy, and login method:
* [Placeholder account](#placeholder-account)
* [IdP-provisioned account](#idp-provisioned-account)
* [Individual account](#individual-account)
{% hint style="info" %}
**NOTE:** For any configuration, Cerby recommends turning on multi-factor authentication (MFA) for the service account with Cerby authenticator.
{% endhint %}
The following sections describe each configuration.
***
## Placeholder account
A placeholder account (also known as a “ghost account”) is an account added to Cerby for associating it with a Cerby-managed email address and phone number.
As a user with an admin role in your seat-based or paid social app, you can use these login credentials, including a secure password generated by Cerby, to create the app’s user account.
To create and configure a placeholder account, you must complete the following steps:
1. Log in to your [Cerby](https://app.cerby.com/) workspace.
2. Click the **Add item** button located at the top right. A drop-down list is displayed.
3. Select the **Account** option from the drop-down list. The **Add account details** dialog box is displayed.
4. Enter your account information in the corresponding fields:
* **Account label in Cerby:** It is the name to assign to your account in Cerby, and it will be displayed on the account card.
* **App name or URL:** It is the name of the app or service provider to which the account belongs or the login URL.
1. Select the corresponding option from the drop-down list after clicking the input field.
* **Username:** It is the username you use to log in to your account.
1. Enter a dummy value because you’ll replace it later with the Cerby-managed email address.
* **Current password:** It is the password you use to log in to your account.
1. Use the Password Generator in the Cerby browser extension to generate a secure password. For instructions, read the article [How to generate secure passwords using the Cerby browser extension](https://help.cerby.com/cerby-browser-extension/accounts/protecting-your-accounts/generate-secure-passwords).
5. Select the corresponding vault from the **Vault** drop-down list to add the account to it.
**NOTE:** This drop-down list is not displayed if you only have access to one vault.
6. Click the **Add account** button. The dialog box closes, and a success message box and the account details page are displayed.
7. Associate a Cerby-managed email address and phone number with the account. For instructions, see the video [How to add a Cerby-managed email or phone number to your account](https://help.cerby.com/tips-and-troubleshooting/video-gallery/accounts/video-how-to-add-a-cerby-managed-email-or-phone-number-to-your-account).
**IMPORTANT:** After adding the Cerby-managed email address, make sure you update the account details in Cerby. Enter this email address as the value in the **Username** field.
8. Create the user account in your app with the login credentials from the Cerby account.
9. Turn on MFA for your app’s user account with Cerby as an authenticator app. For instructions, read the article [How to turn on MFA managed by Cerby](https://help.cerby.com/cerby-web-app/accounts/protecting-your-accounts/turn-on-mfa-with-cerby-authenticator-for-an-account).
Now you are done. You can connect a business hub for your app.
***
## IdP-provisioned account
An IdP-provisioned account (also known as a federated account) is a user account created and managed by your identity provider (IdP).
These accounts are commonly configured by IT admins. One of the main benefits of this approach is that you can implement stronger authentication and advanced security measures like MFA, comply with standards, and centralize user data in your IdP.
{% hint style="danger" %}
**IMPORTANT:** Create an IdP-provisioned account only for seat-based and paid social apps that support the SAML standard for single sign-on (SSO) authentication. If the app doesn't support it, the automation account will not work.
{% endhint %}
To create and configure an IdP-provisioned account, you must complete the following steps:
1. Log in to your IdP instance.
2. Create a user account.
3. Assign the following apps to the user account in your IdP:
* The Cerby app
* The seat-based or paid social app to be managed by this user account
4. Add this user account to Cerby. For instructions, read the article [Add an account](https://help.cerby.com/cerby-web-app/accounts/managing-your-accounts/add-an-account).
5. Turn on MFA for the user account managed by your IdP with Cerby as an authenticator app. For instructions, read the article [How to turn on MFA managed by Cerby](https://help.cerby.com/cerby-web-app/accounts/protecting-your-accounts/turn-on-mfa-with-cerby-authenticator-for-an-account).
Now you are done. You can connect a business hub for your app.
***
## Individual account
An individual account (also known as a profile account) is an account directly created by a user on an app or service provider using their corporate login credentials, such as email address and phone number.
Sometimes, especially in paid social apps, users keep their existing personal accounts to access the apps managed by their organization. In such a case, Cerby recommends creating a new account with corporate login credentials.
To create and configure an individual account, you must complete the following steps:
1. Add your personal account to Cerby. For instructions, read the article [Add an account](https://help.cerby.com/cerby-web-app/accounts/managing-your-accounts/add-an-account).
2. Associate a Cerby-managed email address and phone number with the account. For instructions, read the articles [Set up and associate a Cerby-managed email address for your account ](https://help.cerby.com/cerby-web-app/accounts/managing-your-accounts/set-up-and-associate-a-cerby-managed-email-address-for-your-account)and [Set up and associate a Cerby-managed phone number for your account](https://help.cerby.com/cerby-web-app/accounts/managing-your-accounts/set-up-and-associate-a-cerby-managed-phone-number-for-your-account).
**NOTE:** Cerby recommends you use the Cerby-managed email address as the value in the **Username** field.
3. Turn on MFA for your app’s user account with Cerby as an authenticator app. For instructions, read the article [How to turn on MFA managed by Cerby](https://help.cerby.com/cerby-web-app/accounts/protecting-your-accounts/turn-on-mfa-with-cerby-authenticator-for-an-account).
Now you are done. You can connect a business hub for your app.
# Retrieve the business ID from your app
This article describes how to retrieve the Business ID required to connect your disconnected apps to Cerby.
When connecting an external app to Cerby for identity lifecycle management, you might be asked to provide a Business ID. This ID corresponds to the specific collaboration space of the seat-based or paid social app you want to connect, and Cerby uses to determine which collaboration space's data to interact with and the scope of the permissions granted to users.
Depending on the app, this identifier may appear under different names, including Account ID, Tenant ID, Manager ID, Organization ID, or Team ID.
Providing the correct Business ID is essential to ensure that Cerby accesses the intended target in your external app to start executing automation. Therefore, you can prevent mistakes when your organization connects multiple integrations for the same external app.
Commonly, you can find the ID using the following methods:
* [From the address bar](#from-the-address-bar)
* [From the user interface](#from-the-user-interface)
The following sections describe each method.
{% hint style="danger" %}
**IMPORTANT:** Each business hub handles Business IDs differently. The examples in this article are intended as general guidance. For app-specific articles and videos, visit the [Connecting business hubs for your apps](https://help.cerby.com/setup-and-admin/business-hubs/connecting-your-apps) and [Connecting business hubs for your paid social apps](https://help.cerby.com/setup-and-admin/business-hubs/connecting-your-paid-social-apps) collections in the Cerby Help Center.
{% endhint %}
***
## From the address bar
After you log in to your app, sometimes the ID is displayed in the address bar as part of the URL. Depending on the app, it can appear in the subdomain, path, or query parameters. The following are examples of how different external apps display the ID:
* [**Productboard**](/setup-and-admin/business-hubs/connecting-your-apps/connect-a-business-hub-for-productboard) : The workspace identifier appears as the subdomain. For example, **`cerby-poc`** in **`cerby-poc.productboard.com`**.
* [**Asana**](/setup-and-admin/business-hubs/connecting-your-apps/connect-a-business-hub-for-asana) : The workspace identifier is displayed in the path between the **`admin`** and **`insights`** directories. For example, **`1209392144075813`** in **`https://app.asana.com/admin/1209392144075813/insights`**.
* [**Built In**](/setup-and-admin/business-hubs/connecting-your-apps/connect-a-business-hub-for-built-in)**: The company identifier is included as a query parameter. For example,`0123` in`https://builtin.com/employer/company-admin?selectedCompanyId=0123`.**
***
## From the user interface
After logging in to your app, you can often find the ID by navigating to the settings or business information page. The ID is usually listed in the account details or organization information section. The following are examples of how different external apps display the ID:
* [**Google Ads Manager**](/setup-and-admin/business-hubs/connecting-your-paid-social-apps/google-marketing-suite/connect-a-business-hub-for-a-google-ads-manager-account)**:** The identifier corresponds to the MCC ID, which is the 10-digit number shown in the top-right corner of your Google Ads Manager account, next to your profile, as shown in **Figure 1.**
Figure 1. MCC ID in Google Ads
* [**JetBrains**](/setup-and-admin/business-hubs/connecting-your-apps/connect-a-business-hub-for-jetbrains)**:** The identifier corresponds to the organization's customer ID, which is the number next to the organization's name, as shown in **Figure 2**.
Figure 2. Customer ID on the JetBrains account page
* [**OneSignal**](/setup-and-admin/business-hubs/connecting-your-apps/connect-a-business-hub-for-onesignal)**:** The identifier corresponds to the organization name listed in the **Organizations** page, as shown in **Figure 3**.
Figure 3. Organization name in the OneSignal Organizations page
# Connect a business hub for 10bis
This article describes how to connect a business hub to centrally manage the users of 10bis from Cerby.
{% hint style="info" %}
**Who can use this feature?**
* Workspace **Owners**, **Super Admins**, **Admins**, and **Users**
* Only supported using the Cerby web app
{% endhint %}
As a user with any workspace role in Cerby, except **Guest User** and **Login-Only**, you can connect a business hub integration to centrally manage the users of 10bis.
When you connect the business hub, you become its **Owner**, and you can perform the following user and access management tasks through automated tasks executed by the Cerby agent:
* Check for updates
* Invite app members
* Update app members' group
* Remove app members
{% hint style="success" %}
**TIP:** For more details about the automated tasks of a business hub, how it works, and the supported apps, read the article [Explore Apps](https://help.cerby.com/setup-and-admin/business-hubs/business-hub-catalog).
{% endhint %}
{% hint style="info" %}
**NOTE:** Updating app members’ roles is not available for this business hub because 10bis doesn’t support roles. However, you can update your app members' group via an automation task triggered from Cerby.
This task receives from the Cerby platform a list of users and groups to reassign. The Cerby agent updates the group of each user in your 10bis.
{% endhint %}
This article provides instructions on how to connect a business hub for 10bis. For other app-specific articles and videos, review the [Connecting your business hubs](https://help.cerby.com/setup-and-admin/business-hubs/connecting-your-apps) collection in the Cerby Help Center.
***
## Requirements
The following are the requirements to connect a business hub:
* A Cerby workspace
* A Cerby user account with the **Owner**, **Super Admin**, **Admin**, or **User** role
* Groups configured in your identity provider (IdP) if you want to leverage automatic user provisioning and deprovisioning from your apps based on group assignment events. For more information, read the article [Provision users to your apps via an IdP and business hub](https://help.cerby.com/setup-and-admin/business-hubs/managing-users-and-assets-via-a-business-hub/provision-users-to-your-apps-via-an-idp-and-business-hub)
* An automation account, meaning an active user account in 10bis to be used as a service account. For instructions and recommendations on how to create and configure this account, read the article [Create a service account for your business hub](https://help.cerby.com/setup-and-admin/business-hubs/connecting-your-apps/create-a-service-account-for-your-business-hub)
* The user management and login method for your business hub identified to select the corresponding option when connecting your app. For more information, read the **User management and login method** section of the article [Explore Apps](https://help.cerby.com/setup-and-admin/business-hubs/business-hub-catalog)
***
## Connect a business hub for 10bis
To connect a business hub for 10bis, you must complete the following main steps from the Cerby web app dashboard:
1. [Add a business hub and connect it to 10bis](#id-1.-add-a-business-hub-and-connect-it-to-10bis)
2. [Check for updates to import users and roles to Cerby](#id-2.-check-for-updates-to-import-users-and-roles-to-cerby)
3. [Connect your 10bis user account to the business hub](#id-3.-connect-your-10bis-user-account-to-the-business-hub)
4. [Manage unmatched users](#id-4.-manage-unmatched-users)
The following sections describe each main step.
### 1. Add a business hub and connect it to 10bis
To add a business hub and connect it to 10bis, you must complete the following steps:
1. Log in to your corresponding [Cerby](https://app.cerby.com/) workspace.
2. Select the **Business Hubs** option from the left navigation drawer. The **Business Hubs** page is displayed.
3. Click the **Connect Business Hub** button located at the top-right corner of the page. The **Connect your Business Hubs to Cerby** dialog box is displayed. **TIP:** Select the **Don’t show this again** option to skip this step the next time you connect a new business hub.
4. Click the **Get started** button. A wizard is displayed on the **Select app** page.
5. Select **10bis Hub** from the catalog. The **Enter app details** page is displayed on the wizard.
6. Enter and select your app information in the corresponding fields:
* **Label in Cerby:** It is the name to assign to your business hub in Cerby, and it will be displayed on the business hub card.
* **Unique name:** It is a unique identifier that differentiates your business hub in Cerby from others for the same app. You can assign an alphanumeric value between 3 and 30 characters without symbols or special characters.
* **User management and login method:** It is the way your users log in to the app and determines whether they must save their login credentials as a Cerby account connected to the business hub. You must select one of the following methods:
* **Single sign-on (SSO):** Access is managed by your identity provider, and users log in with SSO authentication. They are not asked to save their credentials in Cerby.
* **Username and password:** Cerby manages account security and access, and users log in with their credentials after saving them in Cerby.
7. Click the **Next** button. The **Select automation account** page is displayed with a list of existing 10bis accounts.
8. Select the automation account you have previously added to Cerby, as described in the [Requirements](#requirements) section. **NOTE:** If you don’t have an automation account, you are prompted to add it. Make sure you read Cerby’s recommendations on how to configure it in the article [Create a service account for your business hub](https://help.cerby.com/setup-and-admin/business-hubs/connecting-your-apps/create-a-service-account-for-your-business-hub). You may need to add the account first and then add the business hub.
9. Click the **Connect app** button. The wizard closes, and a success message box is displayed. The corresponding business hub is also displayed on the **Business Hubs** page
The next step is [2. Check for updates to import users and roles to Cerby](#id-2.-check-for-updates-to-import-users-and-roles-to-cerby).
### 2. Check for updates to import users and roles to Cerby
To check for updates in your app to identify and import users and roles to Cerby, you must complete the following steps:
1. Select the **Business Hubs** option from the left navigation drawer. The **Business Hubs** page is displayed.
2. Click the **Settings** () icon of the corresponding business hub card. The business hub details page is displayed with the **Settings** tab activated.
3. Click the **Check for updates** button located at the top right of the page. A message box is displayed with information about the process. **NOTE:** The check and import process may take a few minutes depending on the number of users, and because Cerby automatically matches users to their corresponding Cerby user account.
4. Confirm that the automated task to check for updates has the “Completed” status by performing any of the following actions:
* Click the **More details** button from the message box.
* Select the **Automation** option from the left navigation drawer to open the **Automation** page with a list of automated tasks and their status.
{% hint style="info" %}
**NOTE:** Cerby automatically performs daily checks for updates for all business hubs, but you can trigger them manually, as described in this section. When a user is deprovisioned from an IdP and a check for updates is performed, Cerby generates a report and sends business hub **Owners** an email to confirm their removal from the app. For more instructions, read the article [Check for updates in your app and apply report](/setup-and-admin/business-hubs/managing-users-and-assets-via-a-business-hub/sync-your-business-hub-with-your-external-app).
{% endhint %}
The next step is [3. Connect your 10bis user account to the business hub](#id-3.-connect-your-10bis-user-account-to-the-business-hub).
### 3. Connect your 10bis user account to the business hub
To connect your 10bis user account to the business hub so Cerby can manage and protect it, you must complete the following steps:
1. Select the **Accounts** option from the left navigation drawer. The **Accounts** page is displayed.
2. Click the **Log in** button of the corresponding 10bis Hub account card. The **Connect your 10bis Hub Account** dialog box is displayed.
3. Enter the login credentials of your **10bis** user account.
4. Click the **Connect account** button. The dialog box closes, and a success message box and a new account card are displayed.
The next step is [4. Manage unmatched users](#id-4.-manage-unmatched-users).
### 4. Manage unmatched users
During a check for updates, Cerby automatically matches app members to the Cerby user accounts that correspond to their email addresses, including existing [guest users](https://help.cerby.com/getting-started/concepts/user-management/guest-users) and [local partners](https://help.cerby.com/getting-started/concepts/user-management/partners#h-7e4add33a2). Manual matching is required when apps don't provide email addresses and for app members using personal or external accounts that couldn’t be identified or are not in the corporate directory.
To view the status of the imported app members, you must complete the following steps:
1. Select the **Business Hubs** option from the left navigation drawer. The **Business Hubs** page is displayed.
2. Click the **More options** (...) icon of the corresponding business hub card. A drop-down list is displayed.
3. Select the **View Members** option from the list. The business hub details page is displayed with the **Members** tab activated. App members are displayed in the following tabs of the **User Overview** section:
* **Unmatched users:** This tab displays the users who were not automatically matched.
* **Onboarded users:** This tab displays the users matched to their Cerby user account.
* **Guest users:** This tab displays the users who were matched to an existing Cerby user account but it doesn’t exist in the corporate directory, such as external collaborators.
For unmatched users, you can perform one of the following actions:
* [Match users](#match-users)
* [Remove unmatched users](#remove-unmatched-users)
* [Exempt unmatched users](#exempt-unmatched-users)
The following sections describe each action.
#### Match users
To match users, you must complete the following steps from the **Unmatched users** tab of the business hub details page:
1. Click the **Match user** button of the corresponding user. The **Match user** dialog box is displayed.
2. Enter the username or email address of the user you want to match and invite in the **Match with** field. The user is displayed on a list.
3. Select the user from the list.
4. Click the **Next** button. The **Select Cerby role** dialog box is displayed.
5. Select the role to assign to the user on the business hub **Cerby role** drop-down list:
* **Owner:** This role enables sharing access and managing business hub settings in Cerby.
* **Collaborator:** This role enables only logging in to the app from Cerby.
6. Click the **Match user** button. The dialog box closes, and a success message box is displayed. The user is moved to the **Onboarded users** tab.
#### Remove unmatched users
To remove unmatched users, you must complete the following steps from the **Unmatched users** tab of the business hub details page:
{% hint style="danger" %}
**IMPORTANT:** When removing an unmatched user, Cerby performs an automated task to revoke the user’s seat and permissions in 10bis.
{% endhint %}
1. Click the **More options** (...) icon of the corresponding user. A drop-down list is displayed.
2. Select the **Remove user** option from the list. The **Remove user?** dialog box is displayed.
3. Click the **Remove user** button. The dialog box closes, and a success message box is displayed. The user is removed from the app via an automated task.
#### Exempt unmatched users
Exempted users keep their user accounts or seats active in your app, but you cannot manage them through Cerby.
To exempt unmatched users, you must complete the following steps from the **Unmatched users** tab of the business hub details page:
1. Click the **More options** (...) icon of the corresponding user. A drop-down list is displayed.
2. Select the **Exempt user** option from the list. The exempt user dialog box is displayed.
3. Enter a reason for exempting the user in the **Provide a reason** field.
4. Click the **Exempt member** button. The dialog box closes, and a success message box is displayed. The user is moved to the **Exempted users** tab.
***
## Use your business hub
The following are the supported features of business hubs you can use:
* [Join the App and connect it to Cerby](https://help.cerby.com/cerby-web-app/business-hubs/join-your-external-app-and-set-up-your-business-hub-access)
* [Invite new app members](/setup-and-admin/business-hubs/managing-users-and-assets-via-a-business-hub/add-users-and-teams-to-your-apps-via-a-business-hub)
* [Remove app members](/setup-and-admin/business-hubs/managing-users-and-assets-via-a-business-hub/remove-users-from-your-app-via-a-business-hub)
* [Provision users to your apps via an IdP and business hub](https://help.cerby.com/setup-and-admin/business-hubs/managing-users-and-assets-via-a-business-hub/provision-users-to-your-apps-via-an-idp-and-business-hub)
* [Update the app members’ roles](/setup-and-admin/business-hubs/managing-users-and-assets-via-a-business-hub/update-user-roles-in-your-app-via-a-business-hub)
* [Check for updates in your app and apply report](/setup-and-admin/business-hubs/managing-users-and-assets-via-a-business-hub/sync-your-business-hub-with-your-external-app)
* [Re-assign the app members’ user accounts](https://github.com/cerbyinc/help-center/tree/main/.uncategorized/unpublished-deprecated-re-assign-the-app-members-user-accounts.md)
* [Log in to your app](https://help.cerby.com/cerby-web-app/business-hubs/log-in-to-your-app)
* [Track activity on app members’ user accounts](/setup-and-admin/business-hubs/managing-users-and-assets-via-a-business-hub/track-activity-on-app-members-user-accounts)
* [Remove an App](/setup-and-admin/business-hubs/managing-your-business-hubs/remove-a-business-hub)
# Connect a business hub for 1Password Business
This article describes how to connect a business hub to centrally manage the users of 1Password Business from Cerby.
{% hint style="info" %}
**Who can use this feature?**
* Workspace **Owners**, **Super Admins**, **Admins**, and **Users**
* Only supported using the Cerby web app
{% endhint %}
As a user with any workspace role in Cerby, except **Guest User** and **Login-Only**, you can connect a business hub integration to centrally manage the users of 1Password Business.
When you connect the business hub, you become its **Owner**, and you can perform the following user and access management tasks through automated tasks executed by the Cerby agent:
* Check for updates
* Add users
* Update user roles
* Remove users
{% hint style="success" %}
**TIP:** For more details about the automated tasks of a business hub, how it works, and the supported apps, read the article [Explore Business Hubs](https://help.cerby.com/setup-and-admin/business-hubs/business-hub-catalog).
{% endhint %}
This article provides instructions on how to connect a business hub for 1Password Business. For other app-specific articles and videos, review the [Connecting business hubs for your apps](https://help.cerby.com/setup-and-admin/business-hubs/connecting-your-apps) and [Connecting business hubs for your paid social apps](https://help.cerby.com/setup-and-admin/business-hubs/connecting-your-paid-social-apps) collections in the Cerby Help Center.
***
## Requirements
The following are the requirements to connect a business hub:
* A Cerby workspace
* A Cerby user account with the workspace **Owner**, **Super Admin**, **Admin**, or **User** role
* A team in 1Password Business
* Groups configured in your identity provider (IdP) if you want to leverage automatic user provisioning and deprovisioning from your apps based on group assignment events. For more information, read the articles available in the [Managing users via an IdP and business hub](https://help.cerby.com/setup-and-admin/business-hubs/managing-users-and-assets-via-a-business-hub) collection in the Cerby Help Center
* An automation account, meaning an active user account with a native **Administrator** role in 1Password Business to be used as a service account. For instructions and recommendations on how to create and configure this account, read the article [Create a service account for your business hub](/setup-and-admin/business-hubs/connecting-your-apps/create-a-service-account-for-your-business-hub)
* A Business unique identifier. You can find the ID in the address bar when you are logged in to 1Password Business. The ID is displayed before **`.1password.com`** in the URL. For example, **`cerby`** in **`https://cerby.1password.com/people`**. Just copy the value and paste it when connecting the business hub.
***
## Connect a business hub for 1Password Business
To connect a business hub for 1Password Business, you must complete the following main steps from the Cerby web app dashboard:
1. [Add a business hub and connect it to 1Password Business](#id-1.-add-a-business-hub-and-connect-it-to-1password-business)
2. [Check for updates to import users and roles to Cerby](#id-2.-check-for-updates-to-import-users-and-roles-to-cerby)
3. [Connect your 1Password Business user account to the business hub](#id-3.-connect-your-1password-business-user-account-to-the-business-hub)
4. [Manage unmatched users](#id-4.-manage-unmatched-users)
The following sections describe each main step.
### 1. Add a business hub and connect it to 1Password Business
To add a business hub and connect it to 1Password Business, you must complete the following steps:
1. Log in to your corresponding [Cerby](https://app.cerby.com/) workspace.
2. Select the **Business Hubs** option from the left menu. The **Business Hubs** page is displayed.
3. Click the **Connect Business Hub** button located at the top-right corner of the page. The **Connect your Business Hubs to Cerby** dialog box is displayed. **TIP:** Select the **Don’t show this again** option to skip this step the next time you connect a new business hub.
4. Click the **Get started** button. A wizard is displayed on the **Select app** page.
5. Select **1Password Hub** from the catalog. The **Enter app details** page is displayed on the wizard.
6. Enter and select your app information in the corresponding fields:
* **Label in Cerby:** It is the name to assign to your business hub in Cerby, and it will be displayed on the business hub card.
* **Business unique identifier:** It is the unique identifier of your business or organization in **1Password Hub**. For instructions on how to find it, read the [Requirements](#requirements) section.
* **User management and login method:** It is the way your users log in to the app and determines whether they must save their login credentials as a Cerby account connected to the business hub.
1. Select the **Username and password** option because account security and access are managed by Cerby, and users log in with their credentials after saving them in Cerby. **IMPORTANT:** The Single sign-on (SSO) option is not supported by 1Password Business.
7. Click the **Next** button. The **Select automation account** page is displayed with a list of existing 1Password Business accounts.
8. Select the automation account you have previously added to Cerby, as described in the [Requirements](#requirements) section. **NOTE:** If you don’t have an automation account, you are prompted to add it. Make sure you read Cerby’s recommendations on how to configure it in the article [Create a service account for your business hub](/setup-and-admin/business-hubs/connecting-your-apps/create-a-service-account-for-your-business-hub). You may need to add the account first and then add the business hub.
9. Click the **Connect app** button. The wizard closes, and a success message box is displayed. The corresponding business hub is also displayed on the **Business Hubs** page.
The next step is [2. Check for updates to import users and roles to Cerby](#id-2.-check-for-updates-to-import-users-and-roles-to-cerby).
### 2. Check for updates to import users and roles to Cerby
To check for updates in your app to identify and import users and roles to Cerby, you must complete the following steps:
1. Select the **Business Hubs** option from the left menu. The **Business Hubs** page is displayed.
2. Click the **More options** (...) icon of the corresponding business hub card. A drop-down menu is displayed.
3. Select the **Settings** option from the menu. The business hub details page is displayed with the **Settings** tab activated.
4. Click the **Check for updates** button located at the top right of the page. A message box is displayed with information about the process. **NOTE:** The check and import process may take a few minutes depending on the number of users, and because Cerby automatically matches users to their corresponding Cerby user account.
5. Confirm that the automated task to check for updates has the “Completed” status by performing any of the following actions:
* Click the **More details** button from the message box.
* Select the **Automation** option from the left menu to open the **Automation** page with a list of automated tasks and their status.
{% hint style="info" %}
**NOTE:** Cerby automatically performs daily checks for updates for all business hubs, but you can trigger them manually, as described in this section. For more instructions, read the article [Sync your app users with your business hub](/setup-and-admin/business-hubs/managing-users-and-assets-via-a-business-hub/sync-your-business-hub-with-your-external-app).
{% endhint %}
The next step is [3. Connect your 1Password Business user account to the business hub](#id-3.-connect-your-1password-business-user-account-to-the-business-hub).
### 3. Connect your 1Password Business user account to the business hub
To connect your 1Password Business user account to the business hub so Cerby can manage and protect it, you must complete the following steps:
1. Select the **Accounts** option from the left menu. The **Accounts** page is displayed.
2. Click the **Log in** button of the corresponding 1Password Hub account card. The **Connect your 1Password Hub Account** dialog box is displayed.
3. Enter the login credentials of your **1Password Business** user account.
4. Click the **Connect account** button. The dialog box closes, and a success message box and a new account card are displayed.
The next step is [4. Manage unmatched users](#id-4.-manage-unmatched-users).
### 4. Manage unmatched users
During a check for updates, Cerby automatically matches app members to the Cerby user accounts that correspond to their email addresses, including existing [guest users](https://help.cerby.com/getting-started/concepts/user-management/guest-users) and [local partners](https://help.cerby.com/getting-started/concepts/user-management/partners#h-7e4add33a2). Manual matching is required when apps don't provide email addresses and for app members using personal or external accounts that couldn’t be identified or are not in the corporate directory.
To view the status of the imported app members, you must complete the following steps:
1. Select the **Business Hubs** option from the left menu. The **Business Hubs** page is displayed.
2. Click the **More options** (...) icon of the corresponding business hub card. A drop-down menu is displayed.
3. Select the **View Members** option from the menu. The business hub details page is displayed with the **Members** tab activated. App members are displayed in the following tabs of the **User Overview** section:
* **Unmatched users:** This tab displays the users who were not automatically matched.
* **Onboarded users:** This tab displays the users matched to their Cerby user account.
* **Guest users:** This tab displays the users who were matched to an existing Cerby user account but it doesn’t exist in the corporate directory, such as external collaborators.
For unmatched users, you can perform one of the following actions:
* [Match users](#match-users)
* [Remove unmatched users](#remove-unmatched-users)
* [Exempt unmatched users](#exempt-unmatched-users)
The following sections describe each action.
#### Match users
To match users, you must complete the following steps from the **Unmatched users** tab of the business hub details page:
1. Click the **Match user** button of the corresponding user. The **Match user** dialog box is displayed.
2. Enter the username or email address of the user you want to match and invite in the **Match with** field. The user is displayed on a list.
3. Select the user from the list.
4. Click the **Next** button. The **Select Cerby role** dialog box is displayed.
5. Select the role to assign to the user on the business hub **Cerby role** drop-down menu:
* **Owner:** This role enables sharing access and managing business hub settings in Cerby.
* **Collaborator:** This role enables only logging in to the app from Cerby.
6. Click the **Match user** button. The dialog box closes, and a success message box is displayed. The user is moved to the **Onboarded users** tab.
#### Remove unmatched users
To remove unmatched users, you must complete the following steps from the **Unmatched users** tab of the business hub details page:
{% hint style="danger" %}
**IMPORTANT:** When removing an unmatched user, Cerby performs an automated task to revoke the user’s seat and permissions in 1Password Business.
{% endhint %}
1. Click the **More options** (...) icon of the corresponding user. A drop-down menu is displayed.
2. Select the **Remove user** option from the menu. The **Remove user?** dialog box is displayed.
3. Click the **Remove user** button. The dialog box closes, and a success message box is displayed. The user is removed from the app via an automated task.
#### Exempt unmatched users
Exempted users keep their user accounts or seats active in your app, but you cannot manage them through Cerby.
To exempt unmatched users, you must complete the following steps from the **Unmatched users** tab of the business hub details page:
1. Click the **More options** (...) icon of the corresponding user. A drop-down menu is displayed.
2. Select the **Exempt user** option from the menu. The exempt user dialog box is displayed.
3. Enter a reason for exempting the user in the **Provide a reason** field.
4. Click the **Exempt member** button. The dialog box closes, and a success message box is displayed. The user is moved to the **Exempted users** tab.
***
## Use your business hub
The following are the supported features of business hubs you can use:
* [Join the external app and set up your business hub access](https://help.cerby.com/cerby-web-app/business-hubs/join-your-external-app-and-set-up-your-business-hub-access)
* [Add users to your app via a business hub](/setup-and-admin/business-hubs/managing-users-and-assets-via-a-business-hub/add-users-and-teams-to-your-apps-via-a-business-hub)
* [Provision users to your apps via an IdP and business hub](/setup-and-admin/business-hubs/managing-users-and-assets-via-a-business-hub/provision-users-to-your-apps-via-an-idp-and-business-hub)
* [Remove users from your app via a business hub](/setup-and-admin/business-hubs/managing-users-and-assets-via-a-business-hub/remove-users-from-your-app-via-a-business-hub)
* [Remove teams from your app via a business hub](/setup-and-admin/business-hubs/managing-users-and-assets-via-a-business-hub/remove-teams-from-your-app-via-a-business-hub)
* [Deprovision users from your apps via an IdP and business hub](/setup-and-admin/business-hubs/managing-users-and-assets-via-a-business-hub/deprovision-users-from-your-apps-via-an-idp-and-business-hub)
* [Update user roles in your app via a business hub](/setup-and-admin/business-hubs/managing-users-and-assets-via-a-business-hub/update-user-roles-in-your-app-via-a-business-hub)
* [Update user roles in your apps via an IdP and business hub](/setup-and-admin/business-hubs/managing-users-and-assets-via-a-business-hub/update-user-roles-in-your-apps-via-an-idp-and-business-hub)
* [Sync your app users with your business hub](/setup-and-admin/business-hubs/managing-users-and-assets-via-a-business-hub/sync-your-business-hub-with-your-external-app)
* [Log in to your app via a business hub](https://help.cerby.com/cerby-web-app/business-hubs/log-in-to-your-app)
* [Track the activity of business hub users](/setup-and-admin/business-hubs/managing-users-and-assets-via-a-business-hub/track-activity-on-app-members-user-accounts)
* [Remove a business hub](/setup-and-admin/business-hubs/managing-your-business-hubs/remove-a-business-hub)
# Connect a business hub for 6sense
This article describes how to connect a business hub to centrally manage the users of 6sense from Cerby.
{% hint style="info" %}
**Who can use this feature?**
* Workspace **Owners**, **Super Admins**, **Admins**, and **Users**
* Only supported using the Cerby web app
{% endhint %}
As a user with any workspace role in Cerby, except **Guest User** and **Login-Only**, you can connect a business hub integration to centrally manage the users of 6sense.
When you connect the business hub, you become its **Owner**, and you can perform the following user and access management tasks through automated tasks executed by the Cerby agent:
* Check for updates
* Update user roles
* Remove users
{% hint style="success" %}
**TIP:** For more details about the automated tasks of a business hub, how it works, and the supported apps, read the article [Explore Business Hubs](https://help.cerby.com/setup-and-admin/business-hubs/business-hub-catalog).
{% endhint %}
{% hint style="info" %}
**NOTE:** The automated task to **add users** is not available for this business hub because 6sense uses Just-In-Time (JIT)\*\*\*\* provisioning, which automatically creates user accounts when they first sign in.
{% endhint %}
This article provides instructions on how to connect a business hub for 6sense. For other app-specific articles and videos, review the [Connecting business hubs for your apps](https://help.cerby.com/setup-and-admin/business-hubs/connecting-your-apps) and [Connecting business hubs for your paid social apps](https://help.cerby.com/setup-and-admin/business-hubs/connecting-your-paid-social-apps) collections in the Cerby Help Center.
***
## Requirements
The following are the requirements to connect a business hub:
* A Cerby workspace
* A Cerby user account with the **Owner**, **Super Admin**, **Admin**, or **User** role
* An organization in 6sense
* Groups configured in your identity provider (IdP) if you want to leverage automatic user provisioning and deprovisioning from your apps based on group assignment events. For more information, read the articles available in the [Managing users via an IdP and business hub](https://help.cerby.com/setup-and-admin/business-hubs/managing-users-and-assets-via-a-business-hub) collection in the Cerby Help Center
* An automation account, meaning an active user account with enough permissions to manage users, groups, and roles in 6sense, to be used as a service account. For instructions and recommendations on how to create and configure this account, read the article [Create a service account for your business hub](/setup-and-admin/business-hubs/connecting-your-apps/create-a-service-account-for-your-business-hub)
* The user management and login method for your business hub identified to select the corresponding option when connecting your app. For more information, read the **User management and login method** section of the article [Explore Business Hubs](https://help.cerby.com/setup-and-admin/business-hubs/business-hub-catalog)
* A business URL subdomain. You can find the subdomain in the address bar when you are logged in to 6sense. For example, **`cerby`** in **`https://cerby.workflows.6sense.com`**. Just copy the value and paste it when connecting the business hub.
***
## Connect a business hub for 6sense
To connect a business hub for 6sense, you must complete the following main steps from the Cerby web app dashboard:
1. [Add a business hub and connect it to 6sense](#id-1.-add-a-business-hub-and-connect-it-to-6sense)
2. [Check for updates to import users and roles to Cerby](#id-2.-check-for-updates-to-import-users-and-roles-to-cerby)
3. [Connect your 6sense user account to the business hub](#id-3.-connect-your-6sense-user-account-to-the-business-hub)
4. [Manage unmatched users](#id-4.-manage-unmatched-users)
The following sections describe each main step.
### 1. Add a business hub and connect it to 6sense
To add a business hub and connect it to 6sense, you must complete the following steps:
1. Log in to your corresponding [Cerby](https://app.cerby.com/) workspace.
2. Select the **Business Hubs** option from the left menu. The **Business Hubs** page is displayed.
3. Click the **Connect Business Hub** button located at the top-right corner of the page. The **Connect your Business Hubs to Cerby** dialog box is displayed. **TIP:** Select the **Don’t show this again** option to skip this step the next time you connect a new business hub.
4. Click the **Get started** button. A wizard is displayed on the **Select app** page.
5. Select **6sense Hub** from the catalog. The **Enter app details** page is displayed on the wizard.
6. Enter and select your app information in the corresponding fields:
* **Label in Cerby:** It is the name to assign to your business hub in Cerby, and it will be displayed on the business hub card.
* **Business URL subdomain:** It is the unique identifier of your business or organization in **6sense Hub**. For instructions on how to find it, read the [Requirements](#requirements) section.
* **User management and login method:** It is the way your users log in to the app and determines whether they must save their login credentials as a Cerby account connected to the business hub.
1. Select the **Single sign-on (SSO)** option because access must be managed by your IdP, and users log in with SSO authentication. They are not asked to save their credentials in Cerby. **IMPORTANT** : The **Username and password** option is not supported for 6sense.
7. Click the **Next** button. The **Select automation account** page is displayed with a list of existing 6sense accounts.
8. Select the automation account you have previously added to Cerby, as described in the [Requirements](#requirements) section. **NOTE:** If you don’t have an automation account, you are prompted to add it. Make sure you read Cerby’s recommendations on how to configure it in the article [Create a service account for your business hub](https://help.cerby.com/setup-and-admin/business-hubs/connecting-your-apps/create-a-service-account-for-your-business-hub). You may need to add the account first and then add the business hub.
9. Click the **Connect app** button. The wizard closes, and a success message box is displayed. The corresponding business hub is also displayed on the **Business Hubs** page
The next step is [2. Check for updates to import users and roles to Cerby](/setup-and-admin/business-hubs/connecting-your-apps/connect-a-business-hub-for-your-app#h-9c6531cf9a).
### 2. Check for updates to import users and roles to Cerby
To check for updates in your app to identify and import users and roles to Cerby, you must complete the following steps:
1. Select the **Business Hubs** option from the left menu. The **Business Hubs** page is displayed.
2. Click the **More options** (...) icon of the corresponding business hub card. A drop-down menu is displayed.
3. Select the **Settings** option from the menu. The business hub details page is displayed with the **Settings** tab activated.
4. Click the **Sync** button located at the top right of the page. A message box is displayed with information about the process. **NOTE:** The check and import process may take a few minutes, depending on the number of users, and because Cerby automatically matches users to their corresponding Cerby user account.
5. Confirm that the automated task to check for updates has the “Completed” status by performing any of the following actions:
* Click the **More details** button in the message box.
* Select the **Automation** option from the left menu to open the **Automation** page with a list of automated tasks and their status.
{% hint style="info" %}
**NOTE:** Cerby automatically performs daily checks for updates for all business hubs, but you can trigger them manually, as described in this section. For more instructions, read the article [Sync your app users with your business hub](/setup-and-admin/business-hubs/managing-users-and-assets-via-a-business-hub/sync-your-business-hub-with-your-external-app).
{% endhint %}
The next step is [3. Connect your 6sense user account to the business hub](#id-3.-connect-your-6sense-user-account-to-the-business-hub).
### 3. Connect your 6sense user account to the business hub
To connect your 6sense user account to the business hub so Cerby can manage and protect it, you must complete the following steps:
1. Select the **Accounts** option from the left menu. The **All accounts** page is displayed.
2. Click the **Log in** button of the corresponding 6sense Hub account card. The **Connect your 6sense Hub Account** dialog box is displayed.
3. Enter the login credentials of your **6sense** user account.
4. Click the **Connect account** button. The dialog box closes, and a success message box and a new account card are displayed.
The next step is [4. Manage unmatched users](#id-4.-manage-unmatched-users).
### 4. Manage unmatched users
During a check for updates, Cerby automatically matches app members to the Cerby user accounts that correspond to their email addresses, including existing [guest users](https://help.cerby.com/getting-started/concepts/user-management/guest-users) and [local partners](https://help.cerby.com/getting-started/concepts/user-management/partners#h-7e4add33a2). Manual matching is required when apps don't provide email addresses and for app members using personal or external accounts that couldn’t be identified or are not in the corporate directory.
To view the status of the imported app members, you must complete the following steps:
1. Select the **Business Hubs** option from the left menu. The **Business Hubs** page is displayed.
2. Click the **More options** (...) icon of the corresponding business hub card. A drop-down menu is displayed.
3. Select the **View Members** option from the menu. The business hub details page is displayed with the **Members** tab activated. App members are displayed in the following tabs of the **User Overview** section:
* **Unmatched users:** This tab displays the users who were not automatically matched.
* **Onboarded users:** This tab displays the users matched to their Cerby user account.
* **Guest users:** This tab displays the users who were matched to an existing Cerby user account, but it doesn’t exist in the corporate directory, such as external collaborators.
For unmatched users, you can perform one of the following actions:
* [Match users](#match-users)
* [Remove unmatched users](#remove-unmatched-users)
* [Exempt unmatched users](#exempt-unmatched-users)
The following sections describe each action.
#### Match users
To match users, you must complete the following steps from the **Unmatched users** tab of the business hub details page:
1. Click the **Match user** button of the corresponding user. The **Match user** dialog box is displayed.
2. Enter the username or email address of the user you want to match and invite in the **Match with** field. The user is displayed on a list.
3. Select the user from the list.
4. Click the **Next** button. The **Select Cerby role** dialog box is displayed.
5. Select the role to assign to the user on the business hub **Cerby role** drop-down menu:
* **Owner:** This role enables sharing access and managing business hub settings in Cerby.
* **Collaborator:** This role enables only logging in to the app from Cerby.
6. Click the **Match user** button. The dialog box closes, and a success message box is displayed. The user is moved to the **Onboarded users** tab.
#### Remove unmatched users
To remove unmatched users, you must complete the following steps from the **Unmatched users** tab of the business hub details page:
{% hint style="danger" %}
**IMPORTANT:** When removing an unmatched user, Cerby performs an automated task to revoke the user’s seat and permissions in 6sense.
{% endhint %}
1. Click the **More options** (...) icon of the corresponding user. A drop-down menu is displayed.
2. Select the **Remove user** option from the list. The **Remove user?** dialog box is displayed.
3. Click the **Remove user** button. The dialog box closes, and a success message box is displayed. The user is removed from the app via an automated task.
#### Exempt unmatched users
Exempted users keep their user accounts or seats active in your app, but you cannot manage them through Cerby.
To exempt unmatched users, you must complete the following steps from the **Unmatched users** tab of the business hub details page:
1. Click the **More options** (...) icon of the corresponding user. A drop-down list is displayed.
2. Select the **Exempt user** option from the list. The exempt user dialog box is displayed.
3. Enter a reason for exempting the user in the **Provide a reason** field.
4. Click the **Exempt member** button. The dialog box closes, and a success message box is displayed. The user is moved to the **Exempted users** tab.
***
## Use your business hub
The following are the supported features of business hubs you can use:
* [Join the external app and set up your business hub access](https://help.cerby.com/cerby-web-app/business-hubs/join-your-external-app-and-set-up-your-business-hub-access)
* [Remove users from your app via a business hub](/setup-and-admin/business-hubs/managing-users-and-assets-via-a-business-hub/remove-users-from-your-app-via-a-business-hub)
* [Remove teams from your app via a business hub](/setup-and-admin/business-hubs/managing-users-and-assets-via-a-business-hub/remove-teams-from-your-app-via-a-business-hub)
* [Deprovision users from your apps via an IdP and business hub](/setup-and-admin/business-hubs/managing-users-and-assets-via-a-business-hub/deprovision-users-from-your-apps-via-an-idp-and-business-hub)
* [Update user roles in your app via a business hub](/setup-and-admin/business-hubs/managing-users-and-assets-via-a-business-hub/update-user-roles-in-your-app-via-a-business-hub)
* [Update user roles in your apps via an IdP and business hub](/setup-and-admin/business-hubs/managing-users-and-assets-via-a-business-hub/update-user-roles-in-your-apps-via-an-idp-and-business-hub)
* [Sync your app users with your business hub](/setup-and-admin/business-hubs/managing-users-and-assets-via-a-business-hub/sync-your-business-hub-with-your-external-app)
* [Log in to your app via a business hub](https://help.cerby.com/cerby-web-app/business-hubs/log-in-to-your-app)
* [Track the activity of business hub users](/setup-and-admin/business-hubs/managing-users-and-assets-via-a-business-hub/track-activity-on-app-members-user-accounts)
* [Remove a business hub](/setup-and-admin/business-hubs/managing-your-business-hubs/remove-a-business-hub)
# Connect a business hub for Acsense
This article describes how to connect a business hub to centrally manage the users of Acsense from Cerby.
{% hint style="info" %}
**Who can use this feature?**
* Workspace **Owners**, **Super Admins**, **Admins**, and **Users**
* Only supported using the Cerby web app
{% endhint %}
As a user with any workspace role in Cerby, except **Guest User** and **Login-Only**, you can connect a business hub integration to centrally manage the users of Acsense.
When you connect the business hub, you become its **Owner**, and you can perform the following user and access management tasks through automated tasks executed by the Cerby agent:
* Check for updates
* Invite app members
* Update app members’ roles
* Remove app members
{% hint style="success" %}
**TIP:** For more details about the automated tasks of a business hub, how it works, and the supported apps, read the article [Explore Apps](https://help.cerby.com/setup-and-admin/business-hubs/business-hub-catalog).
{% endhint %}
This article provides instructions on how to connect a business hub for Acsense. For other app-specific articles and videos, review the [Connecting your business hubs](https://help.cerby.com/setup-and-admin/business-hubs/connecting-your-apps) collection in the Cerby Help Center.
***
## Requirements
The following are the requirements to connect a business hub:
* A Cerby workspace
* A Cerby user account with the **Owner**, **Super Admin**, **Admin**, or **User** role
* Groups configured in your identity provider (IdP) if you want to leverage automatic user provisioning and deprovisioning from your apps based on group assignment events. For more information, read the article [Provision users to your apps via an IdP and business hub](https://help.cerby.com/setup-and-admin/business-hubs/managing-users-and-assets-via-a-business-hub/provision-users-to-your-apps-via-an-idp-and-business-hub)
* An automation account, meaning an active user account with an **Admin** role in Acsense to be used as a service account. For instructions and recommendations on how to create and configure this account, read the article [Create a service account for your business hub](https://help.cerby.com/setup-and-admin/business-hubs/connecting-your-apps/create-a-service-account-for-your-business-hub)
***
## Connect a business hub for Acsense
To connect a business hub for Acsense, you must complete the following main steps from the Cerby web app dashboard:
1. [Add a business hub and connect it to Acsense](#id-1.-add-a-business-hub-and-connect-it-to-acsense)
2. [Check for updates to import users and roles to Cerby](#id-2.-check-for-updates-to-import-users-and-roles-to-cerby)
3. [Connect your Acsense user account to the business hub](#id-3.-connect-your-acsense-user-account-to-the-business-hub)
4. [Manage unmatched users](#id-4.-manage-unmatched-users)
The following sections describe each main step.
### 1. Add a business hub and connect it to Acsense
To add a business hub and connect it to Acsense, you must complete the following steps:
1. Log in to your corresponding [Cerby](https://app.cerby.com/) workspace.
2. Select the **Business Hubs** option from the left navigation drawer. The **Business Hubs** page is displayed.
3. Click the **Connect Business Hub** button located at the top-right corner of the page. The **Connect your Business Hubs to Cerby** dialog box is displayed.
**TIP:** You can select the **Don’t show this again** option to skip this step the next time you connect a new business hub.
4. Click the **Get started** button. A wizard is displayed on the **Select app** page.
5. Select **Acsense Business Hub** from the catalog. The **Enter app details** page is displayed on the wizard.
6. Enter and select your app information in the corresponding fields:
* **Label in Cerby:** It is the name to assign to your business hub in Cerby, and it will be displayed on the business hub card.
* **User management and login method:** It is the way your users log in to the app and determines if they must save their credentials in Cerby.
1. Select the **Username and password** option because account security and access are managed by Cerby, and users log in with their credentials after saving them in Cerby.
**IMPORTANT:** The Single sign-on (SSO) option is not supported by Acsense.
7. Click the **Next** button. The **Select automation account** page is displayed with a list of existing Acsense accounts.
8. Select the automation account you have previously added to Cerby, as described in the [Requirements](#requirements) section.
**NOTE:** If you don’t have an automation account, you are prompted to add it. Make sure you read Cerby’s recommendations on how to configure it in the article [Create a service account for your business hub](https://help.cerby.com/setup-and-admin/business-hubs/connecting-your-apps/create-a-service-account-for-your-business-hub) because you may need to add the account first and then, add the business hub.
9. Click the **Connect app** button. The wizard closes, and a success message box is displayed. The corresponding business hub is also on the **Business Hubs** page.
The next step is [2. Check for updates to import users and roles to Cerby](#id-2.-check-for-updates-to-import-users-and-roles-to-cerby).
### 2. Check for updates to import users and roles to Cerby
To check for updates in your app to identify and import users, roles, and assets to Cerby, you must complete the following steps:
1. Select the **Business Hubs** option from the left navigation drawer. The **Business Hubs** page is displayed.
2. Click the **Settings** icon of the corresponding business hub card. The business hub details page is displayed with the **Settings** tab activated.
3. Click the **Check for updates** button located at the top right of the page. A message box is displayed with information about the process.
**NOTE:** The check and import process may take a few minutes depending on the number of users, and because Cerby automatically matches users to their corresponding Cerby user account.
4. Confirm that the automated task to check for updates has the “Completed” status by performing any of the following actions:
* Click the **More details** button from the message box.
* Select the **Automation** option from the left navigation drawer to open the **Automation** page with a list of automated tasks and their status.
{% hint style="info" %}
**NOTE:** Cerby automatically performs daily checks for updates for all business hubs, but you can trigger them manually, as described in this section. When a user is deprovisioned from an IdP and a check for updates is performed, Cerby generates a report and sends business hub **Owners** an email to confirm their removal from the app. For more instructions, read the article [Check for updates in your app and apply report](/setup-and-admin/business-hubs/managing-users-and-assets-via-a-business-hub/sync-your-business-hub-with-your-external-app).
{% endhint %}
The next step is [3. Connect your Acsense user account to the business hub](#id-3.-connect-your-acsense-user-account-to-the-business-hub).
### 3. Connect your Acsense user account to the business hub
To connect your Acsense user account to the business hub so Cerby can manage and protect it, you must complete the following steps:
1. Select the **Accounts** option from the left navigation drawer. The **Accounts** page is displayed.
2. Click the **Log in** button of the corresponding Acsense Business Hub account card. The **Connect your Acsense Business Hub Account** dialog box is displayed.
3. Enter the login credentials of your Acsense user account.
4. Click the **Connect account** button. The dialog box closes, and a success message box and a new account card are displayed.
The next step is [4. Manage unmatched users](#id-4.-manage-unmatched-users).
### 4. Manage unmatched users
During a check for updates, Cerby automatically matches app members to the Cerby user accounts that correspond to their email addresses, including existing [guest users](https://help.cerby.com/getting-started/concepts/user-management/guest-users) and [local partners](https://help.cerby.com/getting-started/concepts/user-management/partners#h-7e4add33a2). Manual matching is required when apps don't provide email addresses and for app members using personal or external accounts that couldn’t be identified or are not in the corporate directory.
To view the status of the imported app members, you must complete the following steps:
1. Select the **Business Hubs** option from the left navigation drawer. The **Business Hubs** page is displayed.
2. Click the **More options** (...) icon of the corresponding business hub card. A drop-down list is displayed.
3. Select the **View Members** option from the list. The business hub details page is displayed with the **Members** tab activated. App members are displayed in the following tabs of the **User Overview** section:
* **Unmatched users:** This tab displays the users who were not automatically matched.
* **Onboarded users:** This tab displays the users matched to their Cerby user account.
* **Guest users:** This tab displays the users who were matched to an existing Cerby user account but it doesn’t exist in the corporate directory, such as external collaborators.
For unmatched users, you can perform one of the following actions:
* [Match users](#match-users)
* [Remove unmatched users](#remove-unmatched-users)
* [Exempt unmatched users](#exempt-unmatched-users)
The following sections describe each action.
#### Match users
To match users, you must complete the following steps from the **Unmatched users** tab of the business hub details page:
1. Click the **Match user** button of the corresponding user. The **Match user** dialog box is displayed.
2. Enter the username or email address of the user you want to match and invite in the **Match with** field. The user is displayed on a list.
3. Select the user from the list.
4. Click the **Next** button. The **Select Cerby role** dialog box is displayed.
5. Select the role to assign to the user on the business hub **Cerby role** drop-down list:
* **Owner:** This role enables sharing access and managing business hub settings in Cerby.
* **Collaborator:** This role enables only logging in to the app from Cerby.
1. Click the **Match user** button. The dialog box closes, and a success message box is displayed. The user is moved to the **Onboarded** **users** tab.
#### Remove unmatched users
To remove unmatched users, you must complete the following steps from the **Unmatched users** tab of the business hub details page:
{% hint style="danger" %}
**IMPORTANT:** When removing an unmatched user, Cerby performs an automated task to revoke the user’s seat and permissions in Acsense.
{% endhint %}
1. Click the **More options** (...) icon of the corresponding user. A drop-down list is displayed.
2. Select the **Remove user** option from the list. The **Remove user?** dialog box is displayed.
3. Click the **Remove user** button. The dialog box closes, and a success message box is displayed. The user is removed from the app via an automated task.
#### Exempt unmatched users
Exempted users keep their user accounts or seats active in your app, but you cannot manage them through Cerby.
To exempt unmatched users, you must complete the following steps from the **Unmatched users** tab of the business hub details page:
1. Click the **More options** (...) icon of the corresponding user. A drop-down list is displayed.
2. Select the **Exempt user** option from the list. The exempt user dialog box is displayed.
3. Enter a reason for exempting the user in the **Provide a reason** field.
4. Click the **Exempt member** button. The dialog box closes, and a success message box is displayed. The user is moved to the **Exempted users** tab.
***
## Use your business hub
The following are the supported features of business hubs you can use:
* [Join the App and connect it to Cerby](https://help.cerby.com/cerby-web-app/business-hubs/join-your-external-app-and-set-up-your-business-hub-access)
* [Invite new app members](/setup-and-admin/business-hubs/managing-users-and-assets-via-a-business-hub/add-users-and-teams-to-your-apps-via-a-business-hub)
* [Remove app members](/setup-and-admin/business-hubs/managing-users-and-assets-via-a-business-hub/remove-users-from-your-app-via-a-business-hub)
* [Provision users to your apps via an IdP and business hub](https://help.cerby.com/setup-and-admin/business-hubs/managing-users-and-assets-via-a-business-hub/provision-users-to-your-apps-via-an-idp-and-business-hub)
* [Update the app members’ roles](/setup-and-admin/business-hubs/managing-users-and-assets-via-a-business-hub/update-user-roles-in-your-app-via-a-business-hub)
* [Check for updates in your app and apply report](/setup-and-admin/business-hubs/managing-users-and-assets-via-a-business-hub/sync-your-business-hub-with-your-external-app)
* [Re-assign the app members’ user accounts](https://github.com/cerbyinc/help-center/tree/main/.uncategorized/unpublished-deprecated-re-assign-the-app-members-user-accounts.md)
* [Manage the security of app members’ user accounts](/setup-and-admin/business-hubs/managing-users-and-assets-via-a-business-hub/protect-your-app-user-accounts-via-a-business-hub)
* [Log in to your app](https://help.cerby.com/cerby-web-app/business-hubs/log-in-to-your-app)
* [Track activity on app members’ user accounts](/setup-and-admin/business-hubs/managing-users-and-assets-via-a-business-hub/track-activity-on-app-members-user-accounts)
* [Remove an App](/setup-and-admin/business-hubs/managing-your-business-hubs/remove-a-business-hub)
# Connect a business hub for Ada
This article describes how to connect a business hub to centrally manage the users of Ada from Cerby.
{% hint style="info" %}
**Who can use this feature?**
* Workspace **Owners**, **Super Admins**, **Admins**, and **Users**
* Only supported using the Cerby web app
{% endhint %}
As a user with any workspace role in Cerby, except **Guest User** and **Login-Only**, you can connect a business hub integration to centrally manage the users of Ada.
When you connect the business hub, you become its **Owner**, and you can perform the following user and access management tasks through automated tasks executed by the Cerby agent:
* Check for updates
* Add users
* Update user roles
* Remove users
{% hint style="success" %}
**TIP:** For more details about the automated tasks of a business hub, how it works, and the supported apps, read the article [Explore Business Hubs](https://help.cerby.com/setup-and-admin/business-hubs/business-hub-catalog).
{% endhint %}
This article provides instructions on how to connect a business hub for Ada. For other app-specific articles and videos, review the [Connecting business hubs for your apps](https://help.cerby.com/setup-and-admin/business-hubs/connecting-your-apps) and [Connecting business hubs for your paid social apps](https://help.cerby.com/setup-and-admin/business-hubs/connecting-your-paid-social-apps) collections in the Cerby Help Center.
***
## Requirements
The following are the requirements to connect a business hub:
* A Cerby workspace
* A Cerby user account with the workspace **Owner**, **Super Admin**, **Admin**, or **User** role
* Groups configured in your identity provider (IdP) if you want to leverage automatic user provisioning and deprovisioning from your apps based on group assignment events. For more information, read the articles available in the [Managing users via an IdP and business hub](https://help.cerby.com/setup-and-admin/business-hubs/managing-users-and-assets-via-a-business-hub) collection in the Cerby Help Center
* An automation account, meaning an active user account with a native **Admin** role in Ada to be used as a service account. For instructions and recommendations on how to create and configure this account, read the article [Create a service account for your business hub](/setup-and-admin/business-hubs/connecting-your-apps/create-a-service-account-for-your-business-hub)
* The user management and login method for your business hub identified to select the corresponding option when connecting your app. For more information, read the **User management and login method** section of the article [Explore Business Hubs](https://help.cerby.com/setup-and-admin/business-hubs/business-hub-catalog)
* A Business ID. You can find the ID in the address bar\*\*\*\* when you are logged in to Ada. The ID is displayed in the address bar as part of the URL, before **-gen** in the subdomain. For example, \*\*`cerby` \*\*in **`https://cerby-gen.ada.support/team`**. Just copy the value and paste it when connecting the business hub
***
## Connect a business hub for Ada
To connect a business hub for Ada, you must complete the following main steps from the Cerby web app dashboard:
1. [Add a business hub and connect it to Ada](#id-1.-add-a-business-hub-and-connect-it-to-ada)
2. [Check for updates to import users and roles to Cerby](#id-2.-check-for-updates-to-import-users-and-roles-to-cerby)
3. [Connect your Ada user account to the business hub](#id-3.-connect-your-ada-user-account-to-the-business-hub)
4. [Manage unmatched users](#id-4.-manage-unmatched-users)
The following sections describe each main step.
### 1. Add a business hub and connect it to Ada
To add a business hub and connect it to Ada, you must complete the following steps:
1. Log in to your corresponding [Cerby](https://app.cerby.com/) workspace.
2. Select the **Business Hubs** option from the left menu. The **Business Hubs** page is displayed.
3. Click the **Connect Business Hub** button located at the top-right corner of the page. The **Connect your Business Hubs to Cerby** dialog box is displayed. **TIP:** Select the **Don’t show this again** option to skip this step the next time you connect a new business hub.
4. Click the **Get started** button. A wizard is displayed on the **Select app** page.
5. Select **Ada Hub** from the catalog. The **Enter app details** page is displayed on the wizard.
6. Enter and select your app information in the corresponding fields:
* **Label in Cerby:** It is the name to assign to your business hub in Cerby, and it will be displayed on the business hub card.
* **Business ID:** It is the unique identifier of your business or organization in **Ada Hub**. For instructions on how to find it, read the [Requirements](#requirements) section.
* **User management and login method:** It is the way your users log in to the app and determines whether they must save their login credentials as a Cerby account connected to the business hub. You must select one of the following methods:
* **Single sign-on (SSO):** Access is managed by your IdP, and users log in with SSO authentication. They are not asked to save their credentials in Cerby.
* **Username and password:** Cerby manages account security and access, and users log in with their credentials after saving them in Cerby.
7. Click the **Next** button. The **Select automation account** page is displayed with a list of existing Ada accounts.
8. Select the automation account you have previously added to Cerby, as described in the [Requirements](#requirements) section. **NOTE:** If you don’t have an automation account, you are prompted to add it. Make sure you read Cerby’s recommendations on how to configure it in the article [Create a service account for your business hub](/setup-and-admin/business-hubs/connecting-your-apps/create-a-service-account-for-your-business-hub). You may need to add the account first and then add the business hub.
9. Click the **Connect app** button. The wizard closes, and a success message box is displayed. The corresponding business hub is also displayed on the **Business Hubs** page.
The next step is [2. Check for updates to import users and roles to Cerby](#id-2.-check-for-updates-to-import-users-and-roles-to-cerby).
### 2. Check for updates to import users and roles to Cerby
To check for updates in your app to identify and import users and roles to Cerby, you must complete the following steps:
1. Select the **Business Hubs** option from the left menu. The **Business Hubs** page is displayed.
2. Click the **More options** (...) icon of the corresponding business hub card. A drop-down menu is displayed.
3. Select the **Settings** option from the menu. The business hub details page is displayed with the **Settings** tab activated.
4. Click the **Check for updates** button located at the top right of the page. A message box is displayed with information about the process. **NOTE:** The check and import process may take a few minutes depending on the number of users, and because Cerby automatically matches users to their corresponding Cerby user account.
5. Confirm that the automated task to check for updates has the “Completed” status by performing any of the following actions:
* Click the **More details** button from the message box.
* Select the **Automation** option from the left menu to open the **Automation** page with a list of automated tasks and their status.
{% hint style="info" %}
**NOTE:** Cerby automatically performs daily checks for updates for all business hubs, but you can trigger them manually, as described in this section. For more instructions, read the article [Sync your app users with your business hub](/setup-and-admin/business-hubs/managing-users-and-assets-via-a-business-hub/sync-your-business-hub-with-your-external-app).
{% endhint %}
The next step is [3. Connect your Ada user account to the business hub](#id-3.-connect-your-ada-user-account-to-the-business-hub).
### 3. Connect your Ada user account to the business hub
To connect your Ada user account to the business hub so Cerby can manage and protect it, you must complete the following steps:
1. Select the **Accounts** option from the left menu. The **Accounts** page is displayed.
2. Click the **Log in** button of the corresponding Ada Hub account card. The **Connect your Ada Hub Account** dialog box is displayed.
3. Enter the login credentials of your **Ada** user account.
4. Click the **Connect account** button. The dialog box closes, and a success message box and a new account card are displayed.
The next step is [4. Manage unmatched users](#id-4.-manage-unmatched-users).
### 4. Manage unmatched users
During a check for updates, Cerby automatically matches app members to the Cerby user accounts that correspond to their email addresses, including existing [guest users](https://help.cerby.com/getting-started/concepts/user-management/guest-users) and [local partners](https://help.cerby.com/getting-started/concepts/user-management/partners#h-7e4add33a2). Manual matching is required when apps don't provide email addresses and for app members using personal or external accounts that couldn’t be identified or are not in the corporate directory.
To view the status of the imported app members, you must complete the following steps:
1. Select the **Business Hubs** option from the left menu. The **Business Hubs** page is displayed.
2. Click the **More options** (...) icon of the corresponding business hub card. A drop-down menu is displayed.
3. Select the **View Members** option from the menu. The business hub details page is displayed with the **Members** tab activated. App members are displayed in the following tabs of the **User Overview** section:
* **Unmatched users:** This tab displays the users who were not automatically matched.
* **Onboarded users:** This tab displays the users matched to their Cerby user account.
* **Guest users:** This tab displays the users who were matched to an existing Cerby user account but it doesn’t exist in the corporate directory, such as external collaborators.
For unmatched users, you can perform one of the following actions:
* [Match users](#match-users)
* [Remove unmatched users](#remove-unmatched-users)
* [Exempt unmatched users](#exempt-unmatched-users)
The following sections describe each action.
#### Match users
To match users, you must complete the following steps from the **Unmatched users** tab of the business hub details page:
1. Click the **Match user** button of the corresponding user. The **Match user** dialog box is displayed.
2. Enter the username or email address of the user you want to match and invite in the **Match with** field. The user is displayed on a list.
3. Select the user from the list.
4. Click the **Next** button. The **Select Cerby role** dialog box is displayed.
5. Select the role to assign to the user on the business hub **Cerby role** drop-down menu:
* **Owner:** This role enables sharing access and managing business hub settings in Cerby.
* **Collaborator:** This role enables only logging in to the app from Cerby.
6. Click the **Match user** button. The dialog box closes, and a success message box is displayed. The user is moved to the **Onboarded users** tab.
#### Remove unmatched users
To remove unmatched users, you must complete the following steps from the **Unmatched users** tab of the business hub details page:
{% hint style="danger" %}
**IMPORTANT:** When removing an unmatched user, Cerby performs an automated task to revoke the user’s seat and permissions in Ada.
{% endhint %}
1. Click the **More options** (...) icon of the corresponding user. A drop-down menu is displayed.
2. Select the **Remove user** option from the menu. The **Remove user?** dialog box is displayed.
3. Click the **Remove user** button. The dialog box closes, and a success message box is displayed. The user is removed from the app via an automated task.
#### Exempt unmatched users
Exempted users keep their user accounts or seats active in your app, but you cannot manage them through Cerby.
To exempt unmatched users, you must complete the following steps from the **Unmatched users** tab of the business hub details page:
1. Click the **More options** (...) icon of the corresponding user. A drop-down menu is displayed.
2. Select the **Exempt user** option from the menu. The exempt user dialog box is displayed.
3. Enter a reason for exempting the user in the **Provide a reason** field.
4. Click the **Exempt member** button. The dialog box closes, and a success message box is displayed. The user is moved to the **Exempted users** tab.
***
## Use your business hub
The following are the supported features of business hubs you can use:
* [Join the external app and set up your business hub access](https://help.cerby.com/cerby-web-app/business-hubs/join-your-external-app-and-set-up-your-business-hub-access)
* [Add users to your app via a business hub](/setup-and-admin/business-hubs/managing-users-and-assets-via-a-business-hub/add-users-and-teams-to-your-apps-via-a-business-hub)
* [Provision users to your apps via an IdP and business hub](/setup-and-admin/business-hubs/managing-users-and-assets-via-a-business-hub/provision-users-to-your-apps-via-an-idp-and-business-hub)
* [Remove users from your app via a business hub](/setup-and-admin/business-hubs/managing-users-and-assets-via-a-business-hub/remove-users-from-your-app-via-a-business-hub)
* [Remove teams from your app via a business hub](/setup-and-admin/business-hubs/managing-users-and-assets-via-a-business-hub/remove-teams-from-your-app-via-a-business-hub)
* [Deprovision users from your apps via an IdP and business hub](/setup-and-admin/business-hubs/managing-users-and-assets-via-a-business-hub/deprovision-users-from-your-apps-via-an-idp-and-business-hub)
* [Update user roles in your app via a business hub](/setup-and-admin/business-hubs/managing-users-and-assets-via-a-business-hub/update-user-roles-in-your-app-via-a-business-hub)
* [Update user roles in your apps via an IdP and business hub](/setup-and-admin/business-hubs/managing-users-and-assets-via-a-business-hub/update-user-roles-in-your-apps-via-an-idp-and-business-hub)
* [Sync your app users with your business hub](/setup-and-admin/business-hubs/managing-users-and-assets-via-a-business-hub/sync-your-business-hub-with-your-external-app)
* [Log in to your app via a business hub](https://help.cerby.com/cerby-web-app/business-hubs/log-in-to-your-app)
* [Track the activity of business hub users](/setup-and-admin/business-hubs/managing-users-and-assets-via-a-business-hub/track-activity-on-app-members-user-accounts)
* [Remove a business hub](/setup-and-admin/business-hubs/managing-your-business-hubs/remove-a-business-hub)
# Connect a business hub for AddEvent
This article describes how to connect a business hub to centrally manage the users of AddEvent from Cerby.
{% hint style="info" %}
**Who can use this feature?**
* Workspace **Owners**, **Super Admins**, **Admins**, and **Users**
* Only supported using the Cerby web app
{% endhint %}
As a user with any workspace role in Cerby, except **Guest User** and **Login-Only**, you can connect a business hub integration to centrally manage the users of AddEvent.
When you connect the business hub, you become its **Owner**, and you can perform the following user and access management tasks through automated tasks executed by the Cerby agent:
* Check for updates
* Invite app members
* Update app members’ roles
* Remove app members
{% hint style="success" %}
**TIP:** For more details about the automated tasks of a business hub, how it works, and the supported apps, read the article [Explore Apps](https://help.cerby.com/setup-and-admin/business-hubs/business-hub-catalog).
{% endhint %}
This article provides instructions on how to connect a business hub for AddEvent. For other app-specific articles and videos, review the [Connecting your business hubs](https://help.cerby.com/setup-and-admin/business-hubs/connecting-your-apps) collection in the Cerby Help Center.
***
## Requirements
The following are the requirements to connect a business hub:
* A Cerby workspace
* A Cerby user account with the **Owner**, **Super Admin**, **Admin**, or **User** role
* A dashboard in AddEvent
* Groups configured in your identity provider (IdP) if you want to leverage automatic user provisioning and deprovisioning from your apps based on group assignment events. For more information, read the article [Provision users to your apps via an IdP and business hub](https://help.cerby.com/setup-and-admin/business-hubs/managing-users-and-assets-via-a-business-hub/provision-users-to-your-apps-via-an-idp-and-business-hub)
* An automation account, meaning an active user account with a native **Admin** role in AddEvent to be used as a service account. For instructions and recommendations on how to create and configure this account, read the article [Create a service account for your business hub](https://help.cerby.com/setup-and-admin/business-hubs/connecting-your-apps/create-a-service-account-for-your-business-hub)
***
## Connect a business hub for AddEvent
To connect a business hub for AddEvent, you must complete the following main steps from the Cerby web app dashboard:
1. [Add a business hub and connect it to AddEvent](#id-1.-add-a-business-hub-and-connect-it-to-addevent)
2. [Check for updates to import users and roles to Cerby](#id-2.-check-for-updates-to-import-users-and-roles-to-cerby)
3. [Connect your AddEvent user account to the business hub](#id-3.-connect-your-addevent-user-account-to-the-business-hub)
4. [Manage unmatched users](#id-4.-manage-unmatched-users)
The following sections describe each main step.
### 1. Add a business hub and connect it to AddEvent
To add a business hub and connect it to AddEvent, you must complete the following steps:
1. Log in to your corresponding [Cerby](https://app.cerby.com/) workspace.
2. Select the **Business Hubs** option from the left navigation drawer. The **Business Hubs** page is displayed.
3. Click the **Connect Business Hub** button located at the top-right corner of the page. The **Connect your Business Hubs to Cerby** dialog box is displayed. **TIP:** Select the **Don’t show this again** option to skip this step the next time you connect a new business hub.
4. Click the **Get started** button. A wizard is displayed on the **Select app** page.
5. Select **Add Event Hub** from the catalog. The **Enter app details** page is displayed on the wizard.
6. Enter and select your app information in the corresponding fields:
* **Label in Cerby:** It is the name to assign to your business hub in Cerby, and it will be displayed on the business hub card.
* **Internal Unique Identifier:** It is a unique identifier that differentiates your business hub in Cerby from others for the same app. You can assign an alphanumeric value between 3 and 30 characters without symbols or special characters.
* **User management and login method:** It is the way your users log in to the app and determines whether they must save their login credentials as a Cerby account connected to the business hub. You must select one of the following methods:
* **Username and password:** Cerby manages account security and access, and users log in with their credentials after saving them in Cerby.
**IMPORTANT:** The **Single sign-on (SSO)** option is not supported by AddEvent.
7. Click the **Next** button. The **Select automation account** page is displayed with a list of existing AddEvent accounts.
8. Select the automation account you have previously added to Cerby, as described in the [Requirements](#requirements) section. **NOTE:** If you don’t have an automation account, you are prompted to add it. Make sure you read Cerby’s recommendations on how to configure it in the article [Create a service account for your business hub](https://help.cerby.com/setup-and-admin/business-hubs/connecting-your-apps/create-a-service-account-for-your-business-hub). You may need to add the account first and then add the business hub.
9. Click the **Connect app** button. The wizard closes, and a success message box is displayed. The corresponding business hub is also displayed on the **Business Hubs** page
The next step is [2. Check for updates to import users and roles to Cerby](#id-2.-check-for-updates-to-import-users-and-roles-to-cerby).
### 2. Check for updates to import users and roles to Cerby
To check for updates in your app to identify and import users and roles to Cerby, you must complete the following steps:
1. Select the **Business Hubs** option from the left navigation drawer. The **Business Hubs** page is displayed.
2. Click the **Settings** () icon of the corresponding business hub card. The business hub details page is displayed with the **Settings** tab activated.
3. Click the **Check for updates** button located at the top right of the page. A message box is displayed with information about the process. **NOTE:** The check and import process may take a few minutes depending on the number of users, and because Cerby automatically matches users to their corresponding Cerby user account.
4. Confirm that the automated task to check for updates has the “Completed” status by performing any of the following actions:
* Click the **More details** button from the message box.
* Select the **Automation** option from the left navigation drawer to open the **Automation** page with a list of automated tasks and their status.
{% hint style="info" %}
**NOTE:** Cerby automatically performs daily checks for updates for all business hubs, but you can trigger them manually, as described in this section. When a user is deprovisioned from an IdP and a check for updates is performed, Cerby generates a report and sends business hub **Owners** an email to confirm their removal from the app. For more instructions, read the article [Check for updates in your app and apply report](/setup-and-admin/business-hubs/managing-users-and-assets-via-a-business-hub/sync-your-business-hub-with-your-external-app).
{% endhint %}
The next step is [3. Connect your AddEvent user account to the business hub](#id-3.-connect-your-addevent-user-account-to-the-business-hub).
### 3. Connect your AddEvent user account to the business hub
To connect your AddEvent user account to the business hub so Cerby can manage and protect it, you must complete the following steps:
1. Select the **Accounts** option from the left navigation drawer. The **Accounts** page is displayed.
2. Click the **Log in** button of the corresponding Add Event Hub account card. The **Connect your Add Event Hub Account** dialog box is displayed.
3. Enter the login credentials of your **AddEvent** user account.
4. Click the **Connect account** button. The dialog box closes, and a success message box and a new account card are displayed.
The next step is [4. Manage unmatched users](#id-4.-manage-unmatched-users).
### 4. Manage unmatched users
During a check for updates, Cerby automatically matches app members to the Cerby user accounts that correspond to their email addresses, including existing [guest users](https://help.cerby.com/getting-started/concepts/user-management/guest-users) and [local partners](https://help.cerby.com/getting-started/concepts/user-management/partners#h-7e4add33a2). Manual matching is required when apps don't provide email addresses and for app members using personal or external accounts that couldn’t be identified or are not in the corporate directory.
To view the status of the imported app members, you must complete the following steps:
1. Select the **Business Hubs** option from the left navigation drawer. The **Business Hubs** page is displayed.
2. Click the **More options** (...) icon of the corresponding business hub card. A drop-down list is displayed.
3. Select the **View Members** option from the list. The business hub details page is displayed with the **Members** tab activated. App members are displayed in the following tabs of the **User Overview** section:
* **Unmatched users:** This tab displays the users who were not automatically matched.
* **Onboarded users:** This tab displays the users matched to their Cerby user account.
* **Guest users:** This tab displays the users who were matched to an existing Cerby user account but it doesn’t exist in the corporate directory, such as external collaborators.
For unmatched users, you can perform one of the following actions:
* [Match users](#match-users)
* [Remove unmatched users](#remove-unmatched-users)
* [Exempt unmatched users](#exempt-unmatched-users)
The following sections describe each action.
#### Match users
To match users, you must complete the following steps from the **Unmatched users** tab of the business hub details page:
1. Click the **Match user** button of the corresponding user. The **Match user** dialog box is displayed.
2. Enter the username or email address of the user you want to match and invite in the **Match with** field. The user is displayed on a list.
3. Select the user from the list.
4. Click the **Next** button. The **Select Cerby role** dialog box is displayed.
5. Select the role to assign to the user on the business hub **Cerby role** drop-down list:
* **Owner:** This role enables sharing access and managing business hub settings in Cerby.
* **Collaborator:** This role enables only logging in to the app from Cerby.
6. Click the **Match user** button. The dialog box closes, and a success message box is displayed. The user is moved to the **Onboarded users** tab.
#### Remove unmatched users
To remove unmatched users, you must complete the following steps from the **Unmatched users** tab of the business hub details page:
{% hint style="danger" %}
**IMPORTANT:** When removing an unmatched user, Cerby performs an automated task to revoke the user’s seat and permissions in AddEvent.
{% endhint %}
1. Click the **More options** (...) icon of the corresponding user. A drop-down list is displayed.
2. Select the **Remove user** option from the list. The **Remove user?** dialog box is displayed.
3. Click the **Remove user** button. The dialog box closes, and a success message box is displayed. The user is removed from the app via an automated task.
#### Exempt unmatched users
Exempted users keep their user accounts or seats active in your app, but you cannot manage them through Cerby.
To exempt unmatched users, you must complete the following steps from the **Unmatched users** tab of the business hub details page:
1. Click the **More options** (...) icon of the corresponding user. A drop-down list is displayed.
2. Select the **Exempt user** option from the list. The exempt user dialog box is displayed.
3. Enter a reason for exempting the user in the **Provide a reason** field.
4. Click the **Exempt member** button. The dialog box closes, and a success message box is displayed. The user is moved to the **Exempted users** tab.
***
## Use your business hub
The following are the supported features of business hubs you can use:
* [Join the App and connect it to Cerby](https://help.cerby.com/cerby-web-app/business-hubs/join-your-external-app-and-set-up-your-business-hub-access)
* [Invite new app members](/setup-and-admin/business-hubs/managing-users-and-assets-via-a-business-hub/add-users-and-teams-to-your-apps-via-a-business-hub)
* [Remove app members](/setup-and-admin/business-hubs/managing-users-and-assets-via-a-business-hub/remove-users-from-your-app-via-a-business-hub)
* [Provision users to your apps via an IdP and business hub](https://help.cerby.com/setup-and-admin/business-hubs/managing-users-and-assets-via-a-business-hub/provision-users-to-your-apps-via-an-idp-and-business-hub)
* [Update the app members’ roles](/setup-and-admin/business-hubs/managing-users-and-assets-via-a-business-hub/update-user-roles-in-your-app-via-a-business-hub)
* [Check for updates in your app and apply report](/setup-and-admin/business-hubs/managing-users-and-assets-via-a-business-hub/sync-your-business-hub-with-your-external-app)
* [Re-assign the app members’ user accounts](https://github.com/cerbyinc/help-center/tree/main/.uncategorized/unpublished-deprecated-re-assign-the-app-members-user-accounts.md)
* [Manage the security of app members’ user accounts](/setup-and-admin/business-hubs/managing-users-and-assets-via-a-business-hub/protect-your-app-user-accounts-via-a-business-hub)
* [Log in to your app](https://help.cerby.com/cerby-web-app/business-hubs/log-in-to-your-app)
* [Track activity on app members’ user accounts](/setup-and-admin/business-hubs/managing-users-and-assets-via-a-business-hub/track-activity-on-app-members-user-accounts)
* [Remove an App](/setup-and-admin/business-hubs/managing-your-business-hubs/remove-a-business-hub)
# Connect a business hub for Adobe Creative Cloud
This article describes how to connect a business hub for Adobe Creative Cloud to centrally manage users and access from Cerby.
{% hint style="info" %}
**Who can use this feature?**
* Workspace **Owners**, **Super Admins**, **Admins**, and **Users**
* Only supported using the Cerby web app
{% endhint %}
As a user with any workspace role in Cerby, except **Guest User** and **Login-Only**, you can connect a business hub integration to centrally manage the users and access to Adobe Creative Cloud from Cerby.
When you connect a business hub, you become its **Owner**, and you can perform the following management tasks through Cerby automation:
* Sync users and roles
* Add users
* Remove users
{% hint style="info" %}
**NOTE:** Adobe Creative Cloud does not support updating user roles because Adobe Creative Cloud only supports one user state: **License assigned**.
{% endhint %}
This article provides instructions on how to connect a business hub for Adobe Creative Cloud. The process comprises four main steps described in the following sections:
{% stepper %}
{% step %}
[1. Connect a business hub in Cerby](#id-1.-connect-a-business-hub-in-cerby)
Add a business hub in Cerby, connect it to your app, and associate it with a service account.
{% endstep %}
{% step %}
[2. Sync users, roles, and assets from your app to Cerby](#id-2.-sync-users-roles-and-assets-from-your-app-to-cerby)
Run an initial sync to import the current state of your external app into Cerby: users, roles, and assets (Products). This step establishes an accurate baseline of the current state of the app in Cerby.
{% endstep %}
{% step %}
[3. Take action on unmatched users](#id-3.-take-action-on-unmatched-users)
Take action on users, guest users, and local partners who weren't automatically identified by Cerby during the sync.
{% endstep %}
{% step %}
[4. (Optional) Connect your user account to the business hub](#id-4.-optional-connect-your-user-account-to-the-business-hub)
Optionally connect your user account to the business hub to access your app with your login credentials.
{% endstep %}
{% endstepper %}
For other app-specific articles, check the [Connecting your apps](https://help.cerby.com/setup-and-admin/business-hubs/connecting-your-apps) and [Connecting your paid social apps](https://help.cerby.com/setup-and-admin/business-hubs/connecting-your-paid-social-apps) collections. For more information about the Business Hubs feature and how it works, read the article [Business Hubs](https://help.cerby.com/getting-started/concepts/identity-lifecycle-management-idlcm/business-hubs).
***
## Requirements
The following are the requirements to connect a business hub:
* **Cerby**
* A Cerby workspace
* A Cerby user account with the **Owner**, **Super Admin**, **Admin**, or **User** role
* A service account added to Cerby that corresponds to an active user account with a native **Workspace Owner** role in Adobe Creative Cloud. For instructions, read the article [Create a service account for your business hub](/setup-and-admin/business-hubs/connecting-your-apps/create-a-service-account-for-your-business-hub)
* **Identity provider (IdP)**, only if you want to enable automatic user provisioning and deprovisioning for your app based on group assignment events
* An IdP tenant
* Groups configured in your IdP as Cerby teams. For more information, read the articles for [provisioning](https://help.cerby.com/setup-and-admin/business-hubs/managing-users-and-assets-via-a-business-hub/provision-users-to-your-apps-via-an-idp-and-business-hub), [deprovisioning](https://help.cerby.com/setup-and-admin/business-hubs/managing-users-and-assets-via-a-business-hub/deprovision-users-from-your-apps-via-an-idp-and-business-hub), and [updating user roles](https://help.cerby.com/setup-and-admin/business-hubs/managing-users-and-assets-via-a-business-hub/update-user-roles-in-your-apps-via-an-idp-and-business-hub) via an IdP.
* **Adobe Creative Cloud**
* The user management and login method for your business hub identified. Depending on your app, the options are the following:
* **Single sign-on (SSO):** Your IdP manages access to your app, and users log in via SSO authentication. Users are not asked to save their credentials in Cerby, and they continue accessing Adobe Creative Cloud as usual.
* **Username and password:** Cerby manages security and access to your app. You can choose to ask your users to save their credentials in Cerby and connect their account to the business hub.
***
## 1. Connect a business hub in Cerby
To connect a business hub in Cerby for Adobe Creative Cloud, you must complete the following steps:
1. Log in to your [Cerby](https://app.cerby.com/) workspace.
2. Select the **Business Hubs** option from the left menu. The **Business Hubs** page is displayed.
3. Click the **Connect Business Hub** button located at the top right of the page. A wizard is displayed.
NOTE: The first time you connect a business hub, the Connect your Business Hubs to Cerby page is displayed on the wizard. Select the Don’t show this again option and click the Get started button to skip this page in the future.
4. Select **Adobe Creative Cloud Hub** from the catalog; you can use the search bar. The **Enter app details** page is displayed on the wizard.
5. Enter and select your app information in the corresponding fields:
* **Label in Cerby:** It is the name to assign to your business hub.
* **Unique ID:** It is a unique identifier that differentiates your business hub in Cerby from others for the same app. You can assign an alphanumeric value between 3 and 30 characters without symbols or special characters.
* **User management and login method:** It determines how your users log in to the app and whether they must save their login credentials in Cerby:
* **Single sign-on (SSO):** Your IdP manages access to your app, and users log in via SSO authentication. Users are not asked to save their credentials in Cerby, and they continue accessing Adobe Creative Cloud as usual.
* **Username and password:** Cerby manages security and access to your app. You can choose to ask your users to save their credentials in Cerby and connect their accounts to the business hub.
6. Click the **Connect app** button. The **Select automation account** page is displayed with a list of existing Adobe Creative Cloud accounts; if you don’t have one, you are prompted to add a new account.
7. Select the service account from the list, either from the existing options or after adding an account. Make sure you read Cerby’s recommendations for this account in the article [Create a service account for your business hub](https://help.cerby.com/setup-and-admin/business-hubs/connecting-your-apps/create-a-service-account-for-your-business-hub).
8. Click the **Next** button. The **Select account save preferences** page is displayed on the wizard.
9. Activate the switch for the options that correspond to how you want to save users' login credentials in Cerby. If both options are deactivated, user login credentials will not be saved in Cerby:
* **Save account:** Cerby prompts users to save their login credentials for this business hub.
* **Enforce account autosave (app-wide setting):** Cerby automatically saves the login credentials when users log in to Adobe Creative Cloud. This setting applies to all existing and new business hubs for Adobe Creative Cloud and cannot be overridden per business hub.
10. Click the **Connect app** button. The wizard closes, and a success message box is displayed; the corresponding business hub is also displayed on the **Business Hubs** page.
The next step is [2. Sync users, roles, and assets from your app to Cerby](#id-2.-sync-users-roles-and-assets-from-your-app-to-cerby).
## 2. Sync users, roles, and assets from your app to Cerby
To sync the users, roles, and assets from your app to Cerby, you must complete the following steps:
1. Select the **Business Hubs** option from the left menu. The **Business Hubs** page is displayed.
2. Click the **More options** (...) icon of the corresponding business hub. A drop-down menu is displayed.
3. Select the **Sync** option from the menu. A message box is displayed with information about the automation that Cerby will run, which may take a few minutes depending on the number of users and Cerby's automatic matching.
4. Confirm that the sync has the "Completed" status in the **Automation Log** page by completing any of the following steps:
* Click the **More details** button in the message box.
* Select the **Automation Log** option from the left menu.
{% hint style="info" %}
**NOTE:** Cerby runs daily syncs for all business hubs, but you can trigger them manually, as described in this section. For more instructions, read the article [Sync your business hub with your external app](https://github.com/cerbyinc/help-center/tree/main/management/managing-users-and-assets-via-a-business-hub/sync-your-business-hub-with-your-external-app.md).
{% endhint %}
The next step is [3. Take action on unmatched users](#id-3.-take-action-on-unmatched-users).
## 3. Take action on unmatched users
During a sync, Cerby automatically matches app members to the Cerby user accounts that correspond to their email addresses, including [guest users](https://help.cerby.com/getting-started/concepts/user-management/guest-users) and [local partners](https://help.cerby.com/getting-started/concepts/user-management/partners#local-partner). For unmatched users, you can take any of the following actions:
* **Match users:** Associate users in your app with their corresponding Cerby user account so that you can manage their access through Cerby. Manual matching is required when apps don't provide email addresses or when app members use personal or external accounts that couldn't be identified or are not in the corporate directory.
* **Exempt users:** Exempted users keep their user accounts or seats active in your app, but you cannot manage them through Cerby.
* **Remove users:** Remove users when they no longer require access to your app. This action triggers an automation.
To take action on unmatched users, you must complete the following steps:
1. Select the **Business Hubs** option from the left menu. The **Business Hubs** page is displayed.
2. Click the **More options** (...) icon of the corresponding business hub. A drop-down menu is displayed.
3. Select the **View Members** option from the menu. The business hub details page is displayed with the **Users** tab active.
4. Click the **More options** (...) icon of the corresponding user. A drop-down menu is displayed.
5. Take action on the corresponding unmatched users by completing the following steps:
* Match user
1. Select the **Match user** option from the menu. A wizard is displayed, starting with the **Match user** page.
2. Enter the user's name in the search bar. The users that match the name are displayed on a list automatically.
3. Select the user from the list. The user is displayed in the **Match with** section.
4. Click the **Next** button. The **Select Cerby role** page is displayed on the wizard.
5. Select the role to assign to the user on the business hub from the drop-down menu:
* **Owner:** This role enables the user to manage the business hub and its settings in Cerby, as well as the users in your external app.
* **Collaborator:** This role enables the user to only log in to the app from Cerby.
6. Click the **Match user** button. The wizard closes, a success message box is displayed, and the user status is updated.
* Exempt user
1. Select the **Exempt user** option from the menu. The **Exempt user** dialog box is displayed.
2. (Optional) Enter a reason for exempting the user in the **Provide a reason** field.
3. Click the **Exempt user** button. The dialog box closes, a success message box is displayed, and the user status is updated.
* Remove user
1. Select the **Remove user** option from the menu. A confirmation dialog box is displayed.
2. Click the **Remove access** button. A message box is displayed with information about the automation that Cerby will run.
3. Confirm that the user removal has the "Completed" status in the **Automation Log** page by completing any of the following steps:
* Click the **More details** button in the message box.
* Select the **Automation Log** option from the left menu.
The next step is [4. Connect your user account to the business hub](#id-4.-optional-connect-your-user-account-to-the-business-hub).
## 4. (Optional) Connect your user account to the business hub
After connecting a business hub, you automatically become its **Owner**. With this role, you can manage the business hub settings, perform user management tasks, and log in to your app using the associated service account. However, if you have a seat or license in the app, you can also connect your user account to the business hub so you can use your own login credentials to access the app.
To connect your user account to the business hub, you must complete the following steps:
1. Select the **Business Hubs** option from the left menu. The **Business Hubs** page is displayed.
2. Click the business hub. A side panel is displayed to the right with the **Overview** tab active and the **No connected account** section below.
3. Click the **Add account** button. A dialog box is displayed.
4. Specify your account. Depending on whether you already have accounts saved for your app, you must enter the details to add and connect a new account or select an existing account from a list.
5. Click the **Connect account** button. The dialog box closes, and a success message box is displayed.
Now you are done.
***
## Use your business hub
The following are the supported features of business hubs you can use:
* [Join the external app and set up your business hub access](https://help.cerby.com/cerby-web-app/business-hubs/join-your-external-app-and-set-up-your-business-hub-access)
* [Add users to your app via a business hub](/setup-and-admin/business-hubs/managing-users-and-assets-via-a-business-hub/add-users-and-teams-to-your-apps-via-a-business-hub)
* [Provision users to your apps via an IdP and business hub](/setup-and-admin/business-hubs/managing-users-and-assets-via-a-business-hub/provision-users-to-your-apps-via-an-idp-and-business-hub)
* [Remove users from your app via a business hub](/setup-and-admin/business-hubs/managing-users-and-assets-via-a-business-hub/remove-users-from-your-app-via-a-business-hub)
* [Remove teams from your app via a business hub](/setup-and-admin/business-hubs/managing-users-and-assets-via-a-business-hub/remove-teams-from-your-app-via-a-business-hub)
* [Deprovision users from your apps via an IdP and business hub](/setup-and-admin/business-hubs/managing-users-and-assets-via-a-business-hub/deprovision-users-from-your-apps-via-an-idp-and-business-hub)
* [Sync your app users with your business hub](/setup-and-admin/business-hubs/managing-users-and-assets-via-a-business-hub/sync-your-business-hub-with-your-external-app)
* [Log in to your app via a business hub](https://help.cerby.com/cerby-web-app/business-hubs/log-in-to-your-app)
* [Track the activity of business hub users](/setup-and-admin/business-hubs/managing-users-and-assets-via-a-business-hub/track-activity-on-app-members-user-accounts)
* [Remove a business hub](/setup-and-admin/business-hubs/managing-your-business-hubs/remove-a-business-hub)
# Connect a business hub for Adyen
This article describes how to connect a business hub to centrally manage the users of Adyen from Cerby.
{% hint style="info" %}
**Who can use this feature?**
* Workspace **Owners**, **Super Admins**, **Admins**, and **Users**
* Only supported using the Cerby web app
{% endhint %}
As a user with any workspace role in Cerby, except **Guest User** and **Login-Only**, you can connect a business hub integration to centrally manage the users of Adyen.
When you connect the business hub, you become its **Owner**, and you can perform the following user and access management tasks through automated tasks and API calls executed by the Cerby agent:
* Check for updates
* Add users
* Update user roles
* Remove users
{% hint style="success" %}
**TIP:** For more details about the automated tasks of a business hub, how it works, and the supported apps, read the article [Explore Business Hubs](https://help.cerby.com/setup-and-admin/business-hubs/business-hub-catalog).
{% endhint %}
This article provides instructions on how to connect a business hub for Adyen. For other app-specific articles and videos, review the [Connecting business hubs for your apps](https://help.cerby.com/setup-and-admin/business-hubs/connecting-your-apps) and [Connecting business hubs for your paid social apps](https://help.cerby.com/setup-and-admin/business-hubs/connecting-your-paid-social-apps) collections in the Cerby Help Center.
***
## Requirements
The following are the requirements to connect a business hub:
* A Cerby workspace
* A Cerby user account with the workspace **Owner**, **Super Admin**, **Admin**, or **User** role
* Groups configured in your identity provider (IdP) if you want to leverage automatic user provisioning and deprovisioning from your apps based on group assignment events. For more information, read the articles available in the [Managing users via an IdP and business hub](https://help.cerby.com/setup-and-admin/business-hubs/managing-users-and-assets-via-a-business-hub) collection in the Cerby Help Center
* An automation account, meaning an active user account with a native **Merchant admin** role in Adyen to be used as a service account. For instructions and recommendations on how to create and configure this account, read the article [Create a service account for your business hub](/setup-and-admin/business-hubs/connecting-your-apps/create-a-service-account-for-your-business-hub)
* The user management and login method for your business hub identified to select the corresponding option when connecting your app. For more information, read the **User management and login method** section of the article [Explore Business Hubs](https://help.cerby.com/setup-and-admin/business-hubs/business-hub-catalog)
***
## Connect a business hub for Adyen
To connect a business hub for Adyen, you must complete the following main steps from the Cerby web app dashboard:
1. [Add a business hub and connect it to Adyen](#id-1.-add-a-business-hub-and-connect-it-to-adyen)
2. [Check for updates to import users and roles to Cerby](#id-2.-check-for-updates-to-import-users-and-roles-to-cerby)
3. [Connect your Adyen user account to the business hub](#id-3.-connect-your-adyen-user-account-to-the-business-hub)
4. [Manage unmatched users](#id-4.-manage-unmatched-users)
The following sections describe each main step.
### 1. Add a business hub and connect it to Adyen
To add a business hub and connect it to Adyen, you must complete the following steps:
1. Log in to your corresponding [Cerby](https://app.cerby.com/) workspace.
2. Select the **Business Hubs** option from the left menu. The **Business Hubs** page is displayed.
3. Click the **Connect Business Hub** button located at the top-right corner of the page. The **Connect your Business Hubs to Cerby** dialog box is displayed. **TIP:** Select the **Don’t show this again** option to skip this step the next time you connect a new business hub.
4. Click the **Get started** button. A wizard is displayed on the **Select app** page.
5. Select **Adyen Business Hub** from the catalog. The **Enter app details** page is displayed on the wizard.
6. Enter and select your app information in the corresponding fields:
* **Label in Cerby:** It is the name to assign to your business hub in Cerby, and it will be displayed on the business hub card.
* **Business Unique Identifier:** It is a unique identifier that differentiates your business hub in Cerby from others for the same app. You must select one of the following options:
* **Sandbox:** An Adyen sandbox environment, used for development and testing with simulated transactions.
* **Production:** An Adyen production environment, used for live payments with real transactions.
* **User management and login method:** It is the way your users log in to the app and determines whether they must save their login credentials as a Cerby account connected to the business hub. You must select one of the following methods:
* **Single sign-on (SSO):** Access is managed by your IdP, and users log in with SSO authentication. They are not asked to save their credentials in Cerby.
* **Username and password:** Cerby manages account security and access, and users log in with their credentials after saving them in Cerby.
7. Click the **Next** button. The **Select automation account** page is displayed with a list of existing Adyen accounts.
8. Select the automation account you have previously added to Cerby, as described in the [Requirements](#requirements) section. **NOTE:** If you don’t have an automation account, you are prompted to add it. Make sure you read Cerby’s recommendations on how to configure it in the article [Create a service account for your business hub](/setup-and-admin/business-hubs/connecting-your-apps/create-a-service-account-for-your-business-hub). You may need to add the account first and then add the business hub.
9. Click the **Connect app** button. The wizard closes, and a success message box is displayed. The corresponding business hub is also displayed on the **Business Hubs** page.
The next step is [2. Check for updates to import users and roles to Cerby](#id-2.-check-for-updates-to-import-users-and-roles-to-cerby).
### 2. Check for updates to import users and roles to Cerby
To check for updates in your app to identify and import users and roles to Cerby, you must complete the following steps:
1. Select the **Business Hubs** option from the left menu. The **Business Hubs** page is displayed.
2. Click the **More options** (...) icon of the corresponding business hub card. A drop-down menu is displayed.
3. Select the **Settings** option from the menu. The business hub details page is displayed with the **Settings** tab activated.
4. Click the **Check for updates** button located at the top right of the page. A message box is displayed with information about the process. **NOTE:** The check and import process may take a few minutes depending on the number of users, and because Cerby automatically matches users to their corresponding Cerby user account.
5. Confirm that the automated task to check for updates has the “Completed” status by performing any of the following actions:
* Click the **More details** button from the message box.
* Select the **Automation** option from the left menu to open the **Automation** page with a list of automated tasks and their status.
{% hint style="info" %}
**NOTE:** Cerby automatically performs daily checks for updates for all business hubs, but you can trigger them manually, as described in this section. For more instructions, read the article [Sync your app users with your business hub](/setup-and-admin/business-hubs/managing-users-and-assets-via-a-business-hub/sync-your-business-hub-with-your-external-app).
{% endhint %}
The next step is [3. Connect your Adyen user account to the business hub](#id-3.-connect-your-adyen-user-account-to-the-business-hub).
### 3. Connect your Adyen user account to the business hub
To connect your Adyen user account to the business hub so Cerby can manage and protect it, you must complete the following steps:
1. Select the **Accounts** option from the left menu. The **Accounts** page is displayed.
2. Click the **Log in** button of the corresponding Adyen Business Hub account card. The **Connect your Adyen Business Hub Account** dialog box is displayed.
3. Enter the login credentials of your **Adyen** user account.
4. Click the **Connect account** button. The dialog box closes, and a success message box and a new account card are displayed.
The next step is [4. Manage unmatched users](#id-4.-manage-unmatched-users).
### 4. Manage unmatched users
During a check for updates, Cerby automatically matches app members to the Cerby user accounts that correspond to their email addresses, including existing [guest users](https://help.cerby.com/getting-started/concepts/user-management/guest-users) and [local partners](https://help.cerby.com/getting-started/concepts/user-management/partners#h-7e4add33a2). Manual matching is required when apps don't provide email addresses and for app members using personal or external accounts that couldn’t be identified or are not in the corporate directory.
To view the status of the imported app members, you must complete the following steps:
1. Select the **Business Hubs** option from the left menu. The **Business Hubs** page is displayed.
2. Click the **More options** (...) icon of the corresponding business hub card. A drop-down menu is displayed.
3. Select the **View Members** option from the menu. The business hub details page is displayed with the **Members** tab activated. App members are displayed in the following tabs of the **User Overview** section:
* **Unmatched users:** This tab displays the users who were not automatically matched.
* **Onboarded users:** This tab displays the users matched to their Cerby user account.
* **Guest users:** This tab displays the users who were matched to an existing Cerby user account but it doesn’t exist in the corporate directory, such as external collaborators.
For unmatched users, you can perform one of the following actions:
* [Match users](#match-users)
* [Remove unmatched users](#remove-unmatched-users)
* [Exempt unmatched users](#exempt-unmatched-users)
The following sections describe each action.
#### Match users
To match users, you must complete the following steps from the **Unmatched users** tab of the business hub details page:
1. Click the **Match user** button of the corresponding user. The **Match user** dialog box is displayed.
2. Enter the username or email address of the user you want to match and invite in the **Match with** field. The user is displayed on a list.
3. Select the user from the list.
4. Click the **Next** button. The **Select Cerby role** dialog box is displayed.
5. Select the role to assign to the user on the business hub **Cerby role** drop-down menu:
* **Owner:** This role enables sharing access and managing business hub settings in Cerby.
* **Collaborator:** This role enables only logging in to the app from Cerby.
6. Click the **Match user** button. The dialog box closes, and a success message box is displayed. The user is moved to the **Onboarded users** tab.
#### Remove unmatched users
To remove unmatched users, you must complete the following steps from the **Unmatched users** tab of the business hub details page:
{% hint style="danger" %}
**IMPORTANT:** When removing an unmatched user, Cerby performs an automated task to revoke the user’s seat and permissions in Adyen.
{% endhint %}
1. Click the **More options** (...) icon of the corresponding user. A drop-down menu is displayed.
2. Select the **Remove user** option from the menu. The **Remove user?** dialog box is displayed.
3. Click the **Remove user** button. The dialog box closes, and a success message box is displayed. The user is removed from the app via an automated task.
#### Exempt unmatched users
Exempted users keep their user accounts or seats active in your app, but you cannot manage them through Cerby.
To exempt unmatched users, you must complete the following steps from the **Unmatched users** tab of the business hub details page:
1. Click the **More options** (...) icon of the corresponding user. A drop-down menu is displayed.
2. Select the **Exempt user** option from the menu. The exempt user dialog box is displayed.
3. Enter a reason for exempting the user in the **Provide a reason** field.
4. Click the **Exempt member** button. The dialog box closes, and a success message box is displayed. The user is moved to the **Exempted users** tab.
***
## Use your business hub
The following are the supported features of business hubs you can use:
* [Join the external app and set up your business hub access](https://help.cerby.com/cerby-web-app/business-hubs/join-your-external-app-and-set-up-your-business-hub-access)
* [Add users to your app via a business hub](/setup-and-admin/business-hubs/managing-users-and-assets-via-a-business-hub/add-users-and-teams-to-your-apps-via-a-business-hub)
* [Provision users to your apps via an IdP and business hub](/setup-and-admin/business-hubs/managing-users-and-assets-via-a-business-hub/provision-users-to-your-apps-via-an-idp-and-business-hub)
* [Remove users from your app via a business hub](/setup-and-admin/business-hubs/managing-users-and-assets-via-a-business-hub/remove-users-from-your-app-via-a-business-hub)
* [Remove teams from your app via a business hub](/setup-and-admin/business-hubs/managing-users-and-assets-via-a-business-hub/remove-teams-from-your-app-via-a-business-hub)
* [Deprovision users from your apps via an IdP and business hub](/setup-and-admin/business-hubs/managing-users-and-assets-via-a-business-hub/deprovision-users-from-your-apps-via-an-idp-and-business-hub)
* [Update user roles in your app via a business hub](/setup-and-admin/business-hubs/managing-users-and-assets-via-a-business-hub/update-user-roles-in-your-app-via-a-business-hub)
* [Update user roles in your apps via an IdP and business hub](/setup-and-admin/business-hubs/managing-users-and-assets-via-a-business-hub/update-user-roles-in-your-apps-via-an-idp-and-business-hub)
* [Sync your app users with your business hub](/setup-and-admin/business-hubs/managing-users-and-assets-via-a-business-hub/sync-your-business-hub-with-your-external-app)
* [Protect your app users via a business hub](/setup-and-admin/business-hubs/managing-users-and-assets-via-a-business-hub/protect-your-app-user-accounts-via-a-business-hub)
* [Log in to your app via a business hub](https://help.cerby.com/cerby-web-app/business-hubs/log-in-to-your-app)
* [Track the activity of business hub users](/setup-and-admin/business-hubs/managing-users-and-assets-via-a-business-hub/track-activity-on-app-members-user-accounts)
* [Remove a business hub](/setup-and-admin/business-hubs/managing-your-business-hubs/remove-a-business-hub)
# Connect a business hub for Affinity
This article describes how to connect a business hub to centrally manage the users of Affinity from Cerby.
{% hint style="info" %}
**Who can use this feature?**
* Workspace **Owners**, **Super Admins**, **Admins**, and **Users**
* Only supported using the Cerby web app
{% endhint %}
As a user with any workspace role in Cerby, except **Guest User** and **Login-Only**, you can connect a business hub integration to centrally manage the users of Affinity.
When you connect the business hub, you become its **Owner**, and you can perform the following user and access management tasks through automated tasks executed by the Cerby agent:
* Check for updates
* Add users
* Update user roles
* Remove users
{% hint style="success" %}
**TIP:** For more details about the automated tasks of a business hub, how it works, and the supported apps, read the article [Explore Business Hubs](https://help.cerby.com/setup-and-admin/business-hubs/business-hub-catalog).
{% endhint %}
This article provides instructions on how to connect a business hub for Affinity. For other app-specific articles and videos, review the [Connecting business hubs for your apps](https://help.cerby.com/setup-and-admin/business-hubs/connecting-your-apps) and [Connecting business hubs for your paid social apps](https://help.cerby.com/setup-and-admin/business-hubs/connecting-your-paid-social-apps) collections in the Cerby Help Center.
***
## Requirements
The following are the requirements to connect a business hub:
* A Cerby workspace
* A Cerby user account with the workspace **Owner**, **Super Admin**, **Admin**, or **User** role
* Groups configured in your identity provider (IdP) if you want to leverage automatic user provisioning and deprovisioning from your apps based on group assignment events. For more information, read the articles available in the [Managing users via an IdP and business hub](https://help.cerby.com/setup-and-admin/business-hubs/managing-users-and-assets-via-a-business-hub) collection in the Cerby Help Center
* An automation account, meaning an active user account with a native **Admin** role in Affinity to be used as a service account. For instructions and recommendations on how to create and configure this account, read the article [Create a service account for your business hub](/setup-and-admin/business-hubs/connecting-your-apps/create-a-service-account-for-your-business-hub)
* The user management and login method for your business hub identified to select the corresponding option when connecting your app. For more information, read the **User management and login method** section of the article [Explore Business Hubs](https://help.cerby.com/setup-and-admin/business-hubs/business-hub-catalog)
* An Affinity subdomain. You can find the subdomain in the address bar\*\*\*\* when you are logged in to Affinity. For example, **`cerby`** in **`https://cerby.affinity.co/dashboard`**. Just copy the value and paste it when requested while connecting the business hub.
***
## Connect a business hub for Affinity
To connect a business hub for Affinity, you must complete the following main steps from the Cerby web app dashboard:
1. [Add a business hub and connect it to Affinity](#id-1.-add-a-business-hub-and-connect-it-to-affinity)
2. [Check for updates to import users and roles to Cerby](#id-2.-check-for-updates-to-import-users-and-roles-to-cerby)
3. [Connect your Affinity user account to the business hub](#id-3.-connect-your-affinity-user-account-to-the-business-hub)
4. [Manage unmatched users](#id-4.-manage-unmatched-users)
The following sections describe each main step.
### 1. Add a business hub and connect it to Affinity
To add a business hub and connect it to Affinity, you must complete the following steps:
1. Log in to your corresponding [Cerby](https://app.cerby.com/) workspace.
2. Select the **Business Hubs** option from the left menu. The **Business Hubs** page is displayed.
3. Click the **Connect Business Hub** button located at the top-right corner of the page. The **Connect your Business Hubs to Cerby** dialog box is displayed. **TIP:** Select the **Don’t show this again** option to skip this step the next time you connect a new business hub.
4. Click the **Get started** button. A wizard is displayed on the **Select app** page.
5. Select **Affinity Hub** from the catalog. The **Enter app details** page is displayed on the wizard.
6. Enter and select your app information in the corresponding fields:
* **Label in Cerby:** It is the name to assign to your business hub in Cerby, and it will be displayed on the business hub card.
* **Affinity subdomain:** It is the unique identifier of your business or organization in **Affinity Hub**. For instructions on how to find it, read the [Requirements](#requirements) section.
* **User management and login method:** It is the way your users log in to the app and determines whether they must save their login credentials as a Cerby account connected to the business hub.
1. Select the **Single sign-on (SSO)** option because access must be managed by your IdP, and users log in with SSO authentication. They are not asked to save their credentials in Cerby.
**IMPORTANT:** Affinity supports Google SSO via Okta. The **Username and password** option is not currently available for this app.
7. Click the **Next** button. The **Select automation account** page is displayed with a list of existing Affinity accounts.
8. Select the automation account you have previously added to Cerby, as described in the [Requirements](#requirements) section. **NOTE:** If you don’t have an automation account, you are prompted to add it. Make sure you read Cerby’s recommendations on how to configure it in the article [Create a service account for your business hub](/setup-and-admin/business-hubs/connecting-your-apps/create-a-service-account-for-your-business-hub). You may need to add the account first and then add the business hub.
9. Click the **Connect app** button. The wizard closes, and a success message box is displayed. The corresponding business hub is also displayed on the **Business Hubs** page.
The next step is [2. Check for updates to import users and roles to Cerby](#id-2.-check-for-updates-to-import-users-and-roles-to-cerby).
### 2. Check for updates to import users and roles to Cerby
To check for updates in your app to identify and import users and roles to Cerby, you must complete the following steps:
1. Select the **Business Hubs** option from the left menu. The **Business Hubs** page is displayed.
2. Click the **More options** (...) icon of the corresponding business hub card. A drop-down menu is displayed.
3. Select the **Settings** option from the menu. The business hub details page is displayed with the **Settings** tab activated.
4. Click the **Check for updates** button located at the top right of the page. A message box is displayed with information about the process. **NOTE:** The check and import process may take a few minutes depending on the number of users, and because Cerby automatically matches users to their corresponding Cerby user account.
5. Confirm that the automated task to check for updates has the “Completed” status by performing any of the following actions:
* Click the **More details** button from the message box.
* Select the **Automation** option from the left menu to open the **Automation** page with a list of automated tasks and their status.
{% hint style="info" %}
**NOTE:** Cerby automatically performs daily checks for updates for all business hubs, but you can trigger them manually, as described in this section. For more instructions, read the article [Sync your app users with your business hub](/setup-and-admin/business-hubs/managing-users-and-assets-via-a-business-hub/sync-your-business-hub-with-your-external-app).
{% endhint %}
The next step is [3. Connect your Affinity user account to the business hub](#id-3.-connect-your-affinity-user-account-to-the-business-hub).
### 3. Connect your Affinity user account to the business hub
To connect your Affinity user account to the business hub so Cerby can manage and protect it, you must complete the following steps:
1. Select the **Accounts** option from the left menu. The **Accounts** page is displayed.
2. Click the **Log in** button of the corresponding Affinity Hub account card. The **Connect your Affinity Hub Account** dialog box is displayed.
3. Enter the login credentials of your **Affinity** user account.
4. Click the **Connect account** button. The dialog box closes, and a success message box and a new account card are displayed.
The next step is [4. Manage unmatched users](#id-4.-manage-unmatched-users).
### 4. Manage unmatched users
During a check for updates, Cerby automatically matches app members to the Cerby user accounts that correspond to their email addresses, including existing [guest users](https://help.cerby.com/getting-started/concepts/user-management/guest-users) and [local partners](https://help.cerby.com/getting-started/concepts/user-management/partners#h-7e4add33a2). Manual matching is required when apps don't provide email addresses and for app members using personal or external accounts that couldn’t be identified or are not in the corporate directory.
To view the status of the imported app members, you must complete the following steps:
1. Select the **Business Hubs** option from the left menu. The **Business Hubs** page is displayed.
2. Click the **More options** (...) icon of the corresponding business hub card. A drop-down menu is displayed.
3. Select the **View Members** option from the menu. The business hub details page is displayed with the **Members** tab activated. App members are displayed in the following tabs of the **User Overview** section:
* **Unmatched users:** This tab displays the users who were not automatically matched.
* **Onboarded users:** This tab displays the users matched to their Cerby user account.
* **Guest users:** This tab displays the users who were matched to an existing Cerby user account but it doesn’t exist in the corporate directory, such as external collaborators.
For unmatched users, you can perform one of the following actions:
* [Match users](#match-users)
* [Remove unmatched users](#remove-unmatched-users)
* [Exempt unmatched users](#exempt-unmatched-users)
The following sections describe each action.
#### Match users
To match users, you must complete the following steps from the **Unmatched users** tab of the business hub details page:
1. Click the **Match user** button of the corresponding user. The **Match user** dialog box is displayed.
2. Enter the username or email address of the user you want to match and invite in the **Match with** field. The user is displayed on a list.
3. Select the user from the list.
4. Click the **Next** button. The **Select Cerby role** dialog box is displayed.
5. Select the role to assign to the user on the business hub **Cerby role** drop-down menu:
* **Owner:** This role enables sharing access and managing business hub settings in Cerby.
* **Collaborator:** This role enables only logging in to the app from Cerby.
6. Click the **Match user** button. The dialog box closes, and a success message box is displayed. The user is moved to the **Onboarded users** tab.
#### Remove unmatched users
To remove unmatched users, you must complete the following steps from the **Unmatched users** tab of the business hub details page:
{% hint style="danger" %}
**IMPORTANT:** When removing an unmatched user, Cerby performs an automated task to revoke the user’s seat and permissions in Affinity.
{% endhint %}
1. Click the **More options** (...) icon of the corresponding user. A drop-down menu is displayed.
2. Select the **Remove user** option from the menu. The **Remove user?** dialog box is displayed.
3. Click the **Remove user** button. The dialog box closes, and a success message box is displayed. The user is removed from the app via an automated task.
#### Exempt unmatched users
Exempted users keep their user accounts or seats active in your app, but you cannot manage them through Cerby.
To exempt unmatched users, you must complete the following steps from the **Unmatched users** tab of the business hub details page:
1. Click the **More options** (...) icon of the corresponding user. A drop-down menu is displayed.
2. Select the **Exempt user** option from the menu. The exempt user dialog box is displayed.
3. Enter a reason for exempting the user in the **Provide a reason** field.
4. Click the **Exempt member** button. The dialog box closes, and a success message box is displayed. The user is moved to the **Exempted users** tab.
***
## Use your business hub
The following are the supported features of business hubs you can use:
* [Join the external app and set up your business hub access](https://help.cerby.com/cerby-web-app/business-hubs/join-your-external-app-and-set-up-your-business-hub-access)
* [Add users to your app via a business hub](/setup-and-admin/business-hubs/managing-users-and-assets-via-a-business-hub/add-users-and-teams-to-your-apps-via-a-business-hub)
* [Provision users to your apps via an IdP and business hub](/setup-and-admin/business-hubs/managing-users-and-assets-via-a-business-hub/provision-users-to-your-apps-via-an-idp-and-business-hub)
* [Remove users from your app via a business hub](/setup-and-admin/business-hubs/managing-users-and-assets-via-a-business-hub/remove-users-from-your-app-via-a-business-hub)
* [Remove teams from your app via a business hub](/setup-and-admin/business-hubs/managing-users-and-assets-via-a-business-hub/remove-teams-from-your-app-via-a-business-hub)
* [Deprovision users from your apps via an IdP and business hub](/setup-and-admin/business-hubs/managing-users-and-assets-via-a-business-hub/deprovision-users-from-your-apps-via-an-idp-and-business-hub)
* [Update user roles in your app via a business hub](/setup-and-admin/business-hubs/managing-users-and-assets-via-a-business-hub/update-user-roles-in-your-app-via-a-business-hub)
* [Update user roles in your apps via an IdP and business hub](/setup-and-admin/business-hubs/managing-users-and-assets-via-a-business-hub/update-user-roles-in-your-apps-via-an-idp-and-business-hub)
* [Sync your app users with your business hub](/setup-and-admin/business-hubs/managing-users-and-assets-via-a-business-hub/sync-your-business-hub-with-your-external-app)
* [Log in to your app via a business hub](https://help.cerby.com/cerby-web-app/business-hubs/log-in-to-your-app)
* [Track the activity of business hub users](/setup-and-admin/business-hubs/managing-users-and-assets-via-a-business-hub/track-activity-on-app-members-user-accounts)
* [Remove a business hub](/setup-and-admin/business-hubs/managing-your-business-hubs/remove-a-business-hub)
# Connect a business hub for Ahrefs
This article describes how to connect a business hub to centrally manage the users of Ahrefs from Cerby.
{% hint style="info" %}
**Who can use this feature?**
* Workspace **Owners**, **Super Admins**, **Admins**, and **Users**
* Only supported using the Cerby web app
{% endhint %}
As a user with any workspace role in Cerby, except **Guest User** and **Login-Only**, you can connect a business hub integration to centrally manage the users of Ahrefs.
When you connect the business hub, you become its **Owner**, and you can perform the following user and access management tasks through automated tasks executed by the Cerby agent:
* Check for updates
* Add users
* Update user roles
* Remove users
{% hint style="success" %}
**TIP:** For more details about the automated tasks of a business hub, how it works, and the supported apps, read the article [Explore Business Hubs](https://help.cerby.com/setup-and-admin/business-hubs/business-hub-catalog).
{% endhint %}
This article provides instructions on how to connect a business hub for Ahrefs. For other app-specific articles and videos, review the [Connecting your business hubs](https://help.cerby.com/setup-and-admin/business-hubs/connecting-your-apps) collection in the Cerby Help Center.
***
## Requirements
The following are the requirements to connect a business hub:
* A Cerby workspace
* A Cerby user account with the workspace **Owner**, **Super Admin**, **Admin**, or **User** role
* Groups configured in your identity provider (IdP) if you want to leverage automatic user provisioning and deprovisioning from your apps based on group assignment events. For more information, read the article [Provision users to your apps via an IdP and business hub](https://help.cerby.com/setup-and-admin/business-hubs/managing-users-and-assets-via-a-business-hub/provision-users-to-your-apps-via-an-idp-and-business-hub)
* An automation account, meaning an active user account with a native **Admin** role in Ahrefs to be used as a service account. For instructions and recommendations on how to create and configure this account, read the article [Create a service account for your business hub](/setup-and-admin/business-hubs/connecting-your-apps/create-a-service-account-for-your-business-hub)
***
## Connect a business hub for Ahrefs
To connect a business hub for Ahrefs, you must complete the following main steps from the Cerby web app dashboard:
1. [Add a business hub and connect it to Ahrefs](#id-1.-add-a-business-hub-and-connect-it-to-ahrefs)
2. [Check for updates to import users and roles to Cerby](#id-2.-check-for-updates-to-import-users-and-roles-to-cerby)
3. [Connect your Ahrefs user account to the business hub](#id-3.-connect-your-ahrefs-user-account-to-the-business-hub)
4. [Manage unmatched users](#id-4.-manage-unmatched-users)
The following sections describe each main step.
### 1. Add a business hub and connect it to Ahrefs
To add a business hub and connect it to Ahrefs, you must complete the following steps:
1. Log in to your corresponding [Cerby](https://app.cerby.com/) workspace.
2. Select the **Business Hubs** option from the left menu. The **Business Hubs** page is displayed.
3. Click the **Connect Business Hub** button located at the top-right corner of the page. The **Connect your Business Hubs to Cerby** dialog box is displayed. **TIP:** Select the **Don’t show this again** option to skip this step the next time you connect a new business hub.
4. Click the **Get started** button. A wizard is displayed on the **Select app** page.
5. Select **Ahrefs Hub** from the catalog. The **Enter app details** page is displayed on the wizard.
6. Enter and select your app information in the corresponding fields:
* **Label in Cerby:** It is the name to assign to your business hub in Cerby, and it will be displayed on the business hub card.
* **Business unique identifier:** It is a unique identifier that differentiates your business hub in Cerby from others for the same app. You can assign an alphanumeric value between 3 and 30 characters without symbols or special characters.
* **User management and login method:** It is the way your users log in to the app and determines whether they must save their login credentials as a Cerby account connected to the business hub.
1. Select the **Username and password** option because account security and access are managed by Cerby, and users log in with their credentials after saving them in Cerby.
**IMPORTANT:** The **Single sign-on (SSO)** option is not supported by Ahrefs.
7. Click the **Next** button. The **Select automation account** page is displayed with a list of existing Ahrefs accounts.
8. Select the automation account you have previously added to Cerby, as described in the [Requirements](#requirements) section. **NOTE:** If you don’t have an automation account, you are prompted to add it. Make sure you read Cerby’s recommendations on how to configure it in the article [Create a service account for your business hub](/setup-and-admin/business-hubs/connecting-your-apps/create-a-service-account-for-your-business-hub). You may need to add the account first and then add the business hub.
9. Click the **Connect app** button. The wizard closes, and a success message box is displayed. The corresponding business hub is also displayed on the **Business Hubs** page.
The next step is [2. Check for updates to import users and roles to Cerby](#id-2.-check-for-updates-to-import-users-and-roles-to-cerby).
### 2. Check for updates to import users and roles to Cerby
To check for updates in your app to identify and import users and roles to Cerby, you must complete the following steps:
1. Select the **Business Hubs** option from the left menu. The **Business Hubs** page is displayed.
2. Click the **More options** (...) icon of the corresponding business hub card. A drop-down menu is displayed.
3. Select the **Settings** option from the menu. The business hub details page is displayed with the **Settings** tab activated.
4. Click the **Check for updates** button located at the top right of the page. A message box is displayed with information about the process. **NOTE:** The check and import process may take a few minutes depending on the number of users, and because Cerby automatically matches users to their corresponding Cerby user account.
5. Confirm that the automated task to check for updates has the “Completed” status by performing any of the following actions:
* Click the **More details** button from the message box.
* Select the **Automation** option from the left menu to open the **Automation** page with a list of automated tasks and their status.
{% hint style="info" %}
**NOTE:** Cerby automatically performs daily checks for updates for all business hubs, but you can trigger them manually, as described in this section. For more instructions, read the article [Sync your app users with your business hub](/setup-and-admin/business-hubs/managing-users-and-assets-via-a-business-hub/sync-your-business-hub-with-your-external-app).
{% endhint %}
The next step is [3. Connect your Ahrefs user account to the business hub](#id-3.-connect-your-ahrefs-user-account-to-the-business-hub).
### 3. Connect your Ahrefs user account to the business hub
To connect your Ahrefs user account to the business hub so Cerby can manage and protect it, you must complete the following steps:
1. Select the **Accounts** option from the left menu. The **Accounts** page is displayed.
2. Click the **Log in** button of the corresponding Ahrefs Hub account card. The **Connect your Ahrefs Hub Account** dialog box is displayed.
3. Enter the login credentials of your **Ahrefs** user account.
4. Click the **Connect account** button. The dialog box closes, and a success message box and a new account card are displayed.
The next step is [4. Manage unmatched users](#id-4.-manage-unmatched-users).
### 4. Manage unmatched users
During a check for updates, Cerby automatically matches app members to the Cerby user accounts that correspond to their email addresses, including existing [guest users](https://help.cerby.com/getting-started/concepts/user-management/guest-users) and [local partners](https://help.cerby.com/getting-started/concepts/user-management/partners#h-7e4add33a2). Manual matching is required when apps don't provide email addresses and for app members using personal or external accounts that couldn’t be identified or are not in the corporate directory.
To view the status of the imported app members, you must complete the following steps:
1. Select the **Business Hubs** option from the left menu. The **Business Hubs** page is displayed.
2. Click the **More options** (...) icon of the corresponding business hub card. A drop-down menu is displayed.
3. Select the **View Members** option from the menu. The business hub details page is displayed with the **Members** tab activated. App members are displayed in the following tabs of the **User Overview** section:
* **Unmatched users:** This tab displays the users who were not automatically matched.
* **Onboarded users:** This tab displays the users matched to their Cerby user account.
* **Guest users:** This tab displays the users who were matched to an existing Cerby user account but it doesn’t exist in the corporate directory, such as external collaborators.
For unmatched users, you can perform one of the following actions:
* [Match users](#match-users)
* [Remove unmatched users](#remove-unmatched-users)
* [Exempt unmatched users](#exempt-unmatched-users)
The following sections describe each action.
#### Match users
To match users, you must complete the following steps from the **Unmatched users** tab of the business hub details page:
1. Click the **Match user** button of the corresponding user. The **Match user** dialog box is displayed.
2. Enter the username or email address of the user you want to match and invite in the **Match with** field. The user is displayed on a list.
3. Select the user from the list.
4. Click the **Next** button. The **Select Cerby role** dialog box is displayed.
5. Select the role to assign to the user on the business hub **Cerby role** drop-down menu:
* **Owner:** This role enables sharing access and managing business hub settings in Cerby.
* **Collaborator:** This role enables only logging in to the app from Cerby.
6. Click the **Match user** button. The dialog box closes, and a success message box is displayed. The user is moved to the **Onboarded users** tab.
#### Remove unmatched users
To remove unmatched users, you must complete the following steps from the **Unmatched users** tab of the business hub details page:
{% hint style="danger" %}
**IMPORTANT:** When removing an unmatched user, Cerby performs an automated task to revoke the user’s seat and permissions in Ahrefs.
{% endhint %}
1. Click the **More options** (...) icon of the corresponding user. A drop-down menu is displayed.
2. Select the **Remove user** option from the menu. The **Remove user?** dialog box is displayed.
3. Click the **Remove user** button. The dialog box closes, and a success message box is displayed. The user is removed from the app via an automated task.
#### Exempt unmatched users
Exempted users keep their user accounts or seats active in your app, but you cannot manage them through Cerby.
To exempt unmatched users, you must complete the following steps from the **Unmatched users** tab of the business hub details page:
1. Click the **More options** (...) icon of the corresponding user. A drop-down menu is displayed.
2. Select the **Exempt user** option from the menu. The exempt user dialog box is displayed.
3. Enter a reason for exempting the user in the **Provide a reason** field.
4. Click the **Exempt member** button. The dialog box closes, and a success message box is displayed. The user is moved to the **Exempted users** tab.
***
## Use your business hub
The following are the supported features of business hubs you can use:
* [Join the external app and set up your business hub access](https://help.cerby.com/cerby-web-app/business-hubs/join-your-external-app-and-set-up-your-business-hub-access)
* [Add users to your app via a business hub](/setup-and-admin/business-hubs/managing-users-and-assets-via-a-business-hub/add-users-and-teams-to-your-apps-via-a-business-hub)
* [Remove users from your app via a business hub](/setup-and-admin/business-hubs/managing-users-and-assets-via-a-business-hub/remove-users-from-your-app-via-a-business-hub)
* [Remove teams from your app via a business hub](/setup-and-admin/business-hubs/managing-users-and-assets-via-a-business-hub/remove-teams-from-your-app-via-a-business-hub)
* [Provision users to your apps via an IdP and business hub](https://help.cerby.com/setup-and-admin/business-hubs/managing-users-and-assets-via-a-business-hub/provision-users-to-your-apps-via-an-idp-and-business-hub)
* [Update user roles in your app via a business hub](/setup-and-admin/business-hubs/managing-users-and-assets-via-a-business-hub/update-user-roles-in-your-app-via-a-business-hub)
* [Sync your app users with your business hub](/setup-and-admin/business-hubs/managing-users-and-assets-via-a-business-hub/sync-your-business-hub-with-your-external-app)
* [Protect your app users via a business hub](/setup-and-admin/business-hubs/managing-users-and-assets-via-a-business-hub/protect-your-app-user-accounts-via-a-business-hub)
* [Log in to your app via a business hub](https://help.cerby.com/cerby-web-app/business-hubs/log-in-to-your-app)
* [Track the activity of business hub users](/setup-and-admin/business-hubs/managing-users-and-assets-via-a-business-hub/track-activity-on-app-members-user-accounts)
* [Remove a business hub](/setup-and-admin/business-hubs/managing-your-business-hubs/remove-a-business-hub)
# Connect a business hub for Alta
This article describes how to connect a business hub to centrally manage the users of Alta from Cerby.
{% hint style="info" %}
**Who can use this feature?**
* Workspace **Owners**, **Super Admins**, **Admins**, and **Users**
* Only supported using the Cerby web app
{% endhint %}
As a user with any workspace role in Cerby, except **Guest User** and **Login-Only**, you can connect a business hub integration to centrally manage the users of Alta.
When you connect the business hub, you become its **Owner**, and you can perform the following user and access management tasks through automated tasks executed by the Cerby agent:
* Check for updates
* Invite app members
* Update app members’ roles
* Remove app members
{% hint style="success" %}
**TIP:** For more details about the automated tasks of a business hub, how it works, and the supported apps, read the article [Explore Apps](https://help.cerby.com/setup-and-admin/business-hubs/business-hub-catalog).
{% endhint %}
This article provides instructions on how to connect a business hub for Alta. For other app-specific articles and videos, review the [Connecting your business hubs](https://help.cerby.com/setup-and-admin/business-hubs/connecting-your-apps) collection in the Cerby Help Center.
***
## Requirements
The following are the requirements to connect a business hub:
* A Cerby workspace
* A Cerby user account with the **Owner**, **Super Admin**, **Admin**, or **User** role
* A collaboration space in Alta
* Groups configured in your identity provider (IdP) if you want to leverage automatic user provisioning and deprovisioning from your apps based on group assignment events. For more information, read the article [Provision users to your apps via an IdP and business hub](https://help.cerby.com/setup-and-admin/business-hubs/managing-users-and-assets-via-a-business-hub/provision-users-to-your-apps-via-an-idp-and-business-hub)
* An automation account, meaning an active user account with a native **Admin** role in Alta to be used as a service account. For instructions and recommendations on how to create and configure this account, read the article [Create a service account for your business hub](https://help.cerby.com/setup-and-admin/business-hubs/connecting-your-apps/create-a-service-account-for-your-business-hub)
* The user management and login method for your business hub identified to select the corresponding option when connecting your app. For more information, read the **User management and login method** section of the article [Explore Apps](https://help.cerby.com/setup-and-admin/business-hubs/business-hub-catalog)
***
## Connect a business hub for Alta
To connect a business hub for Alta, you must complete the following main steps from the Cerby web app dashboard:
1. [Add a business hub and connect it to Alta](#id-1.-add-a-business-hub-and-connect-it-to-alta)
2. [Check for updates to import users and roles to Cerby](#id-2.-check-for-updates-to-import-users-and-roles-to-cerby)
3. [Connect your Alta user account to the business hub](#id-3.-connect-your-alta-user-account-to-the-business-hub)
4. [Manage unmatched users](#id-4.-manage-unmatched-users)
The following sections describe each main step.
### 1. Add a business hub and connect it to Alta
To add a business hub and connect it to Alta, you must complete the following steps:
1. Log in to your corresponding [Cerby](https://app.cerby.com/) workspace.
2. Select the **Business Hubs** option from the left navigation drawer. The **Business Hubs** page is displayed.
3. Click the **Connect Business Hub** button located at the top-right corner of the page. The **Connect your Business Hubs to Cerby** dialog box is displayed. **TIP:** Select the **Don’t show this again** option to skip this step the next time you connect a new business hub.
4. Click the **Get started** button. A wizard is displayed on the **Select app** page.
5. Select **Alta Hub** from the catalog. The **Enter app details** page is displayed on the wizard.
6. Enter and select your app information in the corresponding fields:
* **Label in Cerby:** It is the name to assign to your business hub in Cerby, and it will be displayed on the business hub card.
* **Internal Unique Identifier:** It is a unique identifier that differentiates your business hub in Cerby from others for the same app. You can assign an alphanumeric value between 3 and 30 characters without symbols or special characters.
* **User management and login method:** It is the way your users log in to the app and determines whether they must save their login credentials as a Cerby account connected to the business hub. You must select one of the following methods:
* **Single sign-on (SSO):** Access is managed by your identity provider, and users log in with SSO authentication. They are not asked to save their credentials in Cerby.
* **Username and password:** Cerby manages account security and access, and users log in with their credentials after saving them in Cerby.
7. Click the **Next** button. The **Select automation account** page is displayed with a list of existing Alta accounts.
8. Select the automation account you have previously added to Cerby, as described in the [Requirements](#requirements) section. **NOTE:** If you don’t have an automation account, you are prompted to add it. Make sure you read Cerby’s recommendations on how to configure it in the article [Create a service account for your business hub](https://help.cerby.com/setup-and-admin/business-hubs/connecting-your-apps/create-a-service-account-for-your-business-hub). You may need to add the account first and then add the business hub.
9. Click the **Connect app** button. The wizard closes, and a success message box is displayed. The corresponding business hub is also displayed on the **Business Hubs** page.
The next step is [2. Check for updates to import users and roles to Cerby](#id-2.-check-for-updates-to-import-users-and-roles-to-cerby).
### 2. Check for updates to import users and roles to Cerby
To check for updates in your app to identify and import users and roles to Cerby, you must complete the following steps:
1. Select the **Business Hubs** option from the left navigation drawer. The **Business Hubs** page is displayed.
2. Click the **Settings** () icon of the corresponding business hub card. The business hub details page is displayed with the **Settings** tab activated.
3. Click the **Check for updates** button located at the top right of the page. A message box is displayed with information about the process. **NOTE:** The check and import process may take a few minutes depending on the number of users, and because Cerby automatically matches users to their corresponding Cerby user account.
4. Confirm that the automated task to check for updates has the “Completed” status by performing any of the following actions:
* Click the **More details** button from the message box.
* Select the **Automation** option from the left navigation drawer to open the **Automation** page with a list of automated tasks and their status.
{% hint style="info" %}
**NOTE:** Cerby automatically performs daily checks for updates for all business hubs, but you can trigger them manually, as described in this section. When a user is deprovisioned from an IdP and a check for updates is performed, Cerby generates a report and sends business hub **Owners** an email to confirm their removal from the app. For more instructions, read the article [Check for updates in your app and apply report](/setup-and-admin/business-hubs/managing-users-and-assets-via-a-business-hub/sync-your-business-hub-with-your-external-app).
{% endhint %}
The next step is [3. Connect your Alta user account to the business hub](#id-3.-connect-your-alta-user-account-to-the-business-hub).
### 3. Connect your Alta user account to the business hub
To connect your Alta user account to the business hub so Cerby can manage and protect it, you must complete the following steps:
1. Select the **Accounts** option from the left navigation drawer. The **Accounts** page is displayed.
2. Click the **Log in** button of the corresponding Alta Hub account card. The **Connect your Alta Hub Account** dialog box is displayed.
3. Enter the login credentials of your **Alta** user account.
4. Click the **Connect account** button. The dialog box closes, and a success message box and a new account card are displayed.
The next step is [4. Manage unmatched users](#id-4.-manage-unmatched-users).
### 4. Manage unmatched users
During a check for updates, Cerby automatically matches app members to the Cerby user accounts that correspond to their email addresses, including existing [guest users](https://help.cerby.com/getting-started/concepts/user-management/guest-users) and [local partners](https://help.cerby.com/getting-started/concepts/user-management/partners#h-7e4add33a2). Manual matching is required when apps don't provide email addresses and for app members using personal or external accounts that couldn’t be identified or are not in the corporate directory.
To view the status of the imported app members, you must complete the following steps:
1. Select the **Business Hubs** option from the left navigation drawer. The **Business Hubs** page is displayed.
2. Click the **More options** (...) icon of the corresponding business hub card. A drop-down list is displayed.
3. Select the **View Members** option from the list. The business hub details page is displayed with the **Members** tab activated. App members are displayed in the following tabs of the **User Overview** section:
* **Unmatched users:** This tab displays the users who were not automatically matched.
* **Onboarded users:** This tab displays the users matched to their Cerby user account.
* **Guest users:** This tab displays the users who were matched to an existing Cerby user account but it doesn’t exist in the corporate directory, such as external collaborators.
For unmatched users, you can perform one of the following actions:
* [Match users](#match-users)
* [Remove unmatched users](#remove-unmatched-users)
* [Exempt unmatched users](#exempt-unmatched-users)
The following sections describe each action.
#### Match users
To match users, you must complete the following steps from the **Unmatched users** tab of the business hub details page:
1. Click the **Match user** button of the corresponding user. The **Match user** dialog box is displayed.
2. Enter the username or email address of the user you want to match and invite in the **Match with** field. The user is displayed on a list.
3. Select the user from the list.
4. Click the **Next** button. The **Select Cerby role** dialog box is displayed.
5. Select the role to assign to the user on the business hub **Cerby role** drop-down list:
* **Owner:** This role enables sharing access and managing business hub settings in Cerby.
* **Collaborator:** This role enables only logging in to the app from Cerby.
6. Click the **Match user** button. The dialog box closes, and a success message box is displayed. The user is moved to the **Onboarded users** tab.
#### Remove unmatched users
To remove unmatched users, you must complete the following steps from the **Unmatched users** tab of the business hub details page:
{% hint style="danger" %}
**IMPORTANT:** When removing an unmatched user, Cerby performs an automated task to revoke the user’s seat and permissions in Alta.
{% endhint %}
1. Click the **More options** (...) icon of the corresponding user. A drop-down list is displayed.
2. Select the **Remove user** option from the list. The **Remove user?** dialog box is displayed.
3. Click the **Remove user** button. The dialog box closes, and a success message box is displayed. The user is removed from the app via an automated task.
#### Exempt unmatched users
Exempted users keep their user accounts or seats active in your app, but you cannot manage them through Cerby.
To exempt unmatched users, you must complete the following steps from the **Unmatched users** tab of the business hub details page:
1. Click the **More options** (...) icon of the corresponding user. A drop-down list is displayed.
2. Select the **Exempt user** option from the list. The exempt user dialog box is displayed.
3. Enter a reason for exempting the user in the **Provide a reason** field.
4. Click the **Exempt member** button. The dialog box closes, and a success message box is displayed. The user is moved to the **Exempted users** tab.
***
## Use your business hub
The following are the supported features of business hubs you can use:
* [Join the App and connect it to Cerby](https://help.cerby.com/cerby-web-app/business-hubs/join-your-external-app-and-set-up-your-business-hub-access)
* [Invite new app members](/setup-and-admin/business-hubs/managing-users-and-assets-via-a-business-hub/add-users-and-teams-to-your-apps-via-a-business-hub)
* [Remove app members](/setup-and-admin/business-hubs/managing-users-and-assets-via-a-business-hub/remove-users-from-your-app-via-a-business-hub)
* [Provision users to your apps via an IdP and business hub](https://help.cerby.com/setup-and-admin/business-hubs/managing-users-and-assets-via-a-business-hub/provision-users-to-your-apps-via-an-idp-and-business-hub)
* [Update the app members’ roles](/setup-and-admin/business-hubs/managing-users-and-assets-via-a-business-hub/update-user-roles-in-your-app-via-a-business-hub)
* [Check for updates in your app and apply report](/setup-and-admin/business-hubs/managing-users-and-assets-via-a-business-hub/sync-your-business-hub-with-your-external-app)
* [Re-assign the app members’ user accounts](https://github.com/cerbyinc/help-center/tree/main/.uncategorized/unpublished-deprecated-re-assign-the-app-members-user-accounts.md)
* [Log in to your app](https://help.cerby.com/cerby-web-app/business-hubs/log-in-to-your-app)
* [Track activity on app members’ user accounts](/setup-and-admin/business-hubs/managing-users-and-assets-via-a-business-hub/track-activity-on-app-members-user-accounts)
* [Remove an App](/setup-and-admin/business-hubs/managing-your-business-hubs/remove-a-business-hub)
# Connect a business hub for American Express Merchant Account
This article describes how to connect a business hub to centrally manage the users of American Express Merchant Account from Cerby.
{% hint style="info" %}
**Who can use this feature?**
* Workspace **Owners**, **Super Admins**, **Admins**, and **Users**
* Only supported using the Cerby web app
{% endhint %}
As a user with any workspace role in Cerby, except **Guest User** and **Login-Only**, you can connect a business hub integration to centrally manage the users of American Express.
When you connect the business hub, you become its **Owner**, and you can perform the following user and access management tasks through automated tasks executed by the Cerby agent:
* Check for updates
* Add users
{% hint style="success" %}
**TIP:** For more details about the automated tasks of a business hub, how it works, and the supported apps, read the article [Explore Business Hubs](https://help.cerby.com/setup-and-admin/business-hubs/business-hub-catalog).
{% endhint %}
{% hint style="info" %}
**NOTES:**
* The automated tasks to **update user roles** and **remove users** are not available for this business hub. These actions are managed exclusively through Bill.com’s support team.
* The task to **add users** to the American Express business hub automates the creation and verification of the user’s merchant account in American Express using the **Merchant ID**, **ABA Account Number**, and **DDA Number** provided by Bill.com.
{% endhint %}
This article provides instructions on how to connect a business hub for American Express. For other app-specific articles and videos, review the [Connecting business hubs for your apps](https://help.cerby.com/setup-and-admin/business-hubs/connecting-your-apps) and [Connecting business hubs for your paid social apps](https://help.cerby.com/setup-and-admin/business-hubs/connecting-your-paid-social-apps) collections in the Cerby Help Center.
***
## Requirements
The following are the requirements to connect a business hub:
* A Cerby workspace
* A Cerby user account with the **Owner**, **Super Admin**, **Admin**, or **User** role
* Groups configured in your identity provider (IdP) if you want to leverage automatic user provisioning and deprovisioning from your apps based on group assignment events. For more information, read the articles available in the [Managing users via an IdP and business hub](https://help.cerby.com/setup-and-admin/business-hubs/managing-users-and-assets-via-a-business-hub) collection in the Cerby Help Center
* An automation account, meaning an active merchant account with enough permissions to manage users, groups, and roles in American Express, to be used as a service account. For instructions and recommendations on how to create and configure this account, read the article [Create a service account for your business hub](/setup-and-admin/business-hubs/connecting-your-apps/create-a-service-account-for-your-business-hub)
***
## Connect a business hub for American Express
To connect a business hub for American Express, you must complete the following main steps from the Cerby web app dashboard:
1. [Add a business hub and connect it to American Express](#id-1.-add-a-business-hub-and-connect-it-to-american-express)
2. [Check for updates to import users and roles to Cerby](#id-2.-check-for-updates-to-import-users-and-roles-to-cerby)
3. [Connect your American Express user account to the business hub](#id-3.-connect-your-american-express-user-account-to-the-business-hub)
4. [Manage unmatched users](#id-4.-manage-unmatched-users)
The following sections describe each main step.
### 1. Add a business hub and connect it to American Express
To add a business hub and connect it to American Express, you must complete the following steps:
1. Log in to your corresponding [Cerby](https://app.cerby.com/) workspace.
2. Select the **Business Hubs** option from the left menu. The **Business Hubs** page is displayed.
3. Click the **Connect Business Hub** button located at the top-right corner of the page. The **Connect your Business Hubs to Cerby** dialog box is displayed. **TIP:** Select the **Don’t show this again** option to skip this step the next time you connect a new business hub.
4. Click the **Get started** button. A wizard is displayed on the **Select app** page.
5. Select **American Express Hub** from the catalog. The **Enter app details** page is displayed on the wizard.
6. Enter and select your app information in the corresponding fields:
* **Label in Cerby:** It is the name to assign to your business hub in Cerby, and it will be displayed on the business hub card.
* **User management and login method:** It is the way your users log in to the app and determines whether they must save their login credentials as a Cerby account connected to the business hub.
1. Select the **Username and password** option because account security and access are managed by Cerby, and users log in with their credentials after saving them in Cerby
**IMPORTANT:** The **Single sign-on (SSO)** option is not supported for American Express.
7. Click the **Next** button. The **Select automation account** page is displayed with a list of existing American Express accounts.
8. Select the automation account you have previously added to Cerby, as described in the [Requirements](#requirements) section. **NOTE:** If you don’t have an automation account, you are prompted to add it. Make sure you read Cerby’s recommendations on how to configure it in the article [Create a service account for your business hub](https://help.cerby.com/setup-and-admin/business-hubs/connecting-your-apps/create-a-service-account-for-your-business-hub). You may need to add the account first and then add the business hub.
9. Click the **Connect app** button. The wizard closes, and a success message box is displayed. The corresponding business hub is also displayed on the **Business Hubs** page
The next step is [2. Check for updates to import users and roles to Cerby](/setup-and-admin/business-hubs/connecting-your-apps/connect-a-business-hub-for-your-app#h-9c6531cf9a).
### 2. Check for updates to import users and roles to Cerby
To check for updates in your app to identify and import users and roles to Cerby, you must complete the following steps:
1. Select the **Business Hubs** option from the left menu. The **Business Hubs** page is displayed.
2. Click the **More options** (...) icon of the corresponding business hub card. A drop-down menu is displayed.
3. Select the **Settings** option from the menu. The business hub details page is displayed with the **Settings** tab activated.
4. Click the **Sync** button located at the top right of the page. A message box is displayed with information about the process. **NOTE:** The check and import process may take a few minutes, depending on the number of users, and because Cerby automatically matches users to their corresponding Cerby user account.
5. Confirm that the automated task to check for updates has the “Completed” status by performing any of the following actions:
* Click the **More details** button in the message box.
* Select the **Automation** option from the left menu to open the **Automation** page with a list of automated tasks and their status.
{% hint style="info" %}
**NOTE:** Cerby automatically performs daily checks for updates for all business hubs, but you can trigger them manually, as described in this section. For more instructions, read the article [Sync your app users with your business hub](/setup-and-admin/business-hubs/managing-users-and-assets-via-a-business-hub/sync-your-business-hub-with-your-external-app).
{% endhint %}
The next step is [3. Connect your American Express user account to the business hub](#id-3.-connect-your-american-express-user-account-to-the-business-hub).
### 3. Connect your American Express user account to the business hub
To connect your American Express user account to the business hub so Cerby can manage and protect it, you must complete the following steps:
1. Select the **Accounts** option from the left menu. The **All accounts** page is displayed.
2. Click the **Log in** button of the corresponding American Express Hub account card. The **Connect your American Express Hub Account** dialog box is displayed.
3. Enter the login credentials of your **American Express** user account.
4. Click the **Connect account** button. The dialog box closes, and a success message box and a new account card are displayed.
The next step is [4. Manage unmatched users](#id-4.-manage-unmatched-users).
### 4. Manage unmatched users
During a check for updates, Cerby automatically matches app members to the Cerby user accounts that correspond to their email addresses, including existing [guest users](https://help.cerby.com/getting-started/concepts/user-management/guest-users) and [local partners](https://help.cerby.com/getting-started/concepts/user-management/partners#h-7e4add33a2). Manual matching is required when apps don't provide email addresses and for app members using personal or external accounts that couldn’t be identified or are not in the corporate directory.
To view the status of the imported app members, you must complete the following steps:
1. Select the **Business Hubs** option from the left menu. The **Business Hubs** page is displayed.
2. Click the **More options** (...) icon of the corresponding business hub card. A drop-down menu is displayed.
3. Select the **View Members** option from the menu. The business hub details page is displayed with the **Members** tab activated. App members are displayed in the following tabs of the **User Overview** section:
* **Unmatched users:** This tab displays the users who were not automatically matched.
* **Onboarded users:** This tab displays the users matched to their Cerby user account.
* **Guest users:** This tab displays the users who were matched to an existing Cerby user account, but it doesn’t exist in the corporate directory, such as external collaborators.
For unmatched users, you can perform one of the following actions:
* [Match users](#match-users)
* [Remove unmatched users](#remove-unmatched-users)
* [Exempt unmatched users](#exempt-unmatched-users)
The following sections describe each action.
#### Match users
To match users, you must complete the following steps from the **Unmatched users** tab of the business hub details page:
1. Click the **Match user** button of the corresponding user. The **Match user** dialog box is displayed.
2. Enter the username or email address of the user you want to match and invite in the **Match with** field. The user is displayed on a list.
3. Select the user from the list.
4. Click the **Next** button. The **Select Cerby role** dialog box is displayed.
5. Select the role to assign to the user on the business hub **Cerby role** drop-down menu:
* **Owner:** This role enables sharing access and managing business hub settings in Cerby.
* **Collaborator:** This role enables only logging in to the app from Cerby.
6. Click the **Match user** button. The dialog box closes, and a success message box is displayed. The user is moved to the **Onboarded users** tab.
#### Remove unmatched users
To remove unmatched users, you must complete the following steps from the **Unmatched users** tab of the business hub details page:
{% hint style="danger" %}
**IMPORTANT:** When removing an unmatched user, Cerby performs an automated task to revoke the user’s seat and permissions in American Express.
{% endhint %}
1. Click the **More options** (...) icon of the corresponding user. A drop-down menu is displayed.
2. Select the **Remove user** option from the list. The **Remove user?** dialog box is displayed.
3. Click the **Remove user** button. The dialog box closes, and a success message box is displayed. The user is removed from the app via an automated task.
#### Exempt unmatched users
Exempted users keep their user accounts or seats active in your app, but you cannot manage them through Cerby.
To exempt unmatched users, you must complete the following steps from the **Unmatched users** tab of the business hub details page:
1. Click the **More options** (...) icon of the corresponding user. A drop-down list is displayed.
2. Select the **Exempt user** option from the list. The exempt user dialog box is displayed.
3. Enter a reason for exempting the user in the **Provide a reason** field.
4. Click the **Exempt member** button. The dialog box closes, and a success message box is displayed. The user is moved to the **Exempted users** tab.
***
## Use your business hub
The following are the supported features of business hubs you can use:
* [Join the external app and set up your business hub access](https://help.cerby.com/cerby-web-app/business-hubs/join-your-external-app-and-set-up-your-business-hub-access)
* [Add users to your app via a business hub](/setup-and-admin/business-hubs/managing-users-and-assets-via-a-business-hub/add-users-and-teams-to-your-apps-via-a-business-hub)
* [Provision users to your apps via an IdP and business hub](/setup-and-admin/business-hubs/managing-users-and-assets-via-a-business-hub/provision-users-to-your-apps-via-an-idp-and-business-hub)
* [Deprovision users from your apps via an IdP and business hub](/setup-and-admin/business-hubs/managing-users-and-assets-via-a-business-hub/deprovision-users-from-your-apps-via-an-idp-and-business-hub)
* [Sync your app users with your business hub](/setup-and-admin/business-hubs/managing-users-and-assets-via-a-business-hub/sync-your-business-hub-with-your-external-app)
* [Protect your app users via a business hub](/setup-and-admin/business-hubs/managing-users-and-assets-via-a-business-hub/protect-your-app-user-accounts-via-a-business-hub)
* [Log in to your app via a business hub](https://help.cerby.com/cerby-web-app/business-hubs/log-in-to-your-app)
* [Track the activity of business hub users](/setup-and-admin/business-hubs/managing-users-and-assets-via-a-business-hub/track-activity-on-app-members-user-accounts)
* [Remove a business hub](/setup-and-admin/business-hubs/managing-your-business-hubs/remove-a-business-hub)
# Connect a business hub for Apollo
This article describes how to connect a business hub to centrally manage the users of Apollo from Cerby.
{% hint style="info" %}
**Who can use this feature?**
* Workspace **Owners**, **Super Admins**, **Admins**, and **Users**
* Only supported using the Cerby web app
{% endhint %}
As a user with any workspace role in Cerby, except **Guest User** and **Login-Only**, you can connect a business hub integration to centrally manage the users of Apollo.
When you connect the business hub, you become its **Owner**, and you can perform the following user and access management tasks through automated tasks executed by the Cerby agent:
* Check for updates
* Invite app members
* Update app members’ roles
* Remove app members
{% hint style="success" %}
**TIP:** For more details about the automated tasks of a business hub, how it works, and the supported apps, read the article [Explore Apps](https://help.cerby.com/setup-and-admin/business-hubs/business-hub-catalog).
{% endhint %}
This article provides instructions on how to connect a business hub for Apollo. For other app-specific articles and videos, review the [Connecting your business hubs](https://help.cerby.com/setup-and-admin/business-hubs/connecting-your-apps) collection in the Cerby Help Center.
***
## Requirements
The following are the requirements to connect a business hub:
* A Cerby workspace
* A Cerby user account with the **Owner**, **Super Admin**, **Admin**, or **User** role
* An organization in Apollo
* Groups configured in your identity provider (IdP) if you want to leverage automatic user provisioning and deprovisioning from your apps based on group assignment events. For more information, read the article [Provision users to your apps via an IdP and business hub](https://help.cerby.com/setup-and-admin/business-hubs/managing-users-and-assets-via-a-business-hub/provision-users-to-your-apps-via-an-idp-and-business-hub)
* An automation account, meaning an active user account with the **Org Admin** role in Apollo to be used as a service account. For instructions and recommendations on how to create and configure this account, read the article [Create a service account for your business hub](https://help.cerby.com/setup-and-admin/business-hubs/connecting-your-apps/create-a-service-account-for-your-business-hub)
* The user management and login method for your business hub identified to select the corresponding option when connecting your app. For more information, read the **User management and login method** section of the article [Explore Apps](https://help.cerby.com/setup-and-admin/business-hubs/business-hub-catalog)
* A business ID. You can find the ID in **the address bar** after logging in to Apollo and navigating to the **Members** tab of your organization. It’s the subdirectory between the **org** and **members** subdirectories of the URL. For example, **cerby** in [**https://studio.apollographql.com/org/cerby/members**](https://studio.apollographql.com/org/cerby/members). Just copy the value and paste it when connecting the business hub.
***
## Connect a business hub for Apollo
To connect a business hub for Apollo, you must complete the following main steps from the Cerby web app dashboard:
1. [Add a business hub and connect it to Apollo](#id-1.-add-a-business-hub-and-connect-it-to-apollo)
2. [Check for updates to import users and roles to Cerby](#id-2.-check-for-updates-to-import-users-and-roles-to-cerby)
3. [Connect your Apollo user account to the business hub](#id-3.-connect-your-apollo-user-account-to-the-business-hub)
4. [Manage unmatched users](#id-4.-manage-unmatched-users)
The following sections describe each main step.
### 1. Add a business hub and connect it to Apollo
To add a business hub and connect it to Apollo, you must complete the following steps:
1. Log in to your corresponding [Cerby](https://app.cerby.com/) workspace.
2. Select the **Business Hubs** option from the left navigation drawer. The **Business Hubs** page is displayed.
3. Click the **Connect Business Hub** button located at the top-right corner of the page. The **Connect your Business Hubs to Cerby** dialog box is displayed.
**TIP:** Select the **Don’t show this again** option to skip this step the next time you connect a new business hub.
4. Click the **Get started** button. A wizard is displayed on the **Select app** page.
5. Select **Apollo Hub** from the catalog. The **Enter app details** page is displayed on the wizard.
6. Enter and select your app information in the corresponding fields:
* **Label in Cerby:** It is the name to assign to your business hub in Cerby, and it will be displayed on the business hub card.
* **Business ID:** It is the unique identifier of your organization in Apollo. For instructions on how to find it, read the [Requirements](#requirements) section.
* **User management and login method:** It is the way your users log in to the app and determines whether they must save their login credentials as a Cerby account connected to the business hub. You must select one of the following methods:
* **Single sign-on (SSO):** Access is managed by your identity provider, and users log in with SSO authentication. They are not asked to save their credentials in Cerby.
* **Username and password:** Cerby manages account security and access, and users log in with their credentials after saving them in Cerby.
7. Click the **Next** button. The **Select automation account** page is displayed with a list of existing Apollo accounts.
8. Select the automation account you have previously added to Cerby, as described in the [Requirements](#requirements) section.
**NOTE:** If you don’t have an automation account, you are prompted to add it. Make sure you read Cerby’s recommendations on how to configure it in the article [Create a service account for your business hub](https://help.cerby.com/setup-and-admin/business-hubs/connecting-your-apps/create-a-service-account-for-your-business-hub). You may need to add the account first and then add the business hub.
9. Click the **Connect app** button. The wizard closes, and a success message box is displayed. The corresponding business hub is also displayed on the **Business Hubs** page.
The next step is [2. Check for updates to import users and roles to Cerby](#id-2.-check-for-updates-to-import-users-and-roles-to-cerby).
### 2. Check for updates to import users and roles to Cerby
To check for updates in your app to identify and import users, roles, and assets to Cerby, you must complete the following steps:
1. Select the **Business Hubs** option from the left navigation drawer. The **Business Hubs** page is displayed.
2. Click the **Settings** icon of the corresponding business hub card. The business hub details page is displayed with the **Settings** tab activated.
3. Click the **Check for updates** button located at the top right of the page. A message box is displayed with information about the process.
**NOTE:** The check and import process may take a few minutes depending on the number of users, and because Cerby automatically matches users to their corresponding Cerby user account.
4. Confirm that the automated task to check for updates has the “Completed” status by performing any of the following actions:
* Click the **More details** button from the message box.
* Select the **Automation** option from the left navigation drawer to open the **Automation** page with a list of automated tasks and their status.
{% hint style="info" %}
**NOTE:** Cerby automatically performs daily checks for updates for all business hubs, but you can trigger them manually, as described in this section. When a user is deprovisioned from an IdP and a check for updates is performed, Cerby generates a report and sends business hub **Owners** an email to confirm their removal from the app. For more instructions, read the article [Check for updates in your app and apply report](/setup-and-admin/business-hubs/managing-users-and-assets-via-a-business-hub/sync-your-business-hub-with-your-external-app).
{% endhint %}
The next step is [3. Connect your Apollo user account to the business hub](#id-3.-connect-your-apollo-user-account-to-the-business-hub).
### 3. Connect your Apollo user account to the business hub
To connect your Apollo user account to the business hub so Cerby can manage and protect it, you must complete the following steps:
1. Select the **Accounts** option from the left navigation drawer. The **Accounts** page is displayed.
2. Click the **Log in** button of the corresponding Apollo Hub account card. The **Connect your Apollo Hub Account** dialog box is displayed.
3. Enter the login credentials of your Apollo user account.
4. Click the **Connect account** button. The dialog box closes, and a success message box and a new account card are displayed.
The next step is [4. Manage unmatched users](#id-4.-manage-unmatched-users).
### 4. Manage unmatched users
During a check for updates, Cerby automatically matches app members to the Cerby user accounts that correspond to their email addresses, including existing [guest users](https://help.cerby.com/getting-started/concepts/user-management/guest-users) and [local partners](https://help.cerby.com/getting-started/concepts/user-management/partners#h-7e4add33a2). Manual matching is required when apps don't provide email addresses and for app members using personal or external accounts that couldn’t be identified or are not in the corporate directory.
To view the status of the imported app members, you must complete the following steps:
1. Select the **Business Hubs** option from the left navigation drawer. The **Business Hubs** page is displayed.
2. Click the **More options** (...) icon of the corresponding business hub card. A drop-down list is displayed.
3. Select the **View Members** option from the list. The business hub details page is displayed with the **Members** tab activated. App members are displayed in the following tabs of the **User Overview** section:
* **Unmatched users:** This tab displays the users who were not automatically matched.
* **Onboarded users:** This tab displays the users matched to their Cerby user account.
* **Guest users:** This tab displays the users who were matched to an existing Cerby user account but it doesn’t exist in the corporate directory, such as external collaborators.
For unmatched users, you can perform one of the following actions:
* [Match users](#match-users)
* [Remove unmatched users](#remove-unmatched-users)
* [Exempt unmatched users](#exempt-unmatched-users)
The following sections describe each action.
#### Match users
To match users, you must complete the following steps from the **Unmatched users** tab of the business hub details page:
1. Click the **Match user** button of the corresponding user. The **Match user** dialog box is displayed.
2. Enter the username or email address of the user you want to match and invite in the **Match with** field. The user is displayed on a list.
3. Select the user from the list.
4. Click the **Next** button. The **Select Cerby role** dialog box is displayed.
5. Select the role to assign to the user on the business hub **Cerby role** drop-down list:
* **Owner:** This role enables sharing access and managing business hub settings in Cerby.
* **Collaborator:** This role enables only logging in to the app from Cerby.
6. Click the **Match user** button. The dialog box closes, and a success message box is displayed. The user is moved to the **Onboarded** **users** tab.
#### Remove unmatched users
To remove unmatched users, you must complete the following steps from the **Unmatched users** tab of the business hub details page:
{% hint style="danger" %}
**IMPORTANT:** When removing an unmatched user, Cerby performs an automated task to revoke the user’s seat and permissions in Apollo.
{% endhint %}
1. Click the **More options** (...) icon of the corresponding user. A drop-down list is displayed.
2. Select the **Remove user** option from the list. The **Remove user?** dialog box is displayed.
3. Click the **Remove user** button. The dialog box closes, and a success message box is displayed. The user is removed from the app via an automated task.
#### Exempt unmatched users
Exempted users keep their user accounts or seats active in your app, but you cannot manage them through Cerby.
To exempt unmatched users, you must complete the following steps from the **Unmatched users** tab of the business hub details page:
1. Click the **More options** (...) icon of the corresponding user. A drop-down list is displayed.
2. Select the **Exempt user** option from the list. The exempt user dialog box is displayed.
3. Enter a reason for exempting the user in the **Provide a reason** field.
4. Click the **Exempt member** button. The dialog box closes, and a success message box is displayed. The user is moved to the **Exempted users** tab.
***
## Use your business hub
The following are the supported features of business hubs you can use:
* [Join the App and connect it to Cerby](https://help.cerby.com/cerby-web-app/business-hubs/join-your-external-app-and-set-up-your-business-hub-access)
* [Invite new app members](/setup-and-admin/business-hubs/managing-users-and-assets-via-a-business-hub/add-users-and-teams-to-your-apps-via-a-business-hub)
* [Remove app members](/setup-and-admin/business-hubs/managing-users-and-assets-via-a-business-hub/remove-users-from-your-app-via-a-business-hub)
* [Provision users to your apps via an IdP and business hub](https://help.cerby.com/setup-and-admin/business-hubs/managing-users-and-assets-via-a-business-hub/provision-users-to-your-apps-via-an-idp-and-business-hub)
* [Update the app members’ roles](/setup-and-admin/business-hubs/managing-users-and-assets-via-a-business-hub/update-user-roles-in-your-app-via-a-business-hub)
* [Check for updates in your app and apply report](/setup-and-admin/business-hubs/managing-users-and-assets-via-a-business-hub/sync-your-business-hub-with-your-external-app)
* [Re-assign the app members’ user accounts](https://github.com/cerbyinc/help-center/tree/main/.uncategorized/unpublished-deprecated-re-assign-the-app-members-user-accounts.md)
* [Manage the security of app members’ user accounts](/setup-and-admin/business-hubs/managing-users-and-assets-via-a-business-hub/protect-your-app-user-accounts-via-a-business-hub)
* [Log in to your app](https://help.cerby.com/cerby-web-app/business-hubs/log-in-to-your-app)
* [Track activity on app members’ user accounts](/setup-and-admin/business-hubs/managing-users-and-assets-via-a-business-hub/track-activity-on-app-members-user-accounts)
* [Remove an App](/setup-and-admin/business-hubs/managing-your-business-hubs/remove-a-business-hub)
# Connect a business hub for Appetize
This article describes how to connect a business hub to centrally manage the users of Appetize from Cerby.
{% hint style="info" %}
**Who can use this feature?**
* Workspace **Owners**, **Super Admins**, **Admins**, and **Users**
* Only supported using the Cerby web app
{% endhint %}
As a user with any workspace role in Cerby, except **Guest User** and **Login-Only**, you can connect a business hub integration to centrally manage the users of Appetize.
When you connect the business hub, you become its **Owner**, and you can perform the following user and access management tasks through automated tasks executed by the Cerby agent:
* Check for updates
* Invite app members
* Update app members’ roles
* Remove app members
{% hint style="success" %}
**TIP:** For more details about the automated tasks of a business hub, how it works, and the supported apps, read the article [Explore Apps](https://help.cerby.com/setup-and-admin/business-hubs/business-hub-catalog).
{% endhint %}
This article provides instructions on how to connect a business hub for Appetize. For other app-specific articles and videos, review the [Connecting your business hubs](https://help.cerby.com/setup-and-admin/business-hubs/connecting-your-apps) collection in the Cerby Help Center.
***
## Requirements
The following are the requirements to connect a business hub:
* A Cerby workspace
* A Cerby user account with the **Owner**, **Super Admin**, **Admin**, or **User** role
* Groups configured in your identity provider (IdP) if you want to leverage automatic user provisioning and deprovisioning from your apps based on group assignment events. For more information, read the article [Provision users to your apps via an IdP and business hub](https://help.cerby.com/setup-and-admin/business-hubs/managing-users-and-assets-via-a-business-hub/provision-users-to-your-apps-via-an-idp-and-business-hub)
* An automation account, meaning an active user account with an **Admin** role in Appetize to be used as a service account. For instructions and recommendations on how to create and configure this account, read the article [Create a service account for your business hub](https://help.cerby.com/setup-and-admin/business-hubs/connecting-your-apps/create-a-service-account-for-your-business-hub)
***
## Connect a business hub for Appetize
To connect a business hub for Appetize, you must complete the following main steps from the Cerby web app dashboard:
1. [Add a business hub and connect it to Appetize](#id-1.-add-a-business-hub-and-connect-it-to-appetize)
2. [Check for updates to import users and roles to Cerby](#id-2.-check-for-updates-to-import-users-and-roles-to-cerby)
3. [Connect your Appetize user account to the business hub](#id-3.-connect-your-appetize-user-account-to-the-business-hub)
4. [Manage unmatched users](#id-4.-manage-unmatched-users)
The following sections describe each main step.
### 1. Add a business hub and connect it to Appetize
To add a business hub and connect it to Appetize, you must complete the following steps:
1. Log in to your corresponding [Cerby](https://app.cerby.com/) workspace.
2. Select the **Business Hubs** option from the left navigation drawer. The **Business Hubs** page is displayed.
3. Click the **Connect Business Hub** button located at the top-right corner of the page. The **Connect your Business Hubs to Cerby** dialog box is displayed. **TIP:** Select the **Don’t show this again** option to skip this step the next time you connect a new business hub.
4. Click the **Get started** button. A wizard is displayed on the **Select app** page.
5. Select **Appetize Hub** from the catalog. The **Enter app details** page is displayed on the wizard.
6. Enter and select your app information in the corresponding fields:
1. **Label in Cerby:** It is the name to assign to your business hub in Cerby, and it will be displayed on the business hub card.
2. **Business unique identifier:** It is a unique identifier that differentiates your business hub in Cerby from others for the same app. You can assign an alphanumeric value between 3 and 30 characters without symbols or special characters.
3. **User management and login method:** It is the way your users log in to the app and determines if they must save their credentials in Cerby.
4. Select the **Username and password** option because account security and access are managed by Cerby, and users log in with their credentials after saving them in Cerby.
**IMPORTANT:** The **Single sign-on (SSO)** option is not supported by CookieHub.
7. Click the **Next** button. The **Select automation account** page is displayed with a list of existing Appetize accounts.
8. Select the automation account you have previously added to Cerby, as described in the [Requirements](#requirements) section. **NOTE:** If you don’t have an automation account, you are prompted to add it. Make sure you read Cerby’s recommendations on how to configure it in the article [Create a service account for your business hub](https://help.cerby.com/setup-and-admin/business-hubs/connecting-your-apps/create-a-service-account-for-your-business-hub). You may need to add the account first and then add the business hub.
9. Click the **Connect app** button. The wizard closes, and a success message box is displayed. The corresponding business hub is also displayed on the **Business Hubs** page.
The next step is [2. Check for updates to import users and roles to Cerby](#id-2.-check-for-updates-to-import-users-and-roles-to-cerby).
### 2. Check for updates to import users and roles to Cerby
To check for updates in your app to identify and import users and roles to Cerby, you must complete the following steps:
1. Select the **Business Hubs** option from the left navigation drawer. The **Business Hubs** page is displayed.
2. Click the **Settings** icon of the corresponding business hub card. The business hub details page is displayed with the **Settings** tab activated.
3. Click the **Check for updates** button located at the top right of the page. A message box is displayed with information about the process. **NOTE:** The check and import process may take a few minutes depending on the number of users, and because Cerby automatically matches users to their corresponding Cerby user account.
4. Confirm that the automated task to check for updates has the “Completed” status by performing any of the following actions:
* Click the **More details** button from the message box.
* Select the **Automation** option from the left navigation drawer to open the **Automation** page with a list of automated tasks and their status.
{% hint style="info" %}
**NOTE:** Cerby automatically performs daily checks for updates for all business hubs, but you can trigger them manually, as described in this section. When a user is deprovisioned from an IdP and a check for updates is performed, Cerby generates a report and sends business hub **Owners** an email to confirm their removal from the app. For more instructions, read the article [Check for updates in your app and apply report](/setup-and-admin/business-hubs/managing-users-and-assets-via-a-business-hub/sync-your-business-hub-with-your-external-app).
{% endhint %}
The next step is [3. Connect your Appetize user account to the business hub](#id-3.-connect-your-appetize-user-account-to-the-business-hub).
### 3. Connect your Appetize user account to the business hub
To connect your Appetize user account to the business hub so Cerby can manage and protect it, you must complete the following steps:
1. Select the **Accounts** option from the left navigation drawer. The **Accounts** page is displayed.
2. Click the **Log in** button of the corresponding Appetize Hub account card. The **Connect your Appetize Hub Account** dialog box is displayed.
3. Enter the login credentials of your Appetize user account.
4. Click the **Connect account** button. The dialog box closes, and a success message box and a new account card are displayed.
The next step is [4. Manage unmatched users](#id-4.-manage-unmatched-users).
### 4. Manage unmatched users
During a check for updates, Cerby automatically matches app members to the Cerby user accounts that correspond to their email addresses, including existing [guest users](https://help.cerby.com/getting-started/concepts/user-management/guest-users) and [local partners](https://help.cerby.com/getting-started/concepts/user-management/partners#h-7e4add33a2). Manual matching is required when apps don't provide email addresses and for app members using personal or external accounts that couldn’t be identified or are not in the corporate directory.
To view the status of the imported app members, you must complete the following steps:
1. Select the **Business Hubs** option from the left navigation drawer. The **Business Hubs** page is displayed.
2. Click the **More options** (...) icon of the corresponding business hub card. A drop-down list is displayed.
3. Select the **View Members** option from the list. The business hub details page is displayed with the **Members** tab activated. App members are displayed in the following tabs of the **User Overview** section:
* **Unmatched users:** This tab displays the users who were not automatically matched.
* **Onboarded users:** This tab displays the users matched to their Cerby user account.
* **Guest users:** This tab displays the users who were matched to an existing Cerby user account but it doesn’t exist in the corporate directory, such as external collaborators.
For unmatched users, you can perform one of the following actions:
* [Match users](#match-users)
* [Remove unmatched users](#remove-unmatched-users)
* [Exempt unmatched users](#exempt-unmatched-users)
The following sections describe each action.
#### Match users
To match users, you must complete the following steps from the **Unmatched users** tab of the business hub details page:
1. Click the **Match user** button of the corresponding user. The **Match user** dialog box is displayed.
2. Enter the username or email address of the user you want to match and invite in the **Match with** field. The user is displayed on a list.
3. Select the user from the list.
4. Click the **Next** button. The **Select Cerby role** dialog box is displayed.
5. Select the role to assign to the user on the business hub **Cerby role** drop-down list:
* **Owner:** This role enables sharing access and managing business hub settings in Cerby.
* **Collaborator:** This role enables only logging in to the app from Cerby.
6. Click the **Match user** button. The dialog box closes, and a success message box is displayed. The user is moved to the **Onboarded** **users** tab.
#### Remove unmatched users
To remove unmatched users, you must complete the following steps from the **Unmatched users** tab of the business hub details page:
{% hint style="danger" %}
**IMPORTANT:** When removing an unmatched user, Cerby performs an automated task to revoke the user’s seat and permissions in Appetize.
{% endhint %}
1. Click the **More options** (...) icon of the corresponding user. A drop-down list is displayed.
2. Select the **Remove user** option from the list. The **Remove user?** dialog box is displayed.
3. Click the **Remove user** button. The dialog box closes, and a success message box is displayed. The user is removed from the app via an automated task.
#### Exempt unmatched users
Exempted users keep their user accounts or seats active in your app, but you cannot manage them through Cerby.
To exempt unmatched users, you must complete the following steps from the **Unmatched users** tab of the business hub details page:
1. Click the **More options** (...) icon of the corresponding user. A drop-down list is displayed.
2. Select the **Exempt user** option from the list. The exempt user dialog box is displayed.
3. Enter a reason for exempting the user in the **Provide a reason** field.
4. Click the **Exempt member** button. The dialog box closes, and a success message box is displayed. The user is moved to the **Exempted users** tab.
***
## Use your business hub
The following are the supported features of business hubs you can use:
* [Join the App and connect it to Cerby](https://help.cerby.com/cerby-web-app/business-hubs/join-your-external-app-and-set-up-your-business-hub-access)
* [Invite new app members](/setup-and-admin/business-hubs/managing-users-and-assets-via-a-business-hub/add-users-and-teams-to-your-apps-via-a-business-hub)
* [Remove app members](/setup-and-admin/business-hubs/managing-users-and-assets-via-a-business-hub/remove-users-from-your-app-via-a-business-hub)
* [Provision users to your apps via an IdP and business hub](https://help.cerby.com/setup-and-admin/business-hubs/managing-users-and-assets-via-a-business-hub/provision-users-to-your-apps-via-an-idp-and-business-hub)
* [Update the app members’ roles](/setup-and-admin/business-hubs/managing-users-and-assets-via-a-business-hub/update-user-roles-in-your-app-via-a-business-hub)
* [Check for updates in your app and apply report](/setup-and-admin/business-hubs/managing-users-and-assets-via-a-business-hub/sync-your-business-hub-with-your-external-app)
* [Re-assign the app members’ user accounts](https://github.com/cerbyinc/help-center/tree/main/.uncategorized/unpublished-deprecated-re-assign-the-app-members-user-accounts.md)
* [Manage the security of app members’ user accounts](/setup-and-admin/business-hubs/managing-users-and-assets-via-a-business-hub/protect-your-app-user-accounts-via-a-business-hub)
* [Log in to your app](https://help.cerby.com/cerby-web-app/business-hubs/log-in-to-your-app)
* [Track activity on app members’ user accounts](/setup-and-admin/business-hubs/managing-users-and-assets-via-a-business-hub/track-activity-on-app-members-user-accounts)
* [Remove an App](/setup-and-admin/business-hubs/managing-your-business-hubs/remove-a-business-hub)
# Connect a business hub for Appfigures
This article describes how to connect a business hub to centrally manage the users of Appfigures from Cerby.
{% hint style="info" %}
**Who can use this feature?**
* Workspace **Owners**, **Super Admins**, **Admins**, and **Users**
* Only supported using the Cerby web app
{% endhint %}
As a user with any workspace role in Cerby, except **Guest User** and **Login-Only**, you can connect a business hub integration to centrally manage the users of Appfigures.
When you connect the business hub, you become its **Owner**, and you can perform the following user and access management tasks through automated tasks executed by the Cerby agent:
* Check for updates
* Invite app members
* Update app members’ roles
* Remove app members
{% hint style="success" %}
**TIP:** For more details about the automated tasks of a business hub, how it works, and the supported apps, read the article [Explore Apps](https://help.cerby.com/setup-and-admin/business-hubs/business-hub-catalog).
{% endhint %}
{% hint style="danger" %}
**IMPORTANT:** Take into consideration that app members who are invited and later removed cannot be invited to join Appfigures again with the same email address. If this scenario occurs, Appfigures displays the “This email is currently in use by a different user” error message.
{% endhint %}
This article provides instructions on how to connect a business hub for Appfigures. For other app-specific articles and videos, review the [Connecting your business hubs](https://help.cerby.com/setup-and-admin/business-hubs/connecting-your-apps) collection in the Cerby Help Center.
***
## Requirements
The following are the requirements to connect a business hub:
* A Cerby workspace
* A Cerby user account with the **Owner**, **Super Admin**, **Admin**, or **User** role
* Groups configured in your identity provider (IdP) if you want to leverage automatic user provisioning and deprovisioning from your apps based on group assignment events. For more information, read the article [Provision users to your apps via an IdP and business hub](https://help.cerby.com/setup-and-admin/business-hubs/managing-users-and-assets-via-a-business-hub/provision-users-to-your-apps-via-an-idp-and-business-hub)
* An automation account, meaning an active user account with an **Admin** role in Appfigures to be used as a service account. For instructions and recommendations on how to create and configure this account, read the article [Create a service account for your business hub](https://help.cerby.com/setup-and-admin/business-hubs/connecting-your-apps/create-a-service-account-for-your-business-hub)
* The user management and login method for your business hub identified to select the corresponding option when connecting your app. For more information, read the **User management and login method** section of the article [Explore Apps](https://help.cerby.com/setup-and-admin/business-hubs/business-hub-catalog)
***
## Connect a business hub for Appfigures
To connect a business hub for Appfigures, you must complete the following main steps from the Cerby web app dashboard:
1. [Add a business hub and connect it to Appfigures](#id-1.-add-a-business-hub-and-connect-it-to-appfigures)
2. [Check for updates to import users and roles to Cerby](#id-2.-check-for-updates-to-import-users-and-roles-to-cerby)
3. [Connect your Appfigures user account to the business hub](#id-3.-connect-your-appfigures-user-account-to-the-business-hub)
4. [Manage unmatched users](#id-4.-manage-unmatched-users)
The following sections describe each main step.
### 1. Add a business hub and connect it to Appfigures
To add a business hub and connect it to Appfigures, you must complete the following steps:
1. Log in to your corresponding [Cerby](https://app.cerby.com/) workspace.
2. Select the **Business Hubs** option from the left navigation drawer. The **Business Hubs** page is displayed.
3. Click the **Connect Business Hub** button located at the top-right corner of the page. The **Connect your Business Hubs to Cerby** dialog box is displayed. **TIP:** Select the **Don’t show this again** option to skip this step the next time you connect a new business hub.
4. Click the **Get started** button. A wizard is displayed on the **Select app** page.
5. Select **Appfigures Hub** from the catalog. The **Enter app details** page is displayed on the wizard.
6. Enter and select your app information in the corresponding fields:
* **Label in Cerby:** It is the name to assign to your business hub in Cerby, and it will be displayed on the business hub card.
* **Business unique identifier:** It is a unique identifier that differentiates your business hub in Cerby from others for the same app. You can assign an alphanumeric value between 3 and 30 characters without symbols or special characters.
* **User management and login method:** It is the way your users log in to the app and determines whether they must save their login credentials as a Cerby account connected to the business hub. You must select one of the following methods:
* **Single sign-on (SSO):** Access is managed by your identity provider, and users log in with SSO authentication. They are not asked to save their credentials in Cerby.
* **Username and password:** Cerby manages account security and access, and users log in with their credentials after saving them in Cerby.
7. Click the **Next** button. The **Select automation account** page is displayed with a list of existing Appfigures accounts.
8. Select the automation account you have previously added to Cerby, as described in the [Requirements](#requirements) section.
**NOTE:** If you don’t have an automation account, you are prompted to add it. Make sure you read Cerby’s recommendations on how to configure it in the article [Create a service account for your business hub](https://help.cerby.com/setup-and-admin/business-hubs/connecting-your-apps/create-a-service-account-for-your-business-hub). You may need to add the account first and then add the business hub.
9. Click the **Connect app** button. The wizard closes, and a success message box is displayed. The corresponding business hub is also displayed on the **Business Hubs** page.
The next step is [2. Check for updates to import users and roles to Cerby](#id-2.-check-for-updates-to-import-users-and-roles-to-cerby).
### 2. Check for updates to import users and roles to Cerby
To check for updates in your app to identify and import users and roles to Cerby, you must complete the following steps:
1. Select the **Business Hubs** option from the left navigation drawer. The **Business Hubs** page is displayed.
2. Click the **Settings** icon of the corresponding business hub card. The business hub details page is displayed with the **Settings** tab activated.
3. Click the **Check for updates** button located at the top right of the page. A message box is displayed with information about the process.
**NOTE:** The check and import process may take a few minutes depending on the number of users, and because Cerby automatically matches users to their corresponding Cerby user account.
4. Confirm that the automated task to check for updates has the “Completed” status by performing any of the following actions:
* Click the **More details** button from the message box.
* Select the **Automation** option from the left navigation drawer to open the **Automation** page with a list of automated tasks and their status.
{% hint style="info" %}
**NOTE:** Cerby automatically performs daily checks for updates for all business hubs, but you can trigger them manually, as described in this section. When a user is deprovisioned from an IdP and a check for updates is performed, Cerby generates a report and sends business hub **Owners** an email to confirm their removal from the app. For more instructions, read the article [Check for updates in your app and apply report](/setup-and-admin/business-hubs/managing-users-and-assets-via-a-business-hub/sync-your-business-hub-with-your-external-app).
{% endhint %}
The next step is [3. Connect your Appfigures user account to the business hub](#id-3.-connect-your-appfigures-user-account-to-the-business-hub).
### 3. Connect your Appfigures user account to the business hub
To connect your Appfigures user account to the business hub so Cerby can manage and protect it, you must complete the following steps:
1. Select the **Accounts** option from the left navigation drawer. The **Accounts** page is displayed.
2. Click the **Log in** button of the corresponding Appfigures Hub account card. The **Connect your Appfigures Hub Account** dialog box is displayed.
3. Enter the login credentials of your Appfigures user account.
4. Click the **Connect account** button. The dialog box closes, and a success message box and a new account card are displayed.
The next step is [4. Manage unmatched users](#id-4.-manage-unmatched-users).
### 4. Manage unmatched users
During a check for updates, Cerby automatically matches app members to the Cerby user accounts that correspond to their email addresses, including existing [guest users](https://help.cerby.com/getting-started/concepts/user-management/guest-users) and [local partners](https://help.cerby.com/getting-started/concepts/user-management/partners#h-7e4add33a2). Manual matching is required when apps don't provide email addresses and for app members using personal or external accounts that couldn’t be identified or are not in the corporate directory.
To view the status of the imported app members, you must complete the following steps:
1. Select the **Business Hubs** option from the left navigation drawer. The **Business Hubs** page is displayed.
2. Click the **More options** (...) icon of the corresponding business hub card. A drop-down list is displayed.
3. Select the **View Members** option from the list. The business hub details page is displayed with the **Members** tab activated. App members are displayed in the following tabs of the **User Overview** section:
* **Unmatched users:** This tab displays the users who were not automatically matched.
* **Onboarded users:** This tab displays the users matched to their Cerby user account.
* **Guest users:** This tab displays the users who were matched to an existing Cerby user account but it doesn’t exist in the corporate directory, such as external collaborators.
For unmatched users, you can perform one of the following actions:
* [Match users](#match-users)
* [Remove unmatched users](#remove-unmatched-users)
* [Exempt unmatched users](#exempt-unmatched-users)
The following sections describe each action.
#### Match users
To match users, you must complete the following steps from the **Unmatched users** tab of the business hub details page:
1. Click the **Match user** button of the corresponding user. The **Match user** dialog box is displayed.
2. Enter the username or email address of the user you want to match and invite in the **Match with** field. The user is displayed on a list.
3. Select the user from the list.
4. Click the **Next** button. The **Select Cerby role** dialog box is displayed.
5. Select the role to assign to the user on the business hub **Cerby role** drop-down list:
* **Owner:** This role enables sharing access and managing business hub settings in Cerby.
* **Collaborator:** This role enables only logging in to the app from Cerby.
6. Click the **Match user** button. The dialog box closes, and a success message box is displayed. The user is moved to the **Onboarded** **users** tab.
#### Remove unmatched users
To remove unmatched users, you must complete the following steps from the **Unmatched users** tab of the business hub details page:
{% hint style="danger" %}
**IMPORTANT:** When removing an unmatched user, Cerby performs an automated task to revoke the user’s seat and permissions in Appfigures.
{% endhint %}
1. Click the **More options** (...) icon of the corresponding user. A drop-down list is displayed.
2. Select the **Remove user** option from the list. The **Remove user?** dialog box is displayed.
3. Click the **Remove user** button. The dialog box closes, and a success message box is displayed. The user is removed from the app via an automated task.
#### Exempt unmatched users
Exempted users keep their user accounts or seats active in your app, but you cannot manage them through Cerby.
To exempt unmatched users, you must complete the following steps from the **Unmatched users** tab of the business hub details page:
1. Click the **More options** (...) icon of the corresponding user. A drop-down list is displayed.
2. Select the **Exempt user** option from the list. The exempt user dialog box is displayed.
3. Enter a reason for exempting the user in the **Provide a reason** field.
4. Click the **Exempt member** button. The dialog box closes, and a success message box is displayed. The user is moved to the **Exempted users** tab.
***
## Use your business hub
The following are the supported features of business hubs you can use:
* [Join the App and connect it to Cerby](https://help.cerby.com/cerby-web-app/business-hubs/join-your-external-app-and-set-up-your-business-hub-access)
* [Invite new app members](/setup-and-admin/business-hubs/managing-users-and-assets-via-a-business-hub/add-users-and-teams-to-your-apps-via-a-business-hub)
* [Remove app members](/setup-and-admin/business-hubs/managing-users-and-assets-via-a-business-hub/remove-users-from-your-app-via-a-business-hub)
* [Provision users to your apps via an IdP and business hub](https://help.cerby.com/setup-and-admin/business-hubs/managing-users-and-assets-via-a-business-hub/provision-users-to-your-apps-via-an-idp-and-business-hub)
* [Update the app members’ roles](/setup-and-admin/business-hubs/managing-users-and-assets-via-a-business-hub/update-user-roles-in-your-app-via-a-business-hub)
* [Check for updates in your app and apply report](/setup-and-admin/business-hubs/managing-users-and-assets-via-a-business-hub/sync-your-business-hub-with-your-external-app)
* [Re-assign the app members’ user accounts](https://github.com/cerbyinc/help-center/tree/main/.uncategorized/unpublished-deprecated-re-assign-the-app-members-user-accounts.md)
* [Manage the security of app members’ user accounts](/setup-and-admin/business-hubs/managing-users-and-assets-via-a-business-hub/protect-your-app-user-accounts-via-a-business-hub)
* [Log in to your app](https://help.cerby.com/cerby-web-app/business-hubs/log-in-to-your-app)
* [Track activity on app members’ user accounts](/setup-and-admin/business-hubs/managing-users-and-assets-via-a-business-hub/track-activity-on-app-members-user-accounts)
* [Remove an App](/setup-and-admin/business-hubs/managing-your-business-hubs/remove-a-business-hub)
# Connect a business hub for AppsFlyer
This article describes how to connect a business hub to centrally manage the users of AppsFlyer from Cerby.
{% hint style="info" %}
**Who can use this feature?**
* Workspace **Owners**, **Super Admins**, **Admins**, and **Users**
* Only supported using the Cerby web app
{% endhint %}
As a user with any workspace role in Cerby, except **Guest User** and **Login-Only**, you can connect a business hub integration to centrally manage the users of AppsFlyer.
When you connect the business hub, you become its **Owner**, and you can perform the following user and access management tasks through automated tasks executed by the Cerby agent:
* Check for updates
* Add users
* Update user roles
* Remove users
{% hint style="success" %}
**TIP:** For more details about the automated tasks of a business hub, how it works, and the supported apps, read the article [Explore Business Hubs](https://help.cerby.com/setup-and-admin/business-hubs/business-hub-catalog).
{% endhint %}
This article provides instructions on how to connect a business hub for Braze. For other app-specific articles and videos, review the [Connecting business hubs for your apps](https://help.cerby.com/setup-and-admin/business-hubs/connecting-your-apps) and [Connecting business hubs for your paid social apps](https://help.cerby.com/setup-and-admin/business-hubs/connecting-your-paid-social-apps) collections in the Cerby Help Center.
***
## Requirements
The following are the requirements to connect a business hub:
* A Cerby workspace
* A Cerby user account with the **Owner**, **Super Admin**, **Admin**, or **User** role
* Groups configured in your identity provider (IdP) if you want to leverage automatic user provisioning and deprovisioning from your apps based on group assignment events. For more information, read the articles available in the [Managing users via an IdP and business hub](https://help.cerby.com/setup-and-admin/business-hubs/managing-users-and-assets-via-a-business-hub) collection in the Cerby Help Center
* An automation account, meaning an active user account with an **Admin** role in AppsFlyer to be used as a service account. For instructions and recommendations on how to create and configure this account, read the article [Create a service account for your business hub](/setup-and-admin/business-hubs/connecting-your-apps/create-a-service-account-for-your-business-hub)
* The user management and login method for your business hub identified to select the corresponding option when connecting your app. For more information, read the **User management and login method** section of the article [Explore Business Hubs](https://help.cerby.com/setup-and-admin/business-hubs/business-hub-catalog)
***
## Connect a business hub for AppsFlyer
To connect a business hub for AppsFlyer, you must complete the following main steps from the Cerby web app dashboard:
1. [Add a business hub and connect it to AppsFlyer](#id-1.-add-a-business-hub-and-connect-it-to-appsflyer)
2. [Check for updates to import users and roles to Cerby](#id-2.-check-for-updates-to-import-users-and-roles-to-cerby)
3. [Connect your AppsFlyer user account to the business hub](#id-3.-connect-your-appsflyer-user-account-to-the-business-hub)
4. [Manage unmatched users](#id-4.-manage-unmatched-users)
The following sections describe each main step.
### 1. Add a business hub and connect it to AppsFlyer
To add a business hub and connect it to AppsFlyer, you must complete the following steps:
1. Log in to your corresponding [Cerby](https://app.cerby.com/) workspace.
2. Select the **Business Hubs** option from the left menu. The **Business Hubs** page is displayed.
3. Click the **Connect Business Hub** button located at the top-right corner of the page. The **Connect your Business Hubs to Cerby** dialog box is displayed. **TIP:** Select the **Don’t show this again** option to skip this step the next time you connect a new business hub.
4. Click the **Get started** button. A wizard is displayed on the **Select app** page.
5. Select **AppsFlyer Hub** from the catalog. The **Enter app details** page is displayed on the wizard.
6. Enter and select your app information in the corresponding fields:
* **Label in Cerby:** It is the name to assign to your business hub in Cerby, and it will be displayed on the business hub card.
* **Unique name:** It is a unique identifier that differentiates your business hub in Cerby from others for the same app. You can assign an alphanumeric value between 3 and 30 characters without symbols or special characters.
* **User management and login method:** It is the way your users log in to the app and determines whether they must save their login credentials as a Cerby account connected to the business hub. You must select one of the following methods:
* **Single sign-on (SSO):** Access is managed by your identity provider, and users log in with SSO authentication. They are not asked to save their credentials in Cerby.
* **Username and password:** Cerby manages account security and access, and users log in with their credentials after saving them in Cerby.
7. Click the **Next** button. The **Select automation account** page is displayed with a list of existing AppsFlyer accounts.
8. Select the automation account you have previously added to Cerby, as described in the [Requirements](#requirements) section. **NOTE:** If you don’t have an automation account, you are prompted to add it. Make sure you read Cerby’s recommendations on how to configure it in the article [Create a service account for your business hub](/setup-and-admin/business-hubs/connecting-your-apps/create-a-service-account-for-your-business-hub). You may need to add the account first and then add the business hub.
9. Click the **Connect app** button. The wizard closes, and a success message box is displayed. The corresponding business hub is also displayed on the **Business Hubs** page.
The next step is [2. Check for updates to import users and roles to Cerby](#id-2.-check-for-updates-to-import-users-and-roles-to-cerby).
### 2. Check for updates to import users and roles to Cerby
To check for updates in your app to identify and import users, roles, and assets to Cerby, you must complete the following steps:
1. Select the **Business Hubs** option from the left menu. The **Business Hubs** page is displayed.
2. Click the **More options** (...) icon of the corresponding business hub card. A drop-down menu is displayed.
3. Select the **Settings** option from the menu. The business hub details page is displayed with the **Settings** tab activated.
4. Click the **Sync** button located at the top right of the page. A message box is displayed with information about the process. **NOTE:** The check and import process may take a few minutes depending on the number of users and assets, and because Cerby automatically matches users to their corresponding Cerby user account.
5. Confirm that the automated task to check for updates has the “Completed” status by performing any of the following actions:
* Click the **More details** button from the message box.
* Select the **Automation** option from the left menu to open the **Automation** page with a list of automated tasks and their status.
{% hint style="info" %}
**NOTE: NOTE:** Cerby automatically performs daily checks for updates for all business hubs, but you can trigger them manually, as described in this section. For more instructions, read the article [Sync your app users with your business hub](/setup-and-admin/business-hubs/managing-users-and-assets-via-a-business-hub/sync-your-business-hub-with-your-external-app).
{% endhint %}
The next step is [3. Connect your AppsFlyer user account to the business hub](#id-3.-connect-your-appsflyer-user-account-to-the-business-hub).
### 3. Connect your AppsFlyer user account to the business hub
To connect your AppsFlyer user account to the business hub so Cerby can manage and protect it, you must complete the following steps:
1. Select the **Accounts** option from the left menu. The **Accounts** page is displayed.
2. Click the **Log in** button of the corresponding AppsFlyer Hub account card. The **Connect your AppsFlyer Hub Account** dialog box is displayed.
3. Enter the login credentials of your AppsFlyer user account.
4. Click the **Connect account** button. The dialog box closes, and a success message box and a new account card are displayed.
The next step is [4. Manage unmatched users](#id-4.-manage-unmatched-users).
### 4. Manage unmatched users
During a check for updates, Cerby automatically matches app members to the Cerby user accounts that correspond to their email addresses, including existing [guest users](https://help.cerby.com/getting-started/concepts/user-management/guest-users) and [local partners](https://help.cerby.com/getting-started/concepts/user-management/partners#h-7e4add33a2). Manual matching is required when apps don't provide email addresses and for app members using personal or external accounts that couldn’t be identified or are not in the corporate directory.
To view the status of the imported app members, you must complete the following steps:
1. Select the **Business Hubs** option from the left menu. The **Business Hubs** page is displayed.
2. Click the **More options** (...) icon of the corresponding business hub card. A drop-down menu is displayed.
3. Select the **View Members** option from the menu. The business hub details page is displayed with the **Members** tab activated. App members are displayed in the following tabs of the **User Overview** section:
* **Unmatched users:** This tab displays the users who were not automatically matched.
* **Onboarded users:** This tab displays the users matched to their Cerby user account.
* **Guest users:** This tab displays the users who were matched to an existing Cerby user account but it doesn’t exist in the corporate directory, such as external collaborators.
For unmatched users, you can perform one of the following actions:
* [Match users](#match-users)
* [Remove unmatched users](#remove-unmatched-users)
* [Exempt unmatched users](#exempt-unmatched-users)
The following sections describe each action.
#### Match users
To match users, you must complete the following steps from the **Unmatched users** tab of the business hub details page:
1. Click the **Match user** button of the corresponding user. The **Match user** dialog box is displayed.
2. Enter the username or email address of the user you want to match and invite in the **Match with** field. The user is displayed on a list.
3. Select the user from the list.
4. Click the **Next** button. The **Select Cerby role** dialog box is displayed.
5. Select the role to assign to the user on the business hub **Cerby role** drop-down menu:
* **Owner:** This role enables sharing access and managing business hub settings in Cerby.
* **Collaborator:** This role enables only logging in to the app from Cerby.
6. Click the **Match user** button. The dialog box closes, and a success message box is displayed. The user is moved to the **Onboarded** **users** tab.
#### Remove unmatched users
To remove unmatched users, you must complete the following steps from the **Unmatched users** tab of the business hub details page:
{% hint style="danger" %}
**IMPORTANT:** When removing an unmatched user, Cerby performs an automated task to revoke the user’s seat and permissions in AppsFlyer.
{% endhint %}
1. Click the **More options** (...)icon of the corresponding user. A drop-down menu is displayed.
2. Select the **Remove user** option from the menu. The **Remove user?** dialog box is displayed.
3. Click the **Remove user** button. The dialog box closes, and a success message box is displayed. The user is removed from the app via an automated task.
#### Exempt unmatched users
Exempted users keep their user accounts or seats active in your app, but you cannot manage them through Cerby.
To exempt unmatched users, you must complete the following steps from the **Unmatched users** tab of the business hub details page:
1. Click the **More options** (...)icon of the corresponding user. A drop-down menu is displayed.
2. Select the **Exempt user** option from the menu. The exempt user dialog box is displayed.
3. Enter a reason for exempting the user in the **Provide a reason** field.
4. Click the **Exempt member** button. The dialog box closes, and a success message box is displayed. The user is moved to the **Exempted users** tab.
***
## Use your business hub
The following are the supported features of business hubs you can use:
* [Join the external app and set up your business hub access](https://help.cerby.com/cerby-web-app/business-hubs/join-your-external-app-and-set-up-your-business-hub-access)
* [Add users to your app via a business hub](/setup-and-admin/business-hubs/managing-users-and-assets-via-a-business-hub/add-users-and-teams-to-your-apps-via-a-business-hub)
* [Provision users to your apps via an IdP and business hub](/setup-and-admin/business-hubs/managing-users-and-assets-via-a-business-hub/provision-users-to-your-apps-via-an-idp-and-business-hub)
* [Remove users from your app via a business hub](/setup-and-admin/business-hubs/managing-users-and-assets-via-a-business-hub/remove-users-from-your-app-via-a-business-hub)
* [Remove teams from your app via a business hub](/setup-and-admin/business-hubs/managing-users-and-assets-via-a-business-hub/remove-teams-from-your-app-via-a-business-hub)
* [Deprovision users from your apps via an IdP and business hub](/setup-and-admin/business-hubs/managing-users-and-assets-via-a-business-hub/deprovision-users-from-your-apps-via-an-idp-and-business-hub)
* [Update user roles in your app via a business hub](/setup-and-admin/business-hubs/managing-users-and-assets-via-a-business-hub/update-user-roles-in-your-app-via-a-business-hub)
* [Update user roles in your apps via an IdP and business hub](/setup-and-admin/business-hubs/managing-users-and-assets-via-a-business-hub/update-user-roles-in-your-apps-via-an-idp-and-business-hub)
* [Sync your app users with your business hub](/setup-and-admin/business-hubs/managing-users-and-assets-via-a-business-hub/sync-your-business-hub-with-your-external-app)
* [Protect your app user accounts via a business hub](/setup-and-admin/business-hubs/managing-users-and-assets-via-a-business-hub/protect-your-app-user-accounts-via-a-business-hub)
* [Log in to your app via a business hub](https://help.cerby.com/cerby-web-app/business-hubs/log-in-to-your-app)
* [Track the activity of business hub users](/setup-and-admin/business-hubs/managing-users-and-assets-via-a-business-hub/track-activity-on-app-members-user-accounts)
* [Remove a business hub](/setup-and-admin/business-hubs/managing-your-business-hubs/remove-a-business-hub)
# Connect a business hub for Appsmith
This article describes how to connect a business hub to centrally manage the users of Appsmith from Cerby.
{% hint style="info" %}
**Who can use this feature?**
* Workspace **Owners**, **Super Admins**, **Admins**, and **Users**
* Only supported using the Cerby web app
{% endhint %}
As a user with any workspace role in Cerby, except **Guest User** and **Login-Only**, you can connect a business hub integration to centrally manage the users of Appsmith.
When you connect the business hub, you become its **Owner**, and you can perform the following user and access management tasks through automated tasks executed by the Cerby agent:
* Check for updates
* Add users
* Update user roles
* Remove users
{% hint style="success" %}
**TIP:** For more details about the automated tasks of a business hub, how it works, and the supported apps, read the article [Explore Business Hubs](https://help.cerby.com/setup-and-admin/business-hubs/business-hub-catalog).
{% endhint %}
This article provides instructions on how to connect a business hub for Appsmith. For other app-specific articles and videos, review the [Connecting business hubs for your apps](https://help.cerby.com/setup-and-admin/business-hubs/connecting-your-apps) and [Connecting business hubs for your paid social apps](https://help.cerby.com/setup-and-admin/business-hubs/connecting-your-paid-social-apps) collections in the Cerby Help Center.
***
## Requirements
The following are the requirements to connect a business hub:
* A Cerby workspace
* A Cerby user account with the workspace **Owner**, **Super Admin**, **Admin**, or **User** role
* A workspace in Appsmith
* Groups configured in your identity provider (IdP) if you want to leverage automatic user provisioning and deprovisioning from your apps based on group assignment events. For more information, read the articles available in the [Managing users via an IdP and business hub](https://help.cerby.com/setup-and-admin/business-hubs/managing-users-and-assets-via-a-business-hub) collection in the Cerby Help Center
* An automation account, meaning an active user account with a native **Administrator** role in Appsmith to be used as a service account. For instructions and recommendations on how to create and configure this account, read the article [Create a service account for your business hub](/setup-and-admin/business-hubs/connecting-your-apps/create-a-service-account-for-your-business-hub)
* The user management and login method for your business hub identified to select the corresponding option when connecting your app. For more information, read the **User management and login method** section of the article [Explore Business Hubs](https://help.cerby.com/setup-and-admin/business-hubs/business-hub-catalog)
* A Business unique identifier. You can find the ID in the address bar after logging in to Appsmith, and selecting the corresponding workspace from the left menu. The ID is displayed in the address bar as part of the URL. For example, **`01abc23456d78e9f0gh1i234`** in **`https://app.appsmith.com/applications?workspaceId=01abc23456d78e9f0gh1i234`.**
***
## Connect a business hub for Appsmith
To connect a business hub for Appsmith, you must complete the following main steps from the Cerby web app dashboard:
1. [Add a business hub and connect it to Appsmith](#id-1.-add-a-business-hub-and-connect-it-to-appsmith)
2. [Check for updates to import users and roles to Cerby](#id-2.-check-for-updates-to-import-users-and-roles-to-cerby)
3. [Connect your Appsmith user account to the business hub](#id-3.-connect-your-appsmith-user-account-to-the-business-hub)
4. [Manage unmatched users](#id-4.-manage-unmatched-users)
The following sections describe each main step.
### 1. Add a business hub and connect it to Appsmith
To add a business hub and connect it to Appsmith, you must complete the following steps:
1. Log in to your corresponding [Cerby](https://app.cerby.com/) workspace.
2. Select the **Business Hubs** option from the left menu. The **Business Hubs** page is displayed.
3. Click the **Connect Business Hub** button located at the top-right corner of the page. The **Connect your Business Hubs to Cerby** dialog box is displayed. **TIP:** Select the **Don’t show this again** option to skip this step the next time you connect a new business hub.
4. Click the **Get started** button. A wizard is displayed on the **Select app** page.
5. Select **Appsmith Hub** from the catalog. The **Enter app details** page is displayed on the wizard.
6. Enter and select your app information in the corresponding fields:
* **Label in Cerby:** It is the name to assign to your business hub in Cerby, and it will be displayed on the business hub card.
* **Business unique identifier:** It is the unique identifier of your business or organization in **Appsmith Hub**. For instructions on how to find it, read the [Requirements](#requirements) section.
* **User management and login method:** It is the way your users log in to the app and determines whether they must save their login credentials as a Cerby account connected to the business hub.
* Select the **Single sign-on (SSO)** option because access must be managed by your IdP, and users log in with SSO authentication. They are not asked to save their credentials in Cerby.
**IMPORTANT:** The **Username and password** option\*\*\*\* is not currently available for Appsmith.
7. Click the **Next** button. The **Select automation account** page is displayed with a list of existing Appsmith accounts.
8. Select the automation account you have previously added to Cerby, as described in the [Requirements](#requirements) section. **NOTE:** If you don’t have an automation account, you are prompted to add it. Make sure you read Cerby’s recommendations on how to configure it in the article [Create a service account for your business hub](/setup-and-admin/business-hubs/connecting-your-apps/create-a-service-account-for-your-business-hub). You may need to add the account first and then add the business hub.
9. Click the **Connect app** button. The wizard closes, and a success message box is displayed. The corresponding business hub is also displayed on the **Business Hubs** page.
The next step is [2. Check for updates to import users and roles to Cerby](#id-2.-check-for-updates-to-import-users-and-roles-to-cerby).
### 2. Check for updates to import users and roles to Cerby
To check for updates in your app to identify and import users and roles to Cerby, you must complete the following steps:
1. Select the **Business Hubs** option from the left menu. The **Business Hubs** page is displayed.
2. Click the **More options** (...) icon of the corresponding business hub card. A drop-down menu is displayed.
3. Select the **Settings** option from the menu. The business hub details page is displayed with the **Settings** tab activated.
4. Click the **Check for updates** button located at the top right of the page. A message box is displayed with information about the process. **NOTE:** The check and import process may take a few minutes depending on the number of users, and because Cerby automatically matches users to their corresponding Cerby user account.
5. Confirm that the automated task to check for updates has the “Completed” status by performing any of the following actions:
* Click the **More details** button from the message box.
* Select the **Automation** option from the left menu to open the **Automation** page with a list of automated tasks and their status.
{% hint style="info" %}
**NOTE:** Cerby automatically performs daily checks for updates for all business hubs, but you can trigger them manually, as described in this section. For more instructions, read the article [Sync your app users with your business hub](/setup-and-admin/business-hubs/managing-users-and-assets-via-a-business-hub/sync-your-business-hub-with-your-external-app).
{% endhint %}
The next step is [3. Connect your Appsmith user account to the business hub](#id-3.-connect-your-appsmith-user-account-to-the-business-hub).
### 3. Connect your Appsmith user account to the business hub
To connect your Appsmith user account to the business hub so Cerby can manage and protect it, you must complete the following steps:
1. Select the **Accounts** option from the left menu. The **Accounts** page is displayed.
2. Click the **Log in** button of the corresponding Appsmith Hub account card. The **Connect your Appsmith Hub Account** dialog box is displayed.
3. Enter the login credentials of your **Appsmith** user account.
4. Click the **Connect account** button. The dialog box closes, and a success message box and a new account card are displayed.
The next step is [4. Manage unmatched users](#id-4.-manage-unmatched-users).
### 4. Manage unmatched users
During a check for updates, Cerby automatically matches app members to the Cerby user accounts that correspond to their email addresses, including existing [guest users](https://help.cerby.com/getting-started/concepts/user-management/guest-users) and [local partners](https://help.cerby.com/getting-started/concepts/user-management/partners#h-7e4add33a2). Manual matching is required when apps don't provide email addresses and for app members using personal or external accounts that couldn’t be identified or are not in the corporate directory.
To view the status of the imported app members, you must complete the following steps:
1. Select the **Business Hubs** option from the left menu. The **Business Hubs** page is displayed.
2. Click the **More options** (...) icon of the corresponding business hub card. A drop-down menu is displayed.
3. Select the **View Members** option from the menu. The business hub details page is displayed with the **Members** tab activated. App members are displayed in the following tabs of the **User Overview** section:
* **Unmatched users:** This tab displays the users who were not automatically matched.
* **Onboarded users:** This tab displays the users matched to their Cerby user account.
* **Guest users:** This tab displays the users who were matched to an existing Cerby user account but it doesn’t exist in the corporate directory, such as external collaborators.
For unmatched users, you can perform one of the following actions:
* [Match users](#match-users)
* [Remove unmatched users](#remove-unmatched-users)
* [Exempt unmatched users](#exempt-unmatched-users)
The following sections describe each action.
#### Match users
To match users, you must complete the following steps from the **Unmatched users** tab of the business hub details page:
1. Click the **Match user** button of the corresponding user. The **Match user** dialog box is displayed.
2. Enter the username or email address of the user you want to match and invite in the **Match with** field. The user is displayed on a list.
3. Select the user from the list.
4. Click the **Next** button. The **Select Cerby role** dialog box is displayed.
5. Select the role to assign to the user on the business hub **Cerby role** drop-down menu:
* **Owner:** This role enables sharing access and managing business hub settings in Cerby.
* **Collaborator:** This role enables only logging in to the app from Cerby.
6. Click the **Match user** button. The dialog box closes, and a success message box is displayed. The user is moved to the **Onboarded users** tab.
#### Remove unmatched users
To remove unmatched users, you must complete the following steps from the **Unmatched users** tab of the business hub details page:
{% hint style="danger" %}
**IMPORTANT:** When removing an unmatched user, Cerby performs an automated task to revoke the user’s seat and permissions in Appsmith.
{% endhint %}
1. Click the **More options** (...) icon of the corresponding user. A drop-down menu is displayed.
2. Select the **Remove user** option from the menu. The **Remove user?** dialog box is displayed.
3. Click the **Remove user** button. The dialog box closes, and a success message box is displayed. The user is removed from the app via an automated task.
#### Exempt unmatched users
Exempted users keep their user accounts or seats active in your app, but you cannot manage them through Cerby.
To exempt unmatched users, you must complete the following steps from the **Unmatched users** tab of the business hub details page:
1. Click the **More options** (...) icon of the corresponding user. A drop-down menu is displayed.
2. Select the **Exempt user** option from the menu. The exempt user dialog box is displayed.
3. Enter a reason for exempting the user in the **Provide a reason** field.
4. Click the **Exempt member** button. The dialog box closes, and a success message box is displayed. The user is moved to the **Exempted users** tab.
***
## Use your business hub
The following are the supported features of business hubs you can use:
* [Join the external app and set up your business hub access](https://help.cerby.com/cerby-web-app/business-hubs/join-your-external-app-and-set-up-your-business-hub-access)
* [Add users to your app via a business hub](/setup-and-admin/business-hubs/managing-users-and-assets-via-a-business-hub/add-users-and-teams-to-your-apps-via-a-business-hub)
* [Provision users to your apps via an IdP and business hub](/setup-and-admin/business-hubs/managing-users-and-assets-via-a-business-hub/provision-users-to-your-apps-via-an-idp-and-business-hub)
* [Remove users from your app via a business hub](/setup-and-admin/business-hubs/managing-users-and-assets-via-a-business-hub/remove-users-from-your-app-via-a-business-hub)
* [Remove teams from your app via a business hub](/setup-and-admin/business-hubs/managing-users-and-assets-via-a-business-hub/remove-teams-from-your-app-via-a-business-hub)
* [Deprovision users from your apps via an IdP and business hub](/setup-and-admin/business-hubs/managing-users-and-assets-via-a-business-hub/deprovision-users-from-your-apps-via-an-idp-and-business-hub)
* [Update user roles in your app via a business hub](/setup-and-admin/business-hubs/managing-users-and-assets-via-a-business-hub/update-user-roles-in-your-app-via-a-business-hub)
* [Update team member roles in your app via a business hub](/setup-and-admin/business-hubs/managing-users-and-assets-via-a-business-hub/update-team-member-roles-in-your-app-via-a-business-hub)
* [Update user roles in your apps via an IdP and business hub](/setup-and-admin/business-hubs/managing-users-and-assets-via-a-business-hub/update-user-roles-in-your-apps-via-an-idp-and-business-hub)
* [Sync your app users with your business hub](/setup-and-admin/business-hubs/managing-users-and-assets-via-a-business-hub/sync-your-business-hub-with-your-external-app)
* [Log in to your app via a business hub](https://help.cerby.com/cerby-web-app/business-hubs/log-in-to-your-app)
* [Track the activity of business hub users](/setup-and-admin/business-hubs/managing-users-and-assets-via-a-business-hub/track-activity-on-app-members-user-accounts)
* [Remove a business hub](/setup-and-admin/business-hubs/managing-your-business-hubs/remove-a-business-hub)
# Connect a business hub for Artisan
This article describes how to connect a business hub to centrally manage the users of Artisan from Cerby.
{% hint style="info" %}
**Who can use this feature?**
* Workspace **Owners**, **Super Admins**, **Admins**, and **Users**
* Only supported using the Cerby web app
{% endhint %}
As a user with any workspace role in Cerby, except **Guest User** and **Login-Only**, you can connect a business hub integration to centrally manage the users of Artisan.
When you connect the business hub, you become its **Owner**, and you can perform the following user and access management tasks through automated tasks executed by the Cerby agent:
* Check for updates
* Add users
* Remove users
{% hint style="success" %}
**TIP:** For more details about the automated tasks of a business hub, how it works, and the supported apps, read the article [Explore Business Hubs](https://help.cerby.com/setup-and-admin/business-hubs/business-hub-catalog).
{% endhint %}
{% hint style="info" %}
**NOTE:** The automated task to update user roles is not available for this business hub.
{% endhint %}
This article provides instructions on how to connect a business hub for Artisan. For other app-specific articles and videos, review the [Connecting business hubs for your apps](https://help.cerby.com/setup-and-admin/business-hubs/connecting-your-apps) and [Connecting business hubs for your paid social apps](https://help.cerby.com/setup-and-admin/business-hubs/connecting-your-paid-social-apps) collections in the Cerby Help Center.
***
## Requirements
The following are the requirements to connect a business hub:
* A Cerby workspace
* A Cerby user account with the **Owner**, **Super Admin**, **Admin**, or **User** role
* Groups configured in your identity provider (IdP) if you want to leverage automatic user provisioning and deprovisioning from your apps based on group assignment events. For more information, read the articles available in the [Managing users via an IdP and business hub](https://help.cerby.com/setup-and-admin/business-hubs/managing-users-and-assets-via-a-business-hub) collection in the Cerby Help Center
* An automation account, meaning an active user account with a native **Admin** role in Artisan to be used as a service account. For instructions and recommendations on how to create and configure this account, read the article [Create a service account for your business hub](/setup-and-admin/business-hubs/connecting-your-apps/create-a-service-account-for-your-business-hub)
* The user management and login method for your business hub identified to select the corresponding option when connecting your app. For more information, read the **User management and login method** section of the article [Explore Business Hubs](https://help.cerby.com/setup-and-admin/business-hubs/business-hub-catalog)
***
## Connect a business hub for Artisan
To connect a business hub for Artisan, you must complete the following main steps from the Cerby web app dashboard:
1. [Add a business hub and connect it to Artisan](#id-1.-add-a-business-hub-and-connect-it-to-artisan)
2. [Check for updates to import users and roles to Cerby](#id-2.-check-for-updates-to-import-users-and-roles-to-cerby)
3. [Connect your Artisan user account to the business hub](#id-3.-connect-your-artisan-user-account-to-the-business-hub)
4. [Manage unmatched users](#id-4.-manage-unmatched-users)
The following sections describe each main step.
### 1. Add a business hub and connect it to Artisan
To add a business hub and connect it to Artisan, you must complete the following steps:
1. Log in to your corresponding [Cerby](https://app.cerby.com/) workspace.
2. Select the **Business Hubs** option from the left menu. The **Business Hubs** page is displayed.
3. Click the **Connect Business Hub** button located at the top-right corner of the page. The **Connect your Business Hubs to Cerby** dialog box is displayed. **TIP:** Select the **Don’t show this again** option to skip this step the next time you connect a new business hub.
4. Click the **Get started** button. A wizard is displayed on the **Select app** page.
5. Select **Artisan Hub** from the catalog. The **Enter app details** page is displayed on the wizard.
6. Enter and select your app information in the corresponding fields:
* **Label in Cerby:** It is the name to assign to your business hub in Cerby, and it will be displayed on the business hub card.
* **Business unique identifier:** It is a unique identifier that differentiates your business hub in Cerby from others for the same app. You can assign an alphanumeric value between 3 and 30 characters without symbols or special characters.
* **User management and login method:** It is the way your users log in to the app and determines whether they must save their login credentials as a Cerby account connected to the business hub.
1. Select the **Single sign-on (SSO)** option because access must be managed by your IdP, and users log in with SSO authentication. They are not asked to save their credentials in Cerby. **IMPORTANT** : The **Username and password** option is not supported for Artisan.
7. Click the **Next** button. The **Select automation account** page is displayed with a list of existing Artisan accounts.
8. Select the automation account you have previously added to Cerby, as described in the [Requirements](#requirements) section. **NOTE:** If you don’t have an automation account, you are prompted to add it. Make sure you read Cerby’s recommendations on how to configure it in the article [Create a service account for your business hub](https://help.cerby.com/setup-and-admin/business-hubs/connecting-your-apps/create-a-service-account-for-your-business-hub). You may need to add the account first and then add the business hub.
9. Click the **Connect app** button. The wizard closes, and a success message box is displayed. The corresponding business hub is also displayed on the **Business Hubs** page
The next step is [2. Check for updates to import users and roles to Cerby](/setup-and-admin/business-hubs/connecting-your-apps/connect-a-business-hub-for-your-app#h-9c6531cf9a).
### 2. Check for updates to import users and roles to Cerby
To check for updates in your app to identify and import users and roles to Cerby, you must complete the following steps:
1. Select the **Business Hubs** option from the left menu. The **Business Hubs** page is displayed.
2. Click the **More options** (...) icon of the corresponding business hub card. A drop-down menu is displayed.
3. Select the **Settings** option from the menu. The business hub details page is displayed with the **Settings** tab activated.
4. Click the **Sync** button located at the top right of the page. A message box is displayed with information about the process. **NOTE:** The check and import process may take a few minutes, depending on the number of users, and because Cerby automatically matches users to their corresponding Cerby user account.
5. Confirm that the automated task to check for updates has the “Completed” status by performing any of the following actions:
* Click the **More details** button in the message box.
* Select the **Automation** option from the left menu to open the **Automation** page with a list of automated tasks and their status.
{% hint style="info" %}
**NOTE:** Cerby automatically performs daily checks for updates for all business hubs, but you can trigger them manually, as described in this section. For more instructions, read the article [Sync your app users with your business hub](/setup-and-admin/business-hubs/managing-users-and-assets-via-a-business-hub/sync-your-business-hub-with-your-external-app).
{% endhint %}
The next step is [3. Connect your Artisan user account to the business hub](#id-3.-connect-your-artisan-user-account-to-the-business-hub).
### 3. Connect your Artisan user account to the business hub
To connect your Artisan user account to the business hub so Cerby can manage and protect it, you must complete the following steps:
1. Select the **Accounts** option from the left menu. The **All accounts** page is displayed.
2. Click the **Log in** button of the corresponding Artisan Hub account card. The **Connect your Artisan Hub Account** dialog box is displayed.
3. Enter the login credentials of your **Artisan** user account.
4. Click the **Connect account** button. The dialog box closes, and a success message box and a new account card are displayed.
The next step is [4. Manage unmatched users](#id-4.-manage-unmatched-users).
### 4. Manage unmatched users
During a check for updates, Cerby automatically matches app members to the Cerby user accounts that correspond to their email addresses, including existing [guest users](https://help.cerby.com/getting-started/concepts/user-management/guest-users) and [local partners](https://help.cerby.com/getting-started/concepts/user-management/partners#h-7e4add33a2). Manual matching is required when apps don't provide email addresses and for app members using personal or external accounts that couldn’t be identified or are not in the corporate directory.
To view the status of the imported app members, you must complete the following steps:
1. Select the **Business Hubs** option from the left menu. The **Business Hubs** page is displayed.
2. Click the **More options** (...) icon of the corresponding business hub card. A drop-down menu is displayed.
3. Select the **View Members** option from the menu. The business hub details page is displayed with the **Members** tab activated. App members are displayed in the following tabs of the **User Overview** section:
* **Unmatched users:** This tab displays the users who were not automatically matched.
* **Onboarded users:** This tab displays the users matched to their Cerby user account.
* **Guest users:** This tab displays the users who were matched to an existing Cerby user account, but it doesn’t exist in the corporate directory, such as external collaborators.
For unmatched users, you can perform one of the following actions:
* [Match users](#match-users)
* [Remove unmatched users](#remove-unmatched-users)
* [Exempt unmatched users](#exempt-unmatched-users)
The following sections describe each action.
#### Match users
To match users, you must complete the following steps from the **Unmatched users** tab of the business hub details page:
1. Click the **Match user** button of the corresponding user. The **Match user** dialog box is displayed.
2. Enter the username or email address of the user you want to match and invite in the **Match with** field. The user is displayed on a list.
3. Select the user from the list.
4. Click the **Next** button. The **Select Cerby role** dialog box is displayed.
5. Select the role to assign to the user on the business hub **Cerby role** drop-down menu:
* **Owner:** This role enables sharing access and managing business hub settings in Cerby.
* **Collaborator:** This role enables only logging in to the app from Cerby.
6. Click the **Match user** button. The dialog box closes, and a success message box is displayed. The user is moved to the **Onboarded users** tab.
#### Remove unmatched users
To remove unmatched users, you must complete the following steps from the **Unmatched users** tab of the business hub details page:
{% hint style="danger" %}
**IMPORTANT:** When removing an unmatched user, Cerby performs an automated task to revoke the user’s seat and permissions in Artisan.
{% endhint %}
1. Click the **More options** (...) icon of the corresponding user. A drop-down menu is displayed.
2. Select the **Remove user** option from the list. The **Remove user?** dialog box is displayed.
3. Click the **Remove user** button. The dialog box closes, and a success message box is displayed. The user is removed from the app via an automated task.
#### Exempt unmatched users
Exempted users keep their user accounts or seats active in your app, but you cannot manage them through Cerby.
To exempt unmatched users, you must complete the following steps from the **Unmatched users** tab of the business hub details page:
1. Click the **More options** (...) icon of the corresponding user. A drop-down list is displayed.
2. Select the **Exempt user** option from the list. The exempt user dialog box is displayed.
3. Enter a reason for exempting the user in the **Provide a reason** field.
4. Click the **Exempt member** button. The dialog box closes, and a success message box is displayed. The user is moved to the **Exempted users** tab.
***
## Use your business hub
The following are the supported features of business hubs you can use:
* [Join the external app and set up your business hub access](https://help.cerby.com/cerby-web-app/business-hubs/join-your-external-app-and-set-up-your-business-hub-access)
* [Add users to your app via a business hub](/setup-and-admin/business-hubs/managing-users-and-assets-via-a-business-hub/add-users-and-teams-to-your-apps-via-a-business-hub)
* [Provision users to your apps via an IdP and business hub](/setup-and-admin/business-hubs/managing-users-and-assets-via-a-business-hub/provision-users-to-your-apps-via-an-idp-and-business-hub)
* [Remove users from your app via a business hub](/setup-and-admin/business-hubs/managing-users-and-assets-via-a-business-hub/remove-users-from-your-app-via-a-business-hub)
* [Remove teams from your app via a business hub](/setup-and-admin/business-hubs/managing-users-and-assets-via-a-business-hub/remove-teams-from-your-app-via-a-business-hub)
* [Deprovision users from your apps via an IdP and business hub](/setup-and-admin/business-hubs/managing-users-and-assets-via-a-business-hub/deprovision-users-from-your-apps-via-an-idp-and-business-hub)
* [Sync your app users with your business hub](/setup-and-admin/business-hubs/managing-users-and-assets-via-a-business-hub/sync-your-business-hub-with-your-external-app)
* [Log in to your app via a business hub](https://help.cerby.com/cerby-web-app/business-hubs/log-in-to-your-app)
* [Track the activity of business hub users](/setup-and-admin/business-hubs/managing-users-and-assets-via-a-business-hub/track-activity-on-app-members-user-accounts)
* [Remove a business hub](/setup-and-admin/business-hubs/managing-your-business-hubs/remove-a-business-hub)
# Connect a business hub for Artlist
This article describes how to connect a business hub to centrally manage the users of Artlist from Cerby.
{% hint style="info" %}
**Who can use this feature?**
* Workspace **Owners**, **Super Admins**, **Admins**, and **Users**
* Only supported using the Cerby web app
{% endhint %}
As a user with any workspace role in Cerby, except **Guest User** and **Login-Only**, you can connect a business hub integration to centrally manage the users of Artlist.
When you connect the business hub, you become its **Owner**, and you can perform the following user and access management tasks through automated tasks or API calls executed by the Cerby agent:
* Check for updates
* Invite app members
* Update app members’ roles
* Remove app members
{% hint style="success" %}
**TIP:** For more details about the automated tasks of a business hub, how it works, and the supported apps, read the article [Explore Apps](https://help.cerby.com/setup-and-admin/business-hubs/business-hub-catalog).
{% endhint %}
This article provides instructions on how to connect a business hub for Artlist. For other app-specific articles and videos, review the [Connecting your business hubs](https://help.cerby.com/setup-and-admin/business-hubs/connecting-your-apps) collection in the Cerby Help Center.
***
## Requirements
The following are the requirements to connect a business hub:
* A Cerby workspace
* A Cerby user account with the **Owner**, **Super Admin**, **Admin**, or **User** role
* A collaboration space in Artlist
* Groups configured in your identity provider (IdP) if you want to leverage automatic user provisioning and deprovisioning from your apps based on group assignment events. For more information, read the article [Provision users to your apps via an IdP and business hub](https://help.cerby.com/setup-and-admin/business-hubs/managing-users-and-assets-via-a-business-hub/provision-users-to-your-apps-via-an-idp-and-business-hub)
* An automation account, meaning an active user account with a native **Admin** role in Artlist to be used as a service account. For instructions and recommendations on how to create and configure this account, read the article [Create a service account for your business hub](https://help.cerby.com/setup-and-admin/business-hubs/connecting-your-apps/create-a-service-account-for-your-business-hub)
* The user management and login method for your business hub identified to select the corresponding option when connecting your app. For more information, read the **User management and login method** section of the article [Explore Apps](https://help.cerby.com/setup-and-admin/business-hubs/business-hub-catalog)
***
## Connect a business hub for Artlist
To connect a business hub for Artlist, you must complete the following main steps from the Cerby web app dashboard:
1. [Add a business hub and connect it to Artlist](#id-1.-add-a-business-hub-and-connect-it-to-artlist)
2. [Check for updates to import users and roles to Cerby](#id-2.-check-for-updates-to-import-users-and-roles-to-cerby)
3. [Connect your Artlist user account to the business hub](#id-3.-connect-your-artlist-user-account-to-the-business-hub)
4. [Manage unmatched users](#id-4.-manage-unmatched-users)
The following sections describe each main step.
### 1. Add a business hub and connect it to Artlist
To add a business hub and connect it to Artlist, you must complete the following steps:
1. Log in to your corresponding [Cerby](https://app.cerby.com/) workspace.
2. Select the **Business Hubs** option from the left navigation drawer. The **Business Hubs** page is displayed.
3. Click the **Connect Business Hub** button located at the top-right corner of the page. The **Connect your Business Hubs to Cerby** dialog box is displayed. **TIP:** Select the **Don’t show this again** option to skip this step the next time you connect a new business hub.
4. Click the **Get started** button. A wizard is displayed on the **Select app** page.
5. Select **Artlist Hub** from the catalog. The **Enter app details** page is displayed on the wizard.
6. Enter and select your app information in the corresponding fields:
* **Label in Cerby:** It is the name to assign to your business hub in Cerby, and it will be displayed on the business hub card.
* **Internal Unique Identifier:** It is a unique identifier that differentiates your business hub in Cerby from others for the same app. You can assign an alphanumeric value between 3 and 30 characters without symbols or special characters.
* **User management and login method:** It is the way your users log in to the app and determines whether they must save their login credentials as a Cerby account connected to the business hub. You must select one of the following methods:
* **Single sign-on (SSO):** Access is managed by your identity provider, and users log in with SSO authentication. They are not asked to save their credentials in Cerby.
* **Username and password:** Cerby manages account security and access, and users log in with their credentials after saving them in Cerby.
7. Click the **Next** button. The **Select automation account** page is displayed with a list of existing Artlist accounts.
8. Select the automation account you have previously added to Cerby, as described in the [Requirements](#requirements) section. **NOTE:** If you don’t have an automation account, you are prompted to add it. Make sure you read Cerby’s recommendations on how to configure it in the article [Create a service account for your business hub](https://help.cerby.com/setup-and-admin/business-hubs/connecting-your-apps/create-a-service-account-for-your-business-hub). You may need to add the account first and then add the business hub.
9. Click the **Connect app** button. The wizard closes, and a success message box is displayed. The corresponding business hub is also displayed on the **Business Hubs** page.
The next step is [2. Check for updates to import users and roles to Cerby](#id-2.-check-for-updates-to-import-users-and-roles-to-cerby).
### 2. Check for updates to import users and roles to Cerby
To check for updates in your app to identify and import users and roles to Cerby, you must complete the following steps:
1. Select the **Business Hubs** option from the left navigation drawer. The **Business Hubs** page is displayed.
2. Click the **Settings** () icon of the corresponding business hub card. The business hub details page is displayed with the **Settings** tab activated.
3. Click the **Check for updates** button located at the top right of the page. A message box is displayed with information about the process. **NOTE:** The check and import process may take a few minutes depending on the number of users, and because Cerby automatically matches users to their corresponding Cerby user account.
4. Confirm that the automated task to check for updates has the “Completed” status by performing any of the following actions:
* Click the **More details** button from the message box.
* Select the **Automation** option from the left navigation drawer to open the **Automation** page with a list of automated tasks and their status.
{% hint style="info" %}
**NOTE:** Cerby automatically performs daily checks for updates for all business hubs, but you can trigger them manually, as described in this section. When a user is deprovisioned from an IdP and a check for updates is performed, Cerby generates a report and sends business hub **Owners** an email to confirm their removal from the app. For more instructions, read the article [Check for updates in your app and apply report](/setup-and-admin/business-hubs/managing-users-and-assets-via-a-business-hub/sync-your-business-hub-with-your-external-app).
{% endhint %}
The next step is [3. Connect your Artlist user account to the business hub](#id-3.-connect-your-artlist-user-account-to-the-business-hub).
### 3. Connect your Artlist user account to the business hub
To connect your Artlist user account to the business hub so Cerby can manage and protect it, you must complete the following steps:
1. Select the **Accounts** option from the left navigation drawer. The **Accounts** page is displayed.
2. Click the **Log in** button of the corresponding Artlist Hub account card. The **Connect your Artlist Hub Account** dialog box is displayed.
3. Enter the login credentials of your **Artlist** user account.
4. Click the **Connect account** button. The dialog box closes, and a success message box and a new account card are displayed.
The next step is [4. Manage unmatched users](#id-4.-manage-unmatched-users).
### 4. Manage unmatched users
During a check for updates, Cerby automatically matches app members to the Cerby user accounts that correspond to their email addresses, including existing [guest users](https://help.cerby.com/getting-started/concepts/user-management/guest-users) and [local partners](https://help.cerby.com/getting-started/concepts/user-management/partners#h-7e4add33a2). Manual matching is required when apps don't provide email addresses and for app members using personal or external accounts that couldn’t be identified or are not in the corporate directory.
To view the status of the imported app members, you must complete the following steps:
1. Select the **Business Hubs** option from the left navigation drawer. The **Business Hubs** page is displayed.
2. Click the **More options** (...) icon of the corresponding business hub card. A drop-down list is displayed.
3. Select the **View Members** option from the list. The business hub details page is displayed with the **Members** tab activated. App members are displayed in the following tabs of the **User Overview** section:
* **Unmatched users:** This tab displays the users who were not automatically matched.
* **Onboarded users:** This tab displays the users matched to their Cerby user account.
* **Guest users:** This tab displays the users who were matched to an existing Cerby user account but it doesn’t exist in the corporate directory, such as external collaborators.
For unmatched users, you can perform one of the following actions:
* [Match users](#match-users)
* [Remove unmatched users](#remove-unmatched-users)
* [Exempt unmatched users](#exempt-unmatched-users)
The following sections describe each action.
#### Match users
To match users, you must complete the following steps from the **Unmatched users** tab of the business hub details page:
1. Click the **Match user** button of the corresponding user. The **Match user** dialog box is displayed.
2. Enter the username or email address of the user you want to match and invite in the **Match with** field. The user is displayed on a list.
3. Select the user from the list.
4. Click the **Next** button. The **Select Cerby role** dialog box is displayed.
5. Select the role to assign to the user on the business hub **Cerby role** drop-down list:
* **Owner:** This role enables sharing access and managing business hub settings in Cerby.
* **Collaborator:** This role enables only logging in to the app from Cerby.
6. Click the **Match user** button. The dialog box closes, and a success message box is displayed. The user is moved to the **Onboarded users** tab.
#### Remove unmatched users
To remove unmatched users, you must complete the following steps from the **Unmatched users** tab of the business hub details page:
{% hint style="danger" %}
**IMPORTANT:** When removing an unmatched user, Cerby performs an automated task to revoke the user’s seat and permissions in Artlist.
{% endhint %}
1. Click the **More options** (...) icon of the corresponding user. A drop-down list is displayed.
2. Select the **Remove user** option from the list. The **Remove user?** dialog box is displayed.
3. Click the **Remove user** button. The dialog box closes, and a success message box is displayed. The user is removed from the app via an automated task.
#### Exempt unmatched users
Exempted users keep their user accounts or seats active in your app, but you cannot manage them through Cerby.
To exempt unmatched users, you must complete the following steps from the **Unmatched users** tab of the business hub details page:
1. Click the **More options** (...) icon of the corresponding user. A drop-down list is displayed.
2. Select the **Exempt user** option from the list. The exempt user dialog box is displayed.
3. Enter a reason for exempting the user in the **Provide a reason** field.
4. Click the **Exempt member** button. The dialog box closes, and a success message box is displayed. The user is moved to the **Exempted users** tab.
***
## Use your business hub
The following are the supported features of business hubs you can use:
* [Join the App and connect it to Cerby](https://help.cerby.com/cerby-web-app/business-hubs/join-your-external-app-and-set-up-your-business-hub-access)
* [Invite new app members](/setup-and-admin/business-hubs/managing-users-and-assets-via-a-business-hub/add-users-and-teams-to-your-apps-via-a-business-hub)
* [Remove app members](/setup-and-admin/business-hubs/managing-users-and-assets-via-a-business-hub/remove-users-from-your-app-via-a-business-hub)
* [Provision users to your apps via an IdP and business hub](https://help.cerby.com/setup-and-admin/business-hubs/managing-users-and-assets-via-a-business-hub/provision-users-to-your-apps-via-an-idp-and-business-hub)
* [Update the app members’ roles](/setup-and-admin/business-hubs/managing-users-and-assets-via-a-business-hub/update-user-roles-in-your-app-via-a-business-hub)
* [Check for updates in your app and apply report](/setup-and-admin/business-hubs/managing-users-and-assets-via-a-business-hub/sync-your-business-hub-with-your-external-app)
* [Re-assign the app members’ user accounts](https://github.com/cerbyinc/help-center/tree/main/.uncategorized/unpublished-deprecated-re-assign-the-app-members-user-accounts.md)
* [Manage the security of app members’ user accounts](/setup-and-admin/business-hubs/managing-users-and-assets-via-a-business-hub/protect-your-app-user-accounts-via-a-business-hub)
* [Log in to your app](https://help.cerby.com/cerby-web-app/business-hubs/log-in-to-your-app)
* [Track activity on app members’ user accounts](/setup-and-admin/business-hubs/managing-users-and-assets-via-a-business-hub/track-activity-on-app-members-user-accounts)
* [Remove an App](/setup-and-admin/business-hubs/managing-your-business-hubs/remove-a-business-hub)
# Connect a business hub for Asana
This article describes how to connect a business hub to centrally manage the users of Asana from Cerby.
{% hint style="info" %}
**Who can use this feature?**
* Workspace **Owners**, **Super Admins**, **Admins**, and **Users**
* Only supported using the Cerby web app
{% endhint %}
As a user with any workspace role in Cerby, except **Guest User** and **Login-Only**, you can connect a business hub integration to centrally manage the users of Asana.
When you connect the business hub, you become its **Owner**, and you can perform the following user and access management tasks through automated tasks executed by the Cerby agent:
* Check for updates
* Invite app members
* Update app members’ roles
* Remove app members
{% hint style="success" %}
**TIP:** For more details about the automated tasks of a business hub, how it works, and the supported apps, read the article [Explore Apps](https://help.cerby.com/setup-and-admin/business-hubs/business-hub-catalog).
{% endhint %}
This article provides instructions on how to connect a business hub for Asana. For other app-specific articles and videos, review the [Connecting your business hubs](https://help.cerby.com/setup-and-admin/business-hubs/connecting-your-apps) collection in the Cerby Help Center.
***
## Requirements
The following are the requirements to connect a business hub:
* A Cerby workspace
* A Cerby user account with the **Owner**, **Super Admin**, **Admin**, or **User** role
* A workspace in Asana
* Groups configured in your identity provider (IdP) if you want to leverage automatic user provisioning and deprovisioning from your apps based on group assignment events. For more information, read the article [Provision users to your apps via an IdP and business hub](https://help.cerby.com/setup-and-admin/business-hubs/managing-users-and-assets-via-a-business-hub/provision-users-to-your-apps-via-an-idp-and-business-hub)
* An automation account, meaning an active user account with a native **Admin** role in Asana to be used as a service account. For instructions and recommendations on how to create and configure this account, read the article [Create a service account for your business hub](https://help.cerby.com/setup-and-admin/business-hubs/connecting-your-apps/create-a-service-account-for-your-business-hub)
* The user management and login method for your business hub identified to select the corresponding option when connecting your app. For more information, read the **User management and login method** section of the article [Explore Apps](https://help.cerby.com/setup-and-admin/business-hubs/business-hub-catalog)
* A Business ID. You can find the ID in the address bar by completing the following steps after logging in to Asana:
1. Click your user profile at the top right of the page.
2. Select the **Admin console** option from the drop-down menu. The admin console page is displayed.
3. Copy the ID from the address bar. The ID is displayed in the address bar as part of the URL, between the \*\*`admin` \*\*and **`insights`** subdirectory. For example, **`1209392144075813`** in **`https://app.asana.com/admin/1209392144075813/insights`.**
***
## Connect a business hub for Asana
To connect a business hub for Asana, you must complete the following main steps from the Cerby web app dashboard:
1. [Add a business hub and connect it to Asana](#id-1.-add-a-business-hub-and-connect-it-to-asana)
2. [Check for updates to import users and roles to Cerby](#id-2.-check-for-updates-to-import-users-and-roles-to-cerby)
3. [Connect your Asana user account to the business hub](#id-3.-connect-your-asana-user-account-to-the-business-hub)
4. [Manage unmatched users](#id-4.-manage-unmatched-users)
The following sections describe each main step.
### 1. Add a business hub and connect it to Asana
To add a business hub and connect it to Asana, you must complete the following steps:
1. Log in to your corresponding [Cerby](https://app.cerby.com/) workspace.
2. Select the **Business Hubs** option from the left navigation drawer. The **Business Hubs** page is displayed.
3. Click the **Connect Business Hub** button located at the top-right corner of the page. The **Connect your Business Hubs to Cerby** dialog box is displayed. **TIP:** Select the **Don’t show this again** option to skip this step the next time you connect a new business hub.
4. Click the **Get started** button. A wizard is displayed on the **Select app** page.
5. Select **Asana Hub** from the catalog. The **Enter app details** page is displayed on the wizard.
6. Enter and select your app information in the corresponding fields:
* **Label in Cerby:** It is the name to assign to your business hub in Cerby, and it will be displayed on the business hub card.
* **Business ID:** It is the unique identifier of your business or organization in **Asana Hub**. For instructions on how to find it, read the [Requirements](#requirements) section.
* **User management and login method:** It is the way your users log in to the app and determines whether they must save their login credentials as a Cerby account connected to the business hub. You must select one of the following methods:
* **Single sign-on (SSO):** Access is managed by your identity provider, and users log in with SSO authentication. They are not asked to save their credentials in Cerby.
* **Username and password:** Cerby manages account security and access, and users log in with their credentials after saving them in Cerby.
7. Click the **Next** button. The **Select automation account** page is displayed with a list of existing Asana accounts.
8. Select the automation account you have previously added to Cerby, as described in the [Requirements](#requirements) section. **NOTE:** If you don’t have an automation account, you are prompted to add it. Make sure you read Cerby’s recommendations on how to configure it in the article [Create a service account for your business hub](https://help.cerby.com/setup-and-admin/business-hubs/connecting-your-apps/create-a-service-account-for-your-business-hub). You may need to add the account first and then add the business hub.
9. Click the **Connect app** button. The wizard closes, and a success message box is displayed. The corresponding business hub is also displayed on the **Business Hubs** page.
The next step is [2. Check for updates to import users and roles to Cerby](#id-2.-check-for-updates-to-import-users-and-roles-to-cerby).
### 2. Check for updates to import users and roles to Cerby
To check for updates in your app to identify and import users and roles to Cerby, you must complete the following steps:
1. Select the **Business Hubs** option from the left navigation drawer. The **Business Hubs** page is displayed.
2. Click the **Settings** () icon of the corresponding business hub card. The business hub details page is displayed with the **Settings** tab activated.
3. Click the **Check for updates** button located at the top right of the page. A message box is displayed with information about the process. **NOTE:** The check and import process may take a few minutes depending on the number of users, and because Cerby automatically matches users to their corresponding Cerby user account.
4. Confirm that the automated task to check for updates has the “Completed” status by performing any of the following actions:
* Click the **More details** button from the message box.
* Select the **Automation** option from the left navigation drawer to open the **Automation** page with a list of automated tasks and their status.
{% hint style="info" %}
**NOTE:** Cerby automatically performs daily checks for updates for all business hubs, but you can trigger them manually, as described in this section. When a user is deprovisioned from an IdP and a check for updates is performed, Cerby generates a report and sends business hub **Owners** an email to confirm their removal from the app. For more instructions, read the article [Check for updates in your app and apply report](/setup-and-admin/business-hubs/managing-users-and-assets-via-a-business-hub/sync-your-business-hub-with-your-external-app).
{% endhint %}
The next step is [3. Connect your Asana user account to the business hub](#id-3.-connect-your-asana-user-account-to-the-business-hub).
### 3. Connect your Asana user account to the business hub
To connect your Asana user account to the business hub so Cerby can manage and protect it, you must complete the following steps:
1. Select the **Accounts** option from the left navigation drawer. The **Accounts** page is displayed.
2. Click the **Log in** button of the corresponding Asana Hub account card. The **Connect your Asana Hub Account** dialog box is displayed.
3. Enter the login credentials of your **Asana** user account.
4. Click the **Connect account** button. The dialog box closes, and a success message box and a new account card are displayed.
The next step is [4. Manage unmatched users](#id-4.-manage-unmatched-users).
### 4. Manage unmatched users
During a check for updates, Cerby automatically matches app members to the Cerby user accounts that correspond to their email addresses, including existing [guest users](https://help.cerby.com/getting-started/concepts/user-management/guest-users) and [local partners](https://help.cerby.com/getting-started/concepts/user-management/partners#h-7e4add33a2). Manual matching is required when apps don't provide email addresses and for app members using personal or external accounts that couldn’t be identified or are not in the corporate directory.
To view the status of the imported app members, you must complete the following steps:
1. Select the **Business Hubs** option from the left navigation drawer. The **Business Hubs** page is displayed.
2. Click the **More options** (...) icon of the corresponding business hub card. A drop-down list is displayed.
3. Select the **View Members** option from the list. The business hub details page is displayed with the **Members** tab activated. App members are displayed in the following tabs of the **User Overview** section:
* **Unmatched users:** This tab displays the users who were not automatically matched.
* **Onboarded users:** This tab displays the users matched to their Cerby user account.
* **Guest users:** This tab displays the users who were matched to an existing Cerby user account but it doesn’t exist in the corporate directory, such as external collaborators.
For unmatched users, you can perform one of the following actions:
* [Match users](#match-users)
* [Remove unmatched users](#remove-unmatched-users)
* [Exempt unmatched users](#exempt-unmatched-users)
The following sections describe each action.
#### Match users
To match users, you must complete the following steps from the **Unmatched users** tab of the business hub details page:
1. Click the **Match user** button of the corresponding user. The **Match user** dialog box is displayed.
2. Enter the username or email address of the user you want to match and invite in the **Match with** field. The user is displayed on a list.
3. Select the user from the list.
4. Click the **Next** button. The **Select Cerby role** dialog box is displayed.
5. Select the role to assign to the user on the business hub **Cerby role** drop-down list:
* **Owner:** This role enables sharing access and managing business hub settings in Cerby.
* **Collaborator:** This role enables only logging in to the app from Cerby.
6. Click the **Match user** button. The dialog box closes, and a success message box is displayed. The user is moved to the **Onboarded users** tab.
#### Remove unmatched users
To remove unmatched users, you must complete the following steps from the **Unmatched users** tab of the business hub details page:
{% hint style="danger" %}
**IMPORTANT:** When removing an unmatched user, Cerby performs an automated task to revoke the user’s seat and permissions in Asana.
{% endhint %}
1. Click the **More options** (...) icon of the corresponding user. A drop-down list is displayed.
2. Select the **Remove user** option from the list. The **Remove user?** dialog box is displayed.
3. Click the **Remove user** button. The dialog box closes, and a success message box is displayed. The user is removed from the app via an automated task.
#### Exempt unmatched users
Exempted users keep their user accounts or seats active in your app, but you cannot manage them through Cerby.
To exempt unmatched users, you must complete the following steps from the **Unmatched users** tab of the business hub details page:
1. Click the **More options** (...) icon of the corresponding user. A drop-down list is displayed.
2. Select the **Exempt user** option from the list. The exempt user dialog box is displayed.
3. Enter a reason for exempting the user in the **Provide a reason** field.
4. Click the **Exempt member** button. The dialog box closes, and a success message box is displayed. The user is moved to the **Exempted users** tab.
***
## Use your business hub
The following are the supported features of business hubs you can use:
* [Join the App and connect it to Cerby](https://help.cerby.com/cerby-web-app/business-hubs/join-your-external-app-and-set-up-your-business-hub-access)
* [Invite new app members](/setup-and-admin/business-hubs/managing-users-and-assets-via-a-business-hub/add-users-and-teams-to-your-apps-via-a-business-hub)
* [Remove app members](/setup-and-admin/business-hubs/managing-users-and-assets-via-a-business-hub/remove-users-from-your-app-via-a-business-hub)
* [Provision users to your apps via an IdP and business hub](https://help.cerby.com/setup-and-admin/business-hubs/managing-users-and-assets-via-a-business-hub/provision-users-to-your-apps-via-an-idp-and-business-hub)
* [Update the app members’ roles](/setup-and-admin/business-hubs/managing-users-and-assets-via-a-business-hub/update-user-roles-in-your-app-via-a-business-hub)
* [Check for updates in your app and apply report](/setup-and-admin/business-hubs/managing-users-and-assets-via-a-business-hub/sync-your-business-hub-with-your-external-app)
* [Re-assign the app members’ user accounts](https://github.com/cerbyinc/help-center/tree/main/.uncategorized/unpublished-deprecated-re-assign-the-app-members-user-accounts.md)
* [Manage the security of app members’ user accounts](/setup-and-admin/business-hubs/managing-users-and-assets-via-a-business-hub/protect-your-app-user-accounts-via-a-business-hub)
* [Log in to your app](https://help.cerby.com/cerby-web-app/business-hubs/log-in-to-your-app)
* [Track activity on app members’ user accounts](/setup-and-admin/business-hubs/managing-users-and-assets-via-a-business-hub/track-activity-on-app-members-user-accounts)
* [Remove an App](/setup-and-admin/business-hubs/managing-your-business-hubs/remove-a-business-hub)
# Connect a business hub for Astrix
This article describes how to connect a business hub to centrally manage the users and assets of Astrix from Cerby.
{% hint style="info" %}
**Who can use this feature?**
* Workspace **Owners**, **Super Admins**, **Admins**, and **Users**
* Only supported using the Cerby web app
{% endhint %}
As a user with any workspace role in Cerby, except **Guest User** and **Login-Only**, you can connect a business hub integration to centrally manage the users and assets of Astrix.
When you connect the business hub, you become its **Owner**, and you can perform the following user and access management tasks through automated tasks executed by the Cerby agent:
* Check for updates
* Add users
* Update user roles
* Remove users
{% hint style="success" %}
**TIP:** For more details about the automated tasks of a business hub, how it works, and the supported apps, read the article [Explore Business Hubs](https://help.cerby.com/setup-and-admin/business-hubs/business-hub-catalog).
{% endhint %}
This article provides instructions on how to connect a business hub for Astrix. For other app-specific articles and videos, review the [Connecting business hubs for your apps](https://help.cerby.com/setup-and-admin/business-hubs/connecting-your-apps) and [Connecting business hubs for your paid social apps](https://help.cerby.com/setup-and-admin/business-hubs/connecting-your-paid-social-apps) collections in the Cerby Help Center.
***
## Requirements
The following are the requirements to connect a business hub:
* A Cerby workspace
* A Cerby user account with the workspace **Owner**, **Super Admin**, **Admin**, or **User** role
* Groups configured in your identity provider (IdP) if you want to leverage automatic user provisioning and deprovisioning from your apps based on group assignment events. For more information, read the articles available in the [Managing users via an IdP and business hub](https://help.cerby.com/setup-and-admin/business-hubs/managing-users-and-assets-via-a-business-hub) collection in the Cerby Help Center
* An automation account, meaning an active user account with a native **Admin** role in Astrix to be used as a service account. For instructions and recommendations on how to create and configure this account, read the article [Create a service account for your business hub](/setup-and-admin/business-hubs/connecting-your-apps/create-a-service-account-for-your-business-hub)
* The user management and login method for your business hub identified to select the corresponding option when connecting your app. For more information, read the **User management and login method** section of the article [Explore Business Hubs](https://help.cerby.com/setup-and-admin/business-hubs/business-hub-catalog)
* A Business ID. You can find the ID in the address bar after logging in to Astrix. It’s the subdomain of the URL. For example, **`cerby`** in **`https://cerby.astrixsecurity.com/settings/accessManagemen`** t. Just copy the value and paste it when requested while connecting the business hub.
***
## Connect a business hub for Astrix
To connect a business hub for Astrix, you must complete the following main steps from the Cerby web app dashboard:
1. [Add a business hub and connect it to Astrix](#id-1.-add-a-business-hub-and-connect-it-to-astrix)
2. [Check for updates to import users, roles, and assets to Cerby](#id-2.-check-for-updates-to-import-users-roles-and-assets-to-cerby)
3. [Connect your Astrix user account to the business hub](#id-3.-connect-your-astrix-user-account-to-the-business-hub)
4. [Manage unmatched users](#id-4.-manage-unmatched-users)
The following sections describe each main step.
### 1. Add a business hub and connect it to Astrix
To add a business hub and connect it to Astrix, you must complete the following steps:
1. Log in to your corresponding [Cerby](https://app.cerby.com/) workspace.
2. Select the **Business Hubs** option from the left menu. The **Business Hubs** page is displayed.
3. Click the **Connect Business Hub** button located at the top-right corner of the page. The **Connect your Business Hubs to Cerby** dialog box is displayed. **TIP:** Select the **Don’t show this again** option to skip this step the next time you connect a new business hub.
4. Click the **Get started** button. A wizard is displayed on the **Select app** page.
5. Select **Astrix Hub** from the catalog. The **Enter app details** page is displayed on the wizard.
6. Enter and select your app information in the corresponding fields:
* **Label in Cerby:** It is the name to assign to your business hub in Cerby, and it will be displayed on the business hub card.
* **Business ID:** It is the unique identifier of your business or organization in **Astrix Hub**. For instructions on how to find it, read the [Requirements](#requirements) section.
* **User management and login method:** It is the way your users log in to the app and determines whether they must save their login credentials as a Cerby account connected to the business hub.
1. Select the **Single sign-on (SSO)** option because access must be managed by your IdP, and users log in with SSO authentication. They are not asked to save their credentials in Cerby.
**IMPORTANT:** The Username and password option is not currently available for Astrix.
7. Click the **Next** button. The **Select automation account** page is displayed with a list of existing Astrix accounts.
8. Select the automation account you have previously added to Cerby, as described in the [Requirements](#requirements) section. **NOTE:** If you don’t have an automation account, you are prompted to add it. Make sure you read Cerby’s recommendations on how to configure it in the article [Create a service account for your business hub](/setup-and-admin/business-hubs/connecting-your-apps/create-a-service-account-for-your-business-hub). You may need to add the account first and then add the business hub.
9. Click the **Connect app** button. The wizard closes, and a success message box is displayed. The corresponding business hub is also displayed on the **Business Hubs** page.
The next step is [2. Check for updates to import users, roles, and assets to Cerby](#id-2.-check-for-updates-to-import-users-roles-and-assets-to-cerby).
### 2. Check for updates to import users, roles, and assets to Cerby
To check for updates in your app to identify and import users, roles, and assets to Cerby, you must complete the following steps:
1. Select the **Business Hubs** option from the left menu. The **Business Hubs** page is displayed.
2. Click the **More options** (...) icon of the corresponding business hub card. A drop-down menu is displayed.
3. Select the **Settings** option from the menu. The business hub details page is displayed with the **Settings** tab activated.
4. Click the **Check for updates** button located at the top right of the page. A message box is displayed with information about the process. **NOTE:** The check and import process may take a few minutes depending on the number of users and assets, and because Cerby automatically matches users to their corresponding Cerby user account.
5. Confirm that the automated task to check for updates has the “Completed” status by performing any of the following actions:
* Click the **More details** button from the message box.
* Select the **Automation** option from the left menu to open the **Automation** page with a list of automated tasks and their status.
{% hint style="info" %}
**NOTE:** Cerby automatically performs daily checks for updates for all business hubs, but you can trigger them manually, as described in this section. For more instructions, read the article [Sync your app users with your business hub](/setup-and-admin/business-hubs/managing-users-and-assets-via-a-business-hub/sync-your-business-hub-with-your-external-app).
{% endhint %}
The next step is [3. Connect your Astrix user account to the business hub](#id-3.-connect-your-astrix-user-account-to-the-business-hub).
### 3. Connect your Astrix user account to the business hub
To connect your Astrix user account to the business hub so Cerby can manage and protect it, you must complete the following steps:
1. Select the **Accounts** option from the left menu. The **Accounts** page is displayed.
2. Click the **Log in** button of the corresponding Astrix Hub account card. The **Connect your Astrix Hub Account** dialog box is displayed.
3. Enter the login credentials of your **Astrix** user account.
4. Click the **Connect account** button. The dialog box closes, and a success message box and a new account card are displayed.
The next step is [4. Manage unmatched users](#id-4.-manage-unmatched-users).
### 4. Manage unmatched users
During a check for updates, Cerby automatically matches app members to the Cerby user accounts that correspond to their email addresses, including existing [guest users](https://help.cerby.com/getting-started/concepts/user-management/guest-users) and [local partners](https://help.cerby.com/getting-started/concepts/user-management/partners#h-7e4add33a2). Manual matching is required when apps don't provide email addresses and for app members using personal or external accounts that couldn’t be identified or are not in the corporate directory.
To view the status of the imported app members, you must complete the following steps:
1. Select the **Business Hubs** option from the left menu. The **Business Hubs** page is displayed.
2. Click the **More options** (...) icon of the corresponding business hub card. A drop-down menu is displayed.
3. Select the **View Members** option from the menu. The business hub details page is displayed with the **Members** tab activated. App members are displayed in the following tabs of the **User Overview** section:
* **Unmatched users:** This tab displays the users who were not automatically matched.
* **Onboarded users:** This tab displays the users matched to their Cerby user account.
* **Guest users:** This tab displays the users who were matched to an existing Cerby user account but it doesn’t exist in the corporate directory, such as external collaborators.
For unmatched users, you can perform one of the following actions:
* [Match users](#match-users)
* [Remove unmatched users](#remove-unmatched-users)
* [Exempt unmatched users](#exempt-unmatched-users)
The following sections describe each action.
#### Match users
To match users, you must complete the following steps from the **Unmatched users** tab of the business hub details page:
1. Click the **Match user** button of the corresponding user. The **Match user** dialog box is displayed.
2. Enter the username or email address of the user you want to match and invite in the **Match with** field. The user is displayed on a list.
3. Select the user from the list.
4. Click the **Next** button. The **Select Cerby role** dialog box is displayed.
5. Select the role to assign to the user on the business hub **Cerby role** drop-down menu:
* **Owner:** This role enables sharing access and managing business hub settings in Cerby.
* **Collaborator:** This role enables only logging in to the app from Cerby.
6. Click the **Match user** button. The dialog box closes, and a success message box is displayed. The user is moved to the **Onboarded users** tab.
#### Remove unmatched users
To remove unmatched users, you must complete the following steps from the **Unmatched users** tab of the business hub details page:
{% hint style="danger" %}
**IMPORTANT:** When removing an unmatched user, Cerby performs an automated task to revoke the user’s seat and permissions in Astrix.
{% endhint %}
1. Click the **More options** (...) icon of the corresponding user. A drop-down menu is displayed.
2. Select the **Remove user** option from the menu. The **Remove user?** dialog box is displayed.
3. Click the **Remove user** button. The dialog box closes, and a success message box is displayed. The user is removed from the app via an automated task.
#### Exempt unmatched users
Exempted users keep their user accounts or seats active in your app, but you cannot manage them through Cerby.
To exempt unmatched users, you must complete the following steps from the **Unmatched users** tab of the business hub details page:
1. Click the **More options** (...) icon of the corresponding user. A drop-down menu is displayed.
2. Select the **Exempt user** option from the menu. The exempt user dialog box is displayed.
3. Enter a reason for exempting the user in the **Provide a reason** field.
4. Click the **Exempt member** button. The dialog box closes, and a success message box is displayed. The user is moved to the **Exempted users** tab.
***
## Use your business hub
The following are the supported features of business hubs you can use:
* [Join the external app and set up your business hub access](https://help.cerby.com/cerby-web-app/business-hubs/join-your-external-app-and-set-up-your-business-hub-access)
* [Add users to your app via a business hub](/setup-and-admin/business-hubs/managing-users-and-assets-via-a-business-hub/add-users-and-teams-to-your-apps-via-a-business-hub)
* [Provision users to your apps via an IdP and business hub](/setup-and-admin/business-hubs/managing-users-and-assets-via-a-business-hub/provision-users-to-your-apps-via-an-idp-and-business-hub)
* [Remove users from your app via a business hub](/setup-and-admin/business-hubs/managing-users-and-assets-via-a-business-hub/remove-users-from-your-app-via-a-business-hub)
* [Remove teams from your app via a business hub](/setup-and-admin/business-hubs/managing-users-and-assets-via-a-business-hub/remove-teams-from-your-app-via-a-business-hub)
* [Deprovision users from your apps via an IdP and business hub](/setup-and-admin/business-hubs/managing-users-and-assets-via-a-business-hub/deprovision-users-from-your-apps-via-an-idp-and-business-hub)
* [Update user roles in your app via a business hub](/setup-and-admin/business-hubs/managing-users-and-assets-via-a-business-hub/update-user-roles-in-your-app-via-a-business-hub)
* [Update user roles in your apps via an IdP and business hub](/setup-and-admin/business-hubs/managing-users-and-assets-via-a-business-hub/update-user-roles-in-your-apps-via-an-idp-and-business-hub)
* [Sync your app users with your business hub](/setup-and-admin/business-hubs/managing-users-and-assets-via-a-business-hub/sync-your-business-hub-with-your-external-app)
* [Log in to your app via a business hub](https://help.cerby.com/cerby-web-app/business-hubs/log-in-to-your-app)
* [Track the activity of business hub users](/setup-and-admin/business-hubs/managing-users-and-assets-via-a-business-hub/track-activity-on-app-members-user-accounts)
* [Remove a business hub](/setup-and-admin/business-hubs/managing-your-business-hubs/remove-a-business-hub)
# Connect a business hub for AstroPay
This article describes how to connect a business hub to centrally manage the users of AstroPay from Cerby.
{% hint style="info" %}
**Who can use this feature?**
* Workspace **Owners**, **Super Admins**, **Admins**, and **Users**
* Only supported using the Cerby web app
{% endhint %}
As a user with any workspace role in Cerby, except **Guest User** and **Login-Only**, you can connect a business hub integration to centrally manage the users of AstroPay.
When you connect the business hub, you become its **Owner**, and you can perform the following user and access management tasks through automated tasks executed by the Cerby agent:
* Check for updates
* Add users
* Update user roles
* Remove users
{% hint style="success" %}
**TIP:** For more details about the automated tasks of a business hub, how it works, and the supported apps, read the article [Explore Business Hubs](https://help.cerby.com/setup-and-admin/business-hubs/business-hub-catalog).
{% endhint %}
This article provides instructions on how to connect a business hub for AstroPay. For other app-specific articles and videos, review the [Connecting business hubs for your apps](https://help.cerby.com/setup-and-admin/business-hubs/connecting-your-apps) and [Connecting business hubs for your paid social apps](https://help.cerby.com/setup-and-admin/business-hubs/connecting-your-paid-social-apps) collections in the Cerby Help Center.
***
## Requirements
The following are the requirements to connect a business hub:
* A Cerby workspace
* A Cerby user account with the **Owner**, **Super Admin**, **Admin**, or **User** role
* Groups configured in your identity provider (IdP) if you want to leverage automatic user provisioning and deprovisioning from your apps based on group assignment events. For more information, read the articles available in the [Managing users via an IdP and business hub](https://help.cerby.com/setup-and-admin/business-hubs/managing-users-and-assets-via-a-business-hub) collection in the Cerby Help Center
* An automation account, meaning an active user account with a native **Administrator** role in AstroPay to be used as a service account. For instructions and recommendations on how to create and configure this account, read the article [Create a service account for your business hub](/setup-and-admin/business-hubs/connecting-your-apps/create-a-service-account-for-your-business-hub)
***
## Connect a business hub for AstroPay
To connect a business hub for AstroPay, you must complete the following main steps from the Cerby web app dashboard:
1. [Add a business hub and connect it to AstroPay](#id-1.-add-a-business-hub-and-connect-it-to-astropay)
2. [Check for updates to import users and roles to Cerby](#id-2.-check-for-updates-to-import-users-and-roles-to-cerby)
3. [Connect your AstroPay user account to the business hub](#id-3.-connect-your-astropay-user-account-to-the-business-hub)
4. [Manage unmatched users](#id-4.-manage-unmatched-users)
The following sections describe each main step.
### 1. Add a business hub and connect it to AstroPay
To add a business hub and connect it to AstroPay, you must complete the following steps:
1. Log in to your corresponding [Cerby](https://app.cerby.com/) workspace.
2. Select the **Business Hubs** option from the left menu. The **Business Hubs** page is displayed.
3. Click the **Connect Business Hub** button located at the top-right corner of the page. The **Connect your Business Hubs to Cerby** dialog box is displayed. **TIP:** Select the **Don’t show this again** option to skip this step the next time you connect a new business hub.
4. Click the **Get started** button. A wizard is displayed on the **Select app** page.
5. Select **AstroPay Hub** from the catalog. The **Enter app details** page is displayed on the wizard.
6. Enter and select your app information in the corresponding fields:
* **Label in Cerby:** It is the name to assign to your business hub in Cerby, and it will be displayed on the business hub card.
* **Business unique identifier:** It is a unique identifier that differentiates your business hub in Cerby from others for the same app. You can assign an alphanumeric value between 3 and 30 characters without symbols or special characters.
* **User management and login method:** It is the way your users log in to the app and determines whether they must save their login credentials as a Cerby account connected to the business hub.
1. Select the **Username and password** option because account security and access are managed by Cerby, and users log in with their credentials after saving them in Cerby
**IMPORTANT:** The **Single sign-on (SSO)** option is not supported for AstroPay.
7. Click the **Next** button. The **Select automation account** page is displayed with a list of existing AstroPay accounts.
8. Select the automation account you have previously added to Cerby, as described in the [Requirements](#requirements) section. **NOTE:** If you don’t have an automation account, you are prompted to add it. Make sure you read Cerby’s recommendations on how to configure it in the article [Create a service account for your business hub](https://help.cerby.com/setup-and-admin/business-hubs/connecting-your-apps/create-a-service-account-for-your-business-hub). You may need to add the account first and then add the business hub.
9. Click the **Connect app** button. The wizard closes, and a success message box is displayed. The corresponding business hub is also displayed on the **Business Hubs** page
The next step is [2. Check for updates to import users and roles to Cerby](/setup-and-admin/business-hubs/connecting-your-apps/connect-a-business-hub-for-your-app#h-9c6531cf9a).
### 2. Check for updates to import users and roles to Cerby
To check for updates in your app to identify and import users and roles to Cerby, you must complete the following steps:
1. Select the **Business Hubs** option from the left menu. The **Business Hubs** page is displayed.
2. Click the **More options** (...) icon of the corresponding business hub card. A drop-down menu is displayed.
3. Select the **Settings** option from the menu. The business hub details page is displayed with the **Settings** tab activated.
4. Click the **Sync** button located at the top right of the page. A message box is displayed with information about the process. **NOTE:** The check and import process may take a few minutes, depending on the number of users, and because Cerby automatically matches users to their corresponding Cerby user account.
5. Confirm that the automated task to check for updates has the “Completed” status by performing any of the following actions:
* Click the **More details** button in the message box.
* Select the **Automation** option from the left menu to open the **Automation** page with a list of automated tasks and their status.
{% hint style="info" %}
**NOTE:** Cerby automatically performs daily checks for updates for all business hubs, but you can trigger them manually, as described in this section. For more instructions, read the article [Sync your app users with your business hub](/setup-and-admin/business-hubs/managing-users-and-assets-via-a-business-hub/sync-your-business-hub-with-your-external-app).
{% endhint %}
The next step is [3. Connect your AstroPay user account to the business hub](#id-3.-connect-your-astropay-user-account-to-the-business-hub).
### 3. Connect your AstroPay user account to the business hub
To connect your AstroPay user account to the business hub so Cerby can manage and protect it, you must complete the following steps:
1. Select the **Accounts** option from the left menu. The **All accounts** page is displayed.
2. Click the **Log in** button of the corresponding AstroPay Hub account card. The **Connect your AstroPay Hub Account** dialog box is displayed.
3. Enter the login credentials of your **AstroPay** user account.
4. Click the **Connect account** button. The dialog box closes, and a success message box and a new account card are displayed.
The next step is [4. Manage unmatched users](#id-4.-manage-unmatched-users).
### 4. Manage unmatched users
During a check for updates, Cerby automatically matches app members to the Cerby user accounts that correspond to their email addresses, including existing [guest users](https://help.cerby.com/getting-started/concepts/user-management/guest-users) and [local partners](https://help.cerby.com/getting-started/concepts/user-management/partners#h-7e4add33a2). Manual matching is required when apps don't provide email addresses and for app members using personal or external accounts that couldn’t be identified or are not in the corporate directory.
To view the status of the imported app members, you must complete the following steps:
1. Select the **Business Hubs** option from the left menu. The **Business Hubs** page is displayed.
2. Click the **More options** (...) icon of the corresponding business hub card. A drop-down menu is displayed.
3. Select the **View Members** option from the menu. The business hub details page is displayed with the **Members** tab activated. App members are displayed in the following tabs of the **User Overview** section:
* **Unmatched users:** This tab displays the users who were not automatically matched.
* **Onboarded users:** This tab displays the users matched to their Cerby user account.
* **Guest users:** This tab displays the users who were matched to an existing Cerby user account, but it doesn’t exist in the corporate directory, such as external collaborators.
For unmatched users, you can perform one of the following actions:
* [Match users](#match-users)
* [Remove unmatched users](#remove-unmatched-users)
* [Exempt unmatched users](#exempt-unmatched-users)
The following sections describe each action.
#### Match users
To match users, you must complete the following steps from the **Unmatched users** tab of the business hub details page:
1. Click the **Match user** button of the corresponding user. The **Match user** dialog box is displayed.
2. Enter the username or email address of the user you want to match and invite in the **Match with** field. The user is displayed on a list.
3. Select the user from the list.
4. Click the **Next** button. The **Select Cerby role** dialog box is displayed.
5. Select the role to assign to the user on the business hub **Cerby role** drop-down menu:
* **Owner:** This role enables sharing access and managing business hub settings in Cerby.
* **Collaborator:** This role enables only logging in to the app from Cerby.
6. Click the **Match user** button. The dialog box closes, and a success message box is displayed. The user is moved to the **Onboarded users** tab.
#### Remove unmatched users
To remove unmatched users, you must complete the following steps from the **Unmatched users** tab of the business hub details page:
{% hint style="danger" %}
**IMPORTANT:** When removing an unmatched user, Cerby performs an automated task to revoke the user’s seat and permissions in AstroPay.
{% endhint %}
1. Click the **More options** (...) icon of the corresponding user. A drop-down menu is displayed.
2. Select the **Remove user** option from the list. The **Remove user?** dialog box is displayed.
3. Click the **Remove user** button. The dialog box closes, and a success message box is displayed. The user is removed from the app via an automated task.
#### Exempt unmatched users
Exempted users keep their user accounts or seats active in your app, but you cannot manage them through Cerby.
To exempt unmatched users, you must complete the following steps from the **Unmatched users** tab of the business hub details page:
1. Click the **More options** (...) icon of the corresponding user. A drop-down list is displayed.
2. Select the **Exempt user** option from the list. The exempt user dialog box is displayed.
3. Enter a reason for exempting the user in the **Provide a reason** field.
4. Click the **Exempt member** button. The dialog box closes, and a success message box is displayed. The user is moved to the **Exempted users** tab.
***
## Use your business hub
The following are the supported features of business hubs you can use:
* [Join the external app and set up your business hub access](https://help.cerby.com/cerby-web-app/business-hubs/join-your-external-app-and-set-up-your-business-hub-access)
* [Add users to your app via a business hub](/setup-and-admin/business-hubs/managing-users-and-assets-via-a-business-hub/add-users-and-teams-to-your-apps-via-a-business-hub)
* [Provision users to your apps via an IdP and business hub](/setup-and-admin/business-hubs/managing-users-and-assets-via-a-business-hub/provision-users-to-your-apps-via-an-idp-and-business-hub)
* [Remove users from your app via a business hub](/setup-and-admin/business-hubs/managing-users-and-assets-via-a-business-hub/remove-users-from-your-app-via-a-business-hub)
* [Remove teams from your app via a business hub](/setup-and-admin/business-hubs/managing-users-and-assets-via-a-business-hub/remove-teams-from-your-app-via-a-business-hub)
* [Deprovision users from your apps via an IdP and business hub](/setup-and-admin/business-hubs/managing-users-and-assets-via-a-business-hub/deprovision-users-from-your-apps-via-an-idp-and-business-hub)
* [Update user roles in your app via a business hub](/setup-and-admin/business-hubs/managing-users-and-assets-via-a-business-hub/update-user-roles-in-your-app-via-a-business-hub)
* [Update user roles in your apps via an IdP and business hub](/setup-and-admin/business-hubs/managing-users-and-assets-via-a-business-hub/update-user-roles-in-your-apps-via-an-idp-and-business-hub)
* [Sync your app users with your business hub](/setup-and-admin/business-hubs/managing-users-and-assets-via-a-business-hub/sync-your-business-hub-with-your-external-app)
* [Protect your app users via a business hub](/setup-and-admin/business-hubs/managing-users-and-assets-via-a-business-hub/protect-your-app-user-accounts-via-a-business-hub)
* [Log in to your app via a business hub](https://help.cerby.com/cerby-web-app/business-hubs/log-in-to-your-app)
* [Track the activity of business hub users](/setup-and-admin/business-hubs/managing-users-and-assets-via-a-business-hub/track-activity-on-app-members-user-accounts)
* [Remove a business hub](/setup-and-admin/business-hubs/managing-your-business-hubs/remove-a-business-hub)
# Connect a business hub for Autodesk
This article describes how to connect a business hub to centrally manage the users and assets of Autodesk from Cerby.
{% hint style="info" %}
**Who can use this feature?**
* Workspace **Owners**, **Super Admins**, **Admins**, and **Users**
* Only supported using the Cerby web app
{% endhint %}
As a user with any workspace role in Cerby, except **Guest User** and **Login-Only**, you can connect a business hub integration to centrally manage the users and assets of Autodesk.
When you connect the business hub, you become its **Owner**, and you can perform the following user and access management tasks through automated tasks executed by the Cerby agent:
* Check for updates
* Add users
* Remove users
{% hint style="success" %}
**TIP:** For more details about the automated tasks of a business hub, how it works, and the supported apps, read the article [Explore Business Hubs](https://help.cerby.com/setup-and-admin/business-hubs/business-hub-catalog).
{% endhint %}
{% hint style="info" %}
**NOTE:** The automated task to update user roles is not currently available for this business hub.
{% endhint %}
This article provides instructions on how to connect a business hub for Autodesk. For other app-specific articles and videos, review the [Connecting business hubs for your apps](https://help.cerby.com/setup-and-admin/business-hubs/connecting-your-apps) and [Connecting business hubs for your paid social apps](https://help.cerby.com/setup-and-admin/business-hubs/connecting-your-paid-social-apps) collections in the Cerby Help Center.
***
## Requirements
The following are the requirements to connect a business hub:
* A Cerby workspace
* A Cerby user account with the workspace **Owner**, **Super Admin**, **Admin**, or **User** role
* A team in Autodesk
* Groups configured in your identity provider (IdP) if you want to leverage automatic user provisioning and deprovisioning from your apps based on group assignment events. For more information, read the articles available in the [Managing users via an IdP and business hub](https://help.cerby.com/setup-and-admin/business-hubs/managing-users-and-assets-via-a-business-hub) collection in the Cerby Help Center
* An automation account, meaning an active user account with a native **Secondary admin** role in Autodesk to be used as a service account. For instructions and recommendations on how to create and configure this account, read the article [Create a service account for your business hub](/setup-and-admin/business-hubs/connecting-your-apps/create-a-service-account-for-your-business-hub)
* The user management and login method for your business hub identified to select the corresponding option when connecting your app. For more information, read the **User management and login method** section of the article [Explore Business Hubs](https://help.cerby.com/setup-and-admin/business-hubs/business-hub-catalog)
* A Team name. You can find the ID by completing the following steps:
1. Log in to your Autodesk account.
2. Navigate to the **User Management** tab. The **User Management** page is displayed with the **By User** tab activated.
3. Locate the **Team** field. The drop-down list displays the teams available in your account, as shown in **Figure 1**.
Figure 1. Team name displayed in the User Management page
4. Identify and copy the name of the team you want to connect to the business hub.
***
## Connect a business hub for Autodesk
To connect a business hub for Autodesk, you must complete the following main steps from the Cerby web app dashboard:
1. [Add a business hub and connect it to Autodesk](#id-1.-add-a-business-hub-and-connect-it-to-autodesk)
2. [Check for updates to import users, roles, and assets to Cerby](#id-2.-check-for-updates-to-import-users-roles-and-assets-to-cerby)
3. [Connect your Autodesk user account to the business hub](#id-3.-connect-your-autodesk-user-account-to-the-business-hub)
4. [Manage unmatched users](#id-4.-manage-unmatched-users)
The following sections describe each main step.
### 1. Add a business hub and connect it to Autodesk
To add a business hub and connect it to Autodesk, you must complete the following steps:
1. Log in to your corresponding [Cerby](https://app.cerby.com/) workspace.
2. Select the **Business Hubs** option from the left menu. The **Business Hubs** page is displayed.
3. Click the **Connect Business Hub** button located at the top-right corner of the page. The **Connect your Business Hubs to Cerby** dialog box is displayed. **TIP:** Select the **Don’t show this again** option to skip this step the next time you connect a new business hub.
4. Click the **Get started** button. A wizard is displayed on the **Select app** page.
5. Select **Autodesk Hub** from the catalog. The **Enter app details** page is displayed on the wizard.
6. Enter and select your app information in the corresponding fields:
* **Label in Cerby:** It is the name to assign to your business hub in Cerby, and it will be displayed on the business hub card.
* **Team name:** It is the unique identifier of your business or organization in **Autodesk Hub**. For instructions on how to find it, read the [Requirements](#requirements) section. **IMPORTANT:** A business hub integration is required for each Autodesk team whose users you want to manage through Cerby.
* **User management and login method:** It is the way your users log in to the app and determines whether they must save their login credentials as a Cerby account connected to the business hub. You must select one of the following methods:
* **Single sign-on (SSO):** Access is managed by your IdP, and users log in with SSO authentication. They are not asked to save their credentials in Cerby.
* **Username and password:** Cerby manages account security and access, and users log in with their credentials after saving them in Cerby.
7. Click the **Next** button. The **Select automation account** page is displayed with a list of existing Autodesk accounts.
8. Select the automation account you have previously added to Cerby, as described in the [Requirements](#requirements) section. **NOTE:** If you don’t have an automation account, you are prompted to add it. Make sure you read Cerby’s recommendations on how to configure it in the article [Create a service account for your business hub](/setup-and-admin/business-hubs/connecting-your-apps/create-a-service-account-for-your-business-hub). You may need to add the account first and then add the business hub.
9. Click the **Connect app** button. The wizard closes, and a success message box is displayed. The corresponding business hub is also displayed on the **Business Hubs** page.
The next step is [2. Check for updates to import users, roles, and assets to Cerby](#id-2.-check-for-updates-to-import-users-roles-and-assets-to-cerby).
### 2. Check for updates to import users, roles, and assets to Cerby
To check for updates in your app to identify and import users, roles, and assets to Cerby, you must complete the following steps:
1. Select the **Business Hubs** option from the left menu. The **Business Hubs** page is displayed.
2. Click the **More options** (...) icon of the corresponding business hub card. A drop-down menu is displayed.
3. Select the **Settings** option from the menu. The business hub details page is displayed with the **Settings** tab activated.
4. Click the **Check for updates** button located at the top right of the page. A message box is displayed with information about the process. **NOTE:** The check and import process may take a few minutes depending on the number of users and assets, and because Cerby automatically matches users to their corresponding Cerby user account.
5. Confirm that the automated task to check for updates has the “Completed” status by performing any of the following actions:
* Click the **More details** button from the message box.
* Select the **Automation** option from the left menu to open the **Automation** page with a list of automated tasks and their status.
{% hint style="info" %}
**NOTE:** Cerby automatically performs daily checks for updates for all business hubs, but you can trigger them manually, as described in this section. For more instructions, read the article [Sync your app users with your business hub](/setup-and-admin/business-hubs/managing-users-and-assets-via-a-business-hub/sync-your-business-hub-with-your-external-app).
{% endhint %}
The next step is [3. Connect your Autodesk user account to the business hub](#id-3.-connect-your-autodesk-user-account-to-the-business-hub).
### 3. Connect your Autodesk user account to the business hub
To connect your Autodesk user account to the business hub so Cerby can manage and protect it, you must complete the following steps:
1. Select the **Accounts** option from the left menu. The **Accounts** page is displayed.
2. Click the **Log in** button of the corresponding Autodesk Hub account card. The **Connect your Autodesk Hub Account** dialog box is displayed.
3. Enter the login credentials of your **Autodesk** user account.
4. Click the **Connect account** button. The dialog box closes, and a success message box and a new account card are displayed.
The next step is [4. Manage unmatched users](#id-4.-manage-unmatched-users).
### 4. Manage unmatched users
During a check for updates, Cerby automatically matches app members to the Cerby user accounts that correspond to their email addresses, including existing [guest users](https://help.cerby.com/getting-started/concepts/user-management/guest-users) and [local partners](https://help.cerby.com/getting-started/concepts/user-management/partners#h-7e4add33a2). Manual matching is required when apps don't provide email addresses and for app members using personal or external accounts that couldn’t be identified or are not in the corporate directory.
To view the status of the imported app members, you must complete the following steps:
1. Select the **Business Hubs** option from the left menu. The **Business Hubs** page is displayed.
2. Click the **More options** (...) icon of the corresponding business hub card. A drop-down menu is displayed.
3. Select the **View Members** option from the menu. The business hub details page is displayed with the **Members** tab activated. App members are displayed in the following tabs of the **User Overview** section:
* **Unmatched users:** This tab displays the users who were not automatically matched.
* **Onboarded users:** This tab displays the users matched to their Cerby user account.
* **Guest users:** This tab displays the users who were matched to an existing Cerby user account but it doesn’t exist in the corporate directory, such as external collaborators.
For unmatched users, you can perform one of the following actions:
* [Match users](#match-users)
* [Remove unmatched users](#remove-unmatched-users)
* [Exempt unmatched users](#exempt-unmatched-users)
The following sections describe each action.
#### Match users
To match users, you must complete the following steps from the **Unmatched users** tab of the business hub details page:
1. Click the **Match user** button of the corresponding user. The **Match user** dialog box is displayed.
2. Enter the username or email address of the user you want to match and invite in the **Match with** field. The user is displayed on a list.
3. Select the user from the list.
4. Click the **Next** button. The **Select Cerby role** dialog box is displayed.
5. Select the role to assign to the user on the business hub **Cerby role** drop-down menu:
* **Owner:** This role enables sharing access and managing business hub settings in Cerby.
* **Collaborator:** This role enables only logging in to the app from Cerby.
6. Click the **Match user** button. The dialog box closes, and a success message box is displayed. The user is moved to the **Onboarded users** tab.
#### Remove unmatched users
To remove unmatched users, you must complete the following steps from the **Unmatched users** tab of the business hub details page:
{% hint style="danger" %}
**IMPORTANT:** When removing an unmatched user, Cerby performs an automated task to revoke the user’s seat and permissions in Autodesk.
{% endhint %}
1. Click the **More options** (...) icon of the corresponding user. A drop-down menu is displayed.
2. Select the **Remove user** option from the menu. The **Remove user?** dialog box is displayed.
3. Click the **Remove user** button. The dialog box closes, and a success message box is displayed. The user is removed from the app via an automated task.
#### Exempt unmatched users
Exempted users keep their user accounts or seats active in your app, but you cannot manage them through Cerby.
To exempt unmatched users, you must complete the following steps from the **Unmatched users** tab of the business hub details page:
1. Click the **More options** (...) icon of the corresponding user. A drop-down menu is displayed.
2. Select the **Exempt user** option from the menu. The exempt user dialog box is displayed.
3. Enter a reason for exempting the user in the **Provide a reason** field.
4. Click the **Exempt member** button. The dialog box closes, and a success message box is displayed. The user is moved to the **Exempted users** tab.
***
## Use your business hub
The following are the supported features of business hubs you can use:
* [Join the external app and set up your business hub access](https://help.cerby.com/cerby-web-app/business-hubs/join-your-external-app-and-set-up-your-business-hub-access)
* [Add users to your app via a business hub](/setup-and-admin/business-hubs/managing-users-and-assets-via-a-business-hub/add-users-and-teams-to-your-apps-via-a-business-hub)
* [Provision users to your apps via an IdP and business hub](/setup-and-admin/business-hubs/managing-users-and-assets-via-a-business-hub/provision-users-to-your-apps-via-an-idp-and-business-hub)
* [Remove users from your app via a business hub](/setup-and-admin/business-hubs/managing-users-and-assets-via-a-business-hub/remove-users-from-your-app-via-a-business-hub)
* [Remove teams from your app via a business hub](/setup-and-admin/business-hubs/managing-users-and-assets-via-a-business-hub/remove-teams-from-your-app-via-a-business-hub)
* [Deprovision users from your apps via an IdP and business hub](/setup-and-admin/business-hubs/managing-users-and-assets-via-a-business-hub/deprovision-users-from-your-apps-via-an-idp-and-business-hub)
* [Sync your app users with your business hub](/setup-and-admin/business-hubs/managing-users-and-assets-via-a-business-hub/sync-your-business-hub-with-your-external-app)
* [Protect your app users via a business hub](/setup-and-admin/business-hubs/managing-users-and-assets-via-a-business-hub/protect-your-app-user-accounts-via-a-business-hub)
* [Log in to your app via a business hub](https://help.cerby.com/cerby-web-app/business-hubs/log-in-to-your-app)
* [Track the activity of business hub users](/setup-and-admin/business-hubs/managing-users-and-assets-via-a-business-hub/track-activity-on-app-members-user-accounts)
* [Remove a business hub](/setup-and-admin/business-hubs/managing-your-business-hubs/remove-a-business-hub)
# Connect a business hub for Auvik
This article describes how to connect a business hub to centrally manage the users and assets of Auvik from Cerby.
{% hint style="info" %}
**Who can use this feature?**
* Workspace **Owners**, **Super Admins**, **Admins**, and **Users**
* Only supported using the Cerby web app
{% endhint %}
As a user with any workspace role in Cerby, except **Guest User** and **Login-Only**, you can connect a business hub integration to centrally manage the users and assets of Auvik.
When you connect the business hub, you become its **Owner**, and you can perform the following user and access management tasks through automated tasks executed by the Cerby agent:
* Check for updates
* Add users
* Update user roles
* Remove users
{% hint style="success" %}
**TIP:** For more details about the automated tasks of a business hub, how it works, and the supported apps, read the article [Explore Business Hubs](https://help.cerby.com/setup-and-admin/business-hubs/business-hub-catalog).
{% endhint %}
This article provides instructions on how to connect a business hub for Auvik. For other app-specific articles and videos, review the [Connecting business hubs for your apps](https://help.cerby.com/setup-and-admin/business-hubs/connecting-your-apps) and [Connecting business hubs for your paid social apps](https://help.cerby.com/setup-and-admin/business-hubs/connecting-your-paid-social-apps) collections in the Cerby Help Center.
***
## Requirements
The following are the requirements to connect a business hub:
* A Cerby workspace
* A Cerby user account with the workspace **Owner**, **Super Admin**, **Admin**, or **User** role
* Groups configured in your identity provider (IdP) if you want to leverage automatic user provisioning and deprovisioning from your apps based on group assignment events. For more information, read the articles available in the [Managing users via an IdP and business hub](https://help.cerby.com/setup-and-admin/business-hubs/managing-users-and-assets-via-a-business-hub) collection in the Cerby Help Center
* An automation account, meaning an active user account with a native **Super Admin** role in Auvik to be used as a service account. For instructions and recommendations on how to create and configure this account, read the article [Create a service account for your business hub](/setup-and-admin/business-hubs/connecting-your-apps/create-a-service-account-for-your-business-hub)
* The user management and login method for your business hub identified to select the corresponding option when connecting your app. For more information, read the **User management and login method** section of the article [Explore Business Hubs](https://help.cerby.com/setup-and-admin/business-hubs/business-hub-catalog)
* A Business ID. You can find the ID in the address bar after logging in to Auvik. It’s the subdomain of the URL. For example, **`cerby`** in **`https://cerby.eu2.my.auvik.com`**. Just copy the value and paste it when connecting the business hub.
***
## Connect a business hub for Auvik
To connect a business hub for Auvik, you must complete the following main steps from the Cerby web app dashboard:
1. [Add a business hub and connect it to Auvik](#id-1.-add-a-business-hub-and-connect-it-to-auvik)
2. [Check for updates to import users, roles, and assets to Cerby](#id-2.-check-for-updates-to-import-users-roles-and-assets-to-cerby)
3. [Connect your Auvik user account to the business hub](#id-3.-connect-your-auvik-user-account-to-the-business-hub)
4. [Manage unmatched users](#id-4.-manage-unmatched-users)
The following sections describe each main step.
### 1. Add a business hub and connect it to Auvik
To add a business hub and connect it to Auvik, you must complete the following steps:
1. Log in to your corresponding [Cerby](https://app.cerby.com/) workspace.
2. Select the **Business Hubs** option from the left menu. The **Business Hubs** page is displayed.
3. Click the **Connect Business Hub** button located at the top-right corner of the page. The **Connect your Business Hubs to Cerby** dialog box is displayed. **TIP:** Select the **Don’t show this again** option to skip this step the next time you connect a new business hub.
4. Click the **Get started** button. A wizard is displayed on the **Select app** page.
5. Select **Auvik Hub** from the catalog. The **Enter app details** page is displayed on the wizard.
6. Enter and select your app information in the corresponding fields:
* **Label in Cerby:** It is the name to assign to your business hub in Cerby, and it will be displayed on the business hub card.
* **Business ID:** It is the unique identifier of your business or organization in **Auvik Hub**. For instructions on how to find it, read the [Requirements](#requirements) section.
* **User management and login method:** It is the way your users log in to the app and determines whether they must save their login credentials as a Cerby account connected to the business hub.
1. Select the **Single sign-on (SSO)** option because access must be managed by your IdP, and users log in with SSO authentication. They are not asked to save their credentials in Cerby.
**IMPORTANT:** The **Username and password** option\*\*\*\* is not available for Auvik.
7. Click the **Next** button. The **Select automation account** page is displayed with a list of existing Auvik accounts.
8. Select the automation account you have previously added to Cerby, as described in the [Requirements](#requirements) section. **NOTE:** If you don’t have an automation account, you are prompted to add it. Make sure you read Cerby’s recommendations on how to configure it in the article [Create a service account for your business hub](/setup-and-admin/business-hubs/connecting-your-apps/create-a-service-account-for-your-business-hub). You may need to add the account first and then add the business hub.
9. Click the **Connect app** button. The wizard closes, and a success message box is displayed. The corresponding business hub is also displayed on the **Business Hubs** page.
The next step is [2. Check for updates to import users, roles, and assets to Cerby](#id-2.-check-for-updates-to-import-users-roles-and-assets-to-cerby).
### 2. Check for updates to import users, roles, and assets to Cerby
To check for updates in your app to identify and import users, roles, and assets to Cerby, you must complete the following steps:
1. Select the **Business Hubs** option from the left menu. The **Business Hubs** page is displayed.
2. Click the **More options** (...) icon of the corresponding business hub card. A drop-down menu is displayed.
3. Select the **Settings** option from the menu. The business hub details page is displayed with the **Settings** tab activated.
4. Click the **Check for updates** button located at the top right of the page. A message box is displayed with information about the process. **NOTE:** The check and import process may take a few minutes depending on the number of users and assets, and because Cerby automatically matches users to their corresponding Cerby user account.
5. Confirm that the automated task to check for updates has the “Completed” status by performing any of the following actions:
* Click the **More details** button from the message box.
* Select the **Automation** option from the left menu to open the **Automation** page with a list of automated tasks and their status.
{% hint style="info" %}
**NOTE:** Cerby automatically performs daily checks for updates for all business hubs, but you can trigger them manually, as described in this section. For more instructions, read the article [Sync your app users with your business hub](/setup-and-admin/business-hubs/managing-users-and-assets-via-a-business-hub/sync-your-business-hub-with-your-external-app).
{% endhint %}
The next step is [3. Connect your Auvik user account to the business hub](#id-3.-connect-your-auvik-user-account-to-the-business-hub).
### 3. Connect your Auvik user account to the business hub
To connect your Auvik user account to the business hub so Cerby can manage and protect it, you must complete the following steps:
1. Select the **Accounts** option from the left menu. The **Accounts** page is displayed.
2. Click the **Log in** button of the corresponding Auvik Hub account card. The **Connect your Auvik Hub Account** dialog box is displayed.
3. Enter the login credentials of your **Auvik** user account.
4. Click the **Connect account** button. The dialog box closes, and a success message box and a new account card are displayed.
The next step is [4. Manage unmatched users](#id-4.-manage-unmatched-users).
### 4. Manage unmatched users
During a check for updates, Cerby automatically matches app members to the Cerby user accounts that correspond to their email addresses, including existing [guest users](https://help.cerby.com/getting-started/concepts/user-management/guest-users) and [local partners](https://help.cerby.com/getting-started/concepts/user-management/partners#h-7e4add33a2). Manual matching is required when apps don't provide email addresses and for app members using personal or external accounts that couldn’t be identified or are not in the corporate directory.
To view the status of the imported app members, you must complete the following steps:
1. Select the **Business Hubs** option from the left menu. The **Business Hubs** page is displayed.
2. Click the **More options** (...) icon of the corresponding business hub card. A drop-down menu is displayed.
3. Select the **View Members** option from the menu. The business hub details page is displayed with the **Members** tab activated. App members are displayed in the following tabs of the **User Overview** section:
* **Unmatched users:** This tab displays the users who were not automatically matched.
* **Onboarded users:** This tab displays the users matched to their Cerby user account.
* **Guest users:** This tab displays the users who were matched to an existing Cerby user account but it doesn’t exist in the corporate directory, such as external collaborators.
For unmatched users, you can perform one of the following actions:
* [Match users](#match-users)
* [Remove unmatched users](#remove-unmatched-users)
* [Exempt unmatched users](#exempt-unmatched-users)
The following sections describe each action.
#### Match users
To match users, you must complete the following steps from the **Unmatched users** tab of the business hub details page:
1. Click the **Match user** button of the corresponding user. The **Match user** dialog box is displayed.
2. Enter the username or email address of the user you want to match and invite in the **Match with** field. The user is displayed on a list.
3. Select the user from the list.
4. Click the **Next** button. The **Select Cerby role** dialog box is displayed.
5. Select the role to assign to the user on the business hub **Cerby role** drop-down menu:
* **Owner:** This role enables sharing access and managing business hub settings in Cerby.
* **Collaborator:** This role enables only logging in to the app from Cerby.
6. Click the **Match user** button. The dialog box closes, and a success message box is displayed. The user is moved to the **Onboarded users** tab.
#### Remove unmatched users
To remove unmatched users, you must complete the following steps from the **Unmatched users** tab of the business hub details page:
{% hint style="danger" %}
**IMPORTANT:** When removing an unmatched user, Cerby performs an automated task to revoke the user’s seat and permissions in Auvik.
{% endhint %}
1. Click the **More options** (...) icon of the corresponding user. A drop-down menu is displayed.
2. Select the **Remove user** option from the menu. The **Remove user?** dialog box is displayed.
3. Click the **Remove user** button. The dialog box closes, and a success message box is displayed. The user is removed from the app via an automated task.
#### Exempt unmatched users
Exempted users keep their user accounts or seats active in your app, but you cannot manage them through Cerby.
To exempt unmatched users, you must complete the following steps from the **Unmatched users** tab of the business hub details page:
1. Click the **More options** (...) icon of the corresponding user. A drop-down menu is displayed.
2. Select the **Exempt user** option from the menu. The exempt user dialog box is displayed.
3. Enter a reason for exempting the user in the **Provide a reason** field.
4. Click the **Exempt member** button. The dialog box closes, and a success message box is displayed. The user is moved to the **Exempted users** tab.
***
## Use your business hub
The following are the supported features of business hubs you can use:
* [Join the external app and set up your business hub access](https://help.cerby.com/cerby-web-app/business-hubs/join-your-external-app-and-set-up-your-business-hub-access)
* [Add users to your app via a business hub](/setup-and-admin/business-hubs/managing-users-and-assets-via-a-business-hub/add-users-and-teams-to-your-apps-via-a-business-hub)
* [Provision users to your apps via an IdP and business hub](/setup-and-admin/business-hubs/managing-users-and-assets-via-a-business-hub/provision-users-to-your-apps-via-an-idp-and-business-hub)
* [Remove users from your app via a business hub](/setup-and-admin/business-hubs/managing-users-and-assets-via-a-business-hub/remove-users-from-your-app-via-a-business-hub)
* [Remove teams from your app via a business hub](/setup-and-admin/business-hubs/managing-users-and-assets-via-a-business-hub/remove-teams-from-your-app-via-a-business-hub)
* [Deprovision users from your apps via an IdP and business hub](/setup-and-admin/business-hubs/managing-users-and-assets-via-a-business-hub/deprovision-users-from-your-apps-via-an-idp-and-business-hub)
* [Update user roles in your app via a business hub](/setup-and-admin/business-hubs/managing-users-and-assets-via-a-business-hub/update-user-roles-in-your-app-via-a-business-hub)
* [Update user roles in your apps via an IdP and business hub](/setup-and-admin/business-hubs/managing-users-and-assets-via-a-business-hub/update-user-roles-in-your-apps-via-an-idp-and-business-hub)
* [Sync your app users with your business hub](/setup-and-admin/business-hubs/managing-users-and-assets-via-a-business-hub/sync-your-business-hub-with-your-external-app)
* [Log in to your app via a business hub](https://help.cerby.com/cerby-web-app/business-hubs/log-in-to-your-app)
* [Track the activity of business hub users](/setup-and-admin/business-hubs/managing-users-and-assets-via-a-business-hub/track-activity-on-app-members-user-accounts)
* [Remove a business hub](/setup-and-admin/business-hubs/managing-your-business-hubs/remove-a-business-hub)
# Connect a business hub for Backbox
This article describes how to connect a business hub to centrally manage the users of Backbox from Cerby.
{% hint style="info" %}
**Who can use this feature?**
* Workspace **Owners**, **Super Admins**, **Admins**, and **Users**
* Only supported using the Cerby web app
{% endhint %}
As a user with any workspace role in Cerby, except **Guest User** and **Login-Only**, you can connect a business hub integration to centrally manage the users of Backbox.
When you connect the business hub, you become its **Owner**, and you can perform the following user and access management tasks through automated tasks executed by the Cerby agent:
* Check for updates
* Add users
* Update user roles
* Remove users
{% hint style="success" %}
**TIP:** For more details about the automated tasks of a business hub, how it works, and the supported apps, read the article [Explore Business Hubs](https://help.cerby.com/setup-and-admin/business-hubs/business-hub-catalog).
{% endhint %}
{% hint style="info" %}
**NOTE:** The **Notification** role may appear in the **Users** table if detected during sync. However, Cerby does not support assigning this role when adding users to Rackbox.
{% endhint %}
This article provides instructions on how to connect a business hub for Backbox. For other app-specific articles and videos, review the [Connecting business hubs for your apps](https://help.cerby.com/setup-and-admin/business-hubs/connecting-your-apps) and [Connecting business hubs for your paid social apps](https://help.cerby.com/setup-and-admin/business-hubs/connecting-your-paid-social-apps) collections in the Cerby Help Center.
***
## Requirements
The following are the requirements to connect a business hub:
* A Cerby workspace
* A Cerby user account with the workspace **Owner**, **Super Admin**, **Admin**, or **User** role
* Groups configured in your identity provider (IdP) if you want to leverage automatic user provisioning and deprovisioning from your apps based on group assignment events. For more information, read the articles available in the [Managing users via an IdP and business hub](https://help.cerby.com/setup-and-admin/business-hubs/managing-users-and-assets-via-a-business-hub) collection in the Cerby Help Center
* An automation account, meaning an active user account with a native **Administrator** role in Backbox to be used as a service account. For instructions and recommendations on how to create and configure this account, read the article [Create a service account for your business hub](/setup-and-admin/business-hubs/connecting-your-apps/create-a-service-account-for-your-business-hub)
* The user management and login method for your business hub identified to select the corresponding option when connecting your app. For more information, read the **User management and login method** section of the article [Explore Business Hubs](https://help.cerby.com/setup-and-admin/business-hubs/business-hub-catalog)
* An IP Address. You can find the ID in the address bar. When you are logged in to Backbox, the ID is displayed in the address bar as part of the URL. For example, **`10.01.234.567`** in\*\*`https://10.01.234.567/#/authentication/backbox_users`.\*\* Just copy the value and paste it when connecting the business hub.
***
## Connect a business hub for Backbox
To connect a business hub for Backbox, you must complete the following main steps from the Cerby web app dashboard:
1. [Add a business hub and connect it to Backbox](#id-1.-add-a-business-hub-and-connect-it-to-backbox)
2. [Check for updates to import users and roles to Cerby](#id-2.-check-for-updates-to-import-users-and-roles-to-cerby)
3. [Connect your Backbox user account to the business hub](#id-3.-connect-your-backbox-user-account-to-the-business-hub)
4. [Manage unmatched users](#id-4.-manage-unmatched-users)
The following sections describe each main step.
### 1. Add a business hub and connect it to Backbox
To add a business hub and connect it to Backbox, you must complete the following steps:
1. Log in to your corresponding [Cerby](https://app.cerby.com/) workspace.
2. Select the **Business Hubs** option from the left menu. The **Business Hubs** page is displayed.
3. Click the **Connect Business Hub** button located at the top-right corner of the page. The **Connect your Business Hubs to Cerby** dialog box is displayed. **TIP:** Select the **Don’t show this again** option to skip this step the next time you connect a new business hub.
4. Click the **Get started** button. A wizard is displayed on the **Select app** page.
5. Select **Backbox Hub** from the catalog. The **Enter app details** page is displayed on the wizard.
6. Enter and select your app information in the corresponding fields:
* **Label in Cerby:** It is the name to assign to your business hub in Cerby, and it will be displayed on the business hub card.
* **IP Address:** It is the unique identifier of your business or organization in **Backbox Hub**. For instructions on how to find it, read the [Requirements](#requirements) section.
* **User management and login method:** It is the way your users log in to the app and determines whether they must save their login credentials as a Cerby account connected to the business hub.
1. Select the **Single sign-on (SSO)** option because access must be managed by your IdP, and users log in with SSO authentication. They are not asked to save their credentials in Cerby.
**IMPORTANT:** The **Username and password** option is not currently available for Backbox.
7. Click the **Next** button. The **Select automation account** page is displayed with a list of existing Backbox accounts.
8. Select the automation account you have previously added to Cerby, as described in the [Requirements](#requirements) section. **NOTE:** If you don’t have an automation account, you are prompted to add it. Make sure you read Cerby’s recommendations on how to configure it in the article [Create a service account for your business hub](/setup-and-admin/business-hubs/connecting-your-apps/create-a-service-account-for-your-business-hub). You may need to add the account first and then add the business hub.
9. Click the **Connect app** button. The wizard closes, and a success message box is displayed. The corresponding business hub is also displayed on the **Business Hubs** page.
The next step is [2. Check for updates to import users and roles to Cerby](#id-2.-check-for-updates-to-import-users-and-roles-to-cerby).
### 2. Check for updates to import users and roles to Cerby
To check for updates in your app to identify and import users and roles to Cerby, you must complete the following steps:
1. Select the **Business Hubs** option from the left menu. The **Business Hubs** page is displayed.
2. Click the **More options** (...) icon of the corresponding business hub card. A drop-down menu is displayed.
3. Select the **Settings** option from the menu. The business hub details page is displayed with the **Settings** tab activated.
4. Click the **Check for updates** button located at the top right of the page. A message box is displayed with information about the process. **NOTE:** The check and import process may take a few minutes depending on the number of users, and because Cerby automatically matches users to their corresponding Cerby user account.
5. Confirm that the automated task to check for updates has the “Completed” status by performing any of the following actions:
* Click the **More details** button from the message box.
* Select the **Automation** option from the left menu to open the **Automation** page with a list of automated tasks and their status.
{% hint style="info" %}
**NOTE:** Cerby automatically performs daily checks for updates for all business hubs, but you can trigger them manually, as described in this section. For more instructions, read the article [Sync your app users with your business hub](/setup-and-admin/business-hubs/managing-users-and-assets-via-a-business-hub/sync-your-business-hub-with-your-external-app).
{% endhint %}
The next step is [3. Connect your Backbox user account to the business hub](#id-3.-connect-your-backbox-user-account-to-the-business-hub).
### 3. Connect your Backbox user account to the business hub
To connect your Backbox user account to the business hub so Cerby can manage and protect it, you must complete the following steps:
1. Select the **Accounts** option from the left menu. The **Accounts** page is displayed.
2. Click the **Log in** button of the corresponding Backbox Hub account card. The **Connect your Backbox Hub Account** dialog box is displayed.
3. Enter the login credentials of your **Backbox** user account.
4. Click the **Connect account** button. The dialog box closes, and a success message box and a new account card are displayed.
The next step is [4. Manage unmatched users](#id-4.-manage-unmatched-users).
### 4. Manage unmatched users
During a check for updates, Cerby automatically matches app members to the Cerby user accounts that correspond to their email addresses, including existing [guest users](https://help.cerby.com/getting-started/concepts/user-management/guest-users) and [local partners](https://help.cerby.com/getting-started/concepts/user-management/partners#h-7e4add33a2). Manual matching is required when apps don't provide email addresses and for app members using personal or external accounts that couldn’t be identified or are not in the corporate directory.
To view the status of the imported app members, you must complete the following steps:
1. Select the **Business Hubs** option from the left menu. The **Business Hubs** page is displayed.
2. Click the **More options** (...) icon of the corresponding business hub card. A drop-down menu is displayed.
3. Select the **View Members** option from the menu. The business hub details page is displayed with the **Members** tab activated. App members are displayed in the following tabs of the **User Overview** section:
* **Unmatched users:** This tab displays the users who were not automatically matched.
* **Onboarded users:** This tab displays the users matched to their Cerby user account.
* **Guest users:** This tab displays the users who were matched to an existing Cerby user account but it doesn’t exist in the corporate directory, such as external collaborators.
For unmatched users, you can perform one of the following actions:
* [Match users](#match-users)
* [Remove unmatched users](#remove-unmatched-users)
* [Exempt unmatched users](#exempt-unmatched-users)
The following sections describe each action.
#### Match users
To match users, you must complete the following steps from the **Unmatched users** tab of the business hub details page:
1. Click the **Match user** button of the corresponding user. The **Match user** dialog box is displayed.
2. Enter the username or email address of the user you want to match and invite in the **Match with** field. The user is displayed on a list.
3. Select the user from the list.
4. Click the **Next** button. The **Select Cerby role** dialog box is displayed.
5. Select the role to assign to the user on the business hub **Cerby role** drop-down menu:
* **Owner:** This role enables sharing access and managing business hub settings in Cerby.
* **Collaborator:** This role enables only logging in to the app from Cerby.
6. Click the **Match user** button. The dialog box closes, and a success message box is displayed. The user is moved to the **Onboarded users** tab.
#### Remove unmatched users
To remove unmatched users, you must complete the following steps from the **Unmatched users** tab of the business hub details page:
{% hint style="danger" %}
**IMPORTANT:** When removing an unmatched user, Cerby performs an automated task to revoke the user’s seat and permissions in Backbox.
{% endhint %}
1. Click the **More options** (...) icon of the corresponding user. A drop-down menu is displayed.
2. Select the **Remove user** option from the menu. The **Remove user?** dialog box is displayed.
3. Click the **Remove user** button. The dialog box closes, and a success message box is displayed. The user is removed from the app via an automated task.
#### Exempt unmatched users
Exempted users keep their user accounts or seats active in your app, but you cannot manage them through Cerby.
To exempt unmatched users, you must complete the following steps from the **Unmatched users** tab of the business hub details page:
1. Click the **More options** (...) icon of the corresponding user. A drop-down menu is displayed.
2. Select the **Exempt user** option from the menu. The exempt user dialog box is displayed.
3. Enter a reason for exempting the user in the **Provide a reason** field.
4. Click the **Exempt member** button. The dialog box closes, and a success message box is displayed. The user is moved to the **Exempted users** tab.
***
## Use your business hub
The following are the supported features of business hubs you can use:
* [Join the external app and set up your business hub access](https://help.cerby.com/cerby-web-app/business-hubs/join-your-external-app-and-set-up-your-business-hub-access)
* [Add users to your app via a business hub](/setup-and-admin/business-hubs/managing-users-and-assets-via-a-business-hub/add-users-and-teams-to-your-apps-via-a-business-hub)
* [Provision users to your apps via an IdP and business hub](/setup-and-admin/business-hubs/managing-users-and-assets-via-a-business-hub/provision-users-to-your-apps-via-an-idp-and-business-hub)
* [Remove users from your app via a business hub](/setup-and-admin/business-hubs/managing-users-and-assets-via-a-business-hub/remove-users-from-your-app-via-a-business-hub)
* [Remove teams from your app via a business hub](/setup-and-admin/business-hubs/managing-users-and-assets-via-a-business-hub/remove-teams-from-your-app-via-a-business-hub)
* [Deprovision users from your apps via an IdP and business hub](/setup-and-admin/business-hubs/managing-users-and-assets-via-a-business-hub/deprovision-users-from-your-apps-via-an-idp-and-business-hub)
* [Update user roles in your app via a business hub](/setup-and-admin/business-hubs/managing-users-and-assets-via-a-business-hub/update-user-roles-in-your-app-via-a-business-hub)
* [Update team member roles in your app via a business hub](/setup-and-admin/business-hubs/managing-users-and-assets-via-a-business-hub/update-team-member-roles-in-your-app-via-a-business-hub)
* [Update user roles in your apps via an IdP and business hub](/setup-and-admin/business-hubs/managing-users-and-assets-via-a-business-hub/update-user-roles-in-your-apps-via-an-idp-and-business-hub)
* [Sync your app users with your business hub](/setup-and-admin/business-hubs/managing-users-and-assets-via-a-business-hub/sync-your-business-hub-with-your-external-app)
* [Log in to your app via a business hub](https://help.cerby.com/cerby-web-app/business-hubs/log-in-to-your-app)
* [Track the activity of business hub users](/setup-and-admin/business-hubs/managing-users-and-assets-via-a-business-hub/track-activity-on-app-members-user-accounts)
* [Remove a business hub](/setup-and-admin/business-hubs/managing-your-business-hubs/remove-a-business-hub)
# Connect a business hub for Backslash
This article describes how to connect a business hub to centrally manage the users of Backslash from Cerby.
{% hint style="info" %}
**Who can use this feature?**
* Workspace **Owners**, **Super Admins**, **Admins**, and **Users**
* Only supported using the Cerby web app
{% endhint %}
As a user with any workspace role in Cerby, except **Guest User** and **Login-Only**, you can connect a business hub integration to centrally manage the users and assets of Backslash.
When you connect the business hub, you become its **Owner**, and you can perform the following user and access management tasks from Cerby through automation:
* Check for updates
* Invite app members
* Update app member’s roles
* Remove app members
{% hint style="success" %}
**TIP:** For more details about the automated tasks of a business hub, how it works, and the supported apps, read the article [Explore Apps](https://help.cerby.com/setup-and-admin/business-hubs/business-hub-catalog).
{% endhint %}
This article provides instructions on how to connect a business hub for Backslash. For other app-specific articles and videos, review the [Connecting your apps](https://help.cerby.com/setup-and-admin/business-hubs/connecting-your-apps) collection in the Cerby Help Center.
***
## Requirements
The following are the requirements to connect a business hub:
* A Cerby workspace
* A Cerby user account with the **Owner**, **Super Admin**, **Admin**, or **User** role
* A tenant in Backslash
* A group assignment configured in your identity provider (IdP) if you want to leverage automatic user provisioning and deprovisioning from your apps based on IdP events. For more information, read the **App user provisioning and deprovisioning** section of the article [Explore Business hubs](https://help.cerby.com/setup-and-admin/business-hubs/business-hub-catalog)
* An automation account, meaning an active user account with a native admin role in your seat-based or paid social app. For instructions and recommendations on how to create and configure this account, read the article [Create a service account for your business hub](https://help.cerby.com/setup-and-admin/business-hubs/connecting-your-apps/create-a-service-account-for-your-business-hub)
* The user management and login method for your business hub identified to select the corresponding option when connecting your app. For more information, read the **User management and login method** section of the article [Explore Business hubs](https://help.cerby.com/setup-and-admin/business-hubs/business-hub-catalog)
***
## Connect a business hub for Backslash
To connect a business hub to Backslash, you must complete the following main steps from the Cerby web app dashboard:
1. [Add a business hub and connect it to Backslash](#id-1.-add-a-business-hub-and-connect-it-to-backslash)
2. [Check for updates to import users, roles, and assets to Cerby](#id-2.-check-for-updates-to-import-users-roles-and-assets-to-cerby)
3. [Connect your app’s user account to the business hub](#id-3.-connect-your-apps-user-account-to-the-business-hub)
4. [Manage unmatched users](#id-4.-manage-unmatched-users)
The following sections describe each main step.
### 1. Add a business hub and connect it to Backslash
To add a business hub and connect it to Backslash, you must complete the following steps:
1. Log in to your corresponding [Cerby](https://app.cerby.com/) workspace.
2. Select the **Business Hubs** option from the left navigation drawer. The **Business Hubs** page is displayed.
3. Click the **Connect Business Hub** button located at the top-right corner of the page. The **Connect your Business Hubs to Cerby** dialog box is displayed.
**TIP:** You can select the **Don’t show this again** option to skip this step the next time you connect a new business hub.
4. Click the **Get started** button. A wizard is displayed on the **Select app** page.
5. Select the **Backslash Tenant** app from the catalog. The **Enter app details** page is displayed on the wizard.
6. Enter and select your app information in the corresponding fields:
* **Label in Cerby:** It is the name to assign to your business hub in Cerby, and it will be displayed on the business hub card.
* **User management and login method:** It is the way your users log in to the app and determines if they must save their credentials in Cerby. You must select one of the following methods:
* **Single sign-on (SSO):** Access is managed by your identity provider, and users log in with SSO authentication. They are not asked to save their credentials in Cerby.
* **Username and password:** Account security and access are managed by Cerby, and users log in with their credentials after saving them in Cerby.
7. Click the **Next** button. The **Select automation account** page is displayed. One of the following scenarios occurs:
* If you already have an account for the app, a list of accounts is displayed.
1. Select the corresponding automation account.
2. Click the **Connect app** button.
* If you don’t have an account for the app, you are prompted to add it:
1. Enter your account details in the corresponding fields:
* **Account label in Cerby:** It is the name to assign to your account in Cerby, and it is displayed on the account card.
* **App:** It is the name of the app or service provider to which the account belongs or the login URL.
**NOTE:** The app you selected in step 5 is displayed on this field, and you cannot change it.
* **Username:** It is the username you use to log in to your account. Sometimes, the username is your email address.
* **Current password:** It is the password you use to log in to your account.
2. Click the **Add account** button.
The wizard closes, and a success message box is displayed. The corresponding business hub is also displayed on the **Business Hubs** page.
The next step is [2. Check for updates to import users, roles, and assets to Cerby](#id-2.-check-for-updates-to-import-users-roles-and-assets-to-cerby).
### 2. Check for updates to import users, roles, and assets to Cerby
To check for updates in your app to identify and import users, roles, and assets to Cerby, you must complete the following steps:
1. Select the **Business Hubs** option from the left navigation drawer. The **Business Hubs** page is displayed.
2. Click the **Settings** () icon of the corresponding business hub card. The business hub details page is displayed with the **Settings** tab activated.
3. Click the **Check for updates** button located at the top right of the page. A message box is displayed with information about the process.
**NOTE:** The check and import process may take a few minutes depending on the number of users and assets, and because Cerby automatically matches users to their corresponding Cerby account.
4. Confirm that the **Check for updates** automated task has the “Completed” status by performing any of the following actions:
* Click the **More details** button from the message box.
* Select the **Automation** option from the left navigation drawer to open the **Automation** page.
{% hint style="info" %}
**NOTE:** Cerby automatically performs daily checks for updates for all business hubs, but you can trigger them manually, as described above in steps 1 to 3. When a user is deprovisioned from an identity provider and a check for updates is performed, Cerby generates a report and sends you an email to confirm their removal from the app. For more instructions, read the article [Check for updates in your app and apply report](/setup-and-admin/business-hubs/managing-users-and-assets-via-a-business-hub/sync-your-business-hub-with-your-external-app).
{% endhint %}
The next step is [3. Connect your app’s user account to the business hub](#id-3.-connect-your-apps-user-account-to-the-business-hub).
### 3. Connect your app’s user account to the business hub
To connect your app’s user account to the business hub so Cerby can manage and protect it, you must complete the following steps:
1. Select the **Accounts** option from the left navigation drawer. The **Accounts** page is displayed.
2. Click the **Log in** button of the corresponding **Backslash Tenant** account card. The **Connect your Backslash Tenant Account** dialog box is displayed.
3. Enter the login credentials of your Backslash user account.
4. Click the **Connect account** button. The dialog box closes, and a success message box and a new account card for your user account are displayed.
The next step is [4. Manage unmatched users](#id-4.-manage-unmatched-users), which you must complete from your Cerby dashboard.
### 4. Manage unmatched users
After a check for updates, make sure you manage all unmatched users. By matching users, Cerby ensures that the app’s user accounts correspond to the users’ corporate identities; therefore, you can perform the following automated user management tasks on them:
* Invite app members
* Update app members’ roles
* Remove app members
Additionally, if you have IdP groups configured, you can benefit from automatic user provisioning and deprovisioning based on IdP events, such as account deactivation or group assignments.
{% hint style="info" %}
**NOTE:** After a check for updates, Cerby automatically matches users to their Cerby user accounts according to their email addresses. Manual matching is required for apps that don't provide email addresses or for which users access through personal accounts.
{% endhint %}
To view the status of the imported app’s users, you must complete the following steps:
1. Select the **Business Hubs** option from the left navigation drawer. The **Business Hubs** page is displayed.
2. Click the **More options** (...) icon of the corresponding business hub card. A drop-down list is displayed.
3. Select the **View Members** option from the list. The business hub details page is displayed with the **Members** tab activated. The app members are displayed in the following tabs of the **User Overview** section:
* **Unmatched users:** This tab displays the users who were not automatically matched because they use an email address that couldn’t be identified or they are not in the corporate directory.
* **Onboarded users:** This tab displays the users matched to their Cerby user account.
**NOTE:** After a check for updates, Cerby automatically matches users to their Cerby user accounts according to their email addresses. Manual matching is required for apps that don't provide email addresses or for which users access through personal accounts.
* **Guest users:** This tab displays the users who were matched to a user account but it doesn’t exist in the corporate directory, such as external collaborators.
For unmatched users, you can perform one of the following actions:
* [Match users](#match-users)
* [Remove unmatched users](#remove-unmatched-users)
* [Exempt unmatched users](#exempt-unmatched-users)
The following sections describe each action.
### Match users
To match users to their corresponding Cerby user account, you must complete the following steps from the **Unmatched users** tab of the business hub details page:
1. Click the **Match user** button of the corresponding user. The **Match user** dialog box is displayed.
2. Enter the Cerby username or email address of the user you want to match and invite in the **Match with** field. The user is displayed on a list.
3. Select the user from the list.
4. Click the **Next** button. The **Select Cerby role** dialog box is displayed.
5. Select the corresponding role of the user on the app from the **Cerby role** drop-down list:
* **Owner:** This role enables sharing access and managing the app settings in Cerby.
* **Collaborator:** This role enables only logging in to the app.
6. Click the **Match user** button. The dialog box closes, and a success message box is displayed. The user is moved to the **Onboarded** **users** tab.
### Remove unmatched users
To remove unmatched users from the app, you must complete the following steps from the **Unmatched users** tab of the business hub details page:
1. Click the **More options** (...) icon of the corresponding user. A drop-down list is displayed.
2. Select the **Remove user** option from the list. The **Remove user?** dialog box is displayed.
3. Click the **Remove user** button. The dialog box closes, and a success message box is displayed. The user is removed from the app.
### Exempt unmatched users
Exempted users keep their user accounts active for the seat-based or paid social app, but you cannot manage them through Cerby.
To exempt unmatched users, you must complete the following steps from the **Unmatched users** tab of the business hub details page:
1. Click the **More options** (...) icon of the corresponding user. A drop-down list is displayed.
2. Select the **Exempt user** option from the list. The exempt user dialog box is displayed.
3. Enter a reason for exempting the user in the **Provide a reason** field.
4. Click the **Exempt member** button. The dialog box closes, and a success message box is displayed. The user is moved to the **Exempted users** tab.
***
## Use your business hub
The following are the supported features of Business hubs you can use:
* [Join the App and connect it to Cerby](https://help.cerby.com/cerby-web-app/business-hubs/join-your-external-app-and-set-up-your-business-hub-access)
* [Invite new app members](/setup-and-admin/business-hubs/managing-users-and-assets-via-a-business-hub/add-users-and-teams-to-your-apps-via-a-business-hub)
* [Remove app members](/setup-and-admin/business-hubs/managing-users-and-assets-via-a-business-hub/remove-users-from-your-app-via-a-business-hub)
* [Provision users to your apps via an IdP and business hub](https://help.cerby.com/setup-and-admin/business-hubs/managing-users-and-assets-via-a-business-hub/provision-users-to-your-apps-via-an-idp-and-business-hub)
* [Update the app members’ roles](/setup-and-admin/business-hubs/managing-users-and-assets-via-a-business-hub/update-user-roles-in-your-app-via-a-business-hub)
* [Check for updates in your app and apply report](/setup-and-admin/business-hubs/managing-users-and-assets-via-a-business-hub/sync-your-business-hub-with-your-external-app)
* [Re-assign the app members’ user accounts](https://github.com/cerbyinc/help-center/tree/main/.uncategorized/unpublished-deprecated-re-assign-the-app-members-user-accounts.md)
* [Manage the security of app members’ user accounts](/setup-and-admin/business-hubs/managing-users-and-assets-via-a-business-hub/protect-your-app-user-accounts-via-a-business-hub)
* [Log in to your app](https://help.cerby.com/cerby-web-app/business-hubs/log-in-to-your-app)
* [Track activity on app members’ user accounts](/setup-and-admin/business-hubs/managing-users-and-assets-via-a-business-hub/track-activity-on-app-members-user-accounts)
* [Remove an App](/setup-and-admin/business-hubs/managing-your-business-hubs/remove-a-business-hub)
# Connect a business hub for Bigleaf
This article describes how to connect a business hub to centrally manage the users of Bigleaf from Cerby.
{% hint style="info" %}
**Who can use this feature?**
* Workspace **Owners**, **Super Admins**, **Admins**, and **Users**
* Only supported using the Cerby web app
{% endhint %}
As a user with any workspace role in Cerby, except **Guest User** and **Login-Only**, you can connect a business hub integration to centrally manage the users of Bigleaf.
When you connect the business hub, you become its **Owner**, and you can perform the following user and access management tasks through automated tasks executed by the Cerby agent:
* Check for updates
* Add users
* Update user roles
* Remove users
{% hint style="success" %}
**TIP:** For more details about the automated tasks of a business hub, how it works, and the supported apps, read the article [Explore Business Hubs](https://help.cerby.com/setup-and-admin/business-hubs/business-hub-catalog).
{% endhint %}
This article provides instructions on how to connect a business hub for Bigleaf. For other app-specific articles and videos, review the [Connecting business hubs for your apps](https://help.cerby.com/setup-and-admin/business-hubs/connecting-your-apps) and [Connecting business hubs for your paid social apps](https://help.cerby.com/setup-and-admin/business-hubs/connecting-your-paid-social-apps) collections in the Cerby Help Center.
***
## Requirements
The following are the requirements to connect a business hub:
* A Cerby workspace
* A Cerby user account with the workspace **Owner**, **Super Admin**, **Admin**, or **User** role
* A company in Bigleaf
* Groups configured in your identity provider (IdP) if you want to leverage automatic user provisioning and deprovisioning from your apps based on group assignment events. For more information, read the articles available in the [Managing users via an IdP and business hub](https://help.cerby.com/setup-and-admin/business-hubs/managing-users-and-assets-via-a-business-hub) collection in the Cerby Help Center
* An automation account, meaning an active user account with a native **Super Admin** or **Company Admin** role in Bigleaf to be used as a service account. For instructions and recommendations on how to create and configure this account, read the article [Create a service account for your business hub](/setup-and-admin/business-hubs/connecting-your-apps/create-a-service-account-for-your-business-hub)
* The user management and login method for your business hub identified to select the corresponding option when connecting your app. For more information, read the **User management and login method** section of the article [Explore Business Hubs](https://help.cerby.com/setup-and-admin/business-hubs/business-hub-catalog)
* A Company ID. You can find the ID in the following ways:
* **In the address bar:** When you are logged in to Bigleaf, the ID is displayed in the address bar as part of the URL. For example, **`0123`** in **`https://app.bigleaf.net/new/companies/0123/users`** Just copy the value and paste it when connecting the business hub.
* **In the business information or settings:** When you are logged in to Bigleaf, navigate to the **Companies** page and select your company. The ID is next to your organization's name for you to copy.
***
## Connect a business hub for Bigleaf
To connect a business hub for Bigleaf, you must complete the following main steps from the Cerby web app dashboard:
1. [Add a business hub and connect it to Bigleaf](#id-1.-add-a-business-hub-and-connect-it-to-bigleaf)
2. [Check for updates to import users and roles to Cerby](#id-2.-check-for-updates-to-import-users-and-roles-to-cerby)
3. [Connect your Bigleaf user account to the business hub](#id-3.-connect-your-bigleaf-user-account-to-the-business-hub)
4. [Manage unmatched users](#id-4.-manage-unmatched-users)
The following sections describe each main step.
### 1. Add a business hub and connect it to Bigleaf
To add a business hub and connect it to Bigleaf, you must complete the following steps:
1. Log in to your corresponding [Cerby](https://app.cerby.com/) workspace.
2. Select the **Business Hubs** option from the left menu. The **Business Hubs** page is displayed.
3. Click the **Connect Business Hub** button located at the top-right corner of the page. The **Connect your Business Hubs to Cerby** dialog box is displayed. **TIP:** Select the **Don’t show this again** option to skip this step the next time you connect a new business hub.
4. Click the **Get started** button. A wizard is displayed on the **Select app** page.
5. Select **Bigleaf Hub** from the catalog. The **Enter app details** page is displayed on the wizard.
6. Enter and select your app information in the corresponding fields:
* **Label in Cerby:** It is the name to assign to your business hub in Cerby, and it will be displayed on the business hub card.
* **Company ID:** It is the unique identifier of your business or organization in **Bigleaf Hub**. For instructions on how to find it, read the [Requirements](#requirements) section.
* **User management and login method:** It is the way your users log in to the app and determines whether they must save their login credentials as a Cerby account connected to the business hub. You must select one of the following methods:
* **Single sign-on (SSO):** Access is managed by your IdP, and users log in with SSO authentication. They are not asked to save their credentials in Cerby.
* **Username and password:** Cerby manages account security and access, and users log in with their credentials after saving them in Cerby.
7. Click the **Next** button. The **Select automation account** page is displayed with a list of existing Bigleaf accounts.
8. Select the automation account you have previously added to Cerby, as described in the [Requirements](#requirements) section. **NOTE:** If you don’t have an automation account, you are prompted to add it. Make sure you read Cerby’s recommendations on how to configure it in the article [Create a service account for your business hub](/setup-and-admin/business-hubs/connecting-your-apps/create-a-service-account-for-your-business-hub). You may need to add the account first and then add the business hub.
9. Click the **Connect app** button. The wizard closes, and a success message box is displayed. The corresponding business hub is also displayed on the **Business Hubs** page.
The next step is [2. Check for updates to import users and roles to Cerby](#id-2.-check-for-updates-to-import-users-and-roles-to-cerby).
### 2. Check for updates to import users and roles to Cerby
To check for updates in your app to identify and import users and roles to Cerby, you must complete the following steps:
1. Select the **Business Hubs** option from the left menu. The **Business Hubs** page is displayed.
2. Click the **More options** (...) icon of the corresponding business hub card. A drop-down menu is displayed.
3. Select the **Settings** option from the menu. The business hub details page is displayed with the **Settings** tab activated.
4. Click the **Check for updates** button located at the top right of the page. A message box is displayed with information about the process. **NOTE:** The check and import process may take a few minutes depending on the number of users, and because Cerby automatically matches users to their corresponding Cerby user account.
5. Confirm that the automated task to check for updates has the “Completed” status by performing any of the following actions:
* Click the **More details** button from the message box.
* Select the **Automation** option from the left menu to open the **Automation** page with a list of automated tasks and their status.
{% hint style="info" %}
**NOTE:** Cerby automatically performs daily checks for updates for all business hubs, but you can trigger them manually, as described in this section. For more instructions, read the article [Sync your app users with your business hub](/setup-and-admin/business-hubs/managing-users-and-assets-via-a-business-hub/sync-your-business-hub-with-your-external-app).
{% endhint %}
The next step is [3. Connect your Bigleaf user account to the business hub](#id-3.-connect-your-bigleaf-user-account-to-the-business-hub).
### 3. Connect your Bigleaf user account to the business hub
To connect your Bigleaf user account to the business hub so Cerby can manage and protect it, you must complete the following steps:
1. Select the **Accounts** option from the left menu. The **Accounts** page is displayed.
2. Click the **Log in** button of the corresponding Bigleaf Hub account card. The **Connect your Bigleaf Hub Account** dialog box is displayed.
3. Enter the login credentials of your **Bigleaf** user account.
4. Click the **Connect account** button. The dialog box closes, and a success message box and a new account card are displayed.
The next step is [4. Manage unmatched users](#id-4.-manage-unmatched-users).
### 4. Manage unmatched users
During a check for updates, Cerby automatically matches app members to the Cerby user accounts that correspond to their email addresses, including existing [guest users](https://help.cerby.com/getting-started/concepts/user-management/guest-users) and [local partners](https://help.cerby.com/getting-started/concepts/user-management/partners#h-7e4add33a2). Manual matching is required when apps don't provide email addresses and for app members using personal or external accounts that couldn’t be identified or are not in the corporate directory.
To view the status of the imported app members, you must complete the following steps:
1. Select the **Business Hubs** option from the left menu. The **Business Hubs** page is displayed.
2. Click the **More options** (...) icon of the corresponding business hub card. A drop-down menu is displayed.
3. Select the **View Members** option from the menu. The business hub details page is displayed with the **Members** tab activated. App members are displayed in the following tabs of the **User Overview** section:
* **Unmatched users:** This tab displays the users who were not automatically matched.
* **Onboarded users:** This tab displays the users matched to their Cerby user account.
* **Guest users:** This tab displays the users who were matched to an existing Cerby user account but it doesn’t exist in the corporate directory, such as external collaborators.
For unmatched users, you can perform one of the following actions:
* [Match users](#match-users)
* [Remove unmatched users](#remove-unmatched-users)
* [Exempt unmatched users](#exempt-unmatched-users)
The following sections describe each action.
#### Match users
To match users, you must complete the following steps from the **Unmatched users** tab of the business hub details page:
1. Click the **Match user** button of the corresponding user. The **Match user** dialog box is displayed.
2. Enter the username or email address of the user you want to match and invite in the **Match with** field. The user is displayed on a list.
3. Select the user from the list.
4. Click the **Next** button. The **Select Cerby role** dialog box is displayed.
5. Select the role to assign to the user on the business hub **Cerby role** drop-down menu:
* **Owner:** This role enables sharing access and managing business hub settings in Cerby.
* **Collaborator:** This role enables only logging in to the app from Cerby.
6. Click the **Match user** button. The dialog box closes, and a success message box is displayed. The user is moved to the **Onboarded users** tab.
#### Remove unmatched users
To remove unmatched users, you must complete the following steps from the **Unmatched users** tab of the business hub details page:
{% hint style="danger" %}
**IMPORTANT:** When removing an unmatched user, Cerby performs an automated task to revoke the user’s seat and permissions in Bigleaf.
{% endhint %}
1. Click the **More options** (...) icon of the corresponding user. A drop-down menu is displayed.
2. Select the **Remove user** option from the menu. The **Remove user?** dialog box is displayed.
3. Click the **Remove user** button. The dialog box closes, and a success message box is displayed. The user is removed from the app via an automated task.
#### Exempt unmatched users
Exempted users keep their user accounts or seats active in your app, but you cannot manage them through Cerby.
To exempt unmatched users, you must complete the following steps from the **Unmatched users** tab of the business hub details page:
1. Click the **More options** (...) icon of the corresponding user. A drop-down menu is displayed.
2. Select the **Exempt user** option from the menu. The exempt user dialog box is displayed.
3. Enter a reason for exempting the user in the **Provide a reason** field.
4. Click the **Exempt member** button. The dialog box closes, and a success message box is displayed. The user is moved to the **Exempted users** tab.
***
## Use your business hub
The following are the supported features of business hubs you can use:
* [Join the external app and set up your business hub access](https://help.cerby.com/cerby-web-app/business-hubs/join-your-external-app-and-set-up-your-business-hub-access)
* [Add users to your app via a business hub](/setup-and-admin/business-hubs/managing-users-and-assets-via-a-business-hub/add-users-and-teams-to-your-apps-via-a-business-hub)
* [Provision users to your apps via an IdP and business hub](/setup-and-admin/business-hubs/managing-users-and-assets-via-a-business-hub/provision-users-to-your-apps-via-an-idp-and-business-hub)
* [Remove users from your app via a business hub](/setup-and-admin/business-hubs/managing-users-and-assets-via-a-business-hub/remove-users-from-your-app-via-a-business-hub)
* [Remove teams from your app via a business hub](/setup-and-admin/business-hubs/managing-users-and-assets-via-a-business-hub/remove-teams-from-your-app-via-a-business-hub)
* [Deprovision users from your apps via an IdP and business hub](/setup-and-admin/business-hubs/managing-users-and-assets-via-a-business-hub/deprovision-users-from-your-apps-via-an-idp-and-business-hub)
* [Update user roles in your app via a business hub](/setup-and-admin/business-hubs/managing-users-and-assets-via-a-business-hub/update-user-roles-in-your-app-via-a-business-hub)
* [Update team member roles in your app via a business hub](/setup-and-admin/business-hubs/managing-users-and-assets-via-a-business-hub/update-team-member-roles-in-your-app-via-a-business-hub)
* [Update user roles in your apps via an IdP and business hub](/setup-and-admin/business-hubs/managing-users-and-assets-via-a-business-hub/update-user-roles-in-your-apps-via-an-idp-and-business-hub)
* [Sync your app users with your business hub](/setup-and-admin/business-hubs/managing-users-and-assets-via-a-business-hub/sync-your-business-hub-with-your-external-app)
* [Protect your app users via a business hub](/setup-and-admin/business-hubs/managing-users-and-assets-via-a-business-hub/protect-your-app-user-accounts-via-a-business-hub)
* [Log in to your app via a business hub](https://help.cerby.com/cerby-web-app/business-hubs/log-in-to-your-app)
* [Track the activity of business hub users](/setup-and-admin/business-hubs/managing-users-and-assets-via-a-business-hub/track-activity-on-app-members-user-accounts)
* [Remove a business hub](/setup-and-admin/business-hubs/managing-your-business-hubs/remove-a-business-hub)
# Connect a business hub for Bitrise
This article describes how to connect a business hub to centrally manage the users of Bitrise from Cerby.
{% hint style="info" %}
**Who can use this feature?**
* Workspace **Owners**, **Super Admins**, **Admins**, and **Users**
* Only supported using the Cerby web app
{% endhint %}
As a user with any workspace role in Cerby, except **Guest User** and **Login-Only**, you can connect a business hub integration to centrally manage the users of Bitrise.
When you connect the business hub, you become its **Owner**, and you can perform the following user and access management tasks through automated tasks executed by the Cerby agent:
* Check for updates
* Add users
* Update user roles
* Remove users
{% hint style="success" %}
**TIP:** For more details about the automated tasks of a business hub, how it works, and the supported apps, read the article [Explore Business Hubs](https://help.cerby.com/setup-and-admin/business-hubs/business-hub-catalog).
{% endhint %}
This article provides instructions on how to connect a business hub for Bitrise. For other app-specific articles and videos, review the [Connecting business hubs for your apps](https://help.cerby.com/setup-and-admin/business-hubs/connecting-your-apps) and [Connecting business hubs for your paid social apps](https://help.cerby.com/setup-and-admin/business-hubs/connecting-your-paid-social-apps) collections in the Cerby Help Center.
***
## Requirements
The following are the requirements to connect a business hub:
1. A Cerby workspace
2. A Cerby user account with the workspace **Owner**, **Super Admin**, **Admin**, or **User** role
3. A workspace in Bitrise
4. Groups configured in your identity provider (IdP) if you want to leverage automatic user provisioning and deprovisioning from your apps based on group assignment events. For more information, read the articles available in the [Managing users via an IdP and business hub](https://help.cerby.com/setup-and-admin/business-hubs/managing-users-and-assets-via-a-business-hub) collection in the Cerby Help Center
5. An automation account, meaning an active user account with a native **Manager** role in Bitrise to be used as a service account. For instructions and recommendations on how to create and configure this account, read the article [Create a service account for your business hub](/setup-and-admin/business-hubs/connecting-your-apps/create-a-service-account-for-your-business-hub)
6. The user management and login method for your business hub identified to select the corresponding option when connecting your app. For more information, read the **User management and login method** section of the article [Explore Business Hubs](https://help.cerby.com/setup-and-admin/business-hubs/business-hub-catalog)
7. A Workspace slug. You can find the slug by completing the following steps after logging in to Britise:
1. Select your workspace from the **Workspace** drop-down menu.
2. Select the **Settings** option from the left menu. The **Workspace settings** page is displayed.
3. Select the **General settings** option from the left menu. The **General settings** page is displayed.
4. Locate the **Workspace slug** field in the **Workspace information** section, as shown in **Figure 1**.
Figure 1. Workspace slug field in the General settings page
5. Copy the value of the slug and paste it when connecting the business hub.
***
## Connect a business hub for Bitrise
To connect a business hub for Bitrise, you must complete the following main steps from the Cerby web app dashboard:
1. [Add a business hub and connect it to Bitrise](#id-1.-add-a-business-hub-and-connect-it-to-bitrise)
2. [Check for updates to import users and roles to Cerby](#id-2.-check-for-updates-to-import-users-and-roles-to-cerby)
3. [Connect your Bitrise user account to the business hub](#id-3.-connect-your-bitrise-user-account-to-the-business-hub)
4. [Manage unmatched users](#id-4.-manage-unmatched-users)
The following sections describe each main step.
### 1. Add a business hub and connect it to Bitrise
To add a business hub and connect it to Bitrise, you must complete the following steps:
1. Log in to your corresponding [Cerby](https://app.cerby.com/) workspace.
2. Select the **Business Hubs** option from the left menu. The **Business Hubs** page is displayed.
3. Click the **Connect Business Hub** button located at the top-right corner of the page. The **Connect your Business Hubs to Cerby** dialog box is displayed. **TIP:** Select the **Don’t show this again** option to skip this step the next time you connect a new business hub.
4. Click the **Get started** button. A wizard is displayed on the **Select app** page.
5. Select **Bitrise Hub** from the catalog. The **Enter app details** page is displayed on the wizard.
6. Enter and select your app information in the corresponding fields:
* **Label in Cerby:** It is the name to assign to your business hub in Cerby, and it will be displayed on the business hub card.
* **Workspace slug:** It is the unique identifier of your business or organization in **Bitrise Hub**. For instructions on how to find it, read the [Requirements](#requirements) section.
* **User management and login method:** It is the way your users log in to the app and determines whether they must save their login credentials as a Cerby account connected to the business hub. You must select one of the following methods:
* **Single sign-on (SSO):** Access is managed by your IdP, and users log in with SSO authentication. They are not asked to save their credentials in Cerby.
* **Username and password:** Cerby manages account security and access, and users log in with their credentials after saving them in Cerby.
7. Click the **Next** button. The **Select automation account** page is displayed with a list of existing Bitrise accounts.
8. Select the automation account you have previously added to Cerby, as described in the [Requirements](#requirements) section. **NOTE:** If you don’t have an automation account, you are prompted to add it. Make sure you read Cerby’s recommendations on how to configure it in the article [Create a service account for your business hub](/setup-and-admin/business-hubs/connecting-your-apps/create-a-service-account-for-your-business-hub). You may need to add the account first and then add the business hub.
9. Click the **Connect app** button. The wizard closes, and a success message box is displayed. The corresponding business hub is also displayed on the **Business Hubs** page.
The next step is [2. Check for updates to import users and roles to Cerby](#id-2.-check-for-updates-to-import-users-and-roles-to-cerby).
### 2. Check for updates to import users and roles to Cerby
To check for updates in your app to identify and import users and roles to Cerby, you must complete the following steps:
1. Select the **Business Hubs** option from the left menu. The **Business Hubs** page is displayed.
2. Click the **More options** (...) icon of the corresponding business hub card. A drop-down menu is displayed.
3. Select the **Settings** option from the menu. The business hub details page is displayed with the **Settings** tab activated.
4. Click the **Check for updates** button located at the top right of the page. A message box is displayed with information about the process. **NOTE:** The check and import process may take a few minutes depending on the number of users, and because Cerby automatically matches users to their corresponding Cerby user account.
5. Confirm that the automated task to check for updates has the “Completed” status by performing any of the following actions:
* Click the **More details** button from the message box.
* Select the **Automation** option from the left menu to open the **Automation** page with a list of automated tasks and their status.
{% hint style="info" %}
**NOTE:** Cerby automatically performs daily checks for updates for all business hubs, but you can trigger them manually, as described in this section. For more instructions, read the article [Sync your app users with your business hub](/setup-and-admin/business-hubs/managing-users-and-assets-via-a-business-hub/sync-your-business-hub-with-your-external-app).
{% endhint %}
The next step is [3. Connect your Bitrise user account to the business hub](#id-3.-connect-your-bitrise-user-account-to-the-business-hub).
### 3. Connect your Bitrise user account to the business hub
To connect your Bitrise user account to the business hub so Cerby can manage and protect it, you must complete the following steps:
1. Select the **Accounts** option from the left menu. The **Accounts** page is displayed.
2. Click the **Log in** button of the corresponding Bitrise Hub account card. The **Connect your Bitrise Hub Account** dialog box is displayed.
3. Enter the login credentials of your **Bitrise** user account.
4. Click the **Connect account** button. The dialog box closes, and a success message box and a new account card are displayed.
The next step is [4. Manage unmatched users](#id-4.-manage-unmatched-users).
### 4. Manage unmatched users
During a check for updates, Cerby automatically matches app members to the Cerby user accounts that correspond to their email addresses, including existing [guest users](https://help.cerby.com/getting-started/concepts/user-management/guest-users) and [local partners](https://help.cerby.com/getting-started/concepts/user-management/partners#h-7e4add33a2). Manual matching is required when apps don't provide email addresses and for app members using personal or external accounts that couldn’t be identified or are not in the corporate directory.
To view the status of the imported app members, you must complete the following steps:
1. Select the **Business Hubs** option from the left menu. The **Business Hubs** page is displayed.
2. Click the **More options** (...) icon of the corresponding business hub card. A drop-down menu is displayed.
3. Select the **View Members** option from the menu. The business hub details page is displayed with the **Members** tab activated. App members are displayed in the following tabs of the **User Overview** section:
* **Unmatched users:** This tab displays the users who were not automatically matched.
* **Onboarded users:** This tab displays the users matched to their Cerby user account.
* **Guest users:** This tab displays the users who were matched to an existing Cerby user account but it doesn’t exist in the corporate directory, such as external collaborators.
For unmatched users, you can perform one of the following actions:
* [Match users](#match-users)
* [Remove unmatched users](#remove-unmatched-users)
* [Exempt unmatched users](#exempt-unmatched-users)
The following sections describe each action.
#### Match users
To match users, you must complete the following steps from the **Unmatched users** tab of the business hub details page:
1. Click the **Match user** button of the corresponding user. The **Match user** dialog box is displayed.
2. Enter the username or email address of the user you want to match and invite in the **Match with** field. The user is displayed on a list.
3. Select the user from the list.
4. Click the **Next** button. The **Select Cerby role** dialog box is displayed.
5. Select the role to assign to the user on the business hub **Cerby role** drop-down menu:
* **Owner:** This role enables sharing access and managing business hub settings in Cerby.
* **Collaborator:** This role enables only logging in to the app from Cerby.
6. Click the **Match user** button. The dialog box closes, and a success message box is displayed. The user is moved to the **Onboarded users** tab.
#### Remove unmatched users
To remove unmatched users, you must complete the following steps from the **Unmatched users** tab of the business hub details page:
{% hint style="danger" %}
**IMPORTANT:** When removing an unmatched user, Cerby performs an automated task to revoke the user’s seat and permissions in Bitrise.
{% endhint %}
1. Click the **More options** (...) icon of the corresponding user. A drop-down menu is displayed.
2. Select the **Remove user** option from the menu. The **Remove user?** dialog box is displayed.
3. Click the **Remove user** button. The dialog box closes, and a success message box is displayed. The user is removed from the app via an automated task.
#### Exempt unmatched users
Exempted users keep their user accounts or seats active in your app, but you cannot manage them through Cerby.
To exempt unmatched users, you must complete the following steps from the **Unmatched users** tab of the business hub details page:
1. Click the **More options** (...) icon of the corresponding user. A drop-down menu is displayed.
2. Select the **Exempt user** option from the menu. The exempt user dialog box is displayed.
3. Enter a reason for exempting the user in the **Provide a reason** field.
4. Click the **Exempt member** button. The dialog box closes, and a success message box is displayed. The user is moved to the **Exempted users** tab.
***
## Use your business hub
The following are the supported features of business hubs you can use:
* [Join the external app and set up your business hub access](https://help.cerby.com/cerby-web-app/business-hubs/join-your-external-app-and-set-up-your-business-hub-access)
* [Add users to your app via a business hub](/setup-and-admin/business-hubs/managing-users-and-assets-via-a-business-hub/add-users-and-teams-to-your-apps-via-a-business-hub)
* [Provision users to your apps via an IdP and business hub](/setup-and-admin/business-hubs/managing-users-and-assets-via-a-business-hub/provision-users-to-your-apps-via-an-idp-and-business-hub)
* [Remove users from your app via a business hub](/setup-and-admin/business-hubs/managing-users-and-assets-via-a-business-hub/remove-users-from-your-app-via-a-business-hub)
* [Remove teams from your app via a business hub](/setup-and-admin/business-hubs/managing-users-and-assets-via-a-business-hub/remove-teams-from-your-app-via-a-business-hub)
* [Deprovision users from your apps via an IdP and business hub](/setup-and-admin/business-hubs/managing-users-and-assets-via-a-business-hub/deprovision-users-from-your-apps-via-an-idp-and-business-hub)
* [Update user roles in your app via a business hub](/setup-and-admin/business-hubs/managing-users-and-assets-via-a-business-hub/update-user-roles-in-your-app-via-a-business-hub)
* [Update user roles in your apps via an IdP and business hub](/setup-and-admin/business-hubs/managing-users-and-assets-via-a-business-hub/update-user-roles-in-your-apps-via-an-idp-and-business-hub)
* [Sync your app users with your business hub](/setup-and-admin/business-hubs/managing-users-and-assets-via-a-business-hub/sync-your-business-hub-with-your-external-app)
* [Protect your app users via a business hub](/setup-and-admin/business-hubs/managing-users-and-assets-via-a-business-hub/protect-your-app-user-accounts-via-a-business-hub)
* [Log in to your app via a business hub](https://help.cerby.com/cerby-web-app/business-hubs/log-in-to-your-app)
* [Track the activity of business hub users](/setup-and-admin/business-hubs/managing-users-and-assets-via-a-business-hub/track-activity-on-app-members-user-accounts)
* [Remove a business hub](/setup-and-admin/business-hubs/managing-your-business-hubs/remove-a-business-hub)
# Connect a business hub for Braintree
This article describes how to connect a business hub to centrally manage the users of Braintree from Cerby.
{% hint style="info" %}
**Who can use this feature?**
* Workspace **Owners**, **Super Admins**, **Admins**, and **Users**
* Only supported using the Cerby web app
{% endhint %}
As a user with any workspace role in Cerby, except **Guest User** and **Login-Only**, you can connect a business hub integration to centrally manage the users of Braintree.
When you connect the business hub, you become its **Owner**, and you can perform the following user and access management tasks through automated tasks executed by the Cerby agent:
* Check for updates
* Add users
* Update user roles
* Remove users
{% hint style="success" %}
**TIP:** For more details about the automated tasks of a business hub, how it works, and the supported apps, read the article [Explore Business Hubs](https://help.cerby.com/setup-and-admin/business-hubs/business-hub-catalog).
{% endhint %}
{% hint style="danger" %}
**IMPORTANT:** Braintree requires the **Merchant Accounts** field when creating user accounts. Therefore, when adding users to your external app, you must specify the merchant accounts to which the user should have access.
{% endhint %}
This article provides instructions on how to connect a business hub for Braintree. For other app-specific articles and videos, review the [Connecting business hubs for your apps](https://help.cerby.com/setup-and-admin/business-hubs/connecting-your-apps) and [Connecting business hubs for your paid social apps](https://help.cerby.com/setup-and-admin/business-hubs/connecting-your-paid-social-apps) collections in the Cerby Help Center.
***
## Requirements
The following are the requirements to connect a business hub:
* A Cerby workspace
* A Cerby user account with the workspace **Owner**, **Super Admin**, **Admin**, or **User** role
* Groups configured in your identity provider (IdP) if you want to leverage automatic user provisioning and deprovisioning from your apps based on group assignment events. For more information, read the articles available in the [Managing users via an IdP and business hub](https://help.cerby.com/setup-and-admin/business-hubs/managing-users-and-assets-via-a-business-hub) collection in the Cerby Help Center
* An automation account, meaning an active user account with a native **Account Admin** role in Braintree to be used as a service account. For instructions and recommendations on how to create and configure this account, read the article [Create a service account for your business hub](/setup-and-admin/business-hubs/connecting-your-apps/create-a-service-account-for-your-business-hub)
{% hint style="warning" %}
**IMPORTANT:** The service account must indicate if this Braintree account is for a sandbox or production environment. Therefore, when adding the account to Cerby, ensure you enter **sandbox** in the **Team Name** field if the account is connected to a sandbox environment, or leave the field empty for production.
{% endhint %}
* The user management and login method for your business hub identified to select the corresponding option when connecting your app. For more information, read the **User management and login method** section of the article [Explore Business Hubs](https://help.cerby.com/setup-and-admin/business-hubs/business-hub-catalog)
***
## Connect a business hub for Braintree
To connect a business hub for Braintree, you must complete the following main steps from the Cerby web app dashboard:
1. [Add a business hub and connect it to Braintree](#id-1.-add-a-business-hub-and-connect-it-to-braintree)
2. [Check for updates to import users and roles to Cerby](#id-2.-check-for-updates-to-import-users-and-roles-to-cerby)
3. [Connect your Braintree user account to the business hub](#id-3.-connect-your-braintree-user-account-to-the-business-hub)
4. [Manage unmatched users](#id-4.-manage-unmatched-users)
The following sections describe each main step.
### 1. Add a business hub and connect it to Braintree
To add a business hub and connect it to Braintree, you must complete the following steps:
1. Log in to your corresponding [Cerby](https://app.cerby.com/) workspace.
2. Select the **Business Hubs** option from the left menu. The **Business Hubs** page is displayed.
3. Click the **Connect Business Hub** button located at the top-right corner of the page. The **Connect your Business Hubs to Cerby** dialog box is displayed. **TIP:** Select the **Don’t show this again** option to skip this step the next time you connect a new business hub.
4. Click the **Get started** button. A wizard is displayed on the **Select app** page.
5. Select **Braintree Hub** from the catalog. The **Enter app details** page is displayed on the wizard.
6. Enter and select your app information in the corresponding fields:
* **Label in Cerby:** It is the name to assign to your business hub in Cerby, and it will be displayed on the business hub card.
* **Unique identifier:** It is a unique identifier that differentiates your business hub in Cerby from others for the same app. You can assign an alphanumeric value between 3 and 30 characters without symbols or special characters.
* **User management and login method:** It is the way your users log in to the app and determines whether they must save their login credentials as a Cerby account connected to the business hub. You must select one of the following methods:
* **Single sign-on (SSO):** Access is managed by your IdP, and users log in with SSO authentication. They are not asked to save their credentials in Cerby.
* **Username and password:** Cerby manages account security and access, and users log in with their credentials after saving them in Cerby.
7. Click the **Next** button. The **Select automation account** page is displayed with a list of existing Braintree accounts.
8. Select the automation account you have previously added to Cerby, as described in the [Requirements](#requirements) section. **NOTE:** If you don’t have an automation account, you are prompted to add it. Make sure you read Cerby’s recommendations on how to configure it in the article [Create a service account for your business hub](/setup-and-admin/business-hubs/connecting-your-apps/create-a-service-account-for-your-business-hub). You may need to add the account first and then add the business hub.
9. Click the **Connect app** button. The wizard closes, and a success message box is displayed. The corresponding business hub is also displayed on the **Business Hubs** page.
The next step is [2. Check for updates to import users and roles to Cerby](#id-2.-check-for-updates-to-import-users-and-roles-to-cerby).
### 2. Check for updates to import users and roles to Cerby
To check for updates in your app to identify and import users and roles to Cerby, you must complete the following steps:
1. Select the **Business Hubs** option from the left menu. The **Business Hubs** page is displayed.
2. Click the **More options** (...) icon of the corresponding business hub card. A drop-down menu is displayed.
3. Select the **Settings** option from the menu. The business hub details page is displayed with the **Settings** tab activated.
4. Click the **Sync** button located at the top right of the page. A message box is displayed with information about the process. **NOTE:** The check and import process may take a few minutes depending on the number of users, and because Cerby automatically matches users to their corresponding Cerby user account.
5. Confirm that the automated task to check for updates has the “Completed” status by performing any of the following actions:
* Click the **More details** button from the message box.
* Select the **Automation** option from the left menu to open the **Automation** page with a list of automated tasks and their status.
{% hint style="info" %}
**NOTE:** Cerby automatically performs daily checks for updates for all business hubs, but you can trigger them manually, as described in this section. For more instructions, read the article [Sync your app users with your business hub](/setup-and-admin/business-hubs/managing-users-and-assets-via-a-business-hub/sync-your-business-hub-with-your-external-app).
{% endhint %}
The next step is [3. Connect your Braintree user account to the business hub](#id-3.-connect-your-braintree-user-account-to-the-business-hub).
### 3. Connect your Braintree user account to the business hub
To connect your Braintree user account to the business hub so Cerby can manage and protect it, you must complete the following steps:
1. Select the **Accounts** option from the left menu. The **Accounts** page is displayed.
2. Click the **Log in** button of the corresponding Braintree Hub account card. The **Connect your Braintree Hub Account** dialog box is displayed.
3. Enter the login credentials of your **Braintree** user account.
4. Click the **Connect account** button. The dialog box closes, and a success message box and a new account card are displayed.
The next step is [4. Manage unmatched users](#id-4.-manage-unmatched-users).
### 4. Manage unmatched users
During a check for updates, Cerby automatically matches app members to the Cerby user accounts that correspond to their email addresses, including existing [guest users](https://help.cerby.com/getting-started/concepts/user-management/guest-users) and [local partners](https://help.cerby.com/getting-started/concepts/user-management/partners#h-7e4add33a2). Manual matching is required when apps don't provide email addresses and for app members using personal or external accounts that couldn’t be identified or are not in the corporate directory.
To view the status of the imported app members, you must complete the following steps:
1. Select the **Business Hubs** option from the left menu. The **Business Hubs** page is displayed.
2. Click the **More options** (...) icon of the corresponding business hub card. A drop-down menu is displayed.
3. Select the **View Members** option from the menu. The business hub details page is displayed with the **Members** tab activated. App members are displayed in the following tabs of the **User Overview** section:
* **Unmatched users:** This tab displays the users who were not automatically matched.
* **Onboarded users:** This tab displays the users matched to their Cerby user account.
* **Guest users:** This tab displays the users who were matched to an existing Cerby user account but it doesn’t exist in the corporate directory, such as external collaborators.
For unmatched users, you can perform one of the following actions:
* [Match users](#match-users)
* [Remove unmatched users](#remove-unmatched-users)
* [Exempt unmatched users](#exempt-unmatched-users)
The following sections describe each action.
#### Match users
To match users, you must complete the following steps from the **Unmatched users** tab of the business hub details page:
1. Click the **Match user** button of the corresponding user. The **Match user** dialog box is displayed.
2. Enter the username or email address of the user you want to match and invite in the **Match with** field. The user is displayed on a list.
3. Select the user from the list.
4. Click the **Next** button. The **Select Cerby role** dialog box is displayed.
5. Select the role to assign to the user on the business hub **Cerby role** drop-down menu:
* **Owner:** This role enables sharing access and managing business hub settings in Cerby.
* **Collaborator:** This role enables only logging in to the app from Cerby.
6. Click the **Match user** button. The dialog box closes, and a success message box is displayed. The user is moved to the **Onboarded users** tab.
#### Remove unmatched users
To remove unmatched users, you must complete the following steps from the **Unmatched users** tab of the business hub details page:
{% hint style="danger" %}
**IMPORTANT:** When removing an unmatched user, Cerby performs an automated task to revoke the user’s seat and permissions in Braintree.
{% endhint %}
1. Click the **More options** (...) icon of the corresponding user. A drop-down menu is displayed.
2. Select the **Remove user** option from the menu. The **Remove user?** dialog box is displayed.
3. Click the **Remove user** button. The dialog box closes, and a success message box is displayed. The user is removed from the app via an automated task.
#### Exempt unmatched users
Exempted users keep their user accounts or seats active in your app, but you cannot manage them through Cerby.
To exempt unmatched users, you must complete the following steps from the **Unmatched users** tab of the business hub details page:
1. Click the **More options** (...) icon of the corresponding user. A drop-down menu is displayed.
2. Select the **Exempt user** option from the menu. The exempt user dialog box is displayed.
3. Enter a reason for exempting the user in the **Provide a reason** field.
4. Click the **Exempt member** button. The dialog box closes, and a success message box is displayed. The user is moved to the **Exempted users** tab.
***
## Use your business hub
The following are the supported features of business hubs you can use:
* [Join the external app and set up your business hub access](https://help.cerby.com/cerby-web-app/business-hubs/join-your-external-app-and-set-up-your-business-hub-access)
* [Add users to your app via a business hub](/setup-and-admin/business-hubs/managing-users-and-assets-via-a-business-hub/add-users-and-teams-to-your-apps-via-a-business-hub)
* [Provision users to your apps via an IdP and business hub](/setup-and-admin/business-hubs/managing-users-and-assets-via-a-business-hub/provision-users-to-your-apps-via-an-idp-and-business-hub)
* [Remove users from your app via a business hub](/setup-and-admin/business-hubs/managing-users-and-assets-via-a-business-hub/remove-users-from-your-app-via-a-business-hub)
* [Remove teams from your app via a business hub](/setup-and-admin/business-hubs/managing-users-and-assets-via-a-business-hub/remove-teams-from-your-app-via-a-business-hub)
* [Deprovision users from your apps via an IdP and business hub](/setup-and-admin/business-hubs/managing-users-and-assets-via-a-business-hub/deprovision-users-from-your-apps-via-an-idp-and-business-hub)
* [Update user roles in your app via a business hub](/setup-and-admin/business-hubs/managing-users-and-assets-via-a-business-hub/update-user-roles-in-your-app-via-a-business-hub)
* [Update user roles in your apps via an IdP and business hub](/setup-and-admin/business-hubs/managing-users-and-assets-via-a-business-hub/update-user-roles-in-your-apps-via-an-idp-and-business-hub)
* [Sync your app users with your business hub](/setup-and-admin/business-hubs/managing-users-and-assets-via-a-business-hub/sync-your-business-hub-with-your-external-app)
* [Log in to your app via a business hub](https://help.cerby.com/cerby-web-app/business-hubs/log-in-to-your-app)
* [Track the activity of business hub users](/setup-and-admin/business-hubs/managing-users-and-assets-via-a-business-hub/track-activity-on-app-members-user-accounts)
* [Remove a business hub](/setup-and-admin/business-hubs/managing-your-business-hubs/remove-a-business-hub)
# Connect a business hub for Braze
This article describes how to connect a business hub to centrally manage the users and assets of Braze from Cerby.
{% hint style="info" %}
**Who can use this feature?**
* Workspace **Owners**, **Super Admins**, **Admins**, and **Users**
* Only supported using the Cerby web app
{% endhint %}
As a user with any workspace role in Cerby, except **Guest User** and **Login-Only**, you can connect a business hub integration to centrally manage the users and assets of Braze.
When you connect the business hub, you become its **Owner**, and you can perform the following user and access management tasks through automated tasks executed by the Cerby agent:
* Check for updates
* Add users
* Update user roles
* Remove users
{% hint style="success" %}
**TIP:** For more details about the automated tasks of a business hub, how it works, and the supported apps, read the article [Explore Business Hubs](https://help.cerby.com/setup-and-admin/business-hubs/business-hub-catalog).
{% endhint %}
This article provides instructions on how to connect a business hub for Braze. For other app-specific articles and videos, review the [Connecting business hubs for your apps](https://help.cerby.com/setup-and-admin/business-hubs/connecting-your-apps) and [Connecting business hubs for your paid social apps](https://help.cerby.com/setup-and-admin/business-hubs/connecting-your-paid-social-apps) collections in the Cerby Help Center.
***
## Requirements
The following are the requirements to connect a business hub:
* A Cerby workspace
* A Cerby user account with the workspace **Owner**, **Super Admin**, **Admin**, or **User** role
* Groups configured in your identity provider (IdP) if you want to leverage automatic user provisioning and deprovisioning from your apps based on group assignment events. For more information, read the articles available in the [Managing users via an IdP and business hub](https://help.cerby.com/setup-and-admin/business-hubs/managing-users-and-assets-via-a-business-hub) collection in the Cerby Help Center
* An automation account, meaning an active user account with an **Admin** role in Braze to be used as a service account. For instructions and recommendations on how to create and configure this account, read the article [Create a service account for your business hub](/setup-and-admin/business-hubs/connecting-your-apps/create-a-service-account-for-your-business-hub)
* The user management and login method for your business hub identified to select the corresponding option when connecting your app. For more information, read the **User management and login method** section of the article [Explore Business Hubs](https://help.cerby.com/setup-and-admin/business-hubs/business-hub-catalog)
***
## Connect a business hub for Braze
To connect a business hub for Braze, you must complete the following main steps from the Cerby web app dashboard:
1. [Add a business hub and connect it to Braze](#id-1.-add-a-business-hub-and-connect-it-to-braze)
2. [Check for updates to import users, roles, and assets to Cerby](#id-2.-check-for-updates-to-import-users-roles-and-assets-to-cerby)
3. [Connect your Braze user account to the business hub](#id-3.-connect-your-braze-user-account-to-the-business-hub)
4. [Manage unmatched users](#id-4.-manage-unmatched-users)
The following sections describe each main step.
### 1. Add a business hub and connect it to Braze
To add a business hub and connect it to Braze, you must complete the following steps:
1. Log in to your corresponding [Cerby](https://app.cerby.com/) workspace.
2. Select the **Business Hubs** option from the left menu. The **Business Hubs** page is displayed.
3. Click the **Connect Business Hub** button located at the top-right corner of the page. The **Connect your Business Hubs to Cerby** dialog box is displayed. **TIP:** Select the **Don’t show this again** option to skip this step the next time you connect a new business hub.
4. Click the **Get started** button. A wizard is displayed on the **Select app** page.
5. Select **Braze Hub** from the catalog. The **Enter app details** page is displayed on the wizard.
6. Enter and select your app information in the corresponding fields:
* **Label in Cerby:** It is the name to assign to your business hub in Cerby, and it will be displayed on the business hub card.
* **Business unique identifier:** It is a unique identifier that differentiates your business hub in Cerby from others for the same app. You can assign an alphanumeric value between 3 and 30 characters without symbols or special characters.
* **User management and login method:** It is the way your users log in to the app and determines whether they must save their login credentials as a Cerby account connected to the business hub. You must select one of the following methods:
* **Single sign-on (SSO):** Access is managed by your IdP, and users log in with SSO authentication. They are not asked to save their credentials in Cerby.
* **Username and password:** Cerby manages account security and access, and users log in with their credentials after saving them in Cerby.
7. Click the **Next** button. The **Select automation account** page is displayed with a list of existing Braze accounts.
8. Select the automation account you have previously added to Cerby, as described in the [Requirements](#requirements) section. **NOTE:** If you don’t have an automation account, you are prompted to add it. Make sure you read Cerby’s recommendations on how to configure it in the article [Create a service account for your business hub](/setup-and-admin/business-hubs/connecting-your-apps/create-a-service-account-for-your-business-hub). You may need to add the account first and then add the business hub.
9. Click the **Connect app** button. The wizard closes, and a success message box is displayed. The corresponding business hub is also displayed on the **Business Hubs** page.
The next step is [2. Check for updates to import users, roles, and assets to Cerby](#id-2.-check-for-updates-to-import-users-roles-and-assets-to-cerby).
### 2. Check for updates to import users, roles, and assets to Cerby
To check for updates in your app to identify and import users, roles, and assets to Cerby, you must complete the following steps:
1. Select the **Business Hubs** option from the left menu. The **Business Hubs** page is displayed.
2. Click the **More options** (...) icon of the corresponding business hub card. A drop-down menu is displayed.
3. Select the **Settings** option from the menu. The business hub details page is displayed with the **Settings** tab activated.
4. Click the **Sync** button located at the top right of the page. A message box is displayed with information about the process. **NOTE:** The check and import process may take a few minutes depending on the number of users and assets, and because Cerby automatically matches users to their corresponding Cerby user account.
5. Confirm that the automated task to check for updates has the “Completed” status by performing any of the following actions:
* Click the **More details** button from the message box.
* Select the **Automation** option from the left menu to open the **Automation** page with a list of automated tasks and their status.
{% hint style="info" %}
**NOTE:** Cerby automatically performs daily checks for updates for all business hubs, but you can trigger them manually, as described in this section. For more instructions, read the article [Sync your app users with your business hub](/setup-and-admin/business-hubs/managing-users-and-assets-via-a-business-hub/sync-your-business-hub-with-your-external-app).
{% endhint %}
The next step is [3. Connect your Braze user account to the business hub](#id-3.-connect-your-braze-user-account-to-the-business-hub).
### 3. Connect your Braze user account to the business hub
To connect your Braze user account to the business hub so Cerby can manage and protect it, you must complete the following steps:
1. Select the **Accounts** option from the left menu. The **Accounts** page is displayed.
2. Click the **Log in** button of the corresponding Braze Hub account card. The **Connect your Braze Hub Account** dialog box is displayed.
3. Enter the login credentials of your **Braze** user account.
4. Click the **Connect account** button. The dialog box closes, and a success message box and a new account card are displayed.
The next step is [4. Manage unmatched users](#id-4.-manage-unmatched-users).
### 4. Manage unmatched users
During a check for updates, Cerby automatically matches app members to the Cerby user accounts that correspond to their email addresses, including existing [guest users](https://help.cerby.com/getting-started/concepts/user-management/guest-users) and [local partners](https://help.cerby.com/getting-started/concepts/user-management/partners#h-7e4add33a2). Manual matching is required when apps don't provide email addresses and for app members using personal or external accounts that couldn’t be identified or are not in the corporate directory.
To view the status of the imported app members, you must complete the following steps:
1. Select the **Business Hubs** option from the left menu. The **Business Hubs** page is displayed.
2. Click the **More options** (...) icon of the corresponding business hub card. A drop-down menu is displayed.
3. Select the **View Members** option from the menu. The business hub details page is displayed with the **Members** tab activated. App members are displayed in the following tabs of the **User Overview** section:
* **Unmatched users:** This tab displays the users who were not automatically matched.
* **Onboarded users:** This tab displays the users matched to their Cerby user account.
* **Guest users:** This tab displays the users who were matched to an existing Cerby user account but it doesn’t exist in the corporate directory, such as external collaborators.
For unmatched users, you can perform one of the following actions:
* [Match users](#match-users)
* [Remove unmatched users](#remove-unmatched-users)
* [Exempt unmatched users](#exempt-unmatched-users)
The following sections describe each action.
#### Match users
To match users, you must complete the following steps from the **Unmatched users** tab of the business hub details page:
1. Click the **Match user** button of the corresponding user. The **Match user** dialog box is displayed.
2. Enter the username or email address of the user you want to match and invite in the **Match with** field. The user is displayed on a list.
3. Select the user from the list.
4. Click the **Next** button. The **Select Cerby role** dialog box is displayed.
5. Select the role to assign to the user on the business hub **Cerby role** drop-down menu:
* **Owner:** This role enables sharing access and managing business hub settings in Cerby.
* **Collaborator:** This role enables only logging in to the app from Cerby.
6. Click the **Match user** button. The dialog box closes, and a success message box is displayed. The user is moved to the **Onboarded users** tab.
#### Remove unmatched users
To remove unmatched users, you must complete the following steps from the **Unmatched users** tab of the business hub details page:
{% hint style="danger" %}
**IMPORTANT:** When removing an unmatched user, Cerby performs an automated task to revoke the user’s seat and permissions in Braze.
{% endhint %}
1. Click the **More options** (...) icon of the corresponding user. A drop-down menu is displayed.
2. Select the **Remove user** option from the menu. The **Remove user?** dialog box is displayed.
3. Click the **Remove user** button. The dialog box closes, and a success message box is displayed. The user is removed from the app via an automated task.
#### Exempt unmatched users
Exempted users keep their user accounts or seats active in your app, but you cannot manage them through Cerby.
To exempt unmatched users, you must complete the following steps from the **Unmatched users** tab of the business hub details page:
1. Click the **More options** (...) icon of the corresponding user. A drop-down menu is displayed.
2. Select the **Exempt user** option from the menu. The exempt user dialog box is displayed.
3. Enter a reason for exempting the user in the **Provide a reason** field.
4. Click the **Exempt member** button. The dialog box closes, and a success message box is displayed. The user is moved to the **Exempted users** tab.
***
## Use your business hub
The following are the supported features of business hubs you can use:
* [Join the external app and set up your business hub access](https://help.cerby.com/cerby-web-app/business-hubs/join-your-external-app-and-set-up-your-business-hub-access)
* [Add users to your app via a business hub](/setup-and-admin/business-hubs/managing-users-and-assets-via-a-business-hub/add-users-and-teams-to-your-apps-via-a-business-hub)
* [Provision users to your apps via an IdP and business hub](/setup-and-admin/business-hubs/managing-users-and-assets-via-a-business-hub/provision-users-to-your-apps-via-an-idp-and-business-hub)
* [Remove users from your app via a business hub](/setup-and-admin/business-hubs/managing-users-and-assets-via-a-business-hub/remove-users-from-your-app-via-a-business-hub)
* [Remove teams from your app via a business hub](/setup-and-admin/business-hubs/managing-users-and-assets-via-a-business-hub/remove-teams-from-your-app-via-a-business-hub)
* [Deprovision users from your apps via an IdP and business hub](/setup-and-admin/business-hubs/managing-users-and-assets-via-a-business-hub/deprovision-users-from-your-apps-via-an-idp-and-business-hub)
* [Update user roles in your app via a business hub](/setup-and-admin/business-hubs/managing-users-and-assets-via-a-business-hub/update-user-roles-in-your-app-via-a-business-hub)
* [Update user roles in your apps via an IdP and business hub](/setup-and-admin/business-hubs/managing-users-and-assets-via-a-business-hub/update-user-roles-in-your-apps-via-an-idp-and-business-hub)
* [Sync your app users with your business hub](/setup-and-admin/business-hubs/managing-users-and-assets-via-a-business-hub/sync-your-business-hub-with-your-external-app)
* [Log in to your app via a business hub](https://help.cerby.com/cerby-web-app/business-hubs/log-in-to-your-app)
* [Track the activity of business hub users](/setup-and-admin/business-hubs/managing-users-and-assets-via-a-business-hub/track-activity-on-app-members-user-accounts)
* [Remove a business hub](/setup-and-admin/business-hubs/managing-your-business-hubs/remove-a-business-hub)
# Connect a business hub for BrowserStack
This article describes how to connect a business hub to centrally manage the users and assets of BrowserStack from Cerby.
{% hint style="info" %}
**Who can use this feature?**
* Workspace **Owners**, **Super Admins**, **Admins**, and **Users**
* Only supported using the Cerby web app
{% endhint %}
As a user with any workspace role in Cerby, except **Guest User** and **Login-Only**, you can connect a business hub integration to centrally manage the users and assets (such as App Percy, Automate Turboscale, or Test Management) of BrowserStack.
When you connect the business hub, you become its **Owner**, and you can perform the following user and access management tasks through automated tasks executed by the Cerby agent:
* Check for updates
* Invite app members
* Update app members’ roles
* Remove app members
{% hint style="success" %}
**TIP:** For more details about the automated tasks of a business hub, how it works, and the supported apps, read the article [Explore Apps](https://help.cerby.com/setup-and-admin/business-hubs/business-hub-catalog).
{% endhint %}
This article provides instructions on how to connect a business hub for BrowserStack. For other app-specific articles and videos, review the [Connecting your business hubs](https://help.cerby.com/setup-and-admin/business-hubs/connecting-your-apps) collection in the Cerby Help Center.
***
## Requirements
The following are the requirements to connect a business hub:
* A Cerby workspace
* A Cerby user account with the **Owner**, **Super Admin**, **Admin**, or **User** role
* An organization in BrowserStack
* Groups configured in your identity provider (IdP) if you want to leverage automatic user provisioning and deprovisioning from your apps based on group assignment events. For more information, read the article [Provision users to your apps via an IdP and business hub](https://help.cerby.com/setup-and-admin/business-hubs/managing-users-and-assets-via-a-business-hub/provision-users-to-your-apps-via-an-idp-and-business-hub)
* An automation account, meaning an active user account with an **Admin** role in BrowserStack to be used as a service account. For instructions and recommendations on how to create and configure this account, read the article [Create a service account for your business hub](https://help.cerby.com/setup-and-admin/business-hubs/connecting-your-apps/create-a-service-account-for-your-business-hub)
* The user management and login method for your business hub identified to select the corresponding option when connecting your app. For more information, read the **User management and login method** section of the article [Explore Apps](https://help.cerby.com/setup-and-admin/business-hubs/business-hub-catalog)
***
## Connect a business hub for BrowserStack
To connect a business hub for BrowserStack, you must complete the following main steps from the Cerby web app dashboard:
1. [Add a business hub and connect it to BrowserStack](#id-1.-add-a-business-hub-and-connect-it-to-browserstack)
2. [Check for updates to import users, roles, and assets to Cerby](#id-2.-check-for-updates-to-import-users-roles-and-assets-to-cerby)
3. [Connect your BrowserStack user account to the business hub](#id-3.-connect-your-browserstack-user-account-to-the-business-hub)
4. [Manage unmatched users](#id-4.-manage-unmatched-users)
The following sections describe each main step.
### 1. Add a business hub and connect it to BrowserStack
To add a business hub and connect it to BrowserStack, you must complete the following steps:
1. Log in to your corresponding [Cerby](https://app.cerby.com/) workspace.
2. Select the **Business Hubs** option from the left navigation drawer. The **Business Hubs** page is displayed.
3. Click the **Connect Business Hub** button located at the top-right corner of the page. The **Connect your Business Hubs to Cerby** dialog box is displayed.
**TIP:** Select the **Don’t show this again** option to skip this step the next time you connect a new business hub.
4. Click the **Get started** button. A wizard is displayed on the **Select app** page.
5. Select **BrowserStack Business Hub** from the catalog. The **Enter app details** page is displayed on the wizard.
6. Enter and select your app information in the corresponding fields:
* **Label in Cerby:** It is the name to assign to your business hub in Cerby, and it will be displayed on the business hub card.
* **Unique Name:** It is a unique identifier that differentiates your business hub in Cerby from others for the same app. You can assign an alphanumeric value between 3 and 30 characters without symbols or special characters.
* **User management and login method:** It is the way your users log in to the app and determines whether they must save their login credentials as a Cerby account connected to the business hub. You must select one of the following methods:
* **Single sign-on (SSO):** Access is managed by your identity provider, and users log in with SSO authentication. They are not asked to save their credentials in Cerby.
* **Username and password:** Cerby manages account security and access, and users log in with their credentials after saving them in Cerby.
7. Click the **Next** button. The **Select automation account** page is displayed with a list of existing BrowserStack accounts.
8. Select the automation account you have previously added to Cerby, as described in the [Requirements](#requirements) section.
**NOTE:** If you don’t have an automation account, you are prompted to add it. Make sure you read Cerby’s recommendations on how to configure it in the article [Create a service account for your business hub](https://help.cerby.com/setup-and-admin/business-hubs/connecting-your-apps/create-a-service-account-for-your-business-hub). You may need to add the account first and then add the business hub.
9. Click the **Connect app** button. The wizard closes, and a success message box is displayed. The corresponding business hub is also displayed on the **Business Hubs** page.
The next step is [2. Check for updates to import users, roles, and assets to Cerby](#id-2.-check-for-updates-to-import-users-roles-and-assets-to-cerby).
### 2. Check for updates to import users, roles, and assets to Cerby
To check for updates in your app to identify and import users, roles, and assets to Cerby, you must complete the following steps:
1. Select the **Business Hubs** option from the left navigation drawer. The **Business Hubs** page is displayed.
2. Click the **Settings** icon of the corresponding business hub card. The business hub details page is displayed with the **Settings** tab activated.
3. Click the **Check for updates** button located at the top right of the page. A message box is displayed with information about the process.
**NOTE:** The check and import process may take a few minutes depending on the number of users and assets, and because Cerby automatically matches users to their corresponding Cerby user account.
4. Confirm that the automated task to check for updates has the “Completed” status by performing any of the following actions:
* Click the **More details** button from the message box.
* Select the **Automation** option from the left navigation drawer to open the **Automation** page with a list of automated tasks and their status.
{% hint style="info" %}
**NOTE:** Cerby automatically performs daily checks for updates for all business hubs, but you can trigger them manually, as described in this section. When a user is deprovisioned from an IdP and a check for updates is performed, Cerby generates a report and sends business hub **Owners** an email to confirm their removal from the app. For more instructions, read the article [Check for updates in your app and apply report](/setup-and-admin/business-hubs/managing-users-and-assets-via-a-business-hub/sync-your-business-hub-with-your-external-app).
{% endhint %}
The next step is [3. Connect your BrowserStack user account to the business hub](#id-3.-connect-your-browserstack-user-account-to-the-business-hub).
### 3. Connect your BrowserStack user account to the business hub
To connect your BrowserStack user account to the business hub so Cerby can manage and protect it, you must complete the following steps:
1. Select the **Accounts** option from the left navigation drawer. The **Accounts** page is displayed.
2. Click the **Log in** button of the corresponding BrowserStack Business Hub account card. The **Connect your BrowserStack Business Hub Account** dialog box is displayed.
3. Enter the login credentials of your BrowserStack user account.
4. Click the **Connect account** button. The dialog box closes, and a success message box and a new account card are displayed.
The next step is [4. Manage unmatched users](#id-4.-manage-unmatched-users).
### 4. Manage unmatched users
During a check for updates, Cerby automatically matches app members to the Cerby user accounts that correspond to their email addresses, including existing [guest users](https://help.cerby.com/getting-started/concepts/user-management/guest-users) and [local partners](https://help.cerby.com/getting-started/concepts/user-management/partners#h-7e4add33a2). Manual matching is required when apps don't provide email addresses and for app members using personal or external accounts that couldn’t be identified or are not in the corporate directory.
To view the status of the imported app members, you must complete the following steps:
1. Select the **Business Hubs** option from the left navigation drawer. The **Business Hubs** page is displayed.
2. Click the **More options** (...) icon of the corresponding business hub card. A drop-down list is displayed.
3. Select the **View Members** option from the list. The business hub details page is displayed with the **Members** tab activated. App members are displayed in the following tabs of the **User Overview** section:
* **Unmatched users:** This tab displays the users who were not automatically matched.
* **Onboarded users:** This tab displays the users matched to their Cerby user account.
* **Guest users:** This tab displays the users who were matched to an existing Cerby user account but it doesn’t exist in the corporate directory, such as external collaborators.
For unmatched users, you can perform one of the following actions:
* [Match users](#match-users)
* [Remove unmatched users](#remove-unmatched-users)
* [Exempt unmatched users](#exempt-unmatched-users)
The following sections describe each action.
#### Match users
To match users, you must complete the following steps from the **Unmatched users** tab of the business hub details page:
1. Click the **Match user** button of the corresponding user. The **Match user** dialog box is displayed.
2. Enter the username or email address of the user you want to match and invite in the **Match with** field. The user is displayed on a list.
3. Select the user from the list.
4. Click the **Next** button. The **Select Cerby role** dialog box is displayed.
5. Select the role to assign to the user on the business hub **Cerby role** drop-down list:
* **Owner:** This role enables sharing access and managing business hub settings in Cerby.
* **Collaborator:** This role enables only logging in to the app from Cerby.
6. Click the **Match user** button. The dialog box closes, and a success message box is displayed. The user is moved to the **Onboarded** **users** tab.
#### Remove unmatched users
To remove unmatched users, you must complete the following steps from the **Unmatched users** tab of the business hub details page:
{% hint style="danger" %}
**IMPORTANT:** When removing an unmatched user, Cerby performs an automated task to revoke the user’s seat and permissions in BrowserStack.
{% endhint %}
1. Click the **More options** (...) icon of the corresponding user. A drop-down list is displayed.
2. Select the **Remove user** option from the list. The **Remove user?** dialog box is displayed.
3. Click the **Remove user** button. The dialog box closes, and a success message box is displayed. The user is removed from the app via an automated task.
#### Exempt unmatched users
Exempted users keep their user accounts or seats active in your app, but you cannot manage them through Cerby.
To exempt unmatched users, you must complete the following steps from the **Unmatched users** tab of the business hub details page:
1. Click the **More options** (...) icon of the corresponding user. A drop-down list is displayed.
2. Select the **Exempt user** option from the list. The exempt user dialog box is displayed.
3. Enter a reason for exempting the user in the **Provide a reason** field.
4. Click the **Exempt member** button. The dialog box closes, and a success message box is displayed. The user is moved to the **Exempted users** tab.
***
## Use your business hub
The following are the supported features of business hubs you can use:
* [Join the App and connect it to Cerby](https://help.cerby.com/cerby-web-app/business-hubs/join-your-external-app-and-set-up-your-business-hub-access)
* [Invite new app members](/setup-and-admin/business-hubs/managing-users-and-assets-via-a-business-hub/add-users-and-teams-to-your-apps-via-a-business-hub)
* [Remove app members](/setup-and-admin/business-hubs/managing-users-and-assets-via-a-business-hub/remove-users-from-your-app-via-a-business-hub)
* [Provision users to your apps via an IdP and business hub](https://help.cerby.com/setup-and-admin/business-hubs/managing-users-and-assets-via-a-business-hub/provision-users-to-your-apps-via-an-idp-and-business-hub)
* [Update the app members’ roles](/setup-and-admin/business-hubs/managing-users-and-assets-via-a-business-hub/update-user-roles-in-your-app-via-a-business-hub)
* [Check for updates in your app and apply report](/setup-and-admin/business-hubs/managing-users-and-assets-via-a-business-hub/sync-your-business-hub-with-your-external-app)
* [Re-assign the app members’ user accounts](https://github.com/cerbyinc/help-center/tree/main/.uncategorized/unpublished-deprecated-re-assign-the-app-members-user-accounts.md)
* [Manage the security of app members’ user accounts](/setup-and-admin/business-hubs/managing-users-and-assets-via-a-business-hub/protect-your-app-user-accounts-via-a-business-hub)
* [Log in to your app](https://help.cerby.com/cerby-web-app/business-hubs/log-in-to-your-app)
* [Track activity on app members’ user accounts](/setup-and-admin/business-hubs/managing-users-and-assets-via-a-business-hub/track-activity-on-app-members-user-accounts)
* [Remove an App](/setup-and-admin/business-hubs/managing-your-business-hubs/remove-a-business-hub)
# Connect a business hub for BuildBuddy
This article describes how to connect a business hub to centrally manage the users of BuildBuddy from Cerby.
{% hint style="info" %}
**Who can use this feature?**
* Workspace **Owners**, **Super Admins**, **Admins**, and **Users**
* Only supported using the Cerby web app
{% endhint %}
As a user with any workspace role in Cerby, except **Guest User** and **Login-Only**, you can connect a business hub integration to centrally manage the users of BuildBuddy.
When you connect the business hub, you become its **Owner**, and you can perform the following user and access management tasks through automated tasks executed by the Cerby agent:
* Check for updates
* Update app members’ roles
* Remove app members
{% hint style="success" %}
**TIP:** For more details about the automated tasks of a business hub, how it works, and the supported apps, read the article [Explore Apps](https://help.cerby.com/setup-and-admin/business-hubs/business-hub-catalog).
{% endhint %}
{% hint style="info" %}
**NOTE:** The automated task to invite app members is not available for this business hub because BuildBuddy provides access through a generic URL that users must visit to accept the invitation
{% endhint %}
This article provides instructions on how to connect a business hub for BuildBuddy. For other app-specific articles and videos, review the [Connecting your business hubs](https://help.cerby.com/setup-and-admin/business-hubs/connecting-your-apps) collection in the Cerby Help Center.
***
## Requirements
The following are the requirements to connect a business hub:
* A Cerby workspace
* A Cerby user account with the **Owner**, **Super Admin**, **Admin**, or **User** role
* A organization in BuildBuddy
* Groups configured in your identity provider (IdP) if you want to leverage automatic user provisioning and deprovisioning from your apps based on group assignment events. For more information, read the article [Provision users to your apps via an IdP and business hub](https://help.cerby.com/setup-and-admin/business-hubs/managing-users-and-assets-via-a-business-hub/provision-users-to-your-apps-via-an-idp-and-business-hub)
* An automation account, meaning an active user account with a native **Admin** role in BuildBuddy to be used as a service account. For instructions and recommendations on how to create and configure this account, read the article [Create a service account for your business hub](https://help.cerby.com/setup-and-admin/business-hubs/connecting-your-apps/create-a-service-account-for-your-business-hub)
* The user management and login method for your business hub identified to select the corresponding option when connecting your app. For more information, read the **User management and login method** section of the article [Explore Apps](https://help.cerby.com/setup-and-admin/business-hubs/business-hub-catalog)
* A BuildBuddy Team Name. You can find the name in the address bar after you are logged in to BuildBuddy. The name is displayed in the address bar as part of the URL. For example, **`cerby`** in **`https://cerby.buildbuddy.io/settings/org/members`**. Just copy the value and paste it when connecting the business hub.
***
## Connect a business hub for BuildBuddy
To connect a business hub for BuildBuddy, you must complete the following main steps from the Cerby web app dashboard:
1. [Add a business hub and connect it to BuildBuddy](#id-1.-add-a-business-hub-and-connect-it-to-buildbuddy)
2. [Check for updates to import users and roles to Cerby](#id-2.-check-for-updates-to-import-users-and-roles-to-cerby)
3. [Connect your BuildBuddy user account to the business hub](#id-3.-connect-your-buildbuddy-user-account-to-the-business-hub)
4. [Manage unmatched users](#id-4.-manage-unmatched-users)
The following sections describe each main step.
### 1. Add a business hub and connect it to BuildBuddy
To add a business hub and connect it to BuildBuddy, you must complete the following steps:
1. Log in to your corresponding [Cerby](https://app.cerby.com/) workspace.
2. Select the **Business Hubs** option from the left navigation drawer. The **Business Hubs** page is displayed.
3. Click the **Connect Business Hub** button located at the top-right corner of the page. The **Connect your Business Hubs to Cerby** dialog box is displayed. **TIP:** Select the **Don’t show this again** option to skip this step the next time you connect a new business hub.
4. Click the **Get started** button. A wizard is displayed on the **Select app** page.
5. Select **BuildBuddy Hub** from the catalog. The **Enter app details** page is displayed on the wizard.
6. Enter and select your app information in the corresponding fields:
* **Label in Cerby:** It is the name to assign to your business hub in Cerby, and it will be displayed on the business hub card.
* **BuildBuddy Team Name:** It is the unique identifier of your business or organization in **BuildBuddy Hub**. For instructions on how to find it, read the [Requirements](#requirements) section.
* **User management and login method:** It is the way your users log in to the app and determines whether they must save their login credentials as a Cerby account connected to the business hub. You must select one of the following methods:
1. Select the **Single sign-on (SSO)** because the access must be managed by your identity provider, and users log in with SSO authentication. They are not asked to save their credentials in Cerby.
{% hint style="warning" %}
**IMPORTANT:** The **Username and password** option is not supported by BuildBuddy.
{% endhint %}
7. Click the **Next** button. The **Select automation account** page is displayed with a list of existing BuildBuddy accounts.
8. Select the automation account you have previously added to Cerby, as described in the [Requirements](#requirements) section. **NOTE:** If you don’t have an automation account, you are prompted to add it. Make sure you read Cerby’s recommendations on how to configure it in the article [Create a service account for your business hub](https://help.cerby.com/setup-and-admin/business-hubs/connecting-your-apps/create-a-service-account-for-your-business-hub). You may need to add the account first and then add the business hub.
9. Click the **Connect app** button. The wizard closes, and a success message box is displayed. The corresponding business hub is also displayed on the **Business Hubs** page.
The next step is [2. Check for updates to import users and roles to Cerby](#id-2.-check-for-updates-to-import-users-and-roles-to-cerby).
### 2. Check for updates to import users and roles to Cerby
To check for updates in your app to identify and import users and roles to Cerby, you must complete the following steps:
1. Select the **Business Hubs** option from the left navigation drawer. The **Business Hubs** page is displayed.
2. Click the **Settings** () icon of the corresponding business hub card. The business hub details page is displayed with the **Settings** tab activated.
3. Click the **Check for updates** button located at the top right of the page. A message box is displayed with information about the process. **NOTE:** The check and import process may take a few minutes depending on the number of users, and because Cerby automatically matches users to their corresponding Cerby user account.
4. Confirm that the automated task to check for updates has the “Completed” status by performing any of the following actions:
* Click the **More details** button from the message box.
* Select the **Automation** option from the left navigation drawer to open the **Automation** page with a list of automated tasks and their status.
{% hint style="info" %}
**NOTE:** Cerby automatically performs daily checks for updates for all business hubs, but you can trigger them manually, as described in this section. When a user is deprovisioned from an IdP and a check for updates is performed, Cerby generates a report and sends business hub **Owners** an email to confirm their removal from the app. For more instructions, read the article [Check for updates in your app and apply report](/setup-and-admin/business-hubs/managing-users-and-assets-via-a-business-hub/sync-your-business-hub-with-your-external-app).
{% endhint %}
The next step is [3. Connect your BuildBuddy user account to the business hub](#id-3.-connect-your-buildbuddy-user-account-to-the-business-hub).
### 3. Connect your BuildBuddy user account to the business hub
To connect your BuildBuddy user account to the business hub so Cerby can manage and protect it, you must complete the following steps:
1. Select the **Accounts** option from the left navigation drawer. The **Accounts** page is displayed.
2. Click the **Log in** button of the corresponding BuildBuddy Hub account card. The **Connect your BuildBuddy Hub Account** dialog box is displayed.
3. Enter the login credentials of your **BuildBuddy** user account.
4. Click the **Connect account** button. The dialog box closes, and a success message box and a new account card are displayed.
The next step is [4. Manage unmatched users](#id-4.-manage-unmatched-users).
### 4. Manage unmatched users
During a check for updates, Cerby automatically matches app members to the Cerby user accounts that correspond to their email addresses, including existing [guest users](https://help.cerby.com/getting-started/concepts/user-management/guest-users) and [local partners](https://help.cerby.com/getting-started/concepts/user-management/partners#h-7e4add33a2). Manual matching is required when apps don't provide email addresses and for app members using personal or external accounts that couldn’t be identified or are not in the corporate directory.
To view the status of the imported app members, you must complete the following steps:
1. Select the **Business Hubs** option from the left navigation drawer. The **Business Hubs** page is displayed.
2. Click the **More options** (...) icon of the corresponding business hub card. A drop-down list is displayed.
3. Select the **View Members** option from the list. The business hub details page is displayed with the **Members** tab activated. App members are displayed in the following tabs of the **User Overview** section:
* **Unmatched users:** This tab displays the users who were not automatically matched.
* **Onboarded users:** This tab displays the users matched to their Cerby user account.
* **Guest users:** This tab displays the users who were matched to an existing Cerby user account but it doesn’t exist in the corporate directory, such as external collaborators.
For unmatched users, you can perform one of the following actions:
* [Match users](#match-users)
* [Remove unmatched users](#remove-unmatched-users)
* [Exempt unmatched users](#exempt-unmatched-users)
The following sections describe each action.
#### Match users
To match users, you must complete the following steps from the **Unmatched users** tab of the business hub details page:
1. Click the **Match user** button of the corresponding user. The **Match user** dialog box is displayed.
2. Enter the username or email address of the user you want to match and invite in the **Match with** field. The user is displayed on a list.
3. Select the user from the list.
4. Click the **Next** button. The **Select Cerby role** dialog box is displayed.
5. Select the role to assign to the user on the business hub **Cerby role** drop-down list:
* **Owner:** This role enables sharing access and managing business hub settings in Cerby.
* **Collaborator:** This role enables only logging in to the app from Cerby.
6. Click the **Match user** button. The dialog box closes, and a success message box is displayed. The user is moved to the **Onboarded users** tab.
#### Remove unmatched users
To remove unmatched users, you must complete the following steps from the **Unmatched users** tab of the business hub details page:
{% hint style="danger" %}
**IMPORTANT:** When removing an unmatched user, Cerby performs an automated task to revoke the user’s seat and permissions in BuildBuddy.
{% endhint %}
1. Click the **More options** (...) icon of the corresponding user. A drop-down list is displayed.
2. Select the **Remove user** option from the list. The **Remove user?** dialog box is displayed.
3. Click the **Remove user** button. The dialog box closes, and a success message box is displayed. The user is removed from the app via an automated task.
#### Exempt unmatched users
Exempted users keep their user accounts or seats active in your app, but you cannot manage them through Cerby.
To exempt unmatched users, you must complete the following steps from the **Unmatched users** tab of the business hub details page:
1. Click the **More options** (...) icon of the corresponding user. A drop-down list is displayed.
2. Select the **Exempt user** option from the list. The exempt user dialog box is displayed.
3. Enter a reason for exempting the user in the **Provide a reason** field.
4. Click the **Exempt member** button. The dialog box closes, and a success message box is displayed. The user is moved to the **Exempted users** tab.
***
## Use your business hub
The following are the supported features of business hubs you can use:
* [Join the App and connect it to Cerby](https://help.cerby.com/cerby-web-app/business-hubs/join-your-external-app-and-set-up-your-business-hub-access)
* [Remove app members](/setup-and-admin/business-hubs/managing-users-and-assets-via-a-business-hub/remove-users-from-your-app-via-a-business-hub)
* [Provision users to your apps via an IdP and business hub](https://help.cerby.com/setup-and-admin/business-hubs/managing-users-and-assets-via-a-business-hub/provision-users-to-your-apps-via-an-idp-and-business-hub)
* [Update the app members’ roles](/setup-and-admin/business-hubs/managing-users-and-assets-via-a-business-hub/update-user-roles-in-your-app-via-a-business-hub)
* [Check for updates in your app and apply report](/setup-and-admin/business-hubs/managing-users-and-assets-via-a-business-hub/sync-your-business-hub-with-your-external-app)
* [Re-assign the app members’ user accounts](https://github.com/cerbyinc/help-center/tree/main/.uncategorized/unpublished-deprecated-re-assign-the-app-members-user-accounts.md)
* [Log in to your app](https://help.cerby.com/cerby-web-app/business-hubs/log-in-to-your-app)
* [Track activity on app members’ user accounts](/setup-and-admin/business-hubs/managing-users-and-assets-via-a-business-hub/track-activity-on-app-members-user-accounts)
* [Remove an App](/setup-and-admin/business-hubs/managing-your-business-hubs/remove-a-business-hub)
# Connect a business hub for Built In
This article describes how to connect a business hub to centrally manage the users of Built In from Cerby.
{% hint style="info" %}
**Who can use this feature?**
* Workspace **Owners**, **Super Admins**, **Admins**, and **Users**
* Only supported using the Cerby web app
{% endhint %}
As a user with any workspace role in Cerby, except **Guest User** and **Login-Only**, you can connect a business hub integration to centrally manage the users of Built In.
When you connect the business hub, you become its **Owner**, and you can perform the following user and access management tasks through automated tasks executed by the Cerby agent:
* Check for updates
* Add users
* Update user roles
* Remove users
{% hint style="success" %}
**TIP:** For more details about the automated tasks of a business hub, how it works, and the supported apps, read the article [Explore Business Hubs](https://help.cerby.com/setup-and-admin/business-hubs/business-hub-catalog).
{% endhint %}
This article provides instructions on how to connect a business hub for Built In. For other app-specific articles and videos, review the [Connecting business hubs for your apps](https://help.cerby.com/setup-and-admin/business-hubs/connecting-your-apps) and [Connecting business hubs for your paid social apps](https://help.cerby.com/setup-and-admin/business-hubs/connecting-your-paid-social-apps) collections in the Cerby Help Center.
***
## Requirements
The following are the requirements to connect a business hub:
* A Cerby workspace
* A Cerby user account with the workspace **Owner**, **Super Admin**, **Admin**, or **User** role
* A company in Built In
* Groups configured in your identity provider (IdP) if you want to leverage automatic user provisioning and deprovisioning from your apps based on group assignment events. For more information, read the articles available in the [Managing users via an IdP and business hub](https://help.cerby.com/setup-and-admin/business-hubs/managing-users-and-assets-via-a-business-hub) collection in the Cerby Help Center
* An automation account, meaning an active user account with a native **Admin** role in Built In to be used as a service account. For instructions and recommendations on how to create and configure this account, read the article [Create a service account for your business hub](/setup-and-admin/business-hubs/connecting-your-apps/create-a-service-account-for-your-business-hub)
* The user management and login method for your business hub identified to select the corresponding option when connecting your app. For more information, read the **User management and login method** section of the article [Explore Business Hubs](https://help.cerby.com/setup-and-admin/business-hubs/business-hub-catalog)
* A Business ID. You can find the ID in the address bar by completing the following steps after logging in to Built In:
1. Click your company logo icon at the top right of the page.
2. Select the **Employee Portal** option from the drop-down menu. The **Employee Portal** page is displayed.
3. Click the **Admin** card from the dashboard. The **People with Admin Rights** page is displayed.
4. Copy the ID from the address bar. The ID is displayed in the address bar as part of the URL. For example, **`0123`** in **`https://builtin.com/employer/company-admin?selectedCompanyId=0123`**
***
## Connect a business hub for Built In
To connect a business hub for Built In, you must complete the following main steps from the Cerby web app dashboard:
1. [Add a business hub and connect it to Built In](#id-1.-add-a-business-hub-and-connect-it-to-built-in)
2. [Check for updates to import users and roles to Cerby](#id-2.-check-for-updates-to-import-users-and-roles-to-cerby)
3. [Connect your Built In user account to the business hub](#id-3.-connect-your-built-in-user-account-to-the-business-hub)
4. [Manage unmatched users](#id-4.-manage-unmatched-users)
The following sections describe each main step.
### 1. Add a business hub and connect it to Built In
To add a business hub and connect it to Built In, you must complete the following steps:
1. Log in to your corresponding [Cerby](https://app.cerby.com/) workspace.
2. Select the **Business Hubs** option from the left menu. The **Business Hubs** page is displayed.
3. Click the **Connect Business Hub** button located at the top-right corner of the page. The **Connect your Business Hubs to Cerby** dialog box is displayed. **TIP:** Select the **Don’t show this again** option to skip this step the next time you connect a new business hub.
4. Click the **Get started** button. A wizard is displayed on the **Select app** page.
5. Select **Builtin Hub** from the catalog. The **Enter app details** page is displayed on the wizard.
6. Enter and select your app information in the corresponding fields:
* **Label in Cerby:** It is the name to assign to your business hub in Cerby, and it will be displayed on the business hub card.
* **Business ID:** It is the unique identifier of your business or organization in **Builtin Hub**. For instructions on how to find it, read the [Requirements](#requirements) section.
* **User management and login method:** It is the way your users log in to the app and determines whether they must save their login credentials as a Cerby account connected to the business hub. You must select one of the following methods:
* **Single sign-on (SSO):** Access is managed by your IdP, and users log in with SSO authentication. They are not asked to save their credentials in Cerby.
* **Username and password:** Cerby manages account security and access, and users log in with their credentials after saving them in Cerby.
7. Click the **Next** button. The **Select automation account** page is displayed with a list of existing Built In accounts.
8. Select the automation account you have previously added to Cerby, as described in the [Requirements](#requirements) section. **NOTE:** If you don’t have an automation account, you are prompted to add it. Make sure you read Cerby’s recommendations on how to configure it in the article [Create a service account for your business hub](/setup-and-admin/business-hubs/connecting-your-apps/create-a-service-account-for-your-business-hub). You may need to add the account first and then add the business hub.
9. Click the **Connect app** button. The wizard closes, and a success message box is displayed. The corresponding business hub is also displayed on the **Business Hubs** page.
The next step is [2. Check for updates to import users and roles to Cerby](#id-2.-check-for-updates-to-import-users-and-roles-to-cerby).
### 2. Check for updates to import users and roles to Cerby
To check for updates in your app to identify and import users and roles to Cerby, you must complete the following steps:
1. Select the **Business Hubs** option from the left menu. The **Business Hubs** page is displayed.
2. Click the **More options** (...) icon of the corresponding business hub card. A drop-down menu is displayed.
3. Select the **Settings** option from the menu. The business hub details page is displayed with the **Settings** tab activated.
4. Click the **Check for updates** button located at the top right of the page. A message box is displayed with information about the process. **NOTE:** The check and import process may take a few minutes depending on the number of users, and because Cerby automatically matches users to their corresponding Cerby user account.
5. Confirm that the automated task to check for updates has the “Completed” status by performing any of the following actions:
* Click the **More details** button from the message box.
* Select the **Automation** option from the left menu to open the **Automation** page with a list of automated tasks and their status.
{% hint style="info" %}
**NOTE:** Cerby automatically performs daily checks for updates for all business hubs, but you can trigger them manually, as described in this section. For more instructions, read the article [Sync your app users with your business hub](/setup-and-admin/business-hubs/managing-users-and-assets-via-a-business-hub/sync-your-business-hub-with-your-external-app).
{% endhint %}
The next step is [3. Connect your Built In user account to the business hub](#id-3.-connect-your-built-in-user-account-to-the-business-hub).
### 3. Connect your Built In user account to the business hub
To connect your Built In user account to the business hub so Cerby can manage and protect it, you must complete the following steps:
1. Select the **Accounts** option from the left menu. The **Accounts** page is displayed.
2. Click the **Log in** button of the corresponding Builtin Hub account card. The **Connect your Builtin Hub Account** dialog box is displayed.
3. Enter the login credentials of your **Built In** user account.
4. Click the **Connect account** button. The dialog box closes, and a success message box and a new account card are displayed.
The next step is [4. Manage unmatched users](#id-4.-manage-unmatched-users).
### 4. Manage unmatched users
During a check for updates, Cerby automatically matches app members to the Cerby user accounts that correspond to their email addresses, including existing [guest users](https://help.cerby.com/getting-started/concepts/user-management/guest-users) and [local partners](https://help.cerby.com/getting-started/concepts/user-management/partners#h-7e4add33a2). Manual matching is required when apps don't provide email addresses and for app members using personal or external accounts that couldn’t be identified or are not in the corporate directory.
To view the status of the imported app members, you must complete the following steps:
1. Select the **Business Hubs** option from the left menu. The **Business Hubs** page is displayed.
2. Click the **More options** (...) icon of the corresponding business hub card. A drop-down menu is displayed.
3. Select the **View Members** option from the menu. The business hub details page is displayed with the **Members** tab activated. App members are displayed in the following tabs of the **User Overview** section:
* **Unmatched users:** This tab displays the users who were not automatically matched.
* **Onboarded users:** This tab displays the users matched to their Cerby user account.
* **Guest users:** This tab displays the users who were matched to an existing Cerby user account but it doesn’t exist in the corporate directory, such as external collaborators.
For unmatched users, you can perform one of the following actions:
* [Match users](#match-users)
* [Remove unmatched users](#remove-unmatched-users)
* [Exempt unmatched users](#exempt-unmatched-users)
The following sections describe each action.
#### Match users
To match users, you must complete the following steps from the **Unmatched users** tab of the business hub details page:
1. Click the **Match user** button of the corresponding user. The **Match user** dialog box is displayed.
2. Enter the username or email address of the user you want to match and invite in the **Match with** field. The user is displayed on a list.
3. Select the user from the list.
4. Click the **Next** button. The **Select Cerby role** dialog box is displayed.
5. Select the role to assign to the user on the business hub **Cerby role** drop-down menu:
* **Owner:** This role enables sharing access and managing business hub settings in Cerby.
* **Collaborator:** This role enables only logging in to the app from Cerby.
6. Click the **Match user** button. The dialog box closes, and a success message box is displayed. The user is moved to the **Onboarded users** tab.
#### Remove unmatched users
To remove unmatched users, you must complete the following steps from the **Unmatched users** tab of the business hub details page:
{% hint style="danger" %}
**IMPORTANT:** When removing an unmatched user, Cerby performs an automated task to revoke the user’s seat and permissions in Built In.
{% endhint %}
1. Click the **More options** (...) icon of the corresponding user. A drop-down menu is displayed.
2. Select the **Remove user** option from the menu. The **Remove user?** dialog box is displayed.
3. Click the **Remove user** button. The dialog box closes, and a success message box is displayed. The user is removed from the app via an automated task.
#### Exempt unmatched users
Exempted users keep their user accounts or seats active in your app, but you cannot manage them through Cerby.
To exempt unmatched users, you must complete the following steps from the **Unmatched users** tab of the business hub details page:
1. Click the **More options** (...) icon of the corresponding user. A drop-down menu is displayed.
2. Select the **Exempt user** option from the menu. The exempt user dialog box is displayed.
3. Enter a reason for exempting the user in the **Provide a reason** field.
4. Click the **Exempt member** button. The dialog box closes, and a success message box is displayed. The user is moved to the **Exempted users** tab.
***
## Use your business hub
The following are the supported features of business hubs you can use:
* [Join the external app and set up your business hub access](https://help.cerby.com/cerby-web-app/business-hubs/join-your-external-app-and-set-up-your-business-hub-access)
* [Add users to your app via a business hub](/setup-and-admin/business-hubs/managing-users-and-assets-via-a-business-hub/add-users-and-teams-to-your-apps-via-a-business-hub)
* [Provision users to your apps via an IdP and business hub](/setup-and-admin/business-hubs/managing-users-and-assets-via-a-business-hub/provision-users-to-your-apps-via-an-idp-and-business-hub)
* [Remove users from your app via a business hub](/setup-and-admin/business-hubs/managing-users-and-assets-via-a-business-hub/remove-users-from-your-app-via-a-business-hub)
* [Remove teams from your app via a business hub](/setup-and-admin/business-hubs/managing-users-and-assets-via-a-business-hub/remove-teams-from-your-app-via-a-business-hub)
* [Deprovision users from your apps via an IdP and business hub](/setup-and-admin/business-hubs/managing-users-and-assets-via-a-business-hub/deprovision-users-from-your-apps-via-an-idp-and-business-hub)
* [Update user roles in your app via a business hub](/setup-and-admin/business-hubs/managing-users-and-assets-via-a-business-hub/update-user-roles-in-your-app-via-a-business-hub)
* [Update team member roles in your app via a business hub](/setup-and-admin/business-hubs/managing-users-and-assets-via-a-business-hub/update-team-member-roles-in-your-app-via-a-business-hub)
* [Update user roles in your apps via an IdP and business hub](/setup-and-admin/business-hubs/managing-users-and-assets-via-a-business-hub/update-user-roles-in-your-apps-via-an-idp-and-business-hub)
* [Sync your app users with your business hub](/setup-and-admin/business-hubs/managing-users-and-assets-via-a-business-hub/sync-your-business-hub-with-your-external-app)
* [Log in to your app via a business hub](https://help.cerby.com/cerby-web-app/business-hubs/log-in-to-your-app)
* [Track the activity of business hub users](/setup-and-admin/business-hubs/managing-users-and-assets-via-a-business-hub/track-activity-on-app-members-user-accounts)
* [Remove a business hub](/setup-and-admin/business-hubs/managing-your-business-hubs/remove-a-business-hub)
# Connect a business hub for BuyMe Business
This article describes how to connect a business hub to centrally manage the users of BuyMe Business from Cerby.
{% hint style="info" %}
**Who can use this feature?**
* Workspace **Owners**, **Super Admins**, **Admins**, and **Users**
* Only supported using the Cerby web app
{% endhint %}
As a user with any workspace role in Cerby, except **Guest User** and **Login-Only**, you can connect a business hub integration to centrally manage the users of BuyMe Business.
When you connect the business hub, you become its **Owner**, and you can perform the following user and access management tasks through automated tasks executed by the Cerby agent:
* Check for updates
* Add users
* Remove users
{% hint style="success" %}
**TIP:** For more details about the automated tasks of a business hub, how it works, and the supported apps, read the article [Explore Business Hubs](https://help.cerby.com/setup-and-admin/business-hubs/business-hub-catalog).
{% endhint %}
{% hint style="info" %}
**NOTE:** The automated task to update user roles is not available for this business hub because users can only be assigned the **Members** role in BuyMe Business.
{% endhint %}
{% hint style="danger" %}
**IMPORTANT:** BuyMe Business requires the following additional fields to create user accounts:
* **User's Birth Date**
* **User's Mobile Phone Number**
You must provide both values when adding users to your external app.
{% endhint %}
This article provides instructions on how to connect a business hub for BuyMe Business. For other app-specific articles and videos, review the [Connecting business hubs for your apps](https://help.cerby.com/setup-and-admin/business-hubs/connecting-your-apps) and [Connecting business hubs for your paid social apps](https://help.cerby.com/setup-and-admin/business-hubs/connecting-your-paid-social-apps) collections in the Cerby Help Center.
***
## Requirements
The following are the requirements to connect a business hub:
* A Cerby workspace
* A Cerby user account with the workspace **Owner**, **Super Admin**, **Admin**, or **User** role
* Groups configured in your identity provider (IdP) if you want to leverage automatic user provisioning and deprovisioning from your apps based on group assignment events. For more information, read the articles available in the [Managing users via an IdP and business hub](https://help.cerby.com/setup-and-admin/business-hubs/managing-users-and-assets-via-a-business-hub) collection in the Cerby Help Center
* An automation account, meaning an active user account with a native **Admin** role in BuyMe Business to be used as a service account. For instructions and recommendations on how to create and configure this account, read the article [Create a service account for your business hub](/setup-and-admin/business-hubs/connecting-your-apps/create-a-service-account-for-your-business-hub)
* The user management and login method for your business hub identified to select the corresponding option when connecting your app. For more information, read the **User management and login method** section of the article [Explore Business Hubs](https://help.cerby.com/setup-and-admin/business-hubs/business-hub-catalog)
* A Business unique identifier. You can find the ID in the address bar\*\*\*\* when you are logged in to BuyMe Business. The ID is displayed in the address bar as part of the URL, after the **systems** subfolder\*\*.\*\* For example, \*\*`/org_name#/activity/4/auto/12345` \*\*in **`https://buyme.co/systems/org_name#/activity/4/auto/12345`**. Just copy the value and paste it when connecting the business hub.
***
## Connect a business hub for BuyMe Business
To connect a business hub for BuyMe Business, you must complete the following main steps from the Cerby web app dashboard:
1. [Add a business hub and connect it to BuyMe Business](#id-1.-add-a-business-hub-and-connect-it-to-buyme-business)
2. [Check for updates to import users and roles to Cerby](#id-2.-check-for-updates-to-import-users-and-roles-to-cerby)
3. [Connect your BuyMe Business user account to the business hub](#id-3.-connect-your-buyme-business-user-account-to-the-business-hub)
4. [Manage unmatched users](#id-4.-manage-unmatched-users)
The following sections describe each main step.
### 1. Add a business hub and connect it to BuyMe Business
To add a business hub and connect it to BuyMe Business, you must complete the following steps:
1. Log in to your corresponding [Cerby](https://app.cerby.com/) workspace.
2. Select the **Business Hubs** option from the left menu. The **Business Hubs** page is displayed.
3. Click the **Connect Business Hub** button located at the top-right corner of the page. The **Connect your Business Hubs to Cerby** dialog box is displayed. **TIP:** Select the **Don’t show this again** option to skip this step the next time you connect a new business hub.
4. Click the **Get started** button. A wizard is displayed on the **Select app** page.
5. Select **BuyMe Business Hub** from the catalog. The **Enter app details** page is displayed on the wizard.
6. Enter and select your app information in the corresponding fields:
* **Label in Cerby:** It is the name to assign to your business hub in Cerby, and it will be displayed on the business hub card.
* **Business unique identifier:** It is the unique identifier of your business or organization in **BuyMe Business Hub**. For instructions on how to find it, read the [Requirements](#requirements) section.
* **User management and login method:** It is the way your users log in to the app and determines whether they must save their login credentials as a Cerby account connected to the business hub.
1. Select the **Single sign-on (SSO)** option because access must be managed by your IdP, and users log in with SSO authentication. They are not asked to save their credentials in Cerby.
**IMPORTANT:** BuyMe Business only supports Google SSO via Okta.
7. Click the **Next** button. The **Select automation account** page is displayed with a list of existing BuyMe Business accounts.
8. Select the automation account you have previously added to Cerby, as described in the [Requirements](#requirements) section. **NOTE:** If you don’t have an automation account, you are prompted to add it. Make sure you read Cerby’s recommendations on how to configure it in the article [Create a service account for your business hub](/setup-and-admin/business-hubs/connecting-your-apps/create-a-service-account-for-your-business-hub). You may need to add the account first and then add the business hub.
9. Click the **Connect app** button. The wizard closes, and a success message box is displayed. The corresponding business hub is also displayed on the **Business Hubs** page.
The next step is [2. Check for updates to import users and roles to Cerby](#id-2.-check-for-updates-to-import-users-and-roles-to-cerby).
### 2. Check for updates to import users and roles to Cerby
To check for updates in your app to identify and import users and roles to Cerby, you must complete the following steps:
1. Select the **Business Hubs** option from the left menu. The **Business Hubs** page is displayed.
2. Click the **More options** (...) icon of the corresponding business hub card. A drop-down menu is displayed.
3. Select the **Settings** option from the menu. The business hub details page is displayed with the **Settings** tab activated.
4. Click the **Check for updates** button located at the top right of the page. A message box is displayed with information about the process. **NOTE:** The check and import process may take a few minutes depending on the number of users, and because Cerby automatically matches users to their corresponding Cerby user account.
5. Confirm that the automated task to check for updates has the “Completed” status by performing any of the following actions:
* Click the **More details** button from the message box.
* Select the **Automation** option from the left menu to open the **Automation** page with a list of automated tasks and their status.
{% hint style="info" %}
**NOTE:** Cerby automatically performs daily checks for updates for all business hubs, but you can trigger them manually, as described in this section. For more instructions, read the article [Sync your app users with your business hub](/setup-and-admin/business-hubs/managing-users-and-assets-via-a-business-hub/sync-your-business-hub-with-your-external-app).
{% endhint %}
The next step is [3. Connect your BuyMe Business user account to the business hub](#id-3.-connect-your-buyme-business-user-account-to-the-business-hub).
### 3. Connect your BuyMe Business user account to the business hub
To connect your BuyMe Business user account to the business hub so Cerby can manage and protect it, you must complete the following steps:
1. Select the **Accounts** option from the left menu. The **Accounts** page is displayed.
2. Click the **Log in** button of the corresponding BuyMe Business Hub account card. The **Connect your BuyMe Business Hub Account** dialog box is displayed.
3. Enter the login credentials of your **BuyMe Business** user account.
4. Click the **Connect account** button. The dialog box closes, and a success message box and a new account card are displayed.
The next step is [4. Manage unmatched users](#id-4.-manage-unmatched-users).
### 4. Manage unmatched users
During a check for updates, Cerby automatically matches app members to the Cerby user accounts that correspond to their email addresses, including existing [guest users](https://help.cerby.com/getting-started/concepts/user-management/guest-users) and [local partners](https://help.cerby.com/getting-started/concepts/user-management/partners#h-7e4add33a2). Manual matching is required when apps don't provide email addresses and for app members using personal or external accounts that couldn’t be identified or are not in the corporate directory.
To view the status of the imported app members, you must complete the following steps:
1. Select the **Business Hubs** option from the left menu. The **Business Hubs** page is displayed.
2. Click the **More options** (...) icon of the corresponding business hub card. A drop-down menu is displayed.
3. Select the **View Members** option from the menu. The business hub details page is displayed with the **Members** tab activated. App members are displayed in the following tabs of the **User Overview** section:
* **Unmatched users:** This tab displays the users who were not automatically matched.
* **Onboarded users:** This tab displays the users matched to their Cerby user account.
* **Guest users:** This tab displays the users who were matched to an existing Cerby user account but it doesn’t exist in the corporate directory, such as external collaborators.
For unmatched users, you can perform one of the following actions:
* [Match users](#match-users)
* [Remove unmatched users](#remove-unmatched-users)
* [Exempt unmatched users](#exempt-unmatched-users)
The following sections describe each action.
#### Match users
To match users, you must complete the following steps from the **Unmatched users** tab of the business hub details page:
1. Click the **Match user** button of the corresponding user. The **Match user** dialog box is displayed.
2. Enter the username or email address of the user you want to match and invite in the **Match with** field. The user is displayed on a list.
3. Select the user from the list.
4. Click the **Next** button. The **Select Cerby role** dialog box is displayed.
5. Select the role to assign to the user on the business hub **Cerby role** drop-down menu:
* **Owner:** This role enables sharing access and managing business hub settings in Cerby.
* **Collaborator:** This role enables only logging in to the app from Cerby.
6. Click the **Match user** button. The dialog box closes, and a success message box is displayed. The user is moved to the **Onboarded users** tab.
#### Remove unmatched users
To remove unmatched users, you must complete the following steps from the **Unmatched users** tab of the business hub details page:
{% hint style="danger" %}
**IMPORTANT:** When removing an unmatched user, Cerby performs an automated task to revoke the user’s seat and permissions in BuyMe Business.
{% endhint %}
1. Click the **More options** (...) icon of the corresponding user. A drop-down menu is displayed.
2. Select the **Remove user** option from the menu. The **Remove user?** dialog box is displayed.
3. Click the **Remove user** button. The dialog box closes, and a success message box is displayed. The user is removed from the app via an automated task.
#### Exempt unmatched users
Exempted users keep their user accounts or seats active in your app, but you cannot manage them through Cerby.
To exempt unmatched users, you must complete the following steps from the **Unmatched users** tab of the business hub details page:
1. Click the **More options** (...) icon of the corresponding user. A drop-down menu is displayed.
2. Select the **Exempt user** option from the menu. The exempt user dialog box is displayed.
3. Enter a reason for exempting the user in the **Provide a reason** field.
4. Click the **Exempt member** button. The dialog box closes, and a success message box is displayed. The user is moved to the **Exempted users** tab.
***
## Use your business hub
The following are the supported features of business hubs you can use:
* [Join the external app and set up your business hub access](https://help.cerby.com/cerby-web-app/business-hubs/join-your-external-app-and-set-up-your-business-hub-access)
* [Add users to your app via a business hub](/setup-and-admin/business-hubs/managing-users-and-assets-via-a-business-hub/add-users-and-teams-to-your-apps-via-a-business-hub)
* [Provision users to your apps via an IdP and business hub](/setup-and-admin/business-hubs/managing-users-and-assets-via-a-business-hub/provision-users-to-your-apps-via-an-idp-and-business-hub)
* [Remove users from your app via a business hub](/setup-and-admin/business-hubs/managing-users-and-assets-via-a-business-hub/remove-users-from-your-app-via-a-business-hub)
* [Remove teams from your app via a business hub](/setup-and-admin/business-hubs/managing-users-and-assets-via-a-business-hub/remove-teams-from-your-app-via-a-business-hub)
* [Deprovision users from your apps via an IdP and business hub](/setup-and-admin/business-hubs/managing-users-and-assets-via-a-business-hub/deprovision-users-from-your-apps-via-an-idp-and-business-hub)
* [Sync your app users with your business hub](/setup-and-admin/business-hubs/managing-users-and-assets-via-a-business-hub/sync-your-business-hub-with-your-external-app)
* [Log in to your app via a business hub](https://help.cerby.com/cerby-web-app/business-hubs/log-in-to-your-app)
* [Track the activity of business hub users](/setup-and-admin/business-hubs/managing-users-and-assets-via-a-business-hub/track-activity-on-app-members-user-accounts)
* [Remove a business hub](/setup-and-admin/business-hubs/managing-your-business-hubs/remove-a-business-hub)
# Connect a business hub for BuzzSumo
This article describes how to connect a business hub to centrally manage the users of BuzzSumo from Cerby.
{% hint style="info" %}
**Who can use this feature?**
* Workspace **Owners**, **Super Admins**, **Admins**, and **Users**
* Only supported using the Cerby web app
{% endhint %}
As a user with any workspace role in Cerby, except **Guest User** and **Login-Only**, you can connect a business hub integration to centrally manage the users of BuzzSumo.
When you connect the business hub, you become its **Owner**, and you can perform the following user and access management tasks through automated tasks executed by the Cerby agent:
* Check for updates
* Invite app members
* Update app members’ roles
* Remove app members
{% hint style="success" %}
**TIP:** For more details about the automated tasks of a business hub, how it works, and the supported apps, read the article [Explore Apps](https://help.cerby.com/setup-and-admin/business-hubs/business-hub-catalog).
{% endhint %}
This article provides instructions on how to connect a business hub for BuzzSumo. For other app-specific articles and videos, review the [Connecting your business hubs](https://help.cerby.com/setup-and-admin/business-hubs/connecting-your-apps) collection in the Cerby Help Center.
***
## Requirements
The following are the requirements to connect a business hub:
* A Cerby workspace
* A Cerby user account with the **Owner**, **Super Admin**, **Admin**, or **User** role
* Groups configured in your identity provider (IdP) if you want to leverage automatic user provisioning and deprovisioning from your apps based on group assignment events. For more information, read the article [Provision users to your apps via an IdP and business hub](https://help.cerby.com/setup-and-admin/business-hubs/managing-users-and-assets-via-a-business-hub/provision-users-to-your-apps-via-an-idp-and-business-hub)
* An automation account, meaning an active user account with a native **Full user** role in BuzzSumo to be used as a service account. For instructions and recommendations on how to create and configure this account, read the article [Create a service account for your business hub](https://help.cerby.com/setup-and-admin/business-hubs/connecting-your-apps/create-a-service-account-for-your-business-hub)
***
## Connect a business hub for BuzzSumo
To connect a business hub for BuzzSumo, you must complete the following main steps from the Cerby web app dashboard:
1. [Add a business hub and connect it to BuzzSumo](#id-1.-add-a-business-hub-and-connect-it-to-buzzsumo)
2. [Check for updates to import users and roles to Cerby](#id-2.-check-for-updates-to-import-users-and-roles-to-cerby)
3. [Connect your BuzzSumo user account to the business hub](#id-3.-connect-your-buzzsumo-user-account-to-the-business-hub)
4. [Manage unmatched users](#id-4.-manage-unmatched-users)
The following sections describe each main step.
### 1. Add a business hub and connect it to BuzzSumo
To add a business hub and connect it to BuzzSumo, you must complete the following steps:
1. Log in to your corresponding [Cerby](https://app.cerby.com/) workspace.
2. Select the **Business Hubs** option from the left navigation drawer. The **Business Hubs** page is displayed.
3. Click the **Connect Business Hub** button located at the top-right corner of the page. The **Connect your Business Hubs to Cerby** dialog box is displayed. **TIP:** Select the **Don’t show this again** option to skip this step the next time you connect a new business hub.
4. Click the **Get started** button. A wizard is displayed on the **Select app** page.
5. Select **BuzzSumo Hub** from the catalog. The **Enter app details** page is displayed on the wizard.
6. Enter and select your app information in the corresponding fields:
* **Label in Cerby:** It is the name to assign to your business hub in Cerby, and it will be displayed on the business hub card.
* **Business unique identifier:** It is a unique identifier that differentiates your business hub in Cerby from others for the same app. You can assign an alphanumeric value between 3 and 30 characters without symbols or special characters.
* **User management and login method:** It is the way your users log in to the app and determines whether they must save their login credentials as a Cerby account connected to the business hub. You must select one of the following methods:
* **Username and password:** Cerby manages account security and access, and users log in with their credentials after saving them in Cerby.
{% hint style="warning" %}
**IMPORTANT:** The **Single sign-on (SSO)** option is not supported by BuzzSumo.
{% endhint %}
7. Click the **Next** button. The **Select automation account** page is displayed with a list of existing BuzzSumo accounts.
8. Select the automation account you have previously added to Cerby, as described in the [Requirements](#requirements) section. **NOTE:** If you don’t have an automation account, you are prompted to add it. Make sure you read Cerby’s recommendations on how to configure it in the article [Create a service account for your business hub](https://help.cerby.com/setup-and-admin/business-hubs/connecting-your-apps/create-a-service-account-for-your-business-hub). You may need to add the account first and then add the business hub.
9. Click the **Connect app** button. The wizard closes, and a success message box is displayed. The corresponding business hub is also displayed on the **Business Hubs** page
The next step is [2. Check for updates to import users and roles to Cerby](#id-2.-check-for-updates-to-import-users-and-roles-to-cerby).
### 2. Check for updates to import users and roles to Cerby
To check for updates in your app to identify and import users and roles to Cerby, you must complete the following steps:
1. Select the **Business Hubs** option from the left navigation drawer. The **Business Hubs** page is displayed.
2. Click the **Settings** () icon of the corresponding business hub card. The business hub details page is displayed with the **Settings** tab activated.
3. Click the **Check for updates** button located at the top right of the page. A message box is displayed with information about the process. **NOTE:** The check and import process may take a few minutes depending on the number of users, and because Cerby automatically matches users to their corresponding Cerby user account.
4. Confirm that the automated task to check for updates has the “Completed” status by performing any of the following actions:
* Click the **More details** button from the message box.
* Select the **Automation** option from the left navigation drawer to open the **Automation** page with a list of automated tasks and their status.
{% hint style="info" %}
**NOTE:** Cerby automatically performs daily checks for updates for all business hubs, but you can trigger them manually, as described in this section. When a user is deprovisioned from an IdP and a check for updates is performed, Cerby generates a report and sends business hub **Owners** an email to confirm their removal from the app. For more instructions, read the article [Check for updates in your app and apply report](/setup-and-admin/business-hubs/managing-users-and-assets-via-a-business-hub/sync-your-business-hub-with-your-external-app).
{% endhint %}
The next step is [3. Connect your BuzzSumo user account to the business hub](#id-3.-connect-your-buzzsumo-user-account-to-the-business-hub).
### 3. Connect your BuzzSumo user account to the business hub
To connect your BuzzSumo user account to the business hub so Cerby can manage and protect it, you must complete the following steps:
1. Select the **Accounts** option from the left navigation drawer. The **Accounts** page is displayed.
2. Click the **Log in** button of the corresponding BuzzSumo Hub account card. The **Connect your BuzzSumo Hub Account** dialog box is displayed.
3. Enter the login credentials of your **BuzzSumo** user account.
4. Click the **Connect account** button. The dialog box closes, and a success message box and a new account card are displayed.
The next step is [4. Manage unmatched users](#id-4.-manage-unmatched-users).
### 4. Manage unmatched users
During a check for updates, Cerby automatically matches app members to the Cerby user accounts that correspond to their email addresses, including existing [guest users](https://help.cerby.com/getting-started/concepts/user-management/guest-users) and [local partners](https://help.cerby.com/getting-started/concepts/user-management/partners#h-7e4add33a2). Manual matching is required when apps don't provide email addresses and for app members using personal or external accounts that couldn’t be identified or are not in the corporate directory.
To view the status of the imported app members, you must complete the following steps:
1. Select the **Business Hubs** option from the left navigation drawer. The **Business Hubs** page is displayed.
2. Click the **More options** (...) icon of the corresponding business hub card. A drop-down list is displayed.
3. Select the **View Members** option from the list. The business hub details page is displayed with the **Members** tab activated. App members are displayed in the following tabs of the **User Overview** section:
* **Unmatched users:** This tab displays the users who were not automatically matched.
* **Onboarded users:** This tab displays the users matched to their Cerby user account.
* **Guest users:** This tab displays the users who were matched to an existing Cerby user account but it doesn’t exist in the corporate directory, such as external collaborators.
For unmatched users, you can perform one of the following actions:
* [Match users](#match-users)
* [Remove unmatched users](#remove-unmatched-users)
* [Exempt unmatched users](#exempt-unmatched-users)
The following sections describe each action.
#### Match users
To match users, you must complete the following steps from the **Unmatched users** tab of the business hub details page:
1. Click the **Match user** button of the corresponding user. The **Match user** dialog box is displayed.
2. Enter the username or email address of the user you want to match and invite in the **Match with** field. The user is displayed on a list.
3. Select the user from the list.
4. Click the **Next** button. The **Select Cerby role** dialog box is displayed.
5. Select the role to assign to the user on the business hub **Cerby role** drop-down list:
* **Owner:** This role enables sharing access and managing business hub settings in Cerby.
* **Collaborator:** This role enables only logging in to the app from Cerby.
6. Click the **Match user** button. The dialog box closes, and a success message box is displayed. The user is moved to the **Onboarded users** tab.
#### Remove unmatched users
To remove unmatched users, you must complete the following steps from the **Unmatched users** tab of the business hub details page:
{% hint style="danger" %}
**IMPORTANT:** When removing an unmatched user, Cerby performs an automated task to revoke the user’s seat and permissions in BuzzSumo.
{% endhint %}
1. Click the **More options** (...) icon of the corresponding user. A drop-down list is displayed.
2. Select the **Remove user** option from the list. The **Remove user?** dialog box is displayed.
3. Click the **Remove user** button. The dialog box closes, and a success message box is displayed. The user is removed from the app via an automated task.
#### Exempt unmatched users
Exempted users keep their user accounts or seats active in your app, but you cannot manage them through Cerby.
To exempt unmatched users, you must complete the following steps from the **Unmatched users** tab of the business hub details page:
1. Click the **More options** (...) icon of the corresponding user. A drop-down list is displayed.
2. Select the **Exempt user** option from the list. The exempt user dialog box is displayed.
3. Enter a reason for exempting the user in the **Provide a reason** field.
4. Click the **Exempt member** button. The dialog box closes, and a success message box is displayed. The user is moved to the **Exempted users** tab.
***
## Use your business hub
The following are the supported features of business hubs you can use:
* [Join the App and connect it to Cerby](https://help.cerby.com/cerby-web-app/business-hubs/join-your-external-app-and-set-up-your-business-hub-access)
* [Invite new app members](/setup-and-admin/business-hubs/managing-users-and-assets-via-a-business-hub/add-users-and-teams-to-your-apps-via-a-business-hub)
* [Remove app members](/setup-and-admin/business-hubs/managing-users-and-assets-via-a-business-hub/remove-users-from-your-app-via-a-business-hub)
* [Provision users to your apps via an IdP and business hub](https://help.cerby.com/setup-and-admin/business-hubs/managing-users-and-assets-via-a-business-hub/provision-users-to-your-apps-via-an-idp-and-business-hub)
* [Update the app members’ roles](/setup-and-admin/business-hubs/managing-users-and-assets-via-a-business-hub/update-user-roles-in-your-app-via-a-business-hub)
* [Check for updates in your app and apply report](/setup-and-admin/business-hubs/managing-users-and-assets-via-a-business-hub/sync-your-business-hub-with-your-external-app)
* [Re-assign the app members’ user accounts](https://github.com/cerbyinc/help-center/tree/main/.uncategorized/unpublished-deprecated-re-assign-the-app-members-user-accounts.md)
* [Manage the security of app members’ user accounts](/setup-and-admin/business-hubs/managing-users-and-assets-via-a-business-hub/protect-your-app-user-accounts-via-a-business-hub)
* [Log in to your app](https://help.cerby.com/cerby-web-app/business-hubs/log-in-to-your-app)
* [Track activity on app members’ user accounts](/setup-and-admin/business-hubs/managing-users-and-assets-via-a-business-hub/track-activity-on-app-members-user-accounts)
* [Remove an App](/setup-and-admin/business-hubs/managing-your-business-hubs/remove-a-business-hub)
---
[Next Page](/llms-full.txt/1)
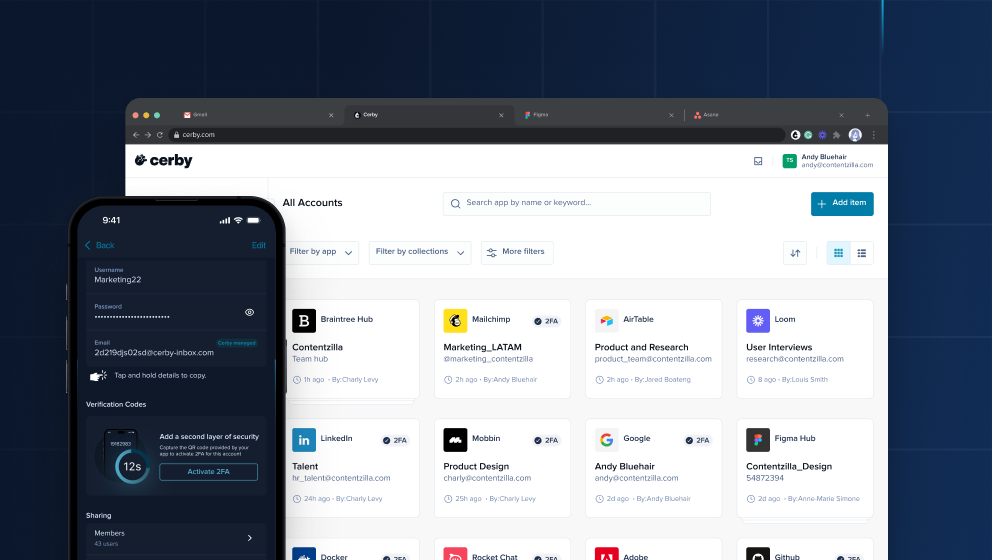
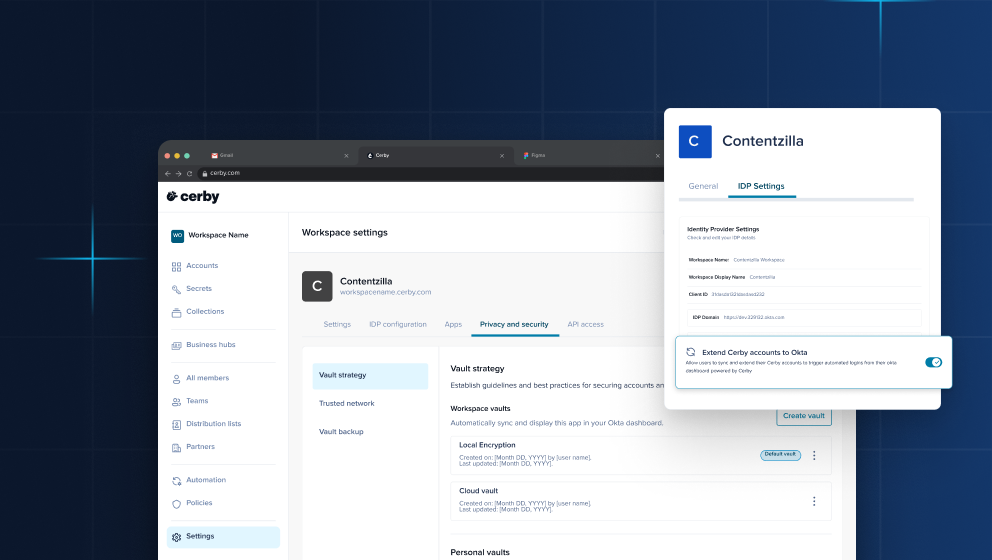
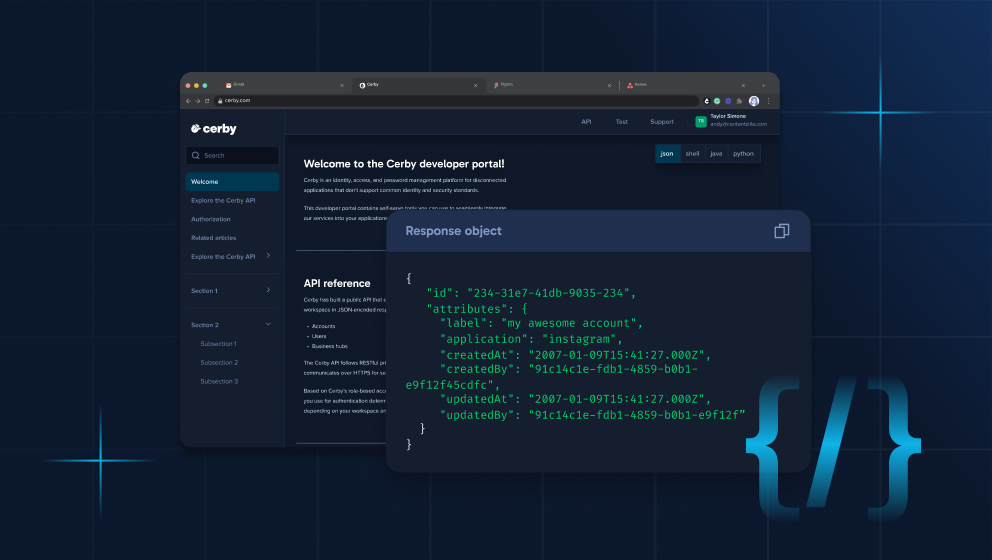
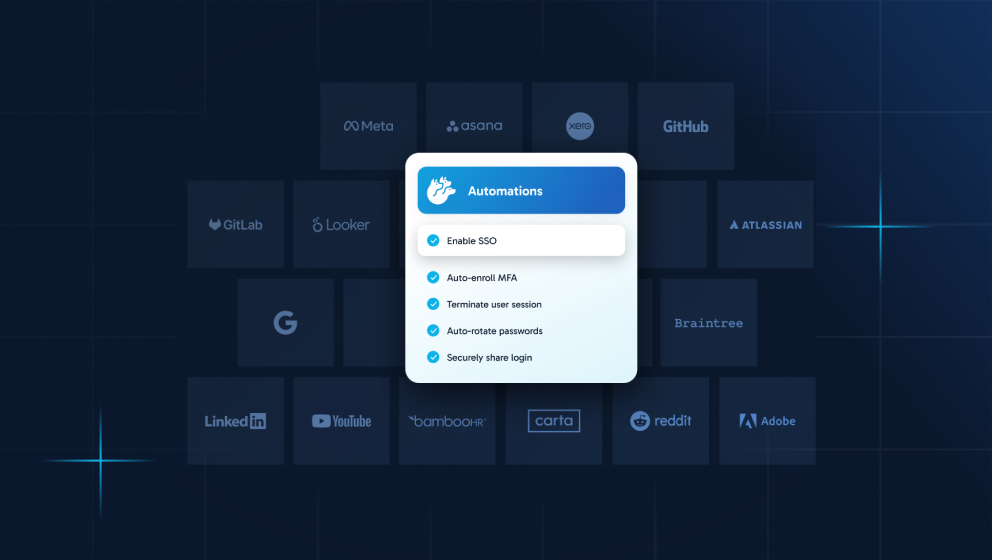
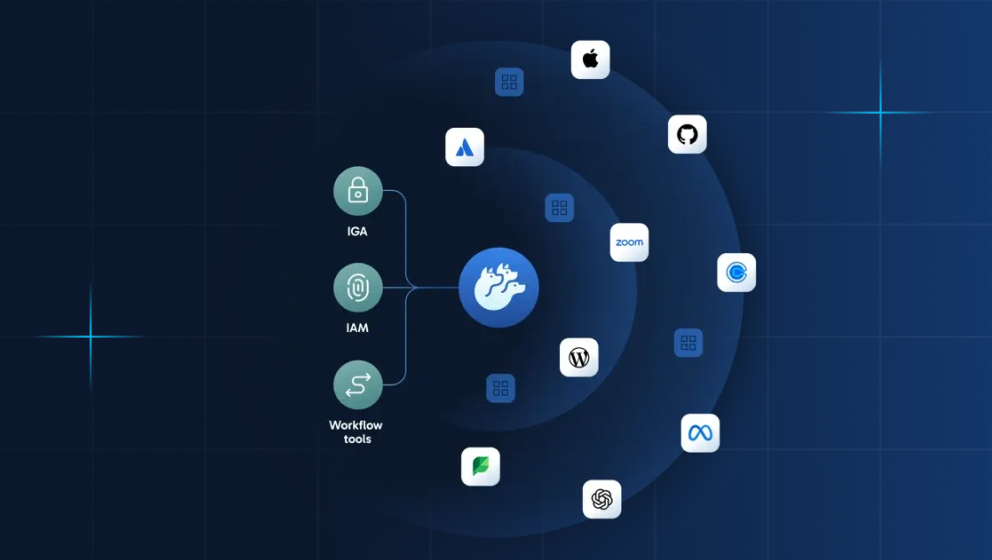
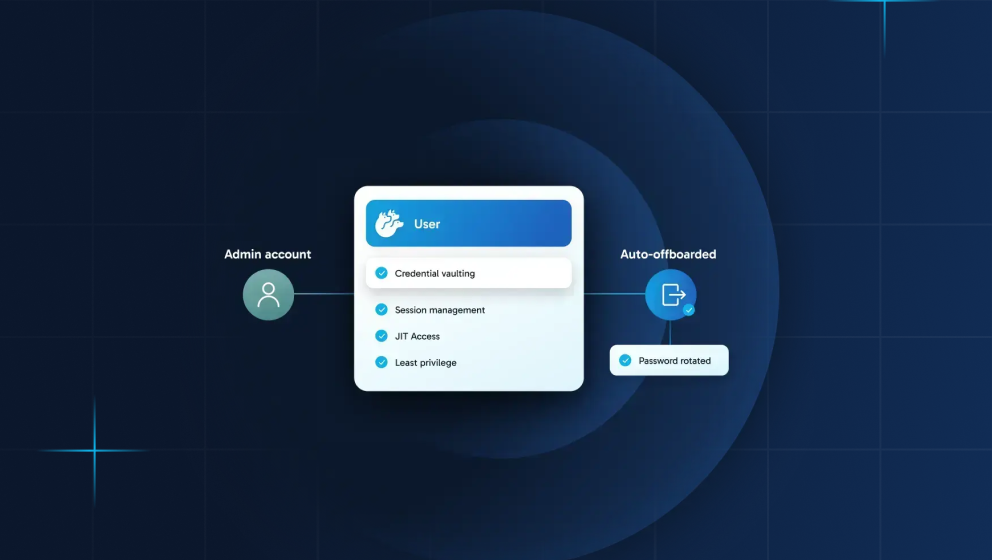
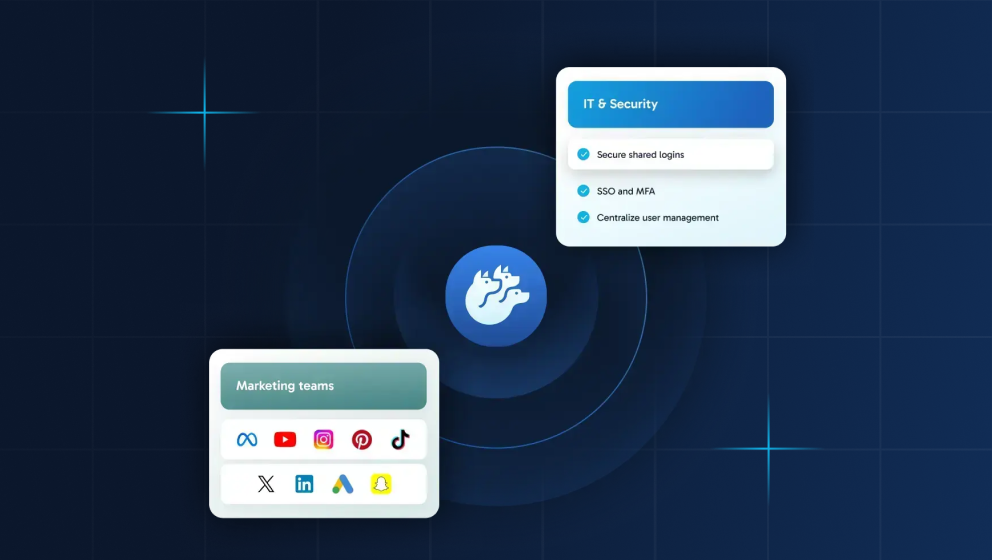


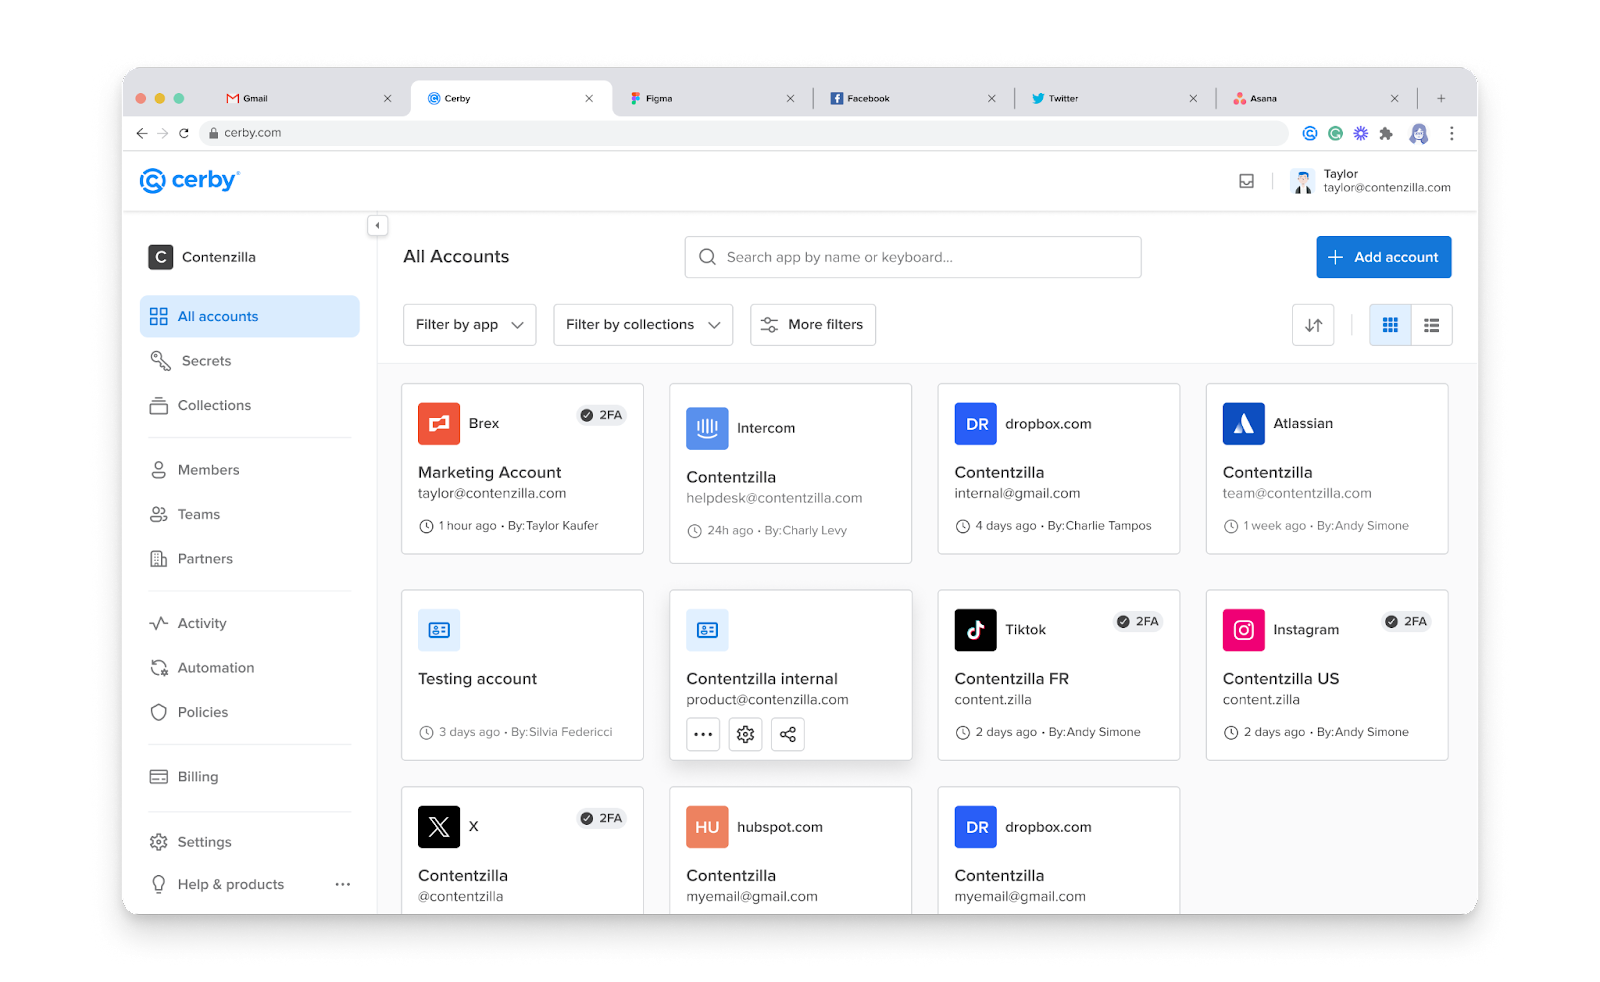
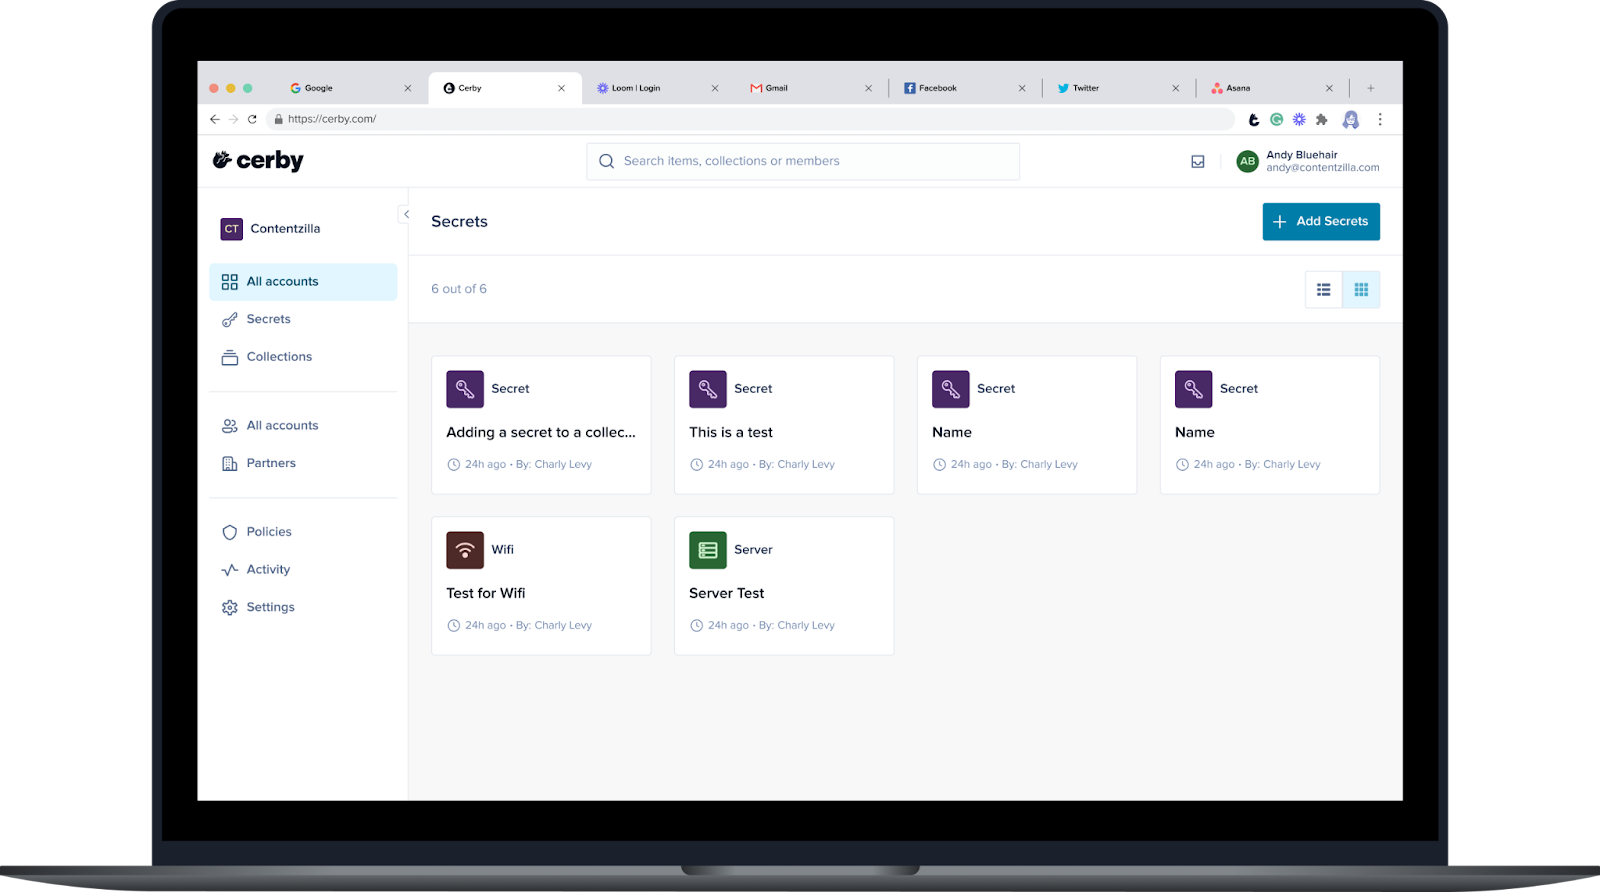
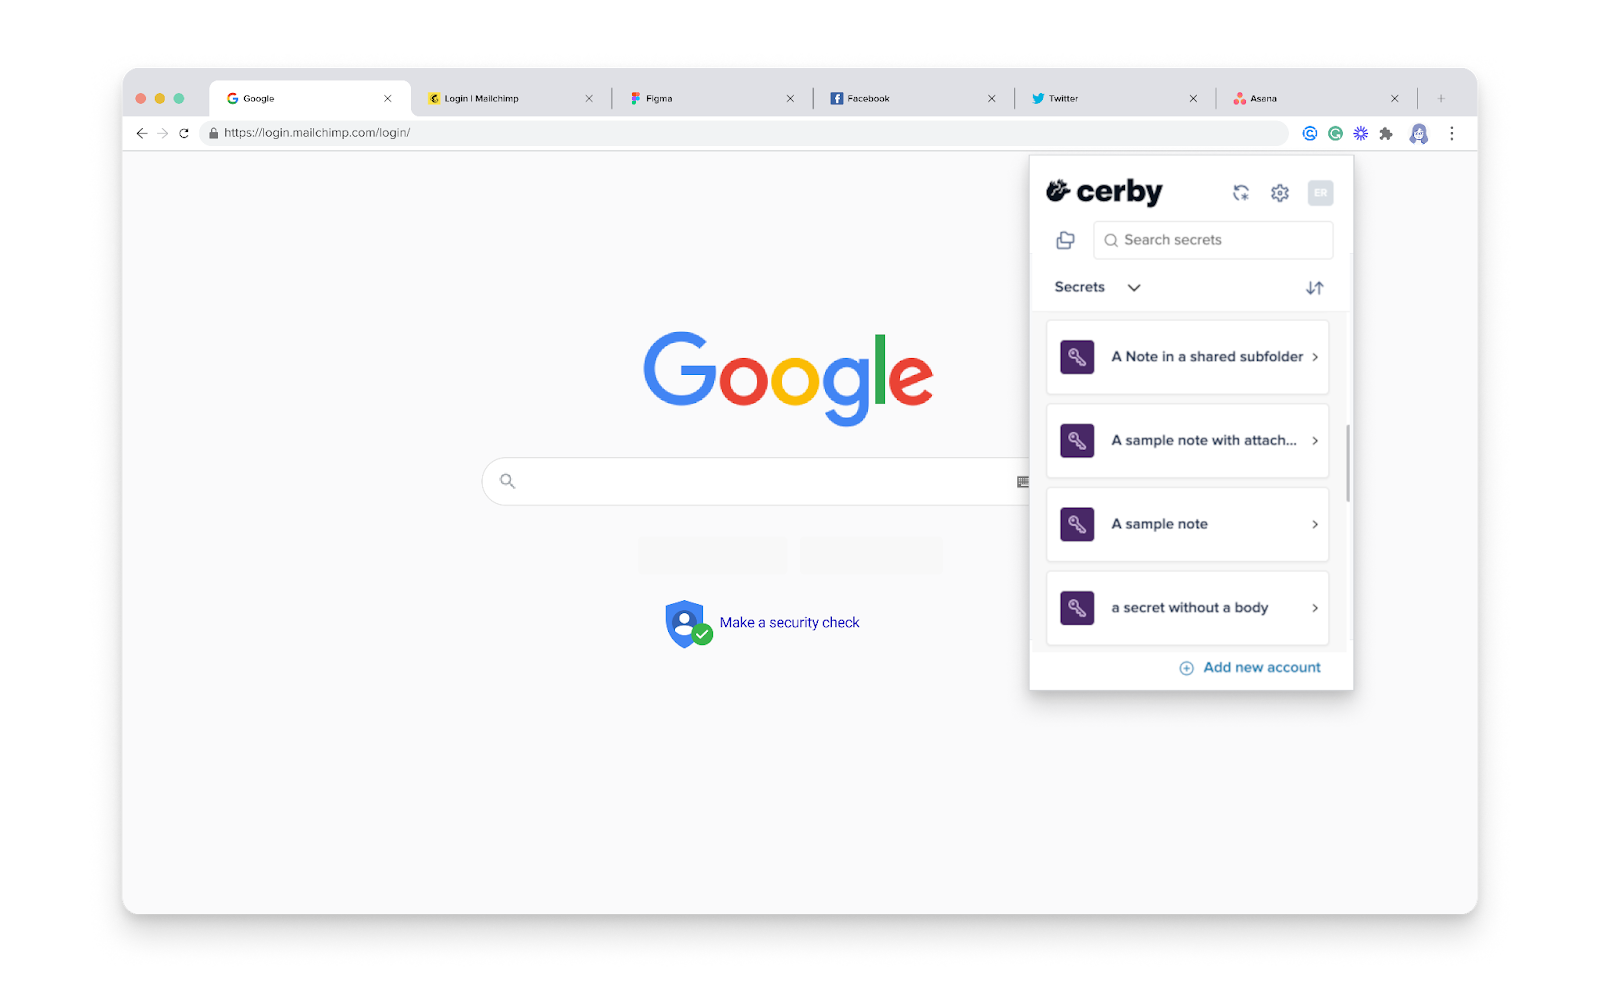
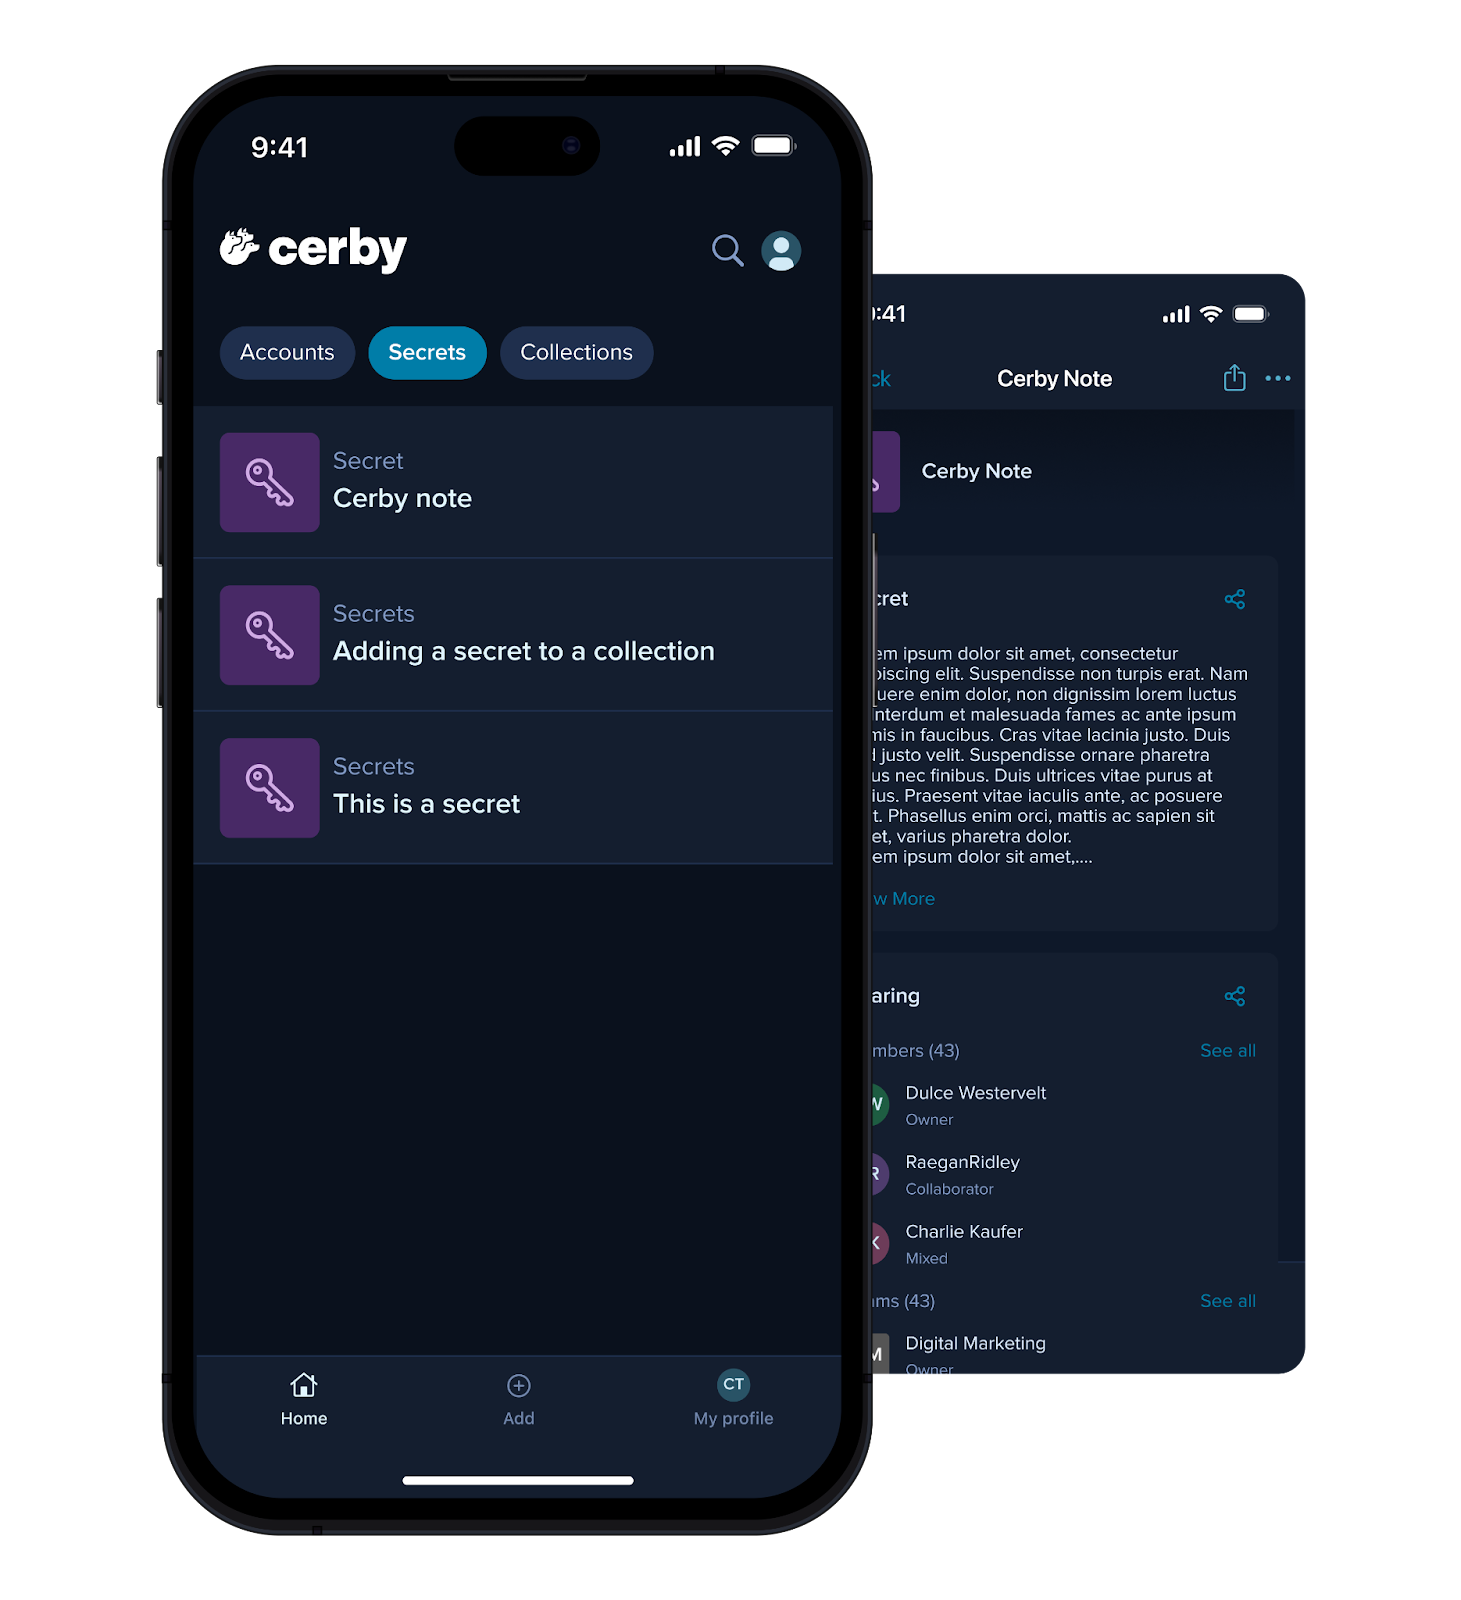
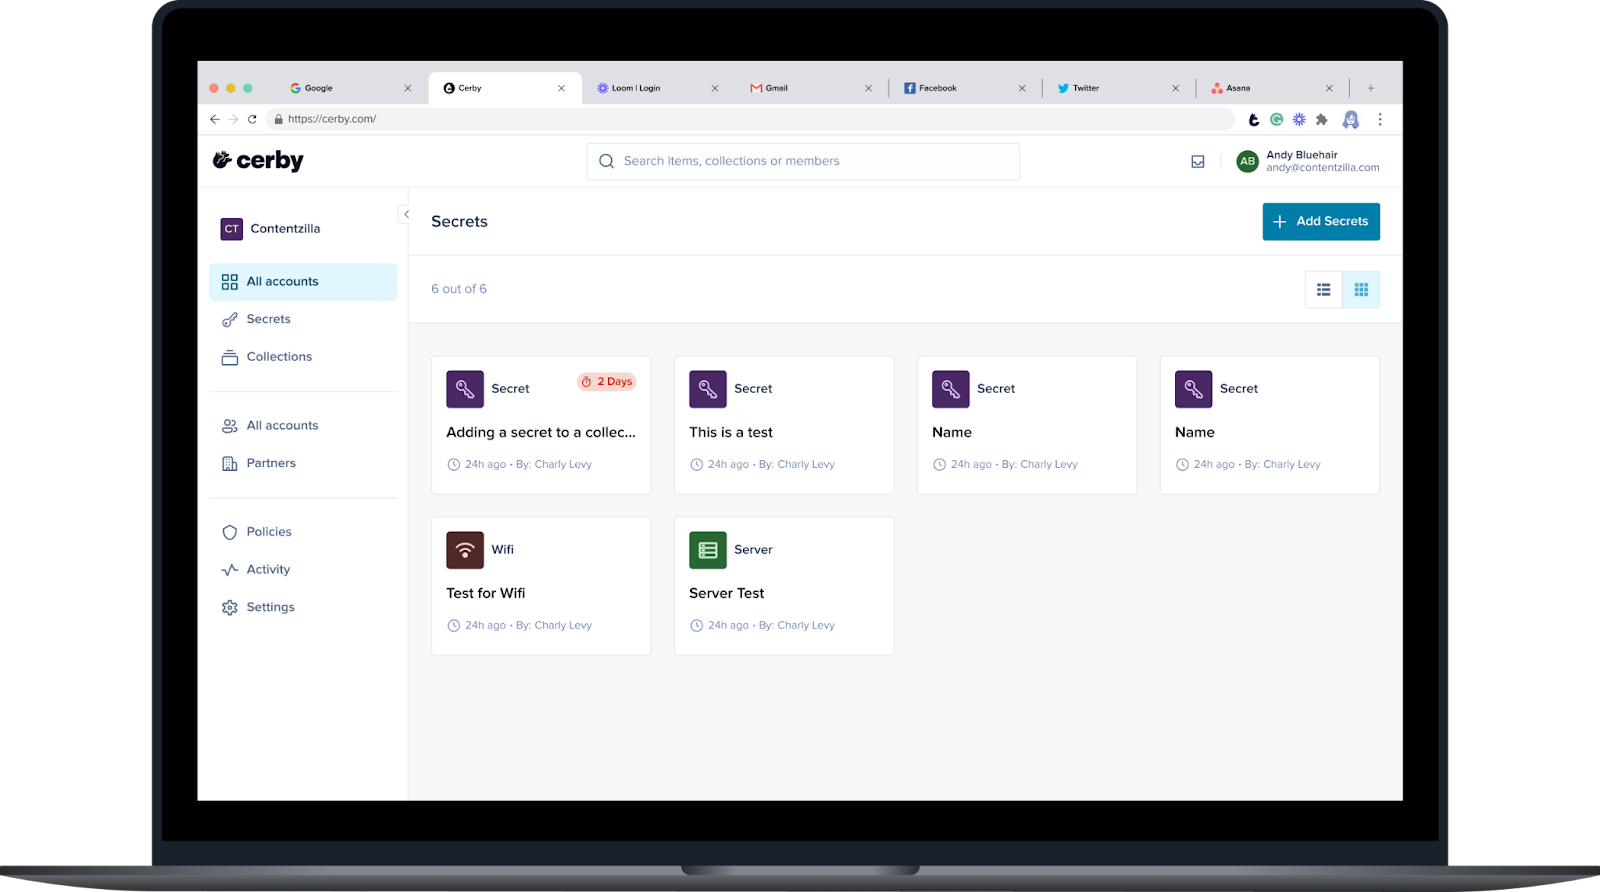
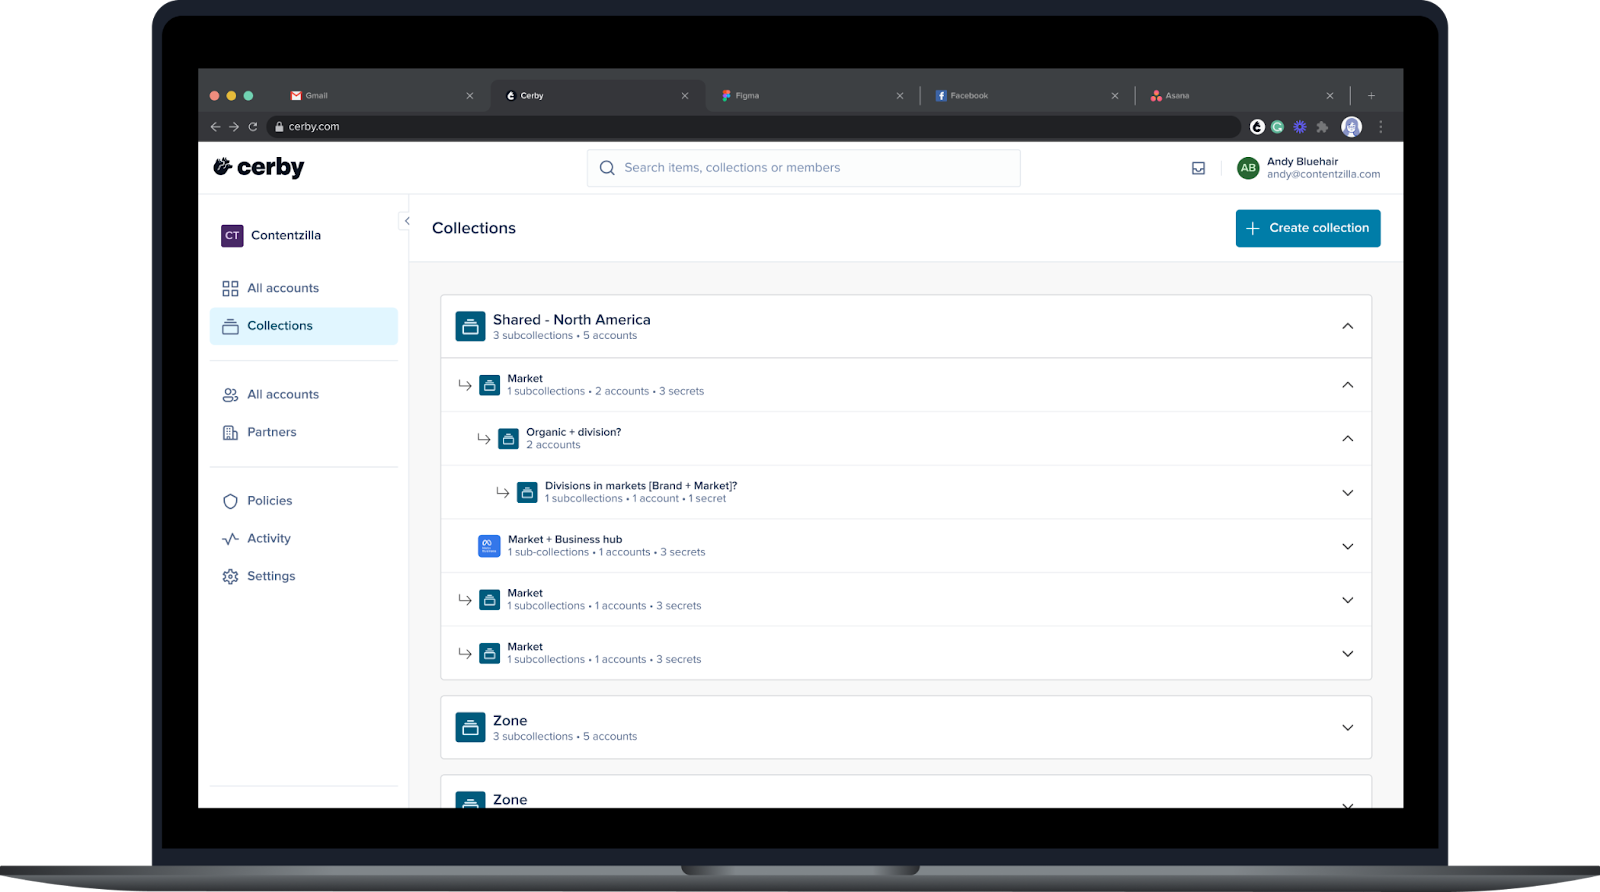
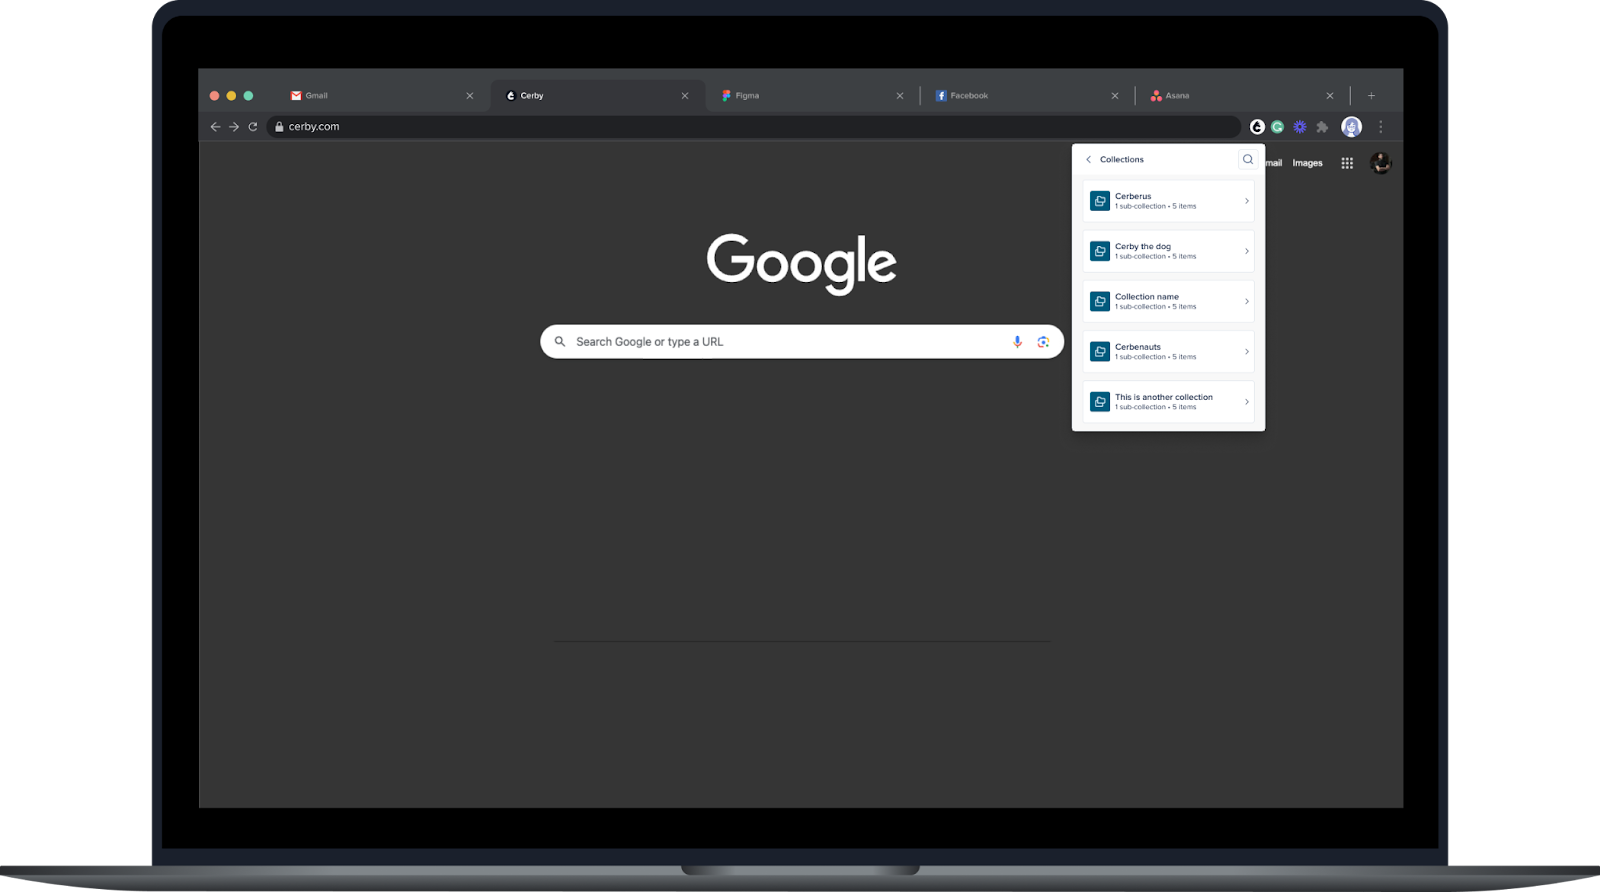
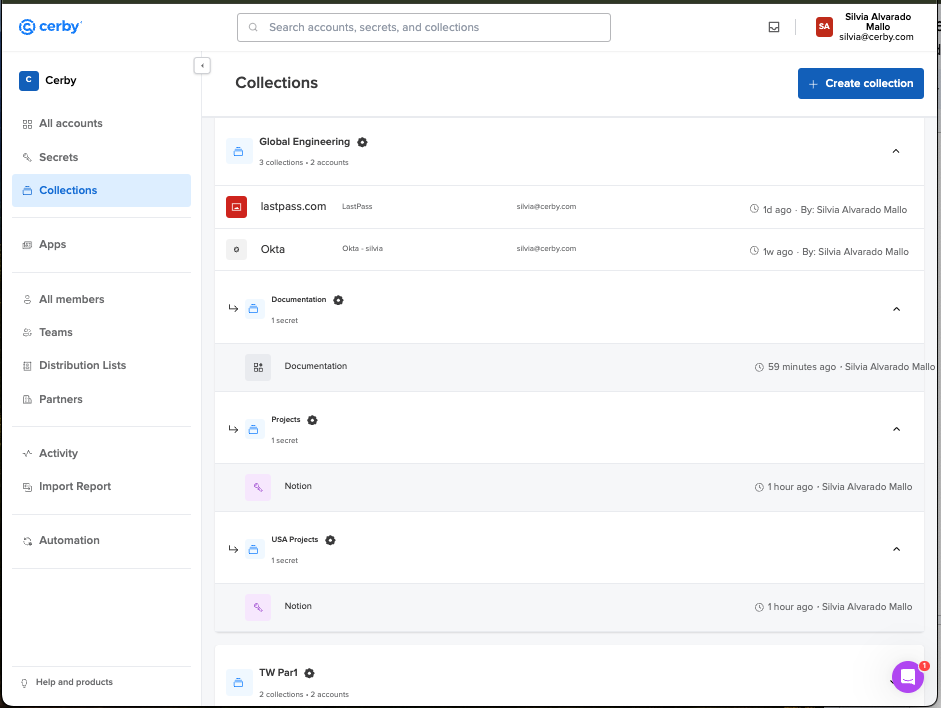
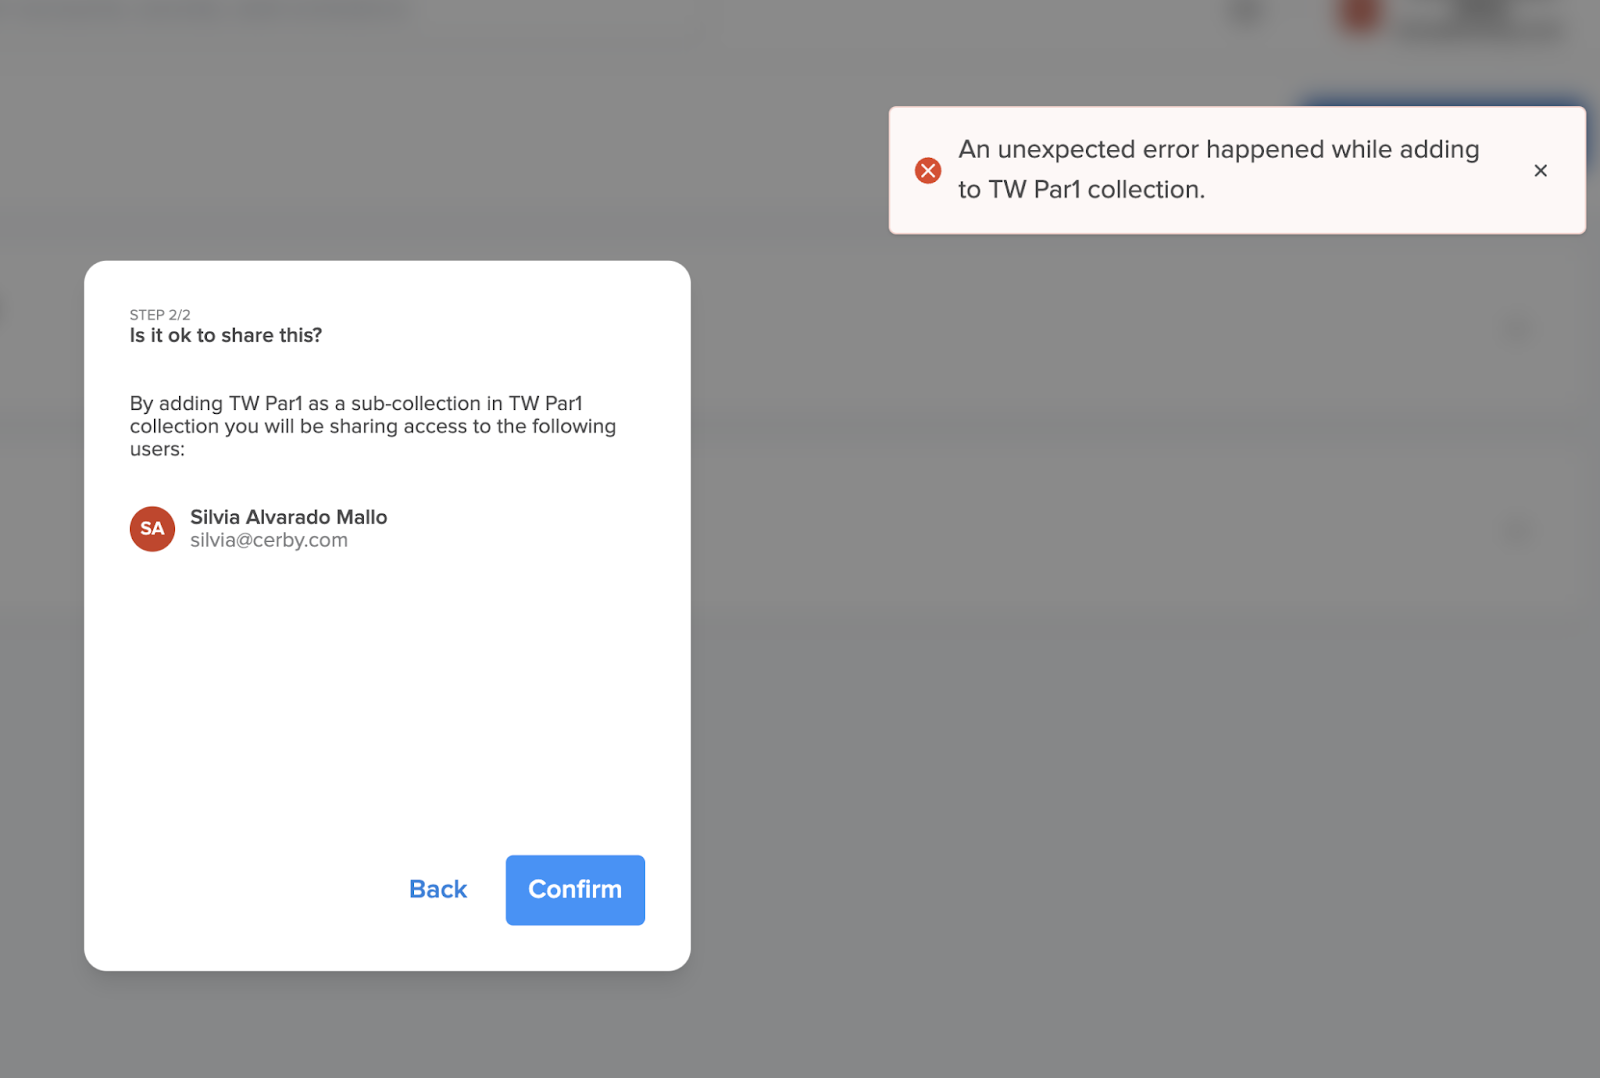
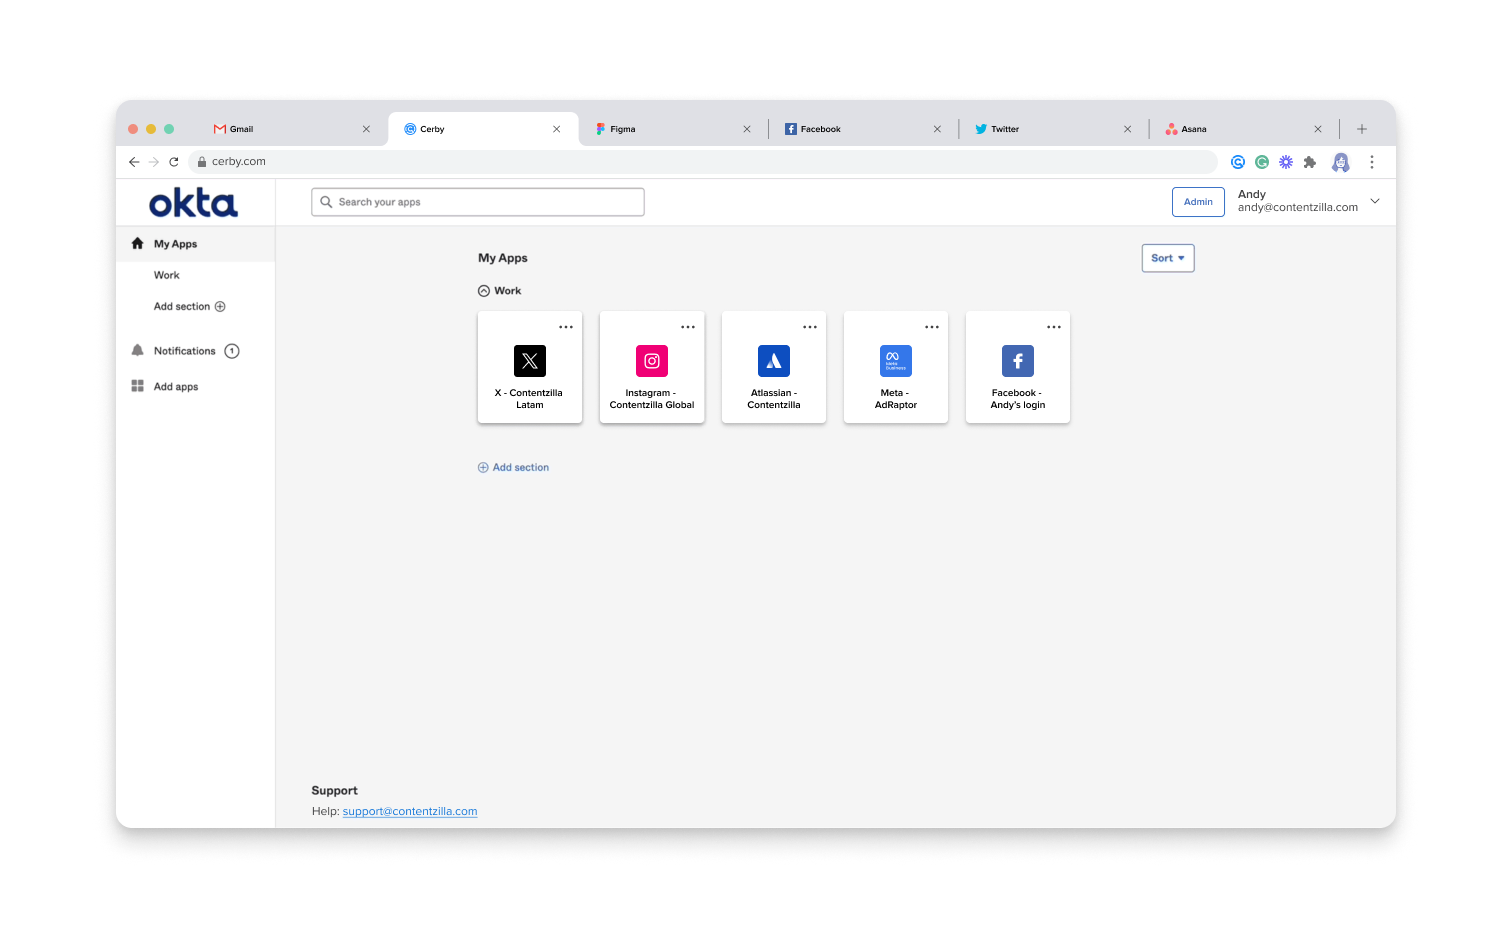
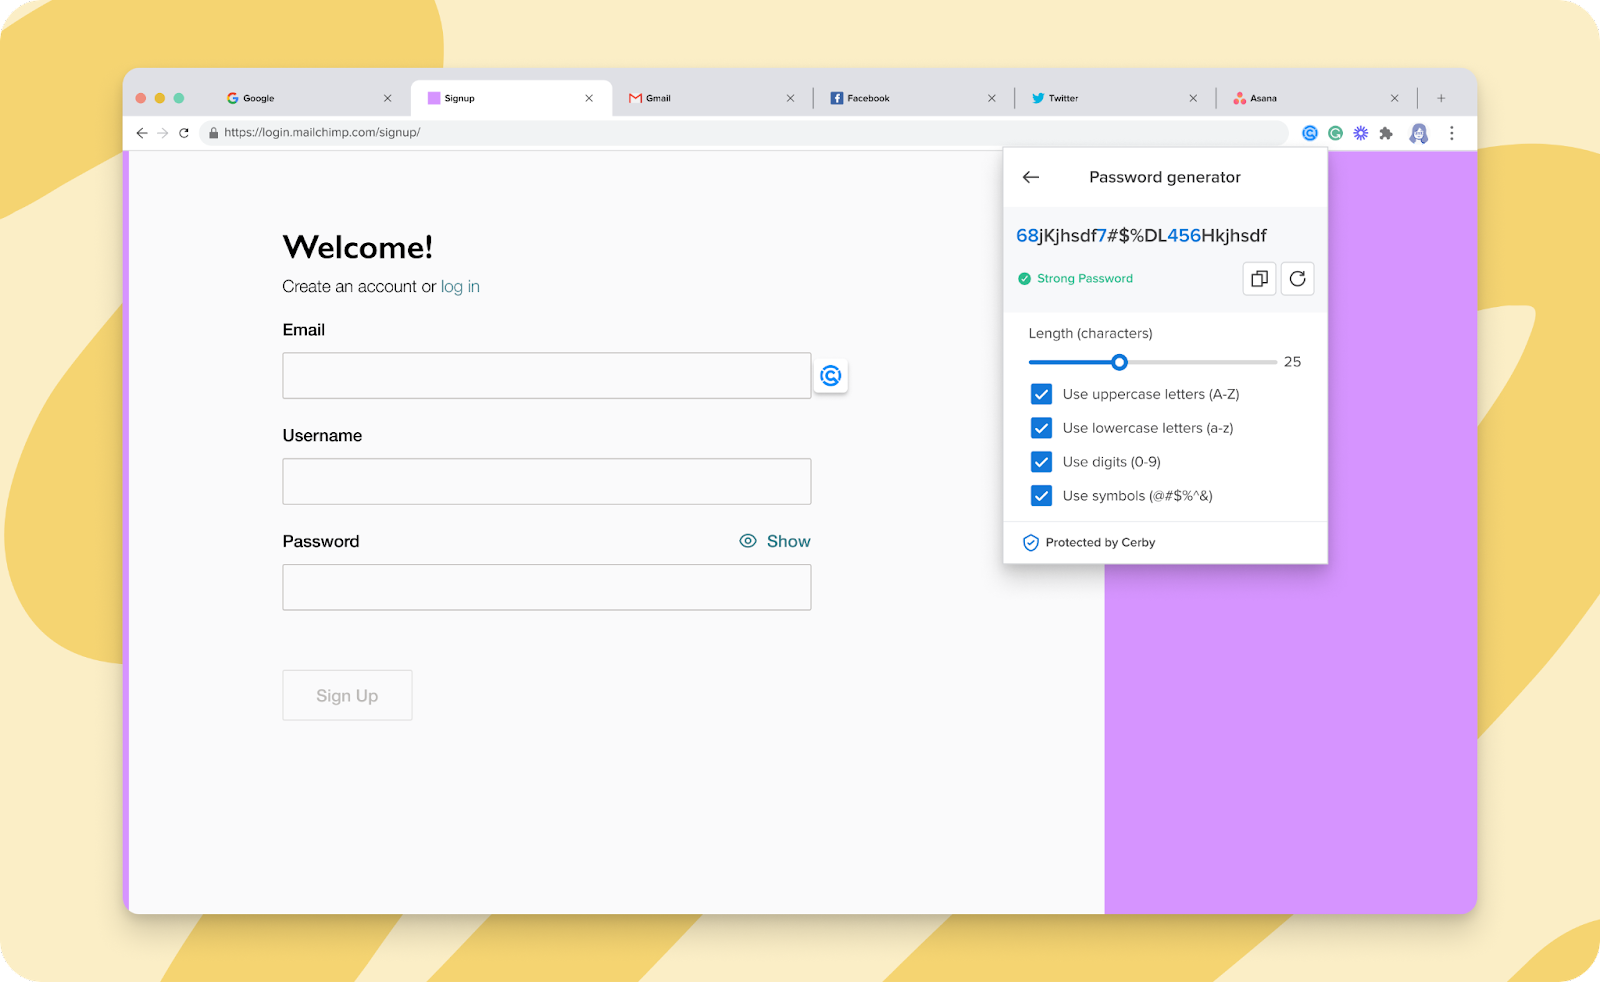
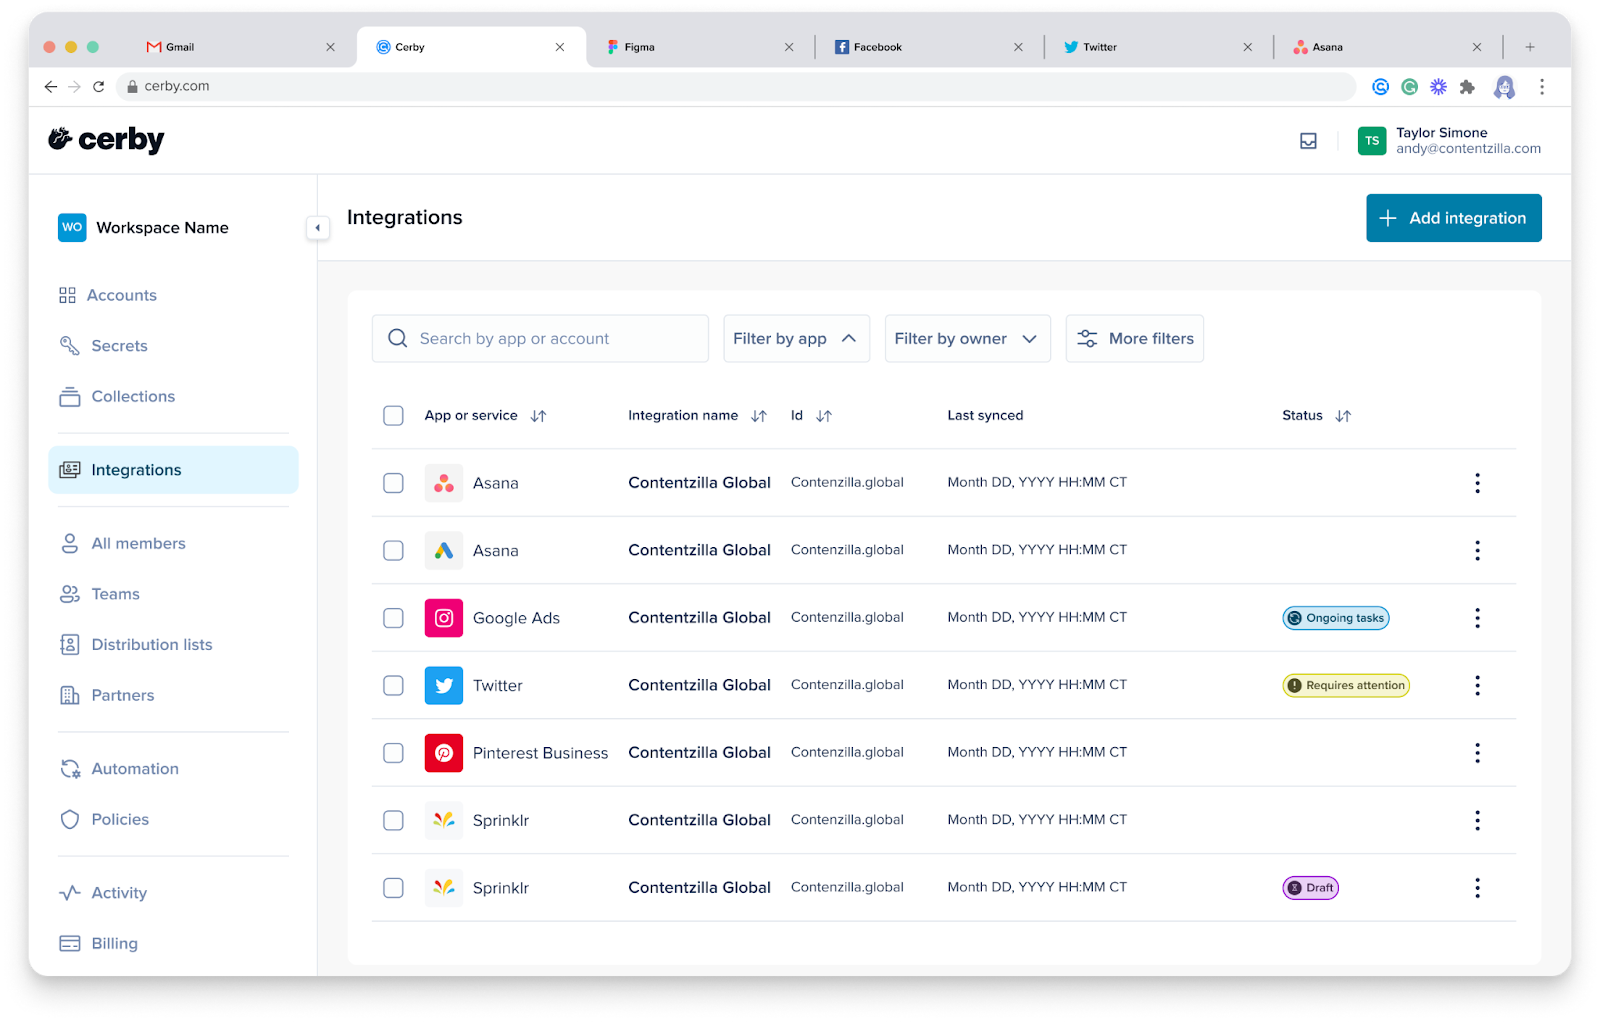
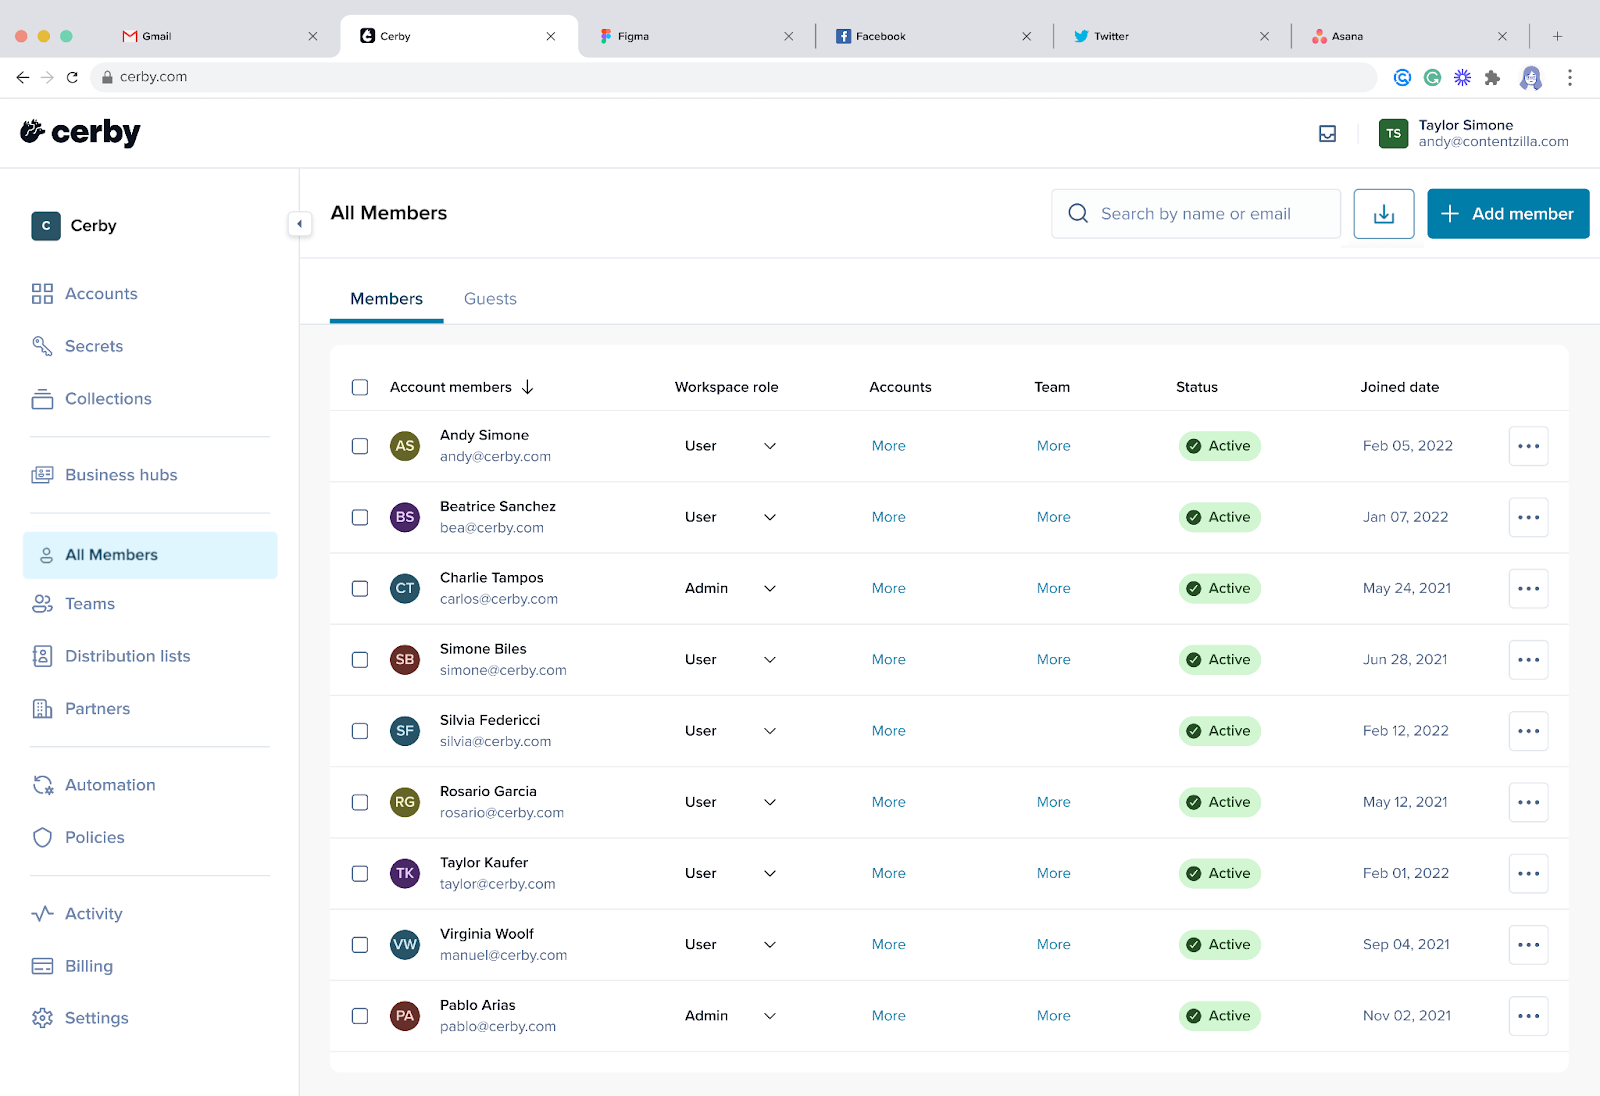
 ) icon located at the top right of the page enables you to export the information of the members table in a CSV file. For more information, read the article Export the workspace members.
# Guest users
This article describes the key benefits of guest users, a role that enables you to share items with external collaborators through Cerby.
With Cerby, you have a secure way to collaborate closer with external parties through guest users. This role enables you to invite any collaborator who doesn't belong to your domain or corporate directory to join your Cerby workspace.
Unlike a [host-guest partnership](/getting-started/concepts/user-management/partners#host-guest-partnership), where you must establish a connection with another Cerby workspace to share accounts, with the guest user role, you can directly share items (accounts, secrets, and collections) because your external collaborators are part of your workspace, using an identity and account provided and managed by Cerby. Therefore, they are searchable through the item-sharing dialog boxes.
Management of guest users is performed by **Workspace Owners**, **Super Admins**, and **Admins**, and invites can be sent by any workspace member in three ways:
* From the Password Manager Importer, to persist the imported user access permissions on[LastPass](https://help.cerby.com/cerby-web-app/item-importer/migrate-from-lastpass-to-cerby) or [1Password](https://help.cerby.com/cerby-web-app/item-importer/migrate-from-1password-to-cerby) folders, passwords, and secure notes to Cerby collections, accounts, and secrets.
* From the [**All Members**](https://help.cerby.com/cerby-web-app/users/invite-a-guest-user-to-your-workspace#from-the-all-members-page) page, via a direct invite.
* From the [**Partners**](/getting-started/concepts/user-management/partners#partners) page, when external collaborators belong to a local partner.
{% hint style="danger" %}
**IMPORTANT:** If your external collaborators are already managed by your identity provider (such as Okta or Entra ID), contact your Cerby Admin or IT team to assign them to Cerby as regular workspace members.
{% endhint %}
After joining Cerby, all of the workspace members from your organization who have the **Owner** role on collections, accounts, and secrets can share their items directly with guest users or via a local partnership. However, they can only grant them the **Collaborator** role.
Guest users are displayed on a table within the **Guest** tab of the **All Members** page, as shown in **Figure 1**.
) icon located at the top right of the page enables you to export the information of the members table in a CSV file. For more information, read the article Export the workspace members.
# Guest users
This article describes the key benefits of guest users, a role that enables you to share items with external collaborators through Cerby.
With Cerby, you have a secure way to collaborate closer with external parties through guest users. This role enables you to invite any collaborator who doesn't belong to your domain or corporate directory to join your Cerby workspace.
Unlike a [host-guest partnership](/getting-started/concepts/user-management/partners#host-guest-partnership), where you must establish a connection with another Cerby workspace to share accounts, with the guest user role, you can directly share items (accounts, secrets, and collections) because your external collaborators are part of your workspace, using an identity and account provided and managed by Cerby. Therefore, they are searchable through the item-sharing dialog boxes.
Management of guest users is performed by **Workspace Owners**, **Super Admins**, and **Admins**, and invites can be sent by any workspace member in three ways:
* From the Password Manager Importer, to persist the imported user access permissions on[LastPass](https://help.cerby.com/cerby-web-app/item-importer/migrate-from-lastpass-to-cerby) or [1Password](https://help.cerby.com/cerby-web-app/item-importer/migrate-from-1password-to-cerby) folders, passwords, and secure notes to Cerby collections, accounts, and secrets.
* From the [**All Members**](https://help.cerby.com/cerby-web-app/users/invite-a-guest-user-to-your-workspace#from-the-all-members-page) page, via a direct invite.
* From the [**Partners**](/getting-started/concepts/user-management/partners#partners) page, when external collaborators belong to a local partner.
{% hint style="danger" %}
**IMPORTANT:** If your external collaborators are already managed by your identity provider (such as Okta or Entra ID), contact your Cerby Admin or IT team to assign them to Cerby as regular workspace members.
{% endhint %}
After joining Cerby, all of the workspace members from your organization who have the **Owner** role on collections, accounts, and secrets can share their items directly with guest users or via a local partnership. However, they can only grant them the **Collaborator** role.
Guest users are displayed on a table within the **Guest** tab of the **All Members** page, as shown in **Figure 1**.
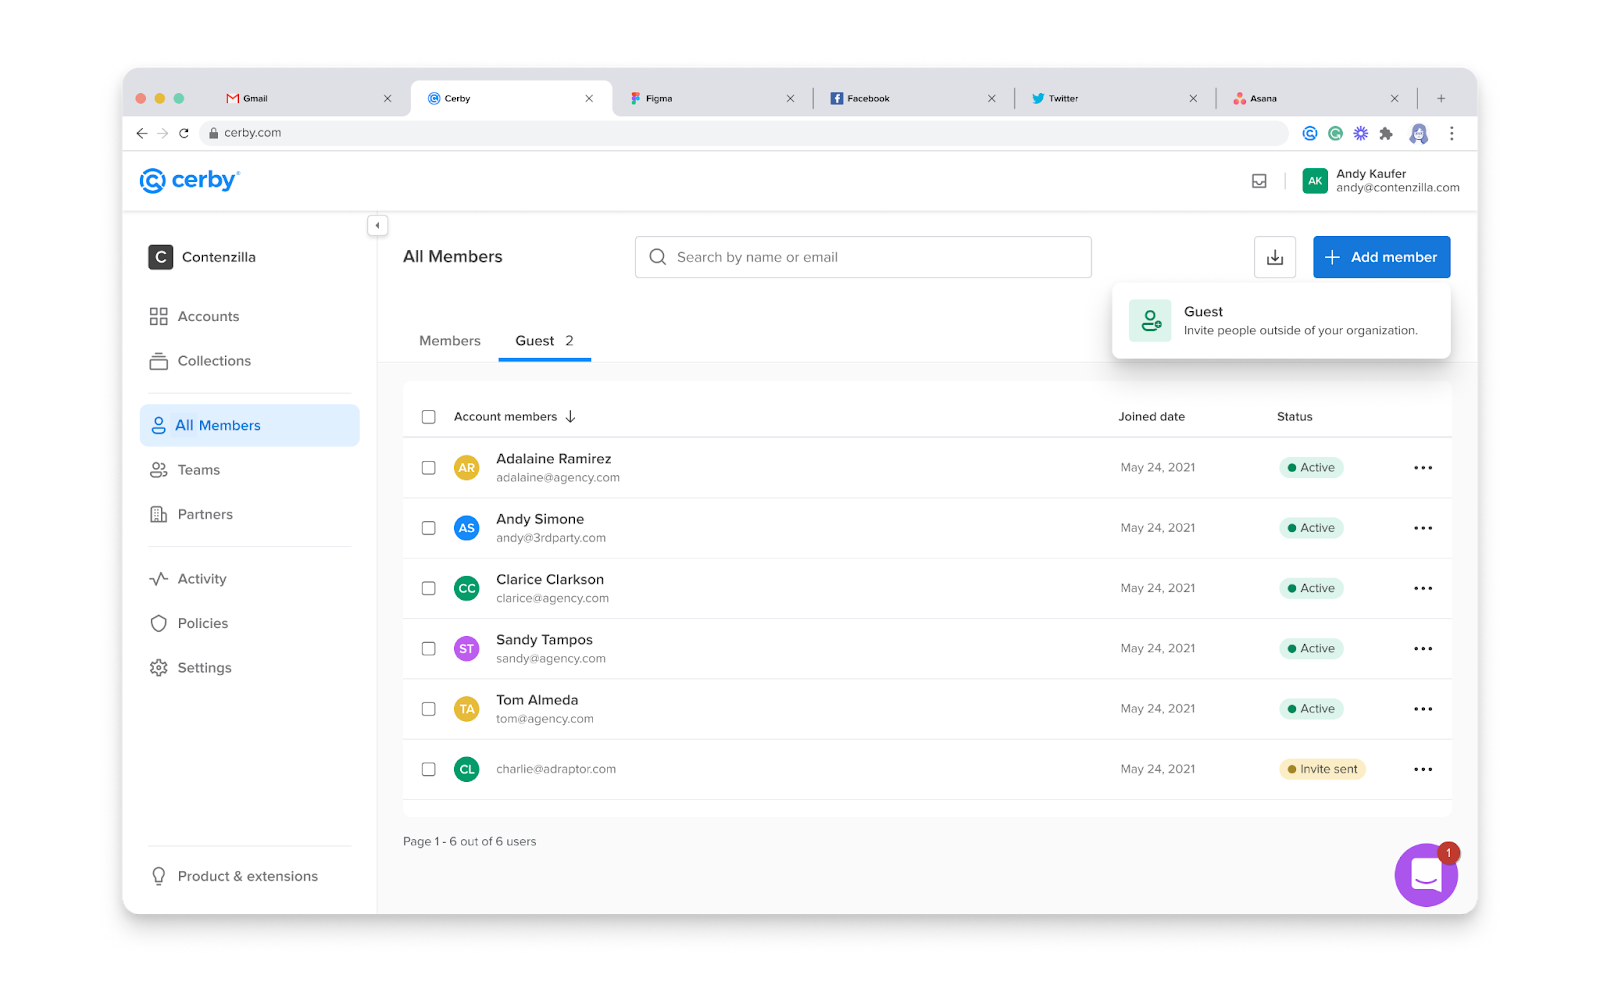
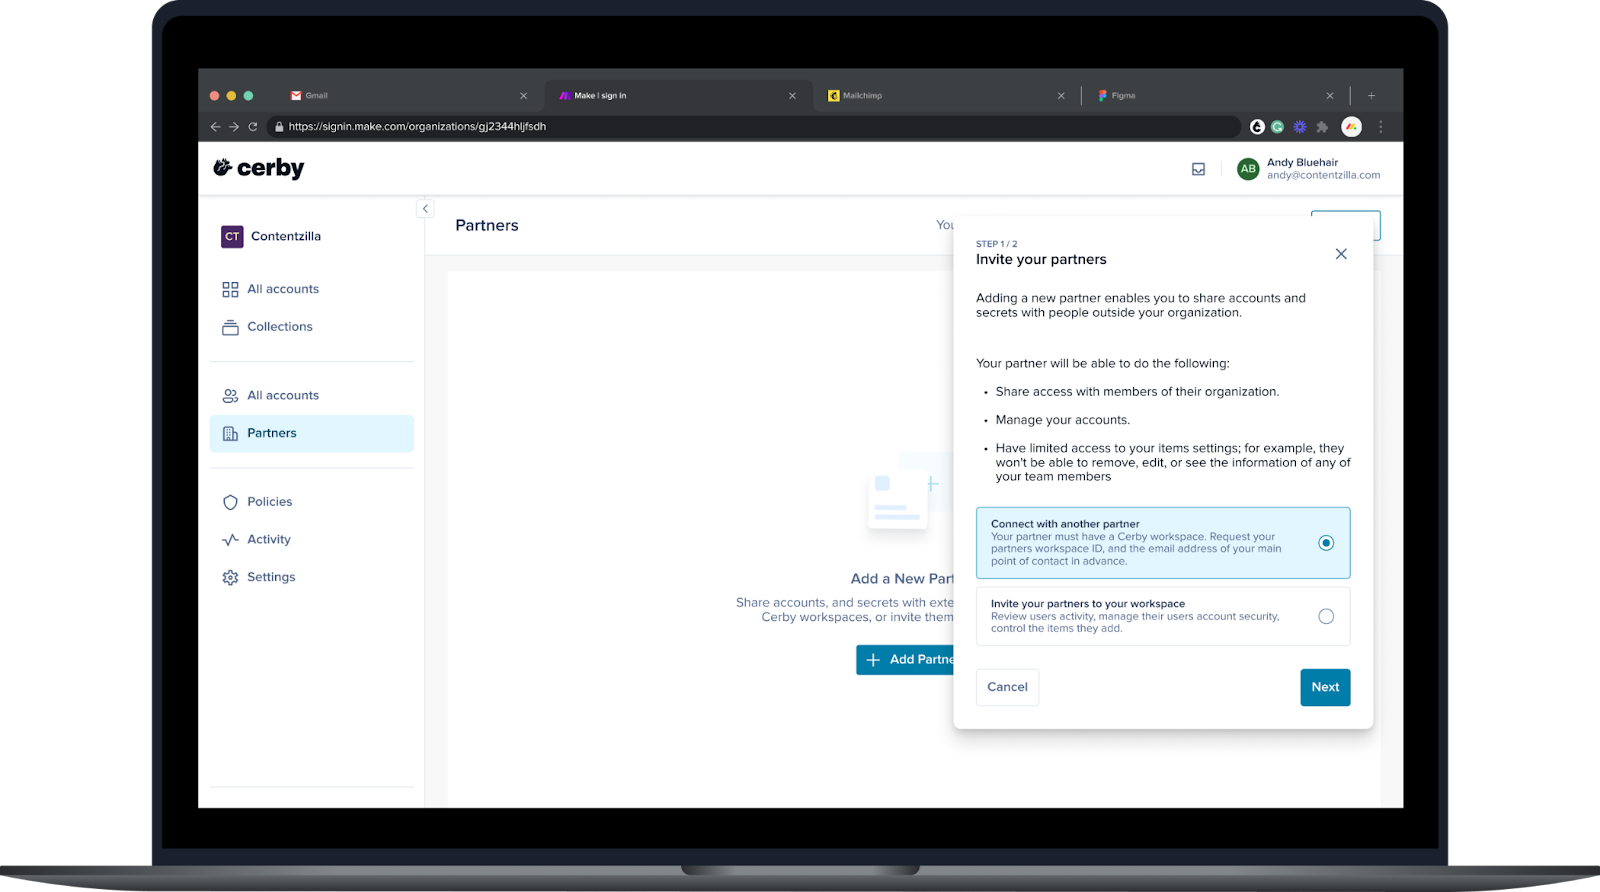
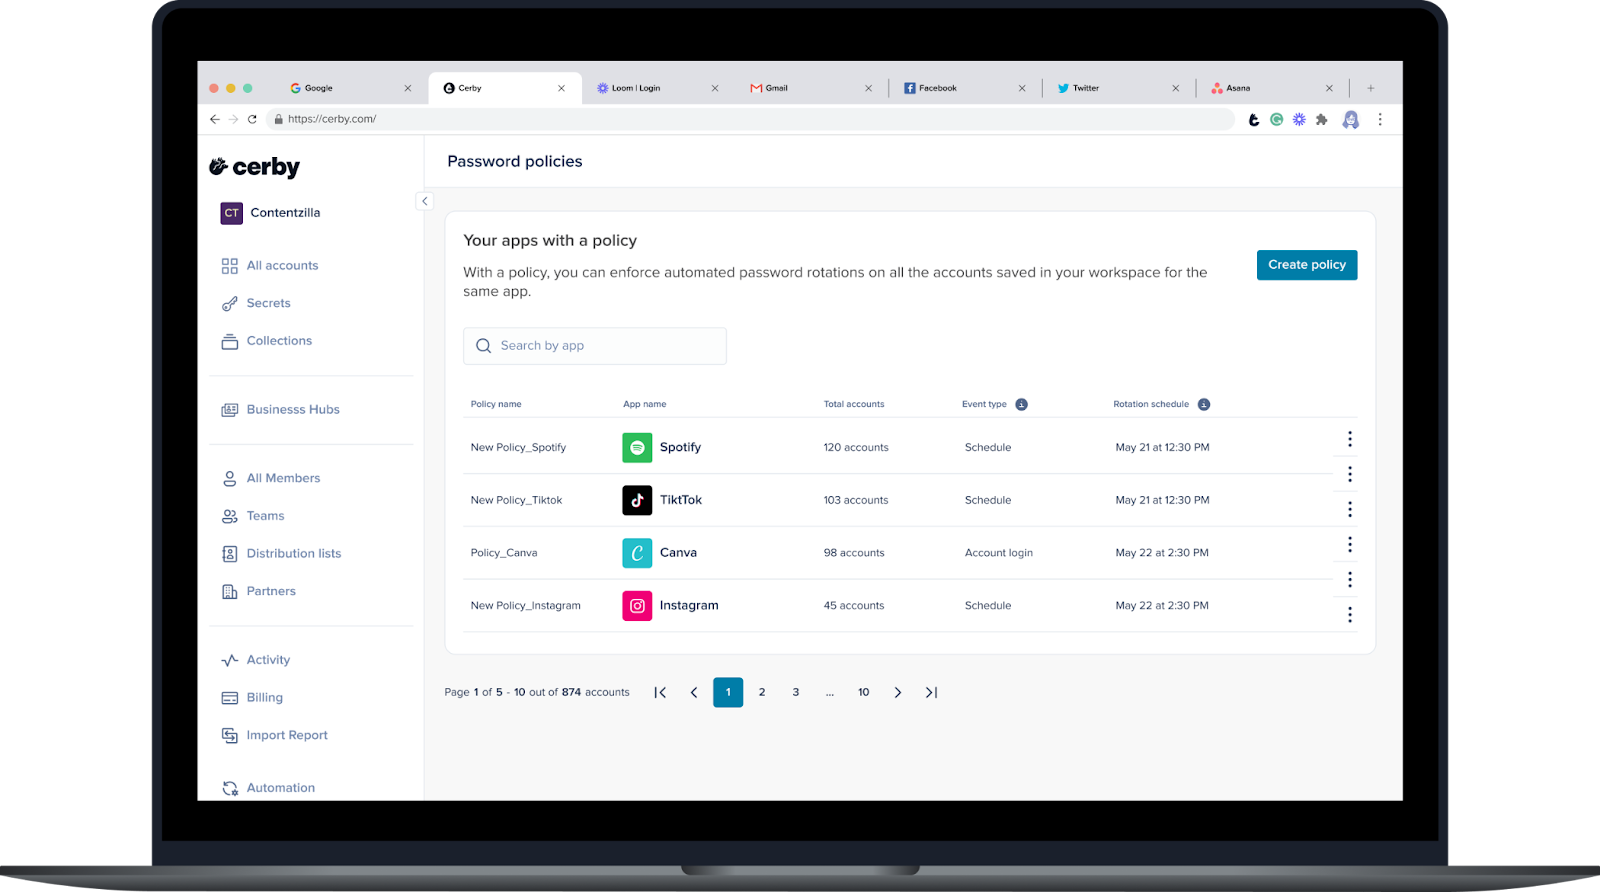
 ) icon or selecting the **View all accounts** option from the **More options** (...) drop-down menu, the policy details page is displayed, as shown in **Figure 2**.
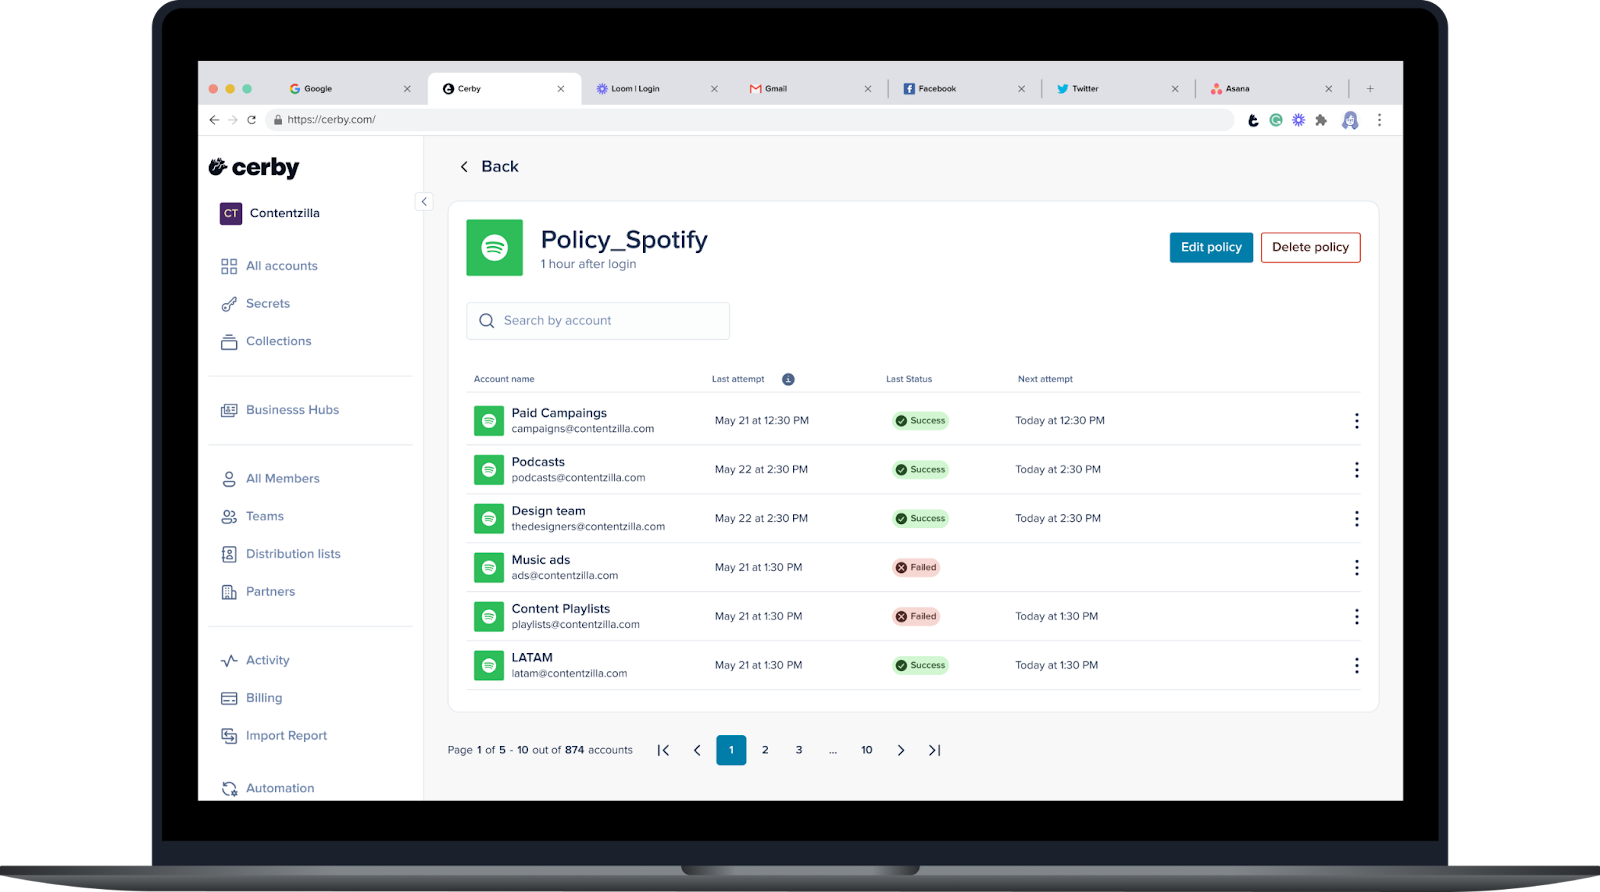
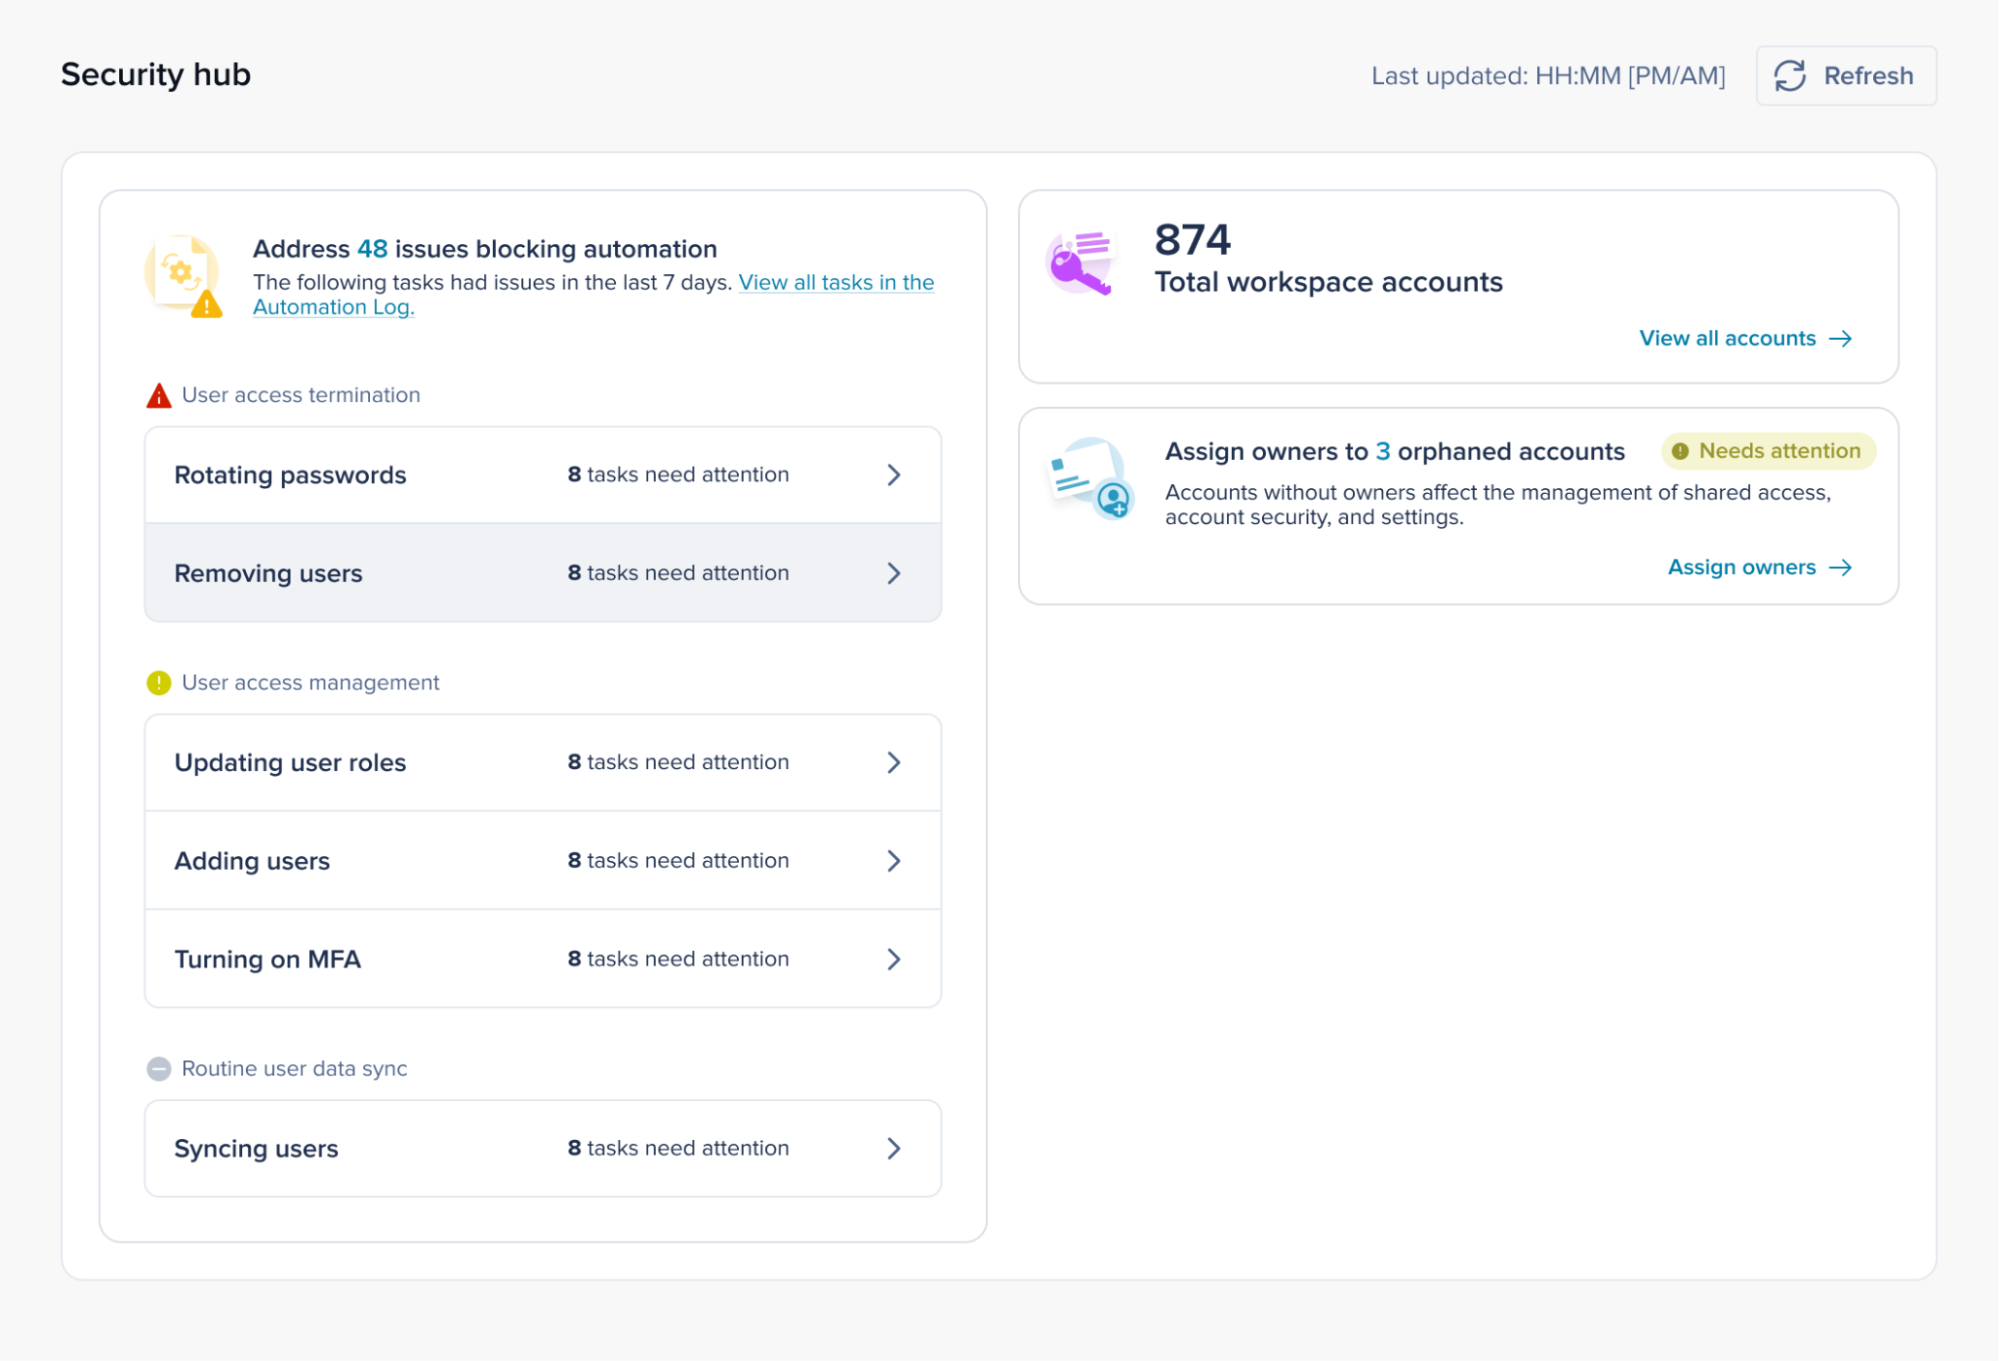
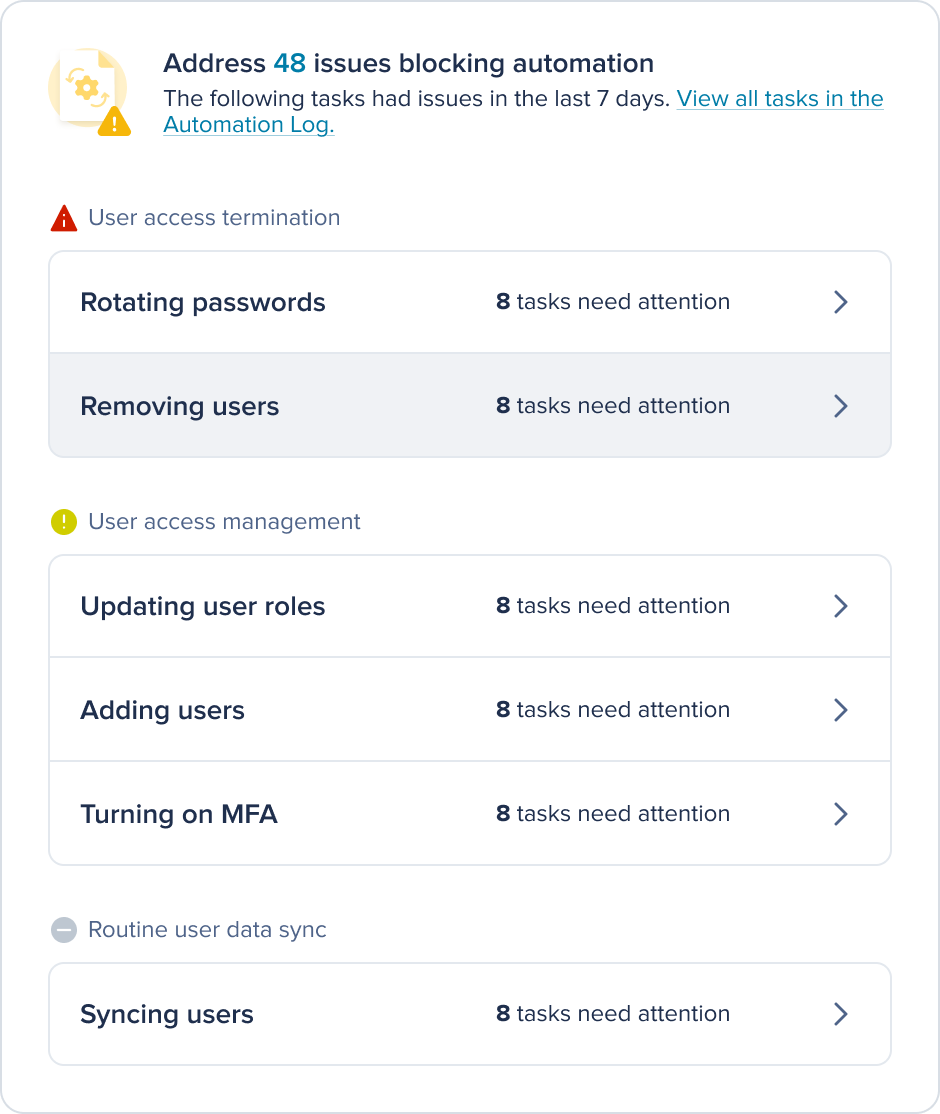
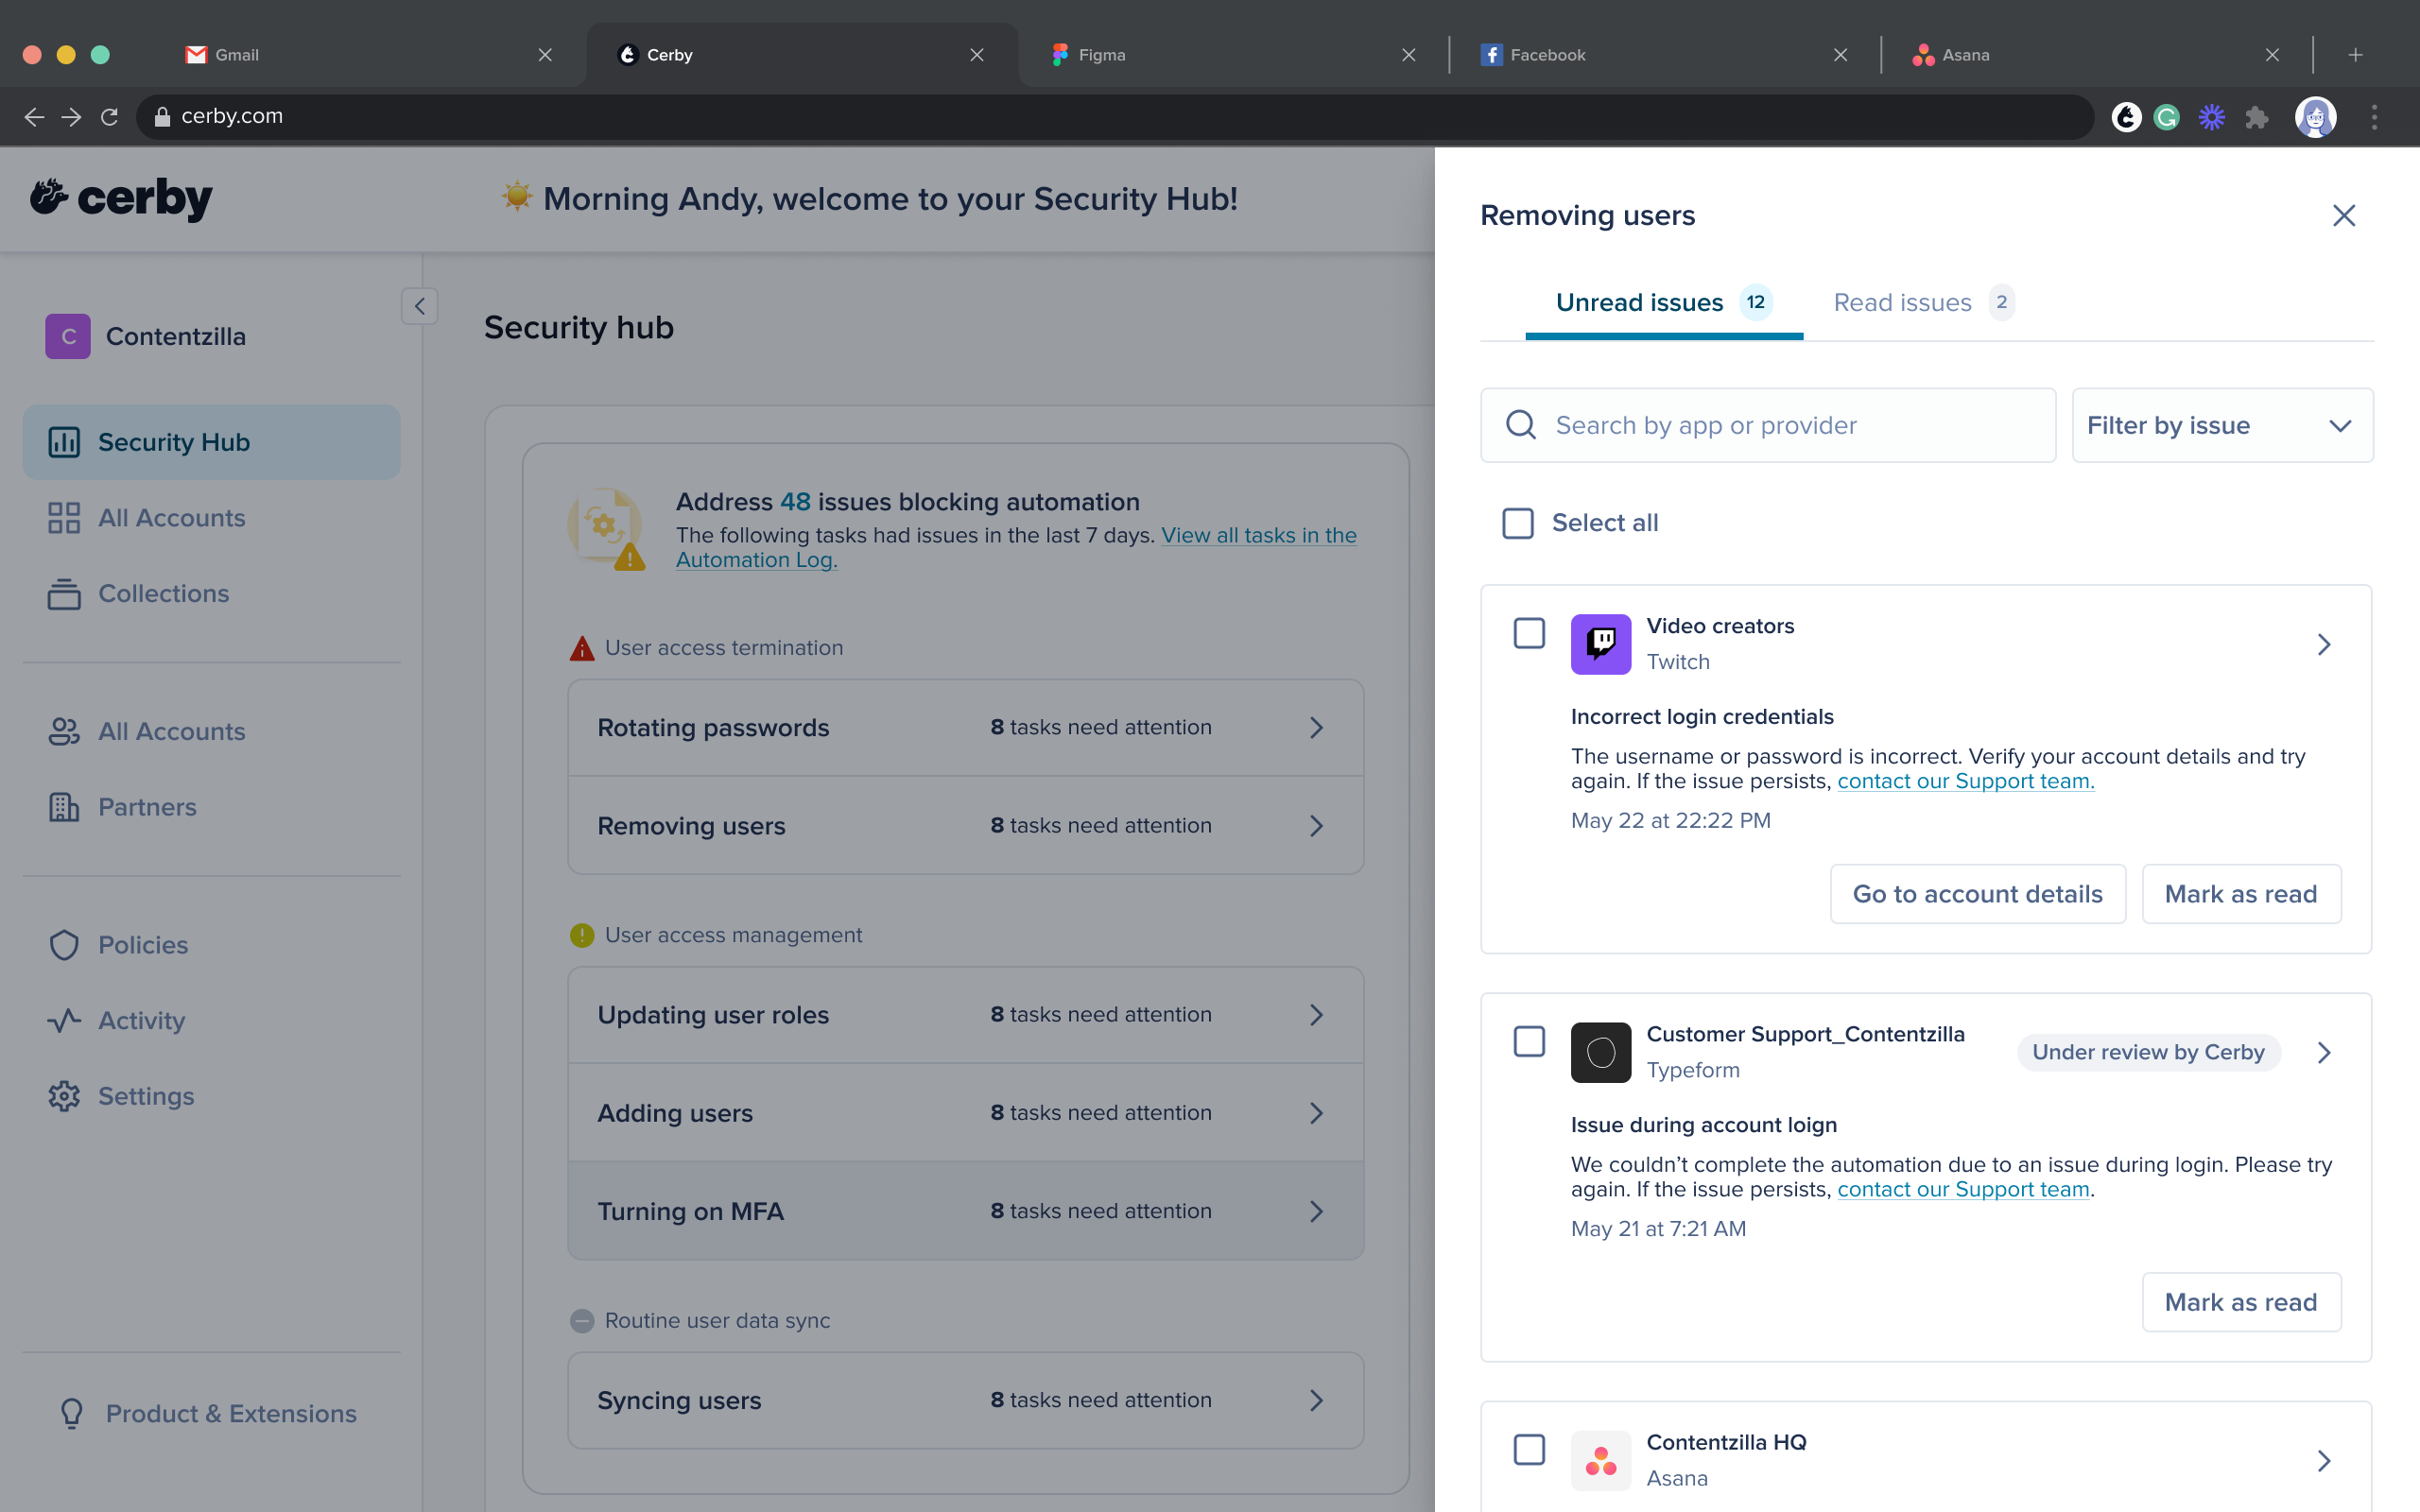
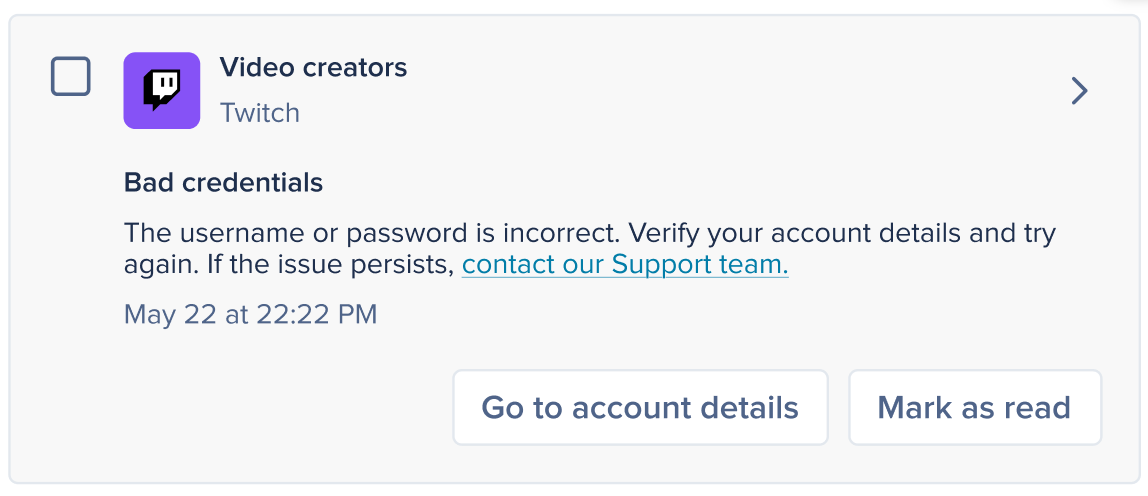
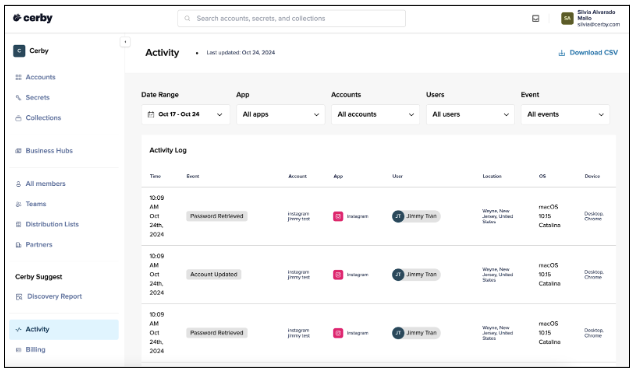
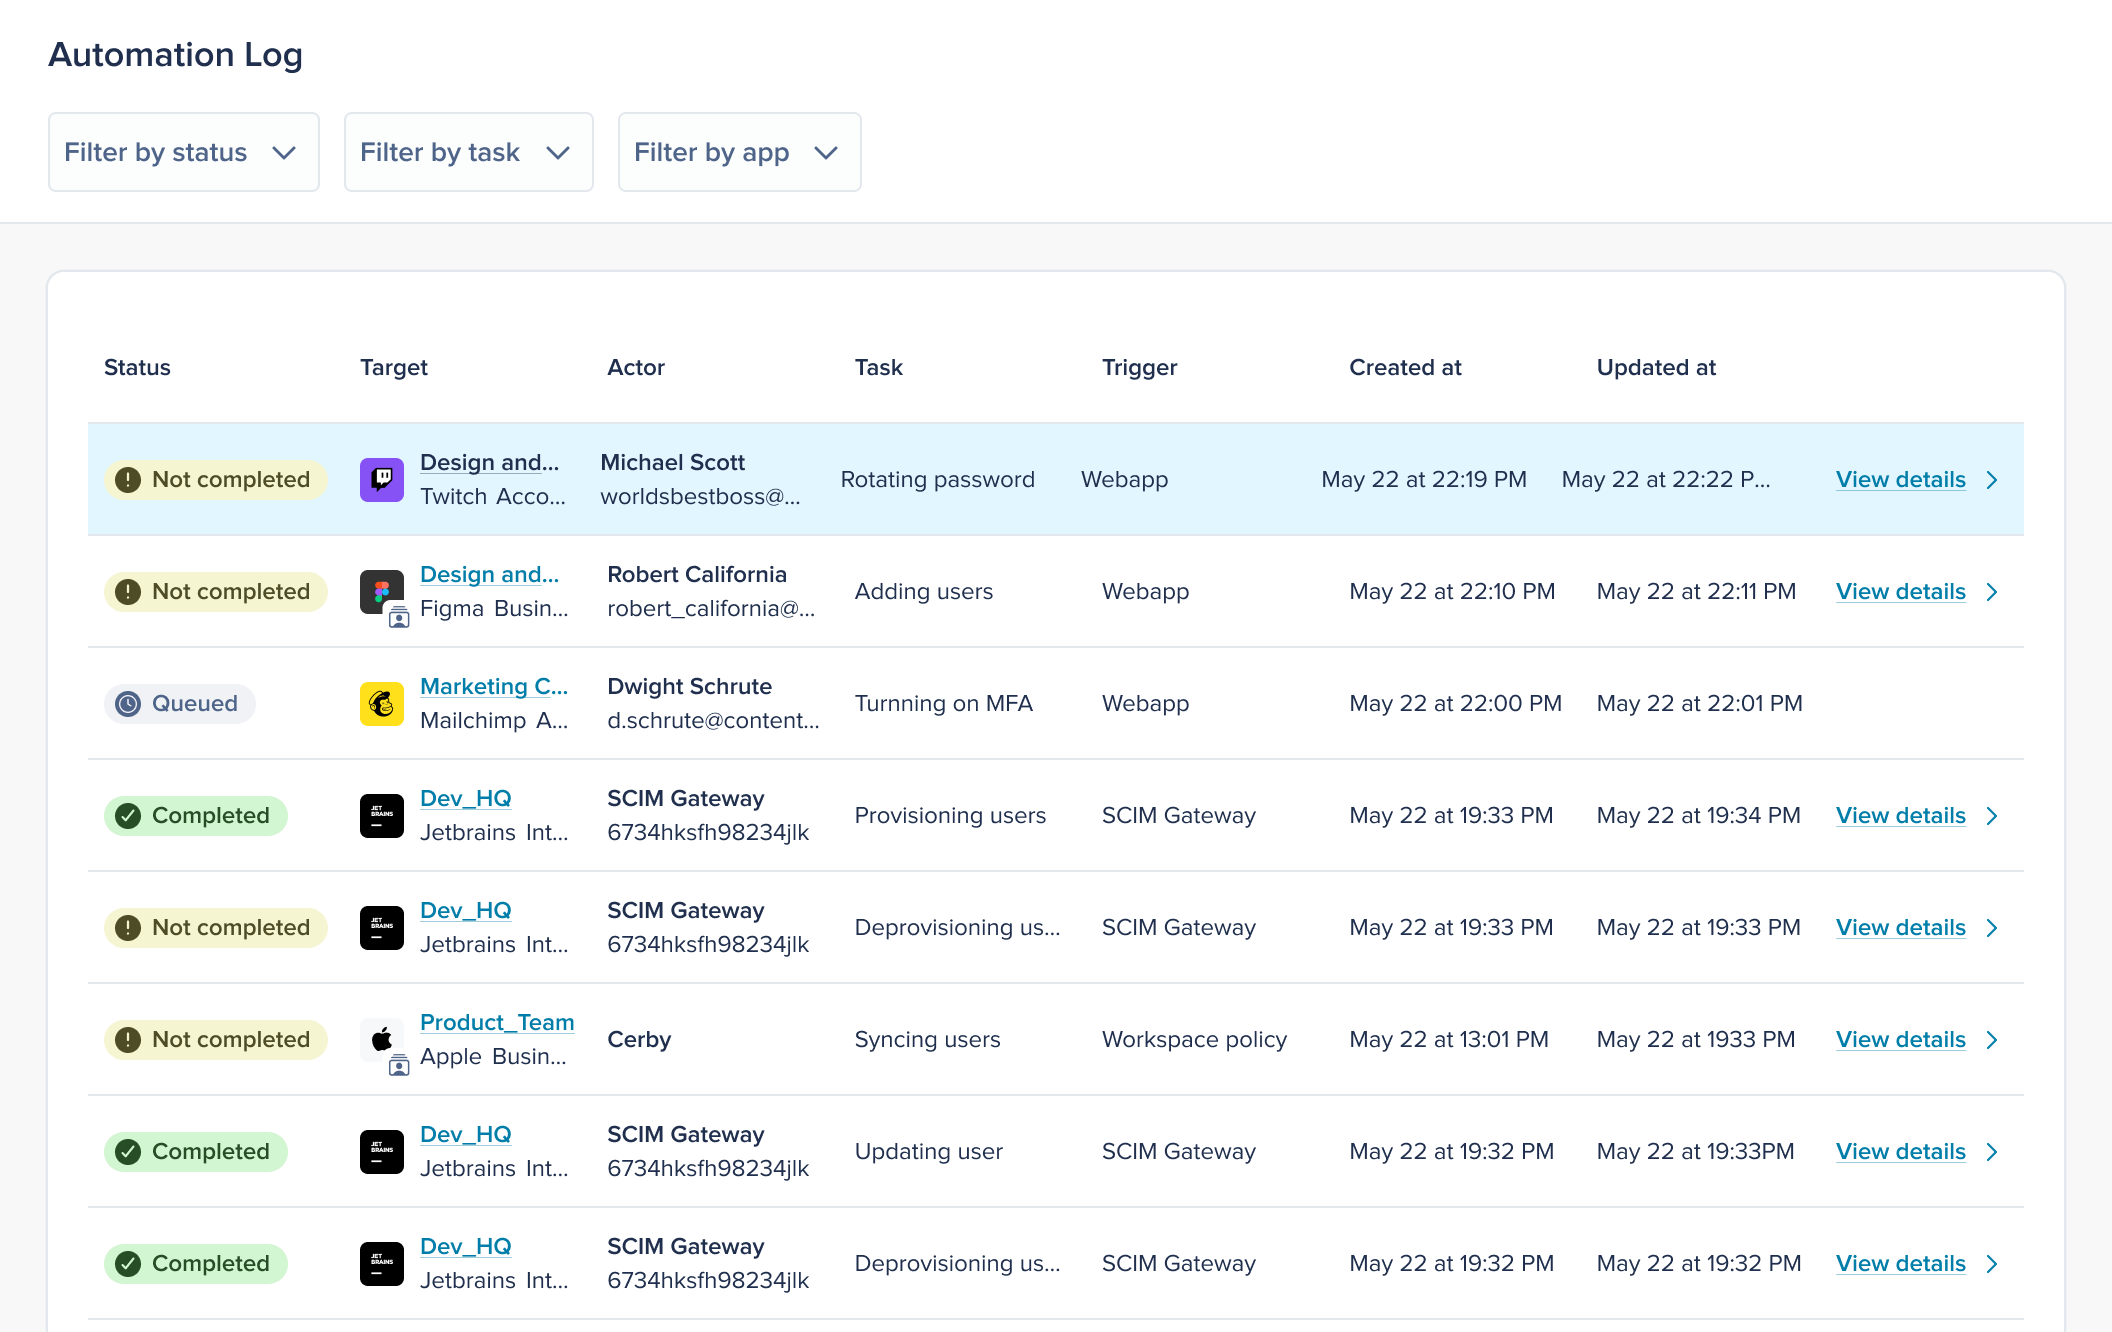
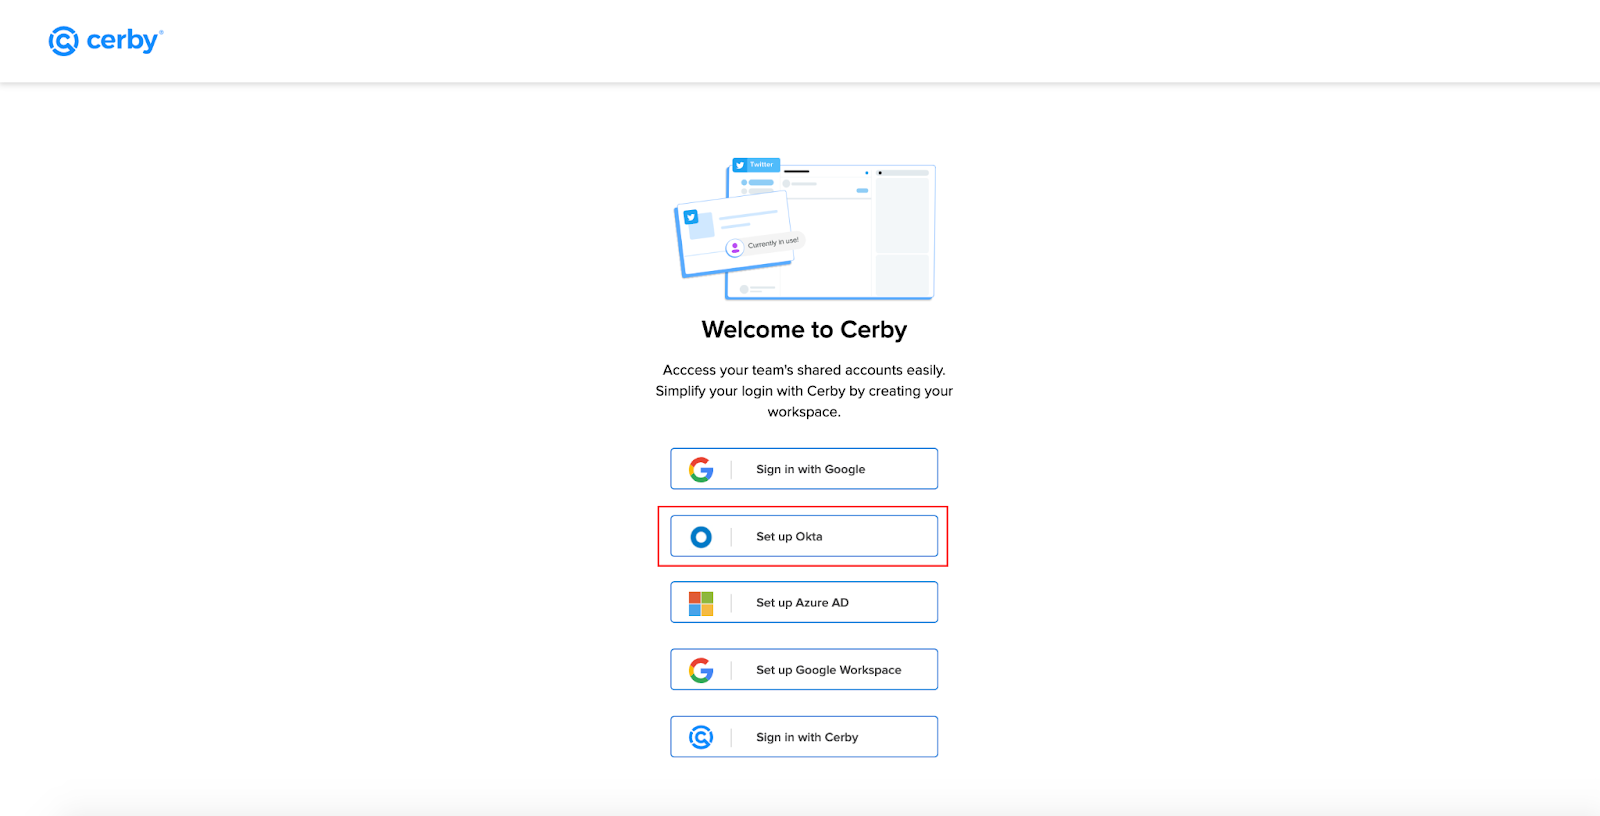

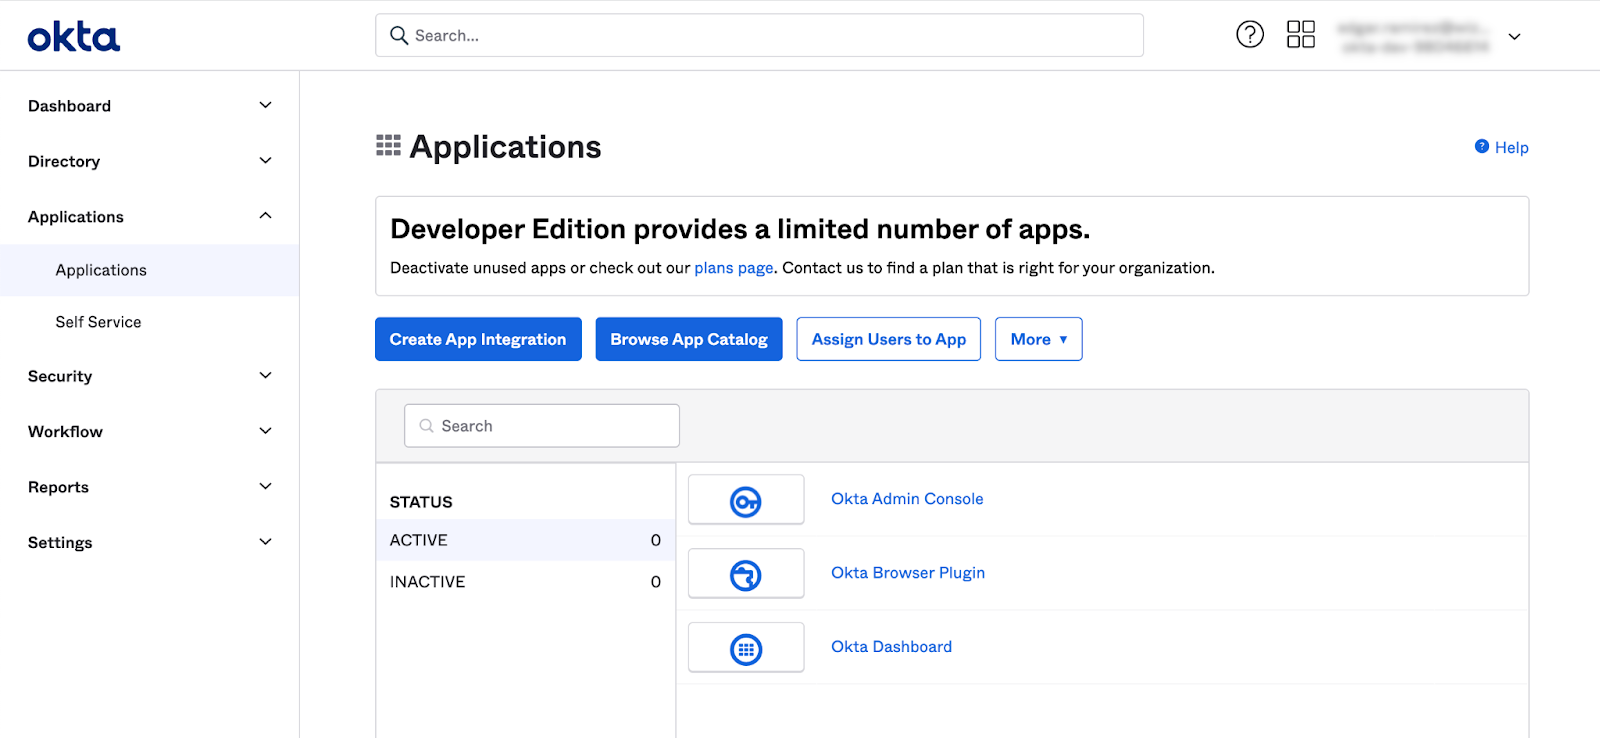
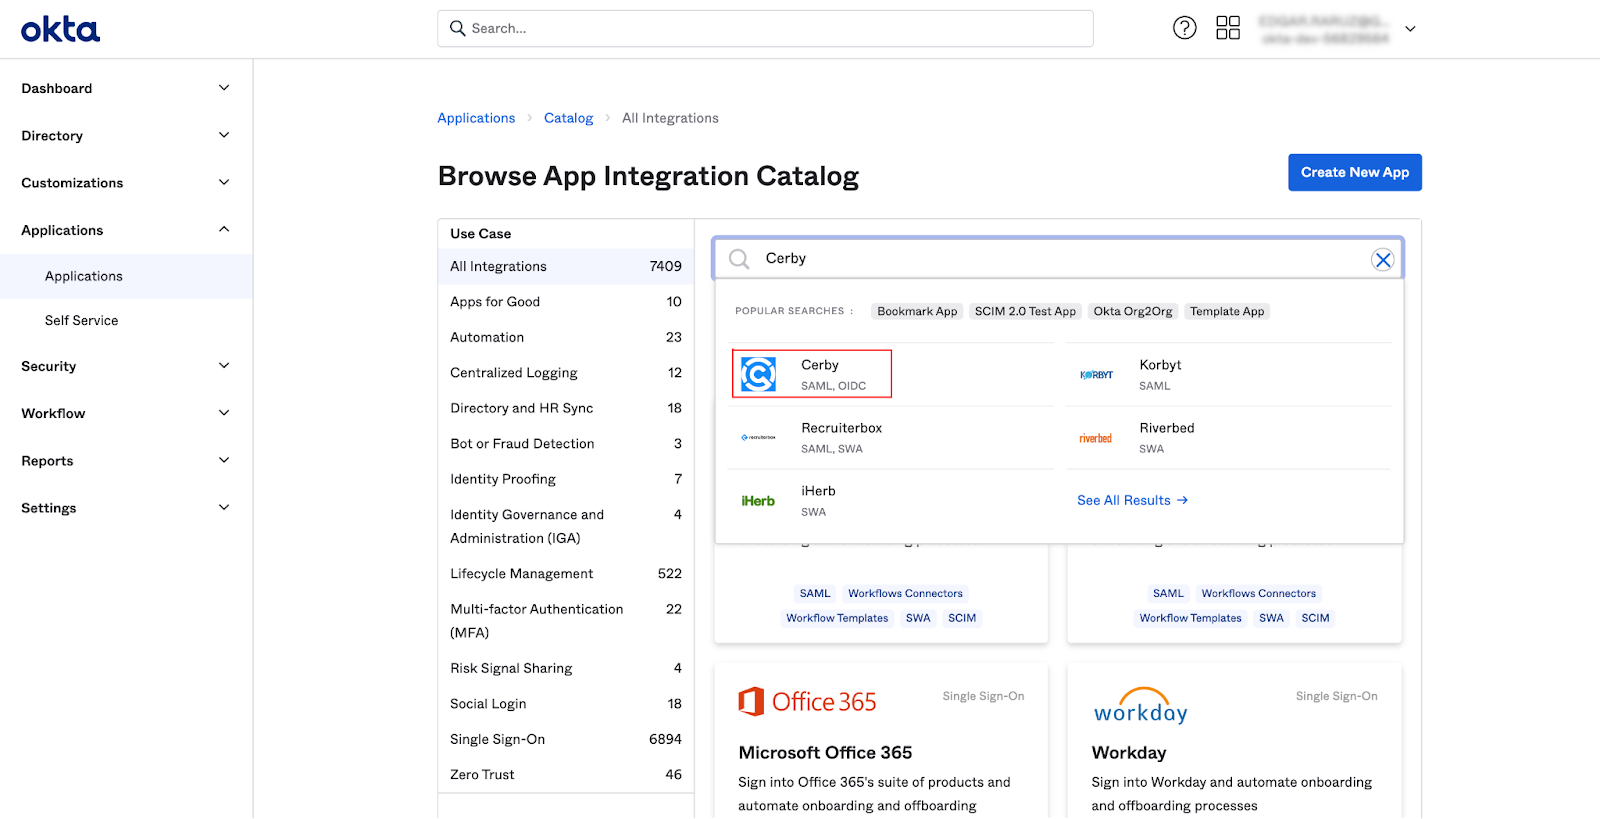
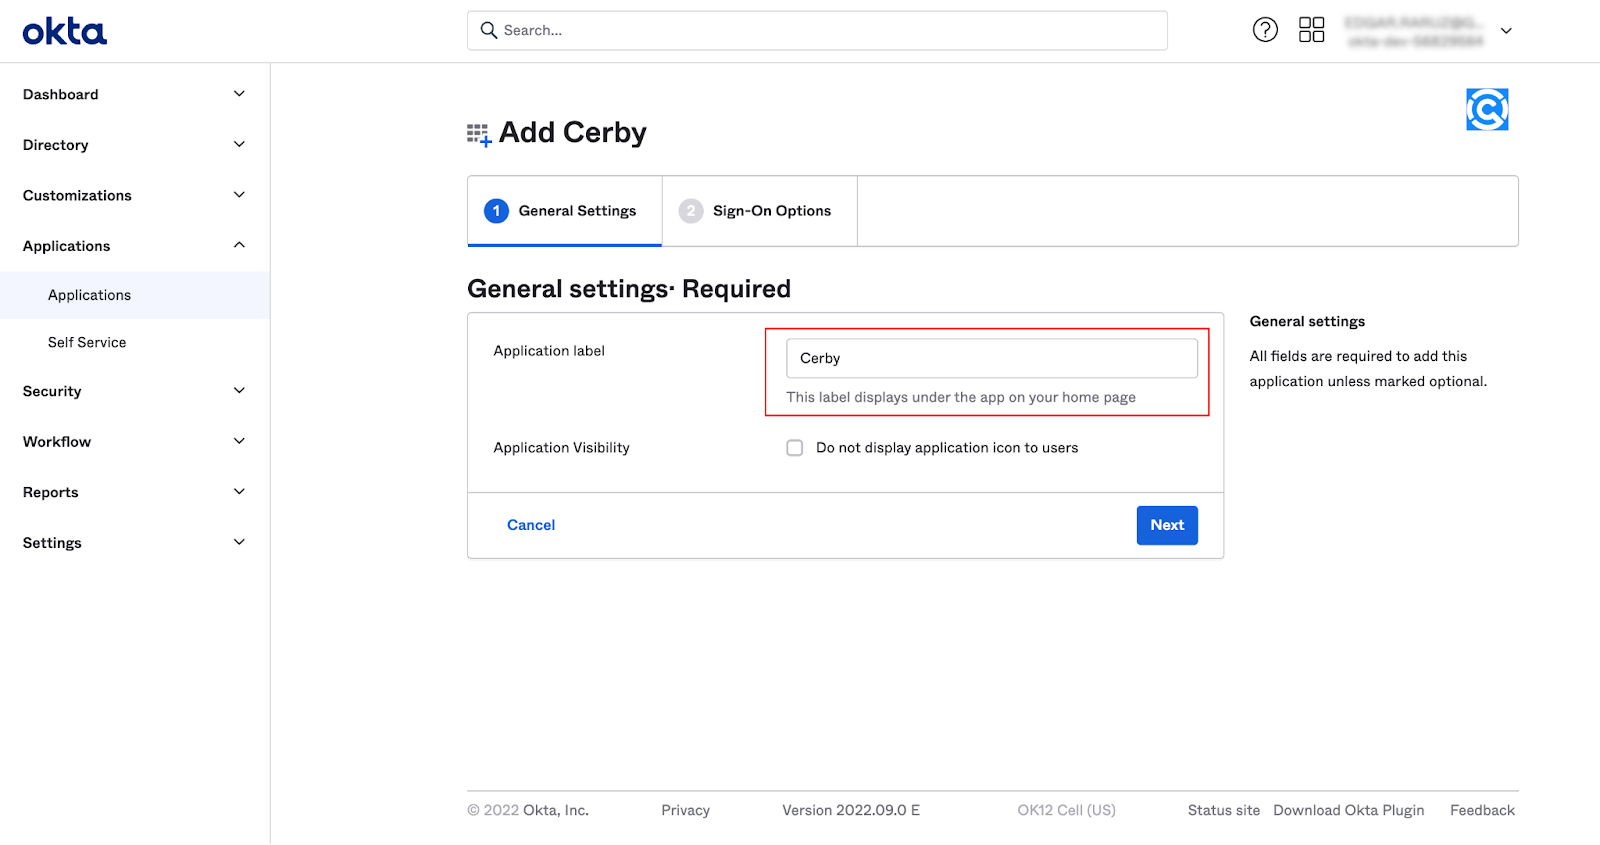
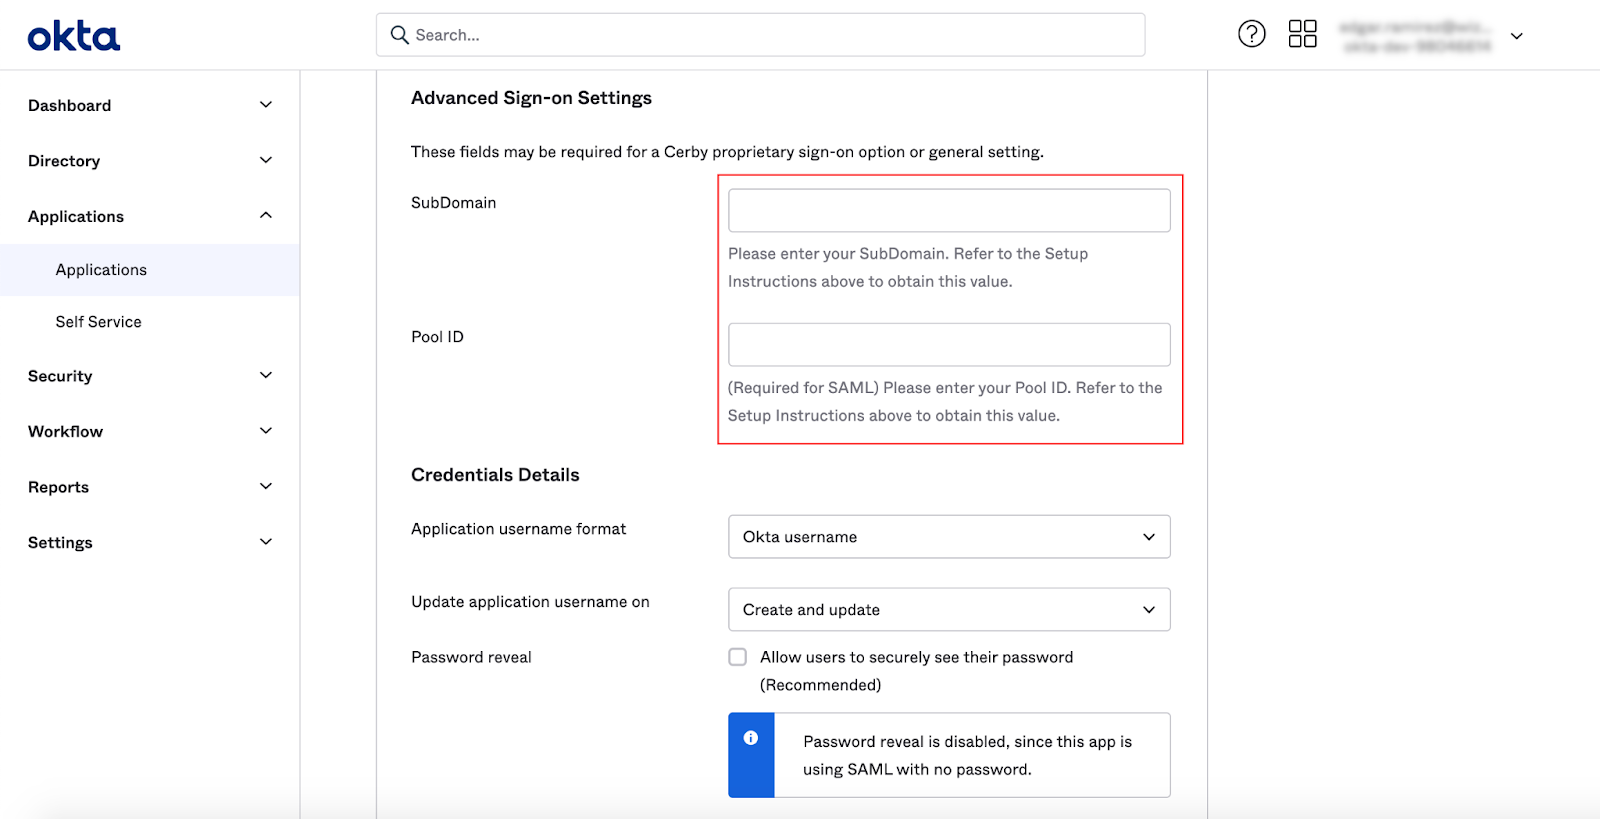
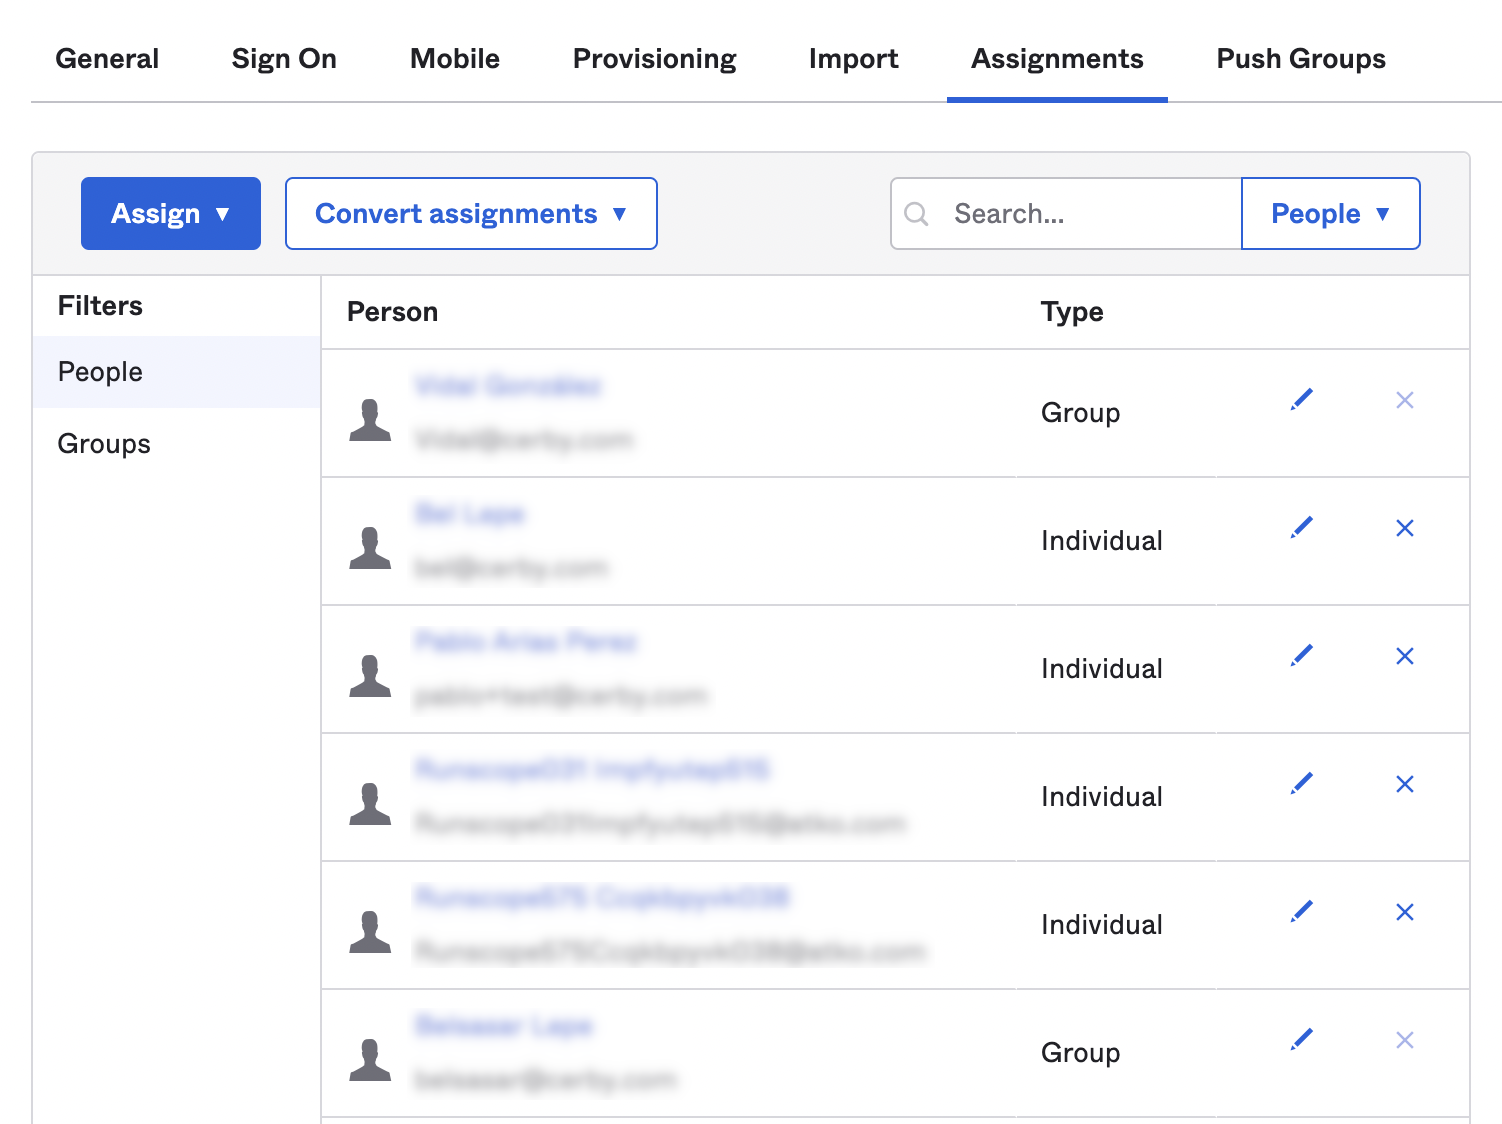
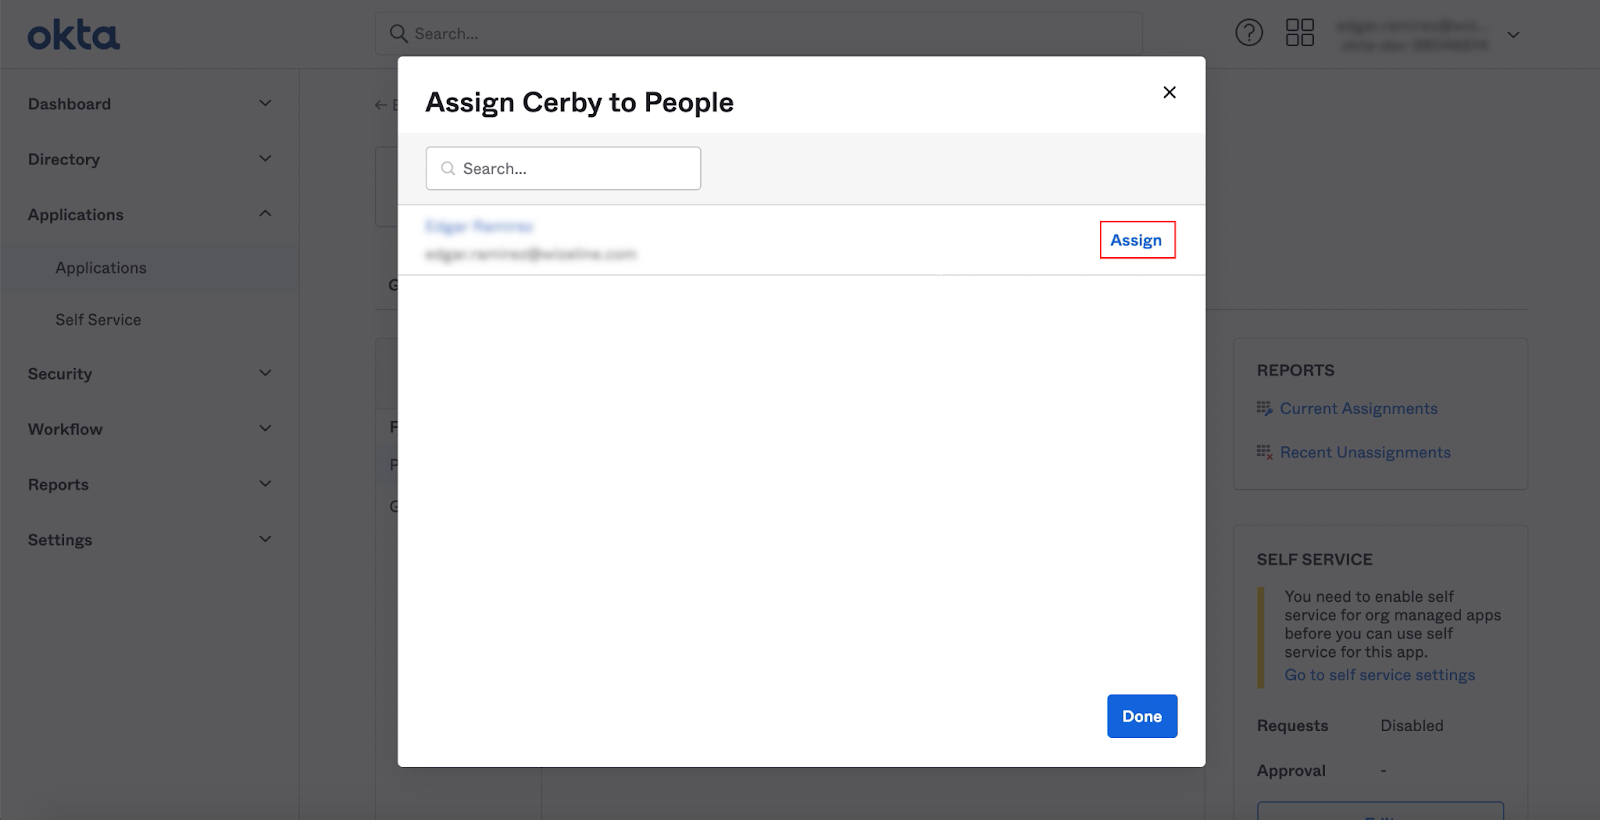
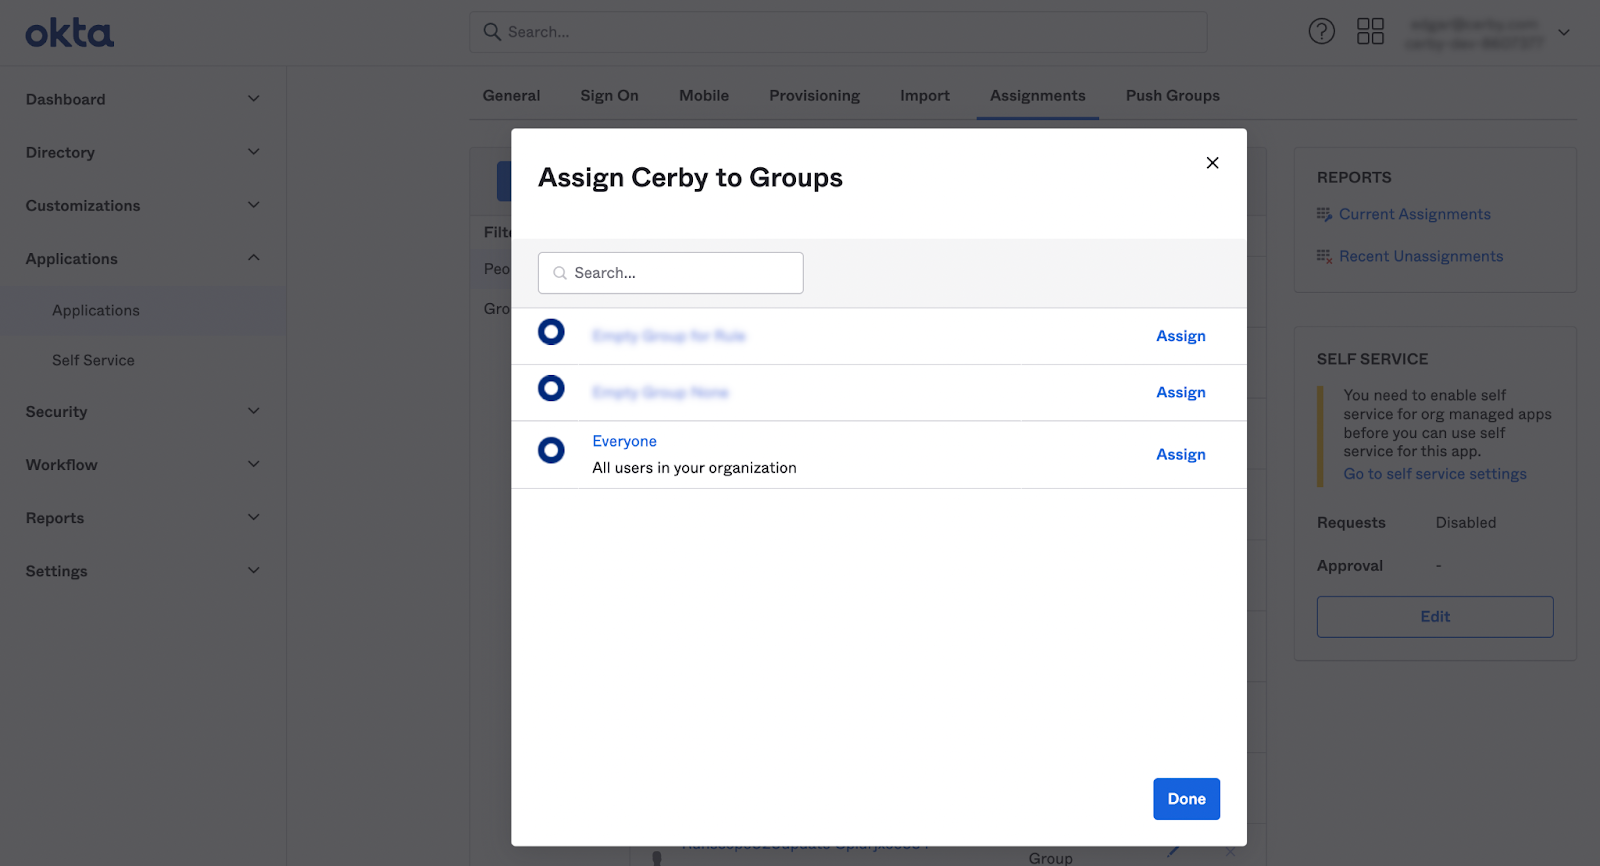
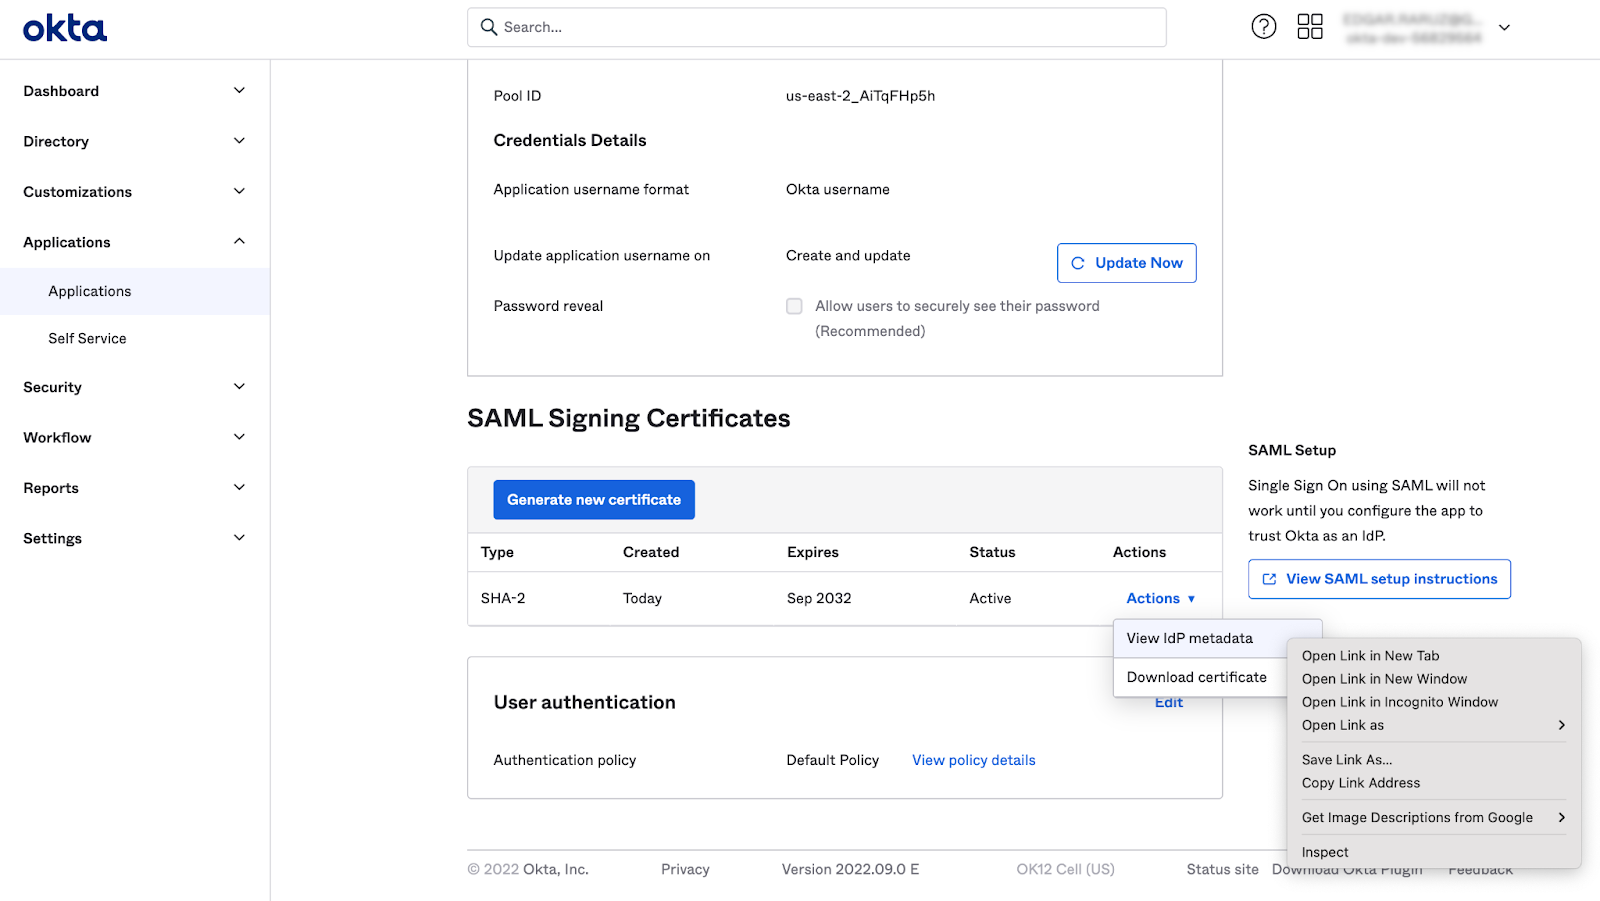
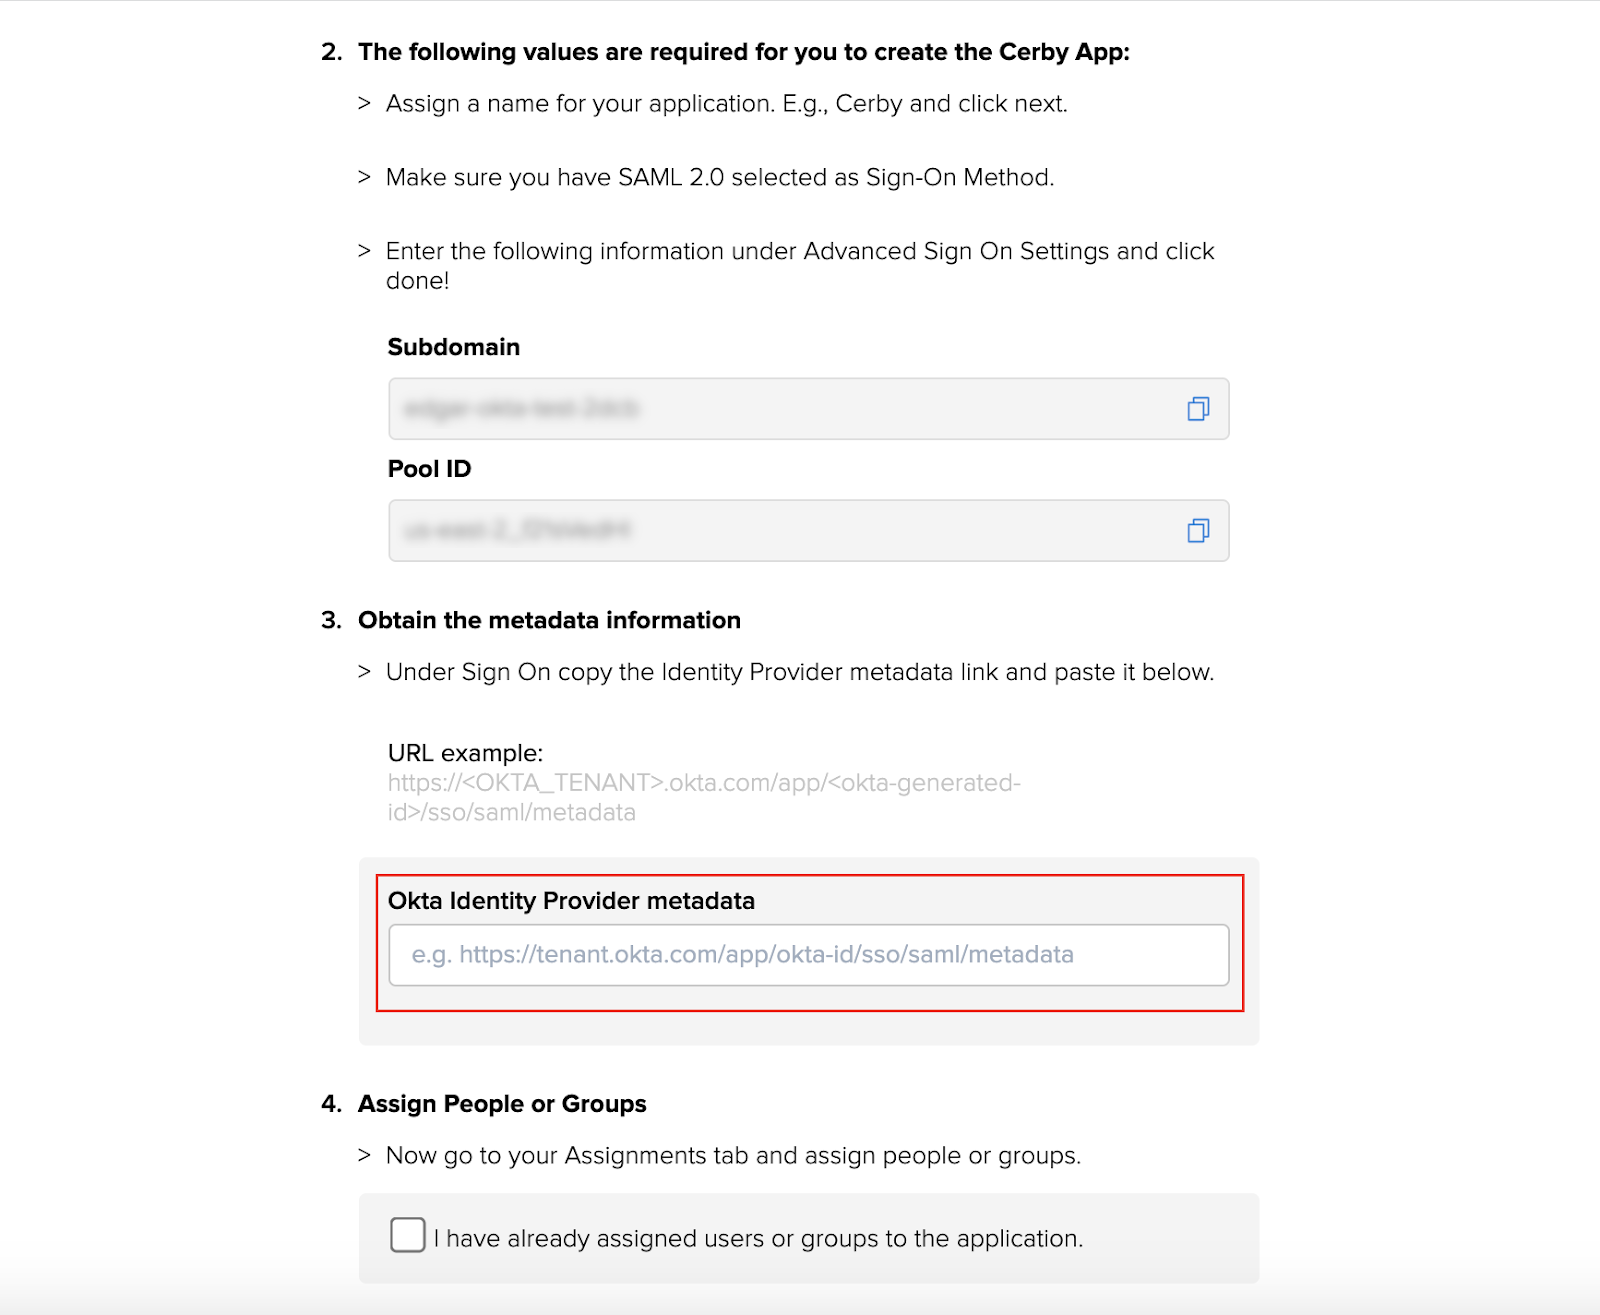
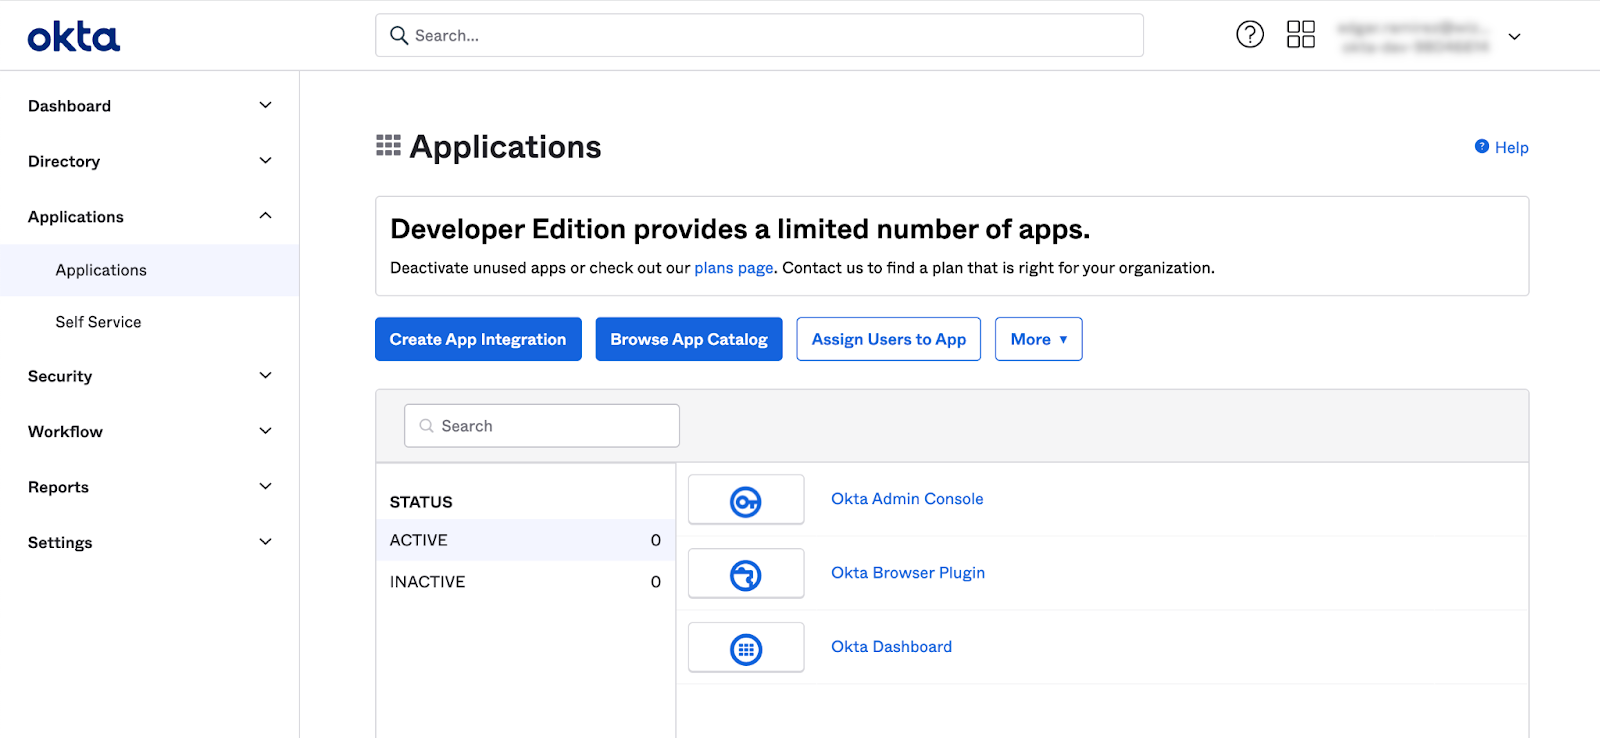
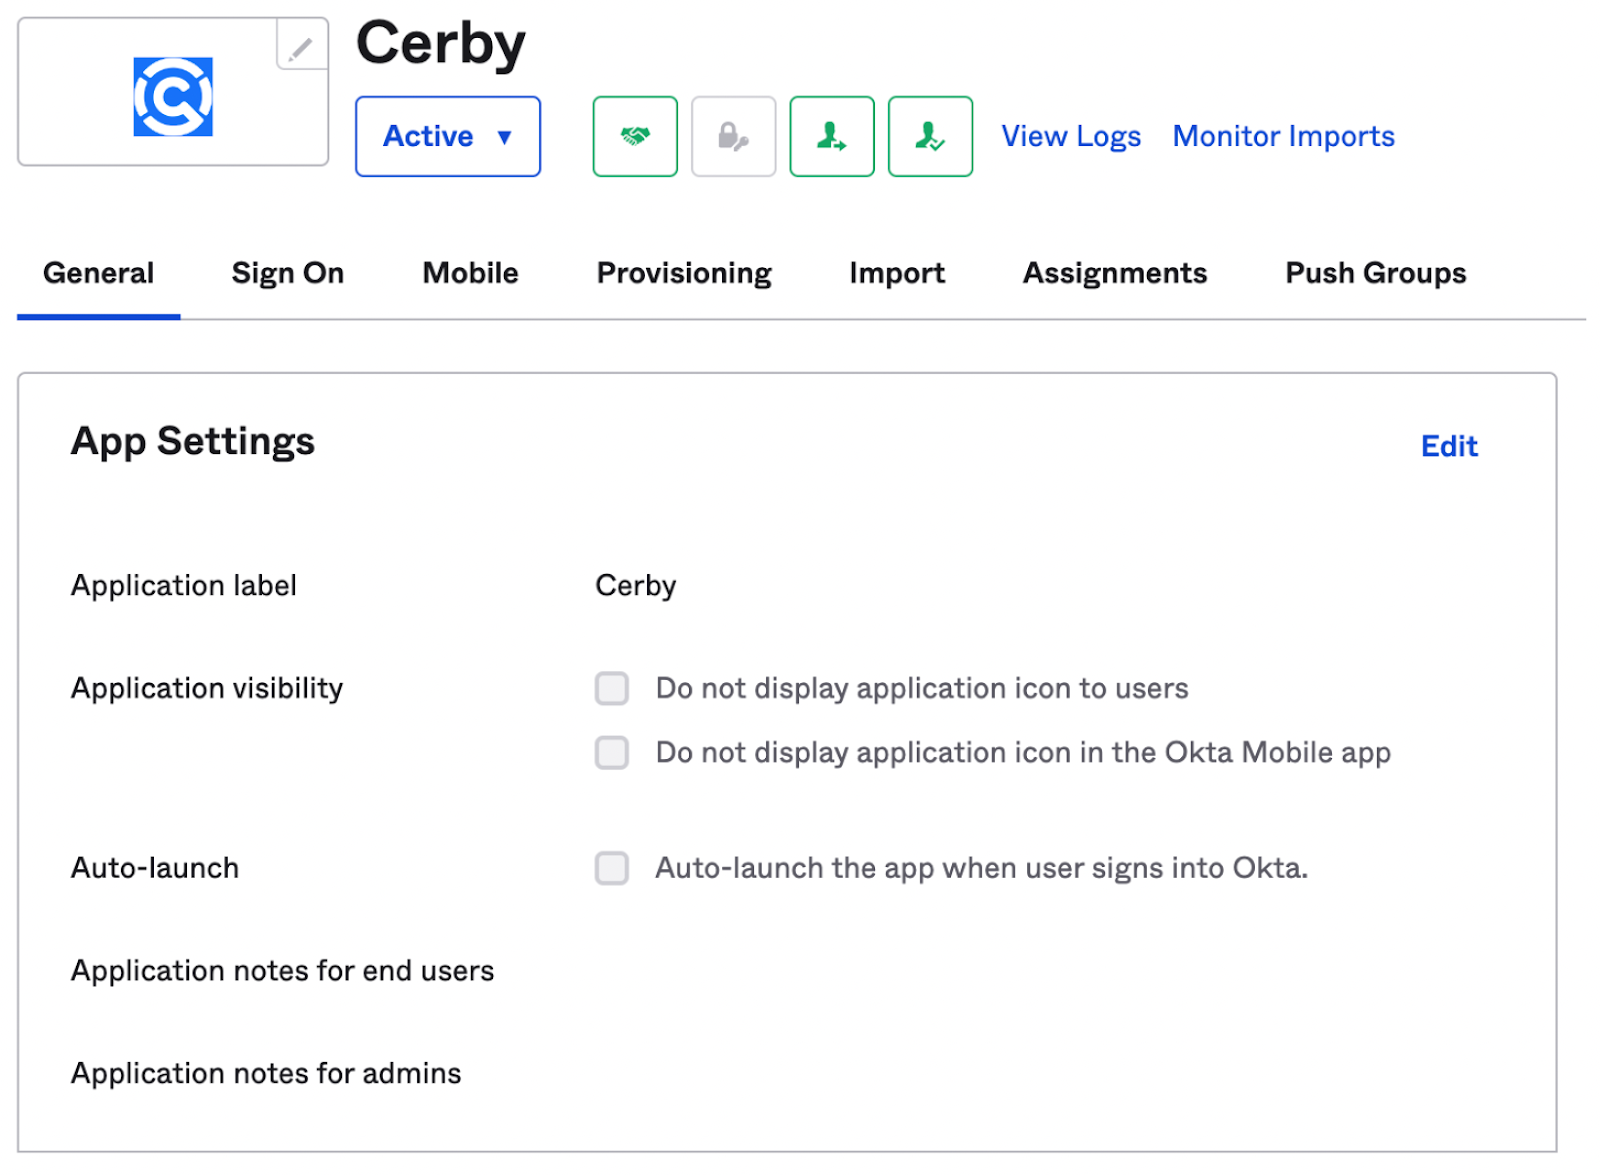
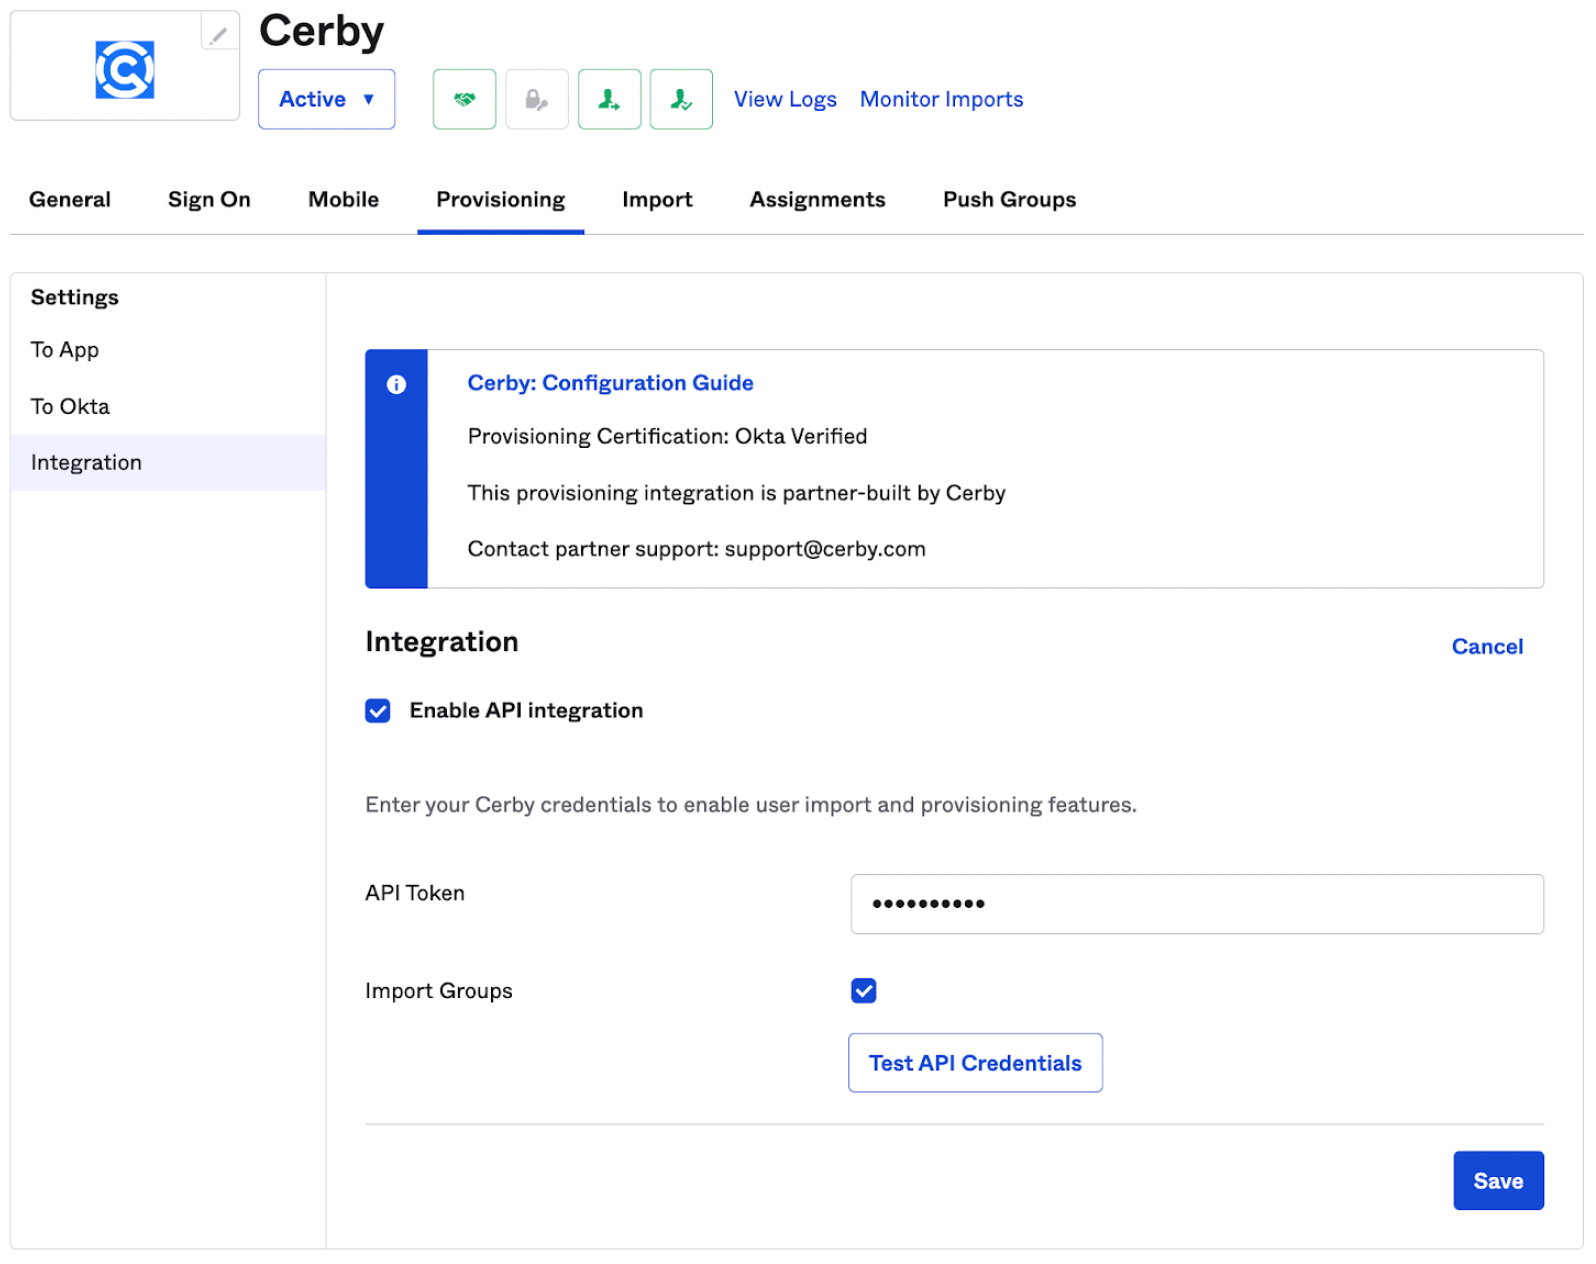
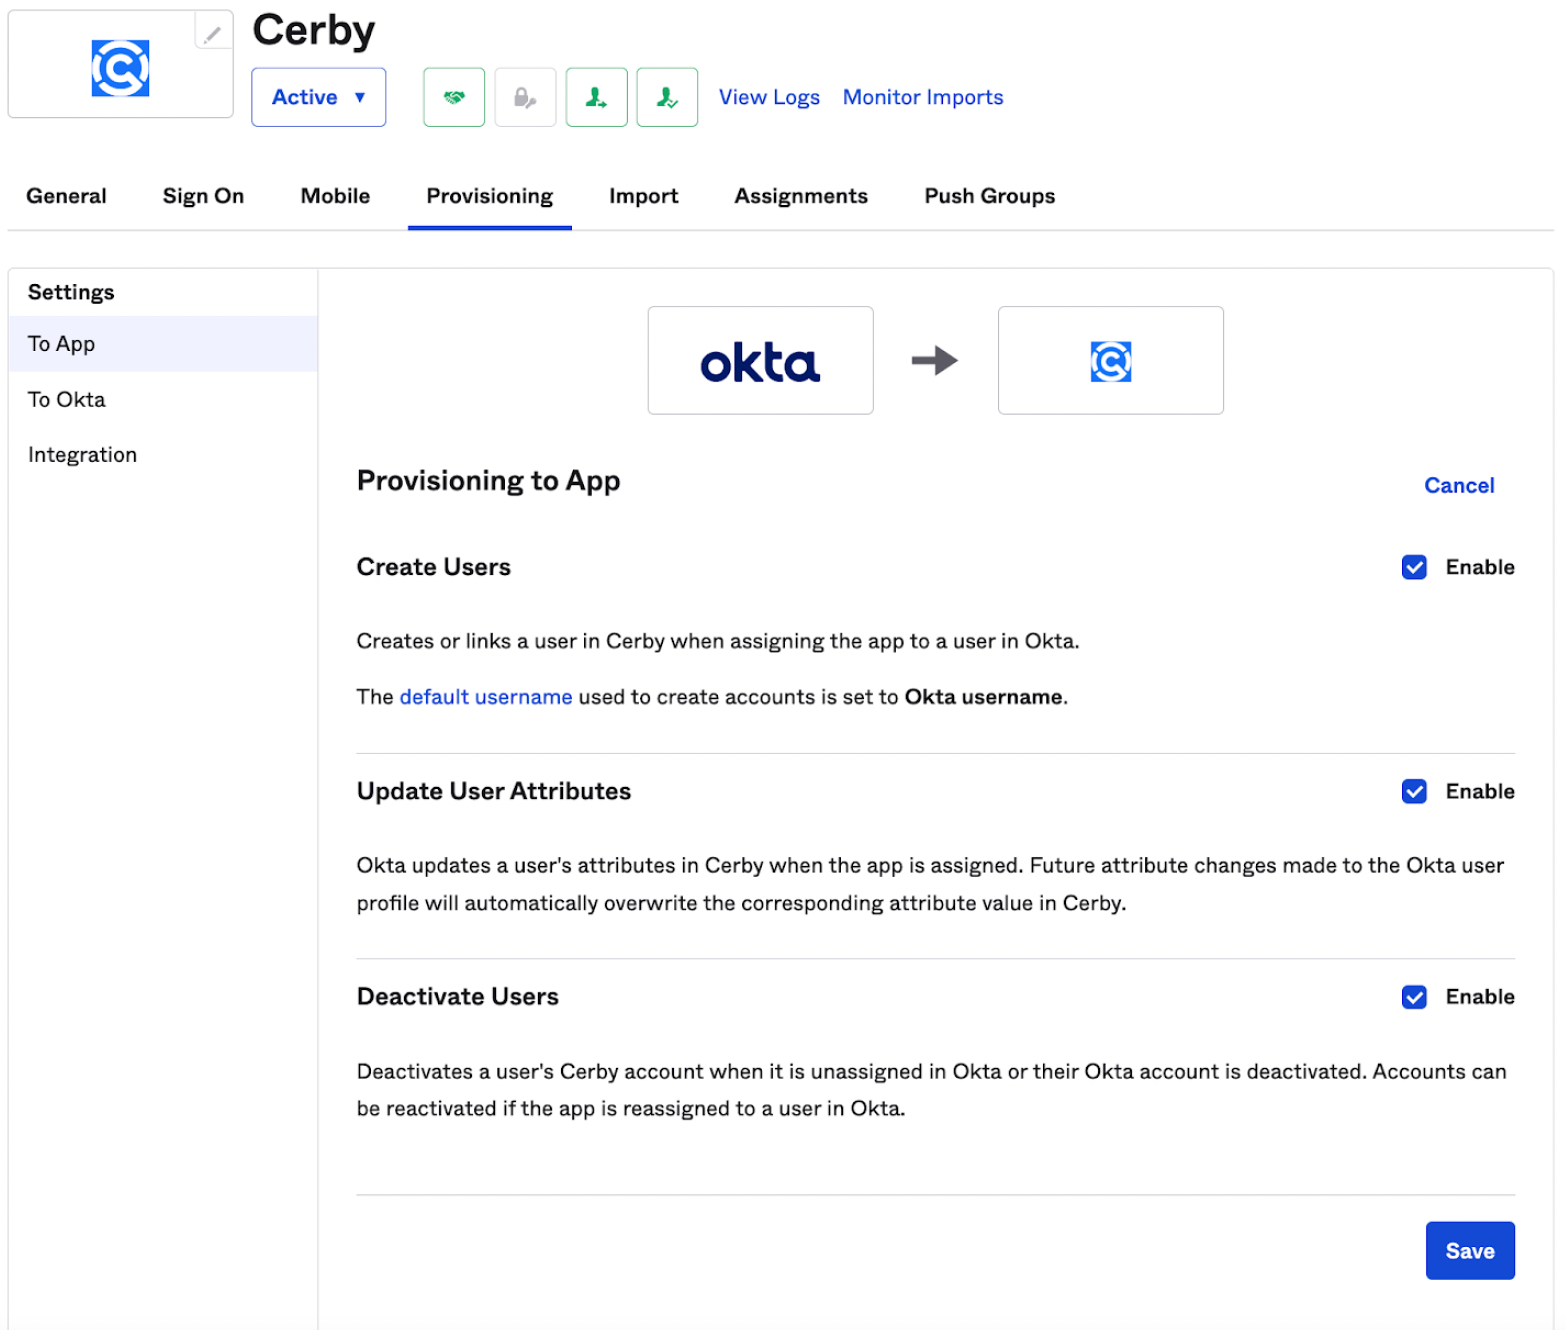

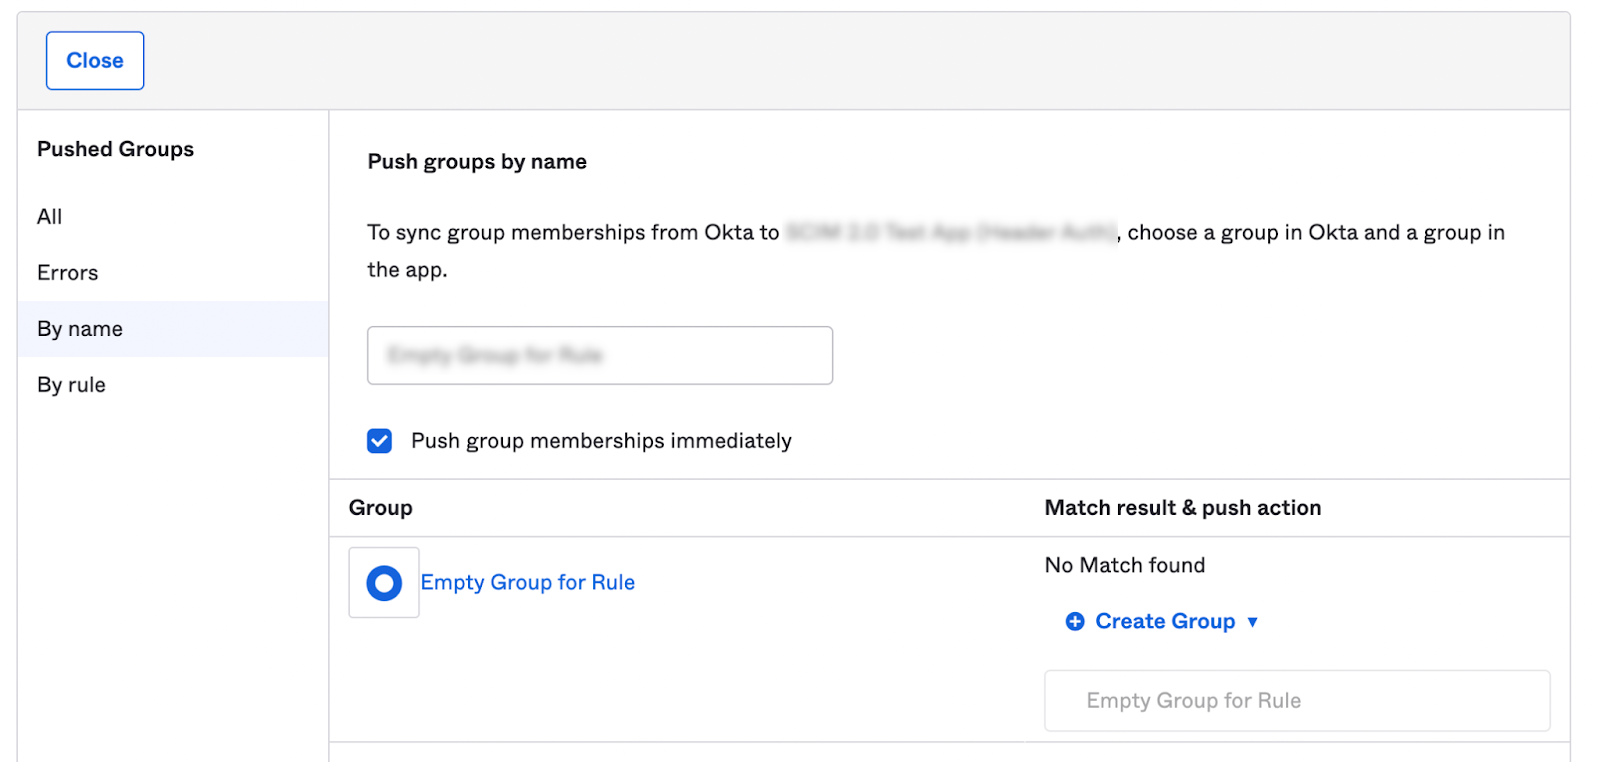
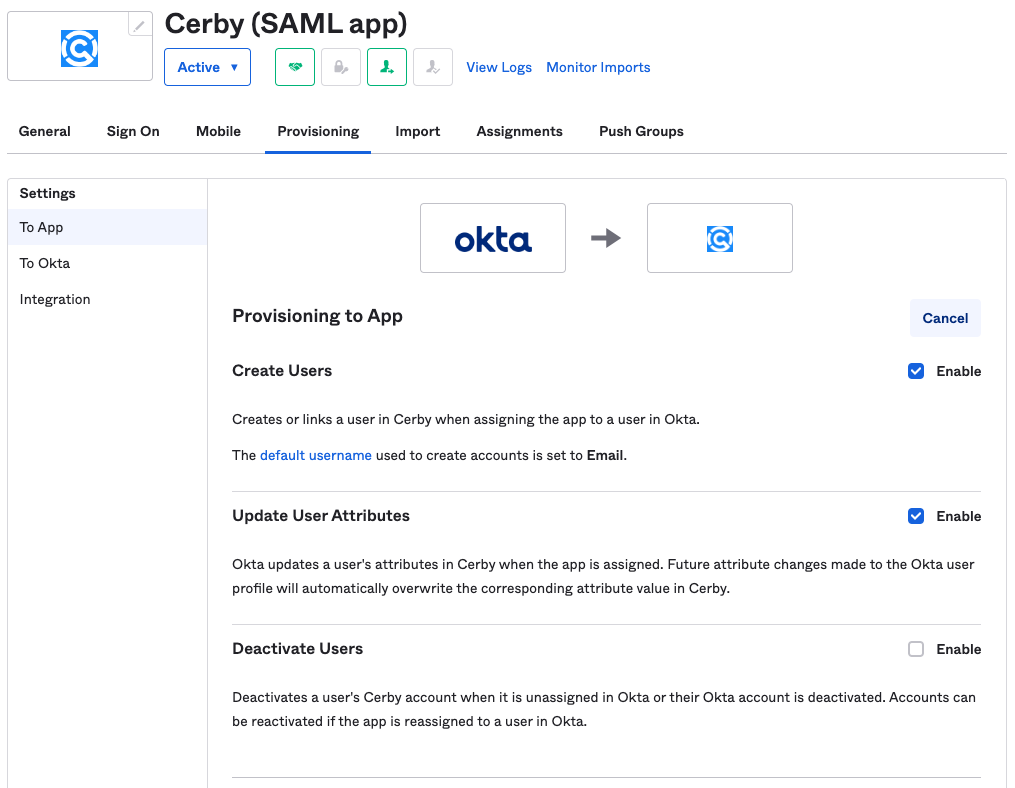
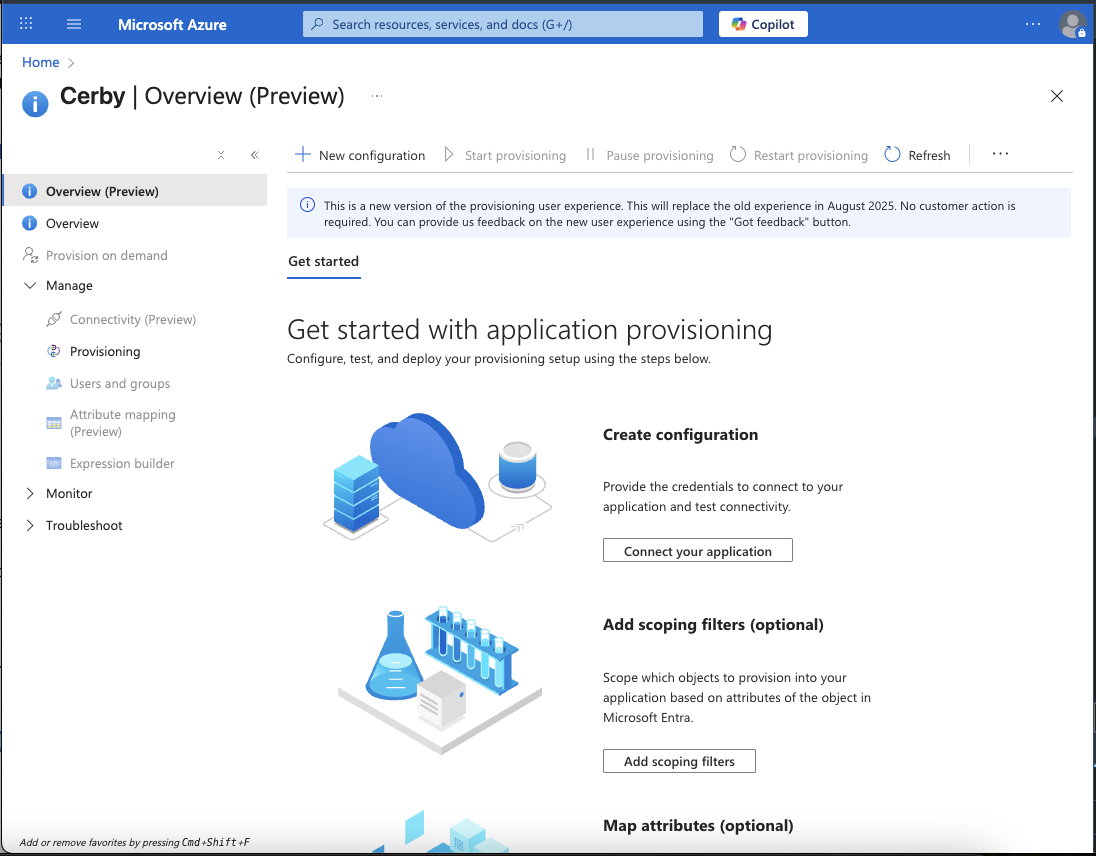
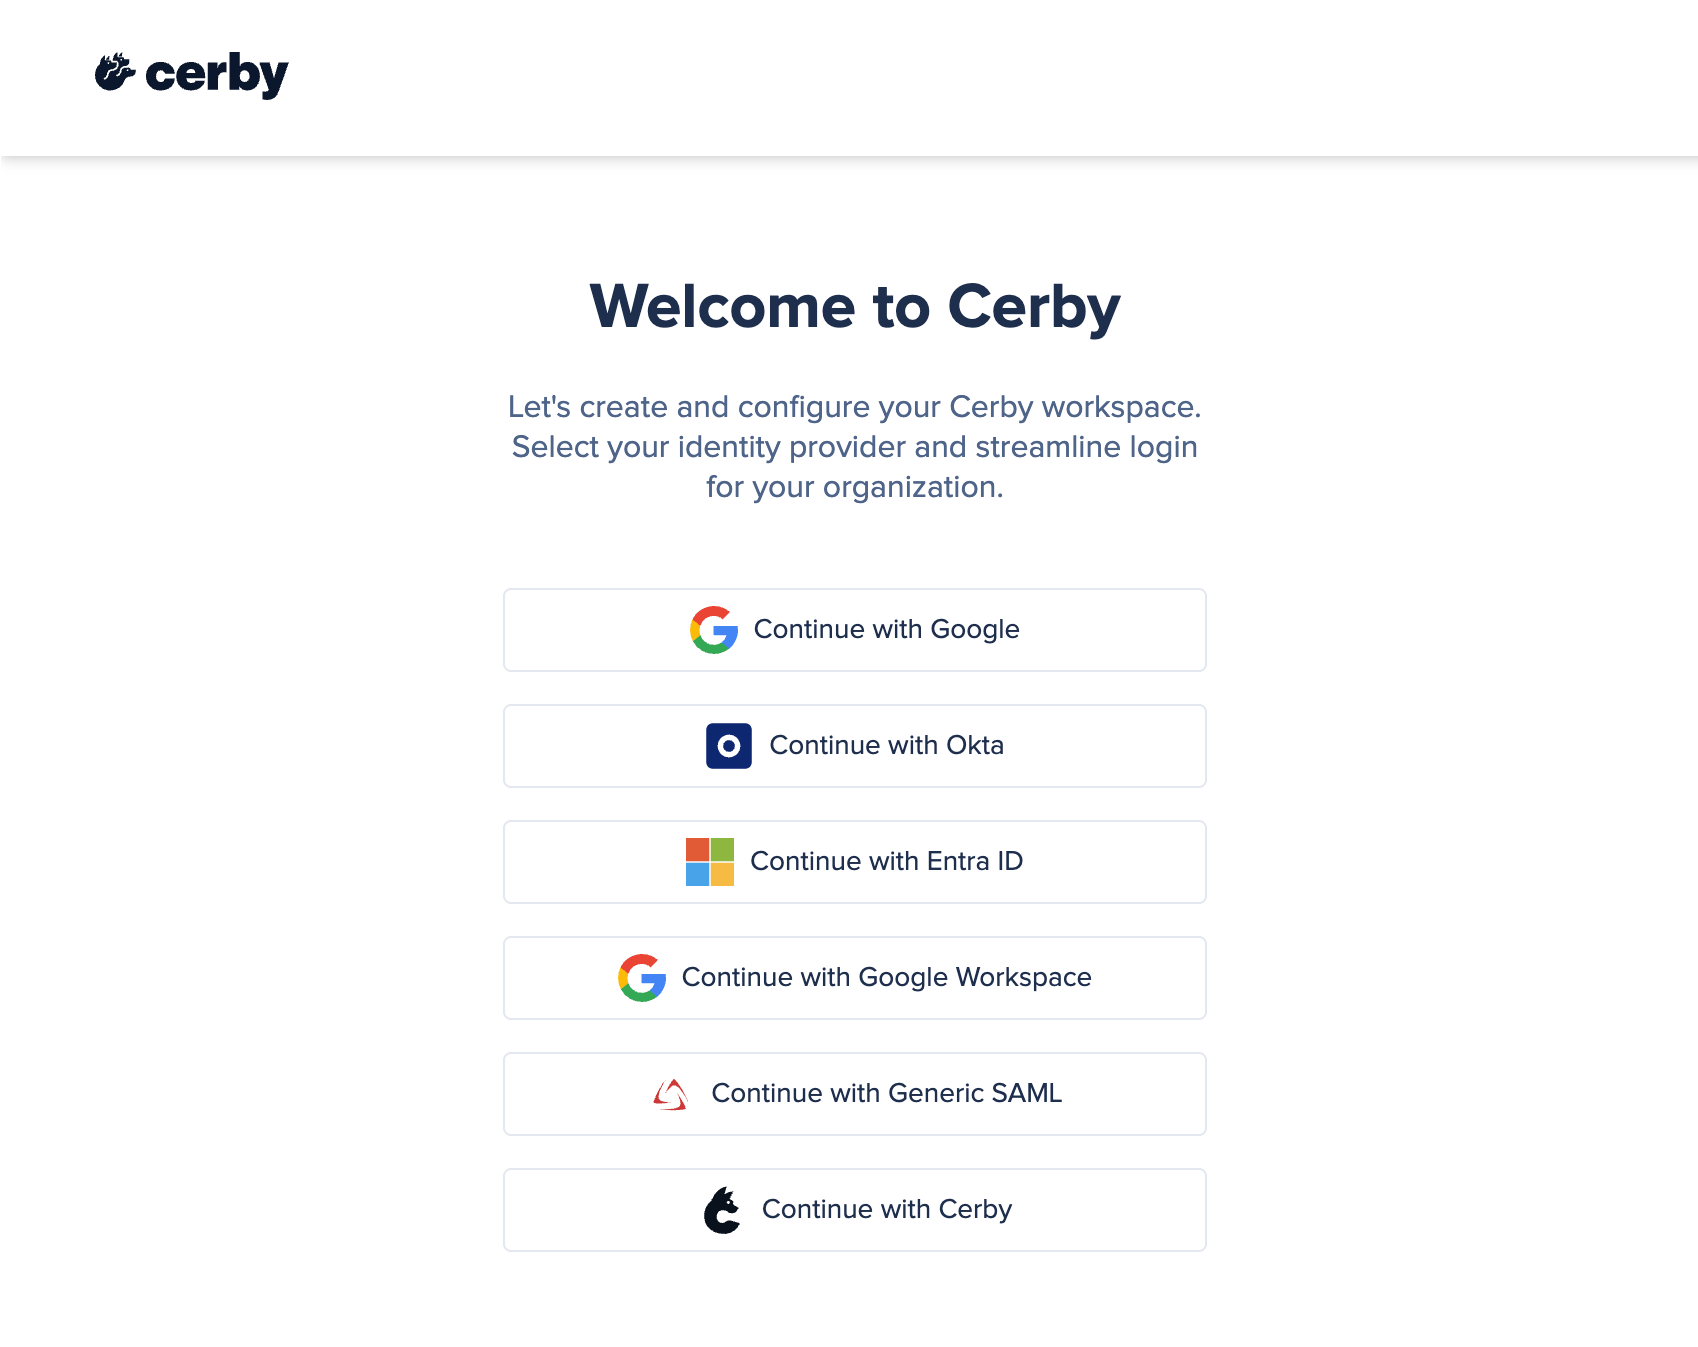
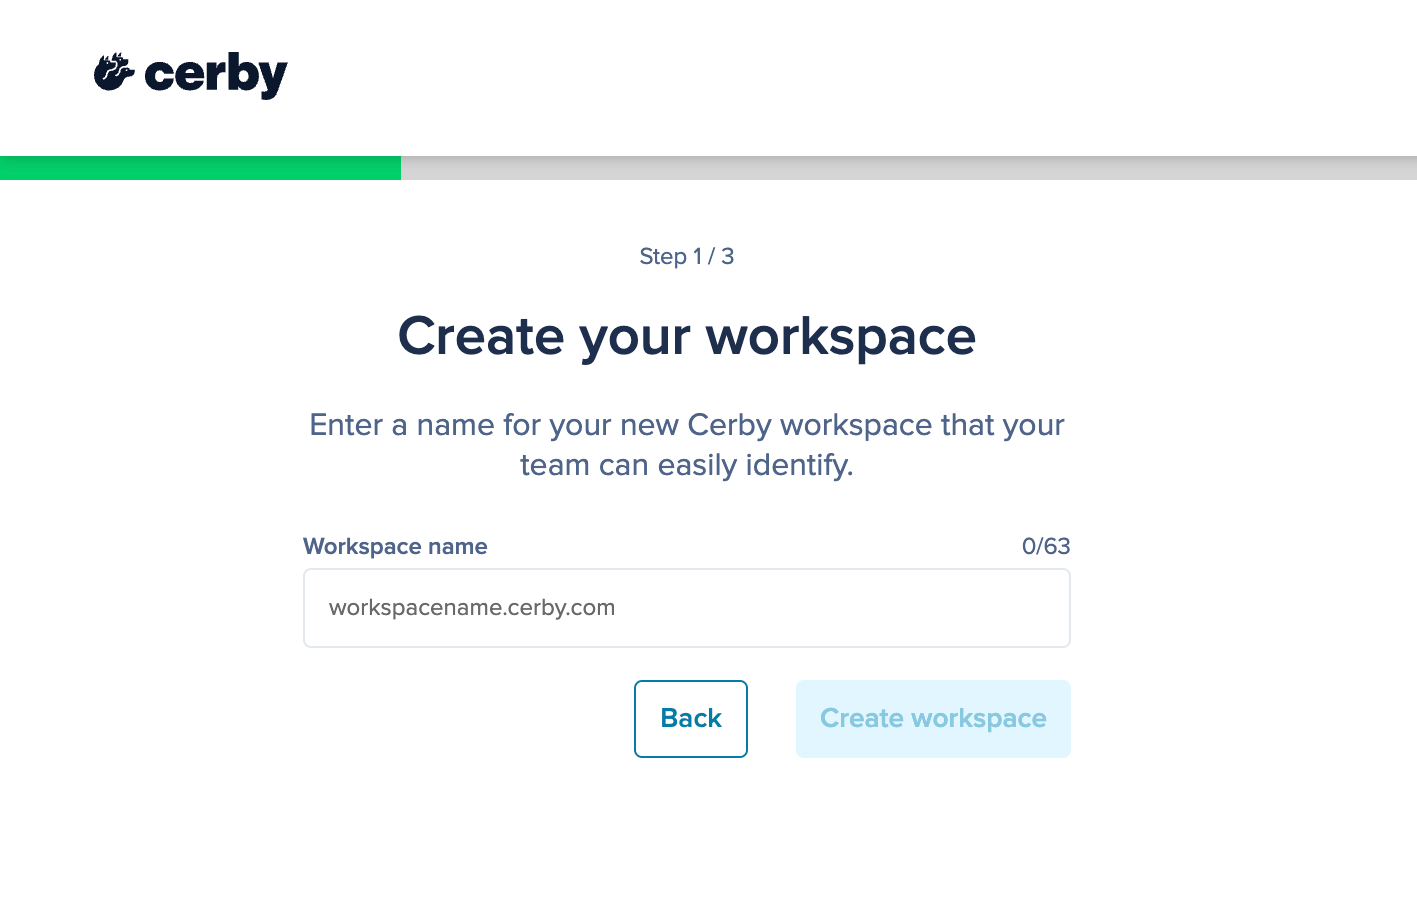
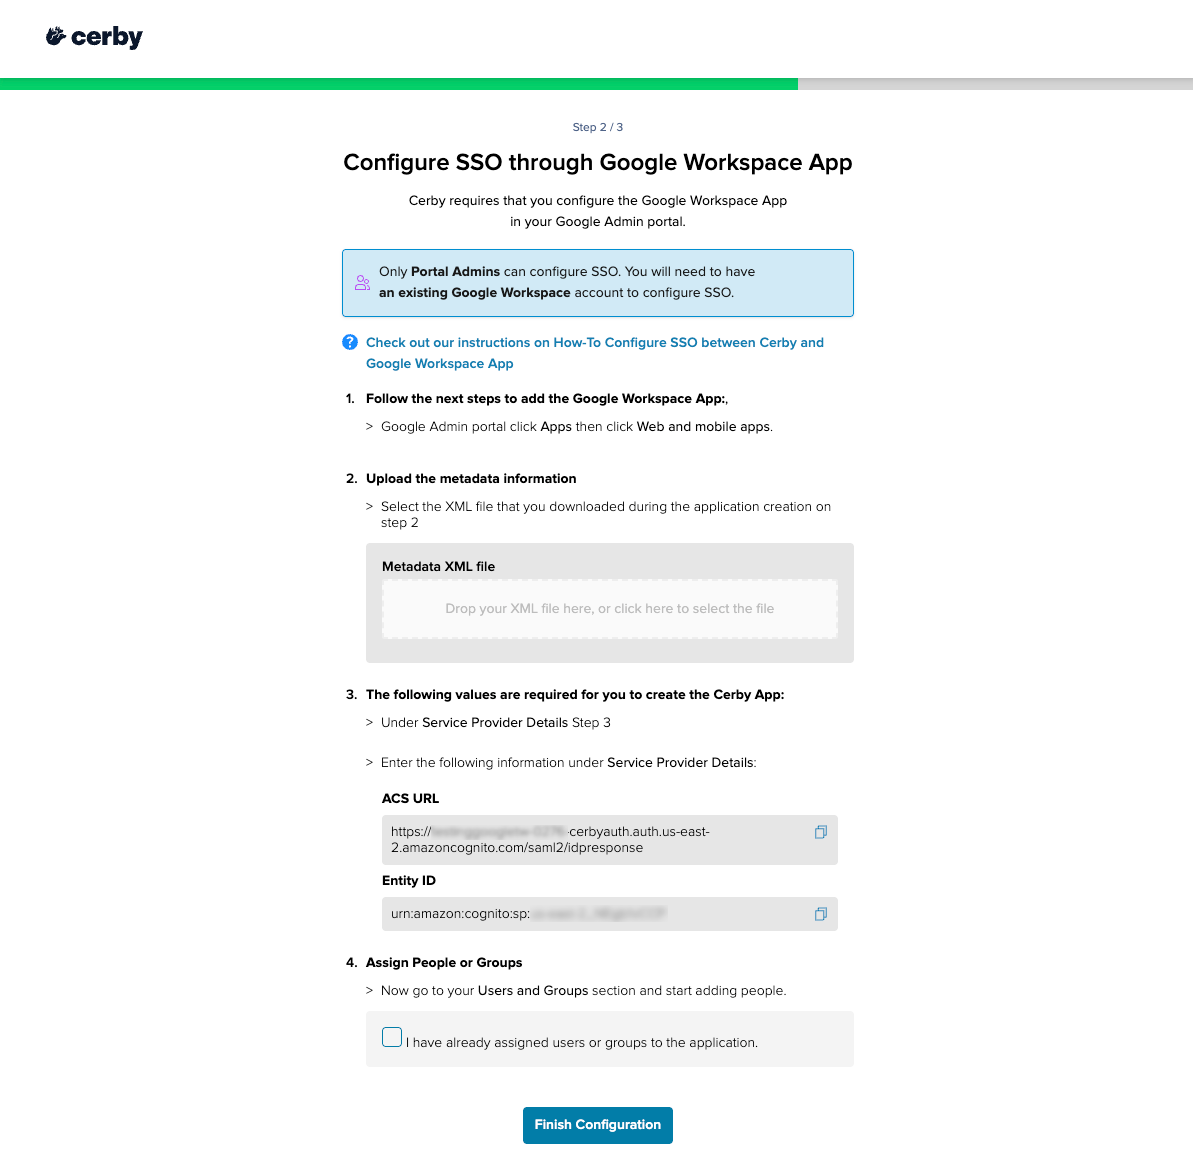
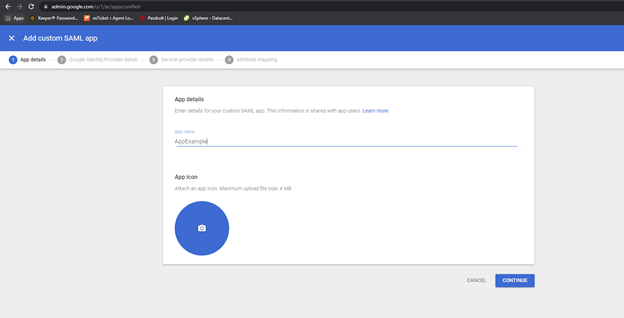

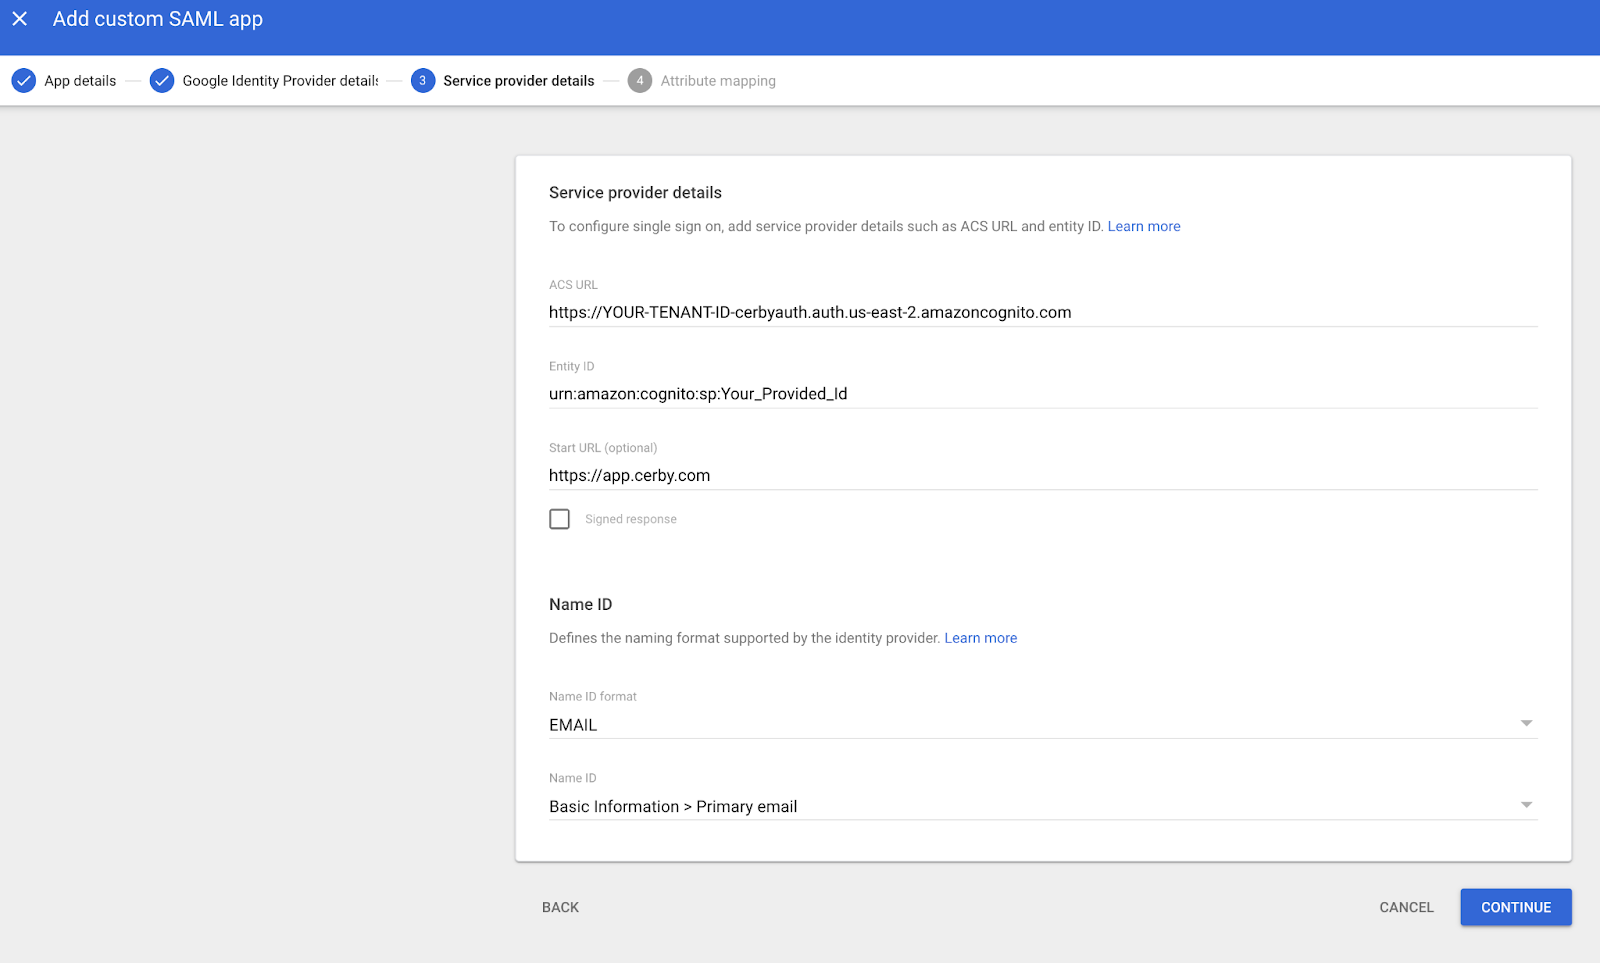
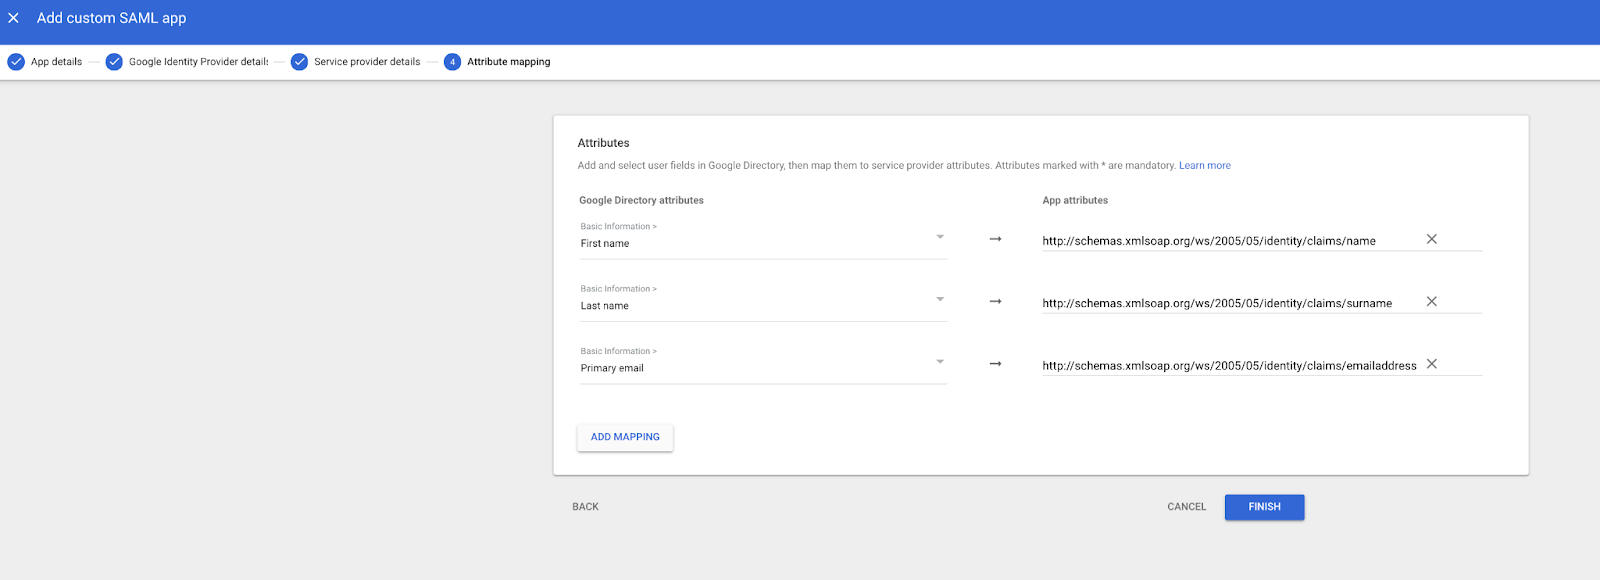
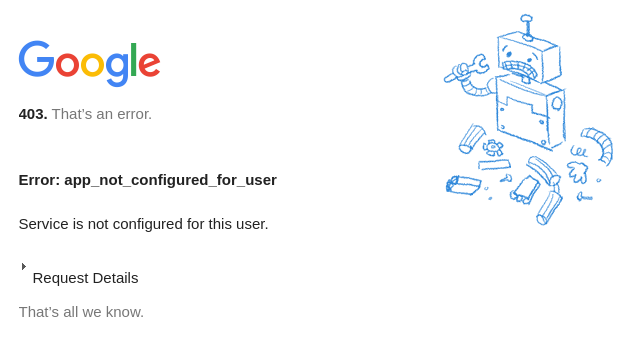
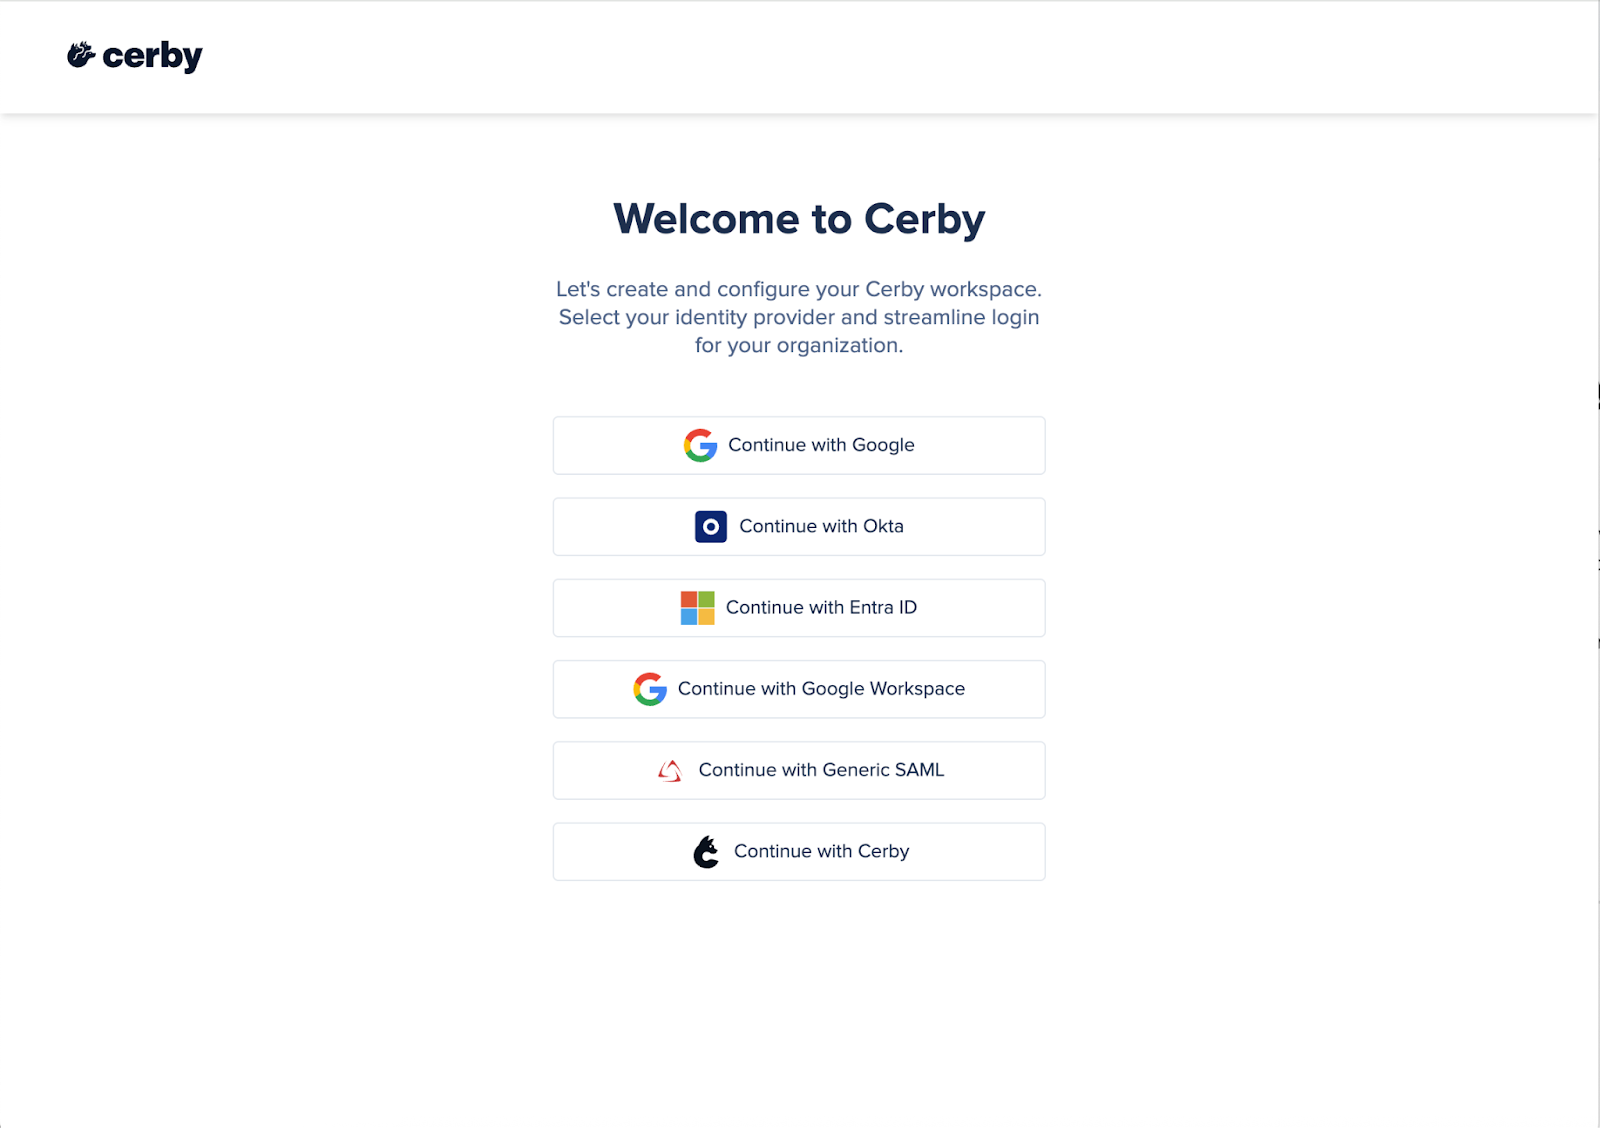
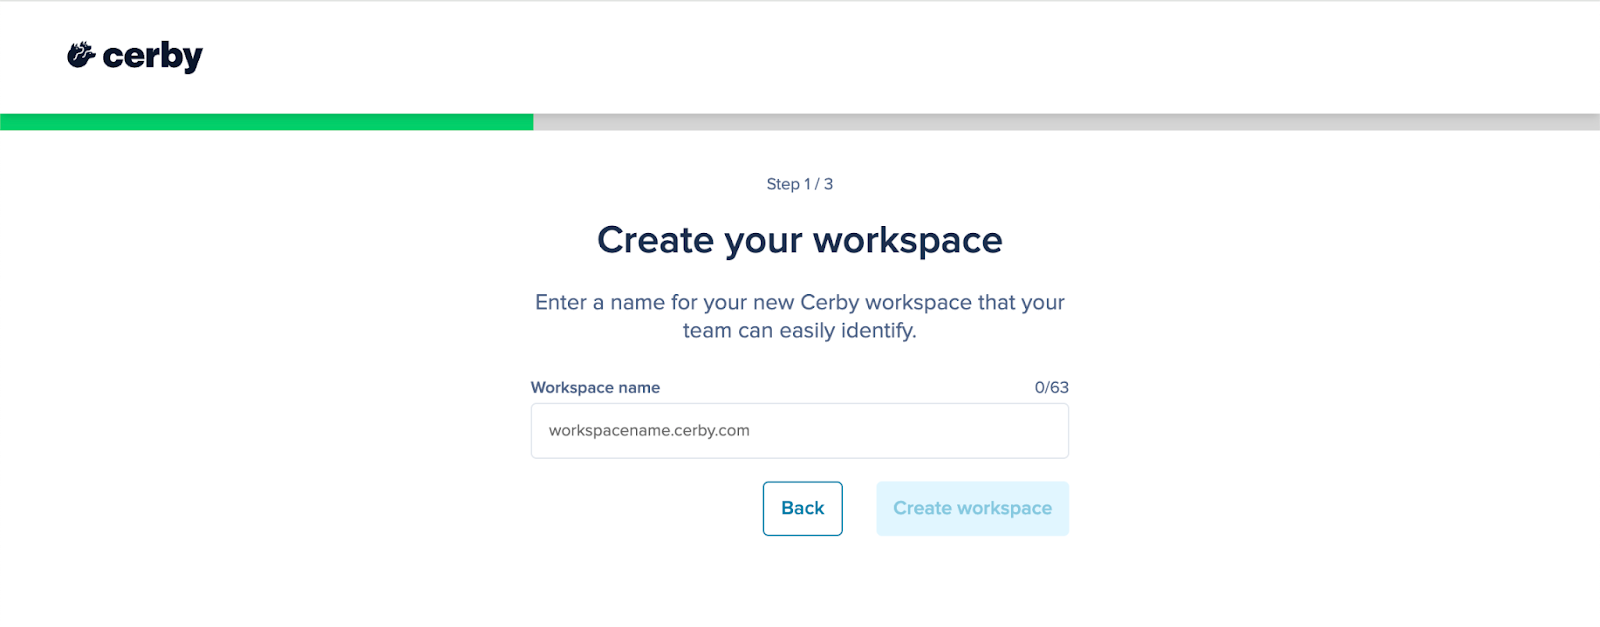
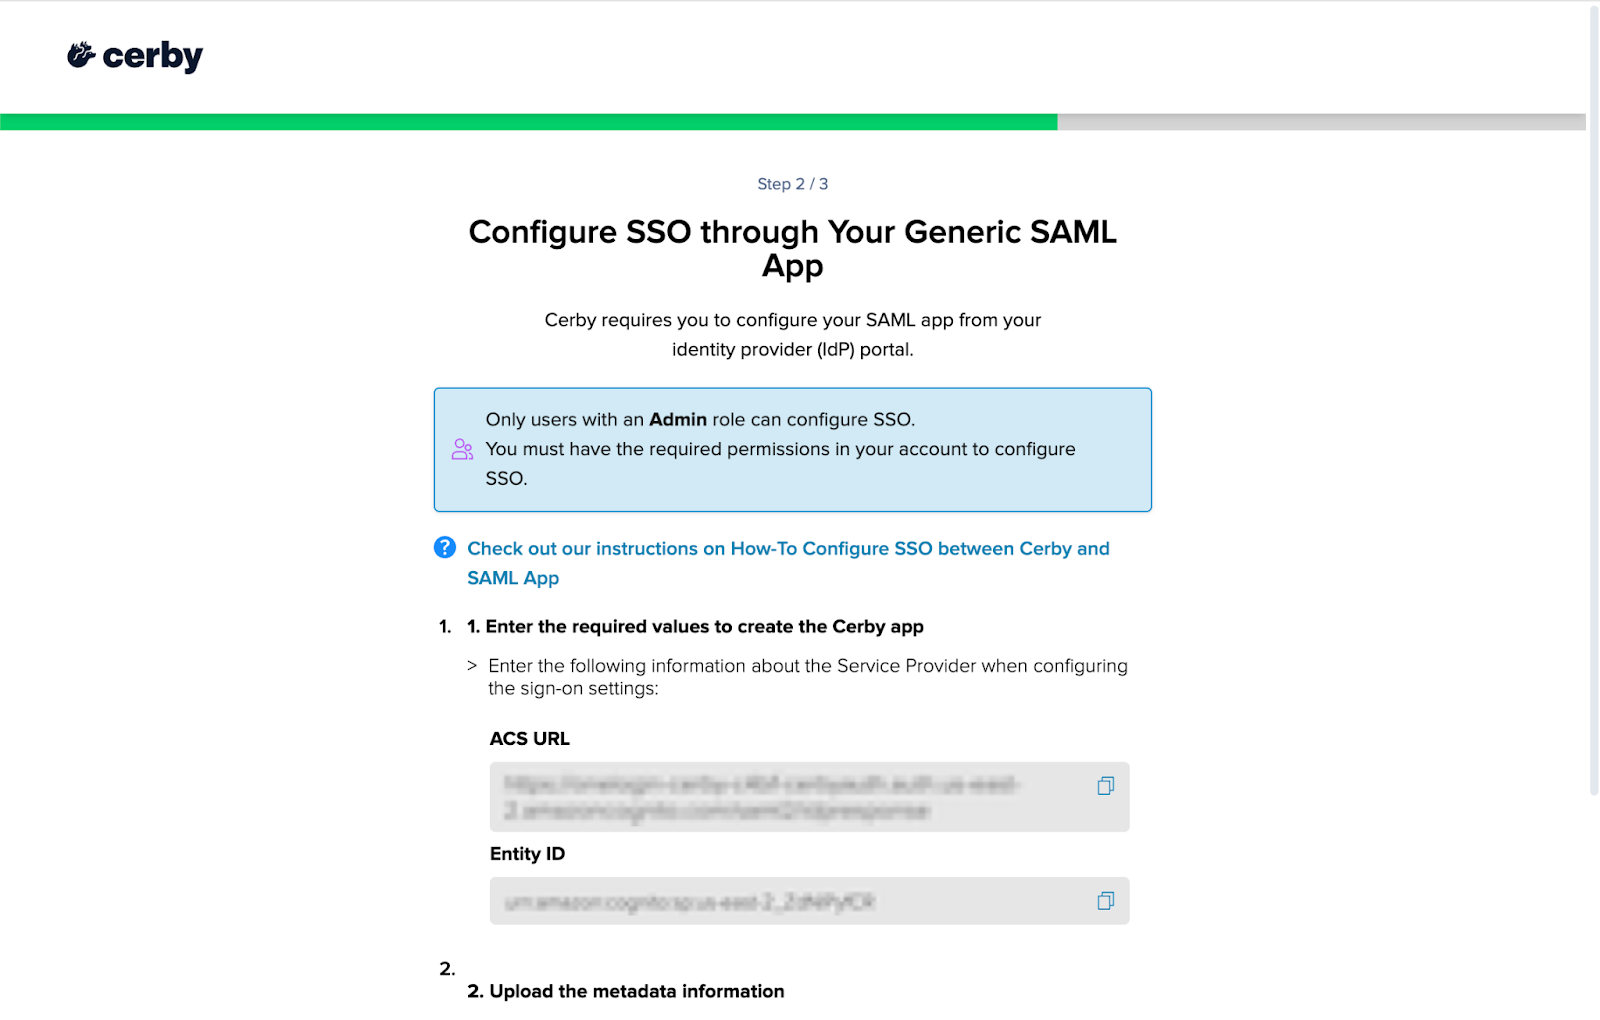

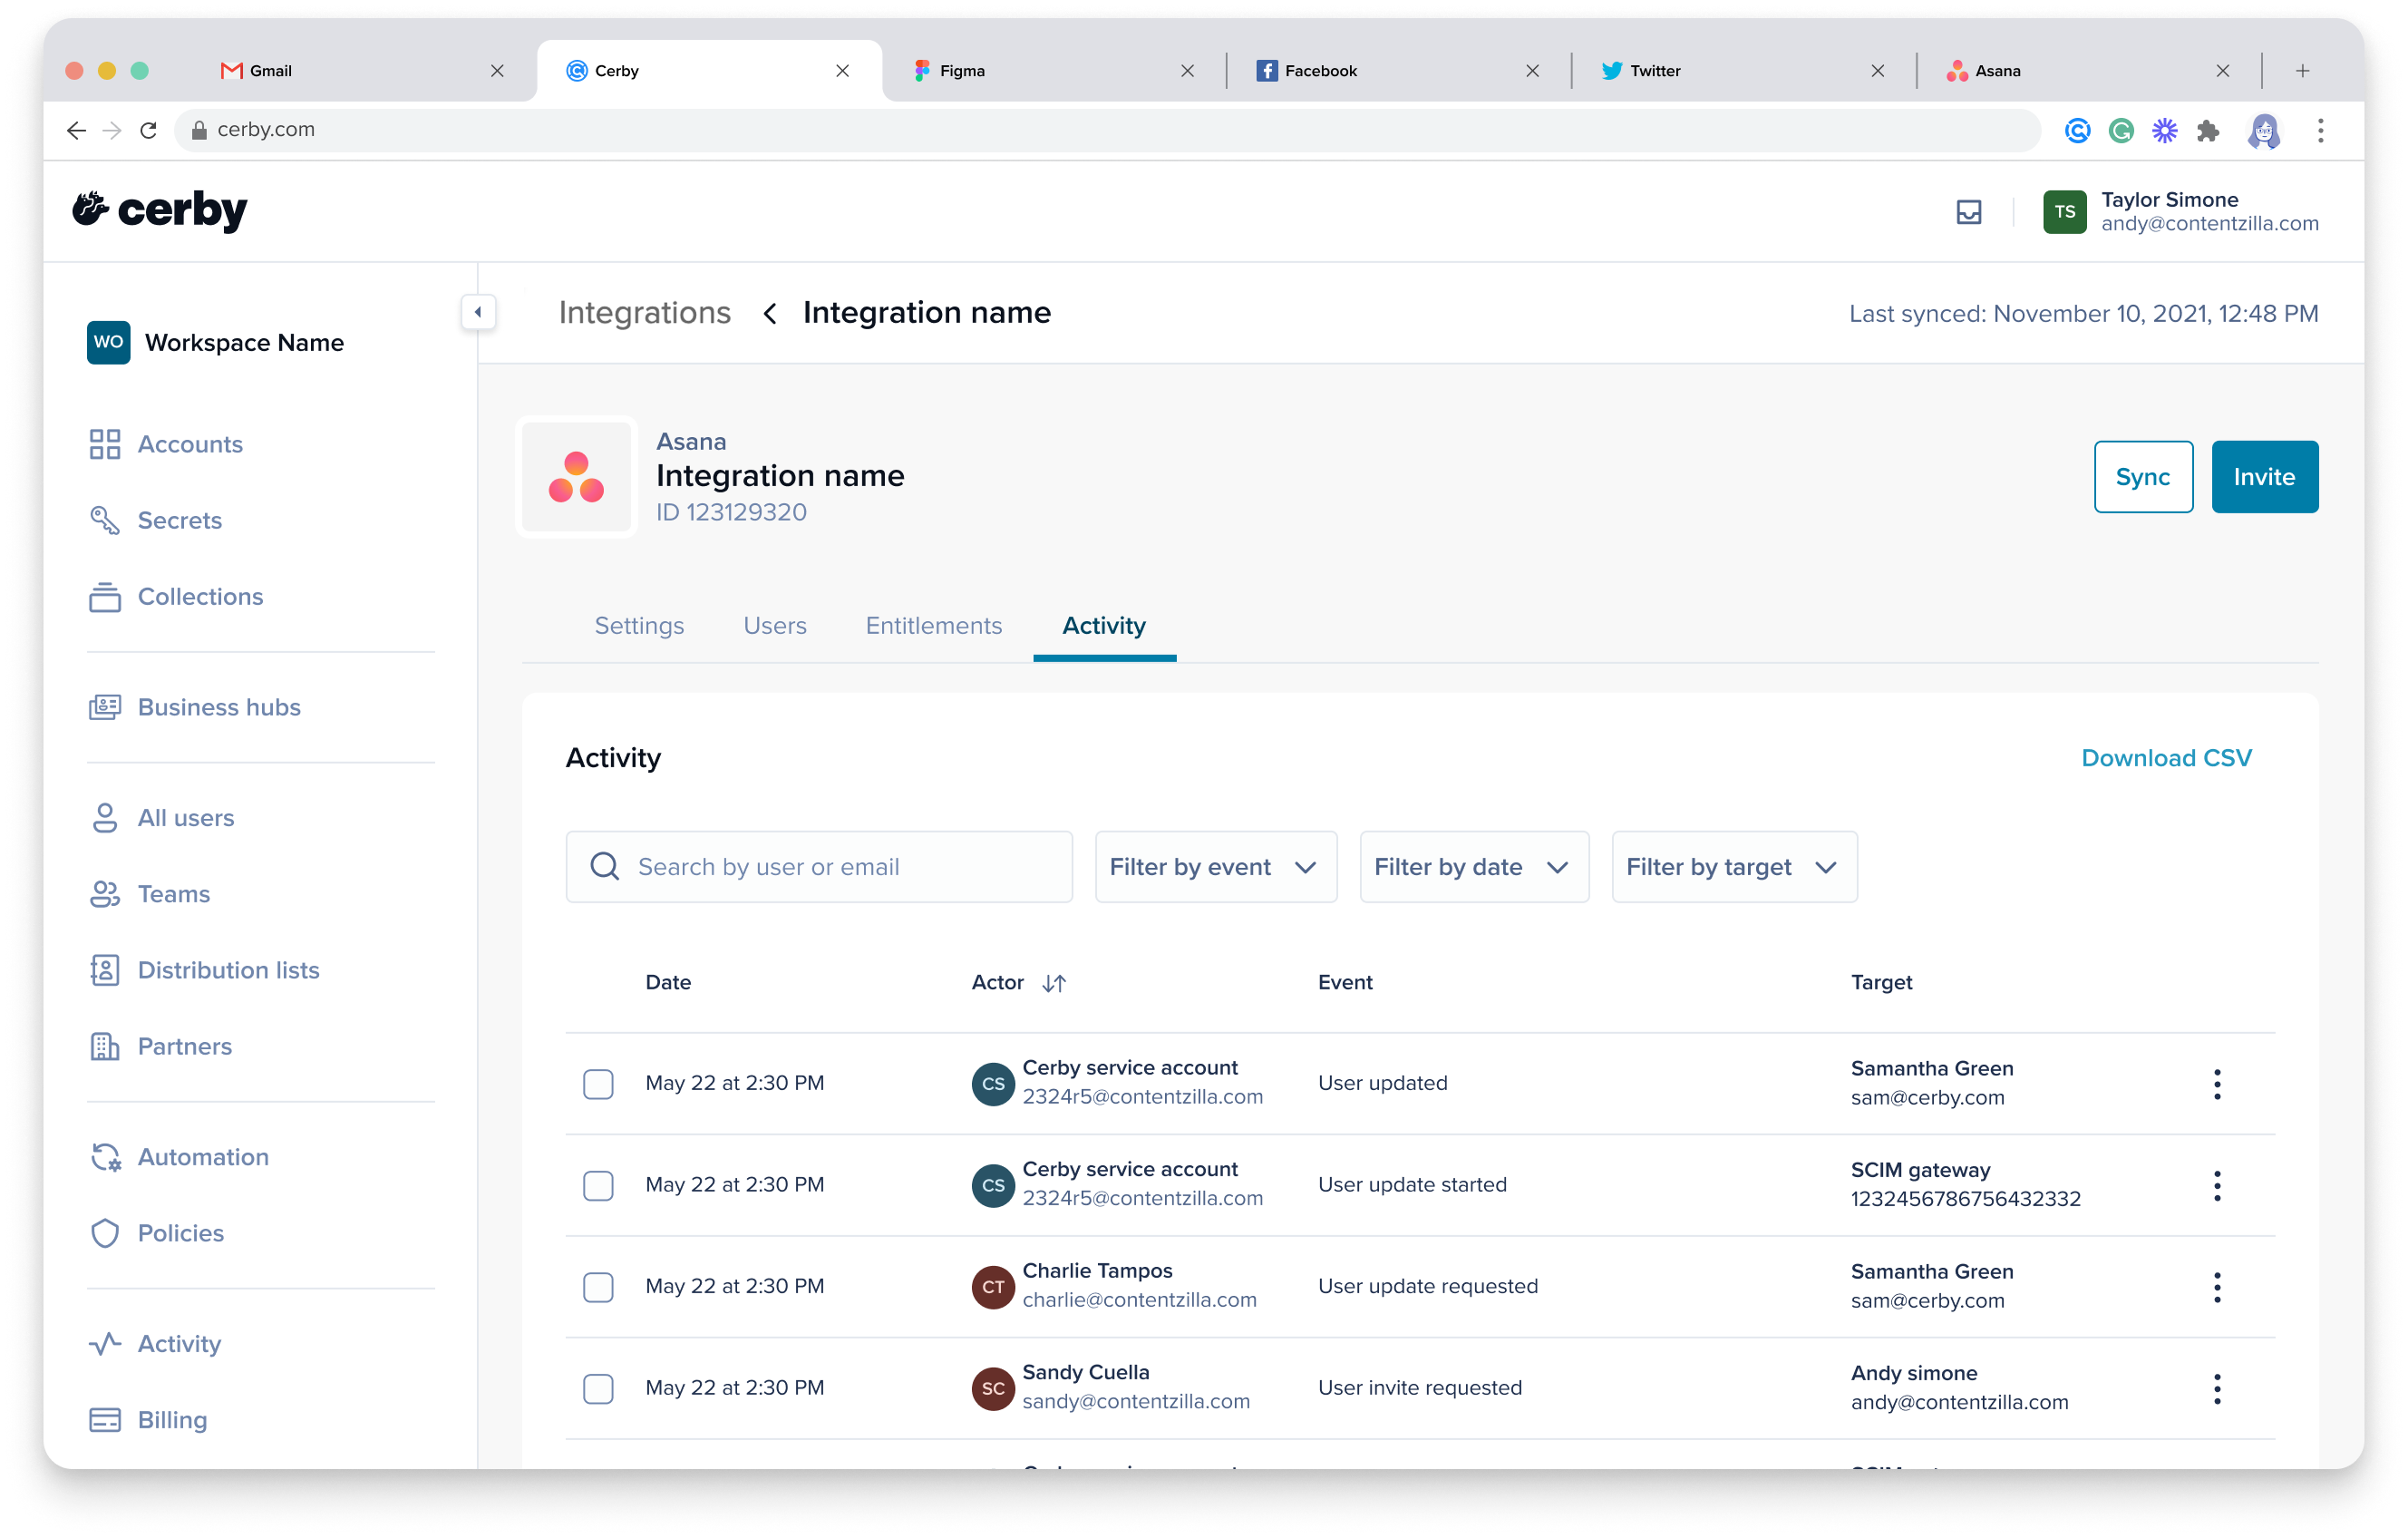
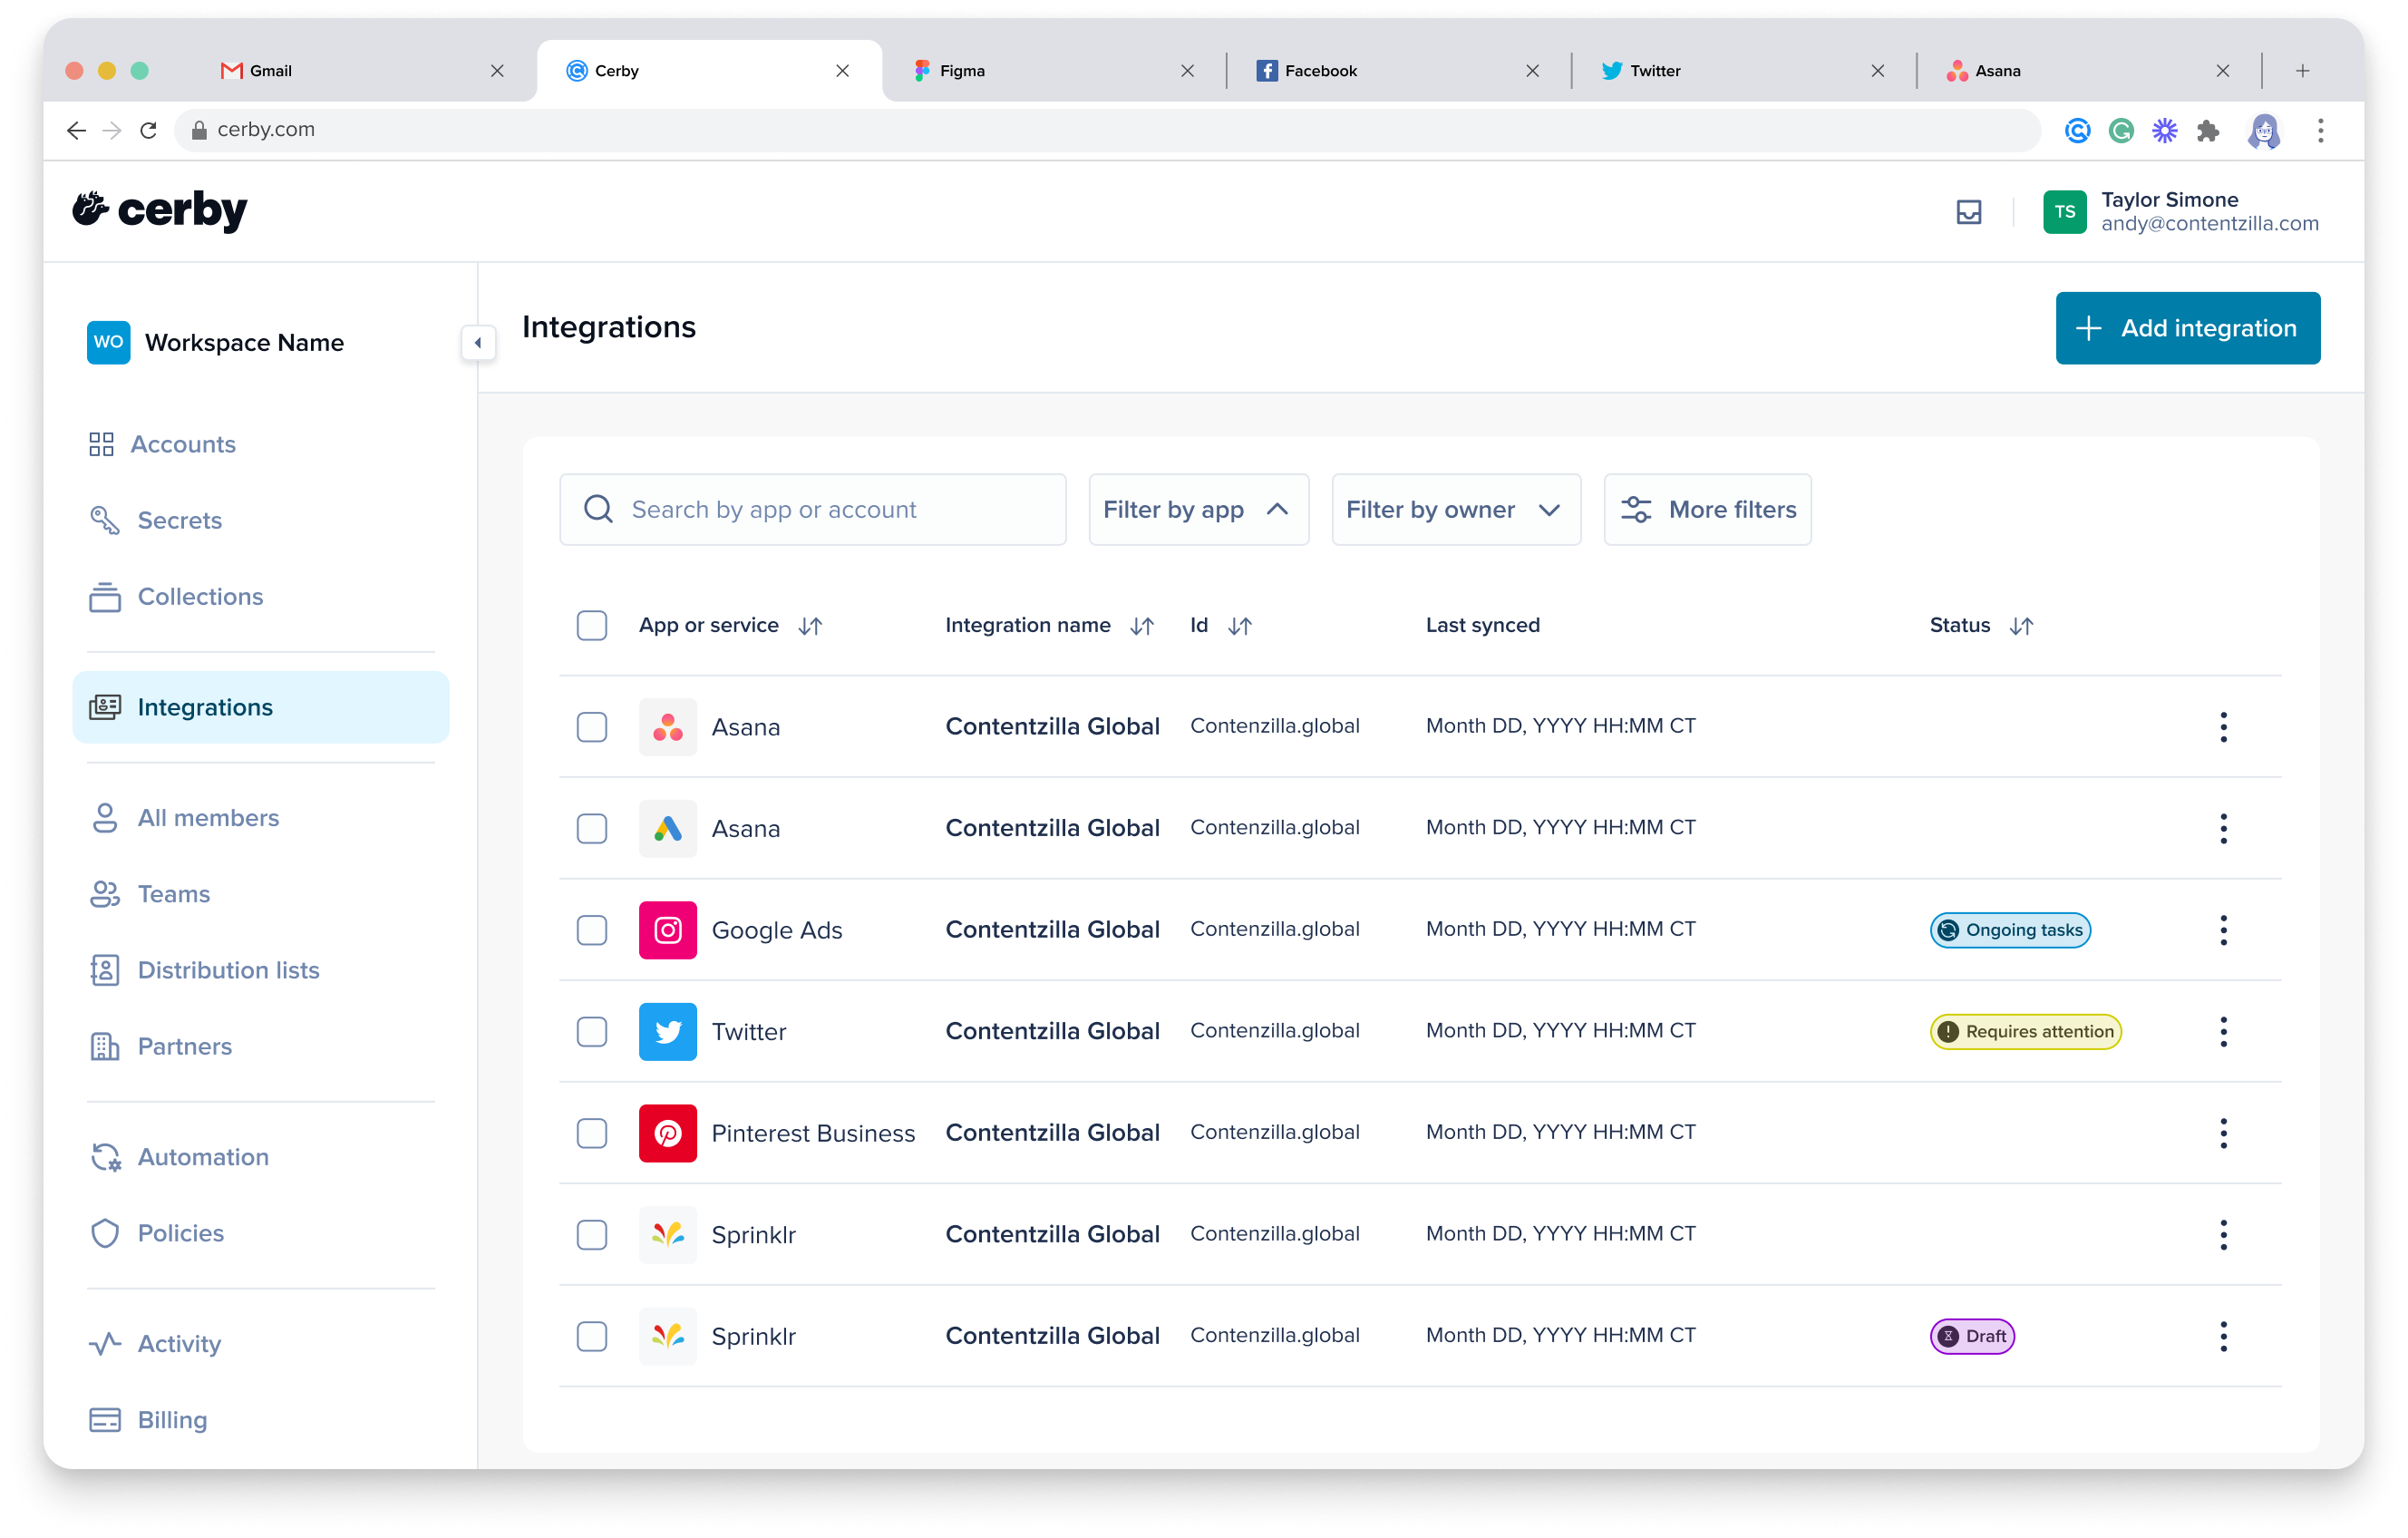
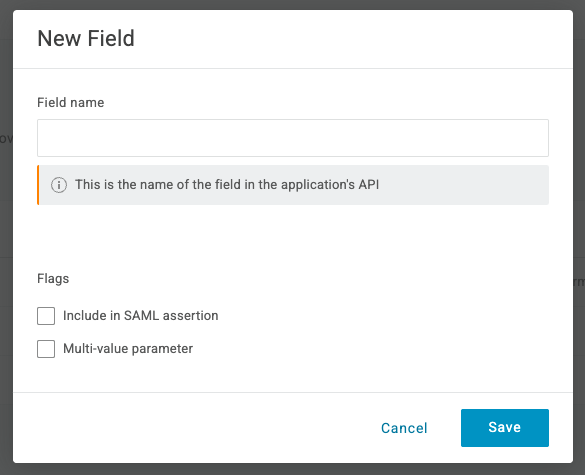
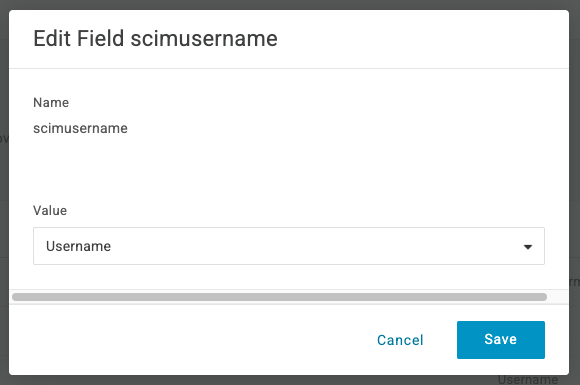
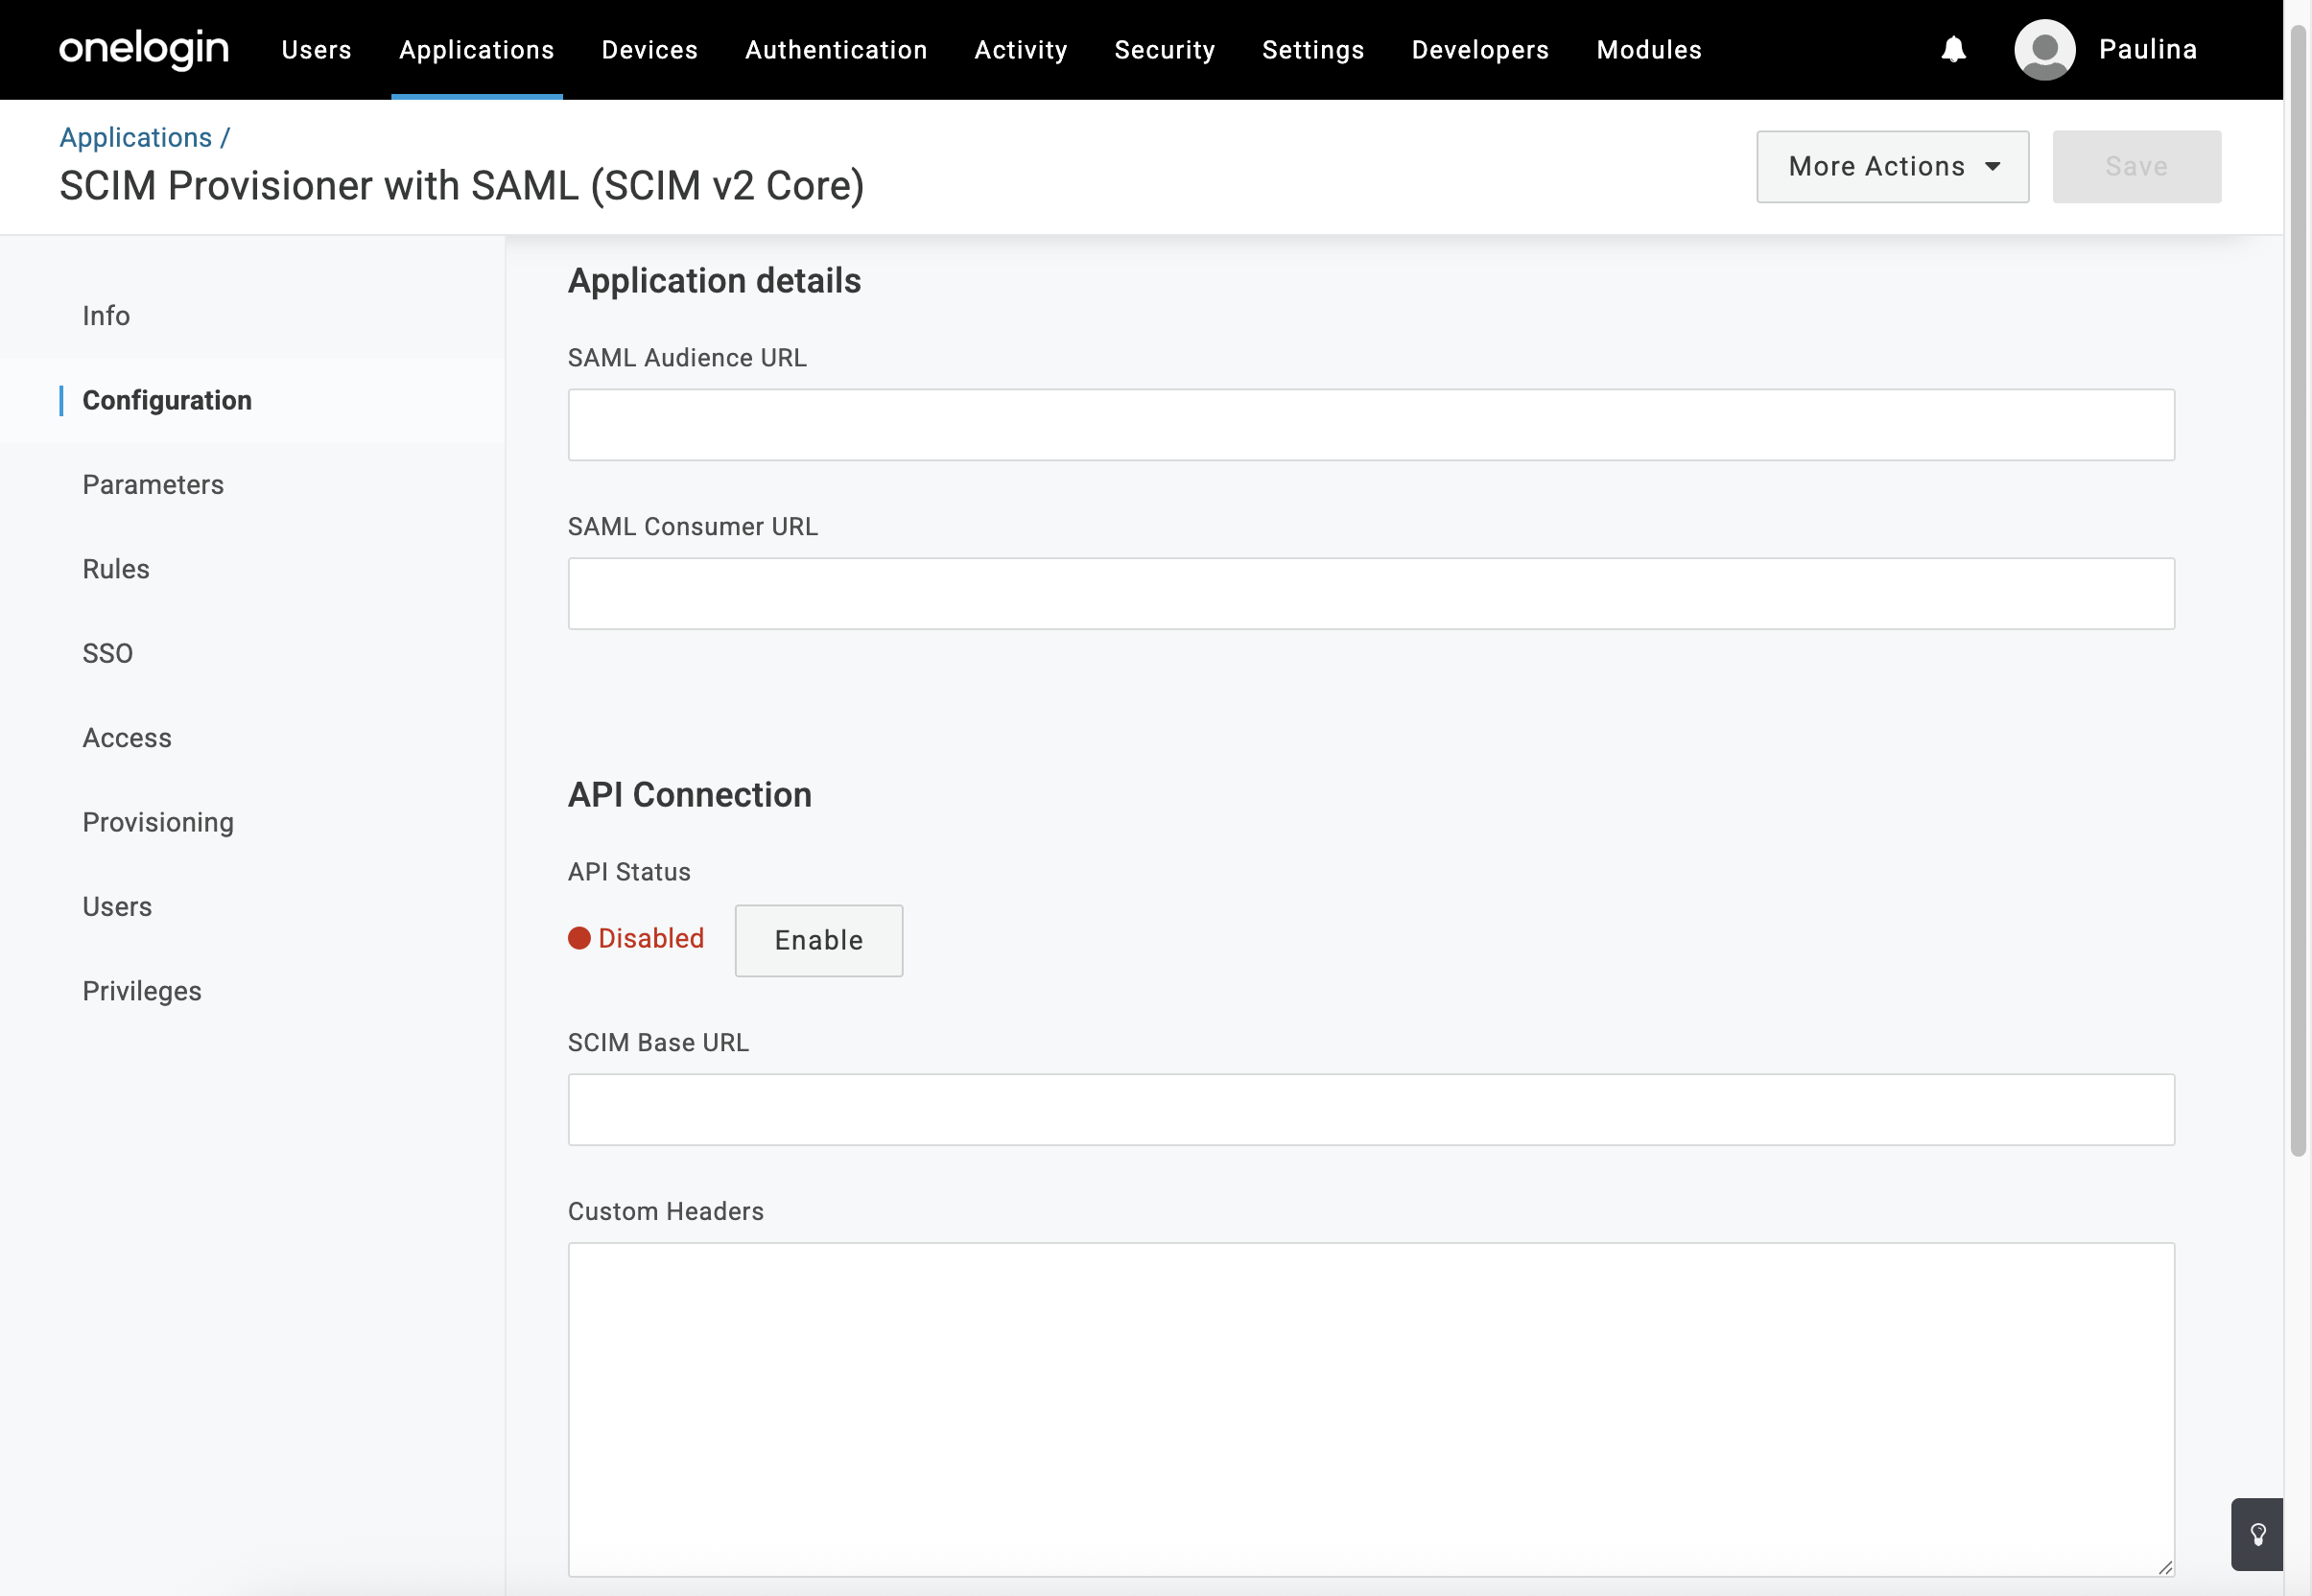
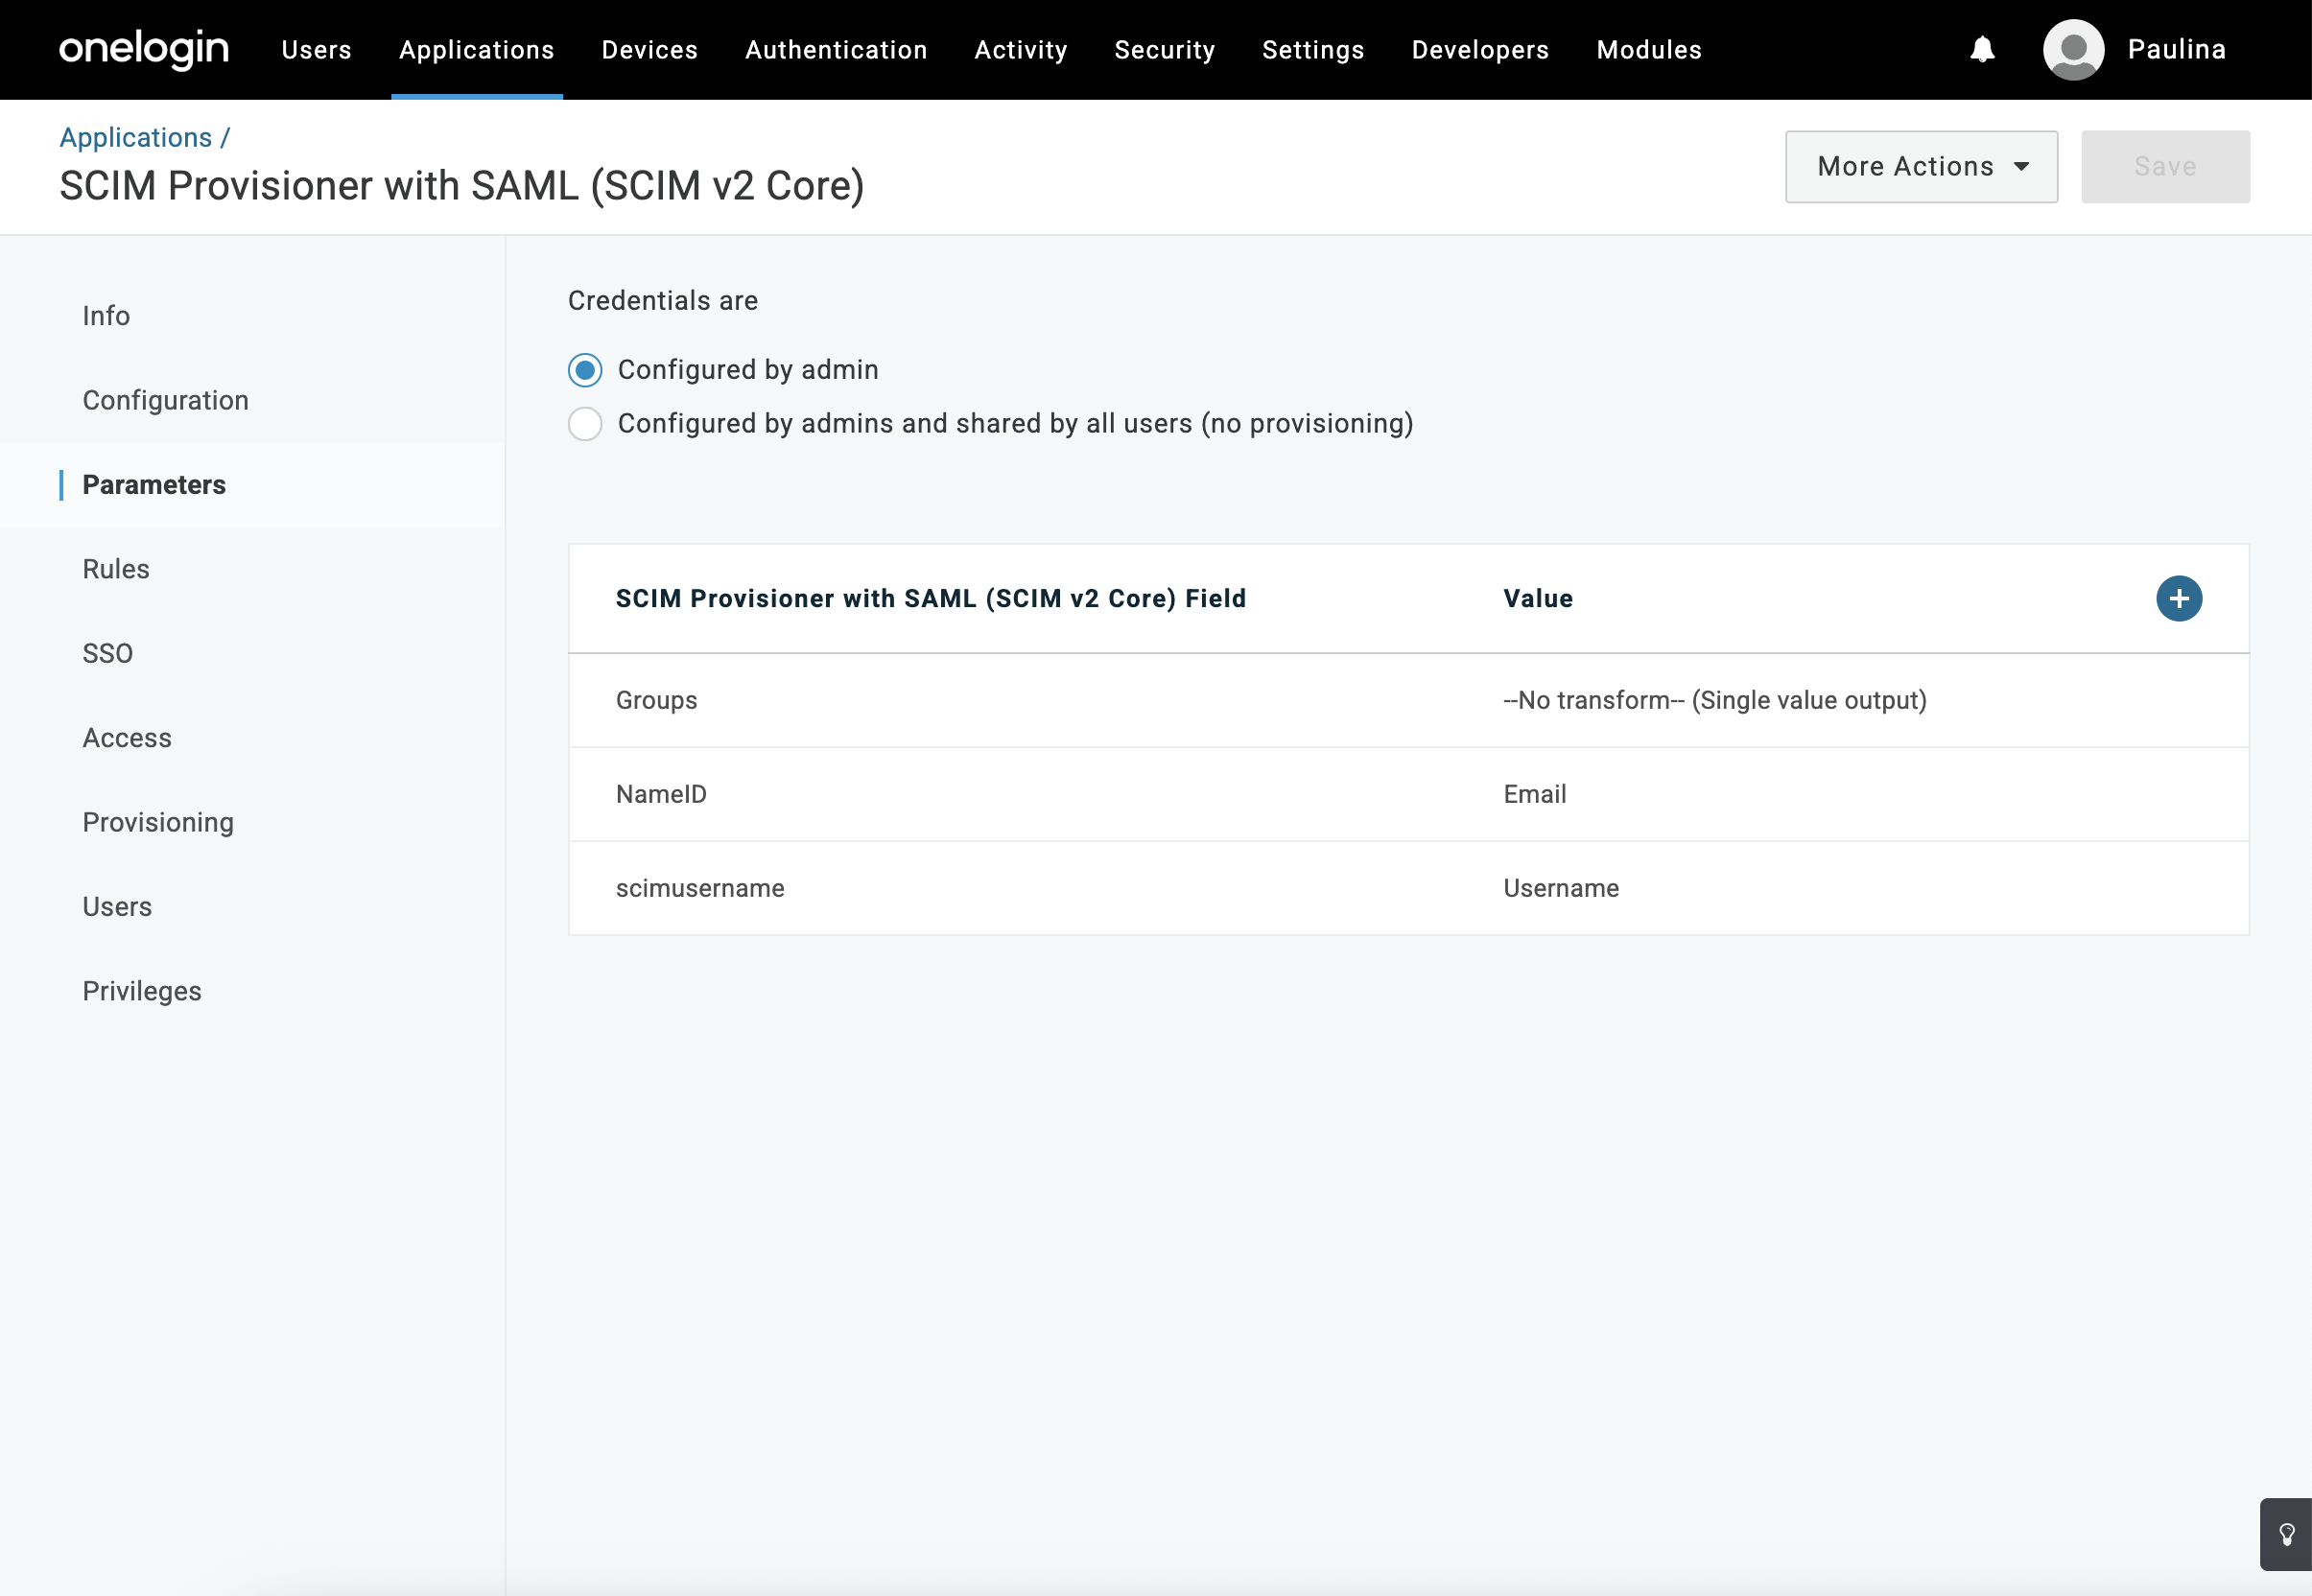

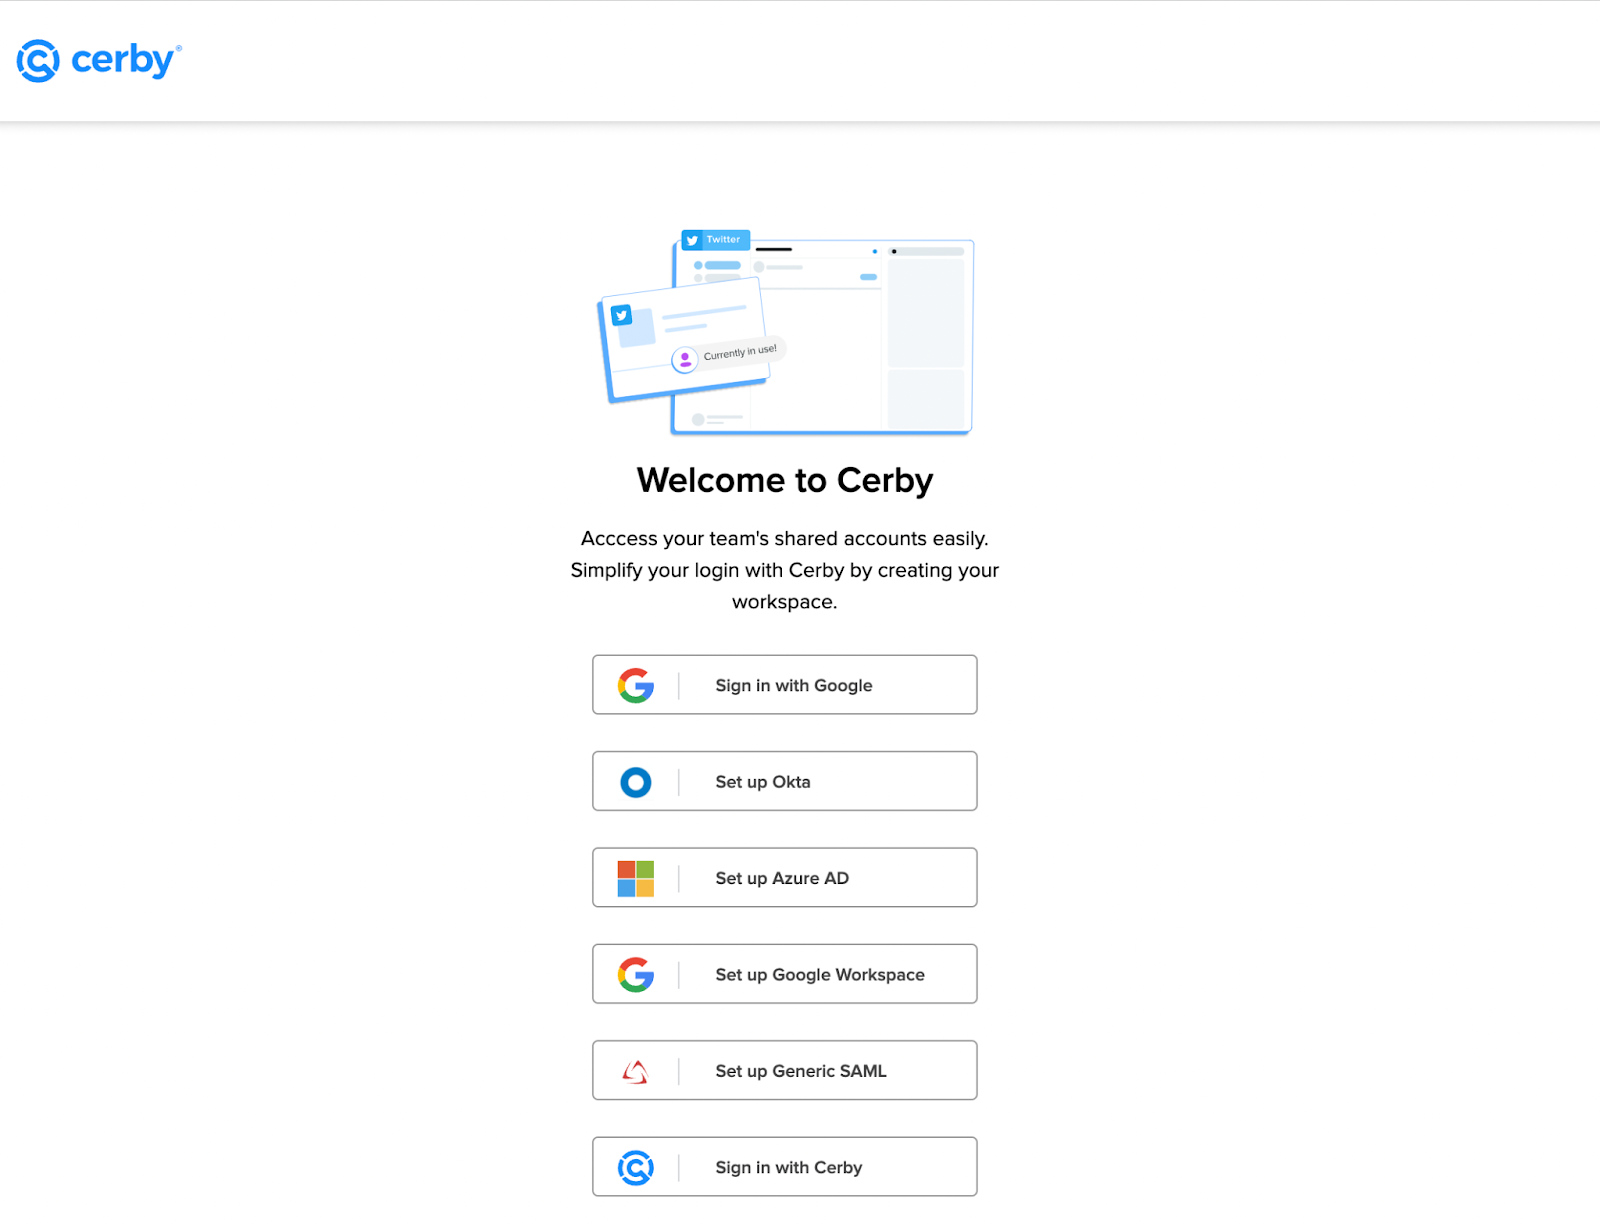

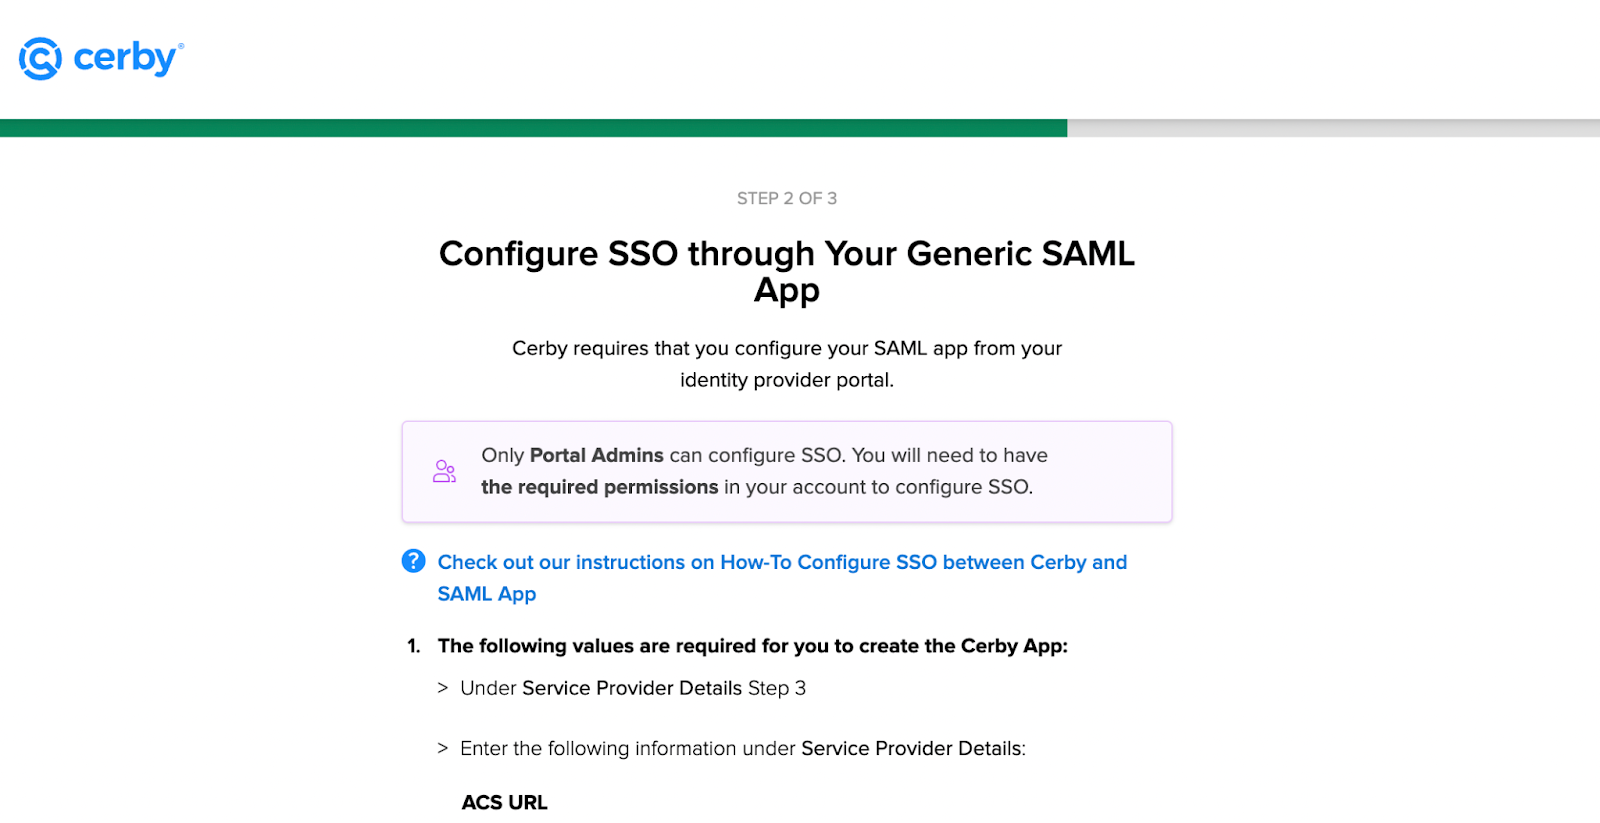

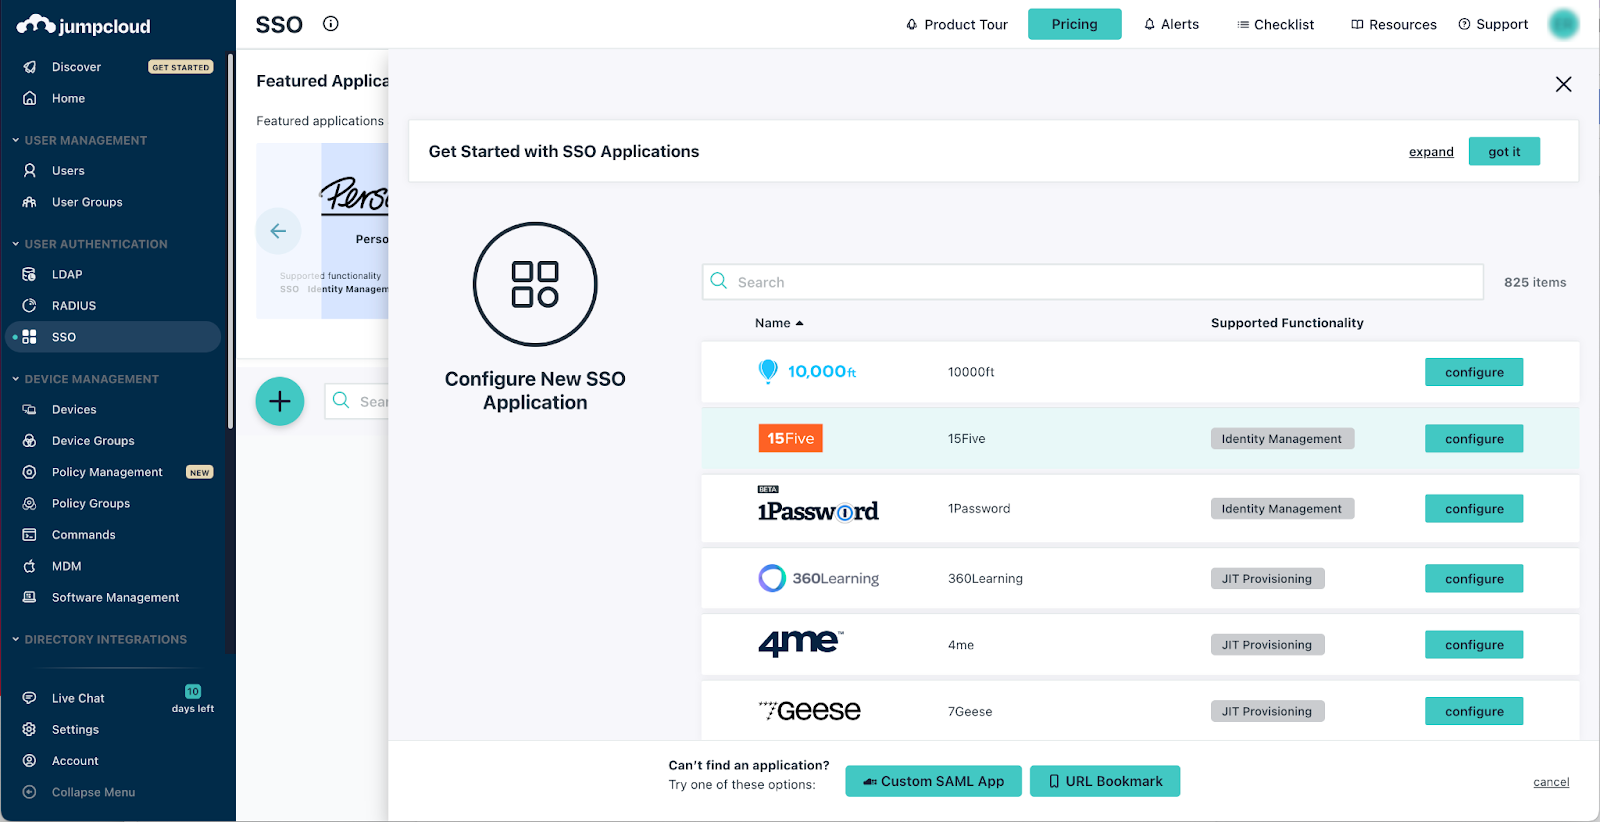
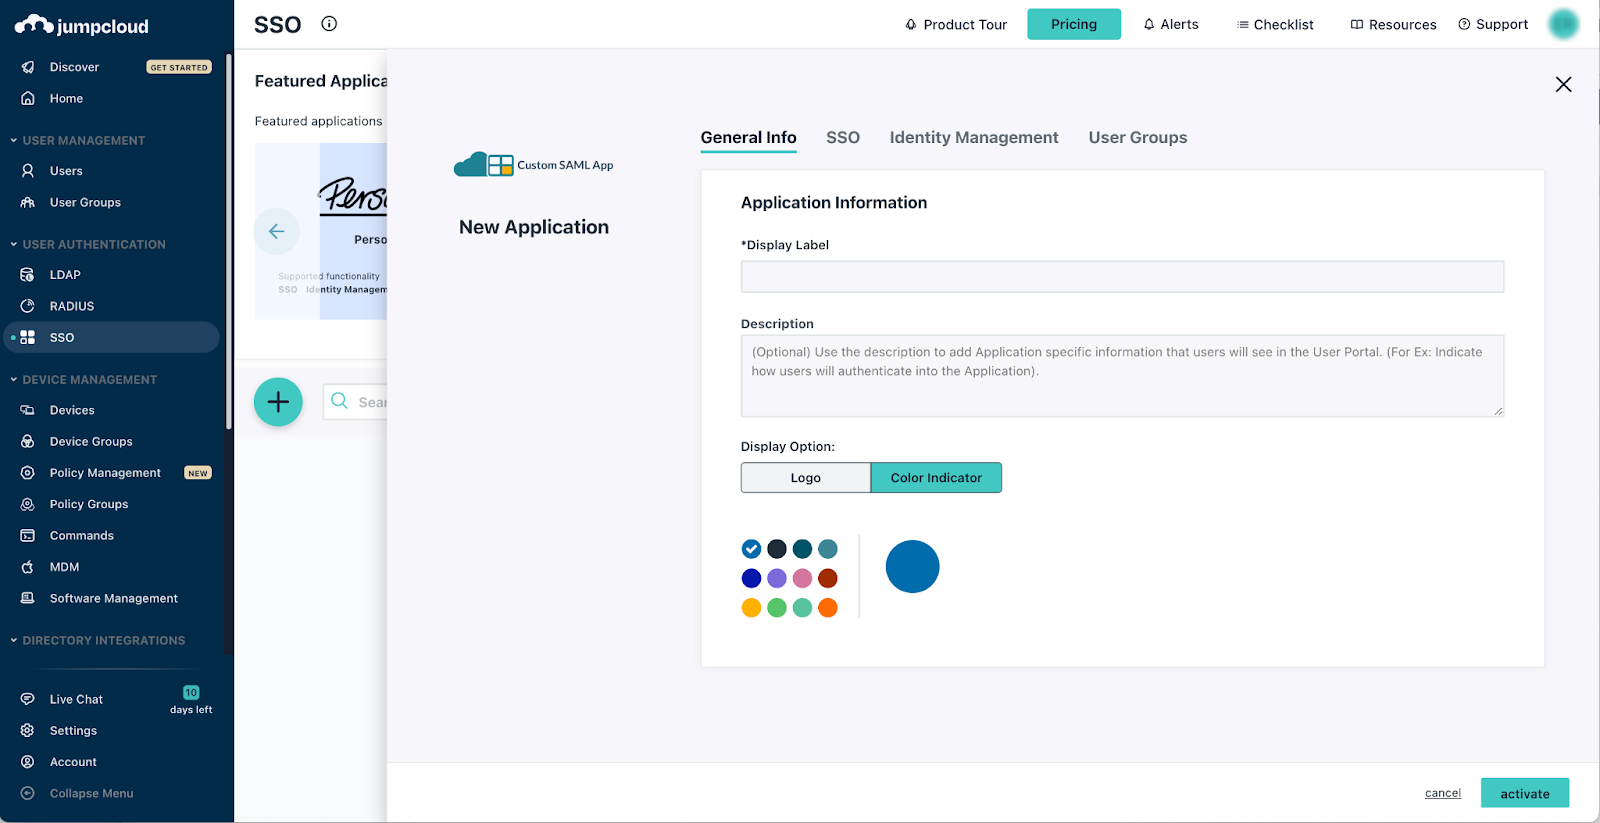

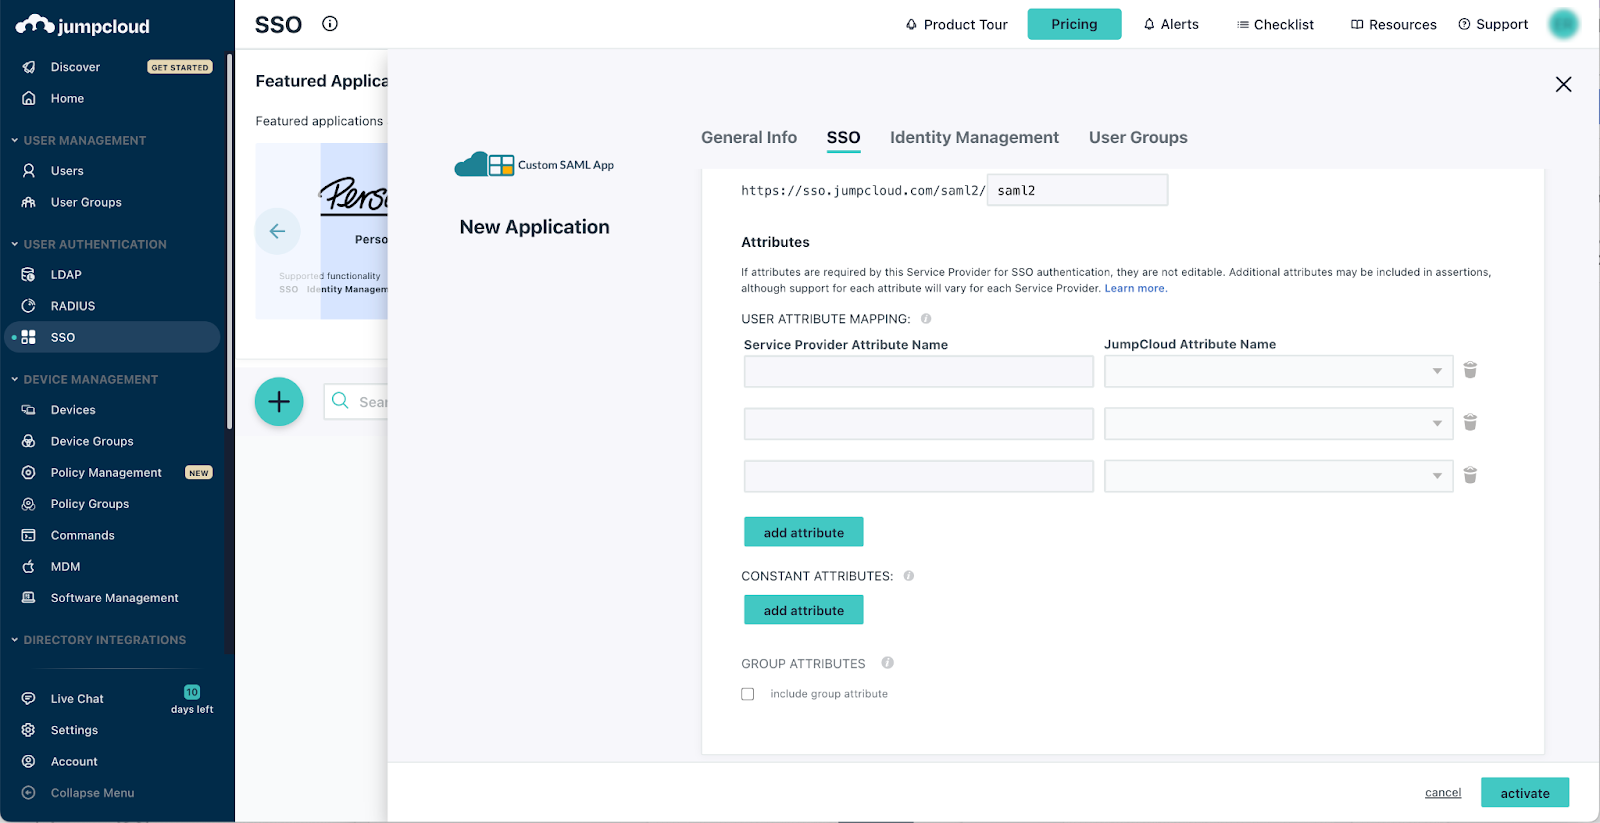
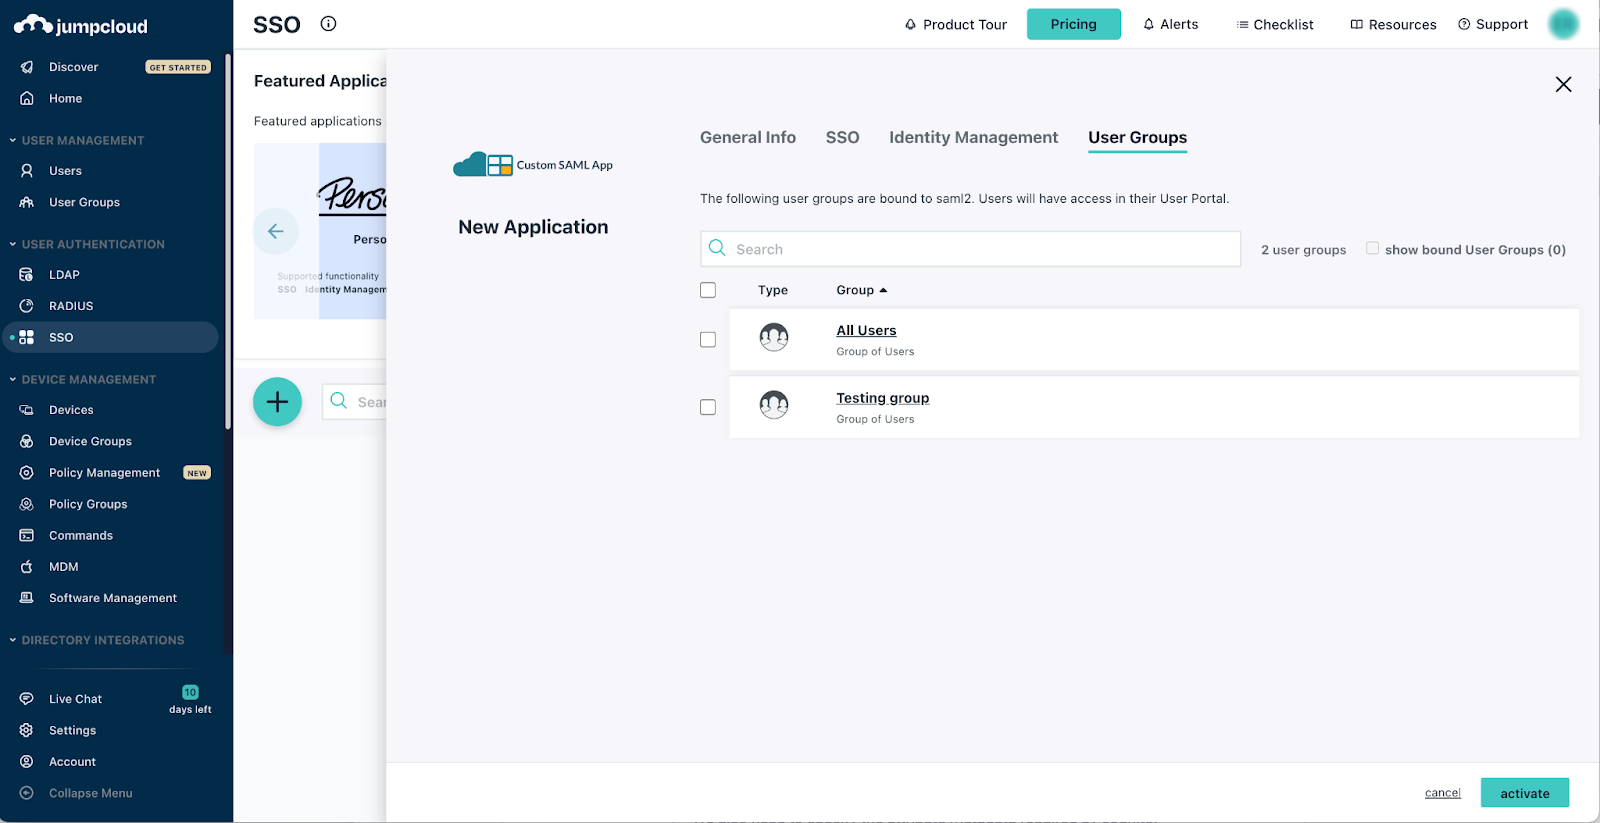
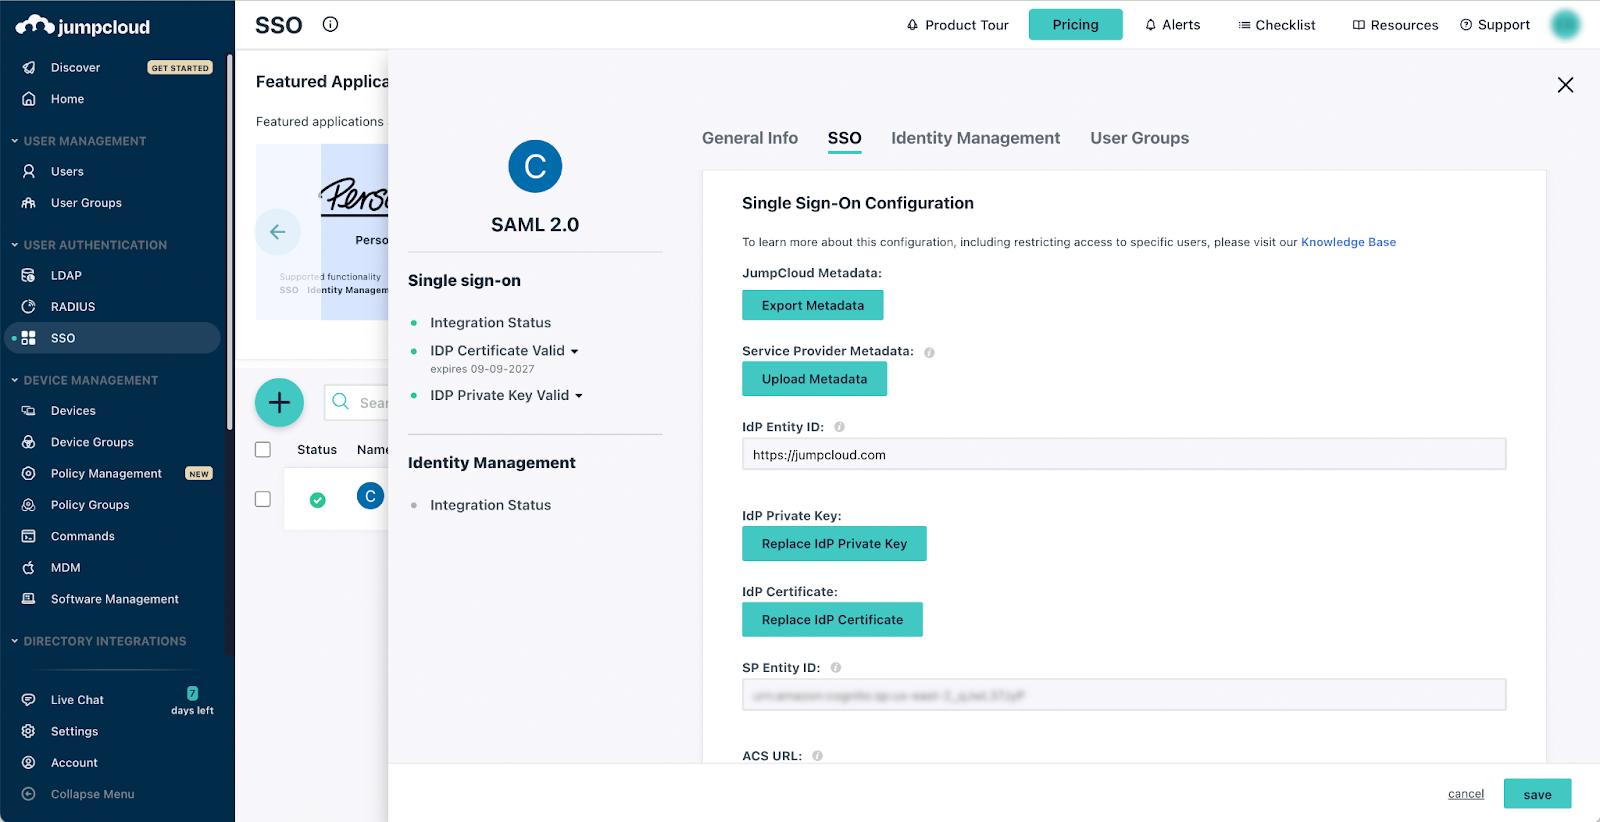
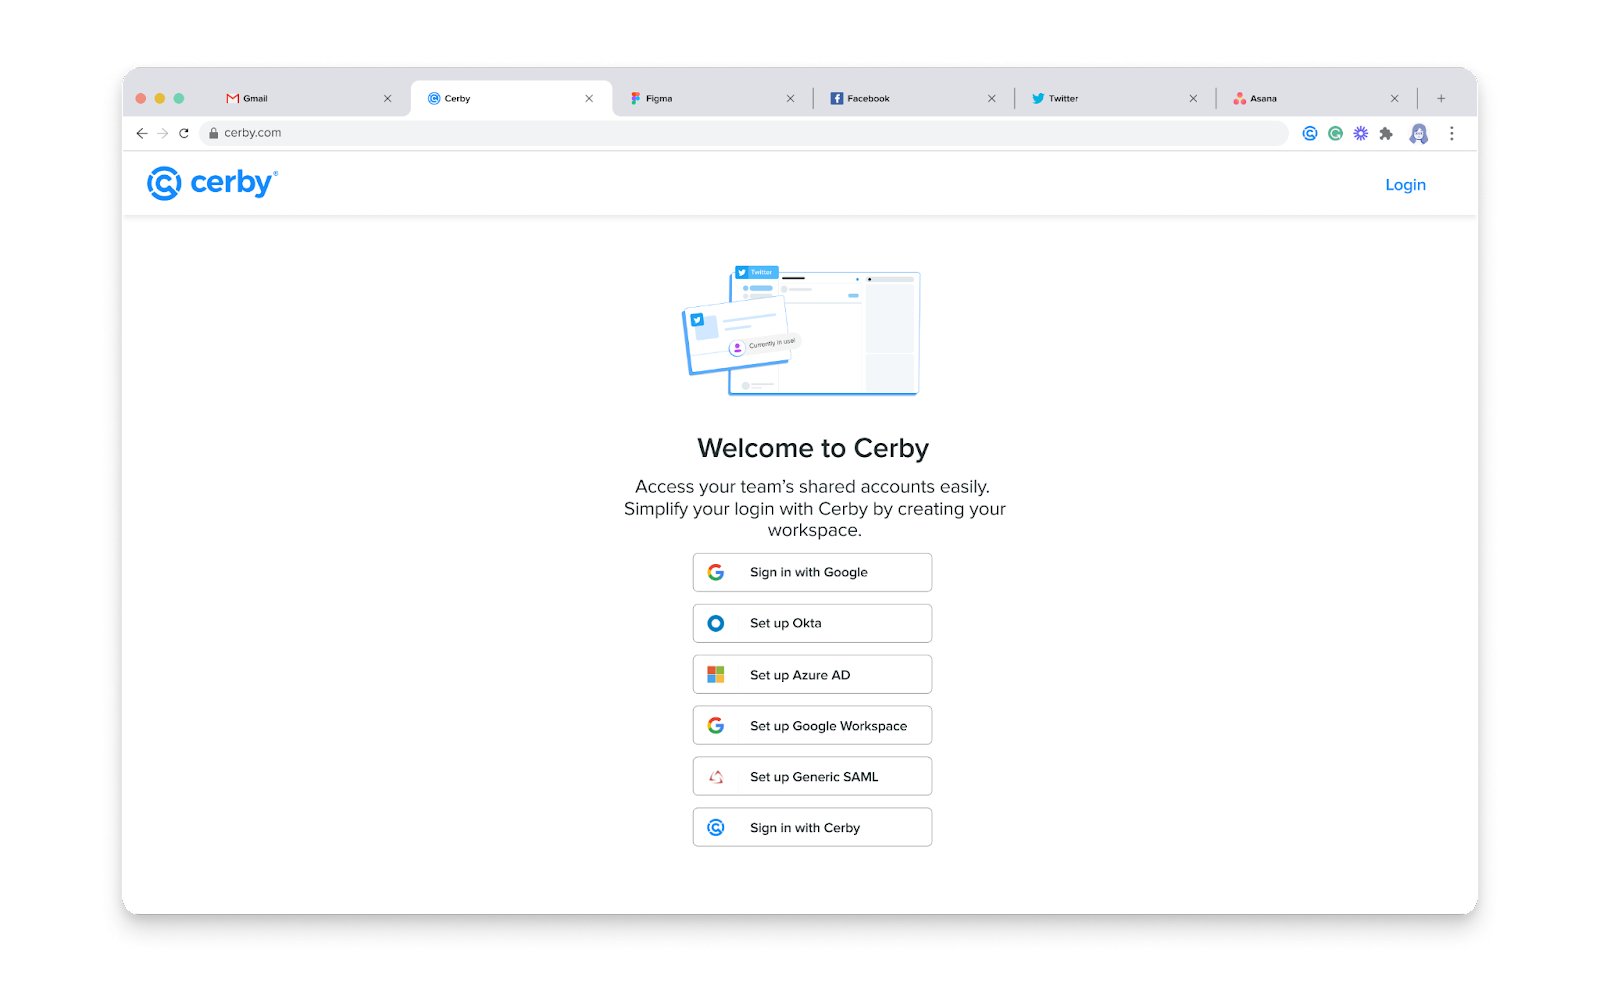
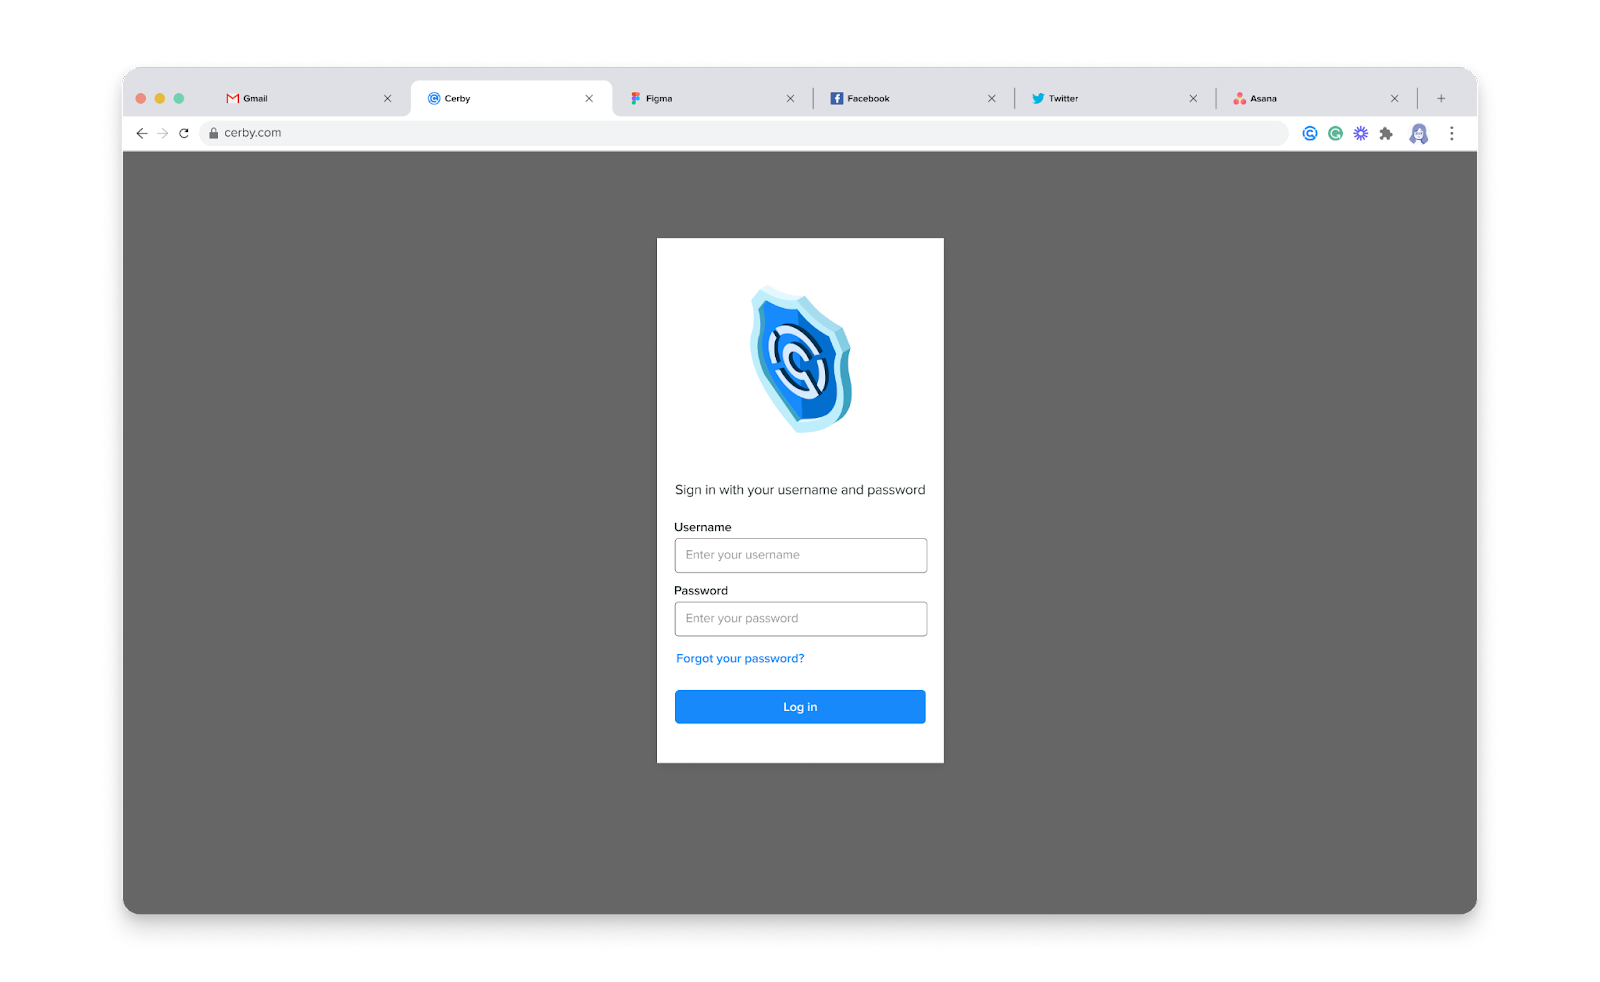
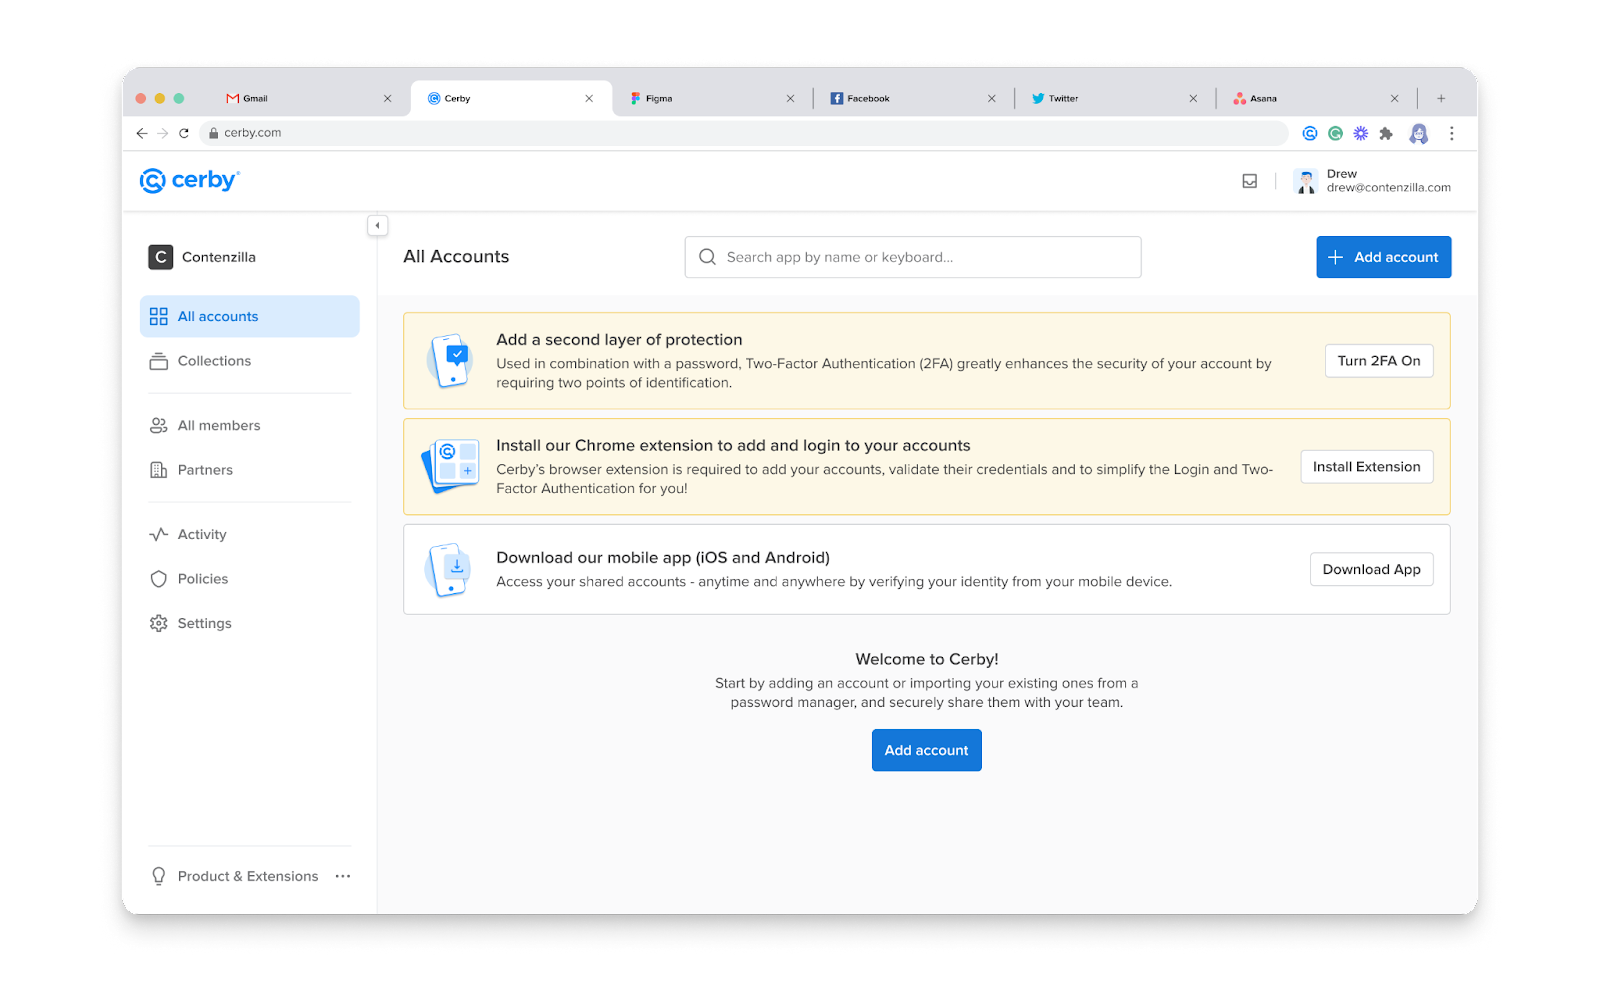
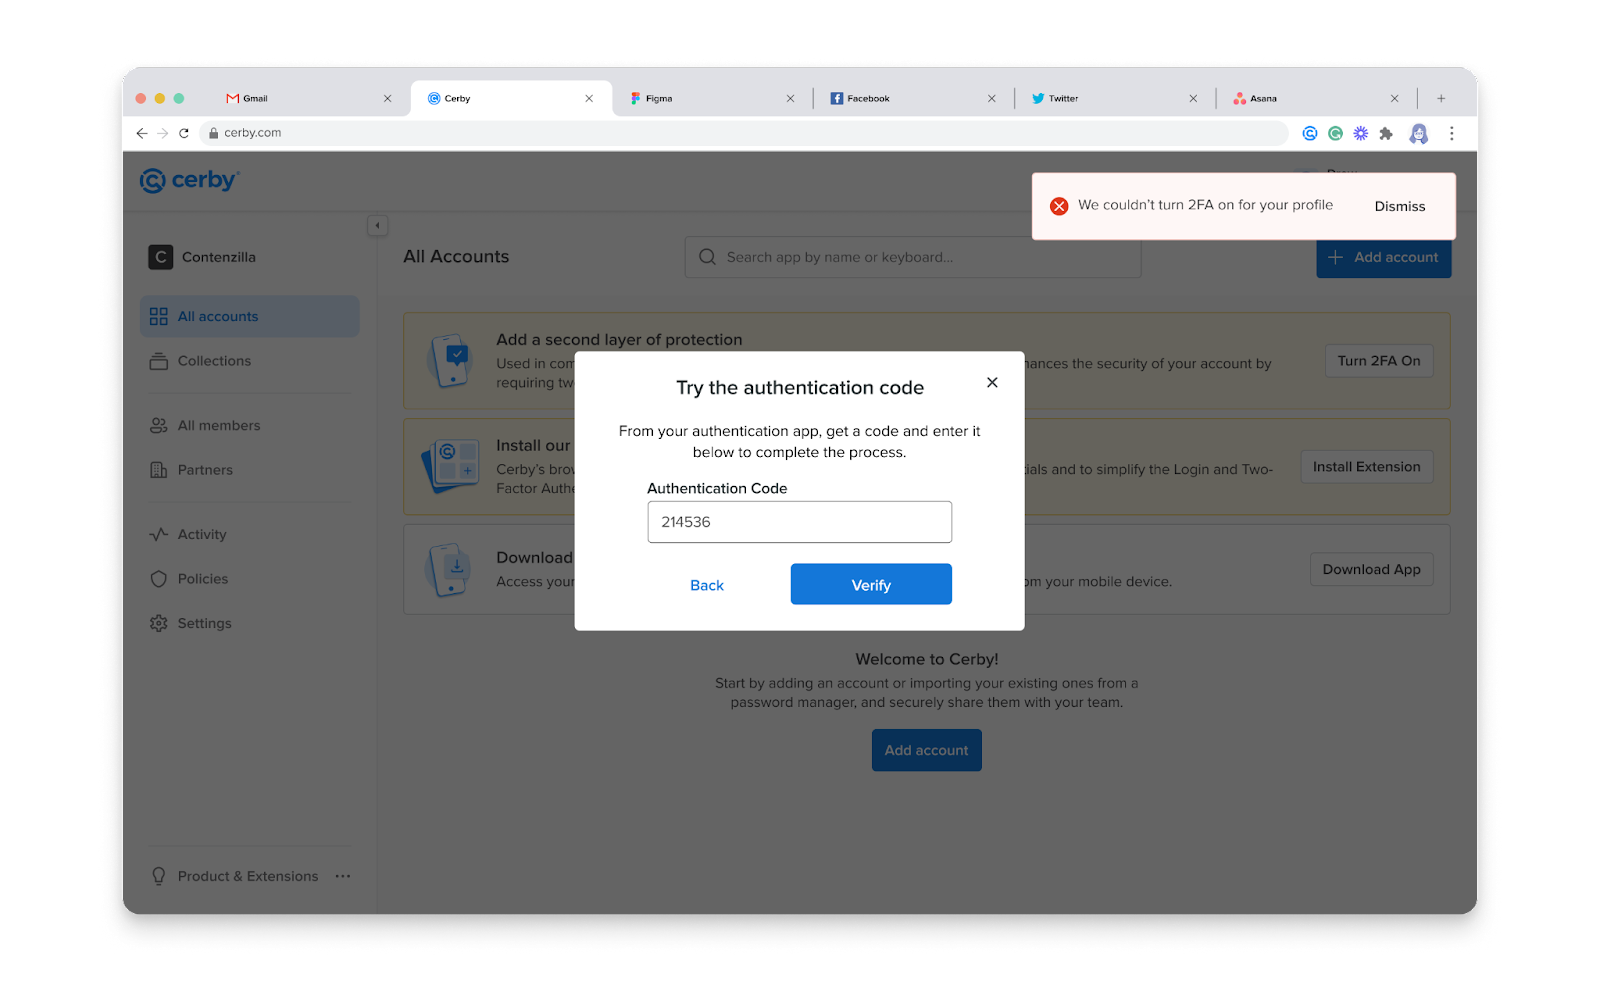
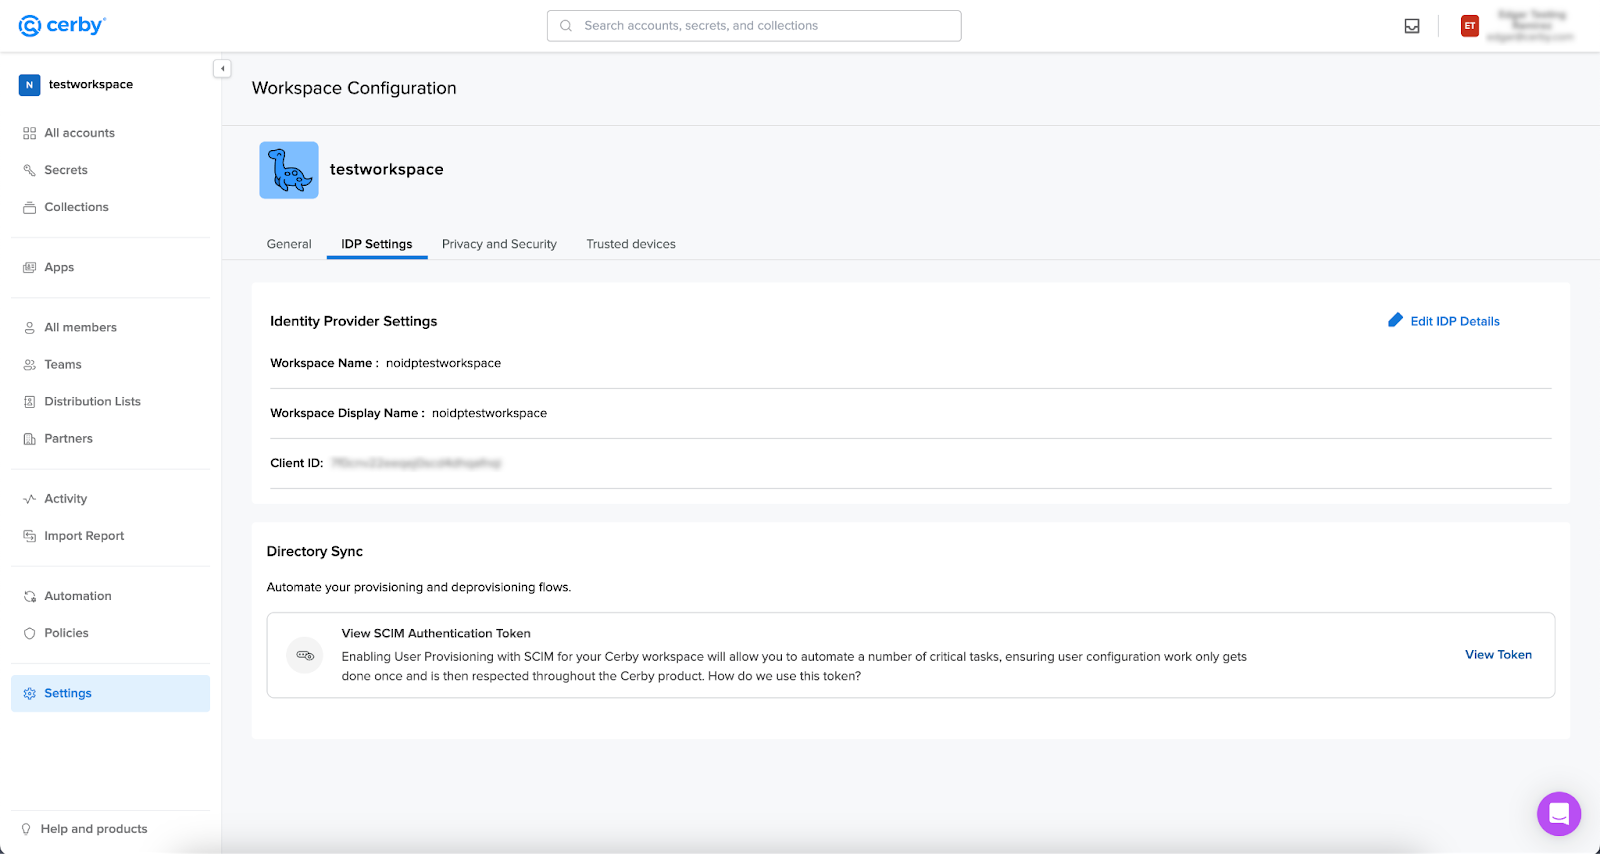
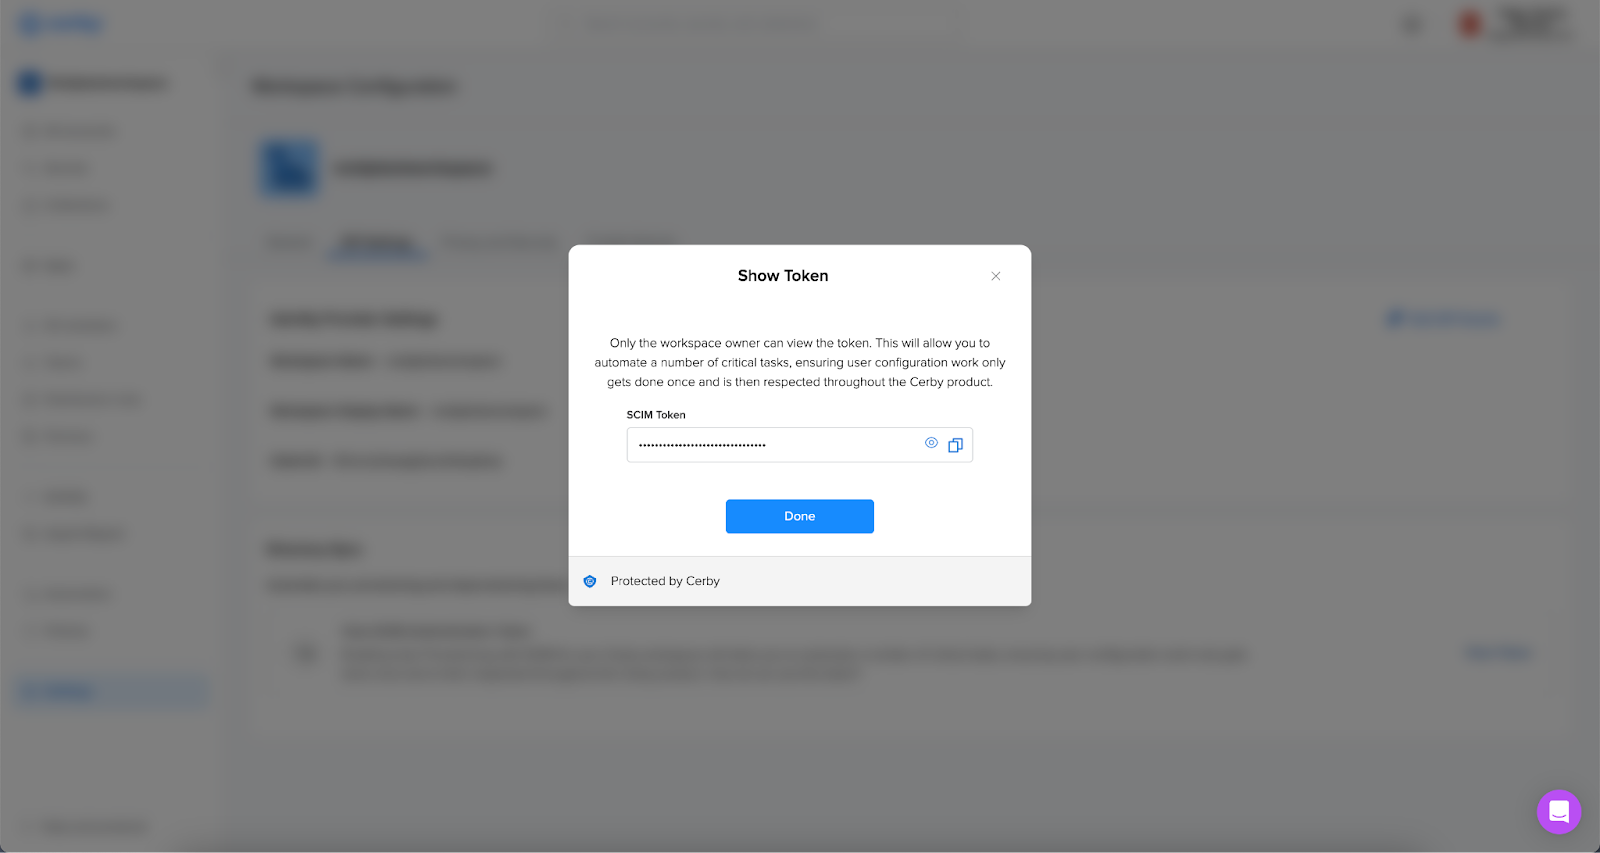
 ) icon of the corresponding business hub card. The business hub details page is displayed with the **Settings** tab activated.
3. Click the **Check for updates** button located at the top right of the page. A message box is displayed with information about the process. **NOTE:** The check and import process may take a few minutes depending on the number of users, and because Cerby automatically matches users to their corresponding Cerby user account.
4. Confirm that the automated task to check for updates has the “Completed” status by performing any of the following actions:
* Click the **More details** button from the message box.
* Select the **Automation** option from the left navigation drawer to open the **Automation** page with a list of automated tasks and their status.
{% hint style="info" %}
**NOTE:** Cerby automatically performs daily checks for updates for all business hubs, but you can trigger them manually, as described in this section. When a user is deprovisioned from an IdP and a check for updates is performed, Cerby generates a report and sends business hub **Owners** an email to confirm their removal from the app. For more instructions, read the article [Check for updates in your app and apply report](/setup-and-admin/business-hubs/managing-users-and-assets-via-a-business-hub/sync-your-business-hub-with-your-external-app).
{% endhint %}
The next step is [3. Connect your 10bis user account to the business hub](#id-3.-connect-your-10bis-user-account-to-the-business-hub).
### 3. Connect your 10bis user account to the business hub
To connect your 10bis user account to the business hub so Cerby can manage and protect it, you must complete the following steps:
1. Select the **Accounts** option from the left navigation drawer. The **Accounts** page is displayed.
2. Click the **Log in** button of the corresponding 10bis Hub account card. The **Connect your 10bis Hub Account** dialog box is displayed.
3. Enter the login credentials of your **10bis** user account.
4. Click the **Connect account** button. The dialog box closes, and a success message box and a new account card are displayed.
The next step is [4. Manage unmatched users](#id-4.-manage-unmatched-users).
### 4. Manage unmatched users
During a check for updates, Cerby automatically matches app members to the Cerby user accounts that correspond to their email addresses, including existing [guest users](https://help.cerby.com/getting-started/concepts/user-management/guest-users) and [local partners](https://help.cerby.com/getting-started/concepts/user-management/partners#h-7e4add33a2). Manual matching is required when apps don't provide email addresses and for app members using personal or external accounts that couldn’t be identified or are not in the corporate directory.
To view the status of the imported app members, you must complete the following steps:
1. Select the **Business Hubs** option from the left navigation drawer. The **Business Hubs** page is displayed.
2. Click the **More options** (...) icon of the corresponding business hub card. A drop-down list is displayed.
3. Select the **View Members** option from the list. The business hub details page is displayed with the **Members** tab activated. App members are displayed in the following tabs of the **User Overview** section:
* **Unmatched users:** This tab displays the users who were not automatically matched.
* **Onboarded users:** This tab displays the users matched to their Cerby user account.
* **Guest users:** This tab displays the users who were matched to an existing Cerby user account but it doesn’t exist in the corporate directory, such as external collaborators.
For unmatched users, you can perform one of the following actions:
* [Match users](#match-users)
* [Remove unmatched users](#remove-unmatched-users)
* [Exempt unmatched users](#exempt-unmatched-users)
The following sections describe each action.
#### Match users
To match users, you must complete the following steps from the **Unmatched users** tab of the business hub details page:
1. Click the **Match user** button of the corresponding user. The **Match user** dialog box is displayed.
2. Enter the username or email address of the user you want to match and invite in the **Match with** field. The user is displayed on a list.
3. Select the user from the list.
4. Click the **Next** button. The **Select Cerby role** dialog box is displayed.
5. Select the role to assign to the user on the business hub **Cerby role** drop-down list:
* **Owner:** This role enables sharing access and managing business hub settings in Cerby.
* **Collaborator:** This role enables only logging in to the app from Cerby.
6. Click the **Match user** button. The dialog box closes, and a success message box is displayed. The user is moved to the **Onboarded users** tab.
#### Remove unmatched users
To remove unmatched users, you must complete the following steps from the **Unmatched users** tab of the business hub details page:
{% hint style="danger" %}
**IMPORTANT:** When removing an unmatched user, Cerby performs an automated task to revoke the user’s seat and permissions in 10bis.
{% endhint %}
1. Click the **More options** (...) icon of the corresponding user. A drop-down list is displayed.
2. Select the **Remove user** option from the list. The **Remove user?** dialog box is displayed.
3. Click the **Remove user** button. The dialog box closes, and a success message box is displayed. The user is removed from the app via an automated task.
#### Exempt unmatched users
Exempted users keep their user accounts or seats active in your app, but you cannot manage them through Cerby.
To exempt unmatched users, you must complete the following steps from the **Unmatched users** tab of the business hub details page:
1. Click the **More options** (...) icon of the corresponding user. A drop-down list is displayed.
2. Select the **Exempt user** option from the list. The exempt user dialog box is displayed.
3. Enter a reason for exempting the user in the **Provide a reason** field.
4. Click the **Exempt member** button. The dialog box closes, and a success message box is displayed. The user is moved to the **Exempted users** tab.
***
## Use your business hub
The following are the supported features of business hubs you can use:
* [Join the App and connect it to Cerby](https://help.cerby.com/cerby-web-app/business-hubs/join-your-external-app-and-set-up-your-business-hub-access)
* [Invite new app members](/setup-and-admin/business-hubs/managing-users-and-assets-via-a-business-hub/add-users-and-teams-to-your-apps-via-a-business-hub)
* [Remove app members](/setup-and-admin/business-hubs/managing-users-and-assets-via-a-business-hub/remove-users-from-your-app-via-a-business-hub)
* [Provision users to your apps via an IdP and business hub](https://help.cerby.com/setup-and-admin/business-hubs/managing-users-and-assets-via-a-business-hub/provision-users-to-your-apps-via-an-idp-and-business-hub)
* [Update the app members’ roles](/setup-and-admin/business-hubs/managing-users-and-assets-via-a-business-hub/update-user-roles-in-your-app-via-a-business-hub)
* [Check for updates in your app and apply report](/setup-and-admin/business-hubs/managing-users-and-assets-via-a-business-hub/sync-your-business-hub-with-your-external-app)
* [Re-assign the app members’ user accounts](https://github.com/cerbyinc/help-center/tree/main/.uncategorized/unpublished-deprecated-re-assign-the-app-members-user-accounts.md)
* [Log in to your app](https://help.cerby.com/cerby-web-app/business-hubs/log-in-to-your-app)
* [Track activity on app members’ user accounts](/setup-and-admin/business-hubs/managing-users-and-assets-via-a-business-hub/track-activity-on-app-members-user-accounts)
* [Remove an App](/setup-and-admin/business-hubs/managing-your-business-hubs/remove-a-business-hub)
# Connect a business hub for 1Password Business
This article describes how to connect a business hub to centrally manage the users of 1Password Business from Cerby.
{% hint style="info" %}
**Who can use this feature?**
* Workspace **Owners**, **Super Admins**, **Admins**, and **Users**
* Only supported using the Cerby web app
{% endhint %}
As a user with any workspace role in Cerby, except **Guest User** and **Login-Only**, you can connect a business hub integration to centrally manage the users of 1Password Business.
When you connect the business hub, you become its **Owner**, and you can perform the following user and access management tasks through automated tasks executed by the Cerby agent:
* Check for updates
* Add users
* Update user roles
* Remove users
{% hint style="success" %}
**TIP:** For more details about the automated tasks of a business hub, how it works, and the supported apps, read the article [Explore Business Hubs](https://help.cerby.com/setup-and-admin/business-hubs/business-hub-catalog).
{% endhint %}
This article provides instructions on how to connect a business hub for 1Password Business. For other app-specific articles and videos, review the [Connecting business hubs for your apps](https://help.cerby.com/setup-and-admin/business-hubs/connecting-your-apps) and [Connecting business hubs for your paid social apps](https://help.cerby.com/setup-and-admin/business-hubs/connecting-your-paid-social-apps) collections in the Cerby Help Center.
***
## Requirements
The following are the requirements to connect a business hub:
* A Cerby workspace
* A Cerby user account with the workspace **Owner**, **Super Admin**, **Admin**, or **User** role
* A team in 1Password Business
* Groups configured in your identity provider (IdP) if you want to leverage automatic user provisioning and deprovisioning from your apps based on group assignment events. For more information, read the articles available in the [Managing users via an IdP and business hub](https://help.cerby.com/setup-and-admin/business-hubs/managing-users-and-assets-via-a-business-hub) collection in the Cerby Help Center
* An automation account, meaning an active user account with a native **Administrator** role in 1Password Business to be used as a service account. For instructions and recommendations on how to create and configure this account, read the article [Create a service account for your business hub](/setup-and-admin/business-hubs/connecting-your-apps/create-a-service-account-for-your-business-hub)
* A Business unique identifier. You can find the ID in the address bar when you are logged in to 1Password Business. The ID is displayed before **`.1password.com`** in the URL. For example, **`cerby`** in **`https://cerby.1password.com/people`**. Just copy the value and paste it when connecting the business hub.
***
## Connect a business hub for 1Password Business
To connect a business hub for 1Password Business, you must complete the following main steps from the Cerby web app dashboard:
1. [Add a business hub and connect it to 1Password Business](#id-1.-add-a-business-hub-and-connect-it-to-1password-business)
2. [Check for updates to import users and roles to Cerby](#id-2.-check-for-updates-to-import-users-and-roles-to-cerby)
3. [Connect your 1Password Business user account to the business hub](#id-3.-connect-your-1password-business-user-account-to-the-business-hub)
4. [Manage unmatched users](#id-4.-manage-unmatched-users)
The following sections describe each main step.
### 1. Add a business hub and connect it to 1Password Business
To add a business hub and connect it to 1Password Business, you must complete the following steps:
1. Log in to your corresponding [Cerby](https://app.cerby.com/) workspace.
2. Select the **Business Hubs** option from the left menu. The **Business Hubs** page is displayed.
3. Click the **Connect Business Hub** button located at the top-right corner of the page. The **Connect your Business Hubs to Cerby** dialog box is displayed. **TIP:** Select the **Don’t show this again** option to skip this step the next time you connect a new business hub.
4. Click the **Get started** button. A wizard is displayed on the **Select app** page.
5. Select **1Password Hub** from the catalog. The **Enter app details** page is displayed on the wizard.
6. Enter and select your app information in the corresponding fields:
* **Label in Cerby:** It is the name to assign to your business hub in Cerby, and it will be displayed on the business hub card.
* **Business unique identifier:** It is the unique identifier of your business or organization in **1Password Hub**. For instructions on how to find it, read the [Requirements](#requirements) section.
* **User management and login method:** It is the way your users log in to the app and determines whether they must save their login credentials as a Cerby account connected to the business hub.
1. Select the **Username and password** option because account security and access are managed by Cerby, and users log in with their credentials after saving them in Cerby. **IMPORTANT:** The Single sign-on (SSO) option is not supported by 1Password Business.
7. Click the **Next** button. The **Select automation account** page is displayed with a list of existing 1Password Business accounts.
8. Select the automation account you have previously added to Cerby, as described in the [Requirements](#requirements) section. **NOTE:** If you don’t have an automation account, you are prompted to add it. Make sure you read Cerby’s recommendations on how to configure it in the article [Create a service account for your business hub](/setup-and-admin/business-hubs/connecting-your-apps/create-a-service-account-for-your-business-hub). You may need to add the account first and then add the business hub.
9. Click the **Connect app** button. The wizard closes, and a success message box is displayed. The corresponding business hub is also displayed on the **Business Hubs** page.
The next step is [2. Check for updates to import users and roles to Cerby](#id-2.-check-for-updates-to-import-users-and-roles-to-cerby).
### 2. Check for updates to import users and roles to Cerby
To check for updates in your app to identify and import users and roles to Cerby, you must complete the following steps:
1. Select the **Business Hubs** option from the left menu. The **Business Hubs** page is displayed.
2. Click the **More options** (...) icon of the corresponding business hub card. A drop-down menu is displayed.
3. Select the **Settings** option from the menu. The business hub details page is displayed with the **Settings** tab activated.
4. Click the **Check for updates** button located at the top right of the page. A message box is displayed with information about the process. **NOTE:** The check and import process may take a few minutes depending on the number of users, and because Cerby automatically matches users to their corresponding Cerby user account.
5. Confirm that the automated task to check for updates has the “Completed” status by performing any of the following actions:
* Click the **More details** button from the message box.
* Select the **Automation** option from the left menu to open the **Automation** page with a list of automated tasks and their status.
{% hint style="info" %}
**NOTE:** Cerby automatically performs daily checks for updates for all business hubs, but you can trigger them manually, as described in this section. For more instructions, read the article [Sync your app users with your business hub](/setup-and-admin/business-hubs/managing-users-and-assets-via-a-business-hub/sync-your-business-hub-with-your-external-app).
{% endhint %}
The next step is [3. Connect your 1Password Business user account to the business hub](#id-3.-connect-your-1password-business-user-account-to-the-business-hub).
### 3. Connect your 1Password Business user account to the business hub
To connect your 1Password Business user account to the business hub so Cerby can manage and protect it, you must complete the following steps:
1. Select the **Accounts** option from the left menu. The **Accounts** page is displayed.
2. Click the **Log in** button of the corresponding 1Password Hub account card. The **Connect your 1Password Hub Account** dialog box is displayed.
3. Enter the login credentials of your **1Password Business** user account.
4. Click the **Connect account** button. The dialog box closes, and a success message box and a new account card are displayed.
The next step is [4. Manage unmatched users](#id-4.-manage-unmatched-users).
### 4. Manage unmatched users
During a check for updates, Cerby automatically matches app members to the Cerby user accounts that correspond to their email addresses, including existing [guest users](https://help.cerby.com/getting-started/concepts/user-management/guest-users) and [local partners](https://help.cerby.com/getting-started/concepts/user-management/partners#h-7e4add33a2). Manual matching is required when apps don't provide email addresses and for app members using personal or external accounts that couldn’t be identified or are not in the corporate directory.
To view the status of the imported app members, you must complete the following steps:
1. Select the **Business Hubs** option from the left menu. The **Business Hubs** page is displayed.
2. Click the **More options** (...) icon of the corresponding business hub card. A drop-down menu is displayed.
3. Select the **View Members** option from the menu. The business hub details page is displayed with the **Members** tab activated. App members are displayed in the following tabs of the **User Overview** section:
* **Unmatched users:** This tab displays the users who were not automatically matched.
* **Onboarded users:** This tab displays the users matched to their Cerby user account.
* **Guest users:** This tab displays the users who were matched to an existing Cerby user account but it doesn’t exist in the corporate directory, such as external collaborators.
For unmatched users, you can perform one of the following actions:
* [Match users](#match-users)
* [Remove unmatched users](#remove-unmatched-users)
* [Exempt unmatched users](#exempt-unmatched-users)
The following sections describe each action.
#### Match users
To match users, you must complete the following steps from the **Unmatched users** tab of the business hub details page:
1. Click the **Match user** button of the corresponding user. The **Match user** dialog box is displayed.
2. Enter the username or email address of the user you want to match and invite in the **Match with** field. The user is displayed on a list.
3. Select the user from the list.
4. Click the **Next** button. The **Select Cerby role** dialog box is displayed.
5. Select the role to assign to the user on the business hub **Cerby role** drop-down menu:
* **Owner:** This role enables sharing access and managing business hub settings in Cerby.
* **Collaborator:** This role enables only logging in to the app from Cerby.
6. Click the **Match user** button. The dialog box closes, and a success message box is displayed. The user is moved to the **Onboarded users** tab.
#### Remove unmatched users
To remove unmatched users, you must complete the following steps from the **Unmatched users** tab of the business hub details page:
{% hint style="danger" %}
**IMPORTANT:** When removing an unmatched user, Cerby performs an automated task to revoke the user’s seat and permissions in 1Password Business.
{% endhint %}
1. Click the **More options** (...) icon of the corresponding user. A drop-down menu is displayed.
2. Select the **Remove user** option from the menu. The **Remove user?** dialog box is displayed.
3. Click the **Remove user** button. The dialog box closes, and a success message box is displayed. The user is removed from the app via an automated task.
#### Exempt unmatched users
Exempted users keep their user accounts or seats active in your app, but you cannot manage them through Cerby.
To exempt unmatched users, you must complete the following steps from the **Unmatched users** tab of the business hub details page:
1. Click the **More options** (...) icon of the corresponding user. A drop-down menu is displayed.
2. Select the **Exempt user** option from the menu. The exempt user dialog box is displayed.
3. Enter a reason for exempting the user in the **Provide a reason** field.
4. Click the **Exempt member** button. The dialog box closes, and a success message box is displayed. The user is moved to the **Exempted users** tab.
***
## Use your business hub
The following are the supported features of business hubs you can use:
* [Join the external app and set up your business hub access](https://help.cerby.com/cerby-web-app/business-hubs/join-your-external-app-and-set-up-your-business-hub-access)
* [Add users to your app via a business hub](/setup-and-admin/business-hubs/managing-users-and-assets-via-a-business-hub/add-users-and-teams-to-your-apps-via-a-business-hub)
* [Provision users to your apps via an IdP and business hub](/setup-and-admin/business-hubs/managing-users-and-assets-via-a-business-hub/provision-users-to-your-apps-via-an-idp-and-business-hub)
* [Remove users from your app via a business hub](/setup-and-admin/business-hubs/managing-users-and-assets-via-a-business-hub/remove-users-from-your-app-via-a-business-hub)
* [Remove teams from your app via a business hub](/setup-and-admin/business-hubs/managing-users-and-assets-via-a-business-hub/remove-teams-from-your-app-via-a-business-hub)
* [Deprovision users from your apps via an IdP and business hub](/setup-and-admin/business-hubs/managing-users-and-assets-via-a-business-hub/deprovision-users-from-your-apps-via-an-idp-and-business-hub)
* [Update user roles in your app via a business hub](/setup-and-admin/business-hubs/managing-users-and-assets-via-a-business-hub/update-user-roles-in-your-app-via-a-business-hub)
* [Update user roles in your apps via an IdP and business hub](/setup-and-admin/business-hubs/managing-users-and-assets-via-a-business-hub/update-user-roles-in-your-apps-via-an-idp-and-business-hub)
* [Sync your app users with your business hub](/setup-and-admin/business-hubs/managing-users-and-assets-via-a-business-hub/sync-your-business-hub-with-your-external-app)
* [Log in to your app via a business hub](https://help.cerby.com/cerby-web-app/business-hubs/log-in-to-your-app)
* [Track the activity of business hub users](/setup-and-admin/business-hubs/managing-users-and-assets-via-a-business-hub/track-activity-on-app-members-user-accounts)
* [Remove a business hub](/setup-and-admin/business-hubs/managing-your-business-hubs/remove-a-business-hub)
# Connect a business hub for 6sense
This article describes how to connect a business hub to centrally manage the users of 6sense from Cerby.
{% hint style="info" %}
**Who can use this feature?**
* Workspace **Owners**, **Super Admins**, **Admins**, and **Users**
* Only supported using the Cerby web app
{% endhint %}
As a user with any workspace role in Cerby, except **Guest User** and **Login-Only**, you can connect a business hub integration to centrally manage the users of 6sense.
When you connect the business hub, you become its **Owner**, and you can perform the following user and access management tasks through automated tasks executed by the Cerby agent:
* Check for updates
* Update user roles
* Remove users
{% hint style="success" %}
**TIP:** For more details about the automated tasks of a business hub, how it works, and the supported apps, read the article [Explore Business Hubs](https://help.cerby.com/setup-and-admin/business-hubs/business-hub-catalog).
{% endhint %}
{% hint style="info" %}
**NOTE:** The automated task to **add users** is not available for this business hub because 6sense uses Just-In-Time (JIT)\*\*\*\* provisioning, which automatically creates user accounts when they first sign in.
{% endhint %}
This article provides instructions on how to connect a business hub for 6sense. For other app-specific articles and videos, review the [Connecting business hubs for your apps](https://help.cerby.com/setup-and-admin/business-hubs/connecting-your-apps) and [Connecting business hubs for your paid social apps](https://help.cerby.com/setup-and-admin/business-hubs/connecting-your-paid-social-apps) collections in the Cerby Help Center.
***
## Requirements
The following are the requirements to connect a business hub:
* A Cerby workspace
* A Cerby user account with the **Owner**, **Super Admin**, **Admin**, or **User** role
* An organization in 6sense
* Groups configured in your identity provider (IdP) if you want to leverage automatic user provisioning and deprovisioning from your apps based on group assignment events. For more information, read the articles available in the [Managing users via an IdP and business hub](https://help.cerby.com/setup-and-admin/business-hubs/managing-users-and-assets-via-a-business-hub) collection in the Cerby Help Center
* An automation account, meaning an active user account with enough permissions to manage users, groups, and roles in 6sense, to be used as a service account. For instructions and recommendations on how to create and configure this account, read the article [Create a service account for your business hub](/setup-and-admin/business-hubs/connecting-your-apps/create-a-service-account-for-your-business-hub)
* The user management and login method for your business hub identified to select the corresponding option when connecting your app. For more information, read the **User management and login method** section of the article [Explore Business Hubs](https://help.cerby.com/setup-and-admin/business-hubs/business-hub-catalog)
* A business URL subdomain. You can find the subdomain in the address bar when you are logged in to 6sense. For example, **`cerby`** in **`https://cerby.workflows.6sense.com`**. Just copy the value and paste it when connecting the business hub.
***
## Connect a business hub for 6sense
To connect a business hub for 6sense, you must complete the following main steps from the Cerby web app dashboard:
1. [Add a business hub and connect it to 6sense](#id-1.-add-a-business-hub-and-connect-it-to-6sense)
2. [Check for updates to import users and roles to Cerby](#id-2.-check-for-updates-to-import-users-and-roles-to-cerby)
3. [Connect your 6sense user account to the business hub](#id-3.-connect-your-6sense-user-account-to-the-business-hub)
4. [Manage unmatched users](#id-4.-manage-unmatched-users)
The following sections describe each main step.
### 1. Add a business hub and connect it to 6sense
To add a business hub and connect it to 6sense, you must complete the following steps:
1. Log in to your corresponding [Cerby](https://app.cerby.com/) workspace.
2. Select the **Business Hubs** option from the left menu. The **Business Hubs** page is displayed.
3. Click the **Connect Business Hub** button located at the top-right corner of the page. The **Connect your Business Hubs to Cerby** dialog box is displayed. **TIP:** Select the **Don’t show this again** option to skip this step the next time you connect a new business hub.
4. Click the **Get started** button. A wizard is displayed on the **Select app** page.
5. Select **6sense Hub** from the catalog. The **Enter app details** page is displayed on the wizard.
6. Enter and select your app information in the corresponding fields:
* **Label in Cerby:** It is the name to assign to your business hub in Cerby, and it will be displayed on the business hub card.
* **Business URL subdomain:** It is the unique identifier of your business or organization in **6sense Hub**. For instructions on how to find it, read the [Requirements](#requirements) section.
* **User management and login method:** It is the way your users log in to the app and determines whether they must save their login credentials as a Cerby account connected to the business hub.
1. Select the **Single sign-on (SSO)** option because access must be managed by your IdP, and users log in with SSO authentication. They are not asked to save their credentials in Cerby. **IMPORTANT** : The **Username and password** option is not supported for 6sense.
7. Click the **Next** button. The **Select automation account** page is displayed with a list of existing 6sense accounts.
8. Select the automation account you have previously added to Cerby, as described in the [Requirements](#requirements) section. **NOTE:** If you don’t have an automation account, you are prompted to add it. Make sure you read Cerby’s recommendations on how to configure it in the article [Create a service account for your business hub](https://help.cerby.com/setup-and-admin/business-hubs/connecting-your-apps/create-a-service-account-for-your-business-hub). You may need to add the account first and then add the business hub.
9. Click the **Connect app** button. The wizard closes, and a success message box is displayed. The corresponding business hub is also displayed on the **Business Hubs** page
The next step is [2. Check for updates to import users and roles to Cerby](/setup-and-admin/business-hubs/connecting-your-apps/connect-a-business-hub-for-your-app#h-9c6531cf9a).
### 2. Check for updates to import users and roles to Cerby
To check for updates in your app to identify and import users and roles to Cerby, you must complete the following steps:
1. Select the **Business Hubs** option from the left menu. The **Business Hubs** page is displayed.
2. Click the **More options** (...) icon of the corresponding business hub card. A drop-down menu is displayed.
3. Select the **Settings** option from the menu. The business hub details page is displayed with the **Settings** tab activated.
4. Click the **Sync** button located at the top right of the page. A message box is displayed with information about the process. **NOTE:** The check and import process may take a few minutes, depending on the number of users, and because Cerby automatically matches users to their corresponding Cerby user account.
5. Confirm that the automated task to check for updates has the “Completed” status by performing any of the following actions:
* Click the **More details** button in the message box.
* Select the **Automation** option from the left menu to open the **Automation** page with a list of automated tasks and their status.
{% hint style="info" %}
**NOTE:** Cerby automatically performs daily checks for updates for all business hubs, but you can trigger them manually, as described in this section. For more instructions, read the article [Sync your app users with your business hub](/setup-and-admin/business-hubs/managing-users-and-assets-via-a-business-hub/sync-your-business-hub-with-your-external-app).
{% endhint %}
The next step is [3. Connect your 6sense user account to the business hub](#id-3.-connect-your-6sense-user-account-to-the-business-hub).
### 3. Connect your 6sense user account to the business hub
To connect your 6sense user account to the business hub so Cerby can manage and protect it, you must complete the following steps:
1. Select the **Accounts** option from the left menu. The **All accounts** page is displayed.
2. Click the **Log in** button of the corresponding 6sense Hub account card. The **Connect your 6sense Hub Account** dialog box is displayed.
3. Enter the login credentials of your **6sense** user account.
4. Click the **Connect account** button. The dialog box closes, and a success message box and a new account card are displayed.
The next step is [4. Manage unmatched users](#id-4.-manage-unmatched-users).
### 4. Manage unmatched users
During a check for updates, Cerby automatically matches app members to the Cerby user accounts that correspond to their email addresses, including existing [guest users](https://help.cerby.com/getting-started/concepts/user-management/guest-users) and [local partners](https://help.cerby.com/getting-started/concepts/user-management/partners#h-7e4add33a2). Manual matching is required when apps don't provide email addresses and for app members using personal or external accounts that couldn’t be identified or are not in the corporate directory.
To view the status of the imported app members, you must complete the following steps:
1. Select the **Business Hubs** option from the left menu. The **Business Hubs** page is displayed.
2. Click the **More options** (...) icon of the corresponding business hub card. A drop-down menu is displayed.
3. Select the **View Members** option from the menu. The business hub details page is displayed with the **Members** tab activated. App members are displayed in the following tabs of the **User Overview** section:
* **Unmatched users:** This tab displays the users who were not automatically matched.
* **Onboarded users:** This tab displays the users matched to their Cerby user account.
* **Guest users:** This tab displays the users who were matched to an existing Cerby user account, but it doesn’t exist in the corporate directory, such as external collaborators.
For unmatched users, you can perform one of the following actions:
* [Match users](#match-users)
* [Remove unmatched users](#remove-unmatched-users)
* [Exempt unmatched users](#exempt-unmatched-users)
The following sections describe each action.
#### Match users
To match users, you must complete the following steps from the **Unmatched users** tab of the business hub details page:
1. Click the **Match user** button of the corresponding user. The **Match user** dialog box is displayed.
2. Enter the username or email address of the user you want to match and invite in the **Match with** field. The user is displayed on a list.
3. Select the user from the list.
4. Click the **Next** button. The **Select Cerby role** dialog box is displayed.
5. Select the role to assign to the user on the business hub **Cerby role** drop-down menu:
* **Owner:** This role enables sharing access and managing business hub settings in Cerby.
* **Collaborator:** This role enables only logging in to the app from Cerby.
6. Click the **Match user** button. The dialog box closes, and a success message box is displayed. The user is moved to the **Onboarded users** tab.
#### Remove unmatched users
To remove unmatched users, you must complete the following steps from the **Unmatched users** tab of the business hub details page:
{% hint style="danger" %}
**IMPORTANT:** When removing an unmatched user, Cerby performs an automated task to revoke the user’s seat and permissions in 6sense.
{% endhint %}
1. Click the **More options** (...) icon of the corresponding user. A drop-down menu is displayed.
2. Select the **Remove user** option from the list. The **Remove user?** dialog box is displayed.
3. Click the **Remove user** button. The dialog box closes, and a success message box is displayed. The user is removed from the app via an automated task.
#### Exempt unmatched users
Exempted users keep their user accounts or seats active in your app, but you cannot manage them through Cerby.
To exempt unmatched users, you must complete the following steps from the **Unmatched users** tab of the business hub details page:
1. Click the **More options** (...) icon of the corresponding user. A drop-down list is displayed.
2. Select the **Exempt user** option from the list. The exempt user dialog box is displayed.
3. Enter a reason for exempting the user in the **Provide a reason** field.
4. Click the **Exempt member** button. The dialog box closes, and a success message box is displayed. The user is moved to the **Exempted users** tab.
***
## Use your business hub
The following are the supported features of business hubs you can use:
* [Join the external app and set up your business hub access](https://help.cerby.com/cerby-web-app/business-hubs/join-your-external-app-and-set-up-your-business-hub-access)
* [Remove users from your app via a business hub](/setup-and-admin/business-hubs/managing-users-and-assets-via-a-business-hub/remove-users-from-your-app-via-a-business-hub)
* [Remove teams from your app via a business hub](/setup-and-admin/business-hubs/managing-users-and-assets-via-a-business-hub/remove-teams-from-your-app-via-a-business-hub)
* [Deprovision users from your apps via an IdP and business hub](/setup-and-admin/business-hubs/managing-users-and-assets-via-a-business-hub/deprovision-users-from-your-apps-via-an-idp-and-business-hub)
* [Update user roles in your app via a business hub](/setup-and-admin/business-hubs/managing-users-and-assets-via-a-business-hub/update-user-roles-in-your-app-via-a-business-hub)
* [Update user roles in your apps via an IdP and business hub](/setup-and-admin/business-hubs/managing-users-and-assets-via-a-business-hub/update-user-roles-in-your-apps-via-an-idp-and-business-hub)
* [Sync your app users with your business hub](/setup-and-admin/business-hubs/managing-users-and-assets-via-a-business-hub/sync-your-business-hub-with-your-external-app)
* [Log in to your app via a business hub](https://help.cerby.com/cerby-web-app/business-hubs/log-in-to-your-app)
* [Track the activity of business hub users](/setup-and-admin/business-hubs/managing-users-and-assets-via-a-business-hub/track-activity-on-app-members-user-accounts)
* [Remove a business hub](/setup-and-admin/business-hubs/managing-your-business-hubs/remove-a-business-hub)
# Connect a business hub for Acsense
This article describes how to connect a business hub to centrally manage the users of Acsense from Cerby.
{% hint style="info" %}
**Who can use this feature?**
* Workspace **Owners**, **Super Admins**, **Admins**, and **Users**
* Only supported using the Cerby web app
{% endhint %}
As a user with any workspace role in Cerby, except **Guest User** and **Login-Only**, you can connect a business hub integration to centrally manage the users of Acsense.
When you connect the business hub, you become its **Owner**, and you can perform the following user and access management tasks through automated tasks executed by the Cerby agent:
* Check for updates
* Invite app members
* Update app members’ roles
* Remove app members
{% hint style="success" %}
**TIP:** For more details about the automated tasks of a business hub, how it works, and the supported apps, read the article [Explore Apps](https://help.cerby.com/setup-and-admin/business-hubs/business-hub-catalog).
{% endhint %}
This article provides instructions on how to connect a business hub for Acsense. For other app-specific articles and videos, review the [Connecting your business hubs](https://help.cerby.com/setup-and-admin/business-hubs/connecting-your-apps) collection in the Cerby Help Center.
***
## Requirements
The following are the requirements to connect a business hub:
* A Cerby workspace
* A Cerby user account with the **Owner**, **Super Admin**, **Admin**, or **User** role
* Groups configured in your identity provider (IdP) if you want to leverage automatic user provisioning and deprovisioning from your apps based on group assignment events. For more information, read the article [Provision users to your apps via an IdP and business hub](https://help.cerby.com/setup-and-admin/business-hubs/managing-users-and-assets-via-a-business-hub/provision-users-to-your-apps-via-an-idp-and-business-hub)
* An automation account, meaning an active user account with an **Admin** role in Acsense to be used as a service account. For instructions and recommendations on how to create and configure this account, read the article [Create a service account for your business hub](https://help.cerby.com/setup-and-admin/business-hubs/connecting-your-apps/create-a-service-account-for-your-business-hub)
***
## Connect a business hub for Acsense
To connect a business hub for Acsense, you must complete the following main steps from the Cerby web app dashboard:
1. [Add a business hub and connect it to Acsense](#id-1.-add-a-business-hub-and-connect-it-to-acsense)
2. [Check for updates to import users and roles to Cerby](#id-2.-check-for-updates-to-import-users-and-roles-to-cerby)
3. [Connect your Acsense user account to the business hub](#id-3.-connect-your-acsense-user-account-to-the-business-hub)
4. [Manage unmatched users](#id-4.-manage-unmatched-users)
The following sections describe each main step.
### 1. Add a business hub and connect it to Acsense
To add a business hub and connect it to Acsense, you must complete the following steps:
1. Log in to your corresponding [Cerby](https://app.cerby.com/) workspace.
2. Select the **Business Hubs** option from the left navigation drawer. The **Business Hubs** page is displayed.
3. Click the **Connect Business Hub** button located at the top-right corner of the page. The **Connect your Business Hubs to Cerby** dialog box is displayed.
**TIP:** You can select the **Don’t show this again** option to skip this step the next time you connect a new business hub.
4. Click the **Get started** button. A wizard is displayed on the **Select app** page.
5. Select **Acsense Business Hub** from the catalog. The **Enter app details** page is displayed on the wizard.
6. Enter and select your app information in the corresponding fields:
* **Label in Cerby:** It is the name to assign to your business hub in Cerby, and it will be displayed on the business hub card.
* **User management and login method:** It is the way your users log in to the app and determines if they must save their credentials in Cerby.
1. Select the **Username and password** option because account security and access are managed by Cerby, and users log in with their credentials after saving them in Cerby.
**IMPORTANT:** The Single sign-on (SSO) option is not supported by Acsense.
7. Click the **Next** button. The **Select automation account** page is displayed with a list of existing Acsense accounts.
8. Select the automation account you have previously added to Cerby, as described in the [Requirements](#requirements) section.
**NOTE:** If you don’t have an automation account, you are prompted to add it. Make sure you read Cerby’s recommendations on how to configure it in the article [Create a service account for your business hub](https://help.cerby.com/setup-and-admin/business-hubs/connecting-your-apps/create-a-service-account-for-your-business-hub) because you may need to add the account first and then, add the business hub.
9. Click the **Connect app** button. The wizard closes, and a success message box is displayed. The corresponding business hub is also on the **Business Hubs** page.
The next step is [2. Check for updates to import users and roles to Cerby](#id-2.-check-for-updates-to-import-users-and-roles-to-cerby).
### 2. Check for updates to import users and roles to Cerby
To check for updates in your app to identify and import users, roles, and assets to Cerby, you must complete the following steps:
1. Select the **Business Hubs** option from the left navigation drawer. The **Business Hubs** page is displayed.
2. Click the **Settings** icon of the corresponding business hub card. The business hub details page is displayed with the **Settings** tab activated.
3. Click the **Check for updates** button located at the top right of the page. A message box is displayed with information about the process.
**NOTE:** The check and import process may take a few minutes depending on the number of users, and because Cerby automatically matches users to their corresponding Cerby user account.
4. Confirm that the automated task to check for updates has the “Completed” status by performing any of the following actions:
* Click the **More details** button from the message box.
* Select the **Automation** option from the left navigation drawer to open the **Automation** page with a list of automated tasks and their status.
{% hint style="info" %}
**NOTE:** Cerby automatically performs daily checks for updates for all business hubs, but you can trigger them manually, as described in this section. When a user is deprovisioned from an IdP and a check for updates is performed, Cerby generates a report and sends business hub **Owners** an email to confirm their removal from the app. For more instructions, read the article [Check for updates in your app and apply report](/setup-and-admin/business-hubs/managing-users-and-assets-via-a-business-hub/sync-your-business-hub-with-your-external-app).
{% endhint %}
The next step is [3. Connect your Acsense user account to the business hub](#id-3.-connect-your-acsense-user-account-to-the-business-hub).
### 3. Connect your Acsense user account to the business hub
To connect your Acsense user account to the business hub so Cerby can manage and protect it, you must complete the following steps:
1. Select the **Accounts** option from the left navigation drawer. The **Accounts** page is displayed.
2. Click the **Log in** button of the corresponding Acsense Business Hub account card. The **Connect your Acsense Business Hub Account** dialog box is displayed.
3. Enter the login credentials of your Acsense user account.
4. Click the **Connect account** button. The dialog box closes, and a success message box and a new account card are displayed.
The next step is [4. Manage unmatched users](#id-4.-manage-unmatched-users).
### 4. Manage unmatched users
During a check for updates, Cerby automatically matches app members to the Cerby user accounts that correspond to their email addresses, including existing [guest users](https://help.cerby.com/getting-started/concepts/user-management/guest-users) and [local partners](https://help.cerby.com/getting-started/concepts/user-management/partners#h-7e4add33a2). Manual matching is required when apps don't provide email addresses and for app members using personal or external accounts that couldn’t be identified or are not in the corporate directory.
To view the status of the imported app members, you must complete the following steps:
1. Select the **Business Hubs** option from the left navigation drawer. The **Business Hubs** page is displayed.
2. Click the **More options** (...) icon of the corresponding business hub card. A drop-down list is displayed.
3. Select the **View Members** option from the list. The business hub details page is displayed with the **Members** tab activated. App members are displayed in the following tabs of the **User Overview** section:
* **Unmatched users:** This tab displays the users who were not automatically matched.
* **Onboarded users:** This tab displays the users matched to their Cerby user account.
* **Guest users:** This tab displays the users who were matched to an existing Cerby user account but it doesn’t exist in the corporate directory, such as external collaborators.
For unmatched users, you can perform one of the following actions:
* [Match users](#match-users)
* [Remove unmatched users](#remove-unmatched-users)
* [Exempt unmatched users](#exempt-unmatched-users)
The following sections describe each action.
#### Match users
To match users, you must complete the following steps from the **Unmatched users** tab of the business hub details page:
1. Click the **Match user** button of the corresponding user. The **Match user** dialog box is displayed.
2. Enter the username or email address of the user you want to match and invite in the **Match with** field. The user is displayed on a list.
3. Select the user from the list.
4. Click the **Next** button. The **Select Cerby role** dialog box is displayed.
5. Select the role to assign to the user on the business hub **Cerby role** drop-down list:
* **Owner:** This role enables sharing access and managing business hub settings in Cerby.
* **Collaborator:** This role enables only logging in to the app from Cerby.
1. Click the **Match user** button. The dialog box closes, and a success message box is displayed. The user is moved to the **Onboarded** **users** tab.
#### Remove unmatched users
To remove unmatched users, you must complete the following steps from the **Unmatched users** tab of the business hub details page:
{% hint style="danger" %}
**IMPORTANT:** When removing an unmatched user, Cerby performs an automated task to revoke the user’s seat and permissions in Acsense.
{% endhint %}
1. Click the **More options** (...) icon of the corresponding user. A drop-down list is displayed.
2. Select the **Remove user** option from the list. The **Remove user?** dialog box is displayed.
3. Click the **Remove user** button. The dialog box closes, and a success message box is displayed. The user is removed from the app via an automated task.
#### Exempt unmatched users
Exempted users keep their user accounts or seats active in your app, but you cannot manage them through Cerby.
To exempt unmatched users, you must complete the following steps from the **Unmatched users** tab of the business hub details page:
1. Click the **More options** (...) icon of the corresponding user. A drop-down list is displayed.
2. Select the **Exempt user** option from the list. The exempt user dialog box is displayed.
3. Enter a reason for exempting the user in the **Provide a reason** field.
4. Click the **Exempt member** button. The dialog box closes, and a success message box is displayed. The user is moved to the **Exempted users** tab.
***
## Use your business hub
The following are the supported features of business hubs you can use:
* [Join the App and connect it to Cerby](https://help.cerby.com/cerby-web-app/business-hubs/join-your-external-app-and-set-up-your-business-hub-access)
* [Invite new app members](/setup-and-admin/business-hubs/managing-users-and-assets-via-a-business-hub/add-users-and-teams-to-your-apps-via-a-business-hub)
* [Remove app members](/setup-and-admin/business-hubs/managing-users-and-assets-via-a-business-hub/remove-users-from-your-app-via-a-business-hub)
* [Provision users to your apps via an IdP and business hub](https://help.cerby.com/setup-and-admin/business-hubs/managing-users-and-assets-via-a-business-hub/provision-users-to-your-apps-via-an-idp-and-business-hub)
* [Update the app members’ roles](/setup-and-admin/business-hubs/managing-users-and-assets-via-a-business-hub/update-user-roles-in-your-app-via-a-business-hub)
* [Check for updates in your app and apply report](/setup-and-admin/business-hubs/managing-users-and-assets-via-a-business-hub/sync-your-business-hub-with-your-external-app)
* [Re-assign the app members’ user accounts](https://github.com/cerbyinc/help-center/tree/main/.uncategorized/unpublished-deprecated-re-assign-the-app-members-user-accounts.md)
* [Manage the security of app members’ user accounts](/setup-and-admin/business-hubs/managing-users-and-assets-via-a-business-hub/protect-your-app-user-accounts-via-a-business-hub)
* [Log in to your app](https://help.cerby.com/cerby-web-app/business-hubs/log-in-to-your-app)
* [Track activity on app members’ user accounts](/setup-and-admin/business-hubs/managing-users-and-assets-via-a-business-hub/track-activity-on-app-members-user-accounts)
* [Remove an App](/setup-and-admin/business-hubs/managing-your-business-hubs/remove-a-business-hub)
# Connect a business hub for Ada
This article describes how to connect a business hub to centrally manage the users of Ada from Cerby.
{% hint style="info" %}
**Who can use this feature?**
* Workspace **Owners**, **Super Admins**, **Admins**, and **Users**
* Only supported using the Cerby web app
{% endhint %}
As a user with any workspace role in Cerby, except **Guest User** and **Login-Only**, you can connect a business hub integration to centrally manage the users of Ada.
When you connect the business hub, you become its **Owner**, and you can perform the following user and access management tasks through automated tasks executed by the Cerby agent:
* Check for updates
* Add users
* Update user roles
* Remove users
{% hint style="success" %}
**TIP:** For more details about the automated tasks of a business hub, how it works, and the supported apps, read the article [Explore Business Hubs](https://help.cerby.com/setup-and-admin/business-hubs/business-hub-catalog).
{% endhint %}
This article provides instructions on how to connect a business hub for Ada. For other app-specific articles and videos, review the [Connecting business hubs for your apps](https://help.cerby.com/setup-and-admin/business-hubs/connecting-your-apps) and [Connecting business hubs for your paid social apps](https://help.cerby.com/setup-and-admin/business-hubs/connecting-your-paid-social-apps) collections in the Cerby Help Center.
***
## Requirements
The following are the requirements to connect a business hub:
* A Cerby workspace
* A Cerby user account with the workspace **Owner**, **Super Admin**, **Admin**, or **User** role
* Groups configured in your identity provider (IdP) if you want to leverage automatic user provisioning and deprovisioning from your apps based on group assignment events. For more information, read the articles available in the [Managing users via an IdP and business hub](https://help.cerby.com/setup-and-admin/business-hubs/managing-users-and-assets-via-a-business-hub) collection in the Cerby Help Center
* An automation account, meaning an active user account with a native **Admin** role in Ada to be used as a service account. For instructions and recommendations on how to create and configure this account, read the article [Create a service account for your business hub](/setup-and-admin/business-hubs/connecting-your-apps/create-a-service-account-for-your-business-hub)
* The user management and login method for your business hub identified to select the corresponding option when connecting your app. For more information, read the **User management and login method** section of the article [Explore Business Hubs](https://help.cerby.com/setup-and-admin/business-hubs/business-hub-catalog)
* A Business ID. You can find the ID in the address bar\*\*\*\* when you are logged in to Ada. The ID is displayed in the address bar as part of the URL, before **-gen** in the subdomain. For example, \*\*`cerby` \*\*in **`https://cerby-gen.ada.support/team`**. Just copy the value and paste it when connecting the business hub
***
## Connect a business hub for Ada
To connect a business hub for Ada, you must complete the following main steps from the Cerby web app dashboard:
1. [Add a business hub and connect it to Ada](#id-1.-add-a-business-hub-and-connect-it-to-ada)
2. [Check for updates to import users and roles to Cerby](#id-2.-check-for-updates-to-import-users-and-roles-to-cerby)
3. [Connect your Ada user account to the business hub](#id-3.-connect-your-ada-user-account-to-the-business-hub)
4. [Manage unmatched users](#id-4.-manage-unmatched-users)
The following sections describe each main step.
### 1. Add a business hub and connect it to Ada
To add a business hub and connect it to Ada, you must complete the following steps:
1. Log in to your corresponding [Cerby](https://app.cerby.com/) workspace.
2. Select the **Business Hubs** option from the left menu. The **Business Hubs** page is displayed.
3. Click the **Connect Business Hub** button located at the top-right corner of the page. The **Connect your Business Hubs to Cerby** dialog box is displayed. **TIP:** Select the **Don’t show this again** option to skip this step the next time you connect a new business hub.
4. Click the **Get started** button. A wizard is displayed on the **Select app** page.
5. Select **Ada Hub** from the catalog. The **Enter app details** page is displayed on the wizard.
6. Enter and select your app information in the corresponding fields:
* **Label in Cerby:** It is the name to assign to your business hub in Cerby, and it will be displayed on the business hub card.
* **Business ID:** It is the unique identifier of your business or organization in **Ada Hub**. For instructions on how to find it, read the [Requirements](#requirements) section.
* **User management and login method:** It is the way your users log in to the app and determines whether they must save their login credentials as a Cerby account connected to the business hub. You must select one of the following methods:
* **Single sign-on (SSO):** Access is managed by your IdP, and users log in with SSO authentication. They are not asked to save their credentials in Cerby.
* **Username and password:** Cerby manages account security and access, and users log in with their credentials after saving them in Cerby.
7. Click the **Next** button. The **Select automation account** page is displayed with a list of existing Ada accounts.
8. Select the automation account you have previously added to Cerby, as described in the [Requirements](#requirements) section. **NOTE:** If you don’t have an automation account, you are prompted to add it. Make sure you read Cerby’s recommendations on how to configure it in the article [Create a service account for your business hub](/setup-and-admin/business-hubs/connecting-your-apps/create-a-service-account-for-your-business-hub). You may need to add the account first and then add the business hub.
9. Click the **Connect app** button. The wizard closes, and a success message box is displayed. The corresponding business hub is also displayed on the **Business Hubs** page.
The next step is [2. Check for updates to import users and roles to Cerby](#id-2.-check-for-updates-to-import-users-and-roles-to-cerby).
### 2. Check for updates to import users and roles to Cerby
To check for updates in your app to identify and import users and roles to Cerby, you must complete the following steps:
1. Select the **Business Hubs** option from the left menu. The **Business Hubs** page is displayed.
2. Click the **More options** (...) icon of the corresponding business hub card. A drop-down menu is displayed.
3. Select the **Settings** option from the menu. The business hub details page is displayed with the **Settings** tab activated.
4. Click the **Check for updates** button located at the top right of the page. A message box is displayed with information about the process. **NOTE:** The check and import process may take a few minutes depending on the number of users, and because Cerby automatically matches users to their corresponding Cerby user account.
5. Confirm that the automated task to check for updates has the “Completed” status by performing any of the following actions:
* Click the **More details** button from the message box.
* Select the **Automation** option from the left menu to open the **Automation** page with a list of automated tasks and their status.
{% hint style="info" %}
**NOTE:** Cerby automatically performs daily checks for updates for all business hubs, but you can trigger them manually, as described in this section. For more instructions, read the article [Sync your app users with your business hub](/setup-and-admin/business-hubs/managing-users-and-assets-via-a-business-hub/sync-your-business-hub-with-your-external-app).
{% endhint %}
The next step is [3. Connect your Ada user account to the business hub](#id-3.-connect-your-ada-user-account-to-the-business-hub).
### 3. Connect your Ada user account to the business hub
To connect your Ada user account to the business hub so Cerby can manage and protect it, you must complete the following steps:
1. Select the **Accounts** option from the left menu. The **Accounts** page is displayed.
2. Click the **Log in** button of the corresponding Ada Hub account card. The **Connect your Ada Hub Account** dialog box is displayed.
3. Enter the login credentials of your **Ada** user account.
4. Click the **Connect account** button. The dialog box closes, and a success message box and a new account card are displayed.
The next step is [4. Manage unmatched users](#id-4.-manage-unmatched-users).
### 4. Manage unmatched users
During a check for updates, Cerby automatically matches app members to the Cerby user accounts that correspond to their email addresses, including existing [guest users](https://help.cerby.com/getting-started/concepts/user-management/guest-users) and [local partners](https://help.cerby.com/getting-started/concepts/user-management/partners#h-7e4add33a2). Manual matching is required when apps don't provide email addresses and for app members using personal or external accounts that couldn’t be identified or are not in the corporate directory.
To view the status of the imported app members, you must complete the following steps:
1. Select the **Business Hubs** option from the left menu. The **Business Hubs** page is displayed.
2. Click the **More options** (...) icon of the corresponding business hub card. A drop-down menu is displayed.
3. Select the **View Members** option from the menu. The business hub details page is displayed with the **Members** tab activated. App members are displayed in the following tabs of the **User Overview** section:
* **Unmatched users:** This tab displays the users who were not automatically matched.
* **Onboarded users:** This tab displays the users matched to their Cerby user account.
* **Guest users:** This tab displays the users who were matched to an existing Cerby user account but it doesn’t exist in the corporate directory, such as external collaborators.
For unmatched users, you can perform one of the following actions:
* [Match users](#match-users)
* [Remove unmatched users](#remove-unmatched-users)
* [Exempt unmatched users](#exempt-unmatched-users)
The following sections describe each action.
#### Match users
To match users, you must complete the following steps from the **Unmatched users** tab of the business hub details page:
1. Click the **Match user** button of the corresponding user. The **Match user** dialog box is displayed.
2. Enter the username or email address of the user you want to match and invite in the **Match with** field. The user is displayed on a list.
3. Select the user from the list.
4. Click the **Next** button. The **Select Cerby role** dialog box is displayed.
5. Select the role to assign to the user on the business hub **Cerby role** drop-down menu:
* **Owner:** This role enables sharing access and managing business hub settings in Cerby.
* **Collaborator:** This role enables only logging in to the app from Cerby.
6. Click the **Match user** button. The dialog box closes, and a success message box is displayed. The user is moved to the **Onboarded users** tab.
#### Remove unmatched users
To remove unmatched users, you must complete the following steps from the **Unmatched users** tab of the business hub details page:
{% hint style="danger" %}
**IMPORTANT:** When removing an unmatched user, Cerby performs an automated task to revoke the user’s seat and permissions in Ada.
{% endhint %}
1. Click the **More options** (...) icon of the corresponding user. A drop-down menu is displayed.
2. Select the **Remove user** option from the menu. The **Remove user?** dialog box is displayed.
3. Click the **Remove user** button. The dialog box closes, and a success message box is displayed. The user is removed from the app via an automated task.
#### Exempt unmatched users
Exempted users keep their user accounts or seats active in your app, but you cannot manage them through Cerby.
To exempt unmatched users, you must complete the following steps from the **Unmatched users** tab of the business hub details page:
1. Click the **More options** (...) icon of the corresponding user. A drop-down menu is displayed.
2. Select the **Exempt user** option from the menu. The exempt user dialog box is displayed.
3. Enter a reason for exempting the user in the **Provide a reason** field.
4. Click the **Exempt member** button. The dialog box closes, and a success message box is displayed. The user is moved to the **Exempted users** tab.
***
## Use your business hub
The following are the supported features of business hubs you can use:
* [Join the external app and set up your business hub access](https://help.cerby.com/cerby-web-app/business-hubs/join-your-external-app-and-set-up-your-business-hub-access)
* [Add users to your app via a business hub](/setup-and-admin/business-hubs/managing-users-and-assets-via-a-business-hub/add-users-and-teams-to-your-apps-via-a-business-hub)
* [Provision users to your apps via an IdP and business hub](/setup-and-admin/business-hubs/managing-users-and-assets-via-a-business-hub/provision-users-to-your-apps-via-an-idp-and-business-hub)
* [Remove users from your app via a business hub](/setup-and-admin/business-hubs/managing-users-and-assets-via-a-business-hub/remove-users-from-your-app-via-a-business-hub)
* [Remove teams from your app via a business hub](/setup-and-admin/business-hubs/managing-users-and-assets-via-a-business-hub/remove-teams-from-your-app-via-a-business-hub)
* [Deprovision users from your apps via an IdP and business hub](/setup-and-admin/business-hubs/managing-users-and-assets-via-a-business-hub/deprovision-users-from-your-apps-via-an-idp-and-business-hub)
* [Update user roles in your app via a business hub](/setup-and-admin/business-hubs/managing-users-and-assets-via-a-business-hub/update-user-roles-in-your-app-via-a-business-hub)
* [Update user roles in your apps via an IdP and business hub](/setup-and-admin/business-hubs/managing-users-and-assets-via-a-business-hub/update-user-roles-in-your-apps-via-an-idp-and-business-hub)
* [Sync your app users with your business hub](/setup-and-admin/business-hubs/managing-users-and-assets-via-a-business-hub/sync-your-business-hub-with-your-external-app)
* [Log in to your app via a business hub](https://help.cerby.com/cerby-web-app/business-hubs/log-in-to-your-app)
* [Track the activity of business hub users](/setup-and-admin/business-hubs/managing-users-and-assets-via-a-business-hub/track-activity-on-app-members-user-accounts)
* [Remove a business hub](/setup-and-admin/business-hubs/managing-your-business-hubs/remove-a-business-hub)
# Connect a business hub for AddEvent
This article describes how to connect a business hub to centrally manage the users of AddEvent from Cerby.
{% hint style="info" %}
**Who can use this feature?**
* Workspace **Owners**, **Super Admins**, **Admins**, and **Users**
* Only supported using the Cerby web app
{% endhint %}
As a user with any workspace role in Cerby, except **Guest User** and **Login-Only**, you can connect a business hub integration to centrally manage the users of AddEvent.
When you connect the business hub, you become its **Owner**, and you can perform the following user and access management tasks through automated tasks executed by the Cerby agent:
* Check for updates
* Invite app members
* Update app members’ roles
* Remove app members
{% hint style="success" %}
**TIP:** For more details about the automated tasks of a business hub, how it works, and the supported apps, read the article [Explore Apps](https://help.cerby.com/setup-and-admin/business-hubs/business-hub-catalog).
{% endhint %}
This article provides instructions on how to connect a business hub for AddEvent. For other app-specific articles and videos, review the [Connecting your business hubs](https://help.cerby.com/setup-and-admin/business-hubs/connecting-your-apps) collection in the Cerby Help Center.
***
## Requirements
The following are the requirements to connect a business hub:
* A Cerby workspace
* A Cerby user account with the **Owner**, **Super Admin**, **Admin**, or **User** role
* A dashboard in AddEvent
* Groups configured in your identity provider (IdP) if you want to leverage automatic user provisioning and deprovisioning from your apps based on group assignment events. For more information, read the article [Provision users to your apps via an IdP and business hub](https://help.cerby.com/setup-and-admin/business-hubs/managing-users-and-assets-via-a-business-hub/provision-users-to-your-apps-via-an-idp-and-business-hub)
* An automation account, meaning an active user account with a native **Admin** role in AddEvent to be used as a service account. For instructions and recommendations on how to create and configure this account, read the article [Create a service account for your business hub](https://help.cerby.com/setup-and-admin/business-hubs/connecting-your-apps/create-a-service-account-for-your-business-hub)
***
## Connect a business hub for AddEvent
To connect a business hub for AddEvent, you must complete the following main steps from the Cerby web app dashboard:
1. [Add a business hub and connect it to AddEvent](#id-1.-add-a-business-hub-and-connect-it-to-addevent)
2. [Check for updates to import users and roles to Cerby](#id-2.-check-for-updates-to-import-users-and-roles-to-cerby)
3. [Connect your AddEvent user account to the business hub](#id-3.-connect-your-addevent-user-account-to-the-business-hub)
4. [Manage unmatched users](#id-4.-manage-unmatched-users)
The following sections describe each main step.
### 1. Add a business hub and connect it to AddEvent
To add a business hub and connect it to AddEvent, you must complete the following steps:
1. Log in to your corresponding [Cerby](https://app.cerby.com/) workspace.
2. Select the **Business Hubs** option from the left navigation drawer. The **Business Hubs** page is displayed.
3. Click the **Connect Business Hub** button located at the top-right corner of the page. The **Connect your Business Hubs to Cerby** dialog box is displayed. **TIP:** Select the **Don’t show this again** option to skip this step the next time you connect a new business hub.
4. Click the **Get started** button. A wizard is displayed on the **Select app** page.
5. Select **Add Event Hub** from the catalog. The **Enter app details** page is displayed on the wizard.
6. Enter and select your app information in the corresponding fields:
* **Label in Cerby:** It is the name to assign to your business hub in Cerby, and it will be displayed on the business hub card.
* **Internal Unique Identifier:** It is a unique identifier that differentiates your business hub in Cerby from others for the same app. You can assign an alphanumeric value between 3 and 30 characters without symbols or special characters.
* **User management and login method:** It is the way your users log in to the app and determines whether they must save their login credentials as a Cerby account connected to the business hub. You must select one of the following methods:
* **Username and password:** Cerby manages account security and access, and users log in with their credentials after saving them in Cerby.
**IMPORTANT:** The **Single sign-on (SSO)** option is not supported by AddEvent.
7. Click the **Next** button. The **Select automation account** page is displayed with a list of existing AddEvent accounts.
8. Select the automation account you have previously added to Cerby, as described in the [Requirements](#requirements) section. **NOTE:** If you don’t have an automation account, you are prompted to add it. Make sure you read Cerby’s recommendations on how to configure it in the article [Create a service account for your business hub](https://help.cerby.com/setup-and-admin/business-hubs/connecting-your-apps/create-a-service-account-for-your-business-hub). You may need to add the account first and then add the business hub.
9. Click the **Connect app** button. The wizard closes, and a success message box is displayed. The corresponding business hub is also displayed on the **Business Hubs** page
The next step is [2. Check for updates to import users and roles to Cerby](#id-2.-check-for-updates-to-import-users-and-roles-to-cerby).
### 2. Check for updates to import users and roles to Cerby
To check for updates in your app to identify and import users and roles to Cerby, you must complete the following steps:
1. Select the **Business Hubs** option from the left navigation drawer. The **Business Hubs** page is displayed.
2. Click the **Settings** (
) icon of the corresponding business hub card. The business hub details page is displayed with the **Settings** tab activated.
3. Click the **Check for updates** button located at the top right of the page. A message box is displayed with information about the process. **NOTE:** The check and import process may take a few minutes depending on the number of users, and because Cerby automatically matches users to their corresponding Cerby user account.
4. Confirm that the automated task to check for updates has the “Completed” status by performing any of the following actions:
* Click the **More details** button from the message box.
* Select the **Automation** option from the left navigation drawer to open the **Automation** page with a list of automated tasks and their status.
{% hint style="info" %}
**NOTE:** Cerby automatically performs daily checks for updates for all business hubs, but you can trigger them manually, as described in this section. When a user is deprovisioned from an IdP and a check for updates is performed, Cerby generates a report and sends business hub **Owners** an email to confirm their removal from the app. For more instructions, read the article [Check for updates in your app and apply report](/setup-and-admin/business-hubs/managing-users-and-assets-via-a-business-hub/sync-your-business-hub-with-your-external-app).
{% endhint %}
The next step is [3. Connect your 10bis user account to the business hub](#id-3.-connect-your-10bis-user-account-to-the-business-hub).
### 3. Connect your 10bis user account to the business hub
To connect your 10bis user account to the business hub so Cerby can manage and protect it, you must complete the following steps:
1. Select the **Accounts** option from the left navigation drawer. The **Accounts** page is displayed.
2. Click the **Log in** button of the corresponding 10bis Hub account card. The **Connect your 10bis Hub Account** dialog box is displayed.
3. Enter the login credentials of your **10bis** user account.
4. Click the **Connect account** button. The dialog box closes, and a success message box and a new account card are displayed.
The next step is [4. Manage unmatched users](#id-4.-manage-unmatched-users).
### 4. Manage unmatched users
During a check for updates, Cerby automatically matches app members to the Cerby user accounts that correspond to their email addresses, including existing [guest users](https://help.cerby.com/getting-started/concepts/user-management/guest-users) and [local partners](https://help.cerby.com/getting-started/concepts/user-management/partners#h-7e4add33a2). Manual matching is required when apps don't provide email addresses and for app members using personal or external accounts that couldn’t be identified or are not in the corporate directory.
To view the status of the imported app members, you must complete the following steps:
1. Select the **Business Hubs** option from the left navigation drawer. The **Business Hubs** page is displayed.
2. Click the **More options** (...) icon of the corresponding business hub card. A drop-down list is displayed.
3. Select the **View Members** option from the list. The business hub details page is displayed with the **Members** tab activated. App members are displayed in the following tabs of the **User Overview** section:
* **Unmatched users:** This tab displays the users who were not automatically matched.
* **Onboarded users:** This tab displays the users matched to their Cerby user account.
* **Guest users:** This tab displays the users who were matched to an existing Cerby user account but it doesn’t exist in the corporate directory, such as external collaborators.
For unmatched users, you can perform one of the following actions:
* [Match users](#match-users)
* [Remove unmatched users](#remove-unmatched-users)
* [Exempt unmatched users](#exempt-unmatched-users)
The following sections describe each action.
#### Match users
To match users, you must complete the following steps from the **Unmatched users** tab of the business hub details page:
1. Click the **Match user** button of the corresponding user. The **Match user** dialog box is displayed.
2. Enter the username or email address of the user you want to match and invite in the **Match with** field. The user is displayed on a list.
3. Select the user from the list.
4. Click the **Next** button. The **Select Cerby role** dialog box is displayed.
5. Select the role to assign to the user on the business hub **Cerby role** drop-down list:
* **Owner:** This role enables sharing access and managing business hub settings in Cerby.
* **Collaborator:** This role enables only logging in to the app from Cerby.
6. Click the **Match user** button. The dialog box closes, and a success message box is displayed. The user is moved to the **Onboarded users** tab.
#### Remove unmatched users
To remove unmatched users, you must complete the following steps from the **Unmatched users** tab of the business hub details page:
{% hint style="danger" %}
**IMPORTANT:** When removing an unmatched user, Cerby performs an automated task to revoke the user’s seat and permissions in 10bis.
{% endhint %}
1. Click the **More options** (...) icon of the corresponding user. A drop-down list is displayed.
2. Select the **Remove user** option from the list. The **Remove user?** dialog box is displayed.
3. Click the **Remove user** button. The dialog box closes, and a success message box is displayed. The user is removed from the app via an automated task.
#### Exempt unmatched users
Exempted users keep their user accounts or seats active in your app, but you cannot manage them through Cerby.
To exempt unmatched users, you must complete the following steps from the **Unmatched users** tab of the business hub details page:
1. Click the **More options** (...) icon of the corresponding user. A drop-down list is displayed.
2. Select the **Exempt user** option from the list. The exempt user dialog box is displayed.
3. Enter a reason for exempting the user in the **Provide a reason** field.
4. Click the **Exempt member** button. The dialog box closes, and a success message box is displayed. The user is moved to the **Exempted users** tab.
***
## Use your business hub
The following are the supported features of business hubs you can use:
* [Join the App and connect it to Cerby](https://help.cerby.com/cerby-web-app/business-hubs/join-your-external-app-and-set-up-your-business-hub-access)
* [Invite new app members](/setup-and-admin/business-hubs/managing-users-and-assets-via-a-business-hub/add-users-and-teams-to-your-apps-via-a-business-hub)
* [Remove app members](/setup-and-admin/business-hubs/managing-users-and-assets-via-a-business-hub/remove-users-from-your-app-via-a-business-hub)
* [Provision users to your apps via an IdP and business hub](https://help.cerby.com/setup-and-admin/business-hubs/managing-users-and-assets-via-a-business-hub/provision-users-to-your-apps-via-an-idp-and-business-hub)
* [Update the app members’ roles](/setup-and-admin/business-hubs/managing-users-and-assets-via-a-business-hub/update-user-roles-in-your-app-via-a-business-hub)
* [Check for updates in your app and apply report](/setup-and-admin/business-hubs/managing-users-and-assets-via-a-business-hub/sync-your-business-hub-with-your-external-app)
* [Re-assign the app members’ user accounts](https://github.com/cerbyinc/help-center/tree/main/.uncategorized/unpublished-deprecated-re-assign-the-app-members-user-accounts.md)
* [Log in to your app](https://help.cerby.com/cerby-web-app/business-hubs/log-in-to-your-app)
* [Track activity on app members’ user accounts](/setup-and-admin/business-hubs/managing-users-and-assets-via-a-business-hub/track-activity-on-app-members-user-accounts)
* [Remove an App](/setup-and-admin/business-hubs/managing-your-business-hubs/remove-a-business-hub)
# Connect a business hub for 1Password Business
This article describes how to connect a business hub to centrally manage the users of 1Password Business from Cerby.
{% hint style="info" %}
**Who can use this feature?**
* Workspace **Owners**, **Super Admins**, **Admins**, and **Users**
* Only supported using the Cerby web app
{% endhint %}
As a user with any workspace role in Cerby, except **Guest User** and **Login-Only**, you can connect a business hub integration to centrally manage the users of 1Password Business.
When you connect the business hub, you become its **Owner**, and you can perform the following user and access management tasks through automated tasks executed by the Cerby agent:
* Check for updates
* Add users
* Update user roles
* Remove users
{% hint style="success" %}
**TIP:** For more details about the automated tasks of a business hub, how it works, and the supported apps, read the article [Explore Business Hubs](https://help.cerby.com/setup-and-admin/business-hubs/business-hub-catalog).
{% endhint %}
This article provides instructions on how to connect a business hub for 1Password Business. For other app-specific articles and videos, review the [Connecting business hubs for your apps](https://help.cerby.com/setup-and-admin/business-hubs/connecting-your-apps) and [Connecting business hubs for your paid social apps](https://help.cerby.com/setup-and-admin/business-hubs/connecting-your-paid-social-apps) collections in the Cerby Help Center.
***
## Requirements
The following are the requirements to connect a business hub:
* A Cerby workspace
* A Cerby user account with the workspace **Owner**, **Super Admin**, **Admin**, or **User** role
* A team in 1Password Business
* Groups configured in your identity provider (IdP) if you want to leverage automatic user provisioning and deprovisioning from your apps based on group assignment events. For more information, read the articles available in the [Managing users via an IdP and business hub](https://help.cerby.com/setup-and-admin/business-hubs/managing-users-and-assets-via-a-business-hub) collection in the Cerby Help Center
* An automation account, meaning an active user account with a native **Administrator** role in 1Password Business to be used as a service account. For instructions and recommendations on how to create and configure this account, read the article [Create a service account for your business hub](/setup-and-admin/business-hubs/connecting-your-apps/create-a-service-account-for-your-business-hub)
* A Business unique identifier. You can find the ID in the address bar when you are logged in to 1Password Business. The ID is displayed before **`.1password.com`** in the URL. For example, **`cerby`** in **`https://cerby.1password.com/people`**. Just copy the value and paste it when connecting the business hub.
***
## Connect a business hub for 1Password Business
To connect a business hub for 1Password Business, you must complete the following main steps from the Cerby web app dashboard:
1. [Add a business hub and connect it to 1Password Business](#id-1.-add-a-business-hub-and-connect-it-to-1password-business)
2. [Check for updates to import users and roles to Cerby](#id-2.-check-for-updates-to-import-users-and-roles-to-cerby)
3. [Connect your 1Password Business user account to the business hub](#id-3.-connect-your-1password-business-user-account-to-the-business-hub)
4. [Manage unmatched users](#id-4.-manage-unmatched-users)
The following sections describe each main step.
### 1. Add a business hub and connect it to 1Password Business
To add a business hub and connect it to 1Password Business, you must complete the following steps:
1. Log in to your corresponding [Cerby](https://app.cerby.com/) workspace.
2. Select the **Business Hubs** option from the left menu. The **Business Hubs** page is displayed.
3. Click the **Connect Business Hub** button located at the top-right corner of the page. The **Connect your Business Hubs to Cerby** dialog box is displayed. **TIP:** Select the **Don’t show this again** option to skip this step the next time you connect a new business hub.
4. Click the **Get started** button. A wizard is displayed on the **Select app** page.
5. Select **1Password Hub** from the catalog. The **Enter app details** page is displayed on the wizard.
6. Enter and select your app information in the corresponding fields:
* **Label in Cerby:** It is the name to assign to your business hub in Cerby, and it will be displayed on the business hub card.
* **Business unique identifier:** It is the unique identifier of your business or organization in **1Password Hub**. For instructions on how to find it, read the [Requirements](#requirements) section.
* **User management and login method:** It is the way your users log in to the app and determines whether they must save their login credentials as a Cerby account connected to the business hub.
1. Select the **Username and password** option because account security and access are managed by Cerby, and users log in with their credentials after saving them in Cerby. **IMPORTANT:** The Single sign-on (SSO) option is not supported by 1Password Business.
7. Click the **Next** button. The **Select automation account** page is displayed with a list of existing 1Password Business accounts.
8. Select the automation account you have previously added to Cerby, as described in the [Requirements](#requirements) section. **NOTE:** If you don’t have an automation account, you are prompted to add it. Make sure you read Cerby’s recommendations on how to configure it in the article [Create a service account for your business hub](/setup-and-admin/business-hubs/connecting-your-apps/create-a-service-account-for-your-business-hub). You may need to add the account first and then add the business hub.
9. Click the **Connect app** button. The wizard closes, and a success message box is displayed. The corresponding business hub is also displayed on the **Business Hubs** page.
The next step is [2. Check for updates to import users and roles to Cerby](#id-2.-check-for-updates-to-import-users-and-roles-to-cerby).
### 2. Check for updates to import users and roles to Cerby
To check for updates in your app to identify and import users and roles to Cerby, you must complete the following steps:
1. Select the **Business Hubs** option from the left menu. The **Business Hubs** page is displayed.
2. Click the **More options** (...) icon of the corresponding business hub card. A drop-down menu is displayed.
3. Select the **Settings** option from the menu. The business hub details page is displayed with the **Settings** tab activated.
4. Click the **Check for updates** button located at the top right of the page. A message box is displayed with information about the process. **NOTE:** The check and import process may take a few minutes depending on the number of users, and because Cerby automatically matches users to their corresponding Cerby user account.
5. Confirm that the automated task to check for updates has the “Completed” status by performing any of the following actions:
* Click the **More details** button from the message box.
* Select the **Automation** option from the left menu to open the **Automation** page with a list of automated tasks and their status.
{% hint style="info" %}
**NOTE:** Cerby automatically performs daily checks for updates for all business hubs, but you can trigger them manually, as described in this section. For more instructions, read the article [Sync your app users with your business hub](/setup-and-admin/business-hubs/managing-users-and-assets-via-a-business-hub/sync-your-business-hub-with-your-external-app).
{% endhint %}
The next step is [3. Connect your 1Password Business user account to the business hub](#id-3.-connect-your-1password-business-user-account-to-the-business-hub).
### 3. Connect your 1Password Business user account to the business hub
To connect your 1Password Business user account to the business hub so Cerby can manage and protect it, you must complete the following steps:
1. Select the **Accounts** option from the left menu. The **Accounts** page is displayed.
2. Click the **Log in** button of the corresponding 1Password Hub account card. The **Connect your 1Password Hub Account** dialog box is displayed.
3. Enter the login credentials of your **1Password Business** user account.
4. Click the **Connect account** button. The dialog box closes, and a success message box and a new account card are displayed.
The next step is [4. Manage unmatched users](#id-4.-manage-unmatched-users).
### 4. Manage unmatched users
During a check for updates, Cerby automatically matches app members to the Cerby user accounts that correspond to their email addresses, including existing [guest users](https://help.cerby.com/getting-started/concepts/user-management/guest-users) and [local partners](https://help.cerby.com/getting-started/concepts/user-management/partners#h-7e4add33a2). Manual matching is required when apps don't provide email addresses and for app members using personal or external accounts that couldn’t be identified or are not in the corporate directory.
To view the status of the imported app members, you must complete the following steps:
1. Select the **Business Hubs** option from the left menu. The **Business Hubs** page is displayed.
2. Click the **More options** (...) icon of the corresponding business hub card. A drop-down menu is displayed.
3. Select the **View Members** option from the menu. The business hub details page is displayed with the **Members** tab activated. App members are displayed in the following tabs of the **User Overview** section:
* **Unmatched users:** This tab displays the users who were not automatically matched.
* **Onboarded users:** This tab displays the users matched to their Cerby user account.
* **Guest users:** This tab displays the users who were matched to an existing Cerby user account but it doesn’t exist in the corporate directory, such as external collaborators.
For unmatched users, you can perform one of the following actions:
* [Match users](#match-users)
* [Remove unmatched users](#remove-unmatched-users)
* [Exempt unmatched users](#exempt-unmatched-users)
The following sections describe each action.
#### Match users
To match users, you must complete the following steps from the **Unmatched users** tab of the business hub details page:
1. Click the **Match user** button of the corresponding user. The **Match user** dialog box is displayed.
2. Enter the username or email address of the user you want to match and invite in the **Match with** field. The user is displayed on a list.
3. Select the user from the list.
4. Click the **Next** button. The **Select Cerby role** dialog box is displayed.
5. Select the role to assign to the user on the business hub **Cerby role** drop-down menu:
* **Owner:** This role enables sharing access and managing business hub settings in Cerby.
* **Collaborator:** This role enables only logging in to the app from Cerby.
6. Click the **Match user** button. The dialog box closes, and a success message box is displayed. The user is moved to the **Onboarded users** tab.
#### Remove unmatched users
To remove unmatched users, you must complete the following steps from the **Unmatched users** tab of the business hub details page:
{% hint style="danger" %}
**IMPORTANT:** When removing an unmatched user, Cerby performs an automated task to revoke the user’s seat and permissions in 1Password Business.
{% endhint %}
1. Click the **More options** (...) icon of the corresponding user. A drop-down menu is displayed.
2. Select the **Remove user** option from the menu. The **Remove user?** dialog box is displayed.
3. Click the **Remove user** button. The dialog box closes, and a success message box is displayed. The user is removed from the app via an automated task.
#### Exempt unmatched users
Exempted users keep their user accounts or seats active in your app, but you cannot manage them through Cerby.
To exempt unmatched users, you must complete the following steps from the **Unmatched users** tab of the business hub details page:
1. Click the **More options** (...) icon of the corresponding user. A drop-down menu is displayed.
2. Select the **Exempt user** option from the menu. The exempt user dialog box is displayed.
3. Enter a reason for exempting the user in the **Provide a reason** field.
4. Click the **Exempt member** button. The dialog box closes, and a success message box is displayed. The user is moved to the **Exempted users** tab.
***
## Use your business hub
The following are the supported features of business hubs you can use:
* [Join the external app and set up your business hub access](https://help.cerby.com/cerby-web-app/business-hubs/join-your-external-app-and-set-up-your-business-hub-access)
* [Add users to your app via a business hub](/setup-and-admin/business-hubs/managing-users-and-assets-via-a-business-hub/add-users-and-teams-to-your-apps-via-a-business-hub)
* [Provision users to your apps via an IdP and business hub](/setup-and-admin/business-hubs/managing-users-and-assets-via-a-business-hub/provision-users-to-your-apps-via-an-idp-and-business-hub)
* [Remove users from your app via a business hub](/setup-and-admin/business-hubs/managing-users-and-assets-via-a-business-hub/remove-users-from-your-app-via-a-business-hub)
* [Remove teams from your app via a business hub](/setup-and-admin/business-hubs/managing-users-and-assets-via-a-business-hub/remove-teams-from-your-app-via-a-business-hub)
* [Deprovision users from your apps via an IdP and business hub](/setup-and-admin/business-hubs/managing-users-and-assets-via-a-business-hub/deprovision-users-from-your-apps-via-an-idp-and-business-hub)
* [Update user roles in your app via a business hub](/setup-and-admin/business-hubs/managing-users-and-assets-via-a-business-hub/update-user-roles-in-your-app-via-a-business-hub)
* [Update user roles in your apps via an IdP and business hub](/setup-and-admin/business-hubs/managing-users-and-assets-via-a-business-hub/update-user-roles-in-your-apps-via-an-idp-and-business-hub)
* [Sync your app users with your business hub](/setup-and-admin/business-hubs/managing-users-and-assets-via-a-business-hub/sync-your-business-hub-with-your-external-app)
* [Log in to your app via a business hub](https://help.cerby.com/cerby-web-app/business-hubs/log-in-to-your-app)
* [Track the activity of business hub users](/setup-and-admin/business-hubs/managing-users-and-assets-via-a-business-hub/track-activity-on-app-members-user-accounts)
* [Remove a business hub](/setup-and-admin/business-hubs/managing-your-business-hubs/remove-a-business-hub)
# Connect a business hub for 6sense
This article describes how to connect a business hub to centrally manage the users of 6sense from Cerby.
{% hint style="info" %}
**Who can use this feature?**
* Workspace **Owners**, **Super Admins**, **Admins**, and **Users**
* Only supported using the Cerby web app
{% endhint %}
As a user with any workspace role in Cerby, except **Guest User** and **Login-Only**, you can connect a business hub integration to centrally manage the users of 6sense.
When you connect the business hub, you become its **Owner**, and you can perform the following user and access management tasks through automated tasks executed by the Cerby agent:
* Check for updates
* Update user roles
* Remove users
{% hint style="success" %}
**TIP:** For more details about the automated tasks of a business hub, how it works, and the supported apps, read the article [Explore Business Hubs](https://help.cerby.com/setup-and-admin/business-hubs/business-hub-catalog).
{% endhint %}
{% hint style="info" %}
**NOTE:** The automated task to **add users** is not available for this business hub because 6sense uses Just-In-Time (JIT)\*\*\*\* provisioning, which automatically creates user accounts when they first sign in.
{% endhint %}
This article provides instructions on how to connect a business hub for 6sense. For other app-specific articles and videos, review the [Connecting business hubs for your apps](https://help.cerby.com/setup-and-admin/business-hubs/connecting-your-apps) and [Connecting business hubs for your paid social apps](https://help.cerby.com/setup-and-admin/business-hubs/connecting-your-paid-social-apps) collections in the Cerby Help Center.
***
## Requirements
The following are the requirements to connect a business hub:
* A Cerby workspace
* A Cerby user account with the **Owner**, **Super Admin**, **Admin**, or **User** role
* An organization in 6sense
* Groups configured in your identity provider (IdP) if you want to leverage automatic user provisioning and deprovisioning from your apps based on group assignment events. For more information, read the articles available in the [Managing users via an IdP and business hub](https://help.cerby.com/setup-and-admin/business-hubs/managing-users-and-assets-via-a-business-hub) collection in the Cerby Help Center
* An automation account, meaning an active user account with enough permissions to manage users, groups, and roles in 6sense, to be used as a service account. For instructions and recommendations on how to create and configure this account, read the article [Create a service account for your business hub](/setup-and-admin/business-hubs/connecting-your-apps/create-a-service-account-for-your-business-hub)
* The user management and login method for your business hub identified to select the corresponding option when connecting your app. For more information, read the **User management and login method** section of the article [Explore Business Hubs](https://help.cerby.com/setup-and-admin/business-hubs/business-hub-catalog)
* A business URL subdomain. You can find the subdomain in the address bar when you are logged in to 6sense. For example, **`cerby`** in **`https://cerby.workflows.6sense.com`**. Just copy the value and paste it when connecting the business hub.
***
## Connect a business hub for 6sense
To connect a business hub for 6sense, you must complete the following main steps from the Cerby web app dashboard:
1. [Add a business hub and connect it to 6sense](#id-1.-add-a-business-hub-and-connect-it-to-6sense)
2. [Check for updates to import users and roles to Cerby](#id-2.-check-for-updates-to-import-users-and-roles-to-cerby)
3. [Connect your 6sense user account to the business hub](#id-3.-connect-your-6sense-user-account-to-the-business-hub)
4. [Manage unmatched users](#id-4.-manage-unmatched-users)
The following sections describe each main step.
### 1. Add a business hub and connect it to 6sense
To add a business hub and connect it to 6sense, you must complete the following steps:
1. Log in to your corresponding [Cerby](https://app.cerby.com/) workspace.
2. Select the **Business Hubs** option from the left menu. The **Business Hubs** page is displayed.
3. Click the **Connect Business Hub** button located at the top-right corner of the page. The **Connect your Business Hubs to Cerby** dialog box is displayed. **TIP:** Select the **Don’t show this again** option to skip this step the next time you connect a new business hub.
4. Click the **Get started** button. A wizard is displayed on the **Select app** page.
5. Select **6sense Hub** from the catalog. The **Enter app details** page is displayed on the wizard.
6. Enter and select your app information in the corresponding fields:
* **Label in Cerby:** It is the name to assign to your business hub in Cerby, and it will be displayed on the business hub card.
* **Business URL subdomain:** It is the unique identifier of your business or organization in **6sense Hub**. For instructions on how to find it, read the [Requirements](#requirements) section.
* **User management and login method:** It is the way your users log in to the app and determines whether they must save their login credentials as a Cerby account connected to the business hub.
1. Select the **Single sign-on (SSO)** option because access must be managed by your IdP, and users log in with SSO authentication. They are not asked to save their credentials in Cerby. **IMPORTANT** : The **Username and password** option is not supported for 6sense.
7. Click the **Next** button. The **Select automation account** page is displayed with a list of existing 6sense accounts.
8. Select the automation account you have previously added to Cerby, as described in the [Requirements](#requirements) section. **NOTE:** If you don’t have an automation account, you are prompted to add it. Make sure you read Cerby’s recommendations on how to configure it in the article [Create a service account for your business hub](https://help.cerby.com/setup-and-admin/business-hubs/connecting-your-apps/create-a-service-account-for-your-business-hub). You may need to add the account first and then add the business hub.
9. Click the **Connect app** button. The wizard closes, and a success message box is displayed. The corresponding business hub is also displayed on the **Business Hubs** page
The next step is [2. Check for updates to import users and roles to Cerby](/setup-and-admin/business-hubs/connecting-your-apps/connect-a-business-hub-for-your-app#h-9c6531cf9a).
### 2. Check for updates to import users and roles to Cerby
To check for updates in your app to identify and import users and roles to Cerby, you must complete the following steps:
1. Select the **Business Hubs** option from the left menu. The **Business Hubs** page is displayed.
2. Click the **More options** (...) icon of the corresponding business hub card. A drop-down menu is displayed.
3. Select the **Settings** option from the menu. The business hub details page is displayed with the **Settings** tab activated.
4. Click the **Sync** button located at the top right of the page. A message box is displayed with information about the process. **NOTE:** The check and import process may take a few minutes, depending on the number of users, and because Cerby automatically matches users to their corresponding Cerby user account.
5. Confirm that the automated task to check for updates has the “Completed” status by performing any of the following actions:
* Click the **More details** button in the message box.
* Select the **Automation** option from the left menu to open the **Automation** page with a list of automated tasks and their status.
{% hint style="info" %}
**NOTE:** Cerby automatically performs daily checks for updates for all business hubs, but you can trigger them manually, as described in this section. For more instructions, read the article [Sync your app users with your business hub](/setup-and-admin/business-hubs/managing-users-and-assets-via-a-business-hub/sync-your-business-hub-with-your-external-app).
{% endhint %}
The next step is [3. Connect your 6sense user account to the business hub](#id-3.-connect-your-6sense-user-account-to-the-business-hub).
### 3. Connect your 6sense user account to the business hub
To connect your 6sense user account to the business hub so Cerby can manage and protect it, you must complete the following steps:
1. Select the **Accounts** option from the left menu. The **All accounts** page is displayed.
2. Click the **Log in** button of the corresponding 6sense Hub account card. The **Connect your 6sense Hub Account** dialog box is displayed.
3. Enter the login credentials of your **6sense** user account.
4. Click the **Connect account** button. The dialog box closes, and a success message box and a new account card are displayed.
The next step is [4. Manage unmatched users](#id-4.-manage-unmatched-users).
### 4. Manage unmatched users
During a check for updates, Cerby automatically matches app members to the Cerby user accounts that correspond to their email addresses, including existing [guest users](https://help.cerby.com/getting-started/concepts/user-management/guest-users) and [local partners](https://help.cerby.com/getting-started/concepts/user-management/partners#h-7e4add33a2). Manual matching is required when apps don't provide email addresses and for app members using personal or external accounts that couldn’t be identified or are not in the corporate directory.
To view the status of the imported app members, you must complete the following steps:
1. Select the **Business Hubs** option from the left menu. The **Business Hubs** page is displayed.
2. Click the **More options** (...) icon of the corresponding business hub card. A drop-down menu is displayed.
3. Select the **View Members** option from the menu. The business hub details page is displayed with the **Members** tab activated. App members are displayed in the following tabs of the **User Overview** section:
* **Unmatched users:** This tab displays the users who were not automatically matched.
* **Onboarded users:** This tab displays the users matched to their Cerby user account.
* **Guest users:** This tab displays the users who were matched to an existing Cerby user account, but it doesn’t exist in the corporate directory, such as external collaborators.
For unmatched users, you can perform one of the following actions:
* [Match users](#match-users)
* [Remove unmatched users](#remove-unmatched-users)
* [Exempt unmatched users](#exempt-unmatched-users)
The following sections describe each action.
#### Match users
To match users, you must complete the following steps from the **Unmatched users** tab of the business hub details page:
1. Click the **Match user** button of the corresponding user. The **Match user** dialog box is displayed.
2. Enter the username or email address of the user you want to match and invite in the **Match with** field. The user is displayed on a list.
3. Select the user from the list.
4. Click the **Next** button. The **Select Cerby role** dialog box is displayed.
5. Select the role to assign to the user on the business hub **Cerby role** drop-down menu:
* **Owner:** This role enables sharing access and managing business hub settings in Cerby.
* **Collaborator:** This role enables only logging in to the app from Cerby.
6. Click the **Match user** button. The dialog box closes, and a success message box is displayed. The user is moved to the **Onboarded users** tab.
#### Remove unmatched users
To remove unmatched users, you must complete the following steps from the **Unmatched users** tab of the business hub details page:
{% hint style="danger" %}
**IMPORTANT:** When removing an unmatched user, Cerby performs an automated task to revoke the user’s seat and permissions in 6sense.
{% endhint %}
1. Click the **More options** (...) icon of the corresponding user. A drop-down menu is displayed.
2. Select the **Remove user** option from the list. The **Remove user?** dialog box is displayed.
3. Click the **Remove user** button. The dialog box closes, and a success message box is displayed. The user is removed from the app via an automated task.
#### Exempt unmatched users
Exempted users keep their user accounts or seats active in your app, but you cannot manage them through Cerby.
To exempt unmatched users, you must complete the following steps from the **Unmatched users** tab of the business hub details page:
1. Click the **More options** (...) icon of the corresponding user. A drop-down list is displayed.
2. Select the **Exempt user** option from the list. The exempt user dialog box is displayed.
3. Enter a reason for exempting the user in the **Provide a reason** field.
4. Click the **Exempt member** button. The dialog box closes, and a success message box is displayed. The user is moved to the **Exempted users** tab.
***
## Use your business hub
The following are the supported features of business hubs you can use:
* [Join the external app and set up your business hub access](https://help.cerby.com/cerby-web-app/business-hubs/join-your-external-app-and-set-up-your-business-hub-access)
* [Remove users from your app via a business hub](/setup-and-admin/business-hubs/managing-users-and-assets-via-a-business-hub/remove-users-from-your-app-via-a-business-hub)
* [Remove teams from your app via a business hub](/setup-and-admin/business-hubs/managing-users-and-assets-via-a-business-hub/remove-teams-from-your-app-via-a-business-hub)
* [Deprovision users from your apps via an IdP and business hub](/setup-and-admin/business-hubs/managing-users-and-assets-via-a-business-hub/deprovision-users-from-your-apps-via-an-idp-and-business-hub)
* [Update user roles in your app via a business hub](/setup-and-admin/business-hubs/managing-users-and-assets-via-a-business-hub/update-user-roles-in-your-app-via-a-business-hub)
* [Update user roles in your apps via an IdP and business hub](/setup-and-admin/business-hubs/managing-users-and-assets-via-a-business-hub/update-user-roles-in-your-apps-via-an-idp-and-business-hub)
* [Sync your app users with your business hub](/setup-and-admin/business-hubs/managing-users-and-assets-via-a-business-hub/sync-your-business-hub-with-your-external-app)
* [Log in to your app via a business hub](https://help.cerby.com/cerby-web-app/business-hubs/log-in-to-your-app)
* [Track the activity of business hub users](/setup-and-admin/business-hubs/managing-users-and-assets-via-a-business-hub/track-activity-on-app-members-user-accounts)
* [Remove a business hub](/setup-and-admin/business-hubs/managing-your-business-hubs/remove-a-business-hub)
# Connect a business hub for Acsense
This article describes how to connect a business hub to centrally manage the users of Acsense from Cerby.
{% hint style="info" %}
**Who can use this feature?**
* Workspace **Owners**, **Super Admins**, **Admins**, and **Users**
* Only supported using the Cerby web app
{% endhint %}
As a user with any workspace role in Cerby, except **Guest User** and **Login-Only**, you can connect a business hub integration to centrally manage the users of Acsense.
When you connect the business hub, you become its **Owner**, and you can perform the following user and access management tasks through automated tasks executed by the Cerby agent:
* Check for updates
* Invite app members
* Update app members’ roles
* Remove app members
{% hint style="success" %}
**TIP:** For more details about the automated tasks of a business hub, how it works, and the supported apps, read the article [Explore Apps](https://help.cerby.com/setup-and-admin/business-hubs/business-hub-catalog).
{% endhint %}
This article provides instructions on how to connect a business hub for Acsense. For other app-specific articles and videos, review the [Connecting your business hubs](https://help.cerby.com/setup-and-admin/business-hubs/connecting-your-apps) collection in the Cerby Help Center.
***
## Requirements
The following are the requirements to connect a business hub:
* A Cerby workspace
* A Cerby user account with the **Owner**, **Super Admin**, **Admin**, or **User** role
* Groups configured in your identity provider (IdP) if you want to leverage automatic user provisioning and deprovisioning from your apps based on group assignment events. For more information, read the article [Provision users to your apps via an IdP and business hub](https://help.cerby.com/setup-and-admin/business-hubs/managing-users-and-assets-via-a-business-hub/provision-users-to-your-apps-via-an-idp-and-business-hub)
* An automation account, meaning an active user account with an **Admin** role in Acsense to be used as a service account. For instructions and recommendations on how to create and configure this account, read the article [Create a service account for your business hub](https://help.cerby.com/setup-and-admin/business-hubs/connecting-your-apps/create-a-service-account-for-your-business-hub)
***
## Connect a business hub for Acsense
To connect a business hub for Acsense, you must complete the following main steps from the Cerby web app dashboard:
1. [Add a business hub and connect it to Acsense](#id-1.-add-a-business-hub-and-connect-it-to-acsense)
2. [Check for updates to import users and roles to Cerby](#id-2.-check-for-updates-to-import-users-and-roles-to-cerby)
3. [Connect your Acsense user account to the business hub](#id-3.-connect-your-acsense-user-account-to-the-business-hub)
4. [Manage unmatched users](#id-4.-manage-unmatched-users)
The following sections describe each main step.
### 1. Add a business hub and connect it to Acsense
To add a business hub and connect it to Acsense, you must complete the following steps:
1. Log in to your corresponding [Cerby](https://app.cerby.com/) workspace.
2. Select the **Business Hubs** option from the left navigation drawer. The **Business Hubs** page is displayed.
3. Click the **Connect Business Hub** button located at the top-right corner of the page. The **Connect your Business Hubs to Cerby** dialog box is displayed.
**TIP:** You can select the **Don’t show this again** option to skip this step the next time you connect a new business hub.
4. Click the **Get started** button. A wizard is displayed on the **Select app** page.
5. Select **Acsense Business Hub** from the catalog. The **Enter app details** page is displayed on the wizard.
6. Enter and select your app information in the corresponding fields:
* **Label in Cerby:** It is the name to assign to your business hub in Cerby, and it will be displayed on the business hub card.
* **User management and login method:** It is the way your users log in to the app and determines if they must save their credentials in Cerby.
1. Select the **Username and password** option because account security and access are managed by Cerby, and users log in with their credentials after saving them in Cerby.
**IMPORTANT:** The Single sign-on (SSO) option is not supported by Acsense.
7. Click the **Next** button. The **Select automation account** page is displayed with a list of existing Acsense accounts.
8. Select the automation account you have previously added to Cerby, as described in the [Requirements](#requirements) section.
**NOTE:** If you don’t have an automation account, you are prompted to add it. Make sure you read Cerby’s recommendations on how to configure it in the article [Create a service account for your business hub](https://help.cerby.com/setup-and-admin/business-hubs/connecting-your-apps/create-a-service-account-for-your-business-hub) because you may need to add the account first and then, add the business hub.
9. Click the **Connect app** button. The wizard closes, and a success message box is displayed. The corresponding business hub is also on the **Business Hubs** page.
The next step is [2. Check for updates to import users and roles to Cerby](#id-2.-check-for-updates-to-import-users-and-roles-to-cerby).
### 2. Check for updates to import users and roles to Cerby
To check for updates in your app to identify and import users, roles, and assets to Cerby, you must complete the following steps:
1. Select the **Business Hubs** option from the left navigation drawer. The **Business Hubs** page is displayed.
2. Click the **Settings** icon of the corresponding business hub card. The business hub details page is displayed with the **Settings** tab activated.
3. Click the **Check for updates** button located at the top right of the page. A message box is displayed with information about the process.
**NOTE:** The check and import process may take a few minutes depending on the number of users, and because Cerby automatically matches users to their corresponding Cerby user account.
4. Confirm that the automated task to check for updates has the “Completed” status by performing any of the following actions:
* Click the **More details** button from the message box.
* Select the **Automation** option from the left navigation drawer to open the **Automation** page with a list of automated tasks and their status.
{% hint style="info" %}
**NOTE:** Cerby automatically performs daily checks for updates for all business hubs, but you can trigger them manually, as described in this section. When a user is deprovisioned from an IdP and a check for updates is performed, Cerby generates a report and sends business hub **Owners** an email to confirm their removal from the app. For more instructions, read the article [Check for updates in your app and apply report](/setup-and-admin/business-hubs/managing-users-and-assets-via-a-business-hub/sync-your-business-hub-with-your-external-app).
{% endhint %}
The next step is [3. Connect your Acsense user account to the business hub](#id-3.-connect-your-acsense-user-account-to-the-business-hub).
### 3. Connect your Acsense user account to the business hub
To connect your Acsense user account to the business hub so Cerby can manage and protect it, you must complete the following steps:
1. Select the **Accounts** option from the left navigation drawer. The **Accounts** page is displayed.
2. Click the **Log in** button of the corresponding Acsense Business Hub account card. The **Connect your Acsense Business Hub Account** dialog box is displayed.
3. Enter the login credentials of your Acsense user account.
4. Click the **Connect account** button. The dialog box closes, and a success message box and a new account card are displayed.
The next step is [4. Manage unmatched users](#id-4.-manage-unmatched-users).
### 4. Manage unmatched users
During a check for updates, Cerby automatically matches app members to the Cerby user accounts that correspond to their email addresses, including existing [guest users](https://help.cerby.com/getting-started/concepts/user-management/guest-users) and [local partners](https://help.cerby.com/getting-started/concepts/user-management/partners#h-7e4add33a2). Manual matching is required when apps don't provide email addresses and for app members using personal or external accounts that couldn’t be identified or are not in the corporate directory.
To view the status of the imported app members, you must complete the following steps:
1. Select the **Business Hubs** option from the left navigation drawer. The **Business Hubs** page is displayed.
2. Click the **More options** (...) icon of the corresponding business hub card. A drop-down list is displayed.
3. Select the **View Members** option from the list. The business hub details page is displayed with the **Members** tab activated. App members are displayed in the following tabs of the **User Overview** section:
* **Unmatched users:** This tab displays the users who were not automatically matched.
* **Onboarded users:** This tab displays the users matched to their Cerby user account.
* **Guest users:** This tab displays the users who were matched to an existing Cerby user account but it doesn’t exist in the corporate directory, such as external collaborators.
For unmatched users, you can perform one of the following actions:
* [Match users](#match-users)
* [Remove unmatched users](#remove-unmatched-users)
* [Exempt unmatched users](#exempt-unmatched-users)
The following sections describe each action.
#### Match users
To match users, you must complete the following steps from the **Unmatched users** tab of the business hub details page:
1. Click the **Match user** button of the corresponding user. The **Match user** dialog box is displayed.
2. Enter the username or email address of the user you want to match and invite in the **Match with** field. The user is displayed on a list.
3. Select the user from the list.
4. Click the **Next** button. The **Select Cerby role** dialog box is displayed.
5. Select the role to assign to the user on the business hub **Cerby role** drop-down list:
* **Owner:** This role enables sharing access and managing business hub settings in Cerby.
* **Collaborator:** This role enables only logging in to the app from Cerby.
1. Click the **Match user** button. The dialog box closes, and a success message box is displayed. The user is moved to the **Onboarded** **users** tab.
#### Remove unmatched users
To remove unmatched users, you must complete the following steps from the **Unmatched users** tab of the business hub details page:
{% hint style="danger" %}
**IMPORTANT:** When removing an unmatched user, Cerby performs an automated task to revoke the user’s seat and permissions in Acsense.
{% endhint %}
1. Click the **More options** (...) icon of the corresponding user. A drop-down list is displayed.
2. Select the **Remove user** option from the list. The **Remove user?** dialog box is displayed.
3. Click the **Remove user** button. The dialog box closes, and a success message box is displayed. The user is removed from the app via an automated task.
#### Exempt unmatched users
Exempted users keep their user accounts or seats active in your app, but you cannot manage them through Cerby.
To exempt unmatched users, you must complete the following steps from the **Unmatched users** tab of the business hub details page:
1. Click the **More options** (...) icon of the corresponding user. A drop-down list is displayed.
2. Select the **Exempt user** option from the list. The exempt user dialog box is displayed.
3. Enter a reason for exempting the user in the **Provide a reason** field.
4. Click the **Exempt member** button. The dialog box closes, and a success message box is displayed. The user is moved to the **Exempted users** tab.
***
## Use your business hub
The following are the supported features of business hubs you can use:
* [Join the App and connect it to Cerby](https://help.cerby.com/cerby-web-app/business-hubs/join-your-external-app-and-set-up-your-business-hub-access)
* [Invite new app members](/setup-and-admin/business-hubs/managing-users-and-assets-via-a-business-hub/add-users-and-teams-to-your-apps-via-a-business-hub)
* [Remove app members](/setup-and-admin/business-hubs/managing-users-and-assets-via-a-business-hub/remove-users-from-your-app-via-a-business-hub)
* [Provision users to your apps via an IdP and business hub](https://help.cerby.com/setup-and-admin/business-hubs/managing-users-and-assets-via-a-business-hub/provision-users-to-your-apps-via-an-idp-and-business-hub)
* [Update the app members’ roles](/setup-and-admin/business-hubs/managing-users-and-assets-via-a-business-hub/update-user-roles-in-your-app-via-a-business-hub)
* [Check for updates in your app and apply report](/setup-and-admin/business-hubs/managing-users-and-assets-via-a-business-hub/sync-your-business-hub-with-your-external-app)
* [Re-assign the app members’ user accounts](https://github.com/cerbyinc/help-center/tree/main/.uncategorized/unpublished-deprecated-re-assign-the-app-members-user-accounts.md)
* [Manage the security of app members’ user accounts](/setup-and-admin/business-hubs/managing-users-and-assets-via-a-business-hub/protect-your-app-user-accounts-via-a-business-hub)
* [Log in to your app](https://help.cerby.com/cerby-web-app/business-hubs/log-in-to-your-app)
* [Track activity on app members’ user accounts](/setup-and-admin/business-hubs/managing-users-and-assets-via-a-business-hub/track-activity-on-app-members-user-accounts)
* [Remove an App](/setup-and-admin/business-hubs/managing-your-business-hubs/remove-a-business-hub)
# Connect a business hub for Ada
This article describes how to connect a business hub to centrally manage the users of Ada from Cerby.
{% hint style="info" %}
**Who can use this feature?**
* Workspace **Owners**, **Super Admins**, **Admins**, and **Users**
* Only supported using the Cerby web app
{% endhint %}
As a user with any workspace role in Cerby, except **Guest User** and **Login-Only**, you can connect a business hub integration to centrally manage the users of Ada.
When you connect the business hub, you become its **Owner**, and you can perform the following user and access management tasks through automated tasks executed by the Cerby agent:
* Check for updates
* Add users
* Update user roles
* Remove users
{% hint style="success" %}
**TIP:** For more details about the automated tasks of a business hub, how it works, and the supported apps, read the article [Explore Business Hubs](https://help.cerby.com/setup-and-admin/business-hubs/business-hub-catalog).
{% endhint %}
This article provides instructions on how to connect a business hub for Ada. For other app-specific articles and videos, review the [Connecting business hubs for your apps](https://help.cerby.com/setup-and-admin/business-hubs/connecting-your-apps) and [Connecting business hubs for your paid social apps](https://help.cerby.com/setup-and-admin/business-hubs/connecting-your-paid-social-apps) collections in the Cerby Help Center.
***
## Requirements
The following are the requirements to connect a business hub:
* A Cerby workspace
* A Cerby user account with the workspace **Owner**, **Super Admin**, **Admin**, or **User** role
* Groups configured in your identity provider (IdP) if you want to leverage automatic user provisioning and deprovisioning from your apps based on group assignment events. For more information, read the articles available in the [Managing users via an IdP and business hub](https://help.cerby.com/setup-and-admin/business-hubs/managing-users-and-assets-via-a-business-hub) collection in the Cerby Help Center
* An automation account, meaning an active user account with a native **Admin** role in Ada to be used as a service account. For instructions and recommendations on how to create and configure this account, read the article [Create a service account for your business hub](/setup-and-admin/business-hubs/connecting-your-apps/create-a-service-account-for-your-business-hub)
* The user management and login method for your business hub identified to select the corresponding option when connecting your app. For more information, read the **User management and login method** section of the article [Explore Business Hubs](https://help.cerby.com/setup-and-admin/business-hubs/business-hub-catalog)
* A Business ID. You can find the ID in the address bar\*\*\*\* when you are logged in to Ada. The ID is displayed in the address bar as part of the URL, before **-gen** in the subdomain. For example, \*\*`cerby` \*\*in **`https://cerby-gen.ada.support/team`**. Just copy the value and paste it when connecting the business hub
***
## Connect a business hub for Ada
To connect a business hub for Ada, you must complete the following main steps from the Cerby web app dashboard:
1. [Add a business hub and connect it to Ada](#id-1.-add-a-business-hub-and-connect-it-to-ada)
2. [Check for updates to import users and roles to Cerby](#id-2.-check-for-updates-to-import-users-and-roles-to-cerby)
3. [Connect your Ada user account to the business hub](#id-3.-connect-your-ada-user-account-to-the-business-hub)
4. [Manage unmatched users](#id-4.-manage-unmatched-users)
The following sections describe each main step.
### 1. Add a business hub and connect it to Ada
To add a business hub and connect it to Ada, you must complete the following steps:
1. Log in to your corresponding [Cerby](https://app.cerby.com/) workspace.
2. Select the **Business Hubs** option from the left menu. The **Business Hubs** page is displayed.
3. Click the **Connect Business Hub** button located at the top-right corner of the page. The **Connect your Business Hubs to Cerby** dialog box is displayed. **TIP:** Select the **Don’t show this again** option to skip this step the next time you connect a new business hub.
4. Click the **Get started** button. A wizard is displayed on the **Select app** page.
5. Select **Ada Hub** from the catalog. The **Enter app details** page is displayed on the wizard.
6. Enter and select your app information in the corresponding fields:
* **Label in Cerby:** It is the name to assign to your business hub in Cerby, and it will be displayed on the business hub card.
* **Business ID:** It is the unique identifier of your business or organization in **Ada Hub**. For instructions on how to find it, read the [Requirements](#requirements) section.
* **User management and login method:** It is the way your users log in to the app and determines whether they must save their login credentials as a Cerby account connected to the business hub. You must select one of the following methods:
* **Single sign-on (SSO):** Access is managed by your IdP, and users log in with SSO authentication. They are not asked to save their credentials in Cerby.
* **Username and password:** Cerby manages account security and access, and users log in with their credentials after saving them in Cerby.
7. Click the **Next** button. The **Select automation account** page is displayed with a list of existing Ada accounts.
8. Select the automation account you have previously added to Cerby, as described in the [Requirements](#requirements) section. **NOTE:** If you don’t have an automation account, you are prompted to add it. Make sure you read Cerby’s recommendations on how to configure it in the article [Create a service account for your business hub](/setup-and-admin/business-hubs/connecting-your-apps/create-a-service-account-for-your-business-hub). You may need to add the account first and then add the business hub.
9. Click the **Connect app** button. The wizard closes, and a success message box is displayed. The corresponding business hub is also displayed on the **Business Hubs** page.
The next step is [2. Check for updates to import users and roles to Cerby](#id-2.-check-for-updates-to-import-users-and-roles-to-cerby).
### 2. Check for updates to import users and roles to Cerby
To check for updates in your app to identify and import users and roles to Cerby, you must complete the following steps:
1. Select the **Business Hubs** option from the left menu. The **Business Hubs** page is displayed.
2. Click the **More options** (...) icon of the corresponding business hub card. A drop-down menu is displayed.
3. Select the **Settings** option from the menu. The business hub details page is displayed with the **Settings** tab activated.
4. Click the **Check for updates** button located at the top right of the page. A message box is displayed with information about the process. **NOTE:** The check and import process may take a few minutes depending on the number of users, and because Cerby automatically matches users to their corresponding Cerby user account.
5. Confirm that the automated task to check for updates has the “Completed” status by performing any of the following actions:
* Click the **More details** button from the message box.
* Select the **Automation** option from the left menu to open the **Automation** page with a list of automated tasks and their status.
{% hint style="info" %}
**NOTE:** Cerby automatically performs daily checks for updates for all business hubs, but you can trigger them manually, as described in this section. For more instructions, read the article [Sync your app users with your business hub](/setup-and-admin/business-hubs/managing-users-and-assets-via-a-business-hub/sync-your-business-hub-with-your-external-app).
{% endhint %}
The next step is [3. Connect your Ada user account to the business hub](#id-3.-connect-your-ada-user-account-to-the-business-hub).
### 3. Connect your Ada user account to the business hub
To connect your Ada user account to the business hub so Cerby can manage and protect it, you must complete the following steps:
1. Select the **Accounts** option from the left menu. The **Accounts** page is displayed.
2. Click the **Log in** button of the corresponding Ada Hub account card. The **Connect your Ada Hub Account** dialog box is displayed.
3. Enter the login credentials of your **Ada** user account.
4. Click the **Connect account** button. The dialog box closes, and a success message box and a new account card are displayed.
The next step is [4. Manage unmatched users](#id-4.-manage-unmatched-users).
### 4. Manage unmatched users
During a check for updates, Cerby automatically matches app members to the Cerby user accounts that correspond to their email addresses, including existing [guest users](https://help.cerby.com/getting-started/concepts/user-management/guest-users) and [local partners](https://help.cerby.com/getting-started/concepts/user-management/partners#h-7e4add33a2). Manual matching is required when apps don't provide email addresses and for app members using personal or external accounts that couldn’t be identified or are not in the corporate directory.
To view the status of the imported app members, you must complete the following steps:
1. Select the **Business Hubs** option from the left menu. The **Business Hubs** page is displayed.
2. Click the **More options** (...) icon of the corresponding business hub card. A drop-down menu is displayed.
3. Select the **View Members** option from the menu. The business hub details page is displayed with the **Members** tab activated. App members are displayed in the following tabs of the **User Overview** section:
* **Unmatched users:** This tab displays the users who were not automatically matched.
* **Onboarded users:** This tab displays the users matched to their Cerby user account.
* **Guest users:** This tab displays the users who were matched to an existing Cerby user account but it doesn’t exist in the corporate directory, such as external collaborators.
For unmatched users, you can perform one of the following actions:
* [Match users](#match-users)
* [Remove unmatched users](#remove-unmatched-users)
* [Exempt unmatched users](#exempt-unmatched-users)
The following sections describe each action.
#### Match users
To match users, you must complete the following steps from the **Unmatched users** tab of the business hub details page:
1. Click the **Match user** button of the corresponding user. The **Match user** dialog box is displayed.
2. Enter the username or email address of the user you want to match and invite in the **Match with** field. The user is displayed on a list.
3. Select the user from the list.
4. Click the **Next** button. The **Select Cerby role** dialog box is displayed.
5. Select the role to assign to the user on the business hub **Cerby role** drop-down menu:
* **Owner:** This role enables sharing access and managing business hub settings in Cerby.
* **Collaborator:** This role enables only logging in to the app from Cerby.
6. Click the **Match user** button. The dialog box closes, and a success message box is displayed. The user is moved to the **Onboarded users** tab.
#### Remove unmatched users
To remove unmatched users, you must complete the following steps from the **Unmatched users** tab of the business hub details page:
{% hint style="danger" %}
**IMPORTANT:** When removing an unmatched user, Cerby performs an automated task to revoke the user’s seat and permissions in Ada.
{% endhint %}
1. Click the **More options** (...) icon of the corresponding user. A drop-down menu is displayed.
2. Select the **Remove user** option from the menu. The **Remove user?** dialog box is displayed.
3. Click the **Remove user** button. The dialog box closes, and a success message box is displayed. The user is removed from the app via an automated task.
#### Exempt unmatched users
Exempted users keep their user accounts or seats active in your app, but you cannot manage them through Cerby.
To exempt unmatched users, you must complete the following steps from the **Unmatched users** tab of the business hub details page:
1. Click the **More options** (...) icon of the corresponding user. A drop-down menu is displayed.
2. Select the **Exempt user** option from the menu. The exempt user dialog box is displayed.
3. Enter a reason for exempting the user in the **Provide a reason** field.
4. Click the **Exempt member** button. The dialog box closes, and a success message box is displayed. The user is moved to the **Exempted users** tab.
***
## Use your business hub
The following are the supported features of business hubs you can use:
* [Join the external app and set up your business hub access](https://help.cerby.com/cerby-web-app/business-hubs/join-your-external-app-and-set-up-your-business-hub-access)
* [Add users to your app via a business hub](/setup-and-admin/business-hubs/managing-users-and-assets-via-a-business-hub/add-users-and-teams-to-your-apps-via-a-business-hub)
* [Provision users to your apps via an IdP and business hub](/setup-and-admin/business-hubs/managing-users-and-assets-via-a-business-hub/provision-users-to-your-apps-via-an-idp-and-business-hub)
* [Remove users from your app via a business hub](/setup-and-admin/business-hubs/managing-users-and-assets-via-a-business-hub/remove-users-from-your-app-via-a-business-hub)
* [Remove teams from your app via a business hub](/setup-and-admin/business-hubs/managing-users-and-assets-via-a-business-hub/remove-teams-from-your-app-via-a-business-hub)
* [Deprovision users from your apps via an IdP and business hub](/setup-and-admin/business-hubs/managing-users-and-assets-via-a-business-hub/deprovision-users-from-your-apps-via-an-idp-and-business-hub)
* [Update user roles in your app via a business hub](/setup-and-admin/business-hubs/managing-users-and-assets-via-a-business-hub/update-user-roles-in-your-app-via-a-business-hub)
* [Update user roles in your apps via an IdP and business hub](/setup-and-admin/business-hubs/managing-users-and-assets-via-a-business-hub/update-user-roles-in-your-apps-via-an-idp-and-business-hub)
* [Sync your app users with your business hub](/setup-and-admin/business-hubs/managing-users-and-assets-via-a-business-hub/sync-your-business-hub-with-your-external-app)
* [Log in to your app via a business hub](https://help.cerby.com/cerby-web-app/business-hubs/log-in-to-your-app)
* [Track the activity of business hub users](/setup-and-admin/business-hubs/managing-users-and-assets-via-a-business-hub/track-activity-on-app-members-user-accounts)
* [Remove a business hub](/setup-and-admin/business-hubs/managing-your-business-hubs/remove-a-business-hub)
# Connect a business hub for AddEvent
This article describes how to connect a business hub to centrally manage the users of AddEvent from Cerby.
{% hint style="info" %}
**Who can use this feature?**
* Workspace **Owners**, **Super Admins**, **Admins**, and **Users**
* Only supported using the Cerby web app
{% endhint %}
As a user with any workspace role in Cerby, except **Guest User** and **Login-Only**, you can connect a business hub integration to centrally manage the users of AddEvent.
When you connect the business hub, you become its **Owner**, and you can perform the following user and access management tasks through automated tasks executed by the Cerby agent:
* Check for updates
* Invite app members
* Update app members’ roles
* Remove app members
{% hint style="success" %}
**TIP:** For more details about the automated tasks of a business hub, how it works, and the supported apps, read the article [Explore Apps](https://help.cerby.com/setup-and-admin/business-hubs/business-hub-catalog).
{% endhint %}
This article provides instructions on how to connect a business hub for AddEvent. For other app-specific articles and videos, review the [Connecting your business hubs](https://help.cerby.com/setup-and-admin/business-hubs/connecting-your-apps) collection in the Cerby Help Center.
***
## Requirements
The following are the requirements to connect a business hub:
* A Cerby workspace
* A Cerby user account with the **Owner**, **Super Admin**, **Admin**, or **User** role
* A dashboard in AddEvent
* Groups configured in your identity provider (IdP) if you want to leverage automatic user provisioning and deprovisioning from your apps based on group assignment events. For more information, read the article [Provision users to your apps via an IdP and business hub](https://help.cerby.com/setup-and-admin/business-hubs/managing-users-and-assets-via-a-business-hub/provision-users-to-your-apps-via-an-idp-and-business-hub)
* An automation account, meaning an active user account with a native **Admin** role in AddEvent to be used as a service account. For instructions and recommendations on how to create and configure this account, read the article [Create a service account for your business hub](https://help.cerby.com/setup-and-admin/business-hubs/connecting-your-apps/create-a-service-account-for-your-business-hub)
***
## Connect a business hub for AddEvent
To connect a business hub for AddEvent, you must complete the following main steps from the Cerby web app dashboard:
1. [Add a business hub and connect it to AddEvent](#id-1.-add-a-business-hub-and-connect-it-to-addevent)
2. [Check for updates to import users and roles to Cerby](#id-2.-check-for-updates-to-import-users-and-roles-to-cerby)
3. [Connect your AddEvent user account to the business hub](#id-3.-connect-your-addevent-user-account-to-the-business-hub)
4. [Manage unmatched users](#id-4.-manage-unmatched-users)
The following sections describe each main step.
### 1. Add a business hub and connect it to AddEvent
To add a business hub and connect it to AddEvent, you must complete the following steps:
1. Log in to your corresponding [Cerby](https://app.cerby.com/) workspace.
2. Select the **Business Hubs** option from the left navigation drawer. The **Business Hubs** page is displayed.
3. Click the **Connect Business Hub** button located at the top-right corner of the page. The **Connect your Business Hubs to Cerby** dialog box is displayed. **TIP:** Select the **Don’t show this again** option to skip this step the next time you connect a new business hub.
4. Click the **Get started** button. A wizard is displayed on the **Select app** page.
5. Select **Add Event Hub** from the catalog. The **Enter app details** page is displayed on the wizard.
6. Enter and select your app information in the corresponding fields:
* **Label in Cerby:** It is the name to assign to your business hub in Cerby, and it will be displayed on the business hub card.
* **Internal Unique Identifier:** It is a unique identifier that differentiates your business hub in Cerby from others for the same app. You can assign an alphanumeric value between 3 and 30 characters without symbols or special characters.
* **User management and login method:** It is the way your users log in to the app and determines whether they must save their login credentials as a Cerby account connected to the business hub. You must select one of the following methods:
* **Username and password:** Cerby manages account security and access, and users log in with their credentials after saving them in Cerby.
**IMPORTANT:** The **Single sign-on (SSO)** option is not supported by AddEvent.
7. Click the **Next** button. The **Select automation account** page is displayed with a list of existing AddEvent accounts.
8. Select the automation account you have previously added to Cerby, as described in the [Requirements](#requirements) section. **NOTE:** If you don’t have an automation account, you are prompted to add it. Make sure you read Cerby’s recommendations on how to configure it in the article [Create a service account for your business hub](https://help.cerby.com/setup-and-admin/business-hubs/connecting-your-apps/create-a-service-account-for-your-business-hub). You may need to add the account first and then add the business hub.
9. Click the **Connect app** button. The wizard closes, and a success message box is displayed. The corresponding business hub is also displayed on the **Business Hubs** page
The next step is [2. Check for updates to import users and roles to Cerby](#id-2.-check-for-updates-to-import-users-and-roles-to-cerby).
### 2. Check for updates to import users and roles to Cerby
To check for updates in your app to identify and import users and roles to Cerby, you must complete the following steps:
1. Select the **Business Hubs** option from the left navigation drawer. The **Business Hubs** page is displayed.
2. Click the **Settings** ( ) icon of the corresponding business hub card. The business hub details page is displayed with the **Settings** tab activated.
3. Click the **Check for updates** button located at the top right of the page. A message box is displayed with information about the process. **NOTE:** The check and import process may take a few minutes depending on the number of users, and because Cerby automatically matches users to their corresponding Cerby user account.
4. Confirm that the automated task to check for updates has the “Completed” status by performing any of the following actions:
* Click the **More details** button from the message box.
* Select the **Automation** option from the left navigation drawer to open the **Automation** page with a list of automated tasks and their status.
{% hint style="info" %}
**NOTE:** Cerby automatically performs daily checks for updates for all business hubs, but you can trigger them manually, as described in this section. When a user is deprovisioned from an IdP and a check for updates is performed, Cerby generates a report and sends business hub **Owners** an email to confirm their removal from the app. For more instructions, read the article [Check for updates in your app and apply report](/setup-and-admin/business-hubs/managing-users-and-assets-via-a-business-hub/sync-your-business-hub-with-your-external-app).
{% endhint %}
The next step is [3. Connect your AddEvent user account to the business hub](#id-3.-connect-your-addevent-user-account-to-the-business-hub).
### 3. Connect your AddEvent user account to the business hub
To connect your AddEvent user account to the business hub so Cerby can manage and protect it, you must complete the following steps:
1. Select the **Accounts** option from the left navigation drawer. The **Accounts** page is displayed.
2. Click the **Log in** button of the corresponding Add Event Hub account card. The **Connect your Add Event Hub Account** dialog box is displayed.
3. Enter the login credentials of your **AddEvent** user account.
4. Click the **Connect account** button. The dialog box closes, and a success message box and a new account card are displayed.
The next step is [4. Manage unmatched users](#id-4.-manage-unmatched-users).
### 4. Manage unmatched users
During a check for updates, Cerby automatically matches app members to the Cerby user accounts that correspond to their email addresses, including existing [guest users](https://help.cerby.com/getting-started/concepts/user-management/guest-users) and [local partners](https://help.cerby.com/getting-started/concepts/user-management/partners#h-7e4add33a2). Manual matching is required when apps don't provide email addresses and for app members using personal or external accounts that couldn’t be identified or are not in the corporate directory.
To view the status of the imported app members, you must complete the following steps:
1. Select the **Business Hubs** option from the left navigation drawer. The **Business Hubs** page is displayed.
2. Click the **More options** (...) icon of the corresponding business hub card. A drop-down list is displayed.
3. Select the **View Members** option from the list. The business hub details page is displayed with the **Members** tab activated. App members are displayed in the following tabs of the **User Overview** section:
* **Unmatched users:** This tab displays the users who were not automatically matched.
* **Onboarded users:** This tab displays the users matched to their Cerby user account.
* **Guest users:** This tab displays the users who were matched to an existing Cerby user account but it doesn’t exist in the corporate directory, such as external collaborators.
For unmatched users, you can perform one of the following actions:
* [Match users](#match-users)
* [Remove unmatched users](#remove-unmatched-users)
* [Exempt unmatched users](#exempt-unmatched-users)
The following sections describe each action.
#### Match users
To match users, you must complete the following steps from the **Unmatched users** tab of the business hub details page:
1. Click the **Match user** button of the corresponding user. The **Match user** dialog box is displayed.
2. Enter the username or email address of the user you want to match and invite in the **Match with** field. The user is displayed on a list.
3. Select the user from the list.
4. Click the **Next** button. The **Select Cerby role** dialog box is displayed.
5. Select the role to assign to the user on the business hub **Cerby role** drop-down list:
* **Owner:** This role enables sharing access and managing business hub settings in Cerby.
* **Collaborator:** This role enables only logging in to the app from Cerby.
6. Click the **Match user** button. The dialog box closes, and a success message box is displayed. The user is moved to the **Onboarded users** tab.
#### Remove unmatched users
To remove unmatched users, you must complete the following steps from the **Unmatched users** tab of the business hub details page:
{% hint style="danger" %}
**IMPORTANT:** When removing an unmatched user, Cerby performs an automated task to revoke the user’s seat and permissions in AddEvent.
{% endhint %}
1. Click the **More options** (...) icon of the corresponding user. A drop-down list is displayed.
2. Select the **Remove user** option from the list. The **Remove user?** dialog box is displayed.
3. Click the **Remove user** button. The dialog box closes, and a success message box is displayed. The user is removed from the app via an automated task.
#### Exempt unmatched users
Exempted users keep their user accounts or seats active in your app, but you cannot manage them through Cerby.
To exempt unmatched users, you must complete the following steps from the **Unmatched users** tab of the business hub details page:
1. Click the **More options** (...) icon of the corresponding user. A drop-down list is displayed.
2. Select the **Exempt user** option from the list. The exempt user dialog box is displayed.
3. Enter a reason for exempting the user in the **Provide a reason** field.
4. Click the **Exempt member** button. The dialog box closes, and a success message box is displayed. The user is moved to the **Exempted users** tab.
***
## Use your business hub
The following are the supported features of business hubs you can use:
* [Join the App and connect it to Cerby](https://help.cerby.com/cerby-web-app/business-hubs/join-your-external-app-and-set-up-your-business-hub-access)
* [Invite new app members](/setup-and-admin/business-hubs/managing-users-and-assets-via-a-business-hub/add-users-and-teams-to-your-apps-via-a-business-hub)
* [Remove app members](/setup-and-admin/business-hubs/managing-users-and-assets-via-a-business-hub/remove-users-from-your-app-via-a-business-hub)
* [Provision users to your apps via an IdP and business hub](https://help.cerby.com/setup-and-admin/business-hubs/managing-users-and-assets-via-a-business-hub/provision-users-to-your-apps-via-an-idp-and-business-hub)
* [Update the app members’ roles](/setup-and-admin/business-hubs/managing-users-and-assets-via-a-business-hub/update-user-roles-in-your-app-via-a-business-hub)
* [Check for updates in your app and apply report](/setup-and-admin/business-hubs/managing-users-and-assets-via-a-business-hub/sync-your-business-hub-with-your-external-app)
* [Re-assign the app members’ user accounts](https://github.com/cerbyinc/help-center/tree/main/.uncategorized/unpublished-deprecated-re-assign-the-app-members-user-accounts.md)
* [Manage the security of app members’ user accounts](/setup-and-admin/business-hubs/managing-users-and-assets-via-a-business-hub/protect-your-app-user-accounts-via-a-business-hub)
* [Log in to your app](https://help.cerby.com/cerby-web-app/business-hubs/log-in-to-your-app)
* [Track activity on app members’ user accounts](/setup-and-admin/business-hubs/managing-users-and-assets-via-a-business-hub/track-activity-on-app-members-user-accounts)
* [Remove an App](/setup-and-admin/business-hubs/managing-your-business-hubs/remove-a-business-hub)
# Connect a business hub for Adobe Creative Cloud
This article describes how to connect a business hub for Adobe Creative Cloud to centrally manage users and access from Cerby.
{% hint style="info" %}
**Who can use this feature?**
* Workspace **Owners**, **Super Admins**, **Admins**, and **Users**
* Only supported using the Cerby web app
{% endhint %}
As a user with any workspace role in Cerby, except **Guest User** and **Login-Only**, you can connect a business hub integration to centrally manage the users and access to Adobe Creative Cloud from Cerby.
When you connect a business hub, you become its **Owner**, and you can perform the following management tasks through Cerby automation:
* Sync users and roles
* Add users
* Remove users
{% hint style="info" %}
**NOTE:** Adobe Creative Cloud does not support updating user roles because Adobe Creative Cloud only supports one user state: **License assigned**.
{% endhint %}
This article provides instructions on how to connect a business hub for Adobe Creative Cloud. The process comprises four main steps described in the following sections:
{% stepper %}
{% step %}
[1. Connect a business hub in Cerby](#id-1.-connect-a-business-hub-in-cerby)
Add a business hub in Cerby, connect it to your app, and associate it with a service account.
{% endstep %}
{% step %}
[2. Sync users, roles, and assets from your app to Cerby](#id-2.-sync-users-roles-and-assets-from-your-app-to-cerby)
Run an initial sync to import the current state of your external app into Cerby: users, roles, and assets (Products). This step establishes an accurate baseline of the current state of the app in Cerby.
{% endstep %}
{% step %}
[3. Take action on unmatched users](#id-3.-take-action-on-unmatched-users)
Take action on users, guest users, and local partners who weren't automatically identified by Cerby during the sync.
{% endstep %}
{% step %}
[4. (Optional) Connect your user account to the business hub](#id-4.-optional-connect-your-user-account-to-the-business-hub)
Optionally connect your user account to the business hub to access your app with your login credentials.
{% endstep %}
{% endstepper %}
For other app-specific articles, check the [Connecting your apps](https://help.cerby.com/setup-and-admin/business-hubs/connecting-your-apps) and [Connecting your paid social apps](https://help.cerby.com/setup-and-admin/business-hubs/connecting-your-paid-social-apps) collections. For more information about the Business Hubs feature and how it works, read the article [Business Hubs](https://help.cerby.com/getting-started/concepts/identity-lifecycle-management-idlcm/business-hubs).
***
## Requirements
The following are the requirements to connect a business hub:
* **Cerby**
* A Cerby workspace
* A Cerby user account with the **Owner**, **Super Admin**, **Admin**, or **User** role
* A service account added to Cerby that corresponds to an active user account with a native **Workspace Owner** role in Adobe Creative Cloud. For instructions, read the article [Create a service account for your business hub](/setup-and-admin/business-hubs/connecting-your-apps/create-a-service-account-for-your-business-hub)
* **Identity provider (IdP)**, only if you want to enable automatic user provisioning and deprovisioning for your app based on group assignment events
* An IdP tenant
* Groups configured in your IdP as Cerby teams. For more information, read the articles for [provisioning](https://help.cerby.com/setup-and-admin/business-hubs/managing-users-and-assets-via-a-business-hub/provision-users-to-your-apps-via-an-idp-and-business-hub), [deprovisioning](https://help.cerby.com/setup-and-admin/business-hubs/managing-users-and-assets-via-a-business-hub/deprovision-users-from-your-apps-via-an-idp-and-business-hub), and [updating user roles](https://help.cerby.com/setup-and-admin/business-hubs/managing-users-and-assets-via-a-business-hub/update-user-roles-in-your-apps-via-an-idp-and-business-hub) via an IdP.
* **Adobe Creative Cloud**
* The user management and login method for your business hub identified. Depending on your app, the options are the following:
* **Single sign-on (SSO):** Your IdP manages access to your app, and users log in via SSO authentication. Users are not asked to save their credentials in Cerby, and they continue accessing Adobe Creative Cloud as usual.
* **Username and password:** Cerby manages security and access to your app. You can choose to ask your users to save their credentials in Cerby and connect their account to the business hub.
***
## 1. Connect a business hub in Cerby
To connect a business hub in Cerby for Adobe Creative Cloud, you must complete the following steps:
1. Log in to your [Cerby](https://app.cerby.com/) workspace.
2. Select the **Business Hubs** option from the left menu. The **Business Hubs** page is displayed.
3. Click the **Connect Business Hub** button located at the top right of the page. A wizard is displayed.
) icon of the corresponding business hub card. The business hub details page is displayed with the **Settings** tab activated.
3. Click the **Check for updates** button located at the top right of the page. A message box is displayed with information about the process. **NOTE:** The check and import process may take a few minutes depending on the number of users, and because Cerby automatically matches users to their corresponding Cerby user account.
4. Confirm that the automated task to check for updates has the “Completed” status by performing any of the following actions:
* Click the **More details** button from the message box.
* Select the **Automation** option from the left navigation drawer to open the **Automation** page with a list of automated tasks and their status.
{% hint style="info" %}
**NOTE:** Cerby automatically performs daily checks for updates for all business hubs, but you can trigger them manually, as described in this section. When a user is deprovisioned from an IdP and a check for updates is performed, Cerby generates a report and sends business hub **Owners** an email to confirm their removal from the app. For more instructions, read the article [Check for updates in your app and apply report](/setup-and-admin/business-hubs/managing-users-and-assets-via-a-business-hub/sync-your-business-hub-with-your-external-app).
{% endhint %}
The next step is [3. Connect your AddEvent user account to the business hub](#id-3.-connect-your-addevent-user-account-to-the-business-hub).
### 3. Connect your AddEvent user account to the business hub
To connect your AddEvent user account to the business hub so Cerby can manage and protect it, you must complete the following steps:
1. Select the **Accounts** option from the left navigation drawer. The **Accounts** page is displayed.
2. Click the **Log in** button of the corresponding Add Event Hub account card. The **Connect your Add Event Hub Account** dialog box is displayed.
3. Enter the login credentials of your **AddEvent** user account.
4. Click the **Connect account** button. The dialog box closes, and a success message box and a new account card are displayed.
The next step is [4. Manage unmatched users](#id-4.-manage-unmatched-users).
### 4. Manage unmatched users
During a check for updates, Cerby automatically matches app members to the Cerby user accounts that correspond to their email addresses, including existing [guest users](https://help.cerby.com/getting-started/concepts/user-management/guest-users) and [local partners](https://help.cerby.com/getting-started/concepts/user-management/partners#h-7e4add33a2). Manual matching is required when apps don't provide email addresses and for app members using personal or external accounts that couldn’t be identified or are not in the corporate directory.
To view the status of the imported app members, you must complete the following steps:
1. Select the **Business Hubs** option from the left navigation drawer. The **Business Hubs** page is displayed.
2. Click the **More options** (...) icon of the corresponding business hub card. A drop-down list is displayed.
3. Select the **View Members** option from the list. The business hub details page is displayed with the **Members** tab activated. App members are displayed in the following tabs of the **User Overview** section:
* **Unmatched users:** This tab displays the users who were not automatically matched.
* **Onboarded users:** This tab displays the users matched to their Cerby user account.
* **Guest users:** This tab displays the users who were matched to an existing Cerby user account but it doesn’t exist in the corporate directory, such as external collaborators.
For unmatched users, you can perform one of the following actions:
* [Match users](#match-users)
* [Remove unmatched users](#remove-unmatched-users)
* [Exempt unmatched users](#exempt-unmatched-users)
The following sections describe each action.
#### Match users
To match users, you must complete the following steps from the **Unmatched users** tab of the business hub details page:
1. Click the **Match user** button of the corresponding user. The **Match user** dialog box is displayed.
2. Enter the username or email address of the user you want to match and invite in the **Match with** field. The user is displayed on a list.
3. Select the user from the list.
4. Click the **Next** button. The **Select Cerby role** dialog box is displayed.
5. Select the role to assign to the user on the business hub **Cerby role** drop-down list:
* **Owner:** This role enables sharing access and managing business hub settings in Cerby.
* **Collaborator:** This role enables only logging in to the app from Cerby.
6. Click the **Match user** button. The dialog box closes, and a success message box is displayed. The user is moved to the **Onboarded users** tab.
#### Remove unmatched users
To remove unmatched users, you must complete the following steps from the **Unmatched users** tab of the business hub details page:
{% hint style="danger" %}
**IMPORTANT:** When removing an unmatched user, Cerby performs an automated task to revoke the user’s seat and permissions in AddEvent.
{% endhint %}
1. Click the **More options** (...) icon of the corresponding user. A drop-down list is displayed.
2. Select the **Remove user** option from the list. The **Remove user?** dialog box is displayed.
3. Click the **Remove user** button. The dialog box closes, and a success message box is displayed. The user is removed from the app via an automated task.
#### Exempt unmatched users
Exempted users keep their user accounts or seats active in your app, but you cannot manage them through Cerby.
To exempt unmatched users, you must complete the following steps from the **Unmatched users** tab of the business hub details page:
1. Click the **More options** (...) icon of the corresponding user. A drop-down list is displayed.
2. Select the **Exempt user** option from the list. The exempt user dialog box is displayed.
3. Enter a reason for exempting the user in the **Provide a reason** field.
4. Click the **Exempt member** button. The dialog box closes, and a success message box is displayed. The user is moved to the **Exempted users** tab.
***
## Use your business hub
The following are the supported features of business hubs you can use:
* [Join the App and connect it to Cerby](https://help.cerby.com/cerby-web-app/business-hubs/join-your-external-app-and-set-up-your-business-hub-access)
* [Invite new app members](/setup-and-admin/business-hubs/managing-users-and-assets-via-a-business-hub/add-users-and-teams-to-your-apps-via-a-business-hub)
* [Remove app members](/setup-and-admin/business-hubs/managing-users-and-assets-via-a-business-hub/remove-users-from-your-app-via-a-business-hub)
* [Provision users to your apps via an IdP and business hub](https://help.cerby.com/setup-and-admin/business-hubs/managing-users-and-assets-via-a-business-hub/provision-users-to-your-apps-via-an-idp-and-business-hub)
* [Update the app members’ roles](/setup-and-admin/business-hubs/managing-users-and-assets-via-a-business-hub/update-user-roles-in-your-app-via-a-business-hub)
* [Check for updates in your app and apply report](/setup-and-admin/business-hubs/managing-users-and-assets-via-a-business-hub/sync-your-business-hub-with-your-external-app)
* [Re-assign the app members’ user accounts](https://github.com/cerbyinc/help-center/tree/main/.uncategorized/unpublished-deprecated-re-assign-the-app-members-user-accounts.md)
* [Manage the security of app members’ user accounts](/setup-and-admin/business-hubs/managing-users-and-assets-via-a-business-hub/protect-your-app-user-accounts-via-a-business-hub)
* [Log in to your app](https://help.cerby.com/cerby-web-app/business-hubs/log-in-to-your-app)
* [Track activity on app members’ user accounts](/setup-and-admin/business-hubs/managing-users-and-assets-via-a-business-hub/track-activity-on-app-members-user-accounts)
* [Remove an App](/setup-and-admin/business-hubs/managing-your-business-hubs/remove-a-business-hub)
# Connect a business hub for Adobe Creative Cloud
This article describes how to connect a business hub for Adobe Creative Cloud to centrally manage users and access from Cerby.
{% hint style="info" %}
**Who can use this feature?**
* Workspace **Owners**, **Super Admins**, **Admins**, and **Users**
* Only supported using the Cerby web app
{% endhint %}
As a user with any workspace role in Cerby, except **Guest User** and **Login-Only**, you can connect a business hub integration to centrally manage the users and access to Adobe Creative Cloud from Cerby.
When you connect a business hub, you become its **Owner**, and you can perform the following management tasks through Cerby automation:
* Sync users and roles
* Add users
* Remove users
{% hint style="info" %}
**NOTE:** Adobe Creative Cloud does not support updating user roles because Adobe Creative Cloud only supports one user state: **License assigned**.
{% endhint %}
This article provides instructions on how to connect a business hub for Adobe Creative Cloud. The process comprises four main steps described in the following sections:
{% stepper %}
{% step %}
[1. Connect a business hub in Cerby](#id-1.-connect-a-business-hub-in-cerby)
Add a business hub in Cerby, connect it to your app, and associate it with a service account.
{% endstep %}
{% step %}
[2. Sync users, roles, and assets from your app to Cerby](#id-2.-sync-users-roles-and-assets-from-your-app-to-cerby)
Run an initial sync to import the current state of your external app into Cerby: users, roles, and assets (Products). This step establishes an accurate baseline of the current state of the app in Cerby.
{% endstep %}
{% step %}
[3. Take action on unmatched users](#id-3.-take-action-on-unmatched-users)
Take action on users, guest users, and local partners who weren't automatically identified by Cerby during the sync.
{% endstep %}
{% step %}
[4. (Optional) Connect your user account to the business hub](#id-4.-optional-connect-your-user-account-to-the-business-hub)
Optionally connect your user account to the business hub to access your app with your login credentials.
{% endstep %}
{% endstepper %}
For other app-specific articles, check the [Connecting your apps](https://help.cerby.com/setup-and-admin/business-hubs/connecting-your-apps) and [Connecting your paid social apps](https://help.cerby.com/setup-and-admin/business-hubs/connecting-your-paid-social-apps) collections. For more information about the Business Hubs feature and how it works, read the article [Business Hubs](https://help.cerby.com/getting-started/concepts/identity-lifecycle-management-idlcm/business-hubs).
***
## Requirements
The following are the requirements to connect a business hub:
* **Cerby**
* A Cerby workspace
* A Cerby user account with the **Owner**, **Super Admin**, **Admin**, or **User** role
* A service account added to Cerby that corresponds to an active user account with a native **Workspace Owner** role in Adobe Creative Cloud. For instructions, read the article [Create a service account for your business hub](/setup-and-admin/business-hubs/connecting-your-apps/create-a-service-account-for-your-business-hub)
* **Identity provider (IdP)**, only if you want to enable automatic user provisioning and deprovisioning for your app based on group assignment events
* An IdP tenant
* Groups configured in your IdP as Cerby teams. For more information, read the articles for [provisioning](https://help.cerby.com/setup-and-admin/business-hubs/managing-users-and-assets-via-a-business-hub/provision-users-to-your-apps-via-an-idp-and-business-hub), [deprovisioning](https://help.cerby.com/setup-and-admin/business-hubs/managing-users-and-assets-via-a-business-hub/deprovision-users-from-your-apps-via-an-idp-and-business-hub), and [updating user roles](https://help.cerby.com/setup-and-admin/business-hubs/managing-users-and-assets-via-a-business-hub/update-user-roles-in-your-apps-via-an-idp-and-business-hub) via an IdP.
* **Adobe Creative Cloud**
* The user management and login method for your business hub identified. Depending on your app, the options are the following:
* **Single sign-on (SSO):** Your IdP manages access to your app, and users log in via SSO authentication. Users are not asked to save their credentials in Cerby, and they continue accessing Adobe Creative Cloud as usual.
* **Username and password:** Cerby manages security and access to your app. You can choose to ask your users to save their credentials in Cerby and connect their account to the business hub.
***
## 1. Connect a business hub in Cerby
To connect a business hub in Cerby for Adobe Creative Cloud, you must complete the following steps:
1. Log in to your [Cerby](https://app.cerby.com/) workspace.
2. Select the **Business Hubs** option from the left menu. The **Business Hubs** page is displayed.
3. Click the **Connect Business Hub** button located at the top right of the page. A wizard is displayed.
 ) icon of the corresponding business hub card. The business hub details page is displayed with the **Settings** tab activated.
3. Click the **Check for updates** button located at the top right of the page. A message box is displayed with information about the process. **NOTE:** The check and import process may take a few minutes depending on the number of users, and because Cerby automatically matches users to their corresponding Cerby user account.
4. Confirm that the automated task to check for updates has the “Completed” status by performing any of the following actions:
* Click the **More details** button from the message box.
* Select the **Automation** option from the left navigation drawer to open the **Automation** page with a list of automated tasks and their status.
{% hint style="info" %}
**NOTE:** Cerby automatically performs daily checks for updates for all business hubs, but you can trigger them manually, as described in this section. When a user is deprovisioned from an IdP and a check for updates is performed, Cerby generates a report and sends business hub **Owners** an email to confirm their removal from the app. For more instructions, read the article [Check for updates in your app and apply report](/setup-and-admin/business-hubs/managing-users-and-assets-via-a-business-hub/sync-your-business-hub-with-your-external-app).
{% endhint %}
The next step is [3. Connect your Alta user account to the business hub](#id-3.-connect-your-alta-user-account-to-the-business-hub).
### 3. Connect your Alta user account to the business hub
To connect your Alta user account to the business hub so Cerby can manage and protect it, you must complete the following steps:
1. Select the **Accounts** option from the left navigation drawer. The **Accounts** page is displayed.
2. Click the **Log in** button of the corresponding Alta Hub account card. The **Connect your Alta Hub Account** dialog box is displayed.
3. Enter the login credentials of your **Alta** user account.
4. Click the **Connect account** button. The dialog box closes, and a success message box and a new account card are displayed.
The next step is [4. Manage unmatched users](#id-4.-manage-unmatched-users).
### 4. Manage unmatched users
During a check for updates, Cerby automatically matches app members to the Cerby user accounts that correspond to their email addresses, including existing [guest users](https://help.cerby.com/getting-started/concepts/user-management/guest-users) and [local partners](https://help.cerby.com/getting-started/concepts/user-management/partners#h-7e4add33a2). Manual matching is required when apps don't provide email addresses and for app members using personal or external accounts that couldn’t be identified or are not in the corporate directory.
To view the status of the imported app members, you must complete the following steps:
1. Select the **Business Hubs** option from the left navigation drawer. The **Business Hubs** page is displayed.
2. Click the **More options** (...) icon of the corresponding business hub card. A drop-down list is displayed.
3. Select the **View Members** option from the list. The business hub details page is displayed with the **Members** tab activated. App members are displayed in the following tabs of the **User Overview** section:
* **Unmatched users:** This tab displays the users who were not automatically matched.
* **Onboarded users:** This tab displays the users matched to their Cerby user account.
* **Guest users:** This tab displays the users who were matched to an existing Cerby user account but it doesn’t exist in the corporate directory, such as external collaborators.
For unmatched users, you can perform one of the following actions:
* [Match users](#match-users)
* [Remove unmatched users](#remove-unmatched-users)
* [Exempt unmatched users](#exempt-unmatched-users)
The following sections describe each action.
#### Match users
To match users, you must complete the following steps from the **Unmatched users** tab of the business hub details page:
1. Click the **Match user** button of the corresponding user. The **Match user** dialog box is displayed.
2. Enter the username or email address of the user you want to match and invite in the **Match with** field. The user is displayed on a list.
3. Select the user from the list.
4. Click the **Next** button. The **Select Cerby role** dialog box is displayed.
5. Select the role to assign to the user on the business hub **Cerby role** drop-down list:
* **Owner:** This role enables sharing access and managing business hub settings in Cerby.
* **Collaborator:** This role enables only logging in to the app from Cerby.
6. Click the **Match user** button. The dialog box closes, and a success message box is displayed. The user is moved to the **Onboarded users** tab.
#### Remove unmatched users
To remove unmatched users, you must complete the following steps from the **Unmatched users** tab of the business hub details page:
{% hint style="danger" %}
**IMPORTANT:** When removing an unmatched user, Cerby performs an automated task to revoke the user’s seat and permissions in Alta.
{% endhint %}
1. Click the **More options** (...) icon of the corresponding user. A drop-down list is displayed.
2. Select the **Remove user** option from the list. The **Remove user?** dialog box is displayed.
3. Click the **Remove user** button. The dialog box closes, and a success message box is displayed. The user is removed from the app via an automated task.
#### Exempt unmatched users
Exempted users keep their user accounts or seats active in your app, but you cannot manage them through Cerby.
To exempt unmatched users, you must complete the following steps from the **Unmatched users** tab of the business hub details page:
1. Click the **More options** (...) icon of the corresponding user. A drop-down list is displayed.
2. Select the **Exempt user** option from the list. The exempt user dialog box is displayed.
3. Enter a reason for exempting the user in the **Provide a reason** field.
4. Click the **Exempt member** button. The dialog box closes, and a success message box is displayed. The user is moved to the **Exempted users** tab.
***
## Use your business hub
The following are the supported features of business hubs you can use:
* [Join the App and connect it to Cerby](https://help.cerby.com/cerby-web-app/business-hubs/join-your-external-app-and-set-up-your-business-hub-access)
* [Invite new app members](/setup-and-admin/business-hubs/managing-users-and-assets-via-a-business-hub/add-users-and-teams-to-your-apps-via-a-business-hub)
* [Remove app members](/setup-and-admin/business-hubs/managing-users-and-assets-via-a-business-hub/remove-users-from-your-app-via-a-business-hub)
* [Provision users to your apps via an IdP and business hub](https://help.cerby.com/setup-and-admin/business-hubs/managing-users-and-assets-via-a-business-hub/provision-users-to-your-apps-via-an-idp-and-business-hub)
* [Update the app members’ roles](/setup-and-admin/business-hubs/managing-users-and-assets-via-a-business-hub/update-user-roles-in-your-app-via-a-business-hub)
* [Check for updates in your app and apply report](/setup-and-admin/business-hubs/managing-users-and-assets-via-a-business-hub/sync-your-business-hub-with-your-external-app)
* [Re-assign the app members’ user accounts](https://github.com/cerbyinc/help-center/tree/main/.uncategorized/unpublished-deprecated-re-assign-the-app-members-user-accounts.md)
* [Log in to your app](https://help.cerby.com/cerby-web-app/business-hubs/log-in-to-your-app)
* [Track activity on app members’ user accounts](/setup-and-admin/business-hubs/managing-users-and-assets-via-a-business-hub/track-activity-on-app-members-user-accounts)
* [Remove an App](/setup-and-admin/business-hubs/managing-your-business-hubs/remove-a-business-hub)
# Connect a business hub for American Express Merchant Account
This article describes how to connect a business hub to centrally manage the users of American Express Merchant Account from Cerby.
{% hint style="info" %}
**Who can use this feature?**
* Workspace **Owners**, **Super Admins**, **Admins**, and **Users**
* Only supported using the Cerby web app
{% endhint %}
As a user with any workspace role in Cerby, except **Guest User** and **Login-Only**, you can connect a business hub integration to centrally manage the users of American Express.
When you connect the business hub, you become its **Owner**, and you can perform the following user and access management tasks through automated tasks executed by the Cerby agent:
* Check for updates
* Add users
{% hint style="success" %}
**TIP:** For more details about the automated tasks of a business hub, how it works, and the supported apps, read the article [Explore Business Hubs](https://help.cerby.com/setup-and-admin/business-hubs/business-hub-catalog).
{% endhint %}
{% hint style="info" %}
**NOTES:**
* The automated tasks to **update user roles** and **remove users** are not available for this business hub. These actions are managed exclusively through Bill.com’s support team.
* The task to **add users** to the American Express business hub automates the creation and verification of the user’s merchant account in American Express using the **Merchant ID**, **ABA Account Number**, and **DDA Number** provided by Bill.com.
{% endhint %}
This article provides instructions on how to connect a business hub for American Express. For other app-specific articles and videos, review the [Connecting business hubs for your apps](https://help.cerby.com/setup-and-admin/business-hubs/connecting-your-apps) and [Connecting business hubs for your paid social apps](https://help.cerby.com/setup-and-admin/business-hubs/connecting-your-paid-social-apps) collections in the Cerby Help Center.
***
## Requirements
The following are the requirements to connect a business hub:
* A Cerby workspace
* A Cerby user account with the **Owner**, **Super Admin**, **Admin**, or **User** role
* Groups configured in your identity provider (IdP) if you want to leverage automatic user provisioning and deprovisioning from your apps based on group assignment events. For more information, read the articles available in the [Managing users via an IdP and business hub](https://help.cerby.com/setup-and-admin/business-hubs/managing-users-and-assets-via-a-business-hub) collection in the Cerby Help Center
* An automation account, meaning an active merchant account with enough permissions to manage users, groups, and roles in American Express, to be used as a service account. For instructions and recommendations on how to create and configure this account, read the article [Create a service account for your business hub](/setup-and-admin/business-hubs/connecting-your-apps/create-a-service-account-for-your-business-hub)
***
## Connect a business hub for American Express
To connect a business hub for American Express, you must complete the following main steps from the Cerby web app dashboard:
1. [Add a business hub and connect it to American Express](#id-1.-add-a-business-hub-and-connect-it-to-american-express)
2. [Check for updates to import users and roles to Cerby](#id-2.-check-for-updates-to-import-users-and-roles-to-cerby)
3. [Connect your American Express user account to the business hub](#id-3.-connect-your-american-express-user-account-to-the-business-hub)
4. [Manage unmatched users](#id-4.-manage-unmatched-users)
The following sections describe each main step.
### 1. Add a business hub and connect it to American Express
To add a business hub and connect it to American Express, you must complete the following steps:
1. Log in to your corresponding [Cerby](https://app.cerby.com/) workspace.
2. Select the **Business Hubs** option from the left menu. The **Business Hubs** page is displayed.
3. Click the **Connect Business Hub** button located at the top-right corner of the page. The **Connect your Business Hubs to Cerby** dialog box is displayed. **TIP:** Select the **Don’t show this again** option to skip this step the next time you connect a new business hub.
4. Click the **Get started** button. A wizard is displayed on the **Select app** page.
5. Select **American Express Hub** from the catalog. The **Enter app details** page is displayed on the wizard.
6. Enter and select your app information in the corresponding fields:
* **Label in Cerby:** It is the name to assign to your business hub in Cerby, and it will be displayed on the business hub card.
* **User management and login method:** It is the way your users log in to the app and determines whether they must save their login credentials as a Cerby account connected to the business hub.
1. Select the **Username and password** option because account security and access are managed by Cerby, and users log in with their credentials after saving them in Cerby
**IMPORTANT:** The **Single sign-on (SSO)** option is not supported for American Express.
7. Click the **Next** button. The **Select automation account** page is displayed with a list of existing American Express accounts.
8. Select the automation account you have previously added to Cerby, as described in the [Requirements](#requirements) section. **NOTE:** If you don’t have an automation account, you are prompted to add it. Make sure you read Cerby’s recommendations on how to configure it in the article [Create a service account for your business hub](https://help.cerby.com/setup-and-admin/business-hubs/connecting-your-apps/create-a-service-account-for-your-business-hub). You may need to add the account first and then add the business hub.
9. Click the **Connect app** button. The wizard closes, and a success message box is displayed. The corresponding business hub is also displayed on the **Business Hubs** page
The next step is [2. Check for updates to import users and roles to Cerby](/setup-and-admin/business-hubs/connecting-your-apps/connect-a-business-hub-for-your-app#h-9c6531cf9a).
### 2. Check for updates to import users and roles to Cerby
To check for updates in your app to identify and import users and roles to Cerby, you must complete the following steps:
1. Select the **Business Hubs** option from the left menu. The **Business Hubs** page is displayed.
2. Click the **More options** (...) icon of the corresponding business hub card. A drop-down menu is displayed.
3. Select the **Settings** option from the menu. The business hub details page is displayed with the **Settings** tab activated.
4. Click the **Sync** button located at the top right of the page. A message box is displayed with information about the process. **NOTE:** The check and import process may take a few minutes, depending on the number of users, and because Cerby automatically matches users to their corresponding Cerby user account.
5. Confirm that the automated task to check for updates has the “Completed” status by performing any of the following actions:
* Click the **More details** button in the message box.
* Select the **Automation** option from the left menu to open the **Automation** page with a list of automated tasks and their status.
{% hint style="info" %}
**NOTE:** Cerby automatically performs daily checks for updates for all business hubs, but you can trigger them manually, as described in this section. For more instructions, read the article [Sync your app users with your business hub](/setup-and-admin/business-hubs/managing-users-and-assets-via-a-business-hub/sync-your-business-hub-with-your-external-app).
{% endhint %}
The next step is [3. Connect your American Express user account to the business hub](#id-3.-connect-your-american-express-user-account-to-the-business-hub).
### 3. Connect your American Express user account to the business hub
To connect your American Express user account to the business hub so Cerby can manage and protect it, you must complete the following steps:
1. Select the **Accounts** option from the left menu. The **All accounts** page is displayed.
2. Click the **Log in** button of the corresponding American Express Hub account card. The **Connect your American Express Hub Account** dialog box is displayed.
3. Enter the login credentials of your **American Express** user account.
4. Click the **Connect account** button. The dialog box closes, and a success message box and a new account card are displayed.
The next step is [4. Manage unmatched users](#id-4.-manage-unmatched-users).
### 4. Manage unmatched users
During a check for updates, Cerby automatically matches app members to the Cerby user accounts that correspond to their email addresses, including existing [guest users](https://help.cerby.com/getting-started/concepts/user-management/guest-users) and [local partners](https://help.cerby.com/getting-started/concepts/user-management/partners#h-7e4add33a2). Manual matching is required when apps don't provide email addresses and for app members using personal or external accounts that couldn’t be identified or are not in the corporate directory.
To view the status of the imported app members, you must complete the following steps:
1. Select the **Business Hubs** option from the left menu. The **Business Hubs** page is displayed.
2. Click the **More options** (...) icon of the corresponding business hub card. A drop-down menu is displayed.
3. Select the **View Members** option from the menu. The business hub details page is displayed with the **Members** tab activated. App members are displayed in the following tabs of the **User Overview** section:
* **Unmatched users:** This tab displays the users who were not automatically matched.
* **Onboarded users:** This tab displays the users matched to their Cerby user account.
* **Guest users:** This tab displays the users who were matched to an existing Cerby user account, but it doesn’t exist in the corporate directory, such as external collaborators.
For unmatched users, you can perform one of the following actions:
* [Match users](#match-users)
* [Remove unmatched users](#remove-unmatched-users)
* [Exempt unmatched users](#exempt-unmatched-users)
The following sections describe each action.
#### Match users
To match users, you must complete the following steps from the **Unmatched users** tab of the business hub details page:
1. Click the **Match user** button of the corresponding user. The **Match user** dialog box is displayed.
2. Enter the username or email address of the user you want to match and invite in the **Match with** field. The user is displayed on a list.
3. Select the user from the list.
4. Click the **Next** button. The **Select Cerby role** dialog box is displayed.
5. Select the role to assign to the user on the business hub **Cerby role** drop-down menu:
* **Owner:** This role enables sharing access and managing business hub settings in Cerby.
* **Collaborator:** This role enables only logging in to the app from Cerby.
6. Click the **Match user** button. The dialog box closes, and a success message box is displayed. The user is moved to the **Onboarded users** tab.
#### Remove unmatched users
To remove unmatched users, you must complete the following steps from the **Unmatched users** tab of the business hub details page:
{% hint style="danger" %}
**IMPORTANT:** When removing an unmatched user, Cerby performs an automated task to revoke the user’s seat and permissions in American Express.
{% endhint %}
1. Click the **More options** (...) icon of the corresponding user. A drop-down menu is displayed.
2. Select the **Remove user** option from the list. The **Remove user?** dialog box is displayed.
3. Click the **Remove user** button. The dialog box closes, and a success message box is displayed. The user is removed from the app via an automated task.
#### Exempt unmatched users
Exempted users keep their user accounts or seats active in your app, but you cannot manage them through Cerby.
To exempt unmatched users, you must complete the following steps from the **Unmatched users** tab of the business hub details page:
1. Click the **More options** (...) icon of the corresponding user. A drop-down list is displayed.
2. Select the **Exempt user** option from the list. The exempt user dialog box is displayed.
3. Enter a reason for exempting the user in the **Provide a reason** field.
4. Click the **Exempt member** button. The dialog box closes, and a success message box is displayed. The user is moved to the **Exempted users** tab.
***
## Use your business hub
The following are the supported features of business hubs you can use:
* [Join the external app and set up your business hub access](https://help.cerby.com/cerby-web-app/business-hubs/join-your-external-app-and-set-up-your-business-hub-access)
* [Add users to your app via a business hub](/setup-and-admin/business-hubs/managing-users-and-assets-via-a-business-hub/add-users-and-teams-to-your-apps-via-a-business-hub)
* [Provision users to your apps via an IdP and business hub](/setup-and-admin/business-hubs/managing-users-and-assets-via-a-business-hub/provision-users-to-your-apps-via-an-idp-and-business-hub)
* [Deprovision users from your apps via an IdP and business hub](/setup-and-admin/business-hubs/managing-users-and-assets-via-a-business-hub/deprovision-users-from-your-apps-via-an-idp-and-business-hub)
* [Sync your app users with your business hub](/setup-and-admin/business-hubs/managing-users-and-assets-via-a-business-hub/sync-your-business-hub-with-your-external-app)
* [Protect your app users via a business hub](/setup-and-admin/business-hubs/managing-users-and-assets-via-a-business-hub/protect-your-app-user-accounts-via-a-business-hub)
* [Log in to your app via a business hub](https://help.cerby.com/cerby-web-app/business-hubs/log-in-to-your-app)
* [Track the activity of business hub users](/setup-and-admin/business-hubs/managing-users-and-assets-via-a-business-hub/track-activity-on-app-members-user-accounts)
* [Remove a business hub](/setup-and-admin/business-hubs/managing-your-business-hubs/remove-a-business-hub)
# Connect a business hub for Apollo
This article describes how to connect a business hub to centrally manage the users of Apollo from Cerby.
{% hint style="info" %}
**Who can use this feature?**
* Workspace **Owners**, **Super Admins**, **Admins**, and **Users**
* Only supported using the Cerby web app
{% endhint %}
As a user with any workspace role in Cerby, except **Guest User** and **Login-Only**, you can connect a business hub integration to centrally manage the users of Apollo.
When you connect the business hub, you become its **Owner**, and you can perform the following user and access management tasks through automated tasks executed by the Cerby agent:
* Check for updates
* Invite app members
* Update app members’ roles
* Remove app members
{% hint style="success" %}
**TIP:** For more details about the automated tasks of a business hub, how it works, and the supported apps, read the article [Explore Apps](https://help.cerby.com/setup-and-admin/business-hubs/business-hub-catalog).
{% endhint %}
This article provides instructions on how to connect a business hub for Apollo. For other app-specific articles and videos, review the [Connecting your business hubs](https://help.cerby.com/setup-and-admin/business-hubs/connecting-your-apps) collection in the Cerby Help Center.
***
## Requirements
The following are the requirements to connect a business hub:
* A Cerby workspace
* A Cerby user account with the **Owner**, **Super Admin**, **Admin**, or **User** role
* An organization in Apollo
* Groups configured in your identity provider (IdP) if you want to leverage automatic user provisioning and deprovisioning from your apps based on group assignment events. For more information, read the article [Provision users to your apps via an IdP and business hub](https://help.cerby.com/setup-and-admin/business-hubs/managing-users-and-assets-via-a-business-hub/provision-users-to-your-apps-via-an-idp-and-business-hub)
* An automation account, meaning an active user account with the **Org Admin** role in Apollo to be used as a service account. For instructions and recommendations on how to create and configure this account, read the article [Create a service account for your business hub](https://help.cerby.com/setup-and-admin/business-hubs/connecting-your-apps/create-a-service-account-for-your-business-hub)
* The user management and login method for your business hub identified to select the corresponding option when connecting your app. For more information, read the **User management and login method** section of the article [Explore Apps](https://help.cerby.com/setup-and-admin/business-hubs/business-hub-catalog)
* A business ID. You can find the ID in **the address bar** after logging in to Apollo and navigating to the **Members** tab of your organization. It’s the subdirectory between the **org** and **members** subdirectories of the URL. For example, **cerby** in [**https://studio.apollographql.com/org/cerby/members**](https://studio.apollographql.com/org/cerby/members). Just copy the value and paste it when connecting the business hub.
***
## Connect a business hub for Apollo
To connect a business hub for Apollo, you must complete the following main steps from the Cerby web app dashboard:
1. [Add a business hub and connect it to Apollo](#id-1.-add-a-business-hub-and-connect-it-to-apollo)
2. [Check for updates to import users and roles to Cerby](#id-2.-check-for-updates-to-import-users-and-roles-to-cerby)
3. [Connect your Apollo user account to the business hub](#id-3.-connect-your-apollo-user-account-to-the-business-hub)
4. [Manage unmatched users](#id-4.-manage-unmatched-users)
The following sections describe each main step.
### 1. Add a business hub and connect it to Apollo
To add a business hub and connect it to Apollo, you must complete the following steps:
1. Log in to your corresponding [Cerby](https://app.cerby.com/) workspace.
2. Select the **Business Hubs** option from the left navigation drawer. The **Business Hubs** page is displayed.
3. Click the **Connect Business Hub** button located at the top-right corner of the page. The **Connect your Business Hubs to Cerby** dialog box is displayed.
**TIP:** Select the **Don’t show this again** option to skip this step the next time you connect a new business hub.
4. Click the **Get started** button. A wizard is displayed on the **Select app** page.
5. Select **Apollo Hub** from the catalog. The **Enter app details** page is displayed on the wizard.
6. Enter and select your app information in the corresponding fields:
* **Label in Cerby:** It is the name to assign to your business hub in Cerby, and it will be displayed on the business hub card.
* **Business ID:** It is the unique identifier of your organization in Apollo. For instructions on how to find it, read the [Requirements](#requirements) section.
* **User management and login method:** It is the way your users log in to the app and determines whether they must save their login credentials as a Cerby account connected to the business hub. You must select one of the following methods:
* **Single sign-on (SSO):** Access is managed by your identity provider, and users log in with SSO authentication. They are not asked to save their credentials in Cerby.
* **Username and password:** Cerby manages account security and access, and users log in with their credentials after saving them in Cerby.
7. Click the **Next** button. The **Select automation account** page is displayed with a list of existing Apollo accounts.
8. Select the automation account you have previously added to Cerby, as described in the [Requirements](#requirements) section.
**NOTE:** If you don’t have an automation account, you are prompted to add it. Make sure you read Cerby’s recommendations on how to configure it in the article [Create a service account for your business hub](https://help.cerby.com/setup-and-admin/business-hubs/connecting-your-apps/create-a-service-account-for-your-business-hub). You may need to add the account first and then add the business hub.
9. Click the **Connect app** button. The wizard closes, and a success message box is displayed. The corresponding business hub is also displayed on the **Business Hubs** page.
The next step is [2. Check for updates to import users and roles to Cerby](#id-2.-check-for-updates-to-import-users-and-roles-to-cerby).
### 2. Check for updates to import users and roles to Cerby
To check for updates in your app to identify and import users, roles, and assets to Cerby, you must complete the following steps:
1. Select the **Business Hubs** option from the left navigation drawer. The **Business Hubs** page is displayed.
2. Click the **Settings** icon of the corresponding business hub card. The business hub details page is displayed with the **Settings** tab activated.
3. Click the **Check for updates** button located at the top right of the page. A message box is displayed with information about the process.
**NOTE:** The check and import process may take a few minutes depending on the number of users, and because Cerby automatically matches users to their corresponding Cerby user account.
4. Confirm that the automated task to check for updates has the “Completed” status by performing any of the following actions:
* Click the **More details** button from the message box.
* Select the **Automation** option from the left navigation drawer to open the **Automation** page with a list of automated tasks and their status.
{% hint style="info" %}
**NOTE:** Cerby automatically performs daily checks for updates for all business hubs, but you can trigger them manually, as described in this section. When a user is deprovisioned from an IdP and a check for updates is performed, Cerby generates a report and sends business hub **Owners** an email to confirm their removal from the app. For more instructions, read the article [Check for updates in your app and apply report](/setup-and-admin/business-hubs/managing-users-and-assets-via-a-business-hub/sync-your-business-hub-with-your-external-app).
{% endhint %}
The next step is [3. Connect your Apollo user account to the business hub](#id-3.-connect-your-apollo-user-account-to-the-business-hub).
### 3. Connect your Apollo user account to the business hub
To connect your Apollo user account to the business hub so Cerby can manage and protect it, you must complete the following steps:
1. Select the **Accounts** option from the left navigation drawer. The **Accounts** page is displayed.
2. Click the **Log in** button of the corresponding Apollo Hub account card. The **Connect your Apollo Hub Account** dialog box is displayed.
3. Enter the login credentials of your Apollo user account.
4. Click the **Connect account** button. The dialog box closes, and a success message box and a new account card are displayed.
The next step is [4. Manage unmatched users](#id-4.-manage-unmatched-users).
### 4. Manage unmatched users
During a check for updates, Cerby automatically matches app members to the Cerby user accounts that correspond to their email addresses, including existing [guest users](https://help.cerby.com/getting-started/concepts/user-management/guest-users) and [local partners](https://help.cerby.com/getting-started/concepts/user-management/partners#h-7e4add33a2). Manual matching is required when apps don't provide email addresses and for app members using personal or external accounts that couldn’t be identified or are not in the corporate directory.
To view the status of the imported app members, you must complete the following steps:
1. Select the **Business Hubs** option from the left navigation drawer. The **Business Hubs** page is displayed.
2. Click the **More options** (...) icon of the corresponding business hub card. A drop-down list is displayed.
3. Select the **View Members** option from the list. The business hub details page is displayed with the **Members** tab activated. App members are displayed in the following tabs of the **User Overview** section:
* **Unmatched users:** This tab displays the users who were not automatically matched.
* **Onboarded users:** This tab displays the users matched to their Cerby user account.
* **Guest users:** This tab displays the users who were matched to an existing Cerby user account but it doesn’t exist in the corporate directory, such as external collaborators.
For unmatched users, you can perform one of the following actions:
* [Match users](#match-users)
* [Remove unmatched users](#remove-unmatched-users)
* [Exempt unmatched users](#exempt-unmatched-users)
The following sections describe each action.
#### Match users
To match users, you must complete the following steps from the **Unmatched users** tab of the business hub details page:
1. Click the **Match user** button of the corresponding user. The **Match user** dialog box is displayed.
2. Enter the username or email address of the user you want to match and invite in the **Match with** field. The user is displayed on a list.
3. Select the user from the list.
4. Click the **Next** button. The **Select Cerby role** dialog box is displayed.
5. Select the role to assign to the user on the business hub **Cerby role** drop-down list:
* **Owner:** This role enables sharing access and managing business hub settings in Cerby.
* **Collaborator:** This role enables only logging in to the app from Cerby.
6. Click the **Match user** button. The dialog box closes, and a success message box is displayed. The user is moved to the **Onboarded** **users** tab.
#### Remove unmatched users
To remove unmatched users, you must complete the following steps from the **Unmatched users** tab of the business hub details page:
{% hint style="danger" %}
**IMPORTANT:** When removing an unmatched user, Cerby performs an automated task to revoke the user’s seat and permissions in Apollo.
{% endhint %}
1. Click the **More options** (...) icon of the corresponding user. A drop-down list is displayed.
2. Select the **Remove user** option from the list. The **Remove user?** dialog box is displayed.
3. Click the **Remove user** button. The dialog box closes, and a success message box is displayed. The user is removed from the app via an automated task.
#### Exempt unmatched users
Exempted users keep their user accounts or seats active in your app, but you cannot manage them through Cerby.
To exempt unmatched users, you must complete the following steps from the **Unmatched users** tab of the business hub details page:
1. Click the **More options** (...) icon of the corresponding user. A drop-down list is displayed.
2. Select the **Exempt user** option from the list. The exempt user dialog box is displayed.
3. Enter a reason for exempting the user in the **Provide a reason** field.
4. Click the **Exempt member** button. The dialog box closes, and a success message box is displayed. The user is moved to the **Exempted users** tab.
***
## Use your business hub
The following are the supported features of business hubs you can use:
* [Join the App and connect it to Cerby](https://help.cerby.com/cerby-web-app/business-hubs/join-your-external-app-and-set-up-your-business-hub-access)
* [Invite new app members](/setup-and-admin/business-hubs/managing-users-and-assets-via-a-business-hub/add-users-and-teams-to-your-apps-via-a-business-hub)
* [Remove app members](/setup-and-admin/business-hubs/managing-users-and-assets-via-a-business-hub/remove-users-from-your-app-via-a-business-hub)
* [Provision users to your apps via an IdP and business hub](https://help.cerby.com/setup-and-admin/business-hubs/managing-users-and-assets-via-a-business-hub/provision-users-to-your-apps-via-an-idp-and-business-hub)
* [Update the app members’ roles](/setup-and-admin/business-hubs/managing-users-and-assets-via-a-business-hub/update-user-roles-in-your-app-via-a-business-hub)
* [Check for updates in your app and apply report](/setup-and-admin/business-hubs/managing-users-and-assets-via-a-business-hub/sync-your-business-hub-with-your-external-app)
* [Re-assign the app members’ user accounts](https://github.com/cerbyinc/help-center/tree/main/.uncategorized/unpublished-deprecated-re-assign-the-app-members-user-accounts.md)
* [Manage the security of app members’ user accounts](/setup-and-admin/business-hubs/managing-users-and-assets-via-a-business-hub/protect-your-app-user-accounts-via-a-business-hub)
* [Log in to your app](https://help.cerby.com/cerby-web-app/business-hubs/log-in-to-your-app)
* [Track activity on app members’ user accounts](/setup-and-admin/business-hubs/managing-users-and-assets-via-a-business-hub/track-activity-on-app-members-user-accounts)
* [Remove an App](/setup-and-admin/business-hubs/managing-your-business-hubs/remove-a-business-hub)
# Connect a business hub for Appetize
This article describes how to connect a business hub to centrally manage the users of Appetize from Cerby.
{% hint style="info" %}
**Who can use this feature?**
* Workspace **Owners**, **Super Admins**, **Admins**, and **Users**
* Only supported using the Cerby web app
{% endhint %}
As a user with any workspace role in Cerby, except **Guest User** and **Login-Only**, you can connect a business hub integration to centrally manage the users of Appetize.
When you connect the business hub, you become its **Owner**, and you can perform the following user and access management tasks through automated tasks executed by the Cerby agent:
* Check for updates
* Invite app members
* Update app members’ roles
* Remove app members
{% hint style="success" %}
**TIP:** For more details about the automated tasks of a business hub, how it works, and the supported apps, read the article [Explore Apps](https://help.cerby.com/setup-and-admin/business-hubs/business-hub-catalog).
{% endhint %}
This article provides instructions on how to connect a business hub for Appetize. For other app-specific articles and videos, review the [Connecting your business hubs](https://help.cerby.com/setup-and-admin/business-hubs/connecting-your-apps) collection in the Cerby Help Center.
***
## Requirements
The following are the requirements to connect a business hub:
* A Cerby workspace
* A Cerby user account with the **Owner**, **Super Admin**, **Admin**, or **User** role
* Groups configured in your identity provider (IdP) if you want to leverage automatic user provisioning and deprovisioning from your apps based on group assignment events. For more information, read the article [Provision users to your apps via an IdP and business hub](https://help.cerby.com/setup-and-admin/business-hubs/managing-users-and-assets-via-a-business-hub/provision-users-to-your-apps-via-an-idp-and-business-hub)
* An automation account, meaning an active user account with an **Admin** role in Appetize to be used as a service account. For instructions and recommendations on how to create and configure this account, read the article [Create a service account for your business hub](https://help.cerby.com/setup-and-admin/business-hubs/connecting-your-apps/create-a-service-account-for-your-business-hub)
***
## Connect a business hub for Appetize
To connect a business hub for Appetize, you must complete the following main steps from the Cerby web app dashboard:
1. [Add a business hub and connect it to Appetize](#id-1.-add-a-business-hub-and-connect-it-to-appetize)
2. [Check for updates to import users and roles to Cerby](#id-2.-check-for-updates-to-import-users-and-roles-to-cerby)
3. [Connect your Appetize user account to the business hub](#id-3.-connect-your-appetize-user-account-to-the-business-hub)
4. [Manage unmatched users](#id-4.-manage-unmatched-users)
The following sections describe each main step.
### 1. Add a business hub and connect it to Appetize
To add a business hub and connect it to Appetize, you must complete the following steps:
1. Log in to your corresponding [Cerby](https://app.cerby.com/) workspace.
2. Select the **Business Hubs** option from the left navigation drawer. The **Business Hubs** page is displayed.
3. Click the **Connect Business Hub** button located at the top-right corner of the page. The **Connect your Business Hubs to Cerby** dialog box is displayed. **TIP:** Select the **Don’t show this again** option to skip this step the next time you connect a new business hub.
4. Click the **Get started** button. A wizard is displayed on the **Select app** page.
5. Select **Appetize Hub** from the catalog. The **Enter app details** page is displayed on the wizard.
6. Enter and select your app information in the corresponding fields:
1. **Label in Cerby:** It is the name to assign to your business hub in Cerby, and it will be displayed on the business hub card.
2. **Business unique identifier:** It is a unique identifier that differentiates your business hub in Cerby from others for the same app. You can assign an alphanumeric value between 3 and 30 characters without symbols or special characters.
3. **User management and login method:** It is the way your users log in to the app and determines if they must save their credentials in Cerby.
4. Select the **Username and password** option because account security and access are managed by Cerby, and users log in with their credentials after saving them in Cerby.
**IMPORTANT:** The **Single sign-on (SSO)** option is not supported by CookieHub.
7. Click the **Next** button. The **Select automation account** page is displayed with a list of existing Appetize accounts.
8. Select the automation account you have previously added to Cerby, as described in the [Requirements](#requirements) section. **NOTE:** If you don’t have an automation account, you are prompted to add it. Make sure you read Cerby’s recommendations on how to configure it in the article [Create a service account for your business hub](https://help.cerby.com/setup-and-admin/business-hubs/connecting-your-apps/create-a-service-account-for-your-business-hub). You may need to add the account first and then add the business hub.
9. Click the **Connect app** button. The wizard closes, and a success message box is displayed. The corresponding business hub is also displayed on the **Business Hubs** page.
The next step is [2. Check for updates to import users and roles to Cerby](#id-2.-check-for-updates-to-import-users-and-roles-to-cerby).
### 2. Check for updates to import users and roles to Cerby
To check for updates in your app to identify and import users and roles to Cerby, you must complete the following steps:
1. Select the **Business Hubs** option from the left navigation drawer. The **Business Hubs** page is displayed.
2. Click the **Settings** icon of the corresponding business hub card. The business hub details page is displayed with the **Settings** tab activated.
3. Click the **Check for updates** button located at the top right of the page. A message box is displayed with information about the process. **NOTE:** The check and import process may take a few minutes depending on the number of users, and because Cerby automatically matches users to their corresponding Cerby user account.
4. Confirm that the automated task to check for updates has the “Completed” status by performing any of the following actions:
* Click the **More details** button from the message box.
* Select the **Automation** option from the left navigation drawer to open the **Automation** page with a list of automated tasks and their status.
{% hint style="info" %}
**NOTE:** Cerby automatically performs daily checks for updates for all business hubs, but you can trigger them manually, as described in this section. When a user is deprovisioned from an IdP and a check for updates is performed, Cerby generates a report and sends business hub **Owners** an email to confirm their removal from the app. For more instructions, read the article [Check for updates in your app and apply report](/setup-and-admin/business-hubs/managing-users-and-assets-via-a-business-hub/sync-your-business-hub-with-your-external-app).
{% endhint %}
The next step is [3. Connect your Appetize user account to the business hub](#id-3.-connect-your-appetize-user-account-to-the-business-hub).
### 3. Connect your Appetize user account to the business hub
To connect your Appetize user account to the business hub so Cerby can manage and protect it, you must complete the following steps:
1. Select the **Accounts** option from the left navigation drawer. The **Accounts** page is displayed.
2. Click the **Log in** button of the corresponding Appetize Hub account card. The **Connect your Appetize Hub Account** dialog box is displayed.
3. Enter the login credentials of your Appetize user account.
4. Click the **Connect account** button. The dialog box closes, and a success message box and a new account card are displayed.
The next step is [4. Manage unmatched users](#id-4.-manage-unmatched-users).
### 4. Manage unmatched users
During a check for updates, Cerby automatically matches app members to the Cerby user accounts that correspond to their email addresses, including existing [guest users](https://help.cerby.com/getting-started/concepts/user-management/guest-users) and [local partners](https://help.cerby.com/getting-started/concepts/user-management/partners#h-7e4add33a2). Manual matching is required when apps don't provide email addresses and for app members using personal or external accounts that couldn’t be identified or are not in the corporate directory.
To view the status of the imported app members, you must complete the following steps:
1. Select the **Business Hubs** option from the left navigation drawer. The **Business Hubs** page is displayed.
2. Click the **More options** (...) icon of the corresponding business hub card. A drop-down list is displayed.
3. Select the **View Members** option from the list. The business hub details page is displayed with the **Members** tab activated. App members are displayed in the following tabs of the **User Overview** section:
* **Unmatched users:** This tab displays the users who were not automatically matched.
* **Onboarded users:** This tab displays the users matched to their Cerby user account.
* **Guest users:** This tab displays the users who were matched to an existing Cerby user account but it doesn’t exist in the corporate directory, such as external collaborators.
For unmatched users, you can perform one of the following actions:
* [Match users](#match-users)
* [Remove unmatched users](#remove-unmatched-users)
* [Exempt unmatched users](#exempt-unmatched-users)
The following sections describe each action.
#### Match users
To match users, you must complete the following steps from the **Unmatched users** tab of the business hub details page:
1. Click the **Match user** button of the corresponding user. The **Match user** dialog box is displayed.
2. Enter the username or email address of the user you want to match and invite in the **Match with** field. The user is displayed on a list.
3. Select the user from the list.
4. Click the **Next** button. The **Select Cerby role** dialog box is displayed.
5. Select the role to assign to the user on the business hub **Cerby role** drop-down list:
* **Owner:** This role enables sharing access and managing business hub settings in Cerby.
* **Collaborator:** This role enables only logging in to the app from Cerby.
6. Click the **Match user** button. The dialog box closes, and a success message box is displayed. The user is moved to the **Onboarded** **users** tab.
#### Remove unmatched users
To remove unmatched users, you must complete the following steps from the **Unmatched users** tab of the business hub details page:
{% hint style="danger" %}
**IMPORTANT:** When removing an unmatched user, Cerby performs an automated task to revoke the user’s seat and permissions in Appetize.
{% endhint %}
1. Click the **More options** (...) icon of the corresponding user. A drop-down list is displayed.
2. Select the **Remove user** option from the list. The **Remove user?** dialog box is displayed.
3. Click the **Remove user** button. The dialog box closes, and a success message box is displayed. The user is removed from the app via an automated task.
#### Exempt unmatched users
Exempted users keep their user accounts or seats active in your app, but you cannot manage them through Cerby.
To exempt unmatched users, you must complete the following steps from the **Unmatched users** tab of the business hub details page:
1. Click the **More options** (...) icon of the corresponding user. A drop-down list is displayed.
2. Select the **Exempt user** option from the list. The exempt user dialog box is displayed.
3. Enter a reason for exempting the user in the **Provide a reason** field.
4. Click the **Exempt member** button. The dialog box closes, and a success message box is displayed. The user is moved to the **Exempted users** tab.
***
## Use your business hub
The following are the supported features of business hubs you can use:
* [Join the App and connect it to Cerby](https://help.cerby.com/cerby-web-app/business-hubs/join-your-external-app-and-set-up-your-business-hub-access)
* [Invite new app members](/setup-and-admin/business-hubs/managing-users-and-assets-via-a-business-hub/add-users-and-teams-to-your-apps-via-a-business-hub)
* [Remove app members](/setup-and-admin/business-hubs/managing-users-and-assets-via-a-business-hub/remove-users-from-your-app-via-a-business-hub)
* [Provision users to your apps via an IdP and business hub](https://help.cerby.com/setup-and-admin/business-hubs/managing-users-and-assets-via-a-business-hub/provision-users-to-your-apps-via-an-idp-and-business-hub)
* [Update the app members’ roles](/setup-and-admin/business-hubs/managing-users-and-assets-via-a-business-hub/update-user-roles-in-your-app-via-a-business-hub)
* [Check for updates in your app and apply report](/setup-and-admin/business-hubs/managing-users-and-assets-via-a-business-hub/sync-your-business-hub-with-your-external-app)
* [Re-assign the app members’ user accounts](https://github.com/cerbyinc/help-center/tree/main/.uncategorized/unpublished-deprecated-re-assign-the-app-members-user-accounts.md)
* [Manage the security of app members’ user accounts](/setup-and-admin/business-hubs/managing-users-and-assets-via-a-business-hub/protect-your-app-user-accounts-via-a-business-hub)
* [Log in to your app](https://help.cerby.com/cerby-web-app/business-hubs/log-in-to-your-app)
* [Track activity on app members’ user accounts](/setup-and-admin/business-hubs/managing-users-and-assets-via-a-business-hub/track-activity-on-app-members-user-accounts)
* [Remove an App](/setup-and-admin/business-hubs/managing-your-business-hubs/remove-a-business-hub)
# Connect a business hub for Appfigures
This article describes how to connect a business hub to centrally manage the users of Appfigures from Cerby.
{% hint style="info" %}
**Who can use this feature?**
* Workspace **Owners**, **Super Admins**, **Admins**, and **Users**
* Only supported using the Cerby web app
{% endhint %}
As a user with any workspace role in Cerby, except **Guest User** and **Login-Only**, you can connect a business hub integration to centrally manage the users of Appfigures.
When you connect the business hub, you become its **Owner**, and you can perform the following user and access management tasks through automated tasks executed by the Cerby agent:
* Check for updates
* Invite app members
* Update app members’ roles
* Remove app members
{% hint style="success" %}
**TIP:** For more details about the automated tasks of a business hub, how it works, and the supported apps, read the article [Explore Apps](https://help.cerby.com/setup-and-admin/business-hubs/business-hub-catalog).
{% endhint %}
{% hint style="danger" %}
**IMPORTANT:** Take into consideration that app members who are invited and later removed cannot be invited to join Appfigures again with the same email address. If this scenario occurs, Appfigures displays the “This email is currently in use by a different user” error message.
{% endhint %}
This article provides instructions on how to connect a business hub for Appfigures. For other app-specific articles and videos, review the [Connecting your business hubs](https://help.cerby.com/setup-and-admin/business-hubs/connecting-your-apps) collection in the Cerby Help Center.
***
## Requirements
The following are the requirements to connect a business hub:
* A Cerby workspace
* A Cerby user account with the **Owner**, **Super Admin**, **Admin**, or **User** role
* Groups configured in your identity provider (IdP) if you want to leverage automatic user provisioning and deprovisioning from your apps based on group assignment events. For more information, read the article [Provision users to your apps via an IdP and business hub](https://help.cerby.com/setup-and-admin/business-hubs/managing-users-and-assets-via-a-business-hub/provision-users-to-your-apps-via-an-idp-and-business-hub)
* An automation account, meaning an active user account with an **Admin** role in Appfigures to be used as a service account. For instructions and recommendations on how to create and configure this account, read the article [Create a service account for your business hub](https://help.cerby.com/setup-and-admin/business-hubs/connecting-your-apps/create-a-service-account-for-your-business-hub)
* The user management and login method for your business hub identified to select the corresponding option when connecting your app. For more information, read the **User management and login method** section of the article [Explore Apps](https://help.cerby.com/setup-and-admin/business-hubs/business-hub-catalog)
***
## Connect a business hub for Appfigures
To connect a business hub for Appfigures, you must complete the following main steps from the Cerby web app dashboard:
1. [Add a business hub and connect it to Appfigures](#id-1.-add-a-business-hub-and-connect-it-to-appfigures)
2. [Check for updates to import users and roles to Cerby](#id-2.-check-for-updates-to-import-users-and-roles-to-cerby)
3. [Connect your Appfigures user account to the business hub](#id-3.-connect-your-appfigures-user-account-to-the-business-hub)
4. [Manage unmatched users](#id-4.-manage-unmatched-users)
The following sections describe each main step.
### 1. Add a business hub and connect it to Appfigures
To add a business hub and connect it to Appfigures, you must complete the following steps:
1. Log in to your corresponding [Cerby](https://app.cerby.com/) workspace.
2. Select the **Business Hubs** option from the left navigation drawer. The **Business Hubs** page is displayed.
3. Click the **Connect Business Hub** button located at the top-right corner of the page. The **Connect your Business Hubs to Cerby** dialog box is displayed. **TIP:** Select the **Don’t show this again** option to skip this step the next time you connect a new business hub.
4. Click the **Get started** button. A wizard is displayed on the **Select app** page.
5. Select **Appfigures Hub** from the catalog. The **Enter app details** page is displayed on the wizard.
6. Enter and select your app information in the corresponding fields:
* **Label in Cerby:** It is the name to assign to your business hub in Cerby, and it will be displayed on the business hub card.
* **Business unique identifier:** It is a unique identifier that differentiates your business hub in Cerby from others for the same app. You can assign an alphanumeric value between 3 and 30 characters without symbols or special characters.
* **User management and login method:** It is the way your users log in to the app and determines whether they must save their login credentials as a Cerby account connected to the business hub. You must select one of the following methods:
* **Single sign-on (SSO):** Access is managed by your identity provider, and users log in with SSO authentication. They are not asked to save their credentials in Cerby.
* **Username and password:** Cerby manages account security and access, and users log in with their credentials after saving them in Cerby.
7. Click the **Next** button. The **Select automation account** page is displayed with a list of existing Appfigures accounts.
8. Select the automation account you have previously added to Cerby, as described in the [Requirements](#requirements) section.
**NOTE:** If you don’t have an automation account, you are prompted to add it. Make sure you read Cerby’s recommendations on how to configure it in the article [Create a service account for your business hub](https://help.cerby.com/setup-and-admin/business-hubs/connecting-your-apps/create-a-service-account-for-your-business-hub). You may need to add the account first and then add the business hub.
9. Click the **Connect app** button. The wizard closes, and a success message box is displayed. The corresponding business hub is also displayed on the **Business Hubs** page.
The next step is [2. Check for updates to import users and roles to Cerby](#id-2.-check-for-updates-to-import-users-and-roles-to-cerby).
### 2. Check for updates to import users and roles to Cerby
To check for updates in your app to identify and import users and roles to Cerby, you must complete the following steps:
1. Select the **Business Hubs** option from the left navigation drawer. The **Business Hubs** page is displayed.
2. Click the **Settings** icon of the corresponding business hub card. The business hub details page is displayed with the **Settings** tab activated.
3. Click the **Check for updates** button located at the top right of the page. A message box is displayed with information about the process.
**NOTE:** The check and import process may take a few minutes depending on the number of users, and because Cerby automatically matches users to their corresponding Cerby user account.
4. Confirm that the automated task to check for updates has the “Completed” status by performing any of the following actions:
* Click the **More details** button from the message box.
* Select the **Automation** option from the left navigation drawer to open the **Automation** page with a list of automated tasks and their status.
{% hint style="info" %}
**NOTE:** Cerby automatically performs daily checks for updates for all business hubs, but you can trigger them manually, as described in this section. When a user is deprovisioned from an IdP and a check for updates is performed, Cerby generates a report and sends business hub **Owners** an email to confirm their removal from the app. For more instructions, read the article [Check for updates in your app and apply report](/setup-and-admin/business-hubs/managing-users-and-assets-via-a-business-hub/sync-your-business-hub-with-your-external-app).
{% endhint %}
The next step is [3. Connect your Appfigures user account to the business hub](#id-3.-connect-your-appfigures-user-account-to-the-business-hub).
### 3. Connect your Appfigures user account to the business hub
To connect your Appfigures user account to the business hub so Cerby can manage and protect it, you must complete the following steps:
1. Select the **Accounts** option from the left navigation drawer. The **Accounts** page is displayed.
2. Click the **Log in** button of the corresponding Appfigures Hub account card. The **Connect your Appfigures Hub Account** dialog box is displayed.
3. Enter the login credentials of your Appfigures user account.
4. Click the **Connect account** button. The dialog box closes, and a success message box and a new account card are displayed.
The next step is [4. Manage unmatched users](#id-4.-manage-unmatched-users).
### 4. Manage unmatched users
During a check for updates, Cerby automatically matches app members to the Cerby user accounts that correspond to their email addresses, including existing [guest users](https://help.cerby.com/getting-started/concepts/user-management/guest-users) and [local partners](https://help.cerby.com/getting-started/concepts/user-management/partners#h-7e4add33a2). Manual matching is required when apps don't provide email addresses and for app members using personal or external accounts that couldn’t be identified or are not in the corporate directory.
To view the status of the imported app members, you must complete the following steps:
1. Select the **Business Hubs** option from the left navigation drawer. The **Business Hubs** page is displayed.
2. Click the **More options** (...) icon of the corresponding business hub card. A drop-down list is displayed.
3. Select the **View Members** option from the list. The business hub details page is displayed with the **Members** tab activated. App members are displayed in the following tabs of the **User Overview** section:
* **Unmatched users:** This tab displays the users who were not automatically matched.
* **Onboarded users:** This tab displays the users matched to their Cerby user account.
* **Guest users:** This tab displays the users who were matched to an existing Cerby user account but it doesn’t exist in the corporate directory, such as external collaborators.
For unmatched users, you can perform one of the following actions:
* [Match users](#match-users)
* [Remove unmatched users](#remove-unmatched-users)
* [Exempt unmatched users](#exempt-unmatched-users)
The following sections describe each action.
#### Match users
To match users, you must complete the following steps from the **Unmatched users** tab of the business hub details page:
1. Click the **Match user** button of the corresponding user. The **Match user** dialog box is displayed.
2. Enter the username or email address of the user you want to match and invite in the **Match with** field. The user is displayed on a list.
3. Select the user from the list.
4. Click the **Next** button. The **Select Cerby role** dialog box is displayed.
5. Select the role to assign to the user on the business hub **Cerby role** drop-down list:
* **Owner:** This role enables sharing access and managing business hub settings in Cerby.
* **Collaborator:** This role enables only logging in to the app from Cerby.
6. Click the **Match user** button. The dialog box closes, and a success message box is displayed. The user is moved to the **Onboarded** **users** tab.
#### Remove unmatched users
To remove unmatched users, you must complete the following steps from the **Unmatched users** tab of the business hub details page:
{% hint style="danger" %}
**IMPORTANT:** When removing an unmatched user, Cerby performs an automated task to revoke the user’s seat and permissions in Appfigures.
{% endhint %}
1. Click the **More options** (...) icon of the corresponding user. A drop-down list is displayed.
2. Select the **Remove user** option from the list. The **Remove user?** dialog box is displayed.
3. Click the **Remove user** button. The dialog box closes, and a success message box is displayed. The user is removed from the app via an automated task.
#### Exempt unmatched users
Exempted users keep their user accounts or seats active in your app, but you cannot manage them through Cerby.
To exempt unmatched users, you must complete the following steps from the **Unmatched users** tab of the business hub details page:
1. Click the **More options** (...) icon of the corresponding user. A drop-down list is displayed.
2. Select the **Exempt user** option from the list. The exempt user dialog box is displayed.
3. Enter a reason for exempting the user in the **Provide a reason** field.
4. Click the **Exempt member** button. The dialog box closes, and a success message box is displayed. The user is moved to the **Exempted users** tab.
***
## Use your business hub
The following are the supported features of business hubs you can use:
* [Join the App and connect it to Cerby](https://help.cerby.com/cerby-web-app/business-hubs/join-your-external-app-and-set-up-your-business-hub-access)
* [Invite new app members](/setup-and-admin/business-hubs/managing-users-and-assets-via-a-business-hub/add-users-and-teams-to-your-apps-via-a-business-hub)
* [Remove app members](/setup-and-admin/business-hubs/managing-users-and-assets-via-a-business-hub/remove-users-from-your-app-via-a-business-hub)
* [Provision users to your apps via an IdP and business hub](https://help.cerby.com/setup-and-admin/business-hubs/managing-users-and-assets-via-a-business-hub/provision-users-to-your-apps-via-an-idp-and-business-hub)
* [Update the app members’ roles](/setup-and-admin/business-hubs/managing-users-and-assets-via-a-business-hub/update-user-roles-in-your-app-via-a-business-hub)
* [Check for updates in your app and apply report](/setup-and-admin/business-hubs/managing-users-and-assets-via-a-business-hub/sync-your-business-hub-with-your-external-app)
* [Re-assign the app members’ user accounts](https://github.com/cerbyinc/help-center/tree/main/.uncategorized/unpublished-deprecated-re-assign-the-app-members-user-accounts.md)
* [Manage the security of app members’ user accounts](/setup-and-admin/business-hubs/managing-users-and-assets-via-a-business-hub/protect-your-app-user-accounts-via-a-business-hub)
* [Log in to your app](https://help.cerby.com/cerby-web-app/business-hubs/log-in-to-your-app)
* [Track activity on app members’ user accounts](/setup-and-admin/business-hubs/managing-users-and-assets-via-a-business-hub/track-activity-on-app-members-user-accounts)
* [Remove an App](/setup-and-admin/business-hubs/managing-your-business-hubs/remove-a-business-hub)
# Connect a business hub for AppsFlyer
This article describes how to connect a business hub to centrally manage the users of AppsFlyer from Cerby.
{% hint style="info" %}
**Who can use this feature?**
* Workspace **Owners**, **Super Admins**, **Admins**, and **Users**
* Only supported using the Cerby web app
{% endhint %}
As a user with any workspace role in Cerby, except **Guest User** and **Login-Only**, you can connect a business hub integration to centrally manage the users of AppsFlyer.
When you connect the business hub, you become its **Owner**, and you can perform the following user and access management tasks through automated tasks executed by the Cerby agent:
* Check for updates
* Add users
* Update user roles
* Remove users
{% hint style="success" %}
**TIP:** For more details about the automated tasks of a business hub, how it works, and the supported apps, read the article [Explore Business Hubs](https://help.cerby.com/setup-and-admin/business-hubs/business-hub-catalog).
{% endhint %}
This article provides instructions on how to connect a business hub for Braze. For other app-specific articles and videos, review the [Connecting business hubs for your apps](https://help.cerby.com/setup-and-admin/business-hubs/connecting-your-apps) and [Connecting business hubs for your paid social apps](https://help.cerby.com/setup-and-admin/business-hubs/connecting-your-paid-social-apps) collections in the Cerby Help Center.
***
## Requirements
The following are the requirements to connect a business hub:
* A Cerby workspace
* A Cerby user account with the **Owner**, **Super Admin**, **Admin**, or **User** role
* Groups configured in your identity provider (IdP) if you want to leverage automatic user provisioning and deprovisioning from your apps based on group assignment events. For more information, read the articles available in the [Managing users via an IdP and business hub](https://help.cerby.com/setup-and-admin/business-hubs/managing-users-and-assets-via-a-business-hub) collection in the Cerby Help Center
* An automation account, meaning an active user account with an **Admin** role in AppsFlyer to be used as a service account. For instructions and recommendations on how to create and configure this account, read the article [Create a service account for your business hub](/setup-and-admin/business-hubs/connecting-your-apps/create-a-service-account-for-your-business-hub)
* The user management and login method for your business hub identified to select the corresponding option when connecting your app. For more information, read the **User management and login method** section of the article [Explore Business Hubs](https://help.cerby.com/setup-and-admin/business-hubs/business-hub-catalog)
***
## Connect a business hub for AppsFlyer
To connect a business hub for AppsFlyer, you must complete the following main steps from the Cerby web app dashboard:
1. [Add a business hub and connect it to AppsFlyer](#id-1.-add-a-business-hub-and-connect-it-to-appsflyer)
2. [Check for updates to import users and roles to Cerby](#id-2.-check-for-updates-to-import-users-and-roles-to-cerby)
3. [Connect your AppsFlyer user account to the business hub](#id-3.-connect-your-appsflyer-user-account-to-the-business-hub)
4. [Manage unmatched users](#id-4.-manage-unmatched-users)
The following sections describe each main step.
### 1. Add a business hub and connect it to AppsFlyer
To add a business hub and connect it to AppsFlyer, you must complete the following steps:
1. Log in to your corresponding [Cerby](https://app.cerby.com/) workspace.
2. Select the **Business Hubs** option from the left menu. The **Business Hubs** page is displayed.
3. Click the **Connect Business Hub** button located at the top-right corner of the page. The **Connect your Business Hubs to Cerby** dialog box is displayed. **TIP:** Select the **Don’t show this again** option to skip this step the next time you connect a new business hub.
4. Click the **Get started** button. A wizard is displayed on the **Select app** page.
5. Select **AppsFlyer Hub** from the catalog. The **Enter app details** page is displayed on the wizard.
6. Enter and select your app information in the corresponding fields:
* **Label in Cerby:** It is the name to assign to your business hub in Cerby, and it will be displayed on the business hub card.
* **Unique name:** It is a unique identifier that differentiates your business hub in Cerby from others for the same app. You can assign an alphanumeric value between 3 and 30 characters without symbols or special characters.
* **User management and login method:** It is the way your users log in to the app and determines whether they must save their login credentials as a Cerby account connected to the business hub. You must select one of the following methods:
* **Single sign-on (SSO):** Access is managed by your identity provider, and users log in with SSO authentication. They are not asked to save their credentials in Cerby.
* **Username and password:** Cerby manages account security and access, and users log in with their credentials after saving them in Cerby.
7. Click the **Next** button. The **Select automation account** page is displayed with a list of existing AppsFlyer accounts.
8. Select the automation account you have previously added to Cerby, as described in the [Requirements](#requirements) section. **NOTE:** If you don’t have an automation account, you are prompted to add it. Make sure you read Cerby’s recommendations on how to configure it in the article [Create a service account for your business hub](/setup-and-admin/business-hubs/connecting-your-apps/create-a-service-account-for-your-business-hub). You may need to add the account first and then add the business hub.
9. Click the **Connect app** button. The wizard closes, and a success message box is displayed. The corresponding business hub is also displayed on the **Business Hubs** page.
The next step is [2. Check for updates to import users and roles to Cerby](#id-2.-check-for-updates-to-import-users-and-roles-to-cerby).
### 2. Check for updates to import users and roles to Cerby
To check for updates in your app to identify and import users, roles, and assets to Cerby, you must complete the following steps:
1. Select the **Business Hubs** option from the left menu. The **Business Hubs** page is displayed.
2. Click the **More options** (...) icon of the corresponding business hub card. A drop-down menu is displayed.
3. Select the **Settings** option from the menu. The business hub details page is displayed with the **Settings** tab activated.
4. Click the **Sync** button located at the top right of the page. A message box is displayed with information about the process. **NOTE:** The check and import process may take a few minutes depending on the number of users and assets, and because Cerby automatically matches users to their corresponding Cerby user account.
5. Confirm that the automated task to check for updates has the “Completed” status by performing any of the following actions:
* Click the **More details** button from the message box.
* Select the **Automation** option from the left menu to open the **Automation** page with a list of automated tasks and their status.
{% hint style="info" %}
**NOTE: NOTE:** Cerby automatically performs daily checks for updates for all business hubs, but you can trigger them manually, as described in this section. For more instructions, read the article [Sync your app users with your business hub](/setup-and-admin/business-hubs/managing-users-and-assets-via-a-business-hub/sync-your-business-hub-with-your-external-app).
{% endhint %}
The next step is [3. Connect your AppsFlyer user account to the business hub](#id-3.-connect-your-appsflyer-user-account-to-the-business-hub).
### 3. Connect your AppsFlyer user account to the business hub
To connect your AppsFlyer user account to the business hub so Cerby can manage and protect it, you must complete the following steps:
1. Select the **Accounts** option from the left menu. The **Accounts** page is displayed.
2. Click the **Log in** button of the corresponding AppsFlyer Hub account card. The **Connect your AppsFlyer Hub Account** dialog box is displayed.
3. Enter the login credentials of your AppsFlyer user account.
4. Click the **Connect account** button. The dialog box closes, and a success message box and a new account card are displayed.
The next step is [4. Manage unmatched users](#id-4.-manage-unmatched-users).
### 4. Manage unmatched users
During a check for updates, Cerby automatically matches app members to the Cerby user accounts that correspond to their email addresses, including existing [guest users](https://help.cerby.com/getting-started/concepts/user-management/guest-users) and [local partners](https://help.cerby.com/getting-started/concepts/user-management/partners#h-7e4add33a2). Manual matching is required when apps don't provide email addresses and for app members using personal or external accounts that couldn’t be identified or are not in the corporate directory.
To view the status of the imported app members, you must complete the following steps:
1. Select the **Business Hubs** option from the left menu. The **Business Hubs** page is displayed.
2. Click the **More options** (...) icon of the corresponding business hub card. A drop-down menu is displayed.
3. Select the **View Members** option from the menu. The business hub details page is displayed with the **Members** tab activated. App members are displayed in the following tabs of the **User Overview** section:
* **Unmatched users:** This tab displays the users who were not automatically matched.
* **Onboarded users:** This tab displays the users matched to their Cerby user account.
* **Guest users:** This tab displays the users who were matched to an existing Cerby user account but it doesn’t exist in the corporate directory, such as external collaborators.
For unmatched users, you can perform one of the following actions:
* [Match users](#match-users)
* [Remove unmatched users](#remove-unmatched-users)
* [Exempt unmatched users](#exempt-unmatched-users)
The following sections describe each action.
#### Match users
To match users, you must complete the following steps from the **Unmatched users** tab of the business hub details page:
1. Click the **Match user** button of the corresponding user. The **Match user** dialog box is displayed.
2. Enter the username or email address of the user you want to match and invite in the **Match with** field. The user is displayed on a list.
3. Select the user from the list.
4. Click the **Next** button. The **Select Cerby role** dialog box is displayed.
5. Select the role to assign to the user on the business hub **Cerby role** drop-down menu:
* **Owner:** This role enables sharing access and managing business hub settings in Cerby.
* **Collaborator:** This role enables only logging in to the app from Cerby.
6. Click the **Match user** button. The dialog box closes, and a success message box is displayed. The user is moved to the **Onboarded** **users** tab.
#### Remove unmatched users
To remove unmatched users, you must complete the following steps from the **Unmatched users** tab of the business hub details page:
{% hint style="danger" %}
**IMPORTANT:** When removing an unmatched user, Cerby performs an automated task to revoke the user’s seat and permissions in AppsFlyer.
{% endhint %}
1. Click the **More options** (...)icon of the corresponding user. A drop-down menu is displayed.
2. Select the **Remove user** option from the menu. The **Remove user?** dialog box is displayed.
3. Click the **Remove user** button. The dialog box closes, and a success message box is displayed. The user is removed from the app via an automated task.
#### Exempt unmatched users
Exempted users keep their user accounts or seats active in your app, but you cannot manage them through Cerby.
To exempt unmatched users, you must complete the following steps from the **Unmatched users** tab of the business hub details page:
1. Click the **More options** (...)icon of the corresponding user. A drop-down menu is displayed.
2. Select the **Exempt user** option from the menu. The exempt user dialog box is displayed.
3. Enter a reason for exempting the user in the **Provide a reason** field.
4. Click the **Exempt member** button. The dialog box closes, and a success message box is displayed. The user is moved to the **Exempted users** tab.
***
## Use your business hub
The following are the supported features of business hubs you can use:
* [Join the external app and set up your business hub access](https://help.cerby.com/cerby-web-app/business-hubs/join-your-external-app-and-set-up-your-business-hub-access)
* [Add users to your app via a business hub](/setup-and-admin/business-hubs/managing-users-and-assets-via-a-business-hub/add-users-and-teams-to-your-apps-via-a-business-hub)
* [Provision users to your apps via an IdP and business hub](/setup-and-admin/business-hubs/managing-users-and-assets-via-a-business-hub/provision-users-to-your-apps-via-an-idp-and-business-hub)
* [Remove users from your app via a business hub](/setup-and-admin/business-hubs/managing-users-and-assets-via-a-business-hub/remove-users-from-your-app-via-a-business-hub)
* [Remove teams from your app via a business hub](/setup-and-admin/business-hubs/managing-users-and-assets-via-a-business-hub/remove-teams-from-your-app-via-a-business-hub)
* [Deprovision users from your apps via an IdP and business hub](/setup-and-admin/business-hubs/managing-users-and-assets-via-a-business-hub/deprovision-users-from-your-apps-via-an-idp-and-business-hub)
* [Update user roles in your app via a business hub](/setup-and-admin/business-hubs/managing-users-and-assets-via-a-business-hub/update-user-roles-in-your-app-via-a-business-hub)
* [Update user roles in your apps via an IdP and business hub](/setup-and-admin/business-hubs/managing-users-and-assets-via-a-business-hub/update-user-roles-in-your-apps-via-an-idp-and-business-hub)
* [Sync your app users with your business hub](/setup-and-admin/business-hubs/managing-users-and-assets-via-a-business-hub/sync-your-business-hub-with-your-external-app)
* [Protect your app user accounts via a business hub](/setup-and-admin/business-hubs/managing-users-and-assets-via-a-business-hub/protect-your-app-user-accounts-via-a-business-hub)
* [Log in to your app via a business hub](https://help.cerby.com/cerby-web-app/business-hubs/log-in-to-your-app)
* [Track the activity of business hub users](/setup-and-admin/business-hubs/managing-users-and-assets-via-a-business-hub/track-activity-on-app-members-user-accounts)
* [Remove a business hub](/setup-and-admin/business-hubs/managing-your-business-hubs/remove-a-business-hub)
# Connect a business hub for Appsmith
This article describes how to connect a business hub to centrally manage the users of Appsmith from Cerby.
{% hint style="info" %}
**Who can use this feature?**
* Workspace **Owners**, **Super Admins**, **Admins**, and **Users**
* Only supported using the Cerby web app
{% endhint %}
As a user with any workspace role in Cerby, except **Guest User** and **Login-Only**, you can connect a business hub integration to centrally manage the users of Appsmith.
When you connect the business hub, you become its **Owner**, and you can perform the following user and access management tasks through automated tasks executed by the Cerby agent:
* Check for updates
* Add users
* Update user roles
* Remove users
{% hint style="success" %}
**TIP:** For more details about the automated tasks of a business hub, how it works, and the supported apps, read the article [Explore Business Hubs](https://help.cerby.com/setup-and-admin/business-hubs/business-hub-catalog).
{% endhint %}
This article provides instructions on how to connect a business hub for Appsmith. For other app-specific articles and videos, review the [Connecting business hubs for your apps](https://help.cerby.com/setup-and-admin/business-hubs/connecting-your-apps) and [Connecting business hubs for your paid social apps](https://help.cerby.com/setup-and-admin/business-hubs/connecting-your-paid-social-apps) collections in the Cerby Help Center.
***
## Requirements
The following are the requirements to connect a business hub:
* A Cerby workspace
* A Cerby user account with the workspace **Owner**, **Super Admin**, **Admin**, or **User** role
* A workspace in Appsmith
* Groups configured in your identity provider (IdP) if you want to leverage automatic user provisioning and deprovisioning from your apps based on group assignment events. For more information, read the articles available in the [Managing users via an IdP and business hub](https://help.cerby.com/setup-and-admin/business-hubs/managing-users-and-assets-via-a-business-hub) collection in the Cerby Help Center
* An automation account, meaning an active user account with a native **Administrator** role in Appsmith to be used as a service account. For instructions and recommendations on how to create and configure this account, read the article [Create a service account for your business hub](/setup-and-admin/business-hubs/connecting-your-apps/create-a-service-account-for-your-business-hub)
* The user management and login method for your business hub identified to select the corresponding option when connecting your app. For more information, read the **User management and login method** section of the article [Explore Business Hubs](https://help.cerby.com/setup-and-admin/business-hubs/business-hub-catalog)
* A Business unique identifier. You can find the ID in the address bar after logging in to Appsmith, and selecting the corresponding workspace from the left menu. The ID is displayed in the address bar as part of the URL. For example, **`01abc23456d78e9f0gh1i234`** in **`https://app.appsmith.com/applications?workspaceId=01abc23456d78e9f0gh1i234`.**
***
## Connect a business hub for Appsmith
To connect a business hub for Appsmith, you must complete the following main steps from the Cerby web app dashboard:
1. [Add a business hub and connect it to Appsmith](#id-1.-add-a-business-hub-and-connect-it-to-appsmith)
2. [Check for updates to import users and roles to Cerby](#id-2.-check-for-updates-to-import-users-and-roles-to-cerby)
3. [Connect your Appsmith user account to the business hub](#id-3.-connect-your-appsmith-user-account-to-the-business-hub)
4. [Manage unmatched users](#id-4.-manage-unmatched-users)
The following sections describe each main step.
### 1. Add a business hub and connect it to Appsmith
To add a business hub and connect it to Appsmith, you must complete the following steps:
1. Log in to your corresponding [Cerby](https://app.cerby.com/) workspace.
2. Select the **Business Hubs** option from the left menu. The **Business Hubs** page is displayed.
3. Click the **Connect Business Hub** button located at the top-right corner of the page. The **Connect your Business Hubs to Cerby** dialog box is displayed. **TIP:** Select the **Don’t show this again** option to skip this step the next time you connect a new business hub.
4. Click the **Get started** button. A wizard is displayed on the **Select app** page.
5. Select **Appsmith Hub** from the catalog. The **Enter app details** page is displayed on the wizard.
6. Enter and select your app information in the corresponding fields:
* **Label in Cerby:** It is the name to assign to your business hub in Cerby, and it will be displayed on the business hub card.
* **Business unique identifier:** It is the unique identifier of your business or organization in **Appsmith Hub**. For instructions on how to find it, read the [Requirements](#requirements) section.
* **User management and login method:** It is the way your users log in to the app and determines whether they must save their login credentials as a Cerby account connected to the business hub.
* Select the **Single sign-on (SSO)** option because access must be managed by your IdP, and users log in with SSO authentication. They are not asked to save their credentials in Cerby.
**IMPORTANT:** The **Username and password** option\*\*\*\* is not currently available for Appsmith.
7. Click the **Next** button. The **Select automation account** page is displayed with a list of existing Appsmith accounts.
8. Select the automation account you have previously added to Cerby, as described in the [Requirements](#requirements) section. **NOTE:** If you don’t have an automation account, you are prompted to add it. Make sure you read Cerby’s recommendations on how to configure it in the article [Create a service account for your business hub](/setup-and-admin/business-hubs/connecting-your-apps/create-a-service-account-for-your-business-hub). You may need to add the account first and then add the business hub.
9. Click the **Connect app** button. The wizard closes, and a success message box is displayed. The corresponding business hub is also displayed on the **Business Hubs** page.
The next step is [2. Check for updates to import users and roles to Cerby](#id-2.-check-for-updates-to-import-users-and-roles-to-cerby).
### 2. Check for updates to import users and roles to Cerby
To check for updates in your app to identify and import users and roles to Cerby, you must complete the following steps:
1. Select the **Business Hubs** option from the left menu. The **Business Hubs** page is displayed.
2. Click the **More options** (...) icon of the corresponding business hub card. A drop-down menu is displayed.
3. Select the **Settings** option from the menu. The business hub details page is displayed with the **Settings** tab activated.
4. Click the **Check for updates** button located at the top right of the page. A message box is displayed with information about the process. **NOTE:** The check and import process may take a few minutes depending on the number of users, and because Cerby automatically matches users to their corresponding Cerby user account.
5. Confirm that the automated task to check for updates has the “Completed” status by performing any of the following actions:
* Click the **More details** button from the message box.
* Select the **Automation** option from the left menu to open the **Automation** page with a list of automated tasks and their status.
{% hint style="info" %}
**NOTE:** Cerby automatically performs daily checks for updates for all business hubs, but you can trigger them manually, as described in this section. For more instructions, read the article [Sync your app users with your business hub](/setup-and-admin/business-hubs/managing-users-and-assets-via-a-business-hub/sync-your-business-hub-with-your-external-app).
{% endhint %}
The next step is [3. Connect your Appsmith user account to the business hub](#id-3.-connect-your-appsmith-user-account-to-the-business-hub).
### 3. Connect your Appsmith user account to the business hub
To connect your Appsmith user account to the business hub so Cerby can manage and protect it, you must complete the following steps:
1. Select the **Accounts** option from the left menu. The **Accounts** page is displayed.
2. Click the **Log in** button of the corresponding Appsmith Hub account card. The **Connect your Appsmith Hub Account** dialog box is displayed.
3. Enter the login credentials of your **Appsmith** user account.
4. Click the **Connect account** button. The dialog box closes, and a success message box and a new account card are displayed.
The next step is [4. Manage unmatched users](#id-4.-manage-unmatched-users).
### 4. Manage unmatched users
During a check for updates, Cerby automatically matches app members to the Cerby user accounts that correspond to their email addresses, including existing [guest users](https://help.cerby.com/getting-started/concepts/user-management/guest-users) and [local partners](https://help.cerby.com/getting-started/concepts/user-management/partners#h-7e4add33a2). Manual matching is required when apps don't provide email addresses and for app members using personal or external accounts that couldn’t be identified or are not in the corporate directory.
To view the status of the imported app members, you must complete the following steps:
1. Select the **Business Hubs** option from the left menu. The **Business Hubs** page is displayed.
2. Click the **More options** (...) icon of the corresponding business hub card. A drop-down menu is displayed.
3. Select the **View Members** option from the menu. The business hub details page is displayed with the **Members** tab activated. App members are displayed in the following tabs of the **User Overview** section:
* **Unmatched users:** This tab displays the users who were not automatically matched.
* **Onboarded users:** This tab displays the users matched to their Cerby user account.
* **Guest users:** This tab displays the users who were matched to an existing Cerby user account but it doesn’t exist in the corporate directory, such as external collaborators.
For unmatched users, you can perform one of the following actions:
* [Match users](#match-users)
* [Remove unmatched users](#remove-unmatched-users)
* [Exempt unmatched users](#exempt-unmatched-users)
The following sections describe each action.
#### Match users
To match users, you must complete the following steps from the **Unmatched users** tab of the business hub details page:
1. Click the **Match user** button of the corresponding user. The **Match user** dialog box is displayed.
2. Enter the username or email address of the user you want to match and invite in the **Match with** field. The user is displayed on a list.
3. Select the user from the list.
4. Click the **Next** button. The **Select Cerby role** dialog box is displayed.
5. Select the role to assign to the user on the business hub **Cerby role** drop-down menu:
* **Owner:** This role enables sharing access and managing business hub settings in Cerby.
* **Collaborator:** This role enables only logging in to the app from Cerby.
6. Click the **Match user** button. The dialog box closes, and a success message box is displayed. The user is moved to the **Onboarded users** tab.
#### Remove unmatched users
To remove unmatched users, you must complete the following steps from the **Unmatched users** tab of the business hub details page:
{% hint style="danger" %}
**IMPORTANT:** When removing an unmatched user, Cerby performs an automated task to revoke the user’s seat and permissions in Appsmith.
{% endhint %}
1. Click the **More options** (...) icon of the corresponding user. A drop-down menu is displayed.
2. Select the **Remove user** option from the menu. The **Remove user?** dialog box is displayed.
3. Click the **Remove user** button. The dialog box closes, and a success message box is displayed. The user is removed from the app via an automated task.
#### Exempt unmatched users
Exempted users keep their user accounts or seats active in your app, but you cannot manage them through Cerby.
To exempt unmatched users, you must complete the following steps from the **Unmatched users** tab of the business hub details page:
1. Click the **More options** (...) icon of the corresponding user. A drop-down menu is displayed.
2. Select the **Exempt user** option from the menu. The exempt user dialog box is displayed.
3. Enter a reason for exempting the user in the **Provide a reason** field.
4. Click the **Exempt member** button. The dialog box closes, and a success message box is displayed. The user is moved to the **Exempted users** tab.
***
## Use your business hub
The following are the supported features of business hubs you can use:
* [Join the external app and set up your business hub access](https://help.cerby.com/cerby-web-app/business-hubs/join-your-external-app-and-set-up-your-business-hub-access)
* [Add users to your app via a business hub](/setup-and-admin/business-hubs/managing-users-and-assets-via-a-business-hub/add-users-and-teams-to-your-apps-via-a-business-hub)
* [Provision users to your apps via an IdP and business hub](/setup-and-admin/business-hubs/managing-users-and-assets-via-a-business-hub/provision-users-to-your-apps-via-an-idp-and-business-hub)
* [Remove users from your app via a business hub](/setup-and-admin/business-hubs/managing-users-and-assets-via-a-business-hub/remove-users-from-your-app-via-a-business-hub)
* [Remove teams from your app via a business hub](/setup-and-admin/business-hubs/managing-users-and-assets-via-a-business-hub/remove-teams-from-your-app-via-a-business-hub)
* [Deprovision users from your apps via an IdP and business hub](/setup-and-admin/business-hubs/managing-users-and-assets-via-a-business-hub/deprovision-users-from-your-apps-via-an-idp-and-business-hub)
* [Update user roles in your app via a business hub](/setup-and-admin/business-hubs/managing-users-and-assets-via-a-business-hub/update-user-roles-in-your-app-via-a-business-hub)
* [Update team member roles in your app via a business hub](/setup-and-admin/business-hubs/managing-users-and-assets-via-a-business-hub/update-team-member-roles-in-your-app-via-a-business-hub)
* [Update user roles in your apps via an IdP and business hub](/setup-and-admin/business-hubs/managing-users-and-assets-via-a-business-hub/update-user-roles-in-your-apps-via-an-idp-and-business-hub)
* [Sync your app users with your business hub](/setup-and-admin/business-hubs/managing-users-and-assets-via-a-business-hub/sync-your-business-hub-with-your-external-app)
* [Log in to your app via a business hub](https://help.cerby.com/cerby-web-app/business-hubs/log-in-to-your-app)
* [Track the activity of business hub users](/setup-and-admin/business-hubs/managing-users-and-assets-via-a-business-hub/track-activity-on-app-members-user-accounts)
* [Remove a business hub](/setup-and-admin/business-hubs/managing-your-business-hubs/remove-a-business-hub)
# Connect a business hub for Artisan
This article describes how to connect a business hub to centrally manage the users of Artisan from Cerby.
{% hint style="info" %}
**Who can use this feature?**
* Workspace **Owners**, **Super Admins**, **Admins**, and **Users**
* Only supported using the Cerby web app
{% endhint %}
As a user with any workspace role in Cerby, except **Guest User** and **Login-Only**, you can connect a business hub integration to centrally manage the users of Artisan.
When you connect the business hub, you become its **Owner**, and you can perform the following user and access management tasks through automated tasks executed by the Cerby agent:
* Check for updates
* Add users
* Remove users
{% hint style="success" %}
**TIP:** For more details about the automated tasks of a business hub, how it works, and the supported apps, read the article [Explore Business Hubs](https://help.cerby.com/setup-and-admin/business-hubs/business-hub-catalog).
{% endhint %}
{% hint style="info" %}
**NOTE:** The automated task to update user roles is not available for this business hub.
{% endhint %}
This article provides instructions on how to connect a business hub for Artisan. For other app-specific articles and videos, review the [Connecting business hubs for your apps](https://help.cerby.com/setup-and-admin/business-hubs/connecting-your-apps) and [Connecting business hubs for your paid social apps](https://help.cerby.com/setup-and-admin/business-hubs/connecting-your-paid-social-apps) collections in the Cerby Help Center.
***
## Requirements
The following are the requirements to connect a business hub:
* A Cerby workspace
* A Cerby user account with the **Owner**, **Super Admin**, **Admin**, or **User** role
* Groups configured in your identity provider (IdP) if you want to leverage automatic user provisioning and deprovisioning from your apps based on group assignment events. For more information, read the articles available in the [Managing users via an IdP and business hub](https://help.cerby.com/setup-and-admin/business-hubs/managing-users-and-assets-via-a-business-hub) collection in the Cerby Help Center
* An automation account, meaning an active user account with a native **Admin** role in Artisan to be used as a service account. For instructions and recommendations on how to create and configure this account, read the article [Create a service account for your business hub](/setup-and-admin/business-hubs/connecting-your-apps/create-a-service-account-for-your-business-hub)
* The user management and login method for your business hub identified to select the corresponding option when connecting your app. For more information, read the **User management and login method** section of the article [Explore Business Hubs](https://help.cerby.com/setup-and-admin/business-hubs/business-hub-catalog)
***
## Connect a business hub for Artisan
To connect a business hub for Artisan, you must complete the following main steps from the Cerby web app dashboard:
1. [Add a business hub and connect it to Artisan](#id-1.-add-a-business-hub-and-connect-it-to-artisan)
2. [Check for updates to import users and roles to Cerby](#id-2.-check-for-updates-to-import-users-and-roles-to-cerby)
3. [Connect your Artisan user account to the business hub](#id-3.-connect-your-artisan-user-account-to-the-business-hub)
4. [Manage unmatched users](#id-4.-manage-unmatched-users)
The following sections describe each main step.
### 1. Add a business hub and connect it to Artisan
To add a business hub and connect it to Artisan, you must complete the following steps:
1. Log in to your corresponding [Cerby](https://app.cerby.com/) workspace.
2. Select the **Business Hubs** option from the left menu. The **Business Hubs** page is displayed.
3. Click the **Connect Business Hub** button located at the top-right corner of the page. The **Connect your Business Hubs to Cerby** dialog box is displayed. **TIP:** Select the **Don’t show this again** option to skip this step the next time you connect a new business hub.
4. Click the **Get started** button. A wizard is displayed on the **Select app** page.
5. Select **Artisan Hub** from the catalog. The **Enter app details** page is displayed on the wizard.
6. Enter and select your app information in the corresponding fields:
* **Label in Cerby:** It is the name to assign to your business hub in Cerby, and it will be displayed on the business hub card.
* **Business unique identifier:** It is a unique identifier that differentiates your business hub in Cerby from others for the same app. You can assign an alphanumeric value between 3 and 30 characters without symbols or special characters.
* **User management and login method:** It is the way your users log in to the app and determines whether they must save their login credentials as a Cerby account connected to the business hub.
1. Select the **Single sign-on (SSO)** option because access must be managed by your IdP, and users log in with SSO authentication. They are not asked to save their credentials in Cerby. **IMPORTANT** : The **Username and password** option is not supported for Artisan.
7. Click the **Next** button. The **Select automation account** page is displayed with a list of existing Artisan accounts.
8. Select the automation account you have previously added to Cerby, as described in the [Requirements](#requirements) section. **NOTE:** If you don’t have an automation account, you are prompted to add it. Make sure you read Cerby’s recommendations on how to configure it in the article [Create a service account for your business hub](https://help.cerby.com/setup-and-admin/business-hubs/connecting-your-apps/create-a-service-account-for-your-business-hub). You may need to add the account first and then add the business hub.
9. Click the **Connect app** button. The wizard closes, and a success message box is displayed. The corresponding business hub is also displayed on the **Business Hubs** page
The next step is [2. Check for updates to import users and roles to Cerby](/setup-and-admin/business-hubs/connecting-your-apps/connect-a-business-hub-for-your-app#h-9c6531cf9a).
### 2. Check for updates to import users and roles to Cerby
To check for updates in your app to identify and import users and roles to Cerby, you must complete the following steps:
1. Select the **Business Hubs** option from the left menu. The **Business Hubs** page is displayed.
2. Click the **More options** (...) icon of the corresponding business hub card. A drop-down menu is displayed.
3. Select the **Settings** option from the menu. The business hub details page is displayed with the **Settings** tab activated.
4. Click the **Sync** button located at the top right of the page. A message box is displayed with information about the process. **NOTE:** The check and import process may take a few minutes, depending on the number of users, and because Cerby automatically matches users to their corresponding Cerby user account.
5. Confirm that the automated task to check for updates has the “Completed” status by performing any of the following actions:
* Click the **More details** button in the message box.
* Select the **Automation** option from the left menu to open the **Automation** page with a list of automated tasks and their status.
{% hint style="info" %}
**NOTE:** Cerby automatically performs daily checks for updates for all business hubs, but you can trigger them manually, as described in this section. For more instructions, read the article [Sync your app users with your business hub](/setup-and-admin/business-hubs/managing-users-and-assets-via-a-business-hub/sync-your-business-hub-with-your-external-app).
{% endhint %}
The next step is [3. Connect your Artisan user account to the business hub](#id-3.-connect-your-artisan-user-account-to-the-business-hub).
### 3. Connect your Artisan user account to the business hub
To connect your Artisan user account to the business hub so Cerby can manage and protect it, you must complete the following steps:
1. Select the **Accounts** option from the left menu. The **All accounts** page is displayed.
2. Click the **Log in** button of the corresponding Artisan Hub account card. The **Connect your Artisan Hub Account** dialog box is displayed.
3. Enter the login credentials of your **Artisan** user account.
4. Click the **Connect account** button. The dialog box closes, and a success message box and a new account card are displayed.
The next step is [4. Manage unmatched users](#id-4.-manage-unmatched-users).
### 4. Manage unmatched users
During a check for updates, Cerby automatically matches app members to the Cerby user accounts that correspond to their email addresses, including existing [guest users](https://help.cerby.com/getting-started/concepts/user-management/guest-users) and [local partners](https://help.cerby.com/getting-started/concepts/user-management/partners#h-7e4add33a2). Manual matching is required when apps don't provide email addresses and for app members using personal or external accounts that couldn’t be identified or are not in the corporate directory.
To view the status of the imported app members, you must complete the following steps:
1. Select the **Business Hubs** option from the left menu. The **Business Hubs** page is displayed.
2. Click the **More options** (...) icon of the corresponding business hub card. A drop-down menu is displayed.
3. Select the **View Members** option from the menu. The business hub details page is displayed with the **Members** tab activated. App members are displayed in the following tabs of the **User Overview** section:
* **Unmatched users:** This tab displays the users who were not automatically matched.
* **Onboarded users:** This tab displays the users matched to their Cerby user account.
* **Guest users:** This tab displays the users who were matched to an existing Cerby user account, but it doesn’t exist in the corporate directory, such as external collaborators.
For unmatched users, you can perform one of the following actions:
* [Match users](#match-users)
* [Remove unmatched users](#remove-unmatched-users)
* [Exempt unmatched users](#exempt-unmatched-users)
The following sections describe each action.
#### Match users
To match users, you must complete the following steps from the **Unmatched users** tab of the business hub details page:
1. Click the **Match user** button of the corresponding user. The **Match user** dialog box is displayed.
2. Enter the username or email address of the user you want to match and invite in the **Match with** field. The user is displayed on a list.
3. Select the user from the list.
4. Click the **Next** button. The **Select Cerby role** dialog box is displayed.
5. Select the role to assign to the user on the business hub **Cerby role** drop-down menu:
* **Owner:** This role enables sharing access and managing business hub settings in Cerby.
* **Collaborator:** This role enables only logging in to the app from Cerby.
6. Click the **Match user** button. The dialog box closes, and a success message box is displayed. The user is moved to the **Onboarded users** tab.
#### Remove unmatched users
To remove unmatched users, you must complete the following steps from the **Unmatched users** tab of the business hub details page:
{% hint style="danger" %}
**IMPORTANT:** When removing an unmatched user, Cerby performs an automated task to revoke the user’s seat and permissions in Artisan.
{% endhint %}
1. Click the **More options** (...) icon of the corresponding user. A drop-down menu is displayed.
2. Select the **Remove user** option from the list. The **Remove user?** dialog box is displayed.
3. Click the **Remove user** button. The dialog box closes, and a success message box is displayed. The user is removed from the app via an automated task.
#### Exempt unmatched users
Exempted users keep their user accounts or seats active in your app, but you cannot manage them through Cerby.
To exempt unmatched users, you must complete the following steps from the **Unmatched users** tab of the business hub details page:
1. Click the **More options** (...) icon of the corresponding user. A drop-down list is displayed.
2. Select the **Exempt user** option from the list. The exempt user dialog box is displayed.
3. Enter a reason for exempting the user in the **Provide a reason** field.
4. Click the **Exempt member** button. The dialog box closes, and a success message box is displayed. The user is moved to the **Exempted users** tab.
***
## Use your business hub
The following are the supported features of business hubs you can use:
* [Join the external app and set up your business hub access](https://help.cerby.com/cerby-web-app/business-hubs/join-your-external-app-and-set-up-your-business-hub-access)
* [Add users to your app via a business hub](/setup-and-admin/business-hubs/managing-users-and-assets-via-a-business-hub/add-users-and-teams-to-your-apps-via-a-business-hub)
* [Provision users to your apps via an IdP and business hub](/setup-and-admin/business-hubs/managing-users-and-assets-via-a-business-hub/provision-users-to-your-apps-via-an-idp-and-business-hub)
* [Remove users from your app via a business hub](/setup-and-admin/business-hubs/managing-users-and-assets-via-a-business-hub/remove-users-from-your-app-via-a-business-hub)
* [Remove teams from your app via a business hub](/setup-and-admin/business-hubs/managing-users-and-assets-via-a-business-hub/remove-teams-from-your-app-via-a-business-hub)
* [Deprovision users from your apps via an IdP and business hub](/setup-and-admin/business-hubs/managing-users-and-assets-via-a-business-hub/deprovision-users-from-your-apps-via-an-idp-and-business-hub)
* [Sync your app users with your business hub](/setup-and-admin/business-hubs/managing-users-and-assets-via-a-business-hub/sync-your-business-hub-with-your-external-app)
* [Log in to your app via a business hub](https://help.cerby.com/cerby-web-app/business-hubs/log-in-to-your-app)
* [Track the activity of business hub users](/setup-and-admin/business-hubs/managing-users-and-assets-via-a-business-hub/track-activity-on-app-members-user-accounts)
* [Remove a business hub](/setup-and-admin/business-hubs/managing-your-business-hubs/remove-a-business-hub)
# Connect a business hub for Artlist
This article describes how to connect a business hub to centrally manage the users of Artlist from Cerby.
{% hint style="info" %}
**Who can use this feature?**
* Workspace **Owners**, **Super Admins**, **Admins**, and **Users**
* Only supported using the Cerby web app
{% endhint %}
As a user with any workspace role in Cerby, except **Guest User** and **Login-Only**, you can connect a business hub integration to centrally manage the users of Artlist.
When you connect the business hub, you become its **Owner**, and you can perform the following user and access management tasks through automated tasks or API calls executed by the Cerby agent:
* Check for updates
* Invite app members
* Update app members’ roles
* Remove app members
{% hint style="success" %}
**TIP:** For more details about the automated tasks of a business hub, how it works, and the supported apps, read the article [Explore Apps](https://help.cerby.com/setup-and-admin/business-hubs/business-hub-catalog).
{% endhint %}
This article provides instructions on how to connect a business hub for Artlist. For other app-specific articles and videos, review the [Connecting your business hubs](https://help.cerby.com/setup-and-admin/business-hubs/connecting-your-apps) collection in the Cerby Help Center.
***
## Requirements
The following are the requirements to connect a business hub:
* A Cerby workspace
* A Cerby user account with the **Owner**, **Super Admin**, **Admin**, or **User** role
* A collaboration space in Artlist
* Groups configured in your identity provider (IdP) if you want to leverage automatic user provisioning and deprovisioning from your apps based on group assignment events. For more information, read the article [Provision users to your apps via an IdP and business hub](https://help.cerby.com/setup-and-admin/business-hubs/managing-users-and-assets-via-a-business-hub/provision-users-to-your-apps-via-an-idp-and-business-hub)
* An automation account, meaning an active user account with a native **Admin** role in Artlist to be used as a service account. For instructions and recommendations on how to create and configure this account, read the article [Create a service account for your business hub](https://help.cerby.com/setup-and-admin/business-hubs/connecting-your-apps/create-a-service-account-for-your-business-hub)
* The user management and login method for your business hub identified to select the corresponding option when connecting your app. For more information, read the **User management and login method** section of the article [Explore Apps](https://help.cerby.com/setup-and-admin/business-hubs/business-hub-catalog)
***
## Connect a business hub for Artlist
To connect a business hub for Artlist, you must complete the following main steps from the Cerby web app dashboard:
1. [Add a business hub and connect it to Artlist](#id-1.-add-a-business-hub-and-connect-it-to-artlist)
2. [Check for updates to import users and roles to Cerby](#id-2.-check-for-updates-to-import-users-and-roles-to-cerby)
3. [Connect your Artlist user account to the business hub](#id-3.-connect-your-artlist-user-account-to-the-business-hub)
4. [Manage unmatched users](#id-4.-manage-unmatched-users)
The following sections describe each main step.
### 1. Add a business hub and connect it to Artlist
To add a business hub and connect it to Artlist, you must complete the following steps:
1. Log in to your corresponding [Cerby](https://app.cerby.com/) workspace.
2. Select the **Business Hubs** option from the left navigation drawer. The **Business Hubs** page is displayed.
3. Click the **Connect Business Hub** button located at the top-right corner of the page. The **Connect your Business Hubs to Cerby** dialog box is displayed. **TIP:** Select the **Don’t show this again** option to skip this step the next time you connect a new business hub.
4. Click the **Get started** button. A wizard is displayed on the **Select app** page.
5. Select **Artlist Hub** from the catalog. The **Enter app details** page is displayed on the wizard.
6. Enter and select your app information in the corresponding fields:
* **Label in Cerby:** It is the name to assign to your business hub in Cerby, and it will be displayed on the business hub card.
* **Internal Unique Identifier:** It is a unique identifier that differentiates your business hub in Cerby from others for the same app. You can assign an alphanumeric value between 3 and 30 characters without symbols or special characters.
* **User management and login method:** It is the way your users log in to the app and determines whether they must save their login credentials as a Cerby account connected to the business hub. You must select one of the following methods:
* **Single sign-on (SSO):** Access is managed by your identity provider, and users log in with SSO authentication. They are not asked to save their credentials in Cerby.
* **Username and password:** Cerby manages account security and access, and users log in with their credentials after saving them in Cerby.
7. Click the **Next** button. The **Select automation account** page is displayed with a list of existing Artlist accounts.
8. Select the automation account you have previously added to Cerby, as described in the [Requirements](#requirements) section. **NOTE:** If you don’t have an automation account, you are prompted to add it. Make sure you read Cerby’s recommendations on how to configure it in the article [Create a service account for your business hub](https://help.cerby.com/setup-and-admin/business-hubs/connecting-your-apps/create-a-service-account-for-your-business-hub). You may need to add the account first and then add the business hub.
9. Click the **Connect app** button. The wizard closes, and a success message box is displayed. The corresponding business hub is also displayed on the **Business Hubs** page.
The next step is [2. Check for updates to import users and roles to Cerby](#id-2.-check-for-updates-to-import-users-and-roles-to-cerby).
### 2. Check for updates to import users and roles to Cerby
To check for updates in your app to identify and import users and roles to Cerby, you must complete the following steps:
1. Select the **Business Hubs** option from the left navigation drawer. The **Business Hubs** page is displayed.
2. Click the **Settings** (
) icon of the corresponding business hub card. The business hub details page is displayed with the **Settings** tab activated.
3. Click the **Check for updates** button located at the top right of the page. A message box is displayed with information about the process. **NOTE:** The check and import process may take a few minutes depending on the number of users, and because Cerby automatically matches users to their corresponding Cerby user account.
4. Confirm that the automated task to check for updates has the “Completed” status by performing any of the following actions:
* Click the **More details** button from the message box.
* Select the **Automation** option from the left navigation drawer to open the **Automation** page with a list of automated tasks and their status.
{% hint style="info" %}
**NOTE:** Cerby automatically performs daily checks for updates for all business hubs, but you can trigger them manually, as described in this section. When a user is deprovisioned from an IdP and a check for updates is performed, Cerby generates a report and sends business hub **Owners** an email to confirm their removal from the app. For more instructions, read the article [Check for updates in your app and apply report](/setup-and-admin/business-hubs/managing-users-and-assets-via-a-business-hub/sync-your-business-hub-with-your-external-app).
{% endhint %}
The next step is [3. Connect your Alta user account to the business hub](#id-3.-connect-your-alta-user-account-to-the-business-hub).
### 3. Connect your Alta user account to the business hub
To connect your Alta user account to the business hub so Cerby can manage and protect it, you must complete the following steps:
1. Select the **Accounts** option from the left navigation drawer. The **Accounts** page is displayed.
2. Click the **Log in** button of the corresponding Alta Hub account card. The **Connect your Alta Hub Account** dialog box is displayed.
3. Enter the login credentials of your **Alta** user account.
4. Click the **Connect account** button. The dialog box closes, and a success message box and a new account card are displayed.
The next step is [4. Manage unmatched users](#id-4.-manage-unmatched-users).
### 4. Manage unmatched users
During a check for updates, Cerby automatically matches app members to the Cerby user accounts that correspond to their email addresses, including existing [guest users](https://help.cerby.com/getting-started/concepts/user-management/guest-users) and [local partners](https://help.cerby.com/getting-started/concepts/user-management/partners#h-7e4add33a2). Manual matching is required when apps don't provide email addresses and for app members using personal or external accounts that couldn’t be identified or are not in the corporate directory.
To view the status of the imported app members, you must complete the following steps:
1. Select the **Business Hubs** option from the left navigation drawer. The **Business Hubs** page is displayed.
2. Click the **More options** (...) icon of the corresponding business hub card. A drop-down list is displayed.
3. Select the **View Members** option from the list. The business hub details page is displayed with the **Members** tab activated. App members are displayed in the following tabs of the **User Overview** section:
* **Unmatched users:** This tab displays the users who were not automatically matched.
* **Onboarded users:** This tab displays the users matched to their Cerby user account.
* **Guest users:** This tab displays the users who were matched to an existing Cerby user account but it doesn’t exist in the corporate directory, such as external collaborators.
For unmatched users, you can perform one of the following actions:
* [Match users](#match-users)
* [Remove unmatched users](#remove-unmatched-users)
* [Exempt unmatched users](#exempt-unmatched-users)
The following sections describe each action.
#### Match users
To match users, you must complete the following steps from the **Unmatched users** tab of the business hub details page:
1. Click the **Match user** button of the corresponding user. The **Match user** dialog box is displayed.
2. Enter the username or email address of the user you want to match and invite in the **Match with** field. The user is displayed on a list.
3. Select the user from the list.
4. Click the **Next** button. The **Select Cerby role** dialog box is displayed.
5. Select the role to assign to the user on the business hub **Cerby role** drop-down list:
* **Owner:** This role enables sharing access and managing business hub settings in Cerby.
* **Collaborator:** This role enables only logging in to the app from Cerby.
6. Click the **Match user** button. The dialog box closes, and a success message box is displayed. The user is moved to the **Onboarded users** tab.
#### Remove unmatched users
To remove unmatched users, you must complete the following steps from the **Unmatched users** tab of the business hub details page:
{% hint style="danger" %}
**IMPORTANT:** When removing an unmatched user, Cerby performs an automated task to revoke the user’s seat and permissions in Alta.
{% endhint %}
1. Click the **More options** (...) icon of the corresponding user. A drop-down list is displayed.
2. Select the **Remove user** option from the list. The **Remove user?** dialog box is displayed.
3. Click the **Remove user** button. The dialog box closes, and a success message box is displayed. The user is removed from the app via an automated task.
#### Exempt unmatched users
Exempted users keep their user accounts or seats active in your app, but you cannot manage them through Cerby.
To exempt unmatched users, you must complete the following steps from the **Unmatched users** tab of the business hub details page:
1. Click the **More options** (...) icon of the corresponding user. A drop-down list is displayed.
2. Select the **Exempt user** option from the list. The exempt user dialog box is displayed.
3. Enter a reason for exempting the user in the **Provide a reason** field.
4. Click the **Exempt member** button. The dialog box closes, and a success message box is displayed. The user is moved to the **Exempted users** tab.
***
## Use your business hub
The following are the supported features of business hubs you can use:
* [Join the App and connect it to Cerby](https://help.cerby.com/cerby-web-app/business-hubs/join-your-external-app-and-set-up-your-business-hub-access)
* [Invite new app members](/setup-and-admin/business-hubs/managing-users-and-assets-via-a-business-hub/add-users-and-teams-to-your-apps-via-a-business-hub)
* [Remove app members](/setup-and-admin/business-hubs/managing-users-and-assets-via-a-business-hub/remove-users-from-your-app-via-a-business-hub)
* [Provision users to your apps via an IdP and business hub](https://help.cerby.com/setup-and-admin/business-hubs/managing-users-and-assets-via-a-business-hub/provision-users-to-your-apps-via-an-idp-and-business-hub)
* [Update the app members’ roles](/setup-and-admin/business-hubs/managing-users-and-assets-via-a-business-hub/update-user-roles-in-your-app-via-a-business-hub)
* [Check for updates in your app and apply report](/setup-and-admin/business-hubs/managing-users-and-assets-via-a-business-hub/sync-your-business-hub-with-your-external-app)
* [Re-assign the app members’ user accounts](https://github.com/cerbyinc/help-center/tree/main/.uncategorized/unpublished-deprecated-re-assign-the-app-members-user-accounts.md)
* [Log in to your app](https://help.cerby.com/cerby-web-app/business-hubs/log-in-to-your-app)
* [Track activity on app members’ user accounts](/setup-and-admin/business-hubs/managing-users-and-assets-via-a-business-hub/track-activity-on-app-members-user-accounts)
* [Remove an App](/setup-and-admin/business-hubs/managing-your-business-hubs/remove-a-business-hub)
# Connect a business hub for American Express Merchant Account
This article describes how to connect a business hub to centrally manage the users of American Express Merchant Account from Cerby.
{% hint style="info" %}
**Who can use this feature?**
* Workspace **Owners**, **Super Admins**, **Admins**, and **Users**
* Only supported using the Cerby web app
{% endhint %}
As a user with any workspace role in Cerby, except **Guest User** and **Login-Only**, you can connect a business hub integration to centrally manage the users of American Express.
When you connect the business hub, you become its **Owner**, and you can perform the following user and access management tasks through automated tasks executed by the Cerby agent:
* Check for updates
* Add users
{% hint style="success" %}
**TIP:** For more details about the automated tasks of a business hub, how it works, and the supported apps, read the article [Explore Business Hubs](https://help.cerby.com/setup-and-admin/business-hubs/business-hub-catalog).
{% endhint %}
{% hint style="info" %}
**NOTES:**
* The automated tasks to **update user roles** and **remove users** are not available for this business hub. These actions are managed exclusively through Bill.com’s support team.
* The task to **add users** to the American Express business hub automates the creation and verification of the user’s merchant account in American Express using the **Merchant ID**, **ABA Account Number**, and **DDA Number** provided by Bill.com.
{% endhint %}
This article provides instructions on how to connect a business hub for American Express. For other app-specific articles and videos, review the [Connecting business hubs for your apps](https://help.cerby.com/setup-and-admin/business-hubs/connecting-your-apps) and [Connecting business hubs for your paid social apps](https://help.cerby.com/setup-and-admin/business-hubs/connecting-your-paid-social-apps) collections in the Cerby Help Center.
***
## Requirements
The following are the requirements to connect a business hub:
* A Cerby workspace
* A Cerby user account with the **Owner**, **Super Admin**, **Admin**, or **User** role
* Groups configured in your identity provider (IdP) if you want to leverage automatic user provisioning and deprovisioning from your apps based on group assignment events. For more information, read the articles available in the [Managing users via an IdP and business hub](https://help.cerby.com/setup-and-admin/business-hubs/managing-users-and-assets-via-a-business-hub) collection in the Cerby Help Center
* An automation account, meaning an active merchant account with enough permissions to manage users, groups, and roles in American Express, to be used as a service account. For instructions and recommendations on how to create and configure this account, read the article [Create a service account for your business hub](/setup-and-admin/business-hubs/connecting-your-apps/create-a-service-account-for-your-business-hub)
***
## Connect a business hub for American Express
To connect a business hub for American Express, you must complete the following main steps from the Cerby web app dashboard:
1. [Add a business hub and connect it to American Express](#id-1.-add-a-business-hub-and-connect-it-to-american-express)
2. [Check for updates to import users and roles to Cerby](#id-2.-check-for-updates-to-import-users-and-roles-to-cerby)
3. [Connect your American Express user account to the business hub](#id-3.-connect-your-american-express-user-account-to-the-business-hub)
4. [Manage unmatched users](#id-4.-manage-unmatched-users)
The following sections describe each main step.
### 1. Add a business hub and connect it to American Express
To add a business hub and connect it to American Express, you must complete the following steps:
1. Log in to your corresponding [Cerby](https://app.cerby.com/) workspace.
2. Select the **Business Hubs** option from the left menu. The **Business Hubs** page is displayed.
3. Click the **Connect Business Hub** button located at the top-right corner of the page. The **Connect your Business Hubs to Cerby** dialog box is displayed. **TIP:** Select the **Don’t show this again** option to skip this step the next time you connect a new business hub.
4. Click the **Get started** button. A wizard is displayed on the **Select app** page.
5. Select **American Express Hub** from the catalog. The **Enter app details** page is displayed on the wizard.
6. Enter and select your app information in the corresponding fields:
* **Label in Cerby:** It is the name to assign to your business hub in Cerby, and it will be displayed on the business hub card.
* **User management and login method:** It is the way your users log in to the app and determines whether they must save their login credentials as a Cerby account connected to the business hub.
1. Select the **Username and password** option because account security and access are managed by Cerby, and users log in with their credentials after saving them in Cerby
**IMPORTANT:** The **Single sign-on (SSO)** option is not supported for American Express.
7. Click the **Next** button. The **Select automation account** page is displayed with a list of existing American Express accounts.
8. Select the automation account you have previously added to Cerby, as described in the [Requirements](#requirements) section. **NOTE:** If you don’t have an automation account, you are prompted to add it. Make sure you read Cerby’s recommendations on how to configure it in the article [Create a service account for your business hub](https://help.cerby.com/setup-and-admin/business-hubs/connecting-your-apps/create-a-service-account-for-your-business-hub). You may need to add the account first and then add the business hub.
9. Click the **Connect app** button. The wizard closes, and a success message box is displayed. The corresponding business hub is also displayed on the **Business Hubs** page
The next step is [2. Check for updates to import users and roles to Cerby](/setup-and-admin/business-hubs/connecting-your-apps/connect-a-business-hub-for-your-app#h-9c6531cf9a).
### 2. Check for updates to import users and roles to Cerby
To check for updates in your app to identify and import users and roles to Cerby, you must complete the following steps:
1. Select the **Business Hubs** option from the left menu. The **Business Hubs** page is displayed.
2. Click the **More options** (...) icon of the corresponding business hub card. A drop-down menu is displayed.
3. Select the **Settings** option from the menu. The business hub details page is displayed with the **Settings** tab activated.
4. Click the **Sync** button located at the top right of the page. A message box is displayed with information about the process. **NOTE:** The check and import process may take a few minutes, depending on the number of users, and because Cerby automatically matches users to their corresponding Cerby user account.
5. Confirm that the automated task to check for updates has the “Completed” status by performing any of the following actions:
* Click the **More details** button in the message box.
* Select the **Automation** option from the left menu to open the **Automation** page with a list of automated tasks and their status.
{% hint style="info" %}
**NOTE:** Cerby automatically performs daily checks for updates for all business hubs, but you can trigger them manually, as described in this section. For more instructions, read the article [Sync your app users with your business hub](/setup-and-admin/business-hubs/managing-users-and-assets-via-a-business-hub/sync-your-business-hub-with-your-external-app).
{% endhint %}
The next step is [3. Connect your American Express user account to the business hub](#id-3.-connect-your-american-express-user-account-to-the-business-hub).
### 3. Connect your American Express user account to the business hub
To connect your American Express user account to the business hub so Cerby can manage and protect it, you must complete the following steps:
1. Select the **Accounts** option from the left menu. The **All accounts** page is displayed.
2. Click the **Log in** button of the corresponding American Express Hub account card. The **Connect your American Express Hub Account** dialog box is displayed.
3. Enter the login credentials of your **American Express** user account.
4. Click the **Connect account** button. The dialog box closes, and a success message box and a new account card are displayed.
The next step is [4. Manage unmatched users](#id-4.-manage-unmatched-users).
### 4. Manage unmatched users
During a check for updates, Cerby automatically matches app members to the Cerby user accounts that correspond to their email addresses, including existing [guest users](https://help.cerby.com/getting-started/concepts/user-management/guest-users) and [local partners](https://help.cerby.com/getting-started/concepts/user-management/partners#h-7e4add33a2). Manual matching is required when apps don't provide email addresses and for app members using personal or external accounts that couldn’t be identified or are not in the corporate directory.
To view the status of the imported app members, you must complete the following steps:
1. Select the **Business Hubs** option from the left menu. The **Business Hubs** page is displayed.
2. Click the **More options** (...) icon of the corresponding business hub card. A drop-down menu is displayed.
3. Select the **View Members** option from the menu. The business hub details page is displayed with the **Members** tab activated. App members are displayed in the following tabs of the **User Overview** section:
* **Unmatched users:** This tab displays the users who were not automatically matched.
* **Onboarded users:** This tab displays the users matched to their Cerby user account.
* **Guest users:** This tab displays the users who were matched to an existing Cerby user account, but it doesn’t exist in the corporate directory, such as external collaborators.
For unmatched users, you can perform one of the following actions:
* [Match users](#match-users)
* [Remove unmatched users](#remove-unmatched-users)
* [Exempt unmatched users](#exempt-unmatched-users)
The following sections describe each action.
#### Match users
To match users, you must complete the following steps from the **Unmatched users** tab of the business hub details page:
1. Click the **Match user** button of the corresponding user. The **Match user** dialog box is displayed.
2. Enter the username or email address of the user you want to match and invite in the **Match with** field. The user is displayed on a list.
3. Select the user from the list.
4. Click the **Next** button. The **Select Cerby role** dialog box is displayed.
5. Select the role to assign to the user on the business hub **Cerby role** drop-down menu:
* **Owner:** This role enables sharing access and managing business hub settings in Cerby.
* **Collaborator:** This role enables only logging in to the app from Cerby.
6. Click the **Match user** button. The dialog box closes, and a success message box is displayed. The user is moved to the **Onboarded users** tab.
#### Remove unmatched users
To remove unmatched users, you must complete the following steps from the **Unmatched users** tab of the business hub details page:
{% hint style="danger" %}
**IMPORTANT:** When removing an unmatched user, Cerby performs an automated task to revoke the user’s seat and permissions in American Express.
{% endhint %}
1. Click the **More options** (...) icon of the corresponding user. A drop-down menu is displayed.
2. Select the **Remove user** option from the list. The **Remove user?** dialog box is displayed.
3. Click the **Remove user** button. The dialog box closes, and a success message box is displayed. The user is removed from the app via an automated task.
#### Exempt unmatched users
Exempted users keep their user accounts or seats active in your app, but you cannot manage them through Cerby.
To exempt unmatched users, you must complete the following steps from the **Unmatched users** tab of the business hub details page:
1. Click the **More options** (...) icon of the corresponding user. A drop-down list is displayed.
2. Select the **Exempt user** option from the list. The exempt user dialog box is displayed.
3. Enter a reason for exempting the user in the **Provide a reason** field.
4. Click the **Exempt member** button. The dialog box closes, and a success message box is displayed. The user is moved to the **Exempted users** tab.
***
## Use your business hub
The following are the supported features of business hubs you can use:
* [Join the external app and set up your business hub access](https://help.cerby.com/cerby-web-app/business-hubs/join-your-external-app-and-set-up-your-business-hub-access)
* [Add users to your app via a business hub](/setup-and-admin/business-hubs/managing-users-and-assets-via-a-business-hub/add-users-and-teams-to-your-apps-via-a-business-hub)
* [Provision users to your apps via an IdP and business hub](/setup-and-admin/business-hubs/managing-users-and-assets-via-a-business-hub/provision-users-to-your-apps-via-an-idp-and-business-hub)
* [Deprovision users from your apps via an IdP and business hub](/setup-and-admin/business-hubs/managing-users-and-assets-via-a-business-hub/deprovision-users-from-your-apps-via-an-idp-and-business-hub)
* [Sync your app users with your business hub](/setup-and-admin/business-hubs/managing-users-and-assets-via-a-business-hub/sync-your-business-hub-with-your-external-app)
* [Protect your app users via a business hub](/setup-and-admin/business-hubs/managing-users-and-assets-via-a-business-hub/protect-your-app-user-accounts-via-a-business-hub)
* [Log in to your app via a business hub](https://help.cerby.com/cerby-web-app/business-hubs/log-in-to-your-app)
* [Track the activity of business hub users](/setup-and-admin/business-hubs/managing-users-and-assets-via-a-business-hub/track-activity-on-app-members-user-accounts)
* [Remove a business hub](/setup-and-admin/business-hubs/managing-your-business-hubs/remove-a-business-hub)
# Connect a business hub for Apollo
This article describes how to connect a business hub to centrally manage the users of Apollo from Cerby.
{% hint style="info" %}
**Who can use this feature?**
* Workspace **Owners**, **Super Admins**, **Admins**, and **Users**
* Only supported using the Cerby web app
{% endhint %}
As a user with any workspace role in Cerby, except **Guest User** and **Login-Only**, you can connect a business hub integration to centrally manage the users of Apollo.
When you connect the business hub, you become its **Owner**, and you can perform the following user and access management tasks through automated tasks executed by the Cerby agent:
* Check for updates
* Invite app members
* Update app members’ roles
* Remove app members
{% hint style="success" %}
**TIP:** For more details about the automated tasks of a business hub, how it works, and the supported apps, read the article [Explore Apps](https://help.cerby.com/setup-and-admin/business-hubs/business-hub-catalog).
{% endhint %}
This article provides instructions on how to connect a business hub for Apollo. For other app-specific articles and videos, review the [Connecting your business hubs](https://help.cerby.com/setup-and-admin/business-hubs/connecting-your-apps) collection in the Cerby Help Center.
***
## Requirements
The following are the requirements to connect a business hub:
* A Cerby workspace
* A Cerby user account with the **Owner**, **Super Admin**, **Admin**, or **User** role
* An organization in Apollo
* Groups configured in your identity provider (IdP) if you want to leverage automatic user provisioning and deprovisioning from your apps based on group assignment events. For more information, read the article [Provision users to your apps via an IdP and business hub](https://help.cerby.com/setup-and-admin/business-hubs/managing-users-and-assets-via-a-business-hub/provision-users-to-your-apps-via-an-idp-and-business-hub)
* An automation account, meaning an active user account with the **Org Admin** role in Apollo to be used as a service account. For instructions and recommendations on how to create and configure this account, read the article [Create a service account for your business hub](https://help.cerby.com/setup-and-admin/business-hubs/connecting-your-apps/create-a-service-account-for-your-business-hub)
* The user management and login method for your business hub identified to select the corresponding option when connecting your app. For more information, read the **User management and login method** section of the article [Explore Apps](https://help.cerby.com/setup-and-admin/business-hubs/business-hub-catalog)
* A business ID. You can find the ID in **the address bar** after logging in to Apollo and navigating to the **Members** tab of your organization. It’s the subdirectory between the **org** and **members** subdirectories of the URL. For example, **cerby** in [**https://studio.apollographql.com/org/cerby/members**](https://studio.apollographql.com/org/cerby/members). Just copy the value and paste it when connecting the business hub.
***
## Connect a business hub for Apollo
To connect a business hub for Apollo, you must complete the following main steps from the Cerby web app dashboard:
1. [Add a business hub and connect it to Apollo](#id-1.-add-a-business-hub-and-connect-it-to-apollo)
2. [Check for updates to import users and roles to Cerby](#id-2.-check-for-updates-to-import-users-and-roles-to-cerby)
3. [Connect your Apollo user account to the business hub](#id-3.-connect-your-apollo-user-account-to-the-business-hub)
4. [Manage unmatched users](#id-4.-manage-unmatched-users)
The following sections describe each main step.
### 1. Add a business hub and connect it to Apollo
To add a business hub and connect it to Apollo, you must complete the following steps:
1. Log in to your corresponding [Cerby](https://app.cerby.com/) workspace.
2. Select the **Business Hubs** option from the left navigation drawer. The **Business Hubs** page is displayed.
3. Click the **Connect Business Hub** button located at the top-right corner of the page. The **Connect your Business Hubs to Cerby** dialog box is displayed.
**TIP:** Select the **Don’t show this again** option to skip this step the next time you connect a new business hub.
4. Click the **Get started** button. A wizard is displayed on the **Select app** page.
5. Select **Apollo Hub** from the catalog. The **Enter app details** page is displayed on the wizard.
6. Enter and select your app information in the corresponding fields:
* **Label in Cerby:** It is the name to assign to your business hub in Cerby, and it will be displayed on the business hub card.
* **Business ID:** It is the unique identifier of your organization in Apollo. For instructions on how to find it, read the [Requirements](#requirements) section.
* **User management and login method:** It is the way your users log in to the app and determines whether they must save their login credentials as a Cerby account connected to the business hub. You must select one of the following methods:
* **Single sign-on (SSO):** Access is managed by your identity provider, and users log in with SSO authentication. They are not asked to save their credentials in Cerby.
* **Username and password:** Cerby manages account security and access, and users log in with their credentials after saving them in Cerby.
7. Click the **Next** button. The **Select automation account** page is displayed with a list of existing Apollo accounts.
8. Select the automation account you have previously added to Cerby, as described in the [Requirements](#requirements) section.
**NOTE:** If you don’t have an automation account, you are prompted to add it. Make sure you read Cerby’s recommendations on how to configure it in the article [Create a service account for your business hub](https://help.cerby.com/setup-and-admin/business-hubs/connecting-your-apps/create-a-service-account-for-your-business-hub). You may need to add the account first and then add the business hub.
9. Click the **Connect app** button. The wizard closes, and a success message box is displayed. The corresponding business hub is also displayed on the **Business Hubs** page.
The next step is [2. Check for updates to import users and roles to Cerby](#id-2.-check-for-updates-to-import-users-and-roles-to-cerby).
### 2. Check for updates to import users and roles to Cerby
To check for updates in your app to identify and import users, roles, and assets to Cerby, you must complete the following steps:
1. Select the **Business Hubs** option from the left navigation drawer. The **Business Hubs** page is displayed.
2. Click the **Settings** icon of the corresponding business hub card. The business hub details page is displayed with the **Settings** tab activated.
3. Click the **Check for updates** button located at the top right of the page. A message box is displayed with information about the process.
**NOTE:** The check and import process may take a few minutes depending on the number of users, and because Cerby automatically matches users to their corresponding Cerby user account.
4. Confirm that the automated task to check for updates has the “Completed” status by performing any of the following actions:
* Click the **More details** button from the message box.
* Select the **Automation** option from the left navigation drawer to open the **Automation** page with a list of automated tasks and their status.
{% hint style="info" %}
**NOTE:** Cerby automatically performs daily checks for updates for all business hubs, but you can trigger them manually, as described in this section. When a user is deprovisioned from an IdP and a check for updates is performed, Cerby generates a report and sends business hub **Owners** an email to confirm their removal from the app. For more instructions, read the article [Check for updates in your app and apply report](/setup-and-admin/business-hubs/managing-users-and-assets-via-a-business-hub/sync-your-business-hub-with-your-external-app).
{% endhint %}
The next step is [3. Connect your Apollo user account to the business hub](#id-3.-connect-your-apollo-user-account-to-the-business-hub).
### 3. Connect your Apollo user account to the business hub
To connect your Apollo user account to the business hub so Cerby can manage and protect it, you must complete the following steps:
1. Select the **Accounts** option from the left navigation drawer. The **Accounts** page is displayed.
2. Click the **Log in** button of the corresponding Apollo Hub account card. The **Connect your Apollo Hub Account** dialog box is displayed.
3. Enter the login credentials of your Apollo user account.
4. Click the **Connect account** button. The dialog box closes, and a success message box and a new account card are displayed.
The next step is [4. Manage unmatched users](#id-4.-manage-unmatched-users).
### 4. Manage unmatched users
During a check for updates, Cerby automatically matches app members to the Cerby user accounts that correspond to their email addresses, including existing [guest users](https://help.cerby.com/getting-started/concepts/user-management/guest-users) and [local partners](https://help.cerby.com/getting-started/concepts/user-management/partners#h-7e4add33a2). Manual matching is required when apps don't provide email addresses and for app members using personal or external accounts that couldn’t be identified or are not in the corporate directory.
To view the status of the imported app members, you must complete the following steps:
1. Select the **Business Hubs** option from the left navigation drawer. The **Business Hubs** page is displayed.
2. Click the **More options** (...) icon of the corresponding business hub card. A drop-down list is displayed.
3. Select the **View Members** option from the list. The business hub details page is displayed with the **Members** tab activated. App members are displayed in the following tabs of the **User Overview** section:
* **Unmatched users:** This tab displays the users who were not automatically matched.
* **Onboarded users:** This tab displays the users matched to their Cerby user account.
* **Guest users:** This tab displays the users who were matched to an existing Cerby user account but it doesn’t exist in the corporate directory, such as external collaborators.
For unmatched users, you can perform one of the following actions:
* [Match users](#match-users)
* [Remove unmatched users](#remove-unmatched-users)
* [Exempt unmatched users](#exempt-unmatched-users)
The following sections describe each action.
#### Match users
To match users, you must complete the following steps from the **Unmatched users** tab of the business hub details page:
1. Click the **Match user** button of the corresponding user. The **Match user** dialog box is displayed.
2. Enter the username or email address of the user you want to match and invite in the **Match with** field. The user is displayed on a list.
3. Select the user from the list.
4. Click the **Next** button. The **Select Cerby role** dialog box is displayed.
5. Select the role to assign to the user on the business hub **Cerby role** drop-down list:
* **Owner:** This role enables sharing access and managing business hub settings in Cerby.
* **Collaborator:** This role enables only logging in to the app from Cerby.
6. Click the **Match user** button. The dialog box closes, and a success message box is displayed. The user is moved to the **Onboarded** **users** tab.
#### Remove unmatched users
To remove unmatched users, you must complete the following steps from the **Unmatched users** tab of the business hub details page:
{% hint style="danger" %}
**IMPORTANT:** When removing an unmatched user, Cerby performs an automated task to revoke the user’s seat and permissions in Apollo.
{% endhint %}
1. Click the **More options** (...) icon of the corresponding user. A drop-down list is displayed.
2. Select the **Remove user** option from the list. The **Remove user?** dialog box is displayed.
3. Click the **Remove user** button. The dialog box closes, and a success message box is displayed. The user is removed from the app via an automated task.
#### Exempt unmatched users
Exempted users keep their user accounts or seats active in your app, but you cannot manage them through Cerby.
To exempt unmatched users, you must complete the following steps from the **Unmatched users** tab of the business hub details page:
1. Click the **More options** (...) icon of the corresponding user. A drop-down list is displayed.
2. Select the **Exempt user** option from the list. The exempt user dialog box is displayed.
3. Enter a reason for exempting the user in the **Provide a reason** field.
4. Click the **Exempt member** button. The dialog box closes, and a success message box is displayed. The user is moved to the **Exempted users** tab.
***
## Use your business hub
The following are the supported features of business hubs you can use:
* [Join the App and connect it to Cerby](https://help.cerby.com/cerby-web-app/business-hubs/join-your-external-app-and-set-up-your-business-hub-access)
* [Invite new app members](/setup-and-admin/business-hubs/managing-users-and-assets-via-a-business-hub/add-users-and-teams-to-your-apps-via-a-business-hub)
* [Remove app members](/setup-and-admin/business-hubs/managing-users-and-assets-via-a-business-hub/remove-users-from-your-app-via-a-business-hub)
* [Provision users to your apps via an IdP and business hub](https://help.cerby.com/setup-and-admin/business-hubs/managing-users-and-assets-via-a-business-hub/provision-users-to-your-apps-via-an-idp-and-business-hub)
* [Update the app members’ roles](/setup-and-admin/business-hubs/managing-users-and-assets-via-a-business-hub/update-user-roles-in-your-app-via-a-business-hub)
* [Check for updates in your app and apply report](/setup-and-admin/business-hubs/managing-users-and-assets-via-a-business-hub/sync-your-business-hub-with-your-external-app)
* [Re-assign the app members’ user accounts](https://github.com/cerbyinc/help-center/tree/main/.uncategorized/unpublished-deprecated-re-assign-the-app-members-user-accounts.md)
* [Manage the security of app members’ user accounts](/setup-and-admin/business-hubs/managing-users-and-assets-via-a-business-hub/protect-your-app-user-accounts-via-a-business-hub)
* [Log in to your app](https://help.cerby.com/cerby-web-app/business-hubs/log-in-to-your-app)
* [Track activity on app members’ user accounts](/setup-and-admin/business-hubs/managing-users-and-assets-via-a-business-hub/track-activity-on-app-members-user-accounts)
* [Remove an App](/setup-and-admin/business-hubs/managing-your-business-hubs/remove-a-business-hub)
# Connect a business hub for Appetize
This article describes how to connect a business hub to centrally manage the users of Appetize from Cerby.
{% hint style="info" %}
**Who can use this feature?**
* Workspace **Owners**, **Super Admins**, **Admins**, and **Users**
* Only supported using the Cerby web app
{% endhint %}
As a user with any workspace role in Cerby, except **Guest User** and **Login-Only**, you can connect a business hub integration to centrally manage the users of Appetize.
When you connect the business hub, you become its **Owner**, and you can perform the following user and access management tasks through automated tasks executed by the Cerby agent:
* Check for updates
* Invite app members
* Update app members’ roles
* Remove app members
{% hint style="success" %}
**TIP:** For more details about the automated tasks of a business hub, how it works, and the supported apps, read the article [Explore Apps](https://help.cerby.com/setup-and-admin/business-hubs/business-hub-catalog).
{% endhint %}
This article provides instructions on how to connect a business hub for Appetize. For other app-specific articles and videos, review the [Connecting your business hubs](https://help.cerby.com/setup-and-admin/business-hubs/connecting-your-apps) collection in the Cerby Help Center.
***
## Requirements
The following are the requirements to connect a business hub:
* A Cerby workspace
* A Cerby user account with the **Owner**, **Super Admin**, **Admin**, or **User** role
* Groups configured in your identity provider (IdP) if you want to leverage automatic user provisioning and deprovisioning from your apps based on group assignment events. For more information, read the article [Provision users to your apps via an IdP and business hub](https://help.cerby.com/setup-and-admin/business-hubs/managing-users-and-assets-via-a-business-hub/provision-users-to-your-apps-via-an-idp-and-business-hub)
* An automation account, meaning an active user account with an **Admin** role in Appetize to be used as a service account. For instructions and recommendations on how to create and configure this account, read the article [Create a service account for your business hub](https://help.cerby.com/setup-and-admin/business-hubs/connecting-your-apps/create-a-service-account-for-your-business-hub)
***
## Connect a business hub for Appetize
To connect a business hub for Appetize, you must complete the following main steps from the Cerby web app dashboard:
1. [Add a business hub and connect it to Appetize](#id-1.-add-a-business-hub-and-connect-it-to-appetize)
2. [Check for updates to import users and roles to Cerby](#id-2.-check-for-updates-to-import-users-and-roles-to-cerby)
3. [Connect your Appetize user account to the business hub](#id-3.-connect-your-appetize-user-account-to-the-business-hub)
4. [Manage unmatched users](#id-4.-manage-unmatched-users)
The following sections describe each main step.
### 1. Add a business hub and connect it to Appetize
To add a business hub and connect it to Appetize, you must complete the following steps:
1. Log in to your corresponding [Cerby](https://app.cerby.com/) workspace.
2. Select the **Business Hubs** option from the left navigation drawer. The **Business Hubs** page is displayed.
3. Click the **Connect Business Hub** button located at the top-right corner of the page. The **Connect your Business Hubs to Cerby** dialog box is displayed. **TIP:** Select the **Don’t show this again** option to skip this step the next time you connect a new business hub.
4. Click the **Get started** button. A wizard is displayed on the **Select app** page.
5. Select **Appetize Hub** from the catalog. The **Enter app details** page is displayed on the wizard.
6. Enter and select your app information in the corresponding fields:
1. **Label in Cerby:** It is the name to assign to your business hub in Cerby, and it will be displayed on the business hub card.
2. **Business unique identifier:** It is a unique identifier that differentiates your business hub in Cerby from others for the same app. You can assign an alphanumeric value between 3 and 30 characters without symbols or special characters.
3. **User management and login method:** It is the way your users log in to the app and determines if they must save their credentials in Cerby.
4. Select the **Username and password** option because account security and access are managed by Cerby, and users log in with their credentials after saving them in Cerby.
**IMPORTANT:** The **Single sign-on (SSO)** option is not supported by CookieHub.
7. Click the **Next** button. The **Select automation account** page is displayed with a list of existing Appetize accounts.
8. Select the automation account you have previously added to Cerby, as described in the [Requirements](#requirements) section. **NOTE:** If you don’t have an automation account, you are prompted to add it. Make sure you read Cerby’s recommendations on how to configure it in the article [Create a service account for your business hub](https://help.cerby.com/setup-and-admin/business-hubs/connecting-your-apps/create-a-service-account-for-your-business-hub). You may need to add the account first and then add the business hub.
9. Click the **Connect app** button. The wizard closes, and a success message box is displayed. The corresponding business hub is also displayed on the **Business Hubs** page.
The next step is [2. Check for updates to import users and roles to Cerby](#id-2.-check-for-updates-to-import-users-and-roles-to-cerby).
### 2. Check for updates to import users and roles to Cerby
To check for updates in your app to identify and import users and roles to Cerby, you must complete the following steps:
1. Select the **Business Hubs** option from the left navigation drawer. The **Business Hubs** page is displayed.
2. Click the **Settings** icon of the corresponding business hub card. The business hub details page is displayed with the **Settings** tab activated.
3. Click the **Check for updates** button located at the top right of the page. A message box is displayed with information about the process. **NOTE:** The check and import process may take a few minutes depending on the number of users, and because Cerby automatically matches users to their corresponding Cerby user account.
4. Confirm that the automated task to check for updates has the “Completed” status by performing any of the following actions:
* Click the **More details** button from the message box.
* Select the **Automation** option from the left navigation drawer to open the **Automation** page with a list of automated tasks and their status.
{% hint style="info" %}
**NOTE:** Cerby automatically performs daily checks for updates for all business hubs, but you can trigger them manually, as described in this section. When a user is deprovisioned from an IdP and a check for updates is performed, Cerby generates a report and sends business hub **Owners** an email to confirm their removal from the app. For more instructions, read the article [Check for updates in your app and apply report](/setup-and-admin/business-hubs/managing-users-and-assets-via-a-business-hub/sync-your-business-hub-with-your-external-app).
{% endhint %}
The next step is [3. Connect your Appetize user account to the business hub](#id-3.-connect-your-appetize-user-account-to-the-business-hub).
### 3. Connect your Appetize user account to the business hub
To connect your Appetize user account to the business hub so Cerby can manage and protect it, you must complete the following steps:
1. Select the **Accounts** option from the left navigation drawer. The **Accounts** page is displayed.
2. Click the **Log in** button of the corresponding Appetize Hub account card. The **Connect your Appetize Hub Account** dialog box is displayed.
3. Enter the login credentials of your Appetize user account.
4. Click the **Connect account** button. The dialog box closes, and a success message box and a new account card are displayed.
The next step is [4. Manage unmatched users](#id-4.-manage-unmatched-users).
### 4. Manage unmatched users
During a check for updates, Cerby automatically matches app members to the Cerby user accounts that correspond to their email addresses, including existing [guest users](https://help.cerby.com/getting-started/concepts/user-management/guest-users) and [local partners](https://help.cerby.com/getting-started/concepts/user-management/partners#h-7e4add33a2). Manual matching is required when apps don't provide email addresses and for app members using personal or external accounts that couldn’t be identified or are not in the corporate directory.
To view the status of the imported app members, you must complete the following steps:
1. Select the **Business Hubs** option from the left navigation drawer. The **Business Hubs** page is displayed.
2. Click the **More options** (...) icon of the corresponding business hub card. A drop-down list is displayed.
3. Select the **View Members** option from the list. The business hub details page is displayed with the **Members** tab activated. App members are displayed in the following tabs of the **User Overview** section:
* **Unmatched users:** This tab displays the users who were not automatically matched.
* **Onboarded users:** This tab displays the users matched to their Cerby user account.
* **Guest users:** This tab displays the users who were matched to an existing Cerby user account but it doesn’t exist in the corporate directory, such as external collaborators.
For unmatched users, you can perform one of the following actions:
* [Match users](#match-users)
* [Remove unmatched users](#remove-unmatched-users)
* [Exempt unmatched users](#exempt-unmatched-users)
The following sections describe each action.
#### Match users
To match users, you must complete the following steps from the **Unmatched users** tab of the business hub details page:
1. Click the **Match user** button of the corresponding user. The **Match user** dialog box is displayed.
2. Enter the username or email address of the user you want to match and invite in the **Match with** field. The user is displayed on a list.
3. Select the user from the list.
4. Click the **Next** button. The **Select Cerby role** dialog box is displayed.
5. Select the role to assign to the user on the business hub **Cerby role** drop-down list:
* **Owner:** This role enables sharing access and managing business hub settings in Cerby.
* **Collaborator:** This role enables only logging in to the app from Cerby.
6. Click the **Match user** button. The dialog box closes, and a success message box is displayed. The user is moved to the **Onboarded** **users** tab.
#### Remove unmatched users
To remove unmatched users, you must complete the following steps from the **Unmatched users** tab of the business hub details page:
{% hint style="danger" %}
**IMPORTANT:** When removing an unmatched user, Cerby performs an automated task to revoke the user’s seat and permissions in Appetize.
{% endhint %}
1. Click the **More options** (...) icon of the corresponding user. A drop-down list is displayed.
2. Select the **Remove user** option from the list. The **Remove user?** dialog box is displayed.
3. Click the **Remove user** button. The dialog box closes, and a success message box is displayed. The user is removed from the app via an automated task.
#### Exempt unmatched users
Exempted users keep their user accounts or seats active in your app, but you cannot manage them through Cerby.
To exempt unmatched users, you must complete the following steps from the **Unmatched users** tab of the business hub details page:
1. Click the **More options** (...) icon of the corresponding user. A drop-down list is displayed.
2. Select the **Exempt user** option from the list. The exempt user dialog box is displayed.
3. Enter a reason for exempting the user in the **Provide a reason** field.
4. Click the **Exempt member** button. The dialog box closes, and a success message box is displayed. The user is moved to the **Exempted users** tab.
***
## Use your business hub
The following are the supported features of business hubs you can use:
* [Join the App and connect it to Cerby](https://help.cerby.com/cerby-web-app/business-hubs/join-your-external-app-and-set-up-your-business-hub-access)
* [Invite new app members](/setup-and-admin/business-hubs/managing-users-and-assets-via-a-business-hub/add-users-and-teams-to-your-apps-via-a-business-hub)
* [Remove app members](/setup-and-admin/business-hubs/managing-users-and-assets-via-a-business-hub/remove-users-from-your-app-via-a-business-hub)
* [Provision users to your apps via an IdP and business hub](https://help.cerby.com/setup-and-admin/business-hubs/managing-users-and-assets-via-a-business-hub/provision-users-to-your-apps-via-an-idp-and-business-hub)
* [Update the app members’ roles](/setup-and-admin/business-hubs/managing-users-and-assets-via-a-business-hub/update-user-roles-in-your-app-via-a-business-hub)
* [Check for updates in your app and apply report](/setup-and-admin/business-hubs/managing-users-and-assets-via-a-business-hub/sync-your-business-hub-with-your-external-app)
* [Re-assign the app members’ user accounts](https://github.com/cerbyinc/help-center/tree/main/.uncategorized/unpublished-deprecated-re-assign-the-app-members-user-accounts.md)
* [Manage the security of app members’ user accounts](/setup-and-admin/business-hubs/managing-users-and-assets-via-a-business-hub/protect-your-app-user-accounts-via-a-business-hub)
* [Log in to your app](https://help.cerby.com/cerby-web-app/business-hubs/log-in-to-your-app)
* [Track activity on app members’ user accounts](/setup-and-admin/business-hubs/managing-users-and-assets-via-a-business-hub/track-activity-on-app-members-user-accounts)
* [Remove an App](/setup-and-admin/business-hubs/managing-your-business-hubs/remove-a-business-hub)
# Connect a business hub for Appfigures
This article describes how to connect a business hub to centrally manage the users of Appfigures from Cerby.
{% hint style="info" %}
**Who can use this feature?**
* Workspace **Owners**, **Super Admins**, **Admins**, and **Users**
* Only supported using the Cerby web app
{% endhint %}
As a user with any workspace role in Cerby, except **Guest User** and **Login-Only**, you can connect a business hub integration to centrally manage the users of Appfigures.
When you connect the business hub, you become its **Owner**, and you can perform the following user and access management tasks through automated tasks executed by the Cerby agent:
* Check for updates
* Invite app members
* Update app members’ roles
* Remove app members
{% hint style="success" %}
**TIP:** For more details about the automated tasks of a business hub, how it works, and the supported apps, read the article [Explore Apps](https://help.cerby.com/setup-and-admin/business-hubs/business-hub-catalog).
{% endhint %}
{% hint style="danger" %}
**IMPORTANT:** Take into consideration that app members who are invited and later removed cannot be invited to join Appfigures again with the same email address. If this scenario occurs, Appfigures displays the “This email is currently in use by a different user” error message.
{% endhint %}
This article provides instructions on how to connect a business hub for Appfigures. For other app-specific articles and videos, review the [Connecting your business hubs](https://help.cerby.com/setup-and-admin/business-hubs/connecting-your-apps) collection in the Cerby Help Center.
***
## Requirements
The following are the requirements to connect a business hub:
* A Cerby workspace
* A Cerby user account with the **Owner**, **Super Admin**, **Admin**, or **User** role
* Groups configured in your identity provider (IdP) if you want to leverage automatic user provisioning and deprovisioning from your apps based on group assignment events. For more information, read the article [Provision users to your apps via an IdP and business hub](https://help.cerby.com/setup-and-admin/business-hubs/managing-users-and-assets-via-a-business-hub/provision-users-to-your-apps-via-an-idp-and-business-hub)
* An automation account, meaning an active user account with an **Admin** role in Appfigures to be used as a service account. For instructions and recommendations on how to create and configure this account, read the article [Create a service account for your business hub](https://help.cerby.com/setup-and-admin/business-hubs/connecting-your-apps/create-a-service-account-for-your-business-hub)
* The user management and login method for your business hub identified to select the corresponding option when connecting your app. For more information, read the **User management and login method** section of the article [Explore Apps](https://help.cerby.com/setup-and-admin/business-hubs/business-hub-catalog)
***
## Connect a business hub for Appfigures
To connect a business hub for Appfigures, you must complete the following main steps from the Cerby web app dashboard:
1. [Add a business hub and connect it to Appfigures](#id-1.-add-a-business-hub-and-connect-it-to-appfigures)
2. [Check for updates to import users and roles to Cerby](#id-2.-check-for-updates-to-import-users-and-roles-to-cerby)
3. [Connect your Appfigures user account to the business hub](#id-3.-connect-your-appfigures-user-account-to-the-business-hub)
4. [Manage unmatched users](#id-4.-manage-unmatched-users)
The following sections describe each main step.
### 1. Add a business hub and connect it to Appfigures
To add a business hub and connect it to Appfigures, you must complete the following steps:
1. Log in to your corresponding [Cerby](https://app.cerby.com/) workspace.
2. Select the **Business Hubs** option from the left navigation drawer. The **Business Hubs** page is displayed.
3. Click the **Connect Business Hub** button located at the top-right corner of the page. The **Connect your Business Hubs to Cerby** dialog box is displayed. **TIP:** Select the **Don’t show this again** option to skip this step the next time you connect a new business hub.
4. Click the **Get started** button. A wizard is displayed on the **Select app** page.
5. Select **Appfigures Hub** from the catalog. The **Enter app details** page is displayed on the wizard.
6. Enter and select your app information in the corresponding fields:
* **Label in Cerby:** It is the name to assign to your business hub in Cerby, and it will be displayed on the business hub card.
* **Business unique identifier:** It is a unique identifier that differentiates your business hub in Cerby from others for the same app. You can assign an alphanumeric value between 3 and 30 characters without symbols or special characters.
* **User management and login method:** It is the way your users log in to the app and determines whether they must save their login credentials as a Cerby account connected to the business hub. You must select one of the following methods:
* **Single sign-on (SSO):** Access is managed by your identity provider, and users log in with SSO authentication. They are not asked to save their credentials in Cerby.
* **Username and password:** Cerby manages account security and access, and users log in with their credentials after saving them in Cerby.
7. Click the **Next** button. The **Select automation account** page is displayed with a list of existing Appfigures accounts.
8. Select the automation account you have previously added to Cerby, as described in the [Requirements](#requirements) section.
**NOTE:** If you don’t have an automation account, you are prompted to add it. Make sure you read Cerby’s recommendations on how to configure it in the article [Create a service account for your business hub](https://help.cerby.com/setup-and-admin/business-hubs/connecting-your-apps/create-a-service-account-for-your-business-hub). You may need to add the account first and then add the business hub.
9. Click the **Connect app** button. The wizard closes, and a success message box is displayed. The corresponding business hub is also displayed on the **Business Hubs** page.
The next step is [2. Check for updates to import users and roles to Cerby](#id-2.-check-for-updates-to-import-users-and-roles-to-cerby).
### 2. Check for updates to import users and roles to Cerby
To check for updates in your app to identify and import users and roles to Cerby, you must complete the following steps:
1. Select the **Business Hubs** option from the left navigation drawer. The **Business Hubs** page is displayed.
2. Click the **Settings** icon of the corresponding business hub card. The business hub details page is displayed with the **Settings** tab activated.
3. Click the **Check for updates** button located at the top right of the page. A message box is displayed with information about the process.
**NOTE:** The check and import process may take a few minutes depending on the number of users, and because Cerby automatically matches users to their corresponding Cerby user account.
4. Confirm that the automated task to check for updates has the “Completed” status by performing any of the following actions:
* Click the **More details** button from the message box.
* Select the **Automation** option from the left navigation drawer to open the **Automation** page with a list of automated tasks and their status.
{% hint style="info" %}
**NOTE:** Cerby automatically performs daily checks for updates for all business hubs, but you can trigger them manually, as described in this section. When a user is deprovisioned from an IdP and a check for updates is performed, Cerby generates a report and sends business hub **Owners** an email to confirm their removal from the app. For more instructions, read the article [Check for updates in your app and apply report](/setup-and-admin/business-hubs/managing-users-and-assets-via-a-business-hub/sync-your-business-hub-with-your-external-app).
{% endhint %}
The next step is [3. Connect your Appfigures user account to the business hub](#id-3.-connect-your-appfigures-user-account-to-the-business-hub).
### 3. Connect your Appfigures user account to the business hub
To connect your Appfigures user account to the business hub so Cerby can manage and protect it, you must complete the following steps:
1. Select the **Accounts** option from the left navigation drawer. The **Accounts** page is displayed.
2. Click the **Log in** button of the corresponding Appfigures Hub account card. The **Connect your Appfigures Hub Account** dialog box is displayed.
3. Enter the login credentials of your Appfigures user account.
4. Click the **Connect account** button. The dialog box closes, and a success message box and a new account card are displayed.
The next step is [4. Manage unmatched users](#id-4.-manage-unmatched-users).
### 4. Manage unmatched users
During a check for updates, Cerby automatically matches app members to the Cerby user accounts that correspond to their email addresses, including existing [guest users](https://help.cerby.com/getting-started/concepts/user-management/guest-users) and [local partners](https://help.cerby.com/getting-started/concepts/user-management/partners#h-7e4add33a2). Manual matching is required when apps don't provide email addresses and for app members using personal or external accounts that couldn’t be identified or are not in the corporate directory.
To view the status of the imported app members, you must complete the following steps:
1. Select the **Business Hubs** option from the left navigation drawer. The **Business Hubs** page is displayed.
2. Click the **More options** (...) icon of the corresponding business hub card. A drop-down list is displayed.
3. Select the **View Members** option from the list. The business hub details page is displayed with the **Members** tab activated. App members are displayed in the following tabs of the **User Overview** section:
* **Unmatched users:** This tab displays the users who were not automatically matched.
* **Onboarded users:** This tab displays the users matched to their Cerby user account.
* **Guest users:** This tab displays the users who were matched to an existing Cerby user account but it doesn’t exist in the corporate directory, such as external collaborators.
For unmatched users, you can perform one of the following actions:
* [Match users](#match-users)
* [Remove unmatched users](#remove-unmatched-users)
* [Exempt unmatched users](#exempt-unmatched-users)
The following sections describe each action.
#### Match users
To match users, you must complete the following steps from the **Unmatched users** tab of the business hub details page:
1. Click the **Match user** button of the corresponding user. The **Match user** dialog box is displayed.
2. Enter the username or email address of the user you want to match and invite in the **Match with** field. The user is displayed on a list.
3. Select the user from the list.
4. Click the **Next** button. The **Select Cerby role** dialog box is displayed.
5. Select the role to assign to the user on the business hub **Cerby role** drop-down list:
* **Owner:** This role enables sharing access and managing business hub settings in Cerby.
* **Collaborator:** This role enables only logging in to the app from Cerby.
6. Click the **Match user** button. The dialog box closes, and a success message box is displayed. The user is moved to the **Onboarded** **users** tab.
#### Remove unmatched users
To remove unmatched users, you must complete the following steps from the **Unmatched users** tab of the business hub details page:
{% hint style="danger" %}
**IMPORTANT:** When removing an unmatched user, Cerby performs an automated task to revoke the user’s seat and permissions in Appfigures.
{% endhint %}
1. Click the **More options** (...) icon of the corresponding user. A drop-down list is displayed.
2. Select the **Remove user** option from the list. The **Remove user?** dialog box is displayed.
3. Click the **Remove user** button. The dialog box closes, and a success message box is displayed. The user is removed from the app via an automated task.
#### Exempt unmatched users
Exempted users keep their user accounts or seats active in your app, but you cannot manage them through Cerby.
To exempt unmatched users, you must complete the following steps from the **Unmatched users** tab of the business hub details page:
1. Click the **More options** (...) icon of the corresponding user. A drop-down list is displayed.
2. Select the **Exempt user** option from the list. The exempt user dialog box is displayed.
3. Enter a reason for exempting the user in the **Provide a reason** field.
4. Click the **Exempt member** button. The dialog box closes, and a success message box is displayed. The user is moved to the **Exempted users** tab.
***
## Use your business hub
The following are the supported features of business hubs you can use:
* [Join the App and connect it to Cerby](https://help.cerby.com/cerby-web-app/business-hubs/join-your-external-app-and-set-up-your-business-hub-access)
* [Invite new app members](/setup-and-admin/business-hubs/managing-users-and-assets-via-a-business-hub/add-users-and-teams-to-your-apps-via-a-business-hub)
* [Remove app members](/setup-and-admin/business-hubs/managing-users-and-assets-via-a-business-hub/remove-users-from-your-app-via-a-business-hub)
* [Provision users to your apps via an IdP and business hub](https://help.cerby.com/setup-and-admin/business-hubs/managing-users-and-assets-via-a-business-hub/provision-users-to-your-apps-via-an-idp-and-business-hub)
* [Update the app members’ roles](/setup-and-admin/business-hubs/managing-users-and-assets-via-a-business-hub/update-user-roles-in-your-app-via-a-business-hub)
* [Check for updates in your app and apply report](/setup-and-admin/business-hubs/managing-users-and-assets-via-a-business-hub/sync-your-business-hub-with-your-external-app)
* [Re-assign the app members’ user accounts](https://github.com/cerbyinc/help-center/tree/main/.uncategorized/unpublished-deprecated-re-assign-the-app-members-user-accounts.md)
* [Manage the security of app members’ user accounts](/setup-and-admin/business-hubs/managing-users-and-assets-via-a-business-hub/protect-your-app-user-accounts-via-a-business-hub)
* [Log in to your app](https://help.cerby.com/cerby-web-app/business-hubs/log-in-to-your-app)
* [Track activity on app members’ user accounts](/setup-and-admin/business-hubs/managing-users-and-assets-via-a-business-hub/track-activity-on-app-members-user-accounts)
* [Remove an App](/setup-and-admin/business-hubs/managing-your-business-hubs/remove-a-business-hub)
# Connect a business hub for AppsFlyer
This article describes how to connect a business hub to centrally manage the users of AppsFlyer from Cerby.
{% hint style="info" %}
**Who can use this feature?**
* Workspace **Owners**, **Super Admins**, **Admins**, and **Users**
* Only supported using the Cerby web app
{% endhint %}
As a user with any workspace role in Cerby, except **Guest User** and **Login-Only**, you can connect a business hub integration to centrally manage the users of AppsFlyer.
When you connect the business hub, you become its **Owner**, and you can perform the following user and access management tasks through automated tasks executed by the Cerby agent:
* Check for updates
* Add users
* Update user roles
* Remove users
{% hint style="success" %}
**TIP:** For more details about the automated tasks of a business hub, how it works, and the supported apps, read the article [Explore Business Hubs](https://help.cerby.com/setup-and-admin/business-hubs/business-hub-catalog).
{% endhint %}
This article provides instructions on how to connect a business hub for Braze. For other app-specific articles and videos, review the [Connecting business hubs for your apps](https://help.cerby.com/setup-and-admin/business-hubs/connecting-your-apps) and [Connecting business hubs for your paid social apps](https://help.cerby.com/setup-and-admin/business-hubs/connecting-your-paid-social-apps) collections in the Cerby Help Center.
***
## Requirements
The following are the requirements to connect a business hub:
* A Cerby workspace
* A Cerby user account with the **Owner**, **Super Admin**, **Admin**, or **User** role
* Groups configured in your identity provider (IdP) if you want to leverage automatic user provisioning and deprovisioning from your apps based on group assignment events. For more information, read the articles available in the [Managing users via an IdP and business hub](https://help.cerby.com/setup-and-admin/business-hubs/managing-users-and-assets-via-a-business-hub) collection in the Cerby Help Center
* An automation account, meaning an active user account with an **Admin** role in AppsFlyer to be used as a service account. For instructions and recommendations on how to create and configure this account, read the article [Create a service account for your business hub](/setup-and-admin/business-hubs/connecting-your-apps/create-a-service-account-for-your-business-hub)
* The user management and login method for your business hub identified to select the corresponding option when connecting your app. For more information, read the **User management and login method** section of the article [Explore Business Hubs](https://help.cerby.com/setup-and-admin/business-hubs/business-hub-catalog)
***
## Connect a business hub for AppsFlyer
To connect a business hub for AppsFlyer, you must complete the following main steps from the Cerby web app dashboard:
1. [Add a business hub and connect it to AppsFlyer](#id-1.-add-a-business-hub-and-connect-it-to-appsflyer)
2. [Check for updates to import users and roles to Cerby](#id-2.-check-for-updates-to-import-users-and-roles-to-cerby)
3. [Connect your AppsFlyer user account to the business hub](#id-3.-connect-your-appsflyer-user-account-to-the-business-hub)
4. [Manage unmatched users](#id-4.-manage-unmatched-users)
The following sections describe each main step.
### 1. Add a business hub and connect it to AppsFlyer
To add a business hub and connect it to AppsFlyer, you must complete the following steps:
1. Log in to your corresponding [Cerby](https://app.cerby.com/) workspace.
2. Select the **Business Hubs** option from the left menu. The **Business Hubs** page is displayed.
3. Click the **Connect Business Hub** button located at the top-right corner of the page. The **Connect your Business Hubs to Cerby** dialog box is displayed. **TIP:** Select the **Don’t show this again** option to skip this step the next time you connect a new business hub.
4. Click the **Get started** button. A wizard is displayed on the **Select app** page.
5. Select **AppsFlyer Hub** from the catalog. The **Enter app details** page is displayed on the wizard.
6. Enter and select your app information in the corresponding fields:
* **Label in Cerby:** It is the name to assign to your business hub in Cerby, and it will be displayed on the business hub card.
* **Unique name:** It is a unique identifier that differentiates your business hub in Cerby from others for the same app. You can assign an alphanumeric value between 3 and 30 characters without symbols or special characters.
* **User management and login method:** It is the way your users log in to the app and determines whether they must save their login credentials as a Cerby account connected to the business hub. You must select one of the following methods:
* **Single sign-on (SSO):** Access is managed by your identity provider, and users log in with SSO authentication. They are not asked to save their credentials in Cerby.
* **Username and password:** Cerby manages account security and access, and users log in with their credentials after saving them in Cerby.
7. Click the **Next** button. The **Select automation account** page is displayed with a list of existing AppsFlyer accounts.
8. Select the automation account you have previously added to Cerby, as described in the [Requirements](#requirements) section. **NOTE:** If you don’t have an automation account, you are prompted to add it. Make sure you read Cerby’s recommendations on how to configure it in the article [Create a service account for your business hub](/setup-and-admin/business-hubs/connecting-your-apps/create-a-service-account-for-your-business-hub). You may need to add the account first and then add the business hub.
9. Click the **Connect app** button. The wizard closes, and a success message box is displayed. The corresponding business hub is also displayed on the **Business Hubs** page.
The next step is [2. Check for updates to import users and roles to Cerby](#id-2.-check-for-updates-to-import-users-and-roles-to-cerby).
### 2. Check for updates to import users and roles to Cerby
To check for updates in your app to identify and import users, roles, and assets to Cerby, you must complete the following steps:
1. Select the **Business Hubs** option from the left menu. The **Business Hubs** page is displayed.
2. Click the **More options** (...) icon of the corresponding business hub card. A drop-down menu is displayed.
3. Select the **Settings** option from the menu. The business hub details page is displayed with the **Settings** tab activated.
4. Click the **Sync** button located at the top right of the page. A message box is displayed with information about the process. **NOTE:** The check and import process may take a few minutes depending on the number of users and assets, and because Cerby automatically matches users to their corresponding Cerby user account.
5. Confirm that the automated task to check for updates has the “Completed” status by performing any of the following actions:
* Click the **More details** button from the message box.
* Select the **Automation** option from the left menu to open the **Automation** page with a list of automated tasks and their status.
{% hint style="info" %}
**NOTE: NOTE:** Cerby automatically performs daily checks for updates for all business hubs, but you can trigger them manually, as described in this section. For more instructions, read the article [Sync your app users with your business hub](/setup-and-admin/business-hubs/managing-users-and-assets-via-a-business-hub/sync-your-business-hub-with-your-external-app).
{% endhint %}
The next step is [3. Connect your AppsFlyer user account to the business hub](#id-3.-connect-your-appsflyer-user-account-to-the-business-hub).
### 3. Connect your AppsFlyer user account to the business hub
To connect your AppsFlyer user account to the business hub so Cerby can manage and protect it, you must complete the following steps:
1. Select the **Accounts** option from the left menu. The **Accounts** page is displayed.
2. Click the **Log in** button of the corresponding AppsFlyer Hub account card. The **Connect your AppsFlyer Hub Account** dialog box is displayed.
3. Enter the login credentials of your AppsFlyer user account.
4. Click the **Connect account** button. The dialog box closes, and a success message box and a new account card are displayed.
The next step is [4. Manage unmatched users](#id-4.-manage-unmatched-users).
### 4. Manage unmatched users
During a check for updates, Cerby automatically matches app members to the Cerby user accounts that correspond to their email addresses, including existing [guest users](https://help.cerby.com/getting-started/concepts/user-management/guest-users) and [local partners](https://help.cerby.com/getting-started/concepts/user-management/partners#h-7e4add33a2). Manual matching is required when apps don't provide email addresses and for app members using personal or external accounts that couldn’t be identified or are not in the corporate directory.
To view the status of the imported app members, you must complete the following steps:
1. Select the **Business Hubs** option from the left menu. The **Business Hubs** page is displayed.
2. Click the **More options** (...) icon of the corresponding business hub card. A drop-down menu is displayed.
3. Select the **View Members** option from the menu. The business hub details page is displayed with the **Members** tab activated. App members are displayed in the following tabs of the **User Overview** section:
* **Unmatched users:** This tab displays the users who were not automatically matched.
* **Onboarded users:** This tab displays the users matched to their Cerby user account.
* **Guest users:** This tab displays the users who were matched to an existing Cerby user account but it doesn’t exist in the corporate directory, such as external collaborators.
For unmatched users, you can perform one of the following actions:
* [Match users](#match-users)
* [Remove unmatched users](#remove-unmatched-users)
* [Exempt unmatched users](#exempt-unmatched-users)
The following sections describe each action.
#### Match users
To match users, you must complete the following steps from the **Unmatched users** tab of the business hub details page:
1. Click the **Match user** button of the corresponding user. The **Match user** dialog box is displayed.
2. Enter the username or email address of the user you want to match and invite in the **Match with** field. The user is displayed on a list.
3. Select the user from the list.
4. Click the **Next** button. The **Select Cerby role** dialog box is displayed.
5. Select the role to assign to the user on the business hub **Cerby role** drop-down menu:
* **Owner:** This role enables sharing access and managing business hub settings in Cerby.
* **Collaborator:** This role enables only logging in to the app from Cerby.
6. Click the **Match user** button. The dialog box closes, and a success message box is displayed. The user is moved to the **Onboarded** **users** tab.
#### Remove unmatched users
To remove unmatched users, you must complete the following steps from the **Unmatched users** tab of the business hub details page:
{% hint style="danger" %}
**IMPORTANT:** When removing an unmatched user, Cerby performs an automated task to revoke the user’s seat and permissions in AppsFlyer.
{% endhint %}
1. Click the **More options** (...)icon of the corresponding user. A drop-down menu is displayed.
2. Select the **Remove user** option from the menu. The **Remove user?** dialog box is displayed.
3. Click the **Remove user** button. The dialog box closes, and a success message box is displayed. The user is removed from the app via an automated task.
#### Exempt unmatched users
Exempted users keep their user accounts or seats active in your app, but you cannot manage them through Cerby.
To exempt unmatched users, you must complete the following steps from the **Unmatched users** tab of the business hub details page:
1. Click the **More options** (...)icon of the corresponding user. A drop-down menu is displayed.
2. Select the **Exempt user** option from the menu. The exempt user dialog box is displayed.
3. Enter a reason for exempting the user in the **Provide a reason** field.
4. Click the **Exempt member** button. The dialog box closes, and a success message box is displayed. The user is moved to the **Exempted users** tab.
***
## Use your business hub
The following are the supported features of business hubs you can use:
* [Join the external app and set up your business hub access](https://help.cerby.com/cerby-web-app/business-hubs/join-your-external-app-and-set-up-your-business-hub-access)
* [Add users to your app via a business hub](/setup-and-admin/business-hubs/managing-users-and-assets-via-a-business-hub/add-users-and-teams-to-your-apps-via-a-business-hub)
* [Provision users to your apps via an IdP and business hub](/setup-and-admin/business-hubs/managing-users-and-assets-via-a-business-hub/provision-users-to-your-apps-via-an-idp-and-business-hub)
* [Remove users from your app via a business hub](/setup-and-admin/business-hubs/managing-users-and-assets-via-a-business-hub/remove-users-from-your-app-via-a-business-hub)
* [Remove teams from your app via a business hub](/setup-and-admin/business-hubs/managing-users-and-assets-via-a-business-hub/remove-teams-from-your-app-via-a-business-hub)
* [Deprovision users from your apps via an IdP and business hub](/setup-and-admin/business-hubs/managing-users-and-assets-via-a-business-hub/deprovision-users-from-your-apps-via-an-idp-and-business-hub)
* [Update user roles in your app via a business hub](/setup-and-admin/business-hubs/managing-users-and-assets-via-a-business-hub/update-user-roles-in-your-app-via-a-business-hub)
* [Update user roles in your apps via an IdP and business hub](/setup-and-admin/business-hubs/managing-users-and-assets-via-a-business-hub/update-user-roles-in-your-apps-via-an-idp-and-business-hub)
* [Sync your app users with your business hub](/setup-and-admin/business-hubs/managing-users-and-assets-via-a-business-hub/sync-your-business-hub-with-your-external-app)
* [Protect your app user accounts via a business hub](/setup-and-admin/business-hubs/managing-users-and-assets-via-a-business-hub/protect-your-app-user-accounts-via-a-business-hub)
* [Log in to your app via a business hub](https://help.cerby.com/cerby-web-app/business-hubs/log-in-to-your-app)
* [Track the activity of business hub users](/setup-and-admin/business-hubs/managing-users-and-assets-via-a-business-hub/track-activity-on-app-members-user-accounts)
* [Remove a business hub](/setup-and-admin/business-hubs/managing-your-business-hubs/remove-a-business-hub)
# Connect a business hub for Appsmith
This article describes how to connect a business hub to centrally manage the users of Appsmith from Cerby.
{% hint style="info" %}
**Who can use this feature?**
* Workspace **Owners**, **Super Admins**, **Admins**, and **Users**
* Only supported using the Cerby web app
{% endhint %}
As a user with any workspace role in Cerby, except **Guest User** and **Login-Only**, you can connect a business hub integration to centrally manage the users of Appsmith.
When you connect the business hub, you become its **Owner**, and you can perform the following user and access management tasks through automated tasks executed by the Cerby agent:
* Check for updates
* Add users
* Update user roles
* Remove users
{% hint style="success" %}
**TIP:** For more details about the automated tasks of a business hub, how it works, and the supported apps, read the article [Explore Business Hubs](https://help.cerby.com/setup-and-admin/business-hubs/business-hub-catalog).
{% endhint %}
This article provides instructions on how to connect a business hub for Appsmith. For other app-specific articles and videos, review the [Connecting business hubs for your apps](https://help.cerby.com/setup-and-admin/business-hubs/connecting-your-apps) and [Connecting business hubs for your paid social apps](https://help.cerby.com/setup-and-admin/business-hubs/connecting-your-paid-social-apps) collections in the Cerby Help Center.
***
## Requirements
The following are the requirements to connect a business hub:
* A Cerby workspace
* A Cerby user account with the workspace **Owner**, **Super Admin**, **Admin**, or **User** role
* A workspace in Appsmith
* Groups configured in your identity provider (IdP) if you want to leverage automatic user provisioning and deprovisioning from your apps based on group assignment events. For more information, read the articles available in the [Managing users via an IdP and business hub](https://help.cerby.com/setup-and-admin/business-hubs/managing-users-and-assets-via-a-business-hub) collection in the Cerby Help Center
* An automation account, meaning an active user account with a native **Administrator** role in Appsmith to be used as a service account. For instructions and recommendations on how to create and configure this account, read the article [Create a service account for your business hub](/setup-and-admin/business-hubs/connecting-your-apps/create-a-service-account-for-your-business-hub)
* The user management and login method for your business hub identified to select the corresponding option when connecting your app. For more information, read the **User management and login method** section of the article [Explore Business Hubs](https://help.cerby.com/setup-and-admin/business-hubs/business-hub-catalog)
* A Business unique identifier. You can find the ID in the address bar after logging in to Appsmith, and selecting the corresponding workspace from the left menu. The ID is displayed in the address bar as part of the URL. For example, **`01abc23456d78e9f0gh1i234`** in **`https://app.appsmith.com/applications?workspaceId=01abc23456d78e9f0gh1i234`.**
***
## Connect a business hub for Appsmith
To connect a business hub for Appsmith, you must complete the following main steps from the Cerby web app dashboard:
1. [Add a business hub and connect it to Appsmith](#id-1.-add-a-business-hub-and-connect-it-to-appsmith)
2. [Check for updates to import users and roles to Cerby](#id-2.-check-for-updates-to-import-users-and-roles-to-cerby)
3. [Connect your Appsmith user account to the business hub](#id-3.-connect-your-appsmith-user-account-to-the-business-hub)
4. [Manage unmatched users](#id-4.-manage-unmatched-users)
The following sections describe each main step.
### 1. Add a business hub and connect it to Appsmith
To add a business hub and connect it to Appsmith, you must complete the following steps:
1. Log in to your corresponding [Cerby](https://app.cerby.com/) workspace.
2. Select the **Business Hubs** option from the left menu. The **Business Hubs** page is displayed.
3. Click the **Connect Business Hub** button located at the top-right corner of the page. The **Connect your Business Hubs to Cerby** dialog box is displayed. **TIP:** Select the **Don’t show this again** option to skip this step the next time you connect a new business hub.
4. Click the **Get started** button. A wizard is displayed on the **Select app** page.
5. Select **Appsmith Hub** from the catalog. The **Enter app details** page is displayed on the wizard.
6. Enter and select your app information in the corresponding fields:
* **Label in Cerby:** It is the name to assign to your business hub in Cerby, and it will be displayed on the business hub card.
* **Business unique identifier:** It is the unique identifier of your business or organization in **Appsmith Hub**. For instructions on how to find it, read the [Requirements](#requirements) section.
* **User management and login method:** It is the way your users log in to the app and determines whether they must save their login credentials as a Cerby account connected to the business hub.
* Select the **Single sign-on (SSO)** option because access must be managed by your IdP, and users log in with SSO authentication. They are not asked to save their credentials in Cerby.
**IMPORTANT:** The **Username and password** option\*\*\*\* is not currently available for Appsmith.
7. Click the **Next** button. The **Select automation account** page is displayed with a list of existing Appsmith accounts.
8. Select the automation account you have previously added to Cerby, as described in the [Requirements](#requirements) section. **NOTE:** If you don’t have an automation account, you are prompted to add it. Make sure you read Cerby’s recommendations on how to configure it in the article [Create a service account for your business hub](/setup-and-admin/business-hubs/connecting-your-apps/create-a-service-account-for-your-business-hub). You may need to add the account first and then add the business hub.
9. Click the **Connect app** button. The wizard closes, and a success message box is displayed. The corresponding business hub is also displayed on the **Business Hubs** page.
The next step is [2. Check for updates to import users and roles to Cerby](#id-2.-check-for-updates-to-import-users-and-roles-to-cerby).
### 2. Check for updates to import users and roles to Cerby
To check for updates in your app to identify and import users and roles to Cerby, you must complete the following steps:
1. Select the **Business Hubs** option from the left menu. The **Business Hubs** page is displayed.
2. Click the **More options** (...) icon of the corresponding business hub card. A drop-down menu is displayed.
3. Select the **Settings** option from the menu. The business hub details page is displayed with the **Settings** tab activated.
4. Click the **Check for updates** button located at the top right of the page. A message box is displayed with information about the process. **NOTE:** The check and import process may take a few minutes depending on the number of users, and because Cerby automatically matches users to their corresponding Cerby user account.
5. Confirm that the automated task to check for updates has the “Completed” status by performing any of the following actions:
* Click the **More details** button from the message box.
* Select the **Automation** option from the left menu to open the **Automation** page with a list of automated tasks and their status.
{% hint style="info" %}
**NOTE:** Cerby automatically performs daily checks for updates for all business hubs, but you can trigger them manually, as described in this section. For more instructions, read the article [Sync your app users with your business hub](/setup-and-admin/business-hubs/managing-users-and-assets-via-a-business-hub/sync-your-business-hub-with-your-external-app).
{% endhint %}
The next step is [3. Connect your Appsmith user account to the business hub](#id-3.-connect-your-appsmith-user-account-to-the-business-hub).
### 3. Connect your Appsmith user account to the business hub
To connect your Appsmith user account to the business hub so Cerby can manage and protect it, you must complete the following steps:
1. Select the **Accounts** option from the left menu. The **Accounts** page is displayed.
2. Click the **Log in** button of the corresponding Appsmith Hub account card. The **Connect your Appsmith Hub Account** dialog box is displayed.
3. Enter the login credentials of your **Appsmith** user account.
4. Click the **Connect account** button. The dialog box closes, and a success message box and a new account card are displayed.
The next step is [4. Manage unmatched users](#id-4.-manage-unmatched-users).
### 4. Manage unmatched users
During a check for updates, Cerby automatically matches app members to the Cerby user accounts that correspond to their email addresses, including existing [guest users](https://help.cerby.com/getting-started/concepts/user-management/guest-users) and [local partners](https://help.cerby.com/getting-started/concepts/user-management/partners#h-7e4add33a2). Manual matching is required when apps don't provide email addresses and for app members using personal or external accounts that couldn’t be identified or are not in the corporate directory.
To view the status of the imported app members, you must complete the following steps:
1. Select the **Business Hubs** option from the left menu. The **Business Hubs** page is displayed.
2. Click the **More options** (...) icon of the corresponding business hub card. A drop-down menu is displayed.
3. Select the **View Members** option from the menu. The business hub details page is displayed with the **Members** tab activated. App members are displayed in the following tabs of the **User Overview** section:
* **Unmatched users:** This tab displays the users who were not automatically matched.
* **Onboarded users:** This tab displays the users matched to their Cerby user account.
* **Guest users:** This tab displays the users who were matched to an existing Cerby user account but it doesn’t exist in the corporate directory, such as external collaborators.
For unmatched users, you can perform one of the following actions:
* [Match users](#match-users)
* [Remove unmatched users](#remove-unmatched-users)
* [Exempt unmatched users](#exempt-unmatched-users)
The following sections describe each action.
#### Match users
To match users, you must complete the following steps from the **Unmatched users** tab of the business hub details page:
1. Click the **Match user** button of the corresponding user. The **Match user** dialog box is displayed.
2. Enter the username or email address of the user you want to match and invite in the **Match with** field. The user is displayed on a list.
3. Select the user from the list.
4. Click the **Next** button. The **Select Cerby role** dialog box is displayed.
5. Select the role to assign to the user on the business hub **Cerby role** drop-down menu:
* **Owner:** This role enables sharing access and managing business hub settings in Cerby.
* **Collaborator:** This role enables only logging in to the app from Cerby.
6. Click the **Match user** button. The dialog box closes, and a success message box is displayed. The user is moved to the **Onboarded users** tab.
#### Remove unmatched users
To remove unmatched users, you must complete the following steps from the **Unmatched users** tab of the business hub details page:
{% hint style="danger" %}
**IMPORTANT:** When removing an unmatched user, Cerby performs an automated task to revoke the user’s seat and permissions in Appsmith.
{% endhint %}
1. Click the **More options** (...) icon of the corresponding user. A drop-down menu is displayed.
2. Select the **Remove user** option from the menu. The **Remove user?** dialog box is displayed.
3. Click the **Remove user** button. The dialog box closes, and a success message box is displayed. The user is removed from the app via an automated task.
#### Exempt unmatched users
Exempted users keep their user accounts or seats active in your app, but you cannot manage them through Cerby.
To exempt unmatched users, you must complete the following steps from the **Unmatched users** tab of the business hub details page:
1. Click the **More options** (...) icon of the corresponding user. A drop-down menu is displayed.
2. Select the **Exempt user** option from the menu. The exempt user dialog box is displayed.
3. Enter a reason for exempting the user in the **Provide a reason** field.
4. Click the **Exempt member** button. The dialog box closes, and a success message box is displayed. The user is moved to the **Exempted users** tab.
***
## Use your business hub
The following are the supported features of business hubs you can use:
* [Join the external app and set up your business hub access](https://help.cerby.com/cerby-web-app/business-hubs/join-your-external-app-and-set-up-your-business-hub-access)
* [Add users to your app via a business hub](/setup-and-admin/business-hubs/managing-users-and-assets-via-a-business-hub/add-users-and-teams-to-your-apps-via-a-business-hub)
* [Provision users to your apps via an IdP and business hub](/setup-and-admin/business-hubs/managing-users-and-assets-via-a-business-hub/provision-users-to-your-apps-via-an-idp-and-business-hub)
* [Remove users from your app via a business hub](/setup-and-admin/business-hubs/managing-users-and-assets-via-a-business-hub/remove-users-from-your-app-via-a-business-hub)
* [Remove teams from your app via a business hub](/setup-and-admin/business-hubs/managing-users-and-assets-via-a-business-hub/remove-teams-from-your-app-via-a-business-hub)
* [Deprovision users from your apps via an IdP and business hub](/setup-and-admin/business-hubs/managing-users-and-assets-via-a-business-hub/deprovision-users-from-your-apps-via-an-idp-and-business-hub)
* [Update user roles in your app via a business hub](/setup-and-admin/business-hubs/managing-users-and-assets-via-a-business-hub/update-user-roles-in-your-app-via-a-business-hub)
* [Update team member roles in your app via a business hub](/setup-and-admin/business-hubs/managing-users-and-assets-via-a-business-hub/update-team-member-roles-in-your-app-via-a-business-hub)
* [Update user roles in your apps via an IdP and business hub](/setup-and-admin/business-hubs/managing-users-and-assets-via-a-business-hub/update-user-roles-in-your-apps-via-an-idp-and-business-hub)
* [Sync your app users with your business hub](/setup-and-admin/business-hubs/managing-users-and-assets-via-a-business-hub/sync-your-business-hub-with-your-external-app)
* [Log in to your app via a business hub](https://help.cerby.com/cerby-web-app/business-hubs/log-in-to-your-app)
* [Track the activity of business hub users](/setup-and-admin/business-hubs/managing-users-and-assets-via-a-business-hub/track-activity-on-app-members-user-accounts)
* [Remove a business hub](/setup-and-admin/business-hubs/managing-your-business-hubs/remove-a-business-hub)
# Connect a business hub for Artisan
This article describes how to connect a business hub to centrally manage the users of Artisan from Cerby.
{% hint style="info" %}
**Who can use this feature?**
* Workspace **Owners**, **Super Admins**, **Admins**, and **Users**
* Only supported using the Cerby web app
{% endhint %}
As a user with any workspace role in Cerby, except **Guest User** and **Login-Only**, you can connect a business hub integration to centrally manage the users of Artisan.
When you connect the business hub, you become its **Owner**, and you can perform the following user and access management tasks through automated tasks executed by the Cerby agent:
* Check for updates
* Add users
* Remove users
{% hint style="success" %}
**TIP:** For more details about the automated tasks of a business hub, how it works, and the supported apps, read the article [Explore Business Hubs](https://help.cerby.com/setup-and-admin/business-hubs/business-hub-catalog).
{% endhint %}
{% hint style="info" %}
**NOTE:** The automated task to update user roles is not available for this business hub.
{% endhint %}
This article provides instructions on how to connect a business hub for Artisan. For other app-specific articles and videos, review the [Connecting business hubs for your apps](https://help.cerby.com/setup-and-admin/business-hubs/connecting-your-apps) and [Connecting business hubs for your paid social apps](https://help.cerby.com/setup-and-admin/business-hubs/connecting-your-paid-social-apps) collections in the Cerby Help Center.
***
## Requirements
The following are the requirements to connect a business hub:
* A Cerby workspace
* A Cerby user account with the **Owner**, **Super Admin**, **Admin**, or **User** role
* Groups configured in your identity provider (IdP) if you want to leverage automatic user provisioning and deprovisioning from your apps based on group assignment events. For more information, read the articles available in the [Managing users via an IdP and business hub](https://help.cerby.com/setup-and-admin/business-hubs/managing-users-and-assets-via-a-business-hub) collection in the Cerby Help Center
* An automation account, meaning an active user account with a native **Admin** role in Artisan to be used as a service account. For instructions and recommendations on how to create and configure this account, read the article [Create a service account for your business hub](/setup-and-admin/business-hubs/connecting-your-apps/create-a-service-account-for-your-business-hub)
* The user management and login method for your business hub identified to select the corresponding option when connecting your app. For more information, read the **User management and login method** section of the article [Explore Business Hubs](https://help.cerby.com/setup-and-admin/business-hubs/business-hub-catalog)
***
## Connect a business hub for Artisan
To connect a business hub for Artisan, you must complete the following main steps from the Cerby web app dashboard:
1. [Add a business hub and connect it to Artisan](#id-1.-add-a-business-hub-and-connect-it-to-artisan)
2. [Check for updates to import users and roles to Cerby](#id-2.-check-for-updates-to-import-users-and-roles-to-cerby)
3. [Connect your Artisan user account to the business hub](#id-3.-connect-your-artisan-user-account-to-the-business-hub)
4. [Manage unmatched users](#id-4.-manage-unmatched-users)
The following sections describe each main step.
### 1. Add a business hub and connect it to Artisan
To add a business hub and connect it to Artisan, you must complete the following steps:
1. Log in to your corresponding [Cerby](https://app.cerby.com/) workspace.
2. Select the **Business Hubs** option from the left menu. The **Business Hubs** page is displayed.
3. Click the **Connect Business Hub** button located at the top-right corner of the page. The **Connect your Business Hubs to Cerby** dialog box is displayed. **TIP:** Select the **Don’t show this again** option to skip this step the next time you connect a new business hub.
4. Click the **Get started** button. A wizard is displayed on the **Select app** page.
5. Select **Artisan Hub** from the catalog. The **Enter app details** page is displayed on the wizard.
6. Enter and select your app information in the corresponding fields:
* **Label in Cerby:** It is the name to assign to your business hub in Cerby, and it will be displayed on the business hub card.
* **Business unique identifier:** It is a unique identifier that differentiates your business hub in Cerby from others for the same app. You can assign an alphanumeric value between 3 and 30 characters without symbols or special characters.
* **User management and login method:** It is the way your users log in to the app and determines whether they must save their login credentials as a Cerby account connected to the business hub.
1. Select the **Single sign-on (SSO)** option because access must be managed by your IdP, and users log in with SSO authentication. They are not asked to save their credentials in Cerby. **IMPORTANT** : The **Username and password** option is not supported for Artisan.
7. Click the **Next** button. The **Select automation account** page is displayed with a list of existing Artisan accounts.
8. Select the automation account you have previously added to Cerby, as described in the [Requirements](#requirements) section. **NOTE:** If you don’t have an automation account, you are prompted to add it. Make sure you read Cerby’s recommendations on how to configure it in the article [Create a service account for your business hub](https://help.cerby.com/setup-and-admin/business-hubs/connecting-your-apps/create-a-service-account-for-your-business-hub). You may need to add the account first and then add the business hub.
9. Click the **Connect app** button. The wizard closes, and a success message box is displayed. The corresponding business hub is also displayed on the **Business Hubs** page
The next step is [2. Check for updates to import users and roles to Cerby](/setup-and-admin/business-hubs/connecting-your-apps/connect-a-business-hub-for-your-app#h-9c6531cf9a).
### 2. Check for updates to import users and roles to Cerby
To check for updates in your app to identify and import users and roles to Cerby, you must complete the following steps:
1. Select the **Business Hubs** option from the left menu. The **Business Hubs** page is displayed.
2. Click the **More options** (...) icon of the corresponding business hub card. A drop-down menu is displayed.
3. Select the **Settings** option from the menu. The business hub details page is displayed with the **Settings** tab activated.
4. Click the **Sync** button located at the top right of the page. A message box is displayed with information about the process. **NOTE:** The check and import process may take a few minutes, depending on the number of users, and because Cerby automatically matches users to their corresponding Cerby user account.
5. Confirm that the automated task to check for updates has the “Completed” status by performing any of the following actions:
* Click the **More details** button in the message box.
* Select the **Automation** option from the left menu to open the **Automation** page with a list of automated tasks and their status.
{% hint style="info" %}
**NOTE:** Cerby automatically performs daily checks for updates for all business hubs, but you can trigger them manually, as described in this section. For more instructions, read the article [Sync your app users with your business hub](/setup-and-admin/business-hubs/managing-users-and-assets-via-a-business-hub/sync-your-business-hub-with-your-external-app).
{% endhint %}
The next step is [3. Connect your Artisan user account to the business hub](#id-3.-connect-your-artisan-user-account-to-the-business-hub).
### 3. Connect your Artisan user account to the business hub
To connect your Artisan user account to the business hub so Cerby can manage and protect it, you must complete the following steps:
1. Select the **Accounts** option from the left menu. The **All accounts** page is displayed.
2. Click the **Log in** button of the corresponding Artisan Hub account card. The **Connect your Artisan Hub Account** dialog box is displayed.
3. Enter the login credentials of your **Artisan** user account.
4. Click the **Connect account** button. The dialog box closes, and a success message box and a new account card are displayed.
The next step is [4. Manage unmatched users](#id-4.-manage-unmatched-users).
### 4. Manage unmatched users
During a check for updates, Cerby automatically matches app members to the Cerby user accounts that correspond to their email addresses, including existing [guest users](https://help.cerby.com/getting-started/concepts/user-management/guest-users) and [local partners](https://help.cerby.com/getting-started/concepts/user-management/partners#h-7e4add33a2). Manual matching is required when apps don't provide email addresses and for app members using personal or external accounts that couldn’t be identified or are not in the corporate directory.
To view the status of the imported app members, you must complete the following steps:
1. Select the **Business Hubs** option from the left menu. The **Business Hubs** page is displayed.
2. Click the **More options** (...) icon of the corresponding business hub card. A drop-down menu is displayed.
3. Select the **View Members** option from the menu. The business hub details page is displayed with the **Members** tab activated. App members are displayed in the following tabs of the **User Overview** section:
* **Unmatched users:** This tab displays the users who were not automatically matched.
* **Onboarded users:** This tab displays the users matched to their Cerby user account.
* **Guest users:** This tab displays the users who were matched to an existing Cerby user account, but it doesn’t exist in the corporate directory, such as external collaborators.
For unmatched users, you can perform one of the following actions:
* [Match users](#match-users)
* [Remove unmatched users](#remove-unmatched-users)
* [Exempt unmatched users](#exempt-unmatched-users)
The following sections describe each action.
#### Match users
To match users, you must complete the following steps from the **Unmatched users** tab of the business hub details page:
1. Click the **Match user** button of the corresponding user. The **Match user** dialog box is displayed.
2. Enter the username or email address of the user you want to match and invite in the **Match with** field. The user is displayed on a list.
3. Select the user from the list.
4. Click the **Next** button. The **Select Cerby role** dialog box is displayed.
5. Select the role to assign to the user on the business hub **Cerby role** drop-down menu:
* **Owner:** This role enables sharing access and managing business hub settings in Cerby.
* **Collaborator:** This role enables only logging in to the app from Cerby.
6. Click the **Match user** button. The dialog box closes, and a success message box is displayed. The user is moved to the **Onboarded users** tab.
#### Remove unmatched users
To remove unmatched users, you must complete the following steps from the **Unmatched users** tab of the business hub details page:
{% hint style="danger" %}
**IMPORTANT:** When removing an unmatched user, Cerby performs an automated task to revoke the user’s seat and permissions in Artisan.
{% endhint %}
1. Click the **More options** (...) icon of the corresponding user. A drop-down menu is displayed.
2. Select the **Remove user** option from the list. The **Remove user?** dialog box is displayed.
3. Click the **Remove user** button. The dialog box closes, and a success message box is displayed. The user is removed from the app via an automated task.
#### Exempt unmatched users
Exempted users keep their user accounts or seats active in your app, but you cannot manage them through Cerby.
To exempt unmatched users, you must complete the following steps from the **Unmatched users** tab of the business hub details page:
1. Click the **More options** (...) icon of the corresponding user. A drop-down list is displayed.
2. Select the **Exempt user** option from the list. The exempt user dialog box is displayed.
3. Enter a reason for exempting the user in the **Provide a reason** field.
4. Click the **Exempt member** button. The dialog box closes, and a success message box is displayed. The user is moved to the **Exempted users** tab.
***
## Use your business hub
The following are the supported features of business hubs you can use:
* [Join the external app and set up your business hub access](https://help.cerby.com/cerby-web-app/business-hubs/join-your-external-app-and-set-up-your-business-hub-access)
* [Add users to your app via a business hub](/setup-and-admin/business-hubs/managing-users-and-assets-via-a-business-hub/add-users-and-teams-to-your-apps-via-a-business-hub)
* [Provision users to your apps via an IdP and business hub](/setup-and-admin/business-hubs/managing-users-and-assets-via-a-business-hub/provision-users-to-your-apps-via-an-idp-and-business-hub)
* [Remove users from your app via a business hub](/setup-and-admin/business-hubs/managing-users-and-assets-via-a-business-hub/remove-users-from-your-app-via-a-business-hub)
* [Remove teams from your app via a business hub](/setup-and-admin/business-hubs/managing-users-and-assets-via-a-business-hub/remove-teams-from-your-app-via-a-business-hub)
* [Deprovision users from your apps via an IdP and business hub](/setup-and-admin/business-hubs/managing-users-and-assets-via-a-business-hub/deprovision-users-from-your-apps-via-an-idp-and-business-hub)
* [Sync your app users with your business hub](/setup-and-admin/business-hubs/managing-users-and-assets-via-a-business-hub/sync-your-business-hub-with-your-external-app)
* [Log in to your app via a business hub](https://help.cerby.com/cerby-web-app/business-hubs/log-in-to-your-app)
* [Track the activity of business hub users](/setup-and-admin/business-hubs/managing-users-and-assets-via-a-business-hub/track-activity-on-app-members-user-accounts)
* [Remove a business hub](/setup-and-admin/business-hubs/managing-your-business-hubs/remove-a-business-hub)
# Connect a business hub for Artlist
This article describes how to connect a business hub to centrally manage the users of Artlist from Cerby.
{% hint style="info" %}
**Who can use this feature?**
* Workspace **Owners**, **Super Admins**, **Admins**, and **Users**
* Only supported using the Cerby web app
{% endhint %}
As a user with any workspace role in Cerby, except **Guest User** and **Login-Only**, you can connect a business hub integration to centrally manage the users of Artlist.
When you connect the business hub, you become its **Owner**, and you can perform the following user and access management tasks through automated tasks or API calls executed by the Cerby agent:
* Check for updates
* Invite app members
* Update app members’ roles
* Remove app members
{% hint style="success" %}
**TIP:** For more details about the automated tasks of a business hub, how it works, and the supported apps, read the article [Explore Apps](https://help.cerby.com/setup-and-admin/business-hubs/business-hub-catalog).
{% endhint %}
This article provides instructions on how to connect a business hub for Artlist. For other app-specific articles and videos, review the [Connecting your business hubs](https://help.cerby.com/setup-and-admin/business-hubs/connecting-your-apps) collection in the Cerby Help Center.
***
## Requirements
The following are the requirements to connect a business hub:
* A Cerby workspace
* A Cerby user account with the **Owner**, **Super Admin**, **Admin**, or **User** role
* A collaboration space in Artlist
* Groups configured in your identity provider (IdP) if you want to leverage automatic user provisioning and deprovisioning from your apps based on group assignment events. For more information, read the article [Provision users to your apps via an IdP and business hub](https://help.cerby.com/setup-and-admin/business-hubs/managing-users-and-assets-via-a-business-hub/provision-users-to-your-apps-via-an-idp-and-business-hub)
* An automation account, meaning an active user account with a native **Admin** role in Artlist to be used as a service account. For instructions and recommendations on how to create and configure this account, read the article [Create a service account for your business hub](https://help.cerby.com/setup-and-admin/business-hubs/connecting-your-apps/create-a-service-account-for-your-business-hub)
* The user management and login method for your business hub identified to select the corresponding option when connecting your app. For more information, read the **User management and login method** section of the article [Explore Apps](https://help.cerby.com/setup-and-admin/business-hubs/business-hub-catalog)
***
## Connect a business hub for Artlist
To connect a business hub for Artlist, you must complete the following main steps from the Cerby web app dashboard:
1. [Add a business hub and connect it to Artlist](#id-1.-add-a-business-hub-and-connect-it-to-artlist)
2. [Check for updates to import users and roles to Cerby](#id-2.-check-for-updates-to-import-users-and-roles-to-cerby)
3. [Connect your Artlist user account to the business hub](#id-3.-connect-your-artlist-user-account-to-the-business-hub)
4. [Manage unmatched users](#id-4.-manage-unmatched-users)
The following sections describe each main step.
### 1. Add a business hub and connect it to Artlist
To add a business hub and connect it to Artlist, you must complete the following steps:
1. Log in to your corresponding [Cerby](https://app.cerby.com/) workspace.
2. Select the **Business Hubs** option from the left navigation drawer. The **Business Hubs** page is displayed.
3. Click the **Connect Business Hub** button located at the top-right corner of the page. The **Connect your Business Hubs to Cerby** dialog box is displayed. **TIP:** Select the **Don’t show this again** option to skip this step the next time you connect a new business hub.
4. Click the **Get started** button. A wizard is displayed on the **Select app** page.
5. Select **Artlist Hub** from the catalog. The **Enter app details** page is displayed on the wizard.
6. Enter and select your app information in the corresponding fields:
* **Label in Cerby:** It is the name to assign to your business hub in Cerby, and it will be displayed on the business hub card.
* **Internal Unique Identifier:** It is a unique identifier that differentiates your business hub in Cerby from others for the same app. You can assign an alphanumeric value between 3 and 30 characters without symbols or special characters.
* **User management and login method:** It is the way your users log in to the app and determines whether they must save their login credentials as a Cerby account connected to the business hub. You must select one of the following methods:
* **Single sign-on (SSO):** Access is managed by your identity provider, and users log in with SSO authentication. They are not asked to save their credentials in Cerby.
* **Username and password:** Cerby manages account security and access, and users log in with their credentials after saving them in Cerby.
7. Click the **Next** button. The **Select automation account** page is displayed with a list of existing Artlist accounts.
8. Select the automation account you have previously added to Cerby, as described in the [Requirements](#requirements) section. **NOTE:** If you don’t have an automation account, you are prompted to add it. Make sure you read Cerby’s recommendations on how to configure it in the article [Create a service account for your business hub](https://help.cerby.com/setup-and-admin/business-hubs/connecting-your-apps/create-a-service-account-for-your-business-hub). You may need to add the account first and then add the business hub.
9. Click the **Connect app** button. The wizard closes, and a success message box is displayed. The corresponding business hub is also displayed on the **Business Hubs** page.
The next step is [2. Check for updates to import users and roles to Cerby](#id-2.-check-for-updates-to-import-users-and-roles-to-cerby).
### 2. Check for updates to import users and roles to Cerby
To check for updates in your app to identify and import users and roles to Cerby, you must complete the following steps:
1. Select the **Business Hubs** option from the left navigation drawer. The **Business Hubs** page is displayed.
2. Click the **Settings** ( ) icon of the corresponding business hub card. The business hub details page is displayed with the **Settings** tab activated.
3. Click the **Check for updates** button located at the top right of the page. A message box is displayed with information about the process. **NOTE:** The check and import process may take a few minutes depending on the number of users, and because Cerby automatically matches users to their corresponding Cerby user account.
4. Confirm that the automated task to check for updates has the “Completed” status by performing any of the following actions:
* Click the **More details** button from the message box.
* Select the **Automation** option from the left navigation drawer to open the **Automation** page with a list of automated tasks and their status.
{% hint style="info" %}
**NOTE:** Cerby automatically performs daily checks for updates for all business hubs, but you can trigger them manually, as described in this section. When a user is deprovisioned from an IdP and a check for updates is performed, Cerby generates a report and sends business hub **Owners** an email to confirm their removal from the app. For more instructions, read the article [Check for updates in your app and apply report](/setup-and-admin/business-hubs/managing-users-and-assets-via-a-business-hub/sync-your-business-hub-with-your-external-app).
{% endhint %}
The next step is [3. Connect your Artlist user account to the business hub](#id-3.-connect-your-artlist-user-account-to-the-business-hub).
### 3. Connect your Artlist user account to the business hub
To connect your Artlist user account to the business hub so Cerby can manage and protect it, you must complete the following steps:
1. Select the **Accounts** option from the left navigation drawer. The **Accounts** page is displayed.
2. Click the **Log in** button of the corresponding Artlist Hub account card. The **Connect your Artlist Hub Account** dialog box is displayed.
3. Enter the login credentials of your **Artlist** user account.
4. Click the **Connect account** button. The dialog box closes, and a success message box and a new account card are displayed.
The next step is [4. Manage unmatched users](#id-4.-manage-unmatched-users).
### 4. Manage unmatched users
During a check for updates, Cerby automatically matches app members to the Cerby user accounts that correspond to their email addresses, including existing [guest users](https://help.cerby.com/getting-started/concepts/user-management/guest-users) and [local partners](https://help.cerby.com/getting-started/concepts/user-management/partners#h-7e4add33a2). Manual matching is required when apps don't provide email addresses and for app members using personal or external accounts that couldn’t be identified or are not in the corporate directory.
To view the status of the imported app members, you must complete the following steps:
1. Select the **Business Hubs** option from the left navigation drawer. The **Business Hubs** page is displayed.
2. Click the **More options** (...) icon of the corresponding business hub card. A drop-down list is displayed.
3. Select the **View Members** option from the list. The business hub details page is displayed with the **Members** tab activated. App members are displayed in the following tabs of the **User Overview** section:
* **Unmatched users:** This tab displays the users who were not automatically matched.
* **Onboarded users:** This tab displays the users matched to their Cerby user account.
* **Guest users:** This tab displays the users who were matched to an existing Cerby user account but it doesn’t exist in the corporate directory, such as external collaborators.
For unmatched users, you can perform one of the following actions:
* [Match users](#match-users)
* [Remove unmatched users](#remove-unmatched-users)
* [Exempt unmatched users](#exempt-unmatched-users)
The following sections describe each action.
#### Match users
To match users, you must complete the following steps from the **Unmatched users** tab of the business hub details page:
1. Click the **Match user** button of the corresponding user. The **Match user** dialog box is displayed.
2. Enter the username or email address of the user you want to match and invite in the **Match with** field. The user is displayed on a list.
3. Select the user from the list.
4. Click the **Next** button. The **Select Cerby role** dialog box is displayed.
5. Select the role to assign to the user on the business hub **Cerby role** drop-down list:
* **Owner:** This role enables sharing access and managing business hub settings in Cerby.
* **Collaborator:** This role enables only logging in to the app from Cerby.
6. Click the **Match user** button. The dialog box closes, and a success message box is displayed. The user is moved to the **Onboarded users** tab.
#### Remove unmatched users
To remove unmatched users, you must complete the following steps from the **Unmatched users** tab of the business hub details page:
{% hint style="danger" %}
**IMPORTANT:** When removing an unmatched user, Cerby performs an automated task to revoke the user’s seat and permissions in Artlist.
{% endhint %}
1. Click the **More options** (...) icon of the corresponding user. A drop-down list is displayed.
2. Select the **Remove user** option from the list. The **Remove user?** dialog box is displayed.
3. Click the **Remove user** button. The dialog box closes, and a success message box is displayed. The user is removed from the app via an automated task.
#### Exempt unmatched users
Exempted users keep their user accounts or seats active in your app, but you cannot manage them through Cerby.
To exempt unmatched users, you must complete the following steps from the **Unmatched users** tab of the business hub details page:
1. Click the **More options** (...) icon of the corresponding user. A drop-down list is displayed.
2. Select the **Exempt user** option from the list. The exempt user dialog box is displayed.
3. Enter a reason for exempting the user in the **Provide a reason** field.
4. Click the **Exempt member** button. The dialog box closes, and a success message box is displayed. The user is moved to the **Exempted users** tab.
***
## Use your business hub
The following are the supported features of business hubs you can use:
* [Join the App and connect it to Cerby](https://help.cerby.com/cerby-web-app/business-hubs/join-your-external-app-and-set-up-your-business-hub-access)
* [Invite new app members](/setup-and-admin/business-hubs/managing-users-and-assets-via-a-business-hub/add-users-and-teams-to-your-apps-via-a-business-hub)
* [Remove app members](/setup-and-admin/business-hubs/managing-users-and-assets-via-a-business-hub/remove-users-from-your-app-via-a-business-hub)
* [Provision users to your apps via an IdP and business hub](https://help.cerby.com/setup-and-admin/business-hubs/managing-users-and-assets-via-a-business-hub/provision-users-to-your-apps-via-an-idp-and-business-hub)
* [Update the app members’ roles](/setup-and-admin/business-hubs/managing-users-and-assets-via-a-business-hub/update-user-roles-in-your-app-via-a-business-hub)
* [Check for updates in your app and apply report](/setup-and-admin/business-hubs/managing-users-and-assets-via-a-business-hub/sync-your-business-hub-with-your-external-app)
* [Re-assign the app members’ user accounts](https://github.com/cerbyinc/help-center/tree/main/.uncategorized/unpublished-deprecated-re-assign-the-app-members-user-accounts.md)
* [Manage the security of app members’ user accounts](/setup-and-admin/business-hubs/managing-users-and-assets-via-a-business-hub/protect-your-app-user-accounts-via-a-business-hub)
* [Log in to your app](https://help.cerby.com/cerby-web-app/business-hubs/log-in-to-your-app)
* [Track activity on app members’ user accounts](/setup-and-admin/business-hubs/managing-users-and-assets-via-a-business-hub/track-activity-on-app-members-user-accounts)
* [Remove an App](/setup-and-admin/business-hubs/managing-your-business-hubs/remove-a-business-hub)
# Connect a business hub for Asana
This article describes how to connect a business hub to centrally manage the users of Asana from Cerby.
{% hint style="info" %}
**Who can use this feature?**
* Workspace **Owners**, **Super Admins**, **Admins**, and **Users**
* Only supported using the Cerby web app
{% endhint %}
As a user with any workspace role in Cerby, except **Guest User** and **Login-Only**, you can connect a business hub integration to centrally manage the users of Asana.
When you connect the business hub, you become its **Owner**, and you can perform the following user and access management tasks through automated tasks executed by the Cerby agent:
* Check for updates
* Invite app members
* Update app members’ roles
* Remove app members
{% hint style="success" %}
**TIP:** For more details about the automated tasks of a business hub, how it works, and the supported apps, read the article [Explore Apps](https://help.cerby.com/setup-and-admin/business-hubs/business-hub-catalog).
{% endhint %}
This article provides instructions on how to connect a business hub for Asana. For other app-specific articles and videos, review the [Connecting your business hubs](https://help.cerby.com/setup-and-admin/business-hubs/connecting-your-apps) collection in the Cerby Help Center.
***
## Requirements
The following are the requirements to connect a business hub:
* A Cerby workspace
* A Cerby user account with the **Owner**, **Super Admin**, **Admin**, or **User** role
* A workspace in Asana
* Groups configured in your identity provider (IdP) if you want to leverage automatic user provisioning and deprovisioning from your apps based on group assignment events. For more information, read the article [Provision users to your apps via an IdP and business hub](https://help.cerby.com/setup-and-admin/business-hubs/managing-users-and-assets-via-a-business-hub/provision-users-to-your-apps-via-an-idp-and-business-hub)
* An automation account, meaning an active user account with a native **Admin** role in Asana to be used as a service account. For instructions and recommendations on how to create and configure this account, read the article [Create a service account for your business hub](https://help.cerby.com/setup-and-admin/business-hubs/connecting-your-apps/create-a-service-account-for-your-business-hub)
* The user management and login method for your business hub identified to select the corresponding option when connecting your app. For more information, read the **User management and login method** section of the article [Explore Apps](https://help.cerby.com/setup-and-admin/business-hubs/business-hub-catalog)
* A Business ID. You can find the ID in the address bar by completing the following steps after logging in to Asana:
1. Click your user profile at the top right of the page.
2. Select the **Admin console** option from the drop-down menu. The admin console page is displayed.
3. Copy the ID from the address bar. The ID is displayed in the address bar as part of the URL, between the \*\*`admin` \*\*and **`insights`** subdirectory. For example, **`1209392144075813`** in **`https://app.asana.com/admin/1209392144075813/insights`.**
***
## Connect a business hub for Asana
To connect a business hub for Asana, you must complete the following main steps from the Cerby web app dashboard:
1. [Add a business hub and connect it to Asana](#id-1.-add-a-business-hub-and-connect-it-to-asana)
2. [Check for updates to import users and roles to Cerby](#id-2.-check-for-updates-to-import-users-and-roles-to-cerby)
3. [Connect your Asana user account to the business hub](#id-3.-connect-your-asana-user-account-to-the-business-hub)
4. [Manage unmatched users](#id-4.-manage-unmatched-users)
The following sections describe each main step.
### 1. Add a business hub and connect it to Asana
To add a business hub and connect it to Asana, you must complete the following steps:
1. Log in to your corresponding [Cerby](https://app.cerby.com/) workspace.
2. Select the **Business Hubs** option from the left navigation drawer. The **Business Hubs** page is displayed.
3. Click the **Connect Business Hub** button located at the top-right corner of the page. The **Connect your Business Hubs to Cerby** dialog box is displayed. **TIP:** Select the **Don’t show this again** option to skip this step the next time you connect a new business hub.
4. Click the **Get started** button. A wizard is displayed on the **Select app** page.
5. Select **Asana Hub** from the catalog. The **Enter app details** page is displayed on the wizard.
6. Enter and select your app information in the corresponding fields:
* **Label in Cerby:** It is the name to assign to your business hub in Cerby, and it will be displayed on the business hub card.
* **Business ID:** It is the unique identifier of your business or organization in **Asana Hub**. For instructions on how to find it, read the [Requirements](#requirements) section.
* **User management and login method:** It is the way your users log in to the app and determines whether they must save their login credentials as a Cerby account connected to the business hub. You must select one of the following methods:
* **Single sign-on (SSO):** Access is managed by your identity provider, and users log in with SSO authentication. They are not asked to save their credentials in Cerby.
* **Username and password:** Cerby manages account security and access, and users log in with their credentials after saving them in Cerby.
7. Click the **Next** button. The **Select automation account** page is displayed with a list of existing Asana accounts.
8. Select the automation account you have previously added to Cerby, as described in the [Requirements](#requirements) section. **NOTE:** If you don’t have an automation account, you are prompted to add it. Make sure you read Cerby’s recommendations on how to configure it in the article [Create a service account for your business hub](https://help.cerby.com/setup-and-admin/business-hubs/connecting-your-apps/create-a-service-account-for-your-business-hub). You may need to add the account first and then add the business hub.
9. Click the **Connect app** button. The wizard closes, and a success message box is displayed. The corresponding business hub is also displayed on the **Business Hubs** page.
The next step is [2. Check for updates to import users and roles to Cerby](#id-2.-check-for-updates-to-import-users-and-roles-to-cerby).
### 2. Check for updates to import users and roles to Cerby
To check for updates in your app to identify and import users and roles to Cerby, you must complete the following steps:
1. Select the **Business Hubs** option from the left navigation drawer. The **Business Hubs** page is displayed.
2. Click the **Settings** (
) icon of the corresponding business hub card. The business hub details page is displayed with the **Settings** tab activated.
3. Click the **Check for updates** button located at the top right of the page. A message box is displayed with information about the process. **NOTE:** The check and import process may take a few minutes depending on the number of users, and because Cerby automatically matches users to their corresponding Cerby user account.
4. Confirm that the automated task to check for updates has the “Completed” status by performing any of the following actions:
* Click the **More details** button from the message box.
* Select the **Automation** option from the left navigation drawer to open the **Automation** page with a list of automated tasks and their status.
{% hint style="info" %}
**NOTE:** Cerby automatically performs daily checks for updates for all business hubs, but you can trigger them manually, as described in this section. When a user is deprovisioned from an IdP and a check for updates is performed, Cerby generates a report and sends business hub **Owners** an email to confirm their removal from the app. For more instructions, read the article [Check for updates in your app and apply report](/setup-and-admin/business-hubs/managing-users-and-assets-via-a-business-hub/sync-your-business-hub-with-your-external-app).
{% endhint %}
The next step is [3. Connect your Artlist user account to the business hub](#id-3.-connect-your-artlist-user-account-to-the-business-hub).
### 3. Connect your Artlist user account to the business hub
To connect your Artlist user account to the business hub so Cerby can manage and protect it, you must complete the following steps:
1. Select the **Accounts** option from the left navigation drawer. The **Accounts** page is displayed.
2. Click the **Log in** button of the corresponding Artlist Hub account card. The **Connect your Artlist Hub Account** dialog box is displayed.
3. Enter the login credentials of your **Artlist** user account.
4. Click the **Connect account** button. The dialog box closes, and a success message box and a new account card are displayed.
The next step is [4. Manage unmatched users](#id-4.-manage-unmatched-users).
### 4. Manage unmatched users
During a check for updates, Cerby automatically matches app members to the Cerby user accounts that correspond to their email addresses, including existing [guest users](https://help.cerby.com/getting-started/concepts/user-management/guest-users) and [local partners](https://help.cerby.com/getting-started/concepts/user-management/partners#h-7e4add33a2). Manual matching is required when apps don't provide email addresses and for app members using personal or external accounts that couldn’t be identified or are not in the corporate directory.
To view the status of the imported app members, you must complete the following steps:
1. Select the **Business Hubs** option from the left navigation drawer. The **Business Hubs** page is displayed.
2. Click the **More options** (...) icon of the corresponding business hub card. A drop-down list is displayed.
3. Select the **View Members** option from the list. The business hub details page is displayed with the **Members** tab activated. App members are displayed in the following tabs of the **User Overview** section:
* **Unmatched users:** This tab displays the users who were not automatically matched.
* **Onboarded users:** This tab displays the users matched to their Cerby user account.
* **Guest users:** This tab displays the users who were matched to an existing Cerby user account but it doesn’t exist in the corporate directory, such as external collaborators.
For unmatched users, you can perform one of the following actions:
* [Match users](#match-users)
* [Remove unmatched users](#remove-unmatched-users)
* [Exempt unmatched users](#exempt-unmatched-users)
The following sections describe each action.
#### Match users
To match users, you must complete the following steps from the **Unmatched users** tab of the business hub details page:
1. Click the **Match user** button of the corresponding user. The **Match user** dialog box is displayed.
2. Enter the username or email address of the user you want to match and invite in the **Match with** field. The user is displayed on a list.
3. Select the user from the list.
4. Click the **Next** button. The **Select Cerby role** dialog box is displayed.
5. Select the role to assign to the user on the business hub **Cerby role** drop-down list:
* **Owner:** This role enables sharing access and managing business hub settings in Cerby.
* **Collaborator:** This role enables only logging in to the app from Cerby.
6. Click the **Match user** button. The dialog box closes, and a success message box is displayed. The user is moved to the **Onboarded users** tab.
#### Remove unmatched users
To remove unmatched users, you must complete the following steps from the **Unmatched users** tab of the business hub details page:
{% hint style="danger" %}
**IMPORTANT:** When removing an unmatched user, Cerby performs an automated task to revoke the user’s seat and permissions in Artlist.
{% endhint %}
1. Click the **More options** (...) icon of the corresponding user. A drop-down list is displayed.
2. Select the **Remove user** option from the list. The **Remove user?** dialog box is displayed.
3. Click the **Remove user** button. The dialog box closes, and a success message box is displayed. The user is removed from the app via an automated task.
#### Exempt unmatched users
Exempted users keep their user accounts or seats active in your app, but you cannot manage them through Cerby.
To exempt unmatched users, you must complete the following steps from the **Unmatched users** tab of the business hub details page:
1. Click the **More options** (...) icon of the corresponding user. A drop-down list is displayed.
2. Select the **Exempt user** option from the list. The exempt user dialog box is displayed.
3. Enter a reason for exempting the user in the **Provide a reason** field.
4. Click the **Exempt member** button. The dialog box closes, and a success message box is displayed. The user is moved to the **Exempted users** tab.
***
## Use your business hub
The following are the supported features of business hubs you can use:
* [Join the App and connect it to Cerby](https://help.cerby.com/cerby-web-app/business-hubs/join-your-external-app-and-set-up-your-business-hub-access)
* [Invite new app members](/setup-and-admin/business-hubs/managing-users-and-assets-via-a-business-hub/add-users-and-teams-to-your-apps-via-a-business-hub)
* [Remove app members](/setup-and-admin/business-hubs/managing-users-and-assets-via-a-business-hub/remove-users-from-your-app-via-a-business-hub)
* [Provision users to your apps via an IdP and business hub](https://help.cerby.com/setup-and-admin/business-hubs/managing-users-and-assets-via-a-business-hub/provision-users-to-your-apps-via-an-idp-and-business-hub)
* [Update the app members’ roles](/setup-and-admin/business-hubs/managing-users-and-assets-via-a-business-hub/update-user-roles-in-your-app-via-a-business-hub)
* [Check for updates in your app and apply report](/setup-and-admin/business-hubs/managing-users-and-assets-via-a-business-hub/sync-your-business-hub-with-your-external-app)
* [Re-assign the app members’ user accounts](https://github.com/cerbyinc/help-center/tree/main/.uncategorized/unpublished-deprecated-re-assign-the-app-members-user-accounts.md)
* [Manage the security of app members’ user accounts](/setup-and-admin/business-hubs/managing-users-and-assets-via-a-business-hub/protect-your-app-user-accounts-via-a-business-hub)
* [Log in to your app](https://help.cerby.com/cerby-web-app/business-hubs/log-in-to-your-app)
* [Track activity on app members’ user accounts](/setup-and-admin/business-hubs/managing-users-and-assets-via-a-business-hub/track-activity-on-app-members-user-accounts)
* [Remove an App](/setup-and-admin/business-hubs/managing-your-business-hubs/remove-a-business-hub)
# Connect a business hub for Asana
This article describes how to connect a business hub to centrally manage the users of Asana from Cerby.
{% hint style="info" %}
**Who can use this feature?**
* Workspace **Owners**, **Super Admins**, **Admins**, and **Users**
* Only supported using the Cerby web app
{% endhint %}
As a user with any workspace role in Cerby, except **Guest User** and **Login-Only**, you can connect a business hub integration to centrally manage the users of Asana.
When you connect the business hub, you become its **Owner**, and you can perform the following user and access management tasks through automated tasks executed by the Cerby agent:
* Check for updates
* Invite app members
* Update app members’ roles
* Remove app members
{% hint style="success" %}
**TIP:** For more details about the automated tasks of a business hub, how it works, and the supported apps, read the article [Explore Apps](https://help.cerby.com/setup-and-admin/business-hubs/business-hub-catalog).
{% endhint %}
This article provides instructions on how to connect a business hub for Asana. For other app-specific articles and videos, review the [Connecting your business hubs](https://help.cerby.com/setup-and-admin/business-hubs/connecting-your-apps) collection in the Cerby Help Center.
***
## Requirements
The following are the requirements to connect a business hub:
* A Cerby workspace
* A Cerby user account with the **Owner**, **Super Admin**, **Admin**, or **User** role
* A workspace in Asana
* Groups configured in your identity provider (IdP) if you want to leverage automatic user provisioning and deprovisioning from your apps based on group assignment events. For more information, read the article [Provision users to your apps via an IdP and business hub](https://help.cerby.com/setup-and-admin/business-hubs/managing-users-and-assets-via-a-business-hub/provision-users-to-your-apps-via-an-idp-and-business-hub)
* An automation account, meaning an active user account with a native **Admin** role in Asana to be used as a service account. For instructions and recommendations on how to create and configure this account, read the article [Create a service account for your business hub](https://help.cerby.com/setup-and-admin/business-hubs/connecting-your-apps/create-a-service-account-for-your-business-hub)
* The user management and login method for your business hub identified to select the corresponding option when connecting your app. For more information, read the **User management and login method** section of the article [Explore Apps](https://help.cerby.com/setup-and-admin/business-hubs/business-hub-catalog)
* A Business ID. You can find the ID in the address bar by completing the following steps after logging in to Asana:
1. Click your user profile at the top right of the page.
2. Select the **Admin console** option from the drop-down menu. The admin console page is displayed.
3. Copy the ID from the address bar. The ID is displayed in the address bar as part of the URL, between the \*\*`admin` \*\*and **`insights`** subdirectory. For example, **`1209392144075813`** in **`https://app.asana.com/admin/1209392144075813/insights`.**
***
## Connect a business hub for Asana
To connect a business hub for Asana, you must complete the following main steps from the Cerby web app dashboard:
1. [Add a business hub and connect it to Asana](#id-1.-add-a-business-hub-and-connect-it-to-asana)
2. [Check for updates to import users and roles to Cerby](#id-2.-check-for-updates-to-import-users-and-roles-to-cerby)
3. [Connect your Asana user account to the business hub](#id-3.-connect-your-asana-user-account-to-the-business-hub)
4. [Manage unmatched users](#id-4.-manage-unmatched-users)
The following sections describe each main step.
### 1. Add a business hub and connect it to Asana
To add a business hub and connect it to Asana, you must complete the following steps:
1. Log in to your corresponding [Cerby](https://app.cerby.com/) workspace.
2. Select the **Business Hubs** option from the left navigation drawer. The **Business Hubs** page is displayed.
3. Click the **Connect Business Hub** button located at the top-right corner of the page. The **Connect your Business Hubs to Cerby** dialog box is displayed. **TIP:** Select the **Don’t show this again** option to skip this step the next time you connect a new business hub.
4. Click the **Get started** button. A wizard is displayed on the **Select app** page.
5. Select **Asana Hub** from the catalog. The **Enter app details** page is displayed on the wizard.
6. Enter and select your app information in the corresponding fields:
* **Label in Cerby:** It is the name to assign to your business hub in Cerby, and it will be displayed on the business hub card.
* **Business ID:** It is the unique identifier of your business or organization in **Asana Hub**. For instructions on how to find it, read the [Requirements](#requirements) section.
* **User management and login method:** It is the way your users log in to the app and determines whether they must save their login credentials as a Cerby account connected to the business hub. You must select one of the following methods:
* **Single sign-on (SSO):** Access is managed by your identity provider, and users log in with SSO authentication. They are not asked to save their credentials in Cerby.
* **Username and password:** Cerby manages account security and access, and users log in with their credentials after saving them in Cerby.
7. Click the **Next** button. The **Select automation account** page is displayed with a list of existing Asana accounts.
8. Select the automation account you have previously added to Cerby, as described in the [Requirements](#requirements) section. **NOTE:** If you don’t have an automation account, you are prompted to add it. Make sure you read Cerby’s recommendations on how to configure it in the article [Create a service account for your business hub](https://help.cerby.com/setup-and-admin/business-hubs/connecting-your-apps/create-a-service-account-for-your-business-hub). You may need to add the account first and then add the business hub.
9. Click the **Connect app** button. The wizard closes, and a success message box is displayed. The corresponding business hub is also displayed on the **Business Hubs** page.
The next step is [2. Check for updates to import users and roles to Cerby](#id-2.-check-for-updates-to-import-users-and-roles-to-cerby).
### 2. Check for updates to import users and roles to Cerby
To check for updates in your app to identify and import users and roles to Cerby, you must complete the following steps:
1. Select the **Business Hubs** option from the left navigation drawer. The **Business Hubs** page is displayed.
2. Click the **Settings** ( ) icon of the corresponding business hub card. The business hub details page is displayed with the **Settings** tab activated.
3. Click the **Check for updates** button located at the top right of the page. A message box is displayed with information about the process. **NOTE:** The check and import process may take a few minutes depending on the number of users, and because Cerby automatically matches users to their corresponding Cerby user account.
4. Confirm that the automated task to check for updates has the “Completed” status by performing any of the following actions:
* Click the **More details** button from the message box.
* Select the **Automation** option from the left navigation drawer to open the **Automation** page with a list of automated tasks and their status.
{% hint style="info" %}
**NOTE:** Cerby automatically performs daily checks for updates for all business hubs, but you can trigger them manually, as described in this section. When a user is deprovisioned from an IdP and a check for updates is performed, Cerby generates a report and sends business hub **Owners** an email to confirm their removal from the app. For more instructions, read the article [Check for updates in your app and apply report](/setup-and-admin/business-hubs/managing-users-and-assets-via-a-business-hub/sync-your-business-hub-with-your-external-app).
{% endhint %}
The next step is [3. Connect your Asana user account to the business hub](#id-3.-connect-your-asana-user-account-to-the-business-hub).
### 3. Connect your Asana user account to the business hub
To connect your Asana user account to the business hub so Cerby can manage and protect it, you must complete the following steps:
1. Select the **Accounts** option from the left navigation drawer. The **Accounts** page is displayed.
2. Click the **Log in** button of the corresponding Asana Hub account card. The **Connect your Asana Hub Account** dialog box is displayed.
3. Enter the login credentials of your **Asana** user account.
4. Click the **Connect account** button. The dialog box closes, and a success message box and a new account card are displayed.
The next step is [4. Manage unmatched users](#id-4.-manage-unmatched-users).
### 4. Manage unmatched users
During a check for updates, Cerby automatically matches app members to the Cerby user accounts that correspond to their email addresses, including existing [guest users](https://help.cerby.com/getting-started/concepts/user-management/guest-users) and [local partners](https://help.cerby.com/getting-started/concepts/user-management/partners#h-7e4add33a2). Manual matching is required when apps don't provide email addresses and for app members using personal or external accounts that couldn’t be identified or are not in the corporate directory.
To view the status of the imported app members, you must complete the following steps:
1. Select the **Business Hubs** option from the left navigation drawer. The **Business Hubs** page is displayed.
2. Click the **More options** (...) icon of the corresponding business hub card. A drop-down list is displayed.
3. Select the **View Members** option from the list. The business hub details page is displayed with the **Members** tab activated. App members are displayed in the following tabs of the **User Overview** section:
* **Unmatched users:** This tab displays the users who were not automatically matched.
* **Onboarded users:** This tab displays the users matched to their Cerby user account.
* **Guest users:** This tab displays the users who were matched to an existing Cerby user account but it doesn’t exist in the corporate directory, such as external collaborators.
For unmatched users, you can perform one of the following actions:
* [Match users](#match-users)
* [Remove unmatched users](#remove-unmatched-users)
* [Exempt unmatched users](#exempt-unmatched-users)
The following sections describe each action.
#### Match users
To match users, you must complete the following steps from the **Unmatched users** tab of the business hub details page:
1. Click the **Match user** button of the corresponding user. The **Match user** dialog box is displayed.
2. Enter the username or email address of the user you want to match and invite in the **Match with** field. The user is displayed on a list.
3. Select the user from the list.
4. Click the **Next** button. The **Select Cerby role** dialog box is displayed.
5. Select the role to assign to the user on the business hub **Cerby role** drop-down list:
* **Owner:** This role enables sharing access and managing business hub settings in Cerby.
* **Collaborator:** This role enables only logging in to the app from Cerby.
6. Click the **Match user** button. The dialog box closes, and a success message box is displayed. The user is moved to the **Onboarded users** tab.
#### Remove unmatched users
To remove unmatched users, you must complete the following steps from the **Unmatched users** tab of the business hub details page:
{% hint style="danger" %}
**IMPORTANT:** When removing an unmatched user, Cerby performs an automated task to revoke the user’s seat and permissions in Asana.
{% endhint %}
1. Click the **More options** (...) icon of the corresponding user. A drop-down list is displayed.
2. Select the **Remove user** option from the list. The **Remove user?** dialog box is displayed.
3. Click the **Remove user** button. The dialog box closes, and a success message box is displayed. The user is removed from the app via an automated task.
#### Exempt unmatched users
Exempted users keep their user accounts or seats active in your app, but you cannot manage them through Cerby.
To exempt unmatched users, you must complete the following steps from the **Unmatched users** tab of the business hub details page:
1. Click the **More options** (...) icon of the corresponding user. A drop-down list is displayed.
2. Select the **Exempt user** option from the list. The exempt user dialog box is displayed.
3. Enter a reason for exempting the user in the **Provide a reason** field.
4. Click the **Exempt member** button. The dialog box closes, and a success message box is displayed. The user is moved to the **Exempted users** tab.
***
## Use your business hub
The following are the supported features of business hubs you can use:
* [Join the App and connect it to Cerby](https://help.cerby.com/cerby-web-app/business-hubs/join-your-external-app-and-set-up-your-business-hub-access)
* [Invite new app members](/setup-and-admin/business-hubs/managing-users-and-assets-via-a-business-hub/add-users-and-teams-to-your-apps-via-a-business-hub)
* [Remove app members](/setup-and-admin/business-hubs/managing-users-and-assets-via-a-business-hub/remove-users-from-your-app-via-a-business-hub)
* [Provision users to your apps via an IdP and business hub](https://help.cerby.com/setup-and-admin/business-hubs/managing-users-and-assets-via-a-business-hub/provision-users-to-your-apps-via-an-idp-and-business-hub)
* [Update the app members’ roles](/setup-and-admin/business-hubs/managing-users-and-assets-via-a-business-hub/update-user-roles-in-your-app-via-a-business-hub)
* [Check for updates in your app and apply report](/setup-and-admin/business-hubs/managing-users-and-assets-via-a-business-hub/sync-your-business-hub-with-your-external-app)
* [Re-assign the app members’ user accounts](https://github.com/cerbyinc/help-center/tree/main/.uncategorized/unpublished-deprecated-re-assign-the-app-members-user-accounts.md)
* [Manage the security of app members’ user accounts](/setup-and-admin/business-hubs/managing-users-and-assets-via-a-business-hub/protect-your-app-user-accounts-via-a-business-hub)
* [Log in to your app](https://help.cerby.com/cerby-web-app/business-hubs/log-in-to-your-app)
* [Track activity on app members’ user accounts](/setup-and-admin/business-hubs/managing-users-and-assets-via-a-business-hub/track-activity-on-app-members-user-accounts)
* [Remove an App](/setup-and-admin/business-hubs/managing-your-business-hubs/remove-a-business-hub)
# Connect a business hub for Astrix
This article describes how to connect a business hub to centrally manage the users and assets of Astrix from Cerby.
{% hint style="info" %}
**Who can use this feature?**
* Workspace **Owners**, **Super Admins**, **Admins**, and **Users**
* Only supported using the Cerby web app
{% endhint %}
As a user with any workspace role in Cerby, except **Guest User** and **Login-Only**, you can connect a business hub integration to centrally manage the users and assets of Astrix.
When you connect the business hub, you become its **Owner**, and you can perform the following user and access management tasks through automated tasks executed by the Cerby agent:
* Check for updates
* Add users
* Update user roles
* Remove users
{% hint style="success" %}
**TIP:** For more details about the automated tasks of a business hub, how it works, and the supported apps, read the article [Explore Business Hubs](https://help.cerby.com/setup-and-admin/business-hubs/business-hub-catalog).
{% endhint %}
This article provides instructions on how to connect a business hub for Astrix. For other app-specific articles and videos, review the [Connecting business hubs for your apps](https://help.cerby.com/setup-and-admin/business-hubs/connecting-your-apps) and [Connecting business hubs for your paid social apps](https://help.cerby.com/setup-and-admin/business-hubs/connecting-your-paid-social-apps) collections in the Cerby Help Center.
***
## Requirements
The following are the requirements to connect a business hub:
* A Cerby workspace
* A Cerby user account with the workspace **Owner**, **Super Admin**, **Admin**, or **User** role
* Groups configured in your identity provider (IdP) if you want to leverage automatic user provisioning and deprovisioning from your apps based on group assignment events. For more information, read the articles available in the [Managing users via an IdP and business hub](https://help.cerby.com/setup-and-admin/business-hubs/managing-users-and-assets-via-a-business-hub) collection in the Cerby Help Center
* An automation account, meaning an active user account with a native **Admin** role in Astrix to be used as a service account. For instructions and recommendations on how to create and configure this account, read the article [Create a service account for your business hub](/setup-and-admin/business-hubs/connecting-your-apps/create-a-service-account-for-your-business-hub)
* The user management and login method for your business hub identified to select the corresponding option when connecting your app. For more information, read the **User management and login method** section of the article [Explore Business Hubs](https://help.cerby.com/setup-and-admin/business-hubs/business-hub-catalog)
* A Business ID. You can find the ID in the address bar after logging in to Astrix. It’s the subdomain of the URL. For example, **`cerby`** in **`https://cerby.astrixsecurity.com/settings/accessManagemen`** t. Just copy the value and paste it when requested while connecting the business hub.
***
## Connect a business hub for Astrix
To connect a business hub for Astrix, you must complete the following main steps from the Cerby web app dashboard:
1. [Add a business hub and connect it to Astrix](#id-1.-add-a-business-hub-and-connect-it-to-astrix)
2. [Check for updates to import users, roles, and assets to Cerby](#id-2.-check-for-updates-to-import-users-roles-and-assets-to-cerby)
3. [Connect your Astrix user account to the business hub](#id-3.-connect-your-astrix-user-account-to-the-business-hub)
4. [Manage unmatched users](#id-4.-manage-unmatched-users)
The following sections describe each main step.
### 1. Add a business hub and connect it to Astrix
To add a business hub and connect it to Astrix, you must complete the following steps:
1. Log in to your corresponding [Cerby](https://app.cerby.com/) workspace.
2. Select the **Business Hubs** option from the left menu. The **Business Hubs** page is displayed.
3. Click the **Connect Business Hub** button located at the top-right corner of the page. The **Connect your Business Hubs to Cerby** dialog box is displayed. **TIP:** Select the **Don’t show this again** option to skip this step the next time you connect a new business hub.
4. Click the **Get started** button. A wizard is displayed on the **Select app** page.
5. Select **Astrix Hub** from the catalog. The **Enter app details** page is displayed on the wizard.
6. Enter and select your app information in the corresponding fields:
* **Label in Cerby:** It is the name to assign to your business hub in Cerby, and it will be displayed on the business hub card.
* **Business ID:** It is the unique identifier of your business or organization in **Astrix Hub**. For instructions on how to find it, read the [Requirements](#requirements) section.
* **User management and login method:** It is the way your users log in to the app and determines whether they must save their login credentials as a Cerby account connected to the business hub.
1. Select the **Single sign-on (SSO)** option because access must be managed by your IdP, and users log in with SSO authentication. They are not asked to save their credentials in Cerby.
**IMPORTANT:** The Username and password option is not currently available for Astrix.
7. Click the **Next** button. The **Select automation account** page is displayed with a list of existing Astrix accounts.
8. Select the automation account you have previously added to Cerby, as described in the [Requirements](#requirements) section. **NOTE:** If you don’t have an automation account, you are prompted to add it. Make sure you read Cerby’s recommendations on how to configure it in the article [Create a service account for your business hub](/setup-and-admin/business-hubs/connecting-your-apps/create-a-service-account-for-your-business-hub). You may need to add the account first and then add the business hub.
9. Click the **Connect app** button. The wizard closes, and a success message box is displayed. The corresponding business hub is also displayed on the **Business Hubs** page.
The next step is [2. Check for updates to import users, roles, and assets to Cerby](#id-2.-check-for-updates-to-import-users-roles-and-assets-to-cerby).
### 2. Check for updates to import users, roles, and assets to Cerby
To check for updates in your app to identify and import users, roles, and assets to Cerby, you must complete the following steps:
1. Select the **Business Hubs** option from the left menu. The **Business Hubs** page is displayed.
2. Click the **More options** (...) icon of the corresponding business hub card. A drop-down menu is displayed.
3. Select the **Settings** option from the menu. The business hub details page is displayed with the **Settings** tab activated.
4. Click the **Check for updates** button located at the top right of the page. A message box is displayed with information about the process. **NOTE:** The check and import process may take a few minutes depending on the number of users and assets, and because Cerby automatically matches users to their corresponding Cerby user account.
5. Confirm that the automated task to check for updates has the “Completed” status by performing any of the following actions:
* Click the **More details** button from the message box.
* Select the **Automation** option from the left menu to open the **Automation** page with a list of automated tasks and their status.
{% hint style="info" %}
**NOTE:** Cerby automatically performs daily checks for updates for all business hubs, but you can trigger them manually, as described in this section. For more instructions, read the article [Sync your app users with your business hub](/setup-and-admin/business-hubs/managing-users-and-assets-via-a-business-hub/sync-your-business-hub-with-your-external-app).
{% endhint %}
The next step is [3. Connect your Astrix user account to the business hub](#id-3.-connect-your-astrix-user-account-to-the-business-hub).
### 3. Connect your Astrix user account to the business hub
To connect your Astrix user account to the business hub so Cerby can manage and protect it, you must complete the following steps:
1. Select the **Accounts** option from the left menu. The **Accounts** page is displayed.
2. Click the **Log in** button of the corresponding Astrix Hub account card. The **Connect your Astrix Hub Account** dialog box is displayed.
3. Enter the login credentials of your **Astrix** user account.
4. Click the **Connect account** button. The dialog box closes, and a success message box and a new account card are displayed.
The next step is [4. Manage unmatched users](#id-4.-manage-unmatched-users).
### 4. Manage unmatched users
During a check for updates, Cerby automatically matches app members to the Cerby user accounts that correspond to their email addresses, including existing [guest users](https://help.cerby.com/getting-started/concepts/user-management/guest-users) and [local partners](https://help.cerby.com/getting-started/concepts/user-management/partners#h-7e4add33a2). Manual matching is required when apps don't provide email addresses and for app members using personal or external accounts that couldn’t be identified or are not in the corporate directory.
To view the status of the imported app members, you must complete the following steps:
1. Select the **Business Hubs** option from the left menu. The **Business Hubs** page is displayed.
2. Click the **More options** (...) icon of the corresponding business hub card. A drop-down menu is displayed.
3. Select the **View Members** option from the menu. The business hub details page is displayed with the **Members** tab activated. App members are displayed in the following tabs of the **User Overview** section:
* **Unmatched users:** This tab displays the users who were not automatically matched.
* **Onboarded users:** This tab displays the users matched to their Cerby user account.
* **Guest users:** This tab displays the users who were matched to an existing Cerby user account but it doesn’t exist in the corporate directory, such as external collaborators.
For unmatched users, you can perform one of the following actions:
* [Match users](#match-users)
* [Remove unmatched users](#remove-unmatched-users)
* [Exempt unmatched users](#exempt-unmatched-users)
The following sections describe each action.
#### Match users
To match users, you must complete the following steps from the **Unmatched users** tab of the business hub details page:
1. Click the **Match user** button of the corresponding user. The **Match user** dialog box is displayed.
2. Enter the username or email address of the user you want to match and invite in the **Match with** field. The user is displayed on a list.
3. Select the user from the list.
4. Click the **Next** button. The **Select Cerby role** dialog box is displayed.
5. Select the role to assign to the user on the business hub **Cerby role** drop-down menu:
* **Owner:** This role enables sharing access and managing business hub settings in Cerby.
* **Collaborator:** This role enables only logging in to the app from Cerby.
6. Click the **Match user** button. The dialog box closes, and a success message box is displayed. The user is moved to the **Onboarded users** tab.
#### Remove unmatched users
To remove unmatched users, you must complete the following steps from the **Unmatched users** tab of the business hub details page:
{% hint style="danger" %}
**IMPORTANT:** When removing an unmatched user, Cerby performs an automated task to revoke the user’s seat and permissions in Astrix.
{% endhint %}
1. Click the **More options** (...) icon of the corresponding user. A drop-down menu is displayed.
2. Select the **Remove user** option from the menu. The **Remove user?** dialog box is displayed.
3. Click the **Remove user** button. The dialog box closes, and a success message box is displayed. The user is removed from the app via an automated task.
#### Exempt unmatched users
Exempted users keep their user accounts or seats active in your app, but you cannot manage them through Cerby.
To exempt unmatched users, you must complete the following steps from the **Unmatched users** tab of the business hub details page:
1. Click the **More options** (...) icon of the corresponding user. A drop-down menu is displayed.
2. Select the **Exempt user** option from the menu. The exempt user dialog box is displayed.
3. Enter a reason for exempting the user in the **Provide a reason** field.
4. Click the **Exempt member** button. The dialog box closes, and a success message box is displayed. The user is moved to the **Exempted users** tab.
***
## Use your business hub
The following are the supported features of business hubs you can use:
* [Join the external app and set up your business hub access](https://help.cerby.com/cerby-web-app/business-hubs/join-your-external-app-and-set-up-your-business-hub-access)
* [Add users to your app via a business hub](/setup-and-admin/business-hubs/managing-users-and-assets-via-a-business-hub/add-users-and-teams-to-your-apps-via-a-business-hub)
* [Provision users to your apps via an IdP and business hub](/setup-and-admin/business-hubs/managing-users-and-assets-via-a-business-hub/provision-users-to-your-apps-via-an-idp-and-business-hub)
* [Remove users from your app via a business hub](/setup-and-admin/business-hubs/managing-users-and-assets-via-a-business-hub/remove-users-from-your-app-via-a-business-hub)
* [Remove teams from your app via a business hub](/setup-and-admin/business-hubs/managing-users-and-assets-via-a-business-hub/remove-teams-from-your-app-via-a-business-hub)
* [Deprovision users from your apps via an IdP and business hub](/setup-and-admin/business-hubs/managing-users-and-assets-via-a-business-hub/deprovision-users-from-your-apps-via-an-idp-and-business-hub)
* [Update user roles in your app via a business hub](/setup-and-admin/business-hubs/managing-users-and-assets-via-a-business-hub/update-user-roles-in-your-app-via-a-business-hub)
* [Update user roles in your apps via an IdP and business hub](/setup-and-admin/business-hubs/managing-users-and-assets-via-a-business-hub/update-user-roles-in-your-apps-via-an-idp-and-business-hub)
* [Sync your app users with your business hub](/setup-and-admin/business-hubs/managing-users-and-assets-via-a-business-hub/sync-your-business-hub-with-your-external-app)
* [Log in to your app via a business hub](https://help.cerby.com/cerby-web-app/business-hubs/log-in-to-your-app)
* [Track the activity of business hub users](/setup-and-admin/business-hubs/managing-users-and-assets-via-a-business-hub/track-activity-on-app-members-user-accounts)
* [Remove a business hub](/setup-and-admin/business-hubs/managing-your-business-hubs/remove-a-business-hub)
# Connect a business hub for AstroPay
This article describes how to connect a business hub to centrally manage the users of AstroPay from Cerby.
{% hint style="info" %}
**Who can use this feature?**
* Workspace **Owners**, **Super Admins**, **Admins**, and **Users**
* Only supported using the Cerby web app
{% endhint %}
As a user with any workspace role in Cerby, except **Guest User** and **Login-Only**, you can connect a business hub integration to centrally manage the users of AstroPay.
When you connect the business hub, you become its **Owner**, and you can perform the following user and access management tasks through automated tasks executed by the Cerby agent:
* Check for updates
* Add users
* Update user roles
* Remove users
{% hint style="success" %}
**TIP:** For more details about the automated tasks of a business hub, how it works, and the supported apps, read the article [Explore Business Hubs](https://help.cerby.com/setup-and-admin/business-hubs/business-hub-catalog).
{% endhint %}
This article provides instructions on how to connect a business hub for AstroPay. For other app-specific articles and videos, review the [Connecting business hubs for your apps](https://help.cerby.com/setup-and-admin/business-hubs/connecting-your-apps) and [Connecting business hubs for your paid social apps](https://help.cerby.com/setup-and-admin/business-hubs/connecting-your-paid-social-apps) collections in the Cerby Help Center.
***
## Requirements
The following are the requirements to connect a business hub:
* A Cerby workspace
* A Cerby user account with the **Owner**, **Super Admin**, **Admin**, or **User** role
* Groups configured in your identity provider (IdP) if you want to leverage automatic user provisioning and deprovisioning from your apps based on group assignment events. For more information, read the articles available in the [Managing users via an IdP and business hub](https://help.cerby.com/setup-and-admin/business-hubs/managing-users-and-assets-via-a-business-hub) collection in the Cerby Help Center
* An automation account, meaning an active user account with a native **Administrator** role in AstroPay to be used as a service account. For instructions and recommendations on how to create and configure this account, read the article [Create a service account for your business hub](/setup-and-admin/business-hubs/connecting-your-apps/create-a-service-account-for-your-business-hub)
***
## Connect a business hub for AstroPay
To connect a business hub for AstroPay, you must complete the following main steps from the Cerby web app dashboard:
1. [Add a business hub and connect it to AstroPay](#id-1.-add-a-business-hub-and-connect-it-to-astropay)
2. [Check for updates to import users and roles to Cerby](#id-2.-check-for-updates-to-import-users-and-roles-to-cerby)
3. [Connect your AstroPay user account to the business hub](#id-3.-connect-your-astropay-user-account-to-the-business-hub)
4. [Manage unmatched users](#id-4.-manage-unmatched-users)
The following sections describe each main step.
### 1. Add a business hub and connect it to AstroPay
To add a business hub and connect it to AstroPay, you must complete the following steps:
1. Log in to your corresponding [Cerby](https://app.cerby.com/) workspace.
2. Select the **Business Hubs** option from the left menu. The **Business Hubs** page is displayed.
3. Click the **Connect Business Hub** button located at the top-right corner of the page. The **Connect your Business Hubs to Cerby** dialog box is displayed. **TIP:** Select the **Don’t show this again** option to skip this step the next time you connect a new business hub.
4. Click the **Get started** button. A wizard is displayed on the **Select app** page.
5. Select **AstroPay Hub** from the catalog. The **Enter app details** page is displayed on the wizard.
6. Enter and select your app information in the corresponding fields:
* **Label in Cerby:** It is the name to assign to your business hub in Cerby, and it will be displayed on the business hub card.
* **Business unique identifier:** It is a unique identifier that differentiates your business hub in Cerby from others for the same app. You can assign an alphanumeric value between 3 and 30 characters without symbols or special characters.
* **User management and login method:** It is the way your users log in to the app and determines whether they must save their login credentials as a Cerby account connected to the business hub.
1. Select the **Username and password** option because account security and access are managed by Cerby, and users log in with their credentials after saving them in Cerby
**IMPORTANT:** The **Single sign-on (SSO)** option is not supported for AstroPay.
7. Click the **Next** button. The **Select automation account** page is displayed with a list of existing AstroPay accounts.
8. Select the automation account you have previously added to Cerby, as described in the [Requirements](#requirements) section. **NOTE:** If you don’t have an automation account, you are prompted to add it. Make sure you read Cerby’s recommendations on how to configure it in the article [Create a service account for your business hub](https://help.cerby.com/setup-and-admin/business-hubs/connecting-your-apps/create-a-service-account-for-your-business-hub). You may need to add the account first and then add the business hub.
9. Click the **Connect app** button. The wizard closes, and a success message box is displayed. The corresponding business hub is also displayed on the **Business Hubs** page
The next step is [2. Check for updates to import users and roles to Cerby](/setup-and-admin/business-hubs/connecting-your-apps/connect-a-business-hub-for-your-app#h-9c6531cf9a).
### 2. Check for updates to import users and roles to Cerby
To check for updates in your app to identify and import users and roles to Cerby, you must complete the following steps:
1. Select the **Business Hubs** option from the left menu. The **Business Hubs** page is displayed.
2. Click the **More options** (...) icon of the corresponding business hub card. A drop-down menu is displayed.
3. Select the **Settings** option from the menu. The business hub details page is displayed with the **Settings** tab activated.
4. Click the **Sync** button located at the top right of the page. A message box is displayed with information about the process. **NOTE:** The check and import process may take a few minutes, depending on the number of users, and because Cerby automatically matches users to their corresponding Cerby user account.
5. Confirm that the automated task to check for updates has the “Completed” status by performing any of the following actions:
* Click the **More details** button in the message box.
* Select the **Automation** option from the left menu to open the **Automation** page with a list of automated tasks and their status.
{% hint style="info" %}
**NOTE:** Cerby automatically performs daily checks for updates for all business hubs, but you can trigger them manually, as described in this section. For more instructions, read the article [Sync your app users with your business hub](/setup-and-admin/business-hubs/managing-users-and-assets-via-a-business-hub/sync-your-business-hub-with-your-external-app).
{% endhint %}
The next step is [3. Connect your AstroPay user account to the business hub](#id-3.-connect-your-astropay-user-account-to-the-business-hub).
### 3. Connect your AstroPay user account to the business hub
To connect your AstroPay user account to the business hub so Cerby can manage and protect it, you must complete the following steps:
1. Select the **Accounts** option from the left menu. The **All accounts** page is displayed.
2. Click the **Log in** button of the corresponding AstroPay Hub account card. The **Connect your AstroPay Hub Account** dialog box is displayed.
3. Enter the login credentials of your **AstroPay** user account.
4. Click the **Connect account** button. The dialog box closes, and a success message box and a new account card are displayed.
The next step is [4. Manage unmatched users](#id-4.-manage-unmatched-users).
### 4. Manage unmatched users
During a check for updates, Cerby automatically matches app members to the Cerby user accounts that correspond to their email addresses, including existing [guest users](https://help.cerby.com/getting-started/concepts/user-management/guest-users) and [local partners](https://help.cerby.com/getting-started/concepts/user-management/partners#h-7e4add33a2). Manual matching is required when apps don't provide email addresses and for app members using personal or external accounts that couldn’t be identified or are not in the corporate directory.
To view the status of the imported app members, you must complete the following steps:
1. Select the **Business Hubs** option from the left menu. The **Business Hubs** page is displayed.
2. Click the **More options** (...) icon of the corresponding business hub card. A drop-down menu is displayed.
3. Select the **View Members** option from the menu. The business hub details page is displayed with the **Members** tab activated. App members are displayed in the following tabs of the **User Overview** section:
* **Unmatched users:** This tab displays the users who were not automatically matched.
* **Onboarded users:** This tab displays the users matched to their Cerby user account.
* **Guest users:** This tab displays the users who were matched to an existing Cerby user account, but it doesn’t exist in the corporate directory, such as external collaborators.
For unmatched users, you can perform one of the following actions:
* [Match users](#match-users)
* [Remove unmatched users](#remove-unmatched-users)
* [Exempt unmatched users](#exempt-unmatched-users)
The following sections describe each action.
#### Match users
To match users, you must complete the following steps from the **Unmatched users** tab of the business hub details page:
1. Click the **Match user** button of the corresponding user. The **Match user** dialog box is displayed.
2. Enter the username or email address of the user you want to match and invite in the **Match with** field. The user is displayed on a list.
3. Select the user from the list.
4. Click the **Next** button. The **Select Cerby role** dialog box is displayed.
5. Select the role to assign to the user on the business hub **Cerby role** drop-down menu:
* **Owner:** This role enables sharing access and managing business hub settings in Cerby.
* **Collaborator:** This role enables only logging in to the app from Cerby.
6. Click the **Match user** button. The dialog box closes, and a success message box is displayed. The user is moved to the **Onboarded users** tab.
#### Remove unmatched users
To remove unmatched users, you must complete the following steps from the **Unmatched users** tab of the business hub details page:
{% hint style="danger" %}
**IMPORTANT:** When removing an unmatched user, Cerby performs an automated task to revoke the user’s seat and permissions in AstroPay.
{% endhint %}
1. Click the **More options** (...) icon of the corresponding user. A drop-down menu is displayed.
2. Select the **Remove user** option from the list. The **Remove user?** dialog box is displayed.
3. Click the **Remove user** button. The dialog box closes, and a success message box is displayed. The user is removed from the app via an automated task.
#### Exempt unmatched users
Exempted users keep their user accounts or seats active in your app, but you cannot manage them through Cerby.
To exempt unmatched users, you must complete the following steps from the **Unmatched users** tab of the business hub details page:
1. Click the **More options** (...) icon of the corresponding user. A drop-down list is displayed.
2. Select the **Exempt user** option from the list. The exempt user dialog box is displayed.
3. Enter a reason for exempting the user in the **Provide a reason** field.
4. Click the **Exempt member** button. The dialog box closes, and a success message box is displayed. The user is moved to the **Exempted users** tab.
***
## Use your business hub
The following are the supported features of business hubs you can use:
* [Join the external app and set up your business hub access](https://help.cerby.com/cerby-web-app/business-hubs/join-your-external-app-and-set-up-your-business-hub-access)
* [Add users to your app via a business hub](/setup-and-admin/business-hubs/managing-users-and-assets-via-a-business-hub/add-users-and-teams-to-your-apps-via-a-business-hub)
* [Provision users to your apps via an IdP and business hub](/setup-and-admin/business-hubs/managing-users-and-assets-via-a-business-hub/provision-users-to-your-apps-via-an-idp-and-business-hub)
* [Remove users from your app via a business hub](/setup-and-admin/business-hubs/managing-users-and-assets-via-a-business-hub/remove-users-from-your-app-via-a-business-hub)
* [Remove teams from your app via a business hub](/setup-and-admin/business-hubs/managing-users-and-assets-via-a-business-hub/remove-teams-from-your-app-via-a-business-hub)
* [Deprovision users from your apps via an IdP and business hub](/setup-and-admin/business-hubs/managing-users-and-assets-via-a-business-hub/deprovision-users-from-your-apps-via-an-idp-and-business-hub)
* [Update user roles in your app via a business hub](/setup-and-admin/business-hubs/managing-users-and-assets-via-a-business-hub/update-user-roles-in-your-app-via-a-business-hub)
* [Update user roles in your apps via an IdP and business hub](/setup-and-admin/business-hubs/managing-users-and-assets-via-a-business-hub/update-user-roles-in-your-apps-via-an-idp-and-business-hub)
* [Sync your app users with your business hub](/setup-and-admin/business-hubs/managing-users-and-assets-via-a-business-hub/sync-your-business-hub-with-your-external-app)
* [Protect your app users via a business hub](/setup-and-admin/business-hubs/managing-users-and-assets-via-a-business-hub/protect-your-app-user-accounts-via-a-business-hub)
* [Log in to your app via a business hub](https://help.cerby.com/cerby-web-app/business-hubs/log-in-to-your-app)
* [Track the activity of business hub users](/setup-and-admin/business-hubs/managing-users-and-assets-via-a-business-hub/track-activity-on-app-members-user-accounts)
* [Remove a business hub](/setup-and-admin/business-hubs/managing-your-business-hubs/remove-a-business-hub)
# Connect a business hub for Autodesk
This article describes how to connect a business hub to centrally manage the users and assets of Autodesk from Cerby.
{% hint style="info" %}
**Who can use this feature?**
* Workspace **Owners**, **Super Admins**, **Admins**, and **Users**
* Only supported using the Cerby web app
{% endhint %}
As a user with any workspace role in Cerby, except **Guest User** and **Login-Only**, you can connect a business hub integration to centrally manage the users and assets of Autodesk.
When you connect the business hub, you become its **Owner**, and you can perform the following user and access management tasks through automated tasks executed by the Cerby agent:
* Check for updates
* Add users
* Remove users
{% hint style="success" %}
**TIP:** For more details about the automated tasks of a business hub, how it works, and the supported apps, read the article [Explore Business Hubs](https://help.cerby.com/setup-and-admin/business-hubs/business-hub-catalog).
{% endhint %}
{% hint style="info" %}
**NOTE:** The automated task to update user roles is not currently available for this business hub.
{% endhint %}
This article provides instructions on how to connect a business hub for Autodesk. For other app-specific articles and videos, review the [Connecting business hubs for your apps](https://help.cerby.com/setup-and-admin/business-hubs/connecting-your-apps) and [Connecting business hubs for your paid social apps](https://help.cerby.com/setup-and-admin/business-hubs/connecting-your-paid-social-apps) collections in the Cerby Help Center.
***
## Requirements
The following are the requirements to connect a business hub:
* A Cerby workspace
* A Cerby user account with the workspace **Owner**, **Super Admin**, **Admin**, or **User** role
* A team in Autodesk
* Groups configured in your identity provider (IdP) if you want to leverage automatic user provisioning and deprovisioning from your apps based on group assignment events. For more information, read the articles available in the [Managing users via an IdP and business hub](https://help.cerby.com/setup-and-admin/business-hubs/managing-users-and-assets-via-a-business-hub) collection in the Cerby Help Center
* An automation account, meaning an active user account with a native **Secondary admin** role in Autodesk to be used as a service account. For instructions and recommendations on how to create and configure this account, read the article [Create a service account for your business hub](/setup-and-admin/business-hubs/connecting-your-apps/create-a-service-account-for-your-business-hub)
* The user management and login method for your business hub identified to select the corresponding option when connecting your app. For more information, read the **User management and login method** section of the article [Explore Business Hubs](https://help.cerby.com/setup-and-admin/business-hubs/business-hub-catalog)
* A Team name. You can find the ID by completing the following steps:
1. Log in to your Autodesk account.
2. Navigate to the **User Management** tab. The **User Management** page is displayed with the **By User** tab activated.
3. Locate the **Team** field. The drop-down list displays the teams available in your account, as shown in **Figure 1**.
) icon of the corresponding business hub card. The business hub details page is displayed with the **Settings** tab activated.
3. Click the **Check for updates** button located at the top right of the page. A message box is displayed with information about the process. **NOTE:** The check and import process may take a few minutes depending on the number of users, and because Cerby automatically matches users to their corresponding Cerby user account.
4. Confirm that the automated task to check for updates has the “Completed” status by performing any of the following actions:
* Click the **More details** button from the message box.
* Select the **Automation** option from the left navigation drawer to open the **Automation** page with a list of automated tasks and their status.
{% hint style="info" %}
**NOTE:** Cerby automatically performs daily checks for updates for all business hubs, but you can trigger them manually, as described in this section. When a user is deprovisioned from an IdP and a check for updates is performed, Cerby generates a report and sends business hub **Owners** an email to confirm their removal from the app. For more instructions, read the article [Check for updates in your app and apply report](/setup-and-admin/business-hubs/managing-users-and-assets-via-a-business-hub/sync-your-business-hub-with-your-external-app).
{% endhint %}
The next step is [3. Connect your Asana user account to the business hub](#id-3.-connect-your-asana-user-account-to-the-business-hub).
### 3. Connect your Asana user account to the business hub
To connect your Asana user account to the business hub so Cerby can manage and protect it, you must complete the following steps:
1. Select the **Accounts** option from the left navigation drawer. The **Accounts** page is displayed.
2. Click the **Log in** button of the corresponding Asana Hub account card. The **Connect your Asana Hub Account** dialog box is displayed.
3. Enter the login credentials of your **Asana** user account.
4. Click the **Connect account** button. The dialog box closes, and a success message box and a new account card are displayed.
The next step is [4. Manage unmatched users](#id-4.-manage-unmatched-users).
### 4. Manage unmatched users
During a check for updates, Cerby automatically matches app members to the Cerby user accounts that correspond to their email addresses, including existing [guest users](https://help.cerby.com/getting-started/concepts/user-management/guest-users) and [local partners](https://help.cerby.com/getting-started/concepts/user-management/partners#h-7e4add33a2). Manual matching is required when apps don't provide email addresses and for app members using personal or external accounts that couldn’t be identified or are not in the corporate directory.
To view the status of the imported app members, you must complete the following steps:
1. Select the **Business Hubs** option from the left navigation drawer. The **Business Hubs** page is displayed.
2. Click the **More options** (...) icon of the corresponding business hub card. A drop-down list is displayed.
3. Select the **View Members** option from the list. The business hub details page is displayed with the **Members** tab activated. App members are displayed in the following tabs of the **User Overview** section:
* **Unmatched users:** This tab displays the users who were not automatically matched.
* **Onboarded users:** This tab displays the users matched to their Cerby user account.
* **Guest users:** This tab displays the users who were matched to an existing Cerby user account but it doesn’t exist in the corporate directory, such as external collaborators.
For unmatched users, you can perform one of the following actions:
* [Match users](#match-users)
* [Remove unmatched users](#remove-unmatched-users)
* [Exempt unmatched users](#exempt-unmatched-users)
The following sections describe each action.
#### Match users
To match users, you must complete the following steps from the **Unmatched users** tab of the business hub details page:
1. Click the **Match user** button of the corresponding user. The **Match user** dialog box is displayed.
2. Enter the username or email address of the user you want to match and invite in the **Match with** field. The user is displayed on a list.
3. Select the user from the list.
4. Click the **Next** button. The **Select Cerby role** dialog box is displayed.
5. Select the role to assign to the user on the business hub **Cerby role** drop-down list:
* **Owner:** This role enables sharing access and managing business hub settings in Cerby.
* **Collaborator:** This role enables only logging in to the app from Cerby.
6. Click the **Match user** button. The dialog box closes, and a success message box is displayed. The user is moved to the **Onboarded users** tab.
#### Remove unmatched users
To remove unmatched users, you must complete the following steps from the **Unmatched users** tab of the business hub details page:
{% hint style="danger" %}
**IMPORTANT:** When removing an unmatched user, Cerby performs an automated task to revoke the user’s seat and permissions in Asana.
{% endhint %}
1. Click the **More options** (...) icon of the corresponding user. A drop-down list is displayed.
2. Select the **Remove user** option from the list. The **Remove user?** dialog box is displayed.
3. Click the **Remove user** button. The dialog box closes, and a success message box is displayed. The user is removed from the app via an automated task.
#### Exempt unmatched users
Exempted users keep their user accounts or seats active in your app, but you cannot manage them through Cerby.
To exempt unmatched users, you must complete the following steps from the **Unmatched users** tab of the business hub details page:
1. Click the **More options** (...) icon of the corresponding user. A drop-down list is displayed.
2. Select the **Exempt user** option from the list. The exempt user dialog box is displayed.
3. Enter a reason for exempting the user in the **Provide a reason** field.
4. Click the **Exempt member** button. The dialog box closes, and a success message box is displayed. The user is moved to the **Exempted users** tab.
***
## Use your business hub
The following are the supported features of business hubs you can use:
* [Join the App and connect it to Cerby](https://help.cerby.com/cerby-web-app/business-hubs/join-your-external-app-and-set-up-your-business-hub-access)
* [Invite new app members](/setup-and-admin/business-hubs/managing-users-and-assets-via-a-business-hub/add-users-and-teams-to-your-apps-via-a-business-hub)
* [Remove app members](/setup-and-admin/business-hubs/managing-users-and-assets-via-a-business-hub/remove-users-from-your-app-via-a-business-hub)
* [Provision users to your apps via an IdP and business hub](https://help.cerby.com/setup-and-admin/business-hubs/managing-users-and-assets-via-a-business-hub/provision-users-to-your-apps-via-an-idp-and-business-hub)
* [Update the app members’ roles](/setup-and-admin/business-hubs/managing-users-and-assets-via-a-business-hub/update-user-roles-in-your-app-via-a-business-hub)
* [Check for updates in your app and apply report](/setup-and-admin/business-hubs/managing-users-and-assets-via-a-business-hub/sync-your-business-hub-with-your-external-app)
* [Re-assign the app members’ user accounts](https://github.com/cerbyinc/help-center/tree/main/.uncategorized/unpublished-deprecated-re-assign-the-app-members-user-accounts.md)
* [Manage the security of app members’ user accounts](/setup-and-admin/business-hubs/managing-users-and-assets-via-a-business-hub/protect-your-app-user-accounts-via-a-business-hub)
* [Log in to your app](https://help.cerby.com/cerby-web-app/business-hubs/log-in-to-your-app)
* [Track activity on app members’ user accounts](/setup-and-admin/business-hubs/managing-users-and-assets-via-a-business-hub/track-activity-on-app-members-user-accounts)
* [Remove an App](/setup-and-admin/business-hubs/managing-your-business-hubs/remove-a-business-hub)
# Connect a business hub for Astrix
This article describes how to connect a business hub to centrally manage the users and assets of Astrix from Cerby.
{% hint style="info" %}
**Who can use this feature?**
* Workspace **Owners**, **Super Admins**, **Admins**, and **Users**
* Only supported using the Cerby web app
{% endhint %}
As a user with any workspace role in Cerby, except **Guest User** and **Login-Only**, you can connect a business hub integration to centrally manage the users and assets of Astrix.
When you connect the business hub, you become its **Owner**, and you can perform the following user and access management tasks through automated tasks executed by the Cerby agent:
* Check for updates
* Add users
* Update user roles
* Remove users
{% hint style="success" %}
**TIP:** For more details about the automated tasks of a business hub, how it works, and the supported apps, read the article [Explore Business Hubs](https://help.cerby.com/setup-and-admin/business-hubs/business-hub-catalog).
{% endhint %}
This article provides instructions on how to connect a business hub for Astrix. For other app-specific articles and videos, review the [Connecting business hubs for your apps](https://help.cerby.com/setup-and-admin/business-hubs/connecting-your-apps) and [Connecting business hubs for your paid social apps](https://help.cerby.com/setup-and-admin/business-hubs/connecting-your-paid-social-apps) collections in the Cerby Help Center.
***
## Requirements
The following are the requirements to connect a business hub:
* A Cerby workspace
* A Cerby user account with the workspace **Owner**, **Super Admin**, **Admin**, or **User** role
* Groups configured in your identity provider (IdP) if you want to leverage automatic user provisioning and deprovisioning from your apps based on group assignment events. For more information, read the articles available in the [Managing users via an IdP and business hub](https://help.cerby.com/setup-and-admin/business-hubs/managing-users-and-assets-via-a-business-hub) collection in the Cerby Help Center
* An automation account, meaning an active user account with a native **Admin** role in Astrix to be used as a service account. For instructions and recommendations on how to create and configure this account, read the article [Create a service account for your business hub](/setup-and-admin/business-hubs/connecting-your-apps/create-a-service-account-for-your-business-hub)
* The user management and login method for your business hub identified to select the corresponding option when connecting your app. For more information, read the **User management and login method** section of the article [Explore Business Hubs](https://help.cerby.com/setup-and-admin/business-hubs/business-hub-catalog)
* A Business ID. You can find the ID in the address bar after logging in to Astrix. It’s the subdomain of the URL. For example, **`cerby`** in **`https://cerby.astrixsecurity.com/settings/accessManagemen`** t. Just copy the value and paste it when requested while connecting the business hub.
***
## Connect a business hub for Astrix
To connect a business hub for Astrix, you must complete the following main steps from the Cerby web app dashboard:
1. [Add a business hub and connect it to Astrix](#id-1.-add-a-business-hub-and-connect-it-to-astrix)
2. [Check for updates to import users, roles, and assets to Cerby](#id-2.-check-for-updates-to-import-users-roles-and-assets-to-cerby)
3. [Connect your Astrix user account to the business hub](#id-3.-connect-your-astrix-user-account-to-the-business-hub)
4. [Manage unmatched users](#id-4.-manage-unmatched-users)
The following sections describe each main step.
### 1. Add a business hub and connect it to Astrix
To add a business hub and connect it to Astrix, you must complete the following steps:
1. Log in to your corresponding [Cerby](https://app.cerby.com/) workspace.
2. Select the **Business Hubs** option from the left menu. The **Business Hubs** page is displayed.
3. Click the **Connect Business Hub** button located at the top-right corner of the page. The **Connect your Business Hubs to Cerby** dialog box is displayed. **TIP:** Select the **Don’t show this again** option to skip this step the next time you connect a new business hub.
4. Click the **Get started** button. A wizard is displayed on the **Select app** page.
5. Select **Astrix Hub** from the catalog. The **Enter app details** page is displayed on the wizard.
6. Enter and select your app information in the corresponding fields:
* **Label in Cerby:** It is the name to assign to your business hub in Cerby, and it will be displayed on the business hub card.
* **Business ID:** It is the unique identifier of your business or organization in **Astrix Hub**. For instructions on how to find it, read the [Requirements](#requirements) section.
* **User management and login method:** It is the way your users log in to the app and determines whether they must save their login credentials as a Cerby account connected to the business hub.
1. Select the **Single sign-on (SSO)** option because access must be managed by your IdP, and users log in with SSO authentication. They are not asked to save their credentials in Cerby.
**IMPORTANT:** The Username and password option is not currently available for Astrix.
7. Click the **Next** button. The **Select automation account** page is displayed with a list of existing Astrix accounts.
8. Select the automation account you have previously added to Cerby, as described in the [Requirements](#requirements) section. **NOTE:** If you don’t have an automation account, you are prompted to add it. Make sure you read Cerby’s recommendations on how to configure it in the article [Create a service account for your business hub](/setup-and-admin/business-hubs/connecting-your-apps/create-a-service-account-for-your-business-hub). You may need to add the account first and then add the business hub.
9. Click the **Connect app** button. The wizard closes, and a success message box is displayed. The corresponding business hub is also displayed on the **Business Hubs** page.
The next step is [2. Check for updates to import users, roles, and assets to Cerby](#id-2.-check-for-updates-to-import-users-roles-and-assets-to-cerby).
### 2. Check for updates to import users, roles, and assets to Cerby
To check for updates in your app to identify and import users, roles, and assets to Cerby, you must complete the following steps:
1. Select the **Business Hubs** option from the left menu. The **Business Hubs** page is displayed.
2. Click the **More options** (...) icon of the corresponding business hub card. A drop-down menu is displayed.
3. Select the **Settings** option from the menu. The business hub details page is displayed with the **Settings** tab activated.
4. Click the **Check for updates** button located at the top right of the page. A message box is displayed with information about the process. **NOTE:** The check and import process may take a few minutes depending on the number of users and assets, and because Cerby automatically matches users to their corresponding Cerby user account.
5. Confirm that the automated task to check for updates has the “Completed” status by performing any of the following actions:
* Click the **More details** button from the message box.
* Select the **Automation** option from the left menu to open the **Automation** page with a list of automated tasks and their status.
{% hint style="info" %}
**NOTE:** Cerby automatically performs daily checks for updates for all business hubs, but you can trigger them manually, as described in this section. For more instructions, read the article [Sync your app users with your business hub](/setup-and-admin/business-hubs/managing-users-and-assets-via-a-business-hub/sync-your-business-hub-with-your-external-app).
{% endhint %}
The next step is [3. Connect your Astrix user account to the business hub](#id-3.-connect-your-astrix-user-account-to-the-business-hub).
### 3. Connect your Astrix user account to the business hub
To connect your Astrix user account to the business hub so Cerby can manage and protect it, you must complete the following steps:
1. Select the **Accounts** option from the left menu. The **Accounts** page is displayed.
2. Click the **Log in** button of the corresponding Astrix Hub account card. The **Connect your Astrix Hub Account** dialog box is displayed.
3. Enter the login credentials of your **Astrix** user account.
4. Click the **Connect account** button. The dialog box closes, and a success message box and a new account card are displayed.
The next step is [4. Manage unmatched users](#id-4.-manage-unmatched-users).
### 4. Manage unmatched users
During a check for updates, Cerby automatically matches app members to the Cerby user accounts that correspond to their email addresses, including existing [guest users](https://help.cerby.com/getting-started/concepts/user-management/guest-users) and [local partners](https://help.cerby.com/getting-started/concepts/user-management/partners#h-7e4add33a2). Manual matching is required when apps don't provide email addresses and for app members using personal or external accounts that couldn’t be identified or are not in the corporate directory.
To view the status of the imported app members, you must complete the following steps:
1. Select the **Business Hubs** option from the left menu. The **Business Hubs** page is displayed.
2. Click the **More options** (...) icon of the corresponding business hub card. A drop-down menu is displayed.
3. Select the **View Members** option from the menu. The business hub details page is displayed with the **Members** tab activated. App members are displayed in the following tabs of the **User Overview** section:
* **Unmatched users:** This tab displays the users who were not automatically matched.
* **Onboarded users:** This tab displays the users matched to their Cerby user account.
* **Guest users:** This tab displays the users who were matched to an existing Cerby user account but it doesn’t exist in the corporate directory, such as external collaborators.
For unmatched users, you can perform one of the following actions:
* [Match users](#match-users)
* [Remove unmatched users](#remove-unmatched-users)
* [Exempt unmatched users](#exempt-unmatched-users)
The following sections describe each action.
#### Match users
To match users, you must complete the following steps from the **Unmatched users** tab of the business hub details page:
1. Click the **Match user** button of the corresponding user. The **Match user** dialog box is displayed.
2. Enter the username or email address of the user you want to match and invite in the **Match with** field. The user is displayed on a list.
3. Select the user from the list.
4. Click the **Next** button. The **Select Cerby role** dialog box is displayed.
5. Select the role to assign to the user on the business hub **Cerby role** drop-down menu:
* **Owner:** This role enables sharing access and managing business hub settings in Cerby.
* **Collaborator:** This role enables only logging in to the app from Cerby.
6. Click the **Match user** button. The dialog box closes, and a success message box is displayed. The user is moved to the **Onboarded users** tab.
#### Remove unmatched users
To remove unmatched users, you must complete the following steps from the **Unmatched users** tab of the business hub details page:
{% hint style="danger" %}
**IMPORTANT:** When removing an unmatched user, Cerby performs an automated task to revoke the user’s seat and permissions in Astrix.
{% endhint %}
1. Click the **More options** (...) icon of the corresponding user. A drop-down menu is displayed.
2. Select the **Remove user** option from the menu. The **Remove user?** dialog box is displayed.
3. Click the **Remove user** button. The dialog box closes, and a success message box is displayed. The user is removed from the app via an automated task.
#### Exempt unmatched users
Exempted users keep their user accounts or seats active in your app, but you cannot manage them through Cerby.
To exempt unmatched users, you must complete the following steps from the **Unmatched users** tab of the business hub details page:
1. Click the **More options** (...) icon of the corresponding user. A drop-down menu is displayed.
2. Select the **Exempt user** option from the menu. The exempt user dialog box is displayed.
3. Enter a reason for exempting the user in the **Provide a reason** field.
4. Click the **Exempt member** button. The dialog box closes, and a success message box is displayed. The user is moved to the **Exempted users** tab.
***
## Use your business hub
The following are the supported features of business hubs you can use:
* [Join the external app and set up your business hub access](https://help.cerby.com/cerby-web-app/business-hubs/join-your-external-app-and-set-up-your-business-hub-access)
* [Add users to your app via a business hub](/setup-and-admin/business-hubs/managing-users-and-assets-via-a-business-hub/add-users-and-teams-to-your-apps-via-a-business-hub)
* [Provision users to your apps via an IdP and business hub](/setup-and-admin/business-hubs/managing-users-and-assets-via-a-business-hub/provision-users-to-your-apps-via-an-idp-and-business-hub)
* [Remove users from your app via a business hub](/setup-and-admin/business-hubs/managing-users-and-assets-via-a-business-hub/remove-users-from-your-app-via-a-business-hub)
* [Remove teams from your app via a business hub](/setup-and-admin/business-hubs/managing-users-and-assets-via-a-business-hub/remove-teams-from-your-app-via-a-business-hub)
* [Deprovision users from your apps via an IdP and business hub](/setup-and-admin/business-hubs/managing-users-and-assets-via-a-business-hub/deprovision-users-from-your-apps-via-an-idp-and-business-hub)
* [Update user roles in your app via a business hub](/setup-and-admin/business-hubs/managing-users-and-assets-via-a-business-hub/update-user-roles-in-your-app-via-a-business-hub)
* [Update user roles in your apps via an IdP and business hub](/setup-and-admin/business-hubs/managing-users-and-assets-via-a-business-hub/update-user-roles-in-your-apps-via-an-idp-and-business-hub)
* [Sync your app users with your business hub](/setup-and-admin/business-hubs/managing-users-and-assets-via-a-business-hub/sync-your-business-hub-with-your-external-app)
* [Log in to your app via a business hub](https://help.cerby.com/cerby-web-app/business-hubs/log-in-to-your-app)
* [Track the activity of business hub users](/setup-and-admin/business-hubs/managing-users-and-assets-via-a-business-hub/track-activity-on-app-members-user-accounts)
* [Remove a business hub](/setup-and-admin/business-hubs/managing-your-business-hubs/remove-a-business-hub)
# Connect a business hub for AstroPay
This article describes how to connect a business hub to centrally manage the users of AstroPay from Cerby.
{% hint style="info" %}
**Who can use this feature?**
* Workspace **Owners**, **Super Admins**, **Admins**, and **Users**
* Only supported using the Cerby web app
{% endhint %}
As a user with any workspace role in Cerby, except **Guest User** and **Login-Only**, you can connect a business hub integration to centrally manage the users of AstroPay.
When you connect the business hub, you become its **Owner**, and you can perform the following user and access management tasks through automated tasks executed by the Cerby agent:
* Check for updates
* Add users
* Update user roles
* Remove users
{% hint style="success" %}
**TIP:** For more details about the automated tasks of a business hub, how it works, and the supported apps, read the article [Explore Business Hubs](https://help.cerby.com/setup-and-admin/business-hubs/business-hub-catalog).
{% endhint %}
This article provides instructions on how to connect a business hub for AstroPay. For other app-specific articles and videos, review the [Connecting business hubs for your apps](https://help.cerby.com/setup-and-admin/business-hubs/connecting-your-apps) and [Connecting business hubs for your paid social apps](https://help.cerby.com/setup-and-admin/business-hubs/connecting-your-paid-social-apps) collections in the Cerby Help Center.
***
## Requirements
The following are the requirements to connect a business hub:
* A Cerby workspace
* A Cerby user account with the **Owner**, **Super Admin**, **Admin**, or **User** role
* Groups configured in your identity provider (IdP) if you want to leverage automatic user provisioning and deprovisioning from your apps based on group assignment events. For more information, read the articles available in the [Managing users via an IdP and business hub](https://help.cerby.com/setup-and-admin/business-hubs/managing-users-and-assets-via-a-business-hub) collection in the Cerby Help Center
* An automation account, meaning an active user account with a native **Administrator** role in AstroPay to be used as a service account. For instructions and recommendations on how to create and configure this account, read the article [Create a service account for your business hub](/setup-and-admin/business-hubs/connecting-your-apps/create-a-service-account-for-your-business-hub)
***
## Connect a business hub for AstroPay
To connect a business hub for AstroPay, you must complete the following main steps from the Cerby web app dashboard:
1. [Add a business hub and connect it to AstroPay](#id-1.-add-a-business-hub-and-connect-it-to-astropay)
2. [Check for updates to import users and roles to Cerby](#id-2.-check-for-updates-to-import-users-and-roles-to-cerby)
3. [Connect your AstroPay user account to the business hub](#id-3.-connect-your-astropay-user-account-to-the-business-hub)
4. [Manage unmatched users](#id-4.-manage-unmatched-users)
The following sections describe each main step.
### 1. Add a business hub and connect it to AstroPay
To add a business hub and connect it to AstroPay, you must complete the following steps:
1. Log in to your corresponding [Cerby](https://app.cerby.com/) workspace.
2. Select the **Business Hubs** option from the left menu. The **Business Hubs** page is displayed.
3. Click the **Connect Business Hub** button located at the top-right corner of the page. The **Connect your Business Hubs to Cerby** dialog box is displayed. **TIP:** Select the **Don’t show this again** option to skip this step the next time you connect a new business hub.
4. Click the **Get started** button. A wizard is displayed on the **Select app** page.
5. Select **AstroPay Hub** from the catalog. The **Enter app details** page is displayed on the wizard.
6. Enter and select your app information in the corresponding fields:
* **Label in Cerby:** It is the name to assign to your business hub in Cerby, and it will be displayed on the business hub card.
* **Business unique identifier:** It is a unique identifier that differentiates your business hub in Cerby from others for the same app. You can assign an alphanumeric value between 3 and 30 characters without symbols or special characters.
* **User management and login method:** It is the way your users log in to the app and determines whether they must save their login credentials as a Cerby account connected to the business hub.
1. Select the **Username and password** option because account security and access are managed by Cerby, and users log in with their credentials after saving them in Cerby
**IMPORTANT:** The **Single sign-on (SSO)** option is not supported for AstroPay.
7. Click the **Next** button. The **Select automation account** page is displayed with a list of existing AstroPay accounts.
8. Select the automation account you have previously added to Cerby, as described in the [Requirements](#requirements) section. **NOTE:** If you don’t have an automation account, you are prompted to add it. Make sure you read Cerby’s recommendations on how to configure it in the article [Create a service account for your business hub](https://help.cerby.com/setup-and-admin/business-hubs/connecting-your-apps/create-a-service-account-for-your-business-hub). You may need to add the account first and then add the business hub.
9. Click the **Connect app** button. The wizard closes, and a success message box is displayed. The corresponding business hub is also displayed on the **Business Hubs** page
The next step is [2. Check for updates to import users and roles to Cerby](/setup-and-admin/business-hubs/connecting-your-apps/connect-a-business-hub-for-your-app#h-9c6531cf9a).
### 2. Check for updates to import users and roles to Cerby
To check for updates in your app to identify and import users and roles to Cerby, you must complete the following steps:
1. Select the **Business Hubs** option from the left menu. The **Business Hubs** page is displayed.
2. Click the **More options** (...) icon of the corresponding business hub card. A drop-down menu is displayed.
3. Select the **Settings** option from the menu. The business hub details page is displayed with the **Settings** tab activated.
4. Click the **Sync** button located at the top right of the page. A message box is displayed with information about the process. **NOTE:** The check and import process may take a few minutes, depending on the number of users, and because Cerby automatically matches users to their corresponding Cerby user account.
5. Confirm that the automated task to check for updates has the “Completed” status by performing any of the following actions:
* Click the **More details** button in the message box.
* Select the **Automation** option from the left menu to open the **Automation** page with a list of automated tasks and their status.
{% hint style="info" %}
**NOTE:** Cerby automatically performs daily checks for updates for all business hubs, but you can trigger them manually, as described in this section. For more instructions, read the article [Sync your app users with your business hub](/setup-and-admin/business-hubs/managing-users-and-assets-via-a-business-hub/sync-your-business-hub-with-your-external-app).
{% endhint %}
The next step is [3. Connect your AstroPay user account to the business hub](#id-3.-connect-your-astropay-user-account-to-the-business-hub).
### 3. Connect your AstroPay user account to the business hub
To connect your AstroPay user account to the business hub so Cerby can manage and protect it, you must complete the following steps:
1. Select the **Accounts** option from the left menu. The **All accounts** page is displayed.
2. Click the **Log in** button of the corresponding AstroPay Hub account card. The **Connect your AstroPay Hub Account** dialog box is displayed.
3. Enter the login credentials of your **AstroPay** user account.
4. Click the **Connect account** button. The dialog box closes, and a success message box and a new account card are displayed.
The next step is [4. Manage unmatched users](#id-4.-manage-unmatched-users).
### 4. Manage unmatched users
During a check for updates, Cerby automatically matches app members to the Cerby user accounts that correspond to their email addresses, including existing [guest users](https://help.cerby.com/getting-started/concepts/user-management/guest-users) and [local partners](https://help.cerby.com/getting-started/concepts/user-management/partners#h-7e4add33a2). Manual matching is required when apps don't provide email addresses and for app members using personal or external accounts that couldn’t be identified or are not in the corporate directory.
To view the status of the imported app members, you must complete the following steps:
1. Select the **Business Hubs** option from the left menu. The **Business Hubs** page is displayed.
2. Click the **More options** (...) icon of the corresponding business hub card. A drop-down menu is displayed.
3. Select the **View Members** option from the menu. The business hub details page is displayed with the **Members** tab activated. App members are displayed in the following tabs of the **User Overview** section:
* **Unmatched users:** This tab displays the users who were not automatically matched.
* **Onboarded users:** This tab displays the users matched to their Cerby user account.
* **Guest users:** This tab displays the users who were matched to an existing Cerby user account, but it doesn’t exist in the corporate directory, such as external collaborators.
For unmatched users, you can perform one of the following actions:
* [Match users](#match-users)
* [Remove unmatched users](#remove-unmatched-users)
* [Exempt unmatched users](#exempt-unmatched-users)
The following sections describe each action.
#### Match users
To match users, you must complete the following steps from the **Unmatched users** tab of the business hub details page:
1. Click the **Match user** button of the corresponding user. The **Match user** dialog box is displayed.
2. Enter the username or email address of the user you want to match and invite in the **Match with** field. The user is displayed on a list.
3. Select the user from the list.
4. Click the **Next** button. The **Select Cerby role** dialog box is displayed.
5. Select the role to assign to the user on the business hub **Cerby role** drop-down menu:
* **Owner:** This role enables sharing access and managing business hub settings in Cerby.
* **Collaborator:** This role enables only logging in to the app from Cerby.
6. Click the **Match user** button. The dialog box closes, and a success message box is displayed. The user is moved to the **Onboarded users** tab.
#### Remove unmatched users
To remove unmatched users, you must complete the following steps from the **Unmatched users** tab of the business hub details page:
{% hint style="danger" %}
**IMPORTANT:** When removing an unmatched user, Cerby performs an automated task to revoke the user’s seat and permissions in AstroPay.
{% endhint %}
1. Click the **More options** (...) icon of the corresponding user. A drop-down menu is displayed.
2. Select the **Remove user** option from the list. The **Remove user?** dialog box is displayed.
3. Click the **Remove user** button. The dialog box closes, and a success message box is displayed. The user is removed from the app via an automated task.
#### Exempt unmatched users
Exempted users keep their user accounts or seats active in your app, but you cannot manage them through Cerby.
To exempt unmatched users, you must complete the following steps from the **Unmatched users** tab of the business hub details page:
1. Click the **More options** (...) icon of the corresponding user. A drop-down list is displayed.
2. Select the **Exempt user** option from the list. The exempt user dialog box is displayed.
3. Enter a reason for exempting the user in the **Provide a reason** field.
4. Click the **Exempt member** button. The dialog box closes, and a success message box is displayed. The user is moved to the **Exempted users** tab.
***
## Use your business hub
The following are the supported features of business hubs you can use:
* [Join the external app and set up your business hub access](https://help.cerby.com/cerby-web-app/business-hubs/join-your-external-app-and-set-up-your-business-hub-access)
* [Add users to your app via a business hub](/setup-and-admin/business-hubs/managing-users-and-assets-via-a-business-hub/add-users-and-teams-to-your-apps-via-a-business-hub)
* [Provision users to your apps via an IdP and business hub](/setup-and-admin/business-hubs/managing-users-and-assets-via-a-business-hub/provision-users-to-your-apps-via-an-idp-and-business-hub)
* [Remove users from your app via a business hub](/setup-and-admin/business-hubs/managing-users-and-assets-via-a-business-hub/remove-users-from-your-app-via-a-business-hub)
* [Remove teams from your app via a business hub](/setup-and-admin/business-hubs/managing-users-and-assets-via-a-business-hub/remove-teams-from-your-app-via-a-business-hub)
* [Deprovision users from your apps via an IdP and business hub](/setup-and-admin/business-hubs/managing-users-and-assets-via-a-business-hub/deprovision-users-from-your-apps-via-an-idp-and-business-hub)
* [Update user roles in your app via a business hub](/setup-and-admin/business-hubs/managing-users-and-assets-via-a-business-hub/update-user-roles-in-your-app-via-a-business-hub)
* [Update user roles in your apps via an IdP and business hub](/setup-and-admin/business-hubs/managing-users-and-assets-via-a-business-hub/update-user-roles-in-your-apps-via-an-idp-and-business-hub)
* [Sync your app users with your business hub](/setup-and-admin/business-hubs/managing-users-and-assets-via-a-business-hub/sync-your-business-hub-with-your-external-app)
* [Protect your app users via a business hub](/setup-and-admin/business-hubs/managing-users-and-assets-via-a-business-hub/protect-your-app-user-accounts-via-a-business-hub)
* [Log in to your app via a business hub](https://help.cerby.com/cerby-web-app/business-hubs/log-in-to-your-app)
* [Track the activity of business hub users](/setup-and-admin/business-hubs/managing-users-and-assets-via-a-business-hub/track-activity-on-app-members-user-accounts)
* [Remove a business hub](/setup-and-admin/business-hubs/managing-your-business-hubs/remove-a-business-hub)
# Connect a business hub for Autodesk
This article describes how to connect a business hub to centrally manage the users and assets of Autodesk from Cerby.
{% hint style="info" %}
**Who can use this feature?**
* Workspace **Owners**, **Super Admins**, **Admins**, and **Users**
* Only supported using the Cerby web app
{% endhint %}
As a user with any workspace role in Cerby, except **Guest User** and **Login-Only**, you can connect a business hub integration to centrally manage the users and assets of Autodesk.
When you connect the business hub, you become its **Owner**, and you can perform the following user and access management tasks through automated tasks executed by the Cerby agent:
* Check for updates
* Add users
* Remove users
{% hint style="success" %}
**TIP:** For more details about the automated tasks of a business hub, how it works, and the supported apps, read the article [Explore Business Hubs](https://help.cerby.com/setup-and-admin/business-hubs/business-hub-catalog).
{% endhint %}
{% hint style="info" %}
**NOTE:** The automated task to update user roles is not currently available for this business hub.
{% endhint %}
This article provides instructions on how to connect a business hub for Autodesk. For other app-specific articles and videos, review the [Connecting business hubs for your apps](https://help.cerby.com/setup-and-admin/business-hubs/connecting-your-apps) and [Connecting business hubs for your paid social apps](https://help.cerby.com/setup-and-admin/business-hubs/connecting-your-paid-social-apps) collections in the Cerby Help Center.
***
## Requirements
The following are the requirements to connect a business hub:
* A Cerby workspace
* A Cerby user account with the workspace **Owner**, **Super Admin**, **Admin**, or **User** role
* A team in Autodesk
* Groups configured in your identity provider (IdP) if you want to leverage automatic user provisioning and deprovisioning from your apps based on group assignment events. For more information, read the articles available in the [Managing users via an IdP and business hub](https://help.cerby.com/setup-and-admin/business-hubs/managing-users-and-assets-via-a-business-hub) collection in the Cerby Help Center
* An automation account, meaning an active user account with a native **Secondary admin** role in Autodesk to be used as a service account. For instructions and recommendations on how to create and configure this account, read the article [Create a service account for your business hub](/setup-and-admin/business-hubs/connecting-your-apps/create-a-service-account-for-your-business-hub)
* The user management and login method for your business hub identified to select the corresponding option when connecting your app. For more information, read the **User management and login method** section of the article [Explore Business Hubs](https://help.cerby.com/setup-and-admin/business-hubs/business-hub-catalog)
* A Team name. You can find the ID by completing the following steps:
1. Log in to your Autodesk account.
2. Navigate to the **User Management** tab. The **User Management** page is displayed with the **By User** tab activated.
3. Locate the **Team** field. The drop-down list displays the teams available in your account, as shown in **Figure 1**.
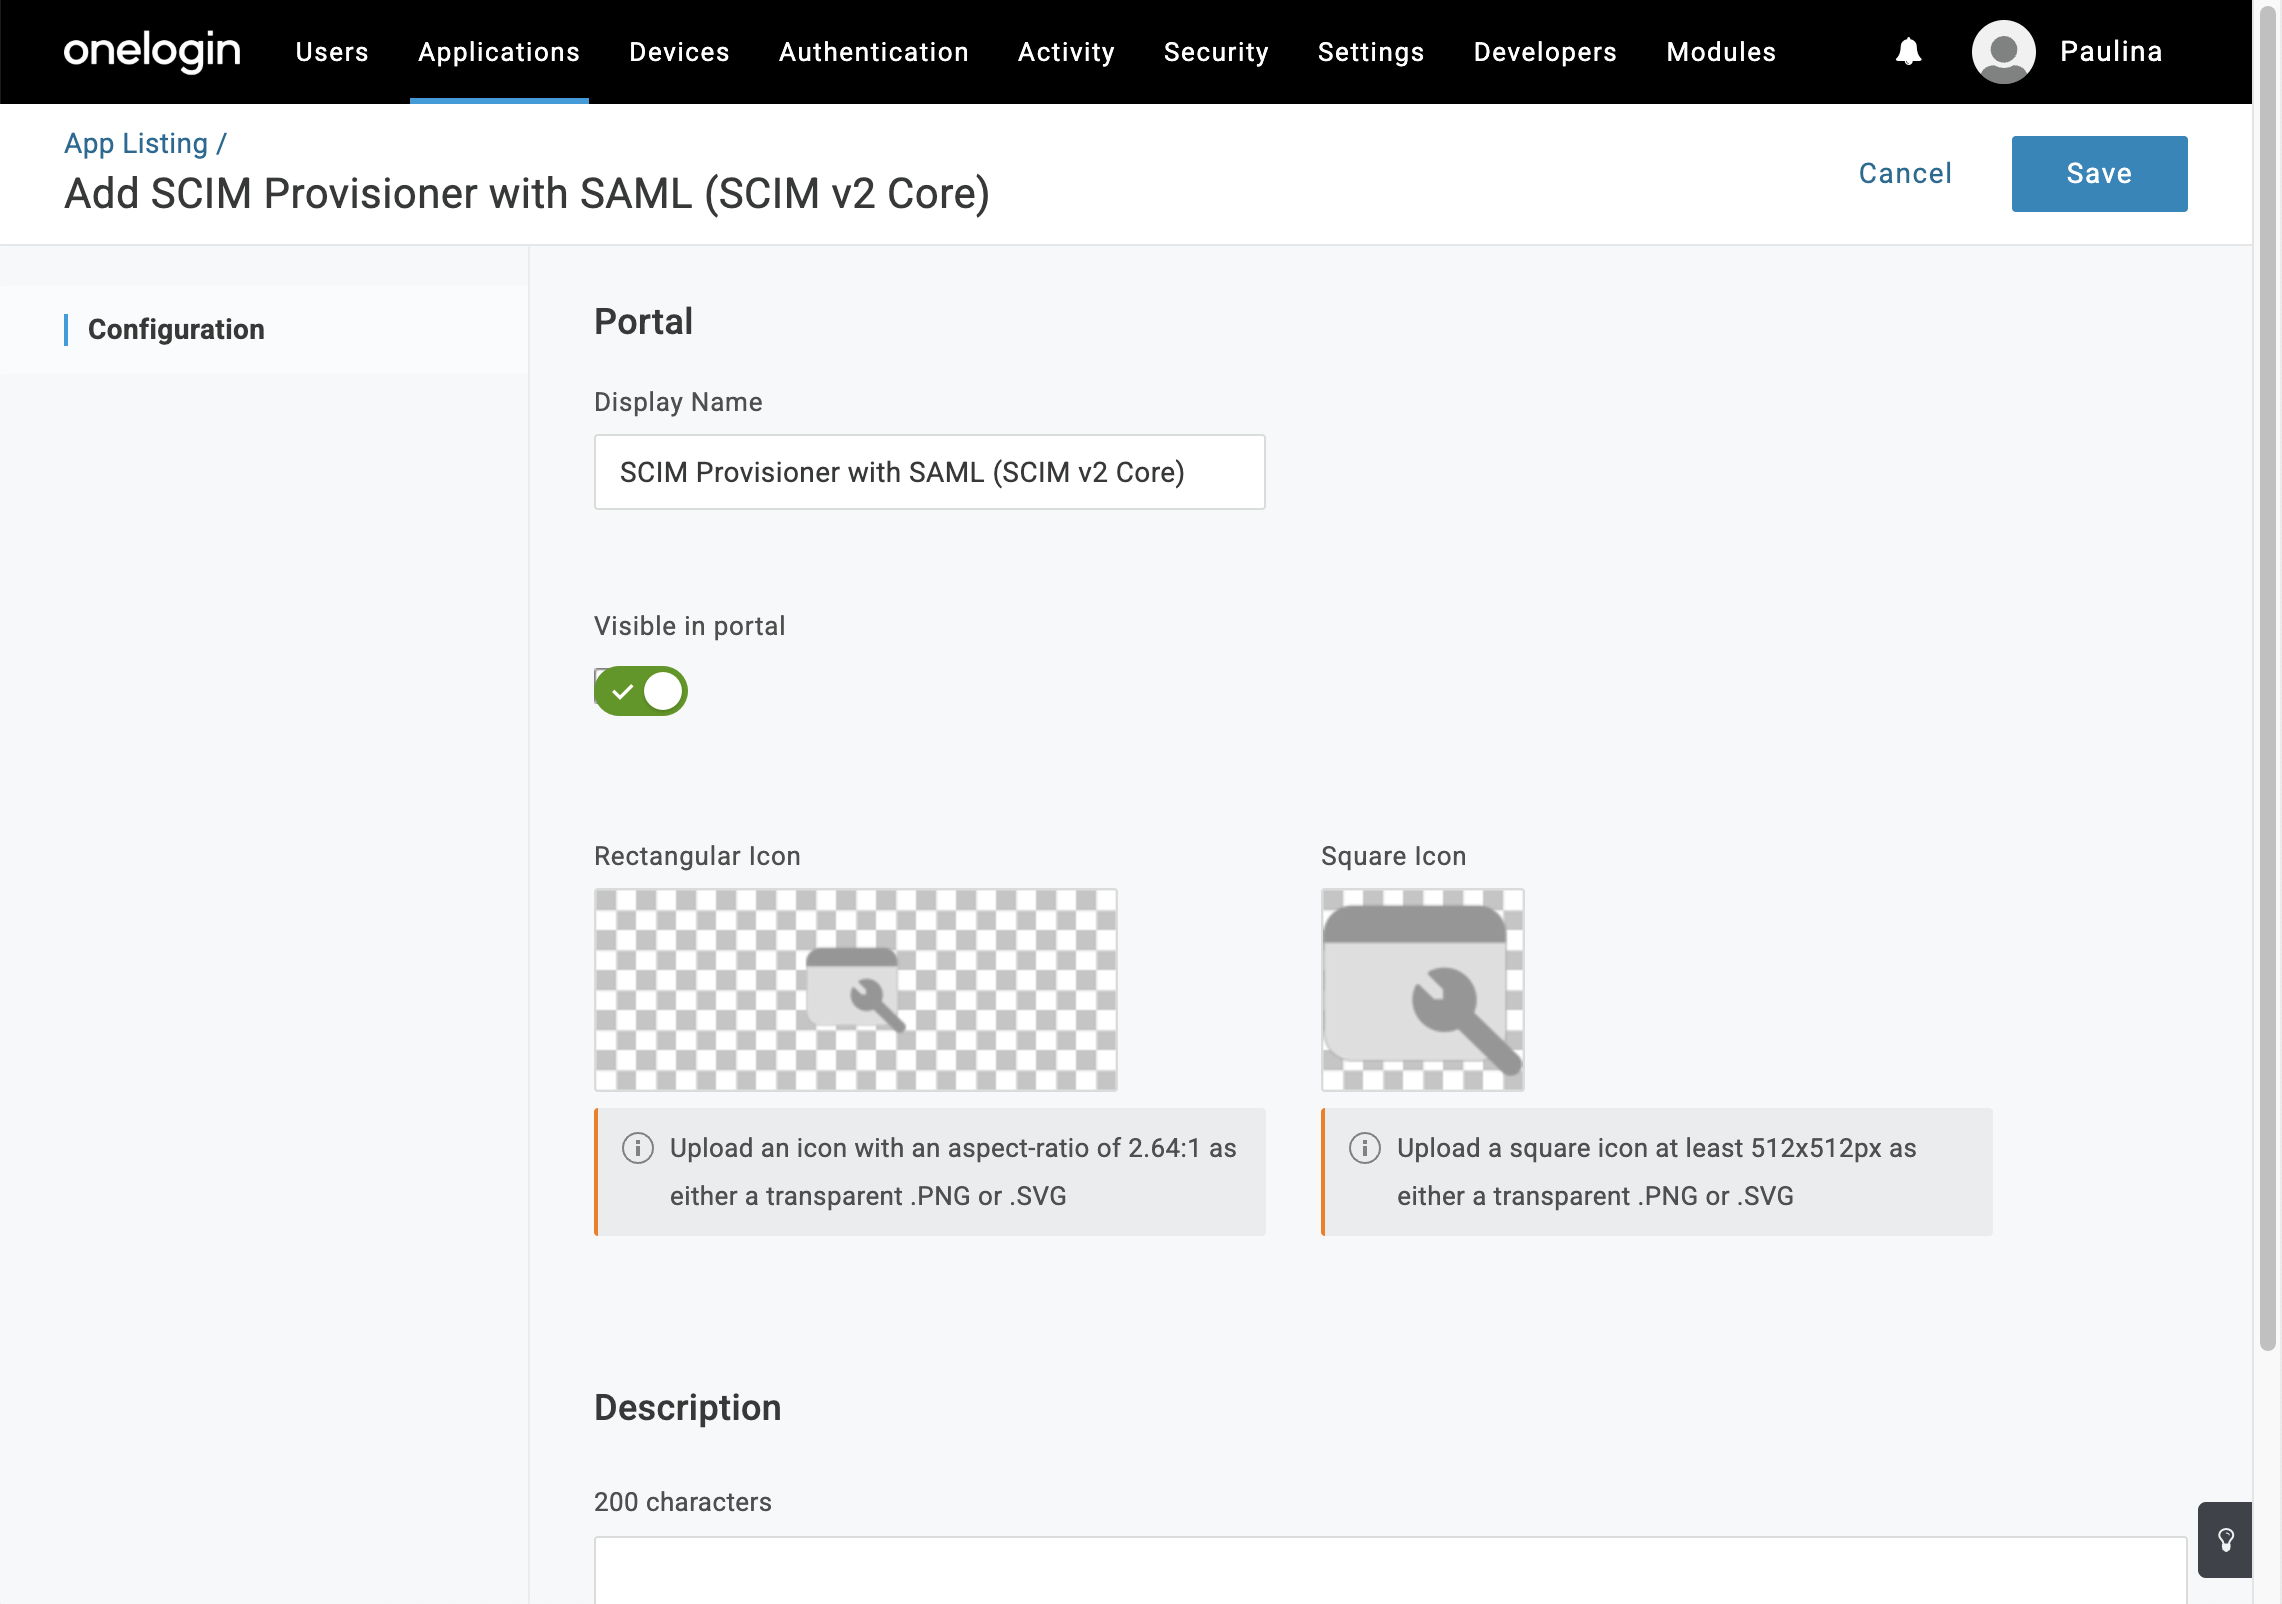
 ) icon of the corresponding business hub card. The business hub details page is displayed with the **Settings** tab activated.
3. Click the **Check for updates** button located at the top right of the page. A message box is displayed with information about the process. **NOTE:** The check and import process may take a few minutes depending on the number of users, and because Cerby automatically matches users to their corresponding Cerby user account.
4. Confirm that the automated task to check for updates has the “Completed” status by performing any of the following actions:
* Click the **More details** button from the message box.
* Select the **Automation** option from the left navigation drawer to open the **Automation** page with a list of automated tasks and their status.
{% hint style="info" %}
**NOTE:** Cerby automatically performs daily checks for updates for all business hubs, but you can trigger them manually, as described in this section. When a user is deprovisioned from an IdP and a check for updates is performed, Cerby generates a report and sends business hub **Owners** an email to confirm their removal from the app. For more instructions, read the article [Check for updates in your app and apply report](/setup-and-admin/business-hubs/managing-users-and-assets-via-a-business-hub/sync-your-business-hub-with-your-external-app).
{% endhint %}
The next step is [3. Connect your BuildBuddy user account to the business hub](#id-3.-connect-your-buildbuddy-user-account-to-the-business-hub).
### 3. Connect your BuildBuddy user account to the business hub
To connect your BuildBuddy user account to the business hub so Cerby can manage and protect it, you must complete the following steps:
1. Select the **Accounts** option from the left navigation drawer. The **Accounts** page is displayed.
2. Click the **Log in** button of the corresponding BuildBuddy Hub account card. The **Connect your BuildBuddy Hub Account** dialog box is displayed.
3. Enter the login credentials of your **BuildBuddy** user account.
4. Click the **Connect account** button. The dialog box closes, and a success message box and a new account card are displayed.
The next step is [4. Manage unmatched users](#id-4.-manage-unmatched-users).
### 4. Manage unmatched users
During a check for updates, Cerby automatically matches app members to the Cerby user accounts that correspond to their email addresses, including existing [guest users](https://help.cerby.com/getting-started/concepts/user-management/guest-users) and [local partners](https://help.cerby.com/getting-started/concepts/user-management/partners#h-7e4add33a2). Manual matching is required when apps don't provide email addresses and for app members using personal or external accounts that couldn’t be identified or are not in the corporate directory.
To view the status of the imported app members, you must complete the following steps:
1. Select the **Business Hubs** option from the left navigation drawer. The **Business Hubs** page is displayed.
2. Click the **More options** (...) icon of the corresponding business hub card. A drop-down list is displayed.
3. Select the **View Members** option from the list. The business hub details page is displayed with the **Members** tab activated. App members are displayed in the following tabs of the **User Overview** section:
* **Unmatched users:** This tab displays the users who were not automatically matched.
* **Onboarded users:** This tab displays the users matched to their Cerby user account.
* **Guest users:** This tab displays the users who were matched to an existing Cerby user account but it doesn’t exist in the corporate directory, such as external collaborators.
For unmatched users, you can perform one of the following actions:
* [Match users](#match-users)
* [Remove unmatched users](#remove-unmatched-users)
* [Exempt unmatched users](#exempt-unmatched-users)
The following sections describe each action.
#### Match users
To match users, you must complete the following steps from the **Unmatched users** tab of the business hub details page:
1. Click the **Match user** button of the corresponding user. The **Match user** dialog box is displayed.
2. Enter the username or email address of the user you want to match and invite in the **Match with** field. The user is displayed on a list.
3. Select the user from the list.
4. Click the **Next** button. The **Select Cerby role** dialog box is displayed.
5. Select the role to assign to the user on the business hub **Cerby role** drop-down list:
* **Owner:** This role enables sharing access and managing business hub settings in Cerby.
* **Collaborator:** This role enables only logging in to the app from Cerby.
6. Click the **Match user** button. The dialog box closes, and a success message box is displayed. The user is moved to the **Onboarded users** tab.
#### Remove unmatched users
To remove unmatched users, you must complete the following steps from the **Unmatched users** tab of the business hub details page:
{% hint style="danger" %}
**IMPORTANT:** When removing an unmatched user, Cerby performs an automated task to revoke the user’s seat and permissions in BuildBuddy.
{% endhint %}
1. Click the **More options** (...) icon of the corresponding user. A drop-down list is displayed.
2. Select the **Remove user** option from the list. The **Remove user?** dialog box is displayed.
3. Click the **Remove user** button. The dialog box closes, and a success message box is displayed. The user is removed from the app via an automated task.
#### Exempt unmatched users
Exempted users keep their user accounts or seats active in your app, but you cannot manage them through Cerby.
To exempt unmatched users, you must complete the following steps from the **Unmatched users** tab of the business hub details page:
1. Click the **More options** (...) icon of the corresponding user. A drop-down list is displayed.
2. Select the **Exempt user** option from the list. The exempt user dialog box is displayed.
3. Enter a reason for exempting the user in the **Provide a reason** field.
4. Click the **Exempt member** button. The dialog box closes, and a success message box is displayed. The user is moved to the **Exempted users** tab.
***
## Use your business hub
The following are the supported features of business hubs you can use:
* [Join the App and connect it to Cerby](https://help.cerby.com/cerby-web-app/business-hubs/join-your-external-app-and-set-up-your-business-hub-access)
* [Remove app members](/setup-and-admin/business-hubs/managing-users-and-assets-via-a-business-hub/remove-users-from-your-app-via-a-business-hub)
* [Provision users to your apps via an IdP and business hub](https://help.cerby.com/setup-and-admin/business-hubs/managing-users-and-assets-via-a-business-hub/provision-users-to-your-apps-via-an-idp-and-business-hub)
* [Update the app members’ roles](/setup-and-admin/business-hubs/managing-users-and-assets-via-a-business-hub/update-user-roles-in-your-app-via-a-business-hub)
* [Check for updates in your app and apply report](/setup-and-admin/business-hubs/managing-users-and-assets-via-a-business-hub/sync-your-business-hub-with-your-external-app)
* [Re-assign the app members’ user accounts](https://github.com/cerbyinc/help-center/tree/main/.uncategorized/unpublished-deprecated-re-assign-the-app-members-user-accounts.md)
* [Log in to your app](https://help.cerby.com/cerby-web-app/business-hubs/log-in-to-your-app)
* [Track activity on app members’ user accounts](/setup-and-admin/business-hubs/managing-users-and-assets-via-a-business-hub/track-activity-on-app-members-user-accounts)
* [Remove an App](/setup-and-admin/business-hubs/managing-your-business-hubs/remove-a-business-hub)
# Connect a business hub for Built In
This article describes how to connect a business hub to centrally manage the users of Built In from Cerby.
{% hint style="info" %}
**Who can use this feature?**
* Workspace **Owners**, **Super Admins**, **Admins**, and **Users**
* Only supported using the Cerby web app
{% endhint %}
As a user with any workspace role in Cerby, except **Guest User** and **Login-Only**, you can connect a business hub integration to centrally manage the users of Built In.
When you connect the business hub, you become its **Owner**, and you can perform the following user and access management tasks through automated tasks executed by the Cerby agent:
* Check for updates
* Add users
* Update user roles
* Remove users
{% hint style="success" %}
**TIP:** For more details about the automated tasks of a business hub, how it works, and the supported apps, read the article [Explore Business Hubs](https://help.cerby.com/setup-and-admin/business-hubs/business-hub-catalog).
{% endhint %}
This article provides instructions on how to connect a business hub for Built In. For other app-specific articles and videos, review the [Connecting business hubs for your apps](https://help.cerby.com/setup-and-admin/business-hubs/connecting-your-apps) and [Connecting business hubs for your paid social apps](https://help.cerby.com/setup-and-admin/business-hubs/connecting-your-paid-social-apps) collections in the Cerby Help Center.
***
## Requirements
The following are the requirements to connect a business hub:
* A Cerby workspace
* A Cerby user account with the workspace **Owner**, **Super Admin**, **Admin**, or **User** role
* A company in Built In
* Groups configured in your identity provider (IdP) if you want to leverage automatic user provisioning and deprovisioning from your apps based on group assignment events. For more information, read the articles available in the [Managing users via an IdP and business hub](https://help.cerby.com/setup-and-admin/business-hubs/managing-users-and-assets-via-a-business-hub) collection in the Cerby Help Center
* An automation account, meaning an active user account with a native **Admin** role in Built In to be used as a service account. For instructions and recommendations on how to create and configure this account, read the article [Create a service account for your business hub](/setup-and-admin/business-hubs/connecting-your-apps/create-a-service-account-for-your-business-hub)
* The user management and login method for your business hub identified to select the corresponding option when connecting your app. For more information, read the **User management and login method** section of the article [Explore Business Hubs](https://help.cerby.com/setup-and-admin/business-hubs/business-hub-catalog)
* A Business ID. You can find the ID in the address bar by completing the following steps after logging in to Built In:
1. Click your company logo icon at the top right of the page.
2. Select the **Employee Portal** option from the drop-down menu. The **Employee Portal** page is displayed.
3. Click the **Admin** card from the dashboard. The **People with Admin Rights** page is displayed.
4. Copy the ID from the address bar. The ID is displayed in the address bar as part of the URL. For example, **`0123`** in **`https://builtin.com/employer/company-admin?selectedCompanyId=0123`**
***
## Connect a business hub for Built In
To connect a business hub for Built In, you must complete the following main steps from the Cerby web app dashboard:
1. [Add a business hub and connect it to Built In](#id-1.-add-a-business-hub-and-connect-it-to-built-in)
2. [Check for updates to import users and roles to Cerby](#id-2.-check-for-updates-to-import-users-and-roles-to-cerby)
3. [Connect your Built In user account to the business hub](#id-3.-connect-your-built-in-user-account-to-the-business-hub)
4. [Manage unmatched users](#id-4.-manage-unmatched-users)
The following sections describe each main step.
### 1. Add a business hub and connect it to Built In
To add a business hub and connect it to Built In, you must complete the following steps:
1. Log in to your corresponding [Cerby](https://app.cerby.com/) workspace.
2. Select the **Business Hubs** option from the left menu. The **Business Hubs** page is displayed.
3. Click the **Connect Business Hub** button located at the top-right corner of the page. The **Connect your Business Hubs to Cerby** dialog box is displayed. **TIP:** Select the **Don’t show this again** option to skip this step the next time you connect a new business hub.
4. Click the **Get started** button. A wizard is displayed on the **Select app** page.
5. Select **Builtin Hub** from the catalog. The **Enter app details** page is displayed on the wizard.
6. Enter and select your app information in the corresponding fields:
* **Label in Cerby:** It is the name to assign to your business hub in Cerby, and it will be displayed on the business hub card.
* **Business ID:** It is the unique identifier of your business or organization in **Builtin Hub**. For instructions on how to find it, read the [Requirements](#requirements) section.
* **User management and login method:** It is the way your users log in to the app and determines whether they must save their login credentials as a Cerby account connected to the business hub. You must select one of the following methods:
* **Single sign-on (SSO):** Access is managed by your IdP, and users log in with SSO authentication. They are not asked to save their credentials in Cerby.
* **Username and password:** Cerby manages account security and access, and users log in with their credentials after saving them in Cerby.
7. Click the **Next** button. The **Select automation account** page is displayed with a list of existing Built In accounts.
8. Select the automation account you have previously added to Cerby, as described in the [Requirements](#requirements) section. **NOTE:** If you don’t have an automation account, you are prompted to add it. Make sure you read Cerby’s recommendations on how to configure it in the article [Create a service account for your business hub](/setup-and-admin/business-hubs/connecting-your-apps/create-a-service-account-for-your-business-hub). You may need to add the account first and then add the business hub.
9. Click the **Connect app** button. The wizard closes, and a success message box is displayed. The corresponding business hub is also displayed on the **Business Hubs** page.
The next step is [2. Check for updates to import users and roles to Cerby](#id-2.-check-for-updates-to-import-users-and-roles-to-cerby).
### 2. Check for updates to import users and roles to Cerby
To check for updates in your app to identify and import users and roles to Cerby, you must complete the following steps:
1. Select the **Business Hubs** option from the left menu. The **Business Hubs** page is displayed.
2. Click the **More options** (...) icon of the corresponding business hub card. A drop-down menu is displayed.
3. Select the **Settings** option from the menu. The business hub details page is displayed with the **Settings** tab activated.
4. Click the **Check for updates** button located at the top right of the page. A message box is displayed with information about the process. **NOTE:** The check and import process may take a few minutes depending on the number of users, and because Cerby automatically matches users to their corresponding Cerby user account.
5. Confirm that the automated task to check for updates has the “Completed” status by performing any of the following actions:
* Click the **More details** button from the message box.
* Select the **Automation** option from the left menu to open the **Automation** page with a list of automated tasks and their status.
{% hint style="info" %}
**NOTE:** Cerby automatically performs daily checks for updates for all business hubs, but you can trigger them manually, as described in this section. For more instructions, read the article [Sync your app users with your business hub](/setup-and-admin/business-hubs/managing-users-and-assets-via-a-business-hub/sync-your-business-hub-with-your-external-app).
{% endhint %}
The next step is [3. Connect your Built In user account to the business hub](#id-3.-connect-your-built-in-user-account-to-the-business-hub).
### 3. Connect your Built In user account to the business hub
To connect your Built In user account to the business hub so Cerby can manage and protect it, you must complete the following steps:
1. Select the **Accounts** option from the left menu. The **Accounts** page is displayed.
2. Click the **Log in** button of the corresponding Builtin Hub account card. The **Connect your Builtin Hub Account** dialog box is displayed.
3. Enter the login credentials of your **Built In** user account.
4. Click the **Connect account** button. The dialog box closes, and a success message box and a new account card are displayed.
The next step is [4. Manage unmatched users](#id-4.-manage-unmatched-users).
### 4. Manage unmatched users
During a check for updates, Cerby automatically matches app members to the Cerby user accounts that correspond to their email addresses, including existing [guest users](https://help.cerby.com/getting-started/concepts/user-management/guest-users) and [local partners](https://help.cerby.com/getting-started/concepts/user-management/partners#h-7e4add33a2). Manual matching is required when apps don't provide email addresses and for app members using personal or external accounts that couldn’t be identified or are not in the corporate directory.
To view the status of the imported app members, you must complete the following steps:
1. Select the **Business Hubs** option from the left menu. The **Business Hubs** page is displayed.
2. Click the **More options** (...) icon of the corresponding business hub card. A drop-down menu is displayed.
3. Select the **View Members** option from the menu. The business hub details page is displayed with the **Members** tab activated. App members are displayed in the following tabs of the **User Overview** section:
* **Unmatched users:** This tab displays the users who were not automatically matched.
* **Onboarded users:** This tab displays the users matched to their Cerby user account.
* **Guest users:** This tab displays the users who were matched to an existing Cerby user account but it doesn’t exist in the corporate directory, such as external collaborators.
For unmatched users, you can perform one of the following actions:
* [Match users](#match-users)
* [Remove unmatched users](#remove-unmatched-users)
* [Exempt unmatched users](#exempt-unmatched-users)
The following sections describe each action.
#### Match users
To match users, you must complete the following steps from the **Unmatched users** tab of the business hub details page:
1. Click the **Match user** button of the corresponding user. The **Match user** dialog box is displayed.
2. Enter the username or email address of the user you want to match and invite in the **Match with** field. The user is displayed on a list.
3. Select the user from the list.
4. Click the **Next** button. The **Select Cerby role** dialog box is displayed.
5. Select the role to assign to the user on the business hub **Cerby role** drop-down menu:
* **Owner:** This role enables sharing access and managing business hub settings in Cerby.
* **Collaborator:** This role enables only logging in to the app from Cerby.
6. Click the **Match user** button. The dialog box closes, and a success message box is displayed. The user is moved to the **Onboarded users** tab.
#### Remove unmatched users
To remove unmatched users, you must complete the following steps from the **Unmatched users** tab of the business hub details page:
{% hint style="danger" %}
**IMPORTANT:** When removing an unmatched user, Cerby performs an automated task to revoke the user’s seat and permissions in Built In.
{% endhint %}
1. Click the **More options** (...) icon of the corresponding user. A drop-down menu is displayed.
2. Select the **Remove user** option from the menu. The **Remove user?** dialog box is displayed.
3. Click the **Remove user** button. The dialog box closes, and a success message box is displayed. The user is removed from the app via an automated task.
#### Exempt unmatched users
Exempted users keep their user accounts or seats active in your app, but you cannot manage them through Cerby.
To exempt unmatched users, you must complete the following steps from the **Unmatched users** tab of the business hub details page:
1. Click the **More options** (...) icon of the corresponding user. A drop-down menu is displayed.
2. Select the **Exempt user** option from the menu. The exempt user dialog box is displayed.
3. Enter a reason for exempting the user in the **Provide a reason** field.
4. Click the **Exempt member** button. The dialog box closes, and a success message box is displayed. The user is moved to the **Exempted users** tab.
***
## Use your business hub
The following are the supported features of business hubs you can use:
* [Join the external app and set up your business hub access](https://help.cerby.com/cerby-web-app/business-hubs/join-your-external-app-and-set-up-your-business-hub-access)
* [Add users to your app via a business hub](/setup-and-admin/business-hubs/managing-users-and-assets-via-a-business-hub/add-users-and-teams-to-your-apps-via-a-business-hub)
* [Provision users to your apps via an IdP and business hub](/setup-and-admin/business-hubs/managing-users-and-assets-via-a-business-hub/provision-users-to-your-apps-via-an-idp-and-business-hub)
* [Remove users from your app via a business hub](/setup-and-admin/business-hubs/managing-users-and-assets-via-a-business-hub/remove-users-from-your-app-via-a-business-hub)
* [Remove teams from your app via a business hub](/setup-and-admin/business-hubs/managing-users-and-assets-via-a-business-hub/remove-teams-from-your-app-via-a-business-hub)
* [Deprovision users from your apps via an IdP and business hub](/setup-and-admin/business-hubs/managing-users-and-assets-via-a-business-hub/deprovision-users-from-your-apps-via-an-idp-and-business-hub)
* [Update user roles in your app via a business hub](/setup-and-admin/business-hubs/managing-users-and-assets-via-a-business-hub/update-user-roles-in-your-app-via-a-business-hub)
* [Update team member roles in your app via a business hub](/setup-and-admin/business-hubs/managing-users-and-assets-via-a-business-hub/update-team-member-roles-in-your-app-via-a-business-hub)
* [Update user roles in your apps via an IdP and business hub](/setup-and-admin/business-hubs/managing-users-and-assets-via-a-business-hub/update-user-roles-in-your-apps-via-an-idp-and-business-hub)
* [Sync your app users with your business hub](/setup-and-admin/business-hubs/managing-users-and-assets-via-a-business-hub/sync-your-business-hub-with-your-external-app)
* [Log in to your app via a business hub](https://help.cerby.com/cerby-web-app/business-hubs/log-in-to-your-app)
* [Track the activity of business hub users](/setup-and-admin/business-hubs/managing-users-and-assets-via-a-business-hub/track-activity-on-app-members-user-accounts)
* [Remove a business hub](/setup-and-admin/business-hubs/managing-your-business-hubs/remove-a-business-hub)
# Connect a business hub for BuyMe Business
This article describes how to connect a business hub to centrally manage the users of BuyMe Business from Cerby.
{% hint style="info" %}
**Who can use this feature?**
* Workspace **Owners**, **Super Admins**, **Admins**, and **Users**
* Only supported using the Cerby web app
{% endhint %}
As a user with any workspace role in Cerby, except **Guest User** and **Login-Only**, you can connect a business hub integration to centrally manage the users of BuyMe Business.
When you connect the business hub, you become its **Owner**, and you can perform the following user and access management tasks through automated tasks executed by the Cerby agent:
* Check for updates
* Add users
* Remove users
{% hint style="success" %}
**TIP:** For more details about the automated tasks of a business hub, how it works, and the supported apps, read the article [Explore Business Hubs](https://help.cerby.com/setup-and-admin/business-hubs/business-hub-catalog).
{% endhint %}
{% hint style="info" %}
**NOTE:** The automated task to update user roles is not available for this business hub because users can only be assigned the **Members** role in BuyMe Business.
{% endhint %}
{% hint style="danger" %}
**IMPORTANT:** BuyMe Business requires the following additional fields to create user accounts:
* **User's Birth Date**
* **User's Mobile Phone Number**
You must provide both values when adding users to your external app.
{% endhint %}
This article provides instructions on how to connect a business hub for BuyMe Business. For other app-specific articles and videos, review the [Connecting business hubs for your apps](https://help.cerby.com/setup-and-admin/business-hubs/connecting-your-apps) and [Connecting business hubs for your paid social apps](https://help.cerby.com/setup-and-admin/business-hubs/connecting-your-paid-social-apps) collections in the Cerby Help Center.
***
## Requirements
The following are the requirements to connect a business hub:
* A Cerby workspace
* A Cerby user account with the workspace **Owner**, **Super Admin**, **Admin**, or **User** role
* Groups configured in your identity provider (IdP) if you want to leverage automatic user provisioning and deprovisioning from your apps based on group assignment events. For more information, read the articles available in the [Managing users via an IdP and business hub](https://help.cerby.com/setup-and-admin/business-hubs/managing-users-and-assets-via-a-business-hub) collection in the Cerby Help Center
* An automation account, meaning an active user account with a native **Admin** role in BuyMe Business to be used as a service account. For instructions and recommendations on how to create and configure this account, read the article [Create a service account for your business hub](/setup-and-admin/business-hubs/connecting-your-apps/create-a-service-account-for-your-business-hub)
* The user management and login method for your business hub identified to select the corresponding option when connecting your app. For more information, read the **User management and login method** section of the article [Explore Business Hubs](https://help.cerby.com/setup-and-admin/business-hubs/business-hub-catalog)
* A Business unique identifier. You can find the ID in the address bar\*\*\*\* when you are logged in to BuyMe Business. The ID is displayed in the address bar as part of the URL, after the **systems** subfolder\*\*.\*\* For example, \*\*`/org_name#/activity/4/auto/12345` \*\*in **`https://buyme.co/systems/org_name#/activity/4/auto/12345`**. Just copy the value and paste it when connecting the business hub.
***
## Connect a business hub for BuyMe Business
To connect a business hub for BuyMe Business, you must complete the following main steps from the Cerby web app dashboard:
1. [Add a business hub and connect it to BuyMe Business](#id-1.-add-a-business-hub-and-connect-it-to-buyme-business)
2. [Check for updates to import users and roles to Cerby](#id-2.-check-for-updates-to-import-users-and-roles-to-cerby)
3. [Connect your BuyMe Business user account to the business hub](#id-3.-connect-your-buyme-business-user-account-to-the-business-hub)
4. [Manage unmatched users](#id-4.-manage-unmatched-users)
The following sections describe each main step.
### 1. Add a business hub and connect it to BuyMe Business
To add a business hub and connect it to BuyMe Business, you must complete the following steps:
1. Log in to your corresponding [Cerby](https://app.cerby.com/) workspace.
2. Select the **Business Hubs** option from the left menu. The **Business Hubs** page is displayed.
3. Click the **Connect Business Hub** button located at the top-right corner of the page. The **Connect your Business Hubs to Cerby** dialog box is displayed. **TIP:** Select the **Don’t show this again** option to skip this step the next time you connect a new business hub.
4. Click the **Get started** button. A wizard is displayed on the **Select app** page.
5. Select **BuyMe Business Hub** from the catalog. The **Enter app details** page is displayed on the wizard.
6. Enter and select your app information in the corresponding fields:
* **Label in Cerby:** It is the name to assign to your business hub in Cerby, and it will be displayed on the business hub card.
* **Business unique identifier:** It is the unique identifier of your business or organization in **BuyMe Business Hub**. For instructions on how to find it, read the [Requirements](#requirements) section.
* **User management and login method:** It is the way your users log in to the app and determines whether they must save their login credentials as a Cerby account connected to the business hub.
1. Select the **Single sign-on (SSO)** option because access must be managed by your IdP, and users log in with SSO authentication. They are not asked to save their credentials in Cerby.
**IMPORTANT:** BuyMe Business only supports Google SSO via Okta.
7. Click the **Next** button. The **Select automation account** page is displayed with a list of existing BuyMe Business accounts.
8. Select the automation account you have previously added to Cerby, as described in the [Requirements](#requirements) section. **NOTE:** If you don’t have an automation account, you are prompted to add it. Make sure you read Cerby’s recommendations on how to configure it in the article [Create a service account for your business hub](/setup-and-admin/business-hubs/connecting-your-apps/create-a-service-account-for-your-business-hub). You may need to add the account first and then add the business hub.
9. Click the **Connect app** button. The wizard closes, and a success message box is displayed. The corresponding business hub is also displayed on the **Business Hubs** page.
The next step is [2. Check for updates to import users and roles to Cerby](#id-2.-check-for-updates-to-import-users-and-roles-to-cerby).
### 2. Check for updates to import users and roles to Cerby
To check for updates in your app to identify and import users and roles to Cerby, you must complete the following steps:
1. Select the **Business Hubs** option from the left menu. The **Business Hubs** page is displayed.
2. Click the **More options** (...) icon of the corresponding business hub card. A drop-down menu is displayed.
3. Select the **Settings** option from the menu. The business hub details page is displayed with the **Settings** tab activated.
4. Click the **Check for updates** button located at the top right of the page. A message box is displayed with information about the process. **NOTE:** The check and import process may take a few minutes depending on the number of users, and because Cerby automatically matches users to their corresponding Cerby user account.
5. Confirm that the automated task to check for updates has the “Completed” status by performing any of the following actions:
* Click the **More details** button from the message box.
* Select the **Automation** option from the left menu to open the **Automation** page with a list of automated tasks and their status.
{% hint style="info" %}
**NOTE:** Cerby automatically performs daily checks for updates for all business hubs, but you can trigger them manually, as described in this section. For more instructions, read the article [Sync your app users with your business hub](/setup-and-admin/business-hubs/managing-users-and-assets-via-a-business-hub/sync-your-business-hub-with-your-external-app).
{% endhint %}
The next step is [3. Connect your BuyMe Business user account to the business hub](#id-3.-connect-your-buyme-business-user-account-to-the-business-hub).
### 3. Connect your BuyMe Business user account to the business hub
To connect your BuyMe Business user account to the business hub so Cerby can manage and protect it, you must complete the following steps:
1. Select the **Accounts** option from the left menu. The **Accounts** page is displayed.
2. Click the **Log in** button of the corresponding BuyMe Business Hub account card. The **Connect your BuyMe Business Hub Account** dialog box is displayed.
3. Enter the login credentials of your **BuyMe Business** user account.
4. Click the **Connect account** button. The dialog box closes, and a success message box and a new account card are displayed.
The next step is [4. Manage unmatched users](#id-4.-manage-unmatched-users).
### 4. Manage unmatched users
During a check for updates, Cerby automatically matches app members to the Cerby user accounts that correspond to their email addresses, including existing [guest users](https://help.cerby.com/getting-started/concepts/user-management/guest-users) and [local partners](https://help.cerby.com/getting-started/concepts/user-management/partners#h-7e4add33a2). Manual matching is required when apps don't provide email addresses and for app members using personal or external accounts that couldn’t be identified or are not in the corporate directory.
To view the status of the imported app members, you must complete the following steps:
1. Select the **Business Hubs** option from the left menu. The **Business Hubs** page is displayed.
2. Click the **More options** (...) icon of the corresponding business hub card. A drop-down menu is displayed.
3. Select the **View Members** option from the menu. The business hub details page is displayed with the **Members** tab activated. App members are displayed in the following tabs of the **User Overview** section:
* **Unmatched users:** This tab displays the users who were not automatically matched.
* **Onboarded users:** This tab displays the users matched to their Cerby user account.
* **Guest users:** This tab displays the users who were matched to an existing Cerby user account but it doesn’t exist in the corporate directory, such as external collaborators.
For unmatched users, you can perform one of the following actions:
* [Match users](#match-users)
* [Remove unmatched users](#remove-unmatched-users)
* [Exempt unmatched users](#exempt-unmatched-users)
The following sections describe each action.
#### Match users
To match users, you must complete the following steps from the **Unmatched users** tab of the business hub details page:
1. Click the **Match user** button of the corresponding user. The **Match user** dialog box is displayed.
2. Enter the username or email address of the user you want to match and invite in the **Match with** field. The user is displayed on a list.
3. Select the user from the list.
4. Click the **Next** button. The **Select Cerby role** dialog box is displayed.
5. Select the role to assign to the user on the business hub **Cerby role** drop-down menu:
* **Owner:** This role enables sharing access and managing business hub settings in Cerby.
* **Collaborator:** This role enables only logging in to the app from Cerby.
6. Click the **Match user** button. The dialog box closes, and a success message box is displayed. The user is moved to the **Onboarded users** tab.
#### Remove unmatched users
To remove unmatched users, you must complete the following steps from the **Unmatched users** tab of the business hub details page:
{% hint style="danger" %}
**IMPORTANT:** When removing an unmatched user, Cerby performs an automated task to revoke the user’s seat and permissions in BuyMe Business.
{% endhint %}
1. Click the **More options** (...) icon of the corresponding user. A drop-down menu is displayed.
2. Select the **Remove user** option from the menu. The **Remove user?** dialog box is displayed.
3. Click the **Remove user** button. The dialog box closes, and a success message box is displayed. The user is removed from the app via an automated task.
#### Exempt unmatched users
Exempted users keep their user accounts or seats active in your app, but you cannot manage them through Cerby.
To exempt unmatched users, you must complete the following steps from the **Unmatched users** tab of the business hub details page:
1. Click the **More options** (...) icon of the corresponding user. A drop-down menu is displayed.
2. Select the **Exempt user** option from the menu. The exempt user dialog box is displayed.
3. Enter a reason for exempting the user in the **Provide a reason** field.
4. Click the **Exempt member** button. The dialog box closes, and a success message box is displayed. The user is moved to the **Exempted users** tab.
***
## Use your business hub
The following are the supported features of business hubs you can use:
* [Join the external app and set up your business hub access](https://help.cerby.com/cerby-web-app/business-hubs/join-your-external-app-and-set-up-your-business-hub-access)
* [Add users to your app via a business hub](/setup-and-admin/business-hubs/managing-users-and-assets-via-a-business-hub/add-users-and-teams-to-your-apps-via-a-business-hub)
* [Provision users to your apps via an IdP and business hub](/setup-and-admin/business-hubs/managing-users-and-assets-via-a-business-hub/provision-users-to-your-apps-via-an-idp-and-business-hub)
* [Remove users from your app via a business hub](/setup-and-admin/business-hubs/managing-users-and-assets-via-a-business-hub/remove-users-from-your-app-via-a-business-hub)
* [Remove teams from your app via a business hub](/setup-and-admin/business-hubs/managing-users-and-assets-via-a-business-hub/remove-teams-from-your-app-via-a-business-hub)
* [Deprovision users from your apps via an IdP and business hub](/setup-and-admin/business-hubs/managing-users-and-assets-via-a-business-hub/deprovision-users-from-your-apps-via-an-idp-and-business-hub)
* [Sync your app users with your business hub](/setup-and-admin/business-hubs/managing-users-and-assets-via-a-business-hub/sync-your-business-hub-with-your-external-app)
* [Log in to your app via a business hub](https://help.cerby.com/cerby-web-app/business-hubs/log-in-to-your-app)
* [Track the activity of business hub users](/setup-and-admin/business-hubs/managing-users-and-assets-via-a-business-hub/track-activity-on-app-members-user-accounts)
* [Remove a business hub](/setup-and-admin/business-hubs/managing-your-business-hubs/remove-a-business-hub)
# Connect a business hub for BuzzSumo
This article describes how to connect a business hub to centrally manage the users of BuzzSumo from Cerby.
{% hint style="info" %}
**Who can use this feature?**
* Workspace **Owners**, **Super Admins**, **Admins**, and **Users**
* Only supported using the Cerby web app
{% endhint %}
As a user with any workspace role in Cerby, except **Guest User** and **Login-Only**, you can connect a business hub integration to centrally manage the users of BuzzSumo.
When you connect the business hub, you become its **Owner**, and you can perform the following user and access management tasks through automated tasks executed by the Cerby agent:
* Check for updates
* Invite app members
* Update app members’ roles
* Remove app members
{% hint style="success" %}
**TIP:** For more details about the automated tasks of a business hub, how it works, and the supported apps, read the article [Explore Apps](https://help.cerby.com/setup-and-admin/business-hubs/business-hub-catalog).
{% endhint %}
This article provides instructions on how to connect a business hub for BuzzSumo. For other app-specific articles and videos, review the [Connecting your business hubs](https://help.cerby.com/setup-and-admin/business-hubs/connecting-your-apps) collection in the Cerby Help Center.
***
## Requirements
The following are the requirements to connect a business hub:
* A Cerby workspace
* A Cerby user account with the **Owner**, **Super Admin**, **Admin**, or **User** role
* Groups configured in your identity provider (IdP) if you want to leverage automatic user provisioning and deprovisioning from your apps based on group assignment events. For more information, read the article [Provision users to your apps via an IdP and business hub](https://help.cerby.com/setup-and-admin/business-hubs/managing-users-and-assets-via-a-business-hub/provision-users-to-your-apps-via-an-idp-and-business-hub)
* An automation account, meaning an active user account with a native **Full user** role in BuzzSumo to be used as a service account. For instructions and recommendations on how to create and configure this account, read the article [Create a service account for your business hub](https://help.cerby.com/setup-and-admin/business-hubs/connecting-your-apps/create-a-service-account-for-your-business-hub)
***
## Connect a business hub for BuzzSumo
To connect a business hub for BuzzSumo, you must complete the following main steps from the Cerby web app dashboard:
1. [Add a business hub and connect it to BuzzSumo](#id-1.-add-a-business-hub-and-connect-it-to-buzzsumo)
2. [Check for updates to import users and roles to Cerby](#id-2.-check-for-updates-to-import-users-and-roles-to-cerby)
3. [Connect your BuzzSumo user account to the business hub](#id-3.-connect-your-buzzsumo-user-account-to-the-business-hub)
4. [Manage unmatched users](#id-4.-manage-unmatched-users)
The following sections describe each main step.
### 1. Add a business hub and connect it to BuzzSumo
To add a business hub and connect it to BuzzSumo, you must complete the following steps:
1. Log in to your corresponding [Cerby](https://app.cerby.com/) workspace.
2. Select the **Business Hubs** option from the left navigation drawer. The **Business Hubs** page is displayed.
3. Click the **Connect Business Hub** button located at the top-right corner of the page. The **Connect your Business Hubs to Cerby** dialog box is displayed. **TIP:** Select the **Don’t show this again** option to skip this step the next time you connect a new business hub.
4. Click the **Get started** button. A wizard is displayed on the **Select app** page.
5. Select **BuzzSumo Hub** from the catalog. The **Enter app details** page is displayed on the wizard.
6. Enter and select your app information in the corresponding fields:
* **Label in Cerby:** It is the name to assign to your business hub in Cerby, and it will be displayed on the business hub card.
* **Business unique identifier:** It is a unique identifier that differentiates your business hub in Cerby from others for the same app. You can assign an alphanumeric value between 3 and 30 characters without symbols or special characters.
* **User management and login method:** It is the way your users log in to the app and determines whether they must save their login credentials as a Cerby account connected to the business hub. You must select one of the following methods:
* **Username and password:** Cerby manages account security and access, and users log in with their credentials after saving them in Cerby.
{% hint style="warning" %}
**IMPORTANT:** The **Single sign-on (SSO)** option is not supported by BuzzSumo.
{% endhint %}
7. Click the **Next** button. The **Select automation account** page is displayed with a list of existing BuzzSumo accounts.
8. Select the automation account you have previously added to Cerby, as described in the [Requirements](#requirements) section. **NOTE:** If you don’t have an automation account, you are prompted to add it. Make sure you read Cerby’s recommendations on how to configure it in the article [Create a service account for your business hub](https://help.cerby.com/setup-and-admin/business-hubs/connecting-your-apps/create-a-service-account-for-your-business-hub). You may need to add the account first and then add the business hub.
9. Click the **Connect app** button. The wizard closes, and a success message box is displayed. The corresponding business hub is also displayed on the **Business Hubs** page
The next step is [2. Check for updates to import users and roles to Cerby](#id-2.-check-for-updates-to-import-users-and-roles-to-cerby).
### 2. Check for updates to import users and roles to Cerby
To check for updates in your app to identify and import users and roles to Cerby, you must complete the following steps:
1. Select the **Business Hubs** option from the left navigation drawer. The **Business Hubs** page is displayed.
2. Click the **Settings** (
) icon of the corresponding business hub card. The business hub details page is displayed with the **Settings** tab activated.
3. Click the **Check for updates** button located at the top right of the page. A message box is displayed with information about the process. **NOTE:** The check and import process may take a few minutes depending on the number of users, and because Cerby automatically matches users to their corresponding Cerby user account.
4. Confirm that the automated task to check for updates has the “Completed” status by performing any of the following actions:
* Click the **More details** button from the message box.
* Select the **Automation** option from the left navigation drawer to open the **Automation** page with a list of automated tasks and their status.
{% hint style="info" %}
**NOTE:** Cerby automatically performs daily checks for updates for all business hubs, but you can trigger them manually, as described in this section. When a user is deprovisioned from an IdP and a check for updates is performed, Cerby generates a report and sends business hub **Owners** an email to confirm their removal from the app. For more instructions, read the article [Check for updates in your app and apply report](/setup-and-admin/business-hubs/managing-users-and-assets-via-a-business-hub/sync-your-business-hub-with-your-external-app).
{% endhint %}
The next step is [3. Connect your BuildBuddy user account to the business hub](#id-3.-connect-your-buildbuddy-user-account-to-the-business-hub).
### 3. Connect your BuildBuddy user account to the business hub
To connect your BuildBuddy user account to the business hub so Cerby can manage and protect it, you must complete the following steps:
1. Select the **Accounts** option from the left navigation drawer. The **Accounts** page is displayed.
2. Click the **Log in** button of the corresponding BuildBuddy Hub account card. The **Connect your BuildBuddy Hub Account** dialog box is displayed.
3. Enter the login credentials of your **BuildBuddy** user account.
4. Click the **Connect account** button. The dialog box closes, and a success message box and a new account card are displayed.
The next step is [4. Manage unmatched users](#id-4.-manage-unmatched-users).
### 4. Manage unmatched users
During a check for updates, Cerby automatically matches app members to the Cerby user accounts that correspond to their email addresses, including existing [guest users](https://help.cerby.com/getting-started/concepts/user-management/guest-users) and [local partners](https://help.cerby.com/getting-started/concepts/user-management/partners#h-7e4add33a2). Manual matching is required when apps don't provide email addresses and for app members using personal or external accounts that couldn’t be identified or are not in the corporate directory.
To view the status of the imported app members, you must complete the following steps:
1. Select the **Business Hubs** option from the left navigation drawer. The **Business Hubs** page is displayed.
2. Click the **More options** (...) icon of the corresponding business hub card. A drop-down list is displayed.
3. Select the **View Members** option from the list. The business hub details page is displayed with the **Members** tab activated. App members are displayed in the following tabs of the **User Overview** section:
* **Unmatched users:** This tab displays the users who were not automatically matched.
* **Onboarded users:** This tab displays the users matched to their Cerby user account.
* **Guest users:** This tab displays the users who were matched to an existing Cerby user account but it doesn’t exist in the corporate directory, such as external collaborators.
For unmatched users, you can perform one of the following actions:
* [Match users](#match-users)
* [Remove unmatched users](#remove-unmatched-users)
* [Exempt unmatched users](#exempt-unmatched-users)
The following sections describe each action.
#### Match users
To match users, you must complete the following steps from the **Unmatched users** tab of the business hub details page:
1. Click the **Match user** button of the corresponding user. The **Match user** dialog box is displayed.
2. Enter the username or email address of the user you want to match and invite in the **Match with** field. The user is displayed on a list.
3. Select the user from the list.
4. Click the **Next** button. The **Select Cerby role** dialog box is displayed.
5. Select the role to assign to the user on the business hub **Cerby role** drop-down list:
* **Owner:** This role enables sharing access and managing business hub settings in Cerby.
* **Collaborator:** This role enables only logging in to the app from Cerby.
6. Click the **Match user** button. The dialog box closes, and a success message box is displayed. The user is moved to the **Onboarded users** tab.
#### Remove unmatched users
To remove unmatched users, you must complete the following steps from the **Unmatched users** tab of the business hub details page:
{% hint style="danger" %}
**IMPORTANT:** When removing an unmatched user, Cerby performs an automated task to revoke the user’s seat and permissions in BuildBuddy.
{% endhint %}
1. Click the **More options** (...) icon of the corresponding user. A drop-down list is displayed.
2. Select the **Remove user** option from the list. The **Remove user?** dialog box is displayed.
3. Click the **Remove user** button. The dialog box closes, and a success message box is displayed. The user is removed from the app via an automated task.
#### Exempt unmatched users
Exempted users keep their user accounts or seats active in your app, but you cannot manage them through Cerby.
To exempt unmatched users, you must complete the following steps from the **Unmatched users** tab of the business hub details page:
1. Click the **More options** (...) icon of the corresponding user. A drop-down list is displayed.
2. Select the **Exempt user** option from the list. The exempt user dialog box is displayed.
3. Enter a reason for exempting the user in the **Provide a reason** field.
4. Click the **Exempt member** button. The dialog box closes, and a success message box is displayed. The user is moved to the **Exempted users** tab.
***
## Use your business hub
The following are the supported features of business hubs you can use:
* [Join the App and connect it to Cerby](https://help.cerby.com/cerby-web-app/business-hubs/join-your-external-app-and-set-up-your-business-hub-access)
* [Remove app members](/setup-and-admin/business-hubs/managing-users-and-assets-via-a-business-hub/remove-users-from-your-app-via-a-business-hub)
* [Provision users to your apps via an IdP and business hub](https://help.cerby.com/setup-and-admin/business-hubs/managing-users-and-assets-via-a-business-hub/provision-users-to-your-apps-via-an-idp-and-business-hub)
* [Update the app members’ roles](/setup-and-admin/business-hubs/managing-users-and-assets-via-a-business-hub/update-user-roles-in-your-app-via-a-business-hub)
* [Check for updates in your app and apply report](/setup-and-admin/business-hubs/managing-users-and-assets-via-a-business-hub/sync-your-business-hub-with-your-external-app)
* [Re-assign the app members’ user accounts](https://github.com/cerbyinc/help-center/tree/main/.uncategorized/unpublished-deprecated-re-assign-the-app-members-user-accounts.md)
* [Log in to your app](https://help.cerby.com/cerby-web-app/business-hubs/log-in-to-your-app)
* [Track activity on app members’ user accounts](/setup-and-admin/business-hubs/managing-users-and-assets-via-a-business-hub/track-activity-on-app-members-user-accounts)
* [Remove an App](/setup-and-admin/business-hubs/managing-your-business-hubs/remove-a-business-hub)
# Connect a business hub for Built In
This article describes how to connect a business hub to centrally manage the users of Built In from Cerby.
{% hint style="info" %}
**Who can use this feature?**
* Workspace **Owners**, **Super Admins**, **Admins**, and **Users**
* Only supported using the Cerby web app
{% endhint %}
As a user with any workspace role in Cerby, except **Guest User** and **Login-Only**, you can connect a business hub integration to centrally manage the users of Built In.
When you connect the business hub, you become its **Owner**, and you can perform the following user and access management tasks through automated tasks executed by the Cerby agent:
* Check for updates
* Add users
* Update user roles
* Remove users
{% hint style="success" %}
**TIP:** For more details about the automated tasks of a business hub, how it works, and the supported apps, read the article [Explore Business Hubs](https://help.cerby.com/setup-and-admin/business-hubs/business-hub-catalog).
{% endhint %}
This article provides instructions on how to connect a business hub for Built In. For other app-specific articles and videos, review the [Connecting business hubs for your apps](https://help.cerby.com/setup-and-admin/business-hubs/connecting-your-apps) and [Connecting business hubs for your paid social apps](https://help.cerby.com/setup-and-admin/business-hubs/connecting-your-paid-social-apps) collections in the Cerby Help Center.
***
## Requirements
The following are the requirements to connect a business hub:
* A Cerby workspace
* A Cerby user account with the workspace **Owner**, **Super Admin**, **Admin**, or **User** role
* A company in Built In
* Groups configured in your identity provider (IdP) if you want to leverage automatic user provisioning and deprovisioning from your apps based on group assignment events. For more information, read the articles available in the [Managing users via an IdP and business hub](https://help.cerby.com/setup-and-admin/business-hubs/managing-users-and-assets-via-a-business-hub) collection in the Cerby Help Center
* An automation account, meaning an active user account with a native **Admin** role in Built In to be used as a service account. For instructions and recommendations on how to create and configure this account, read the article [Create a service account for your business hub](/setup-and-admin/business-hubs/connecting-your-apps/create-a-service-account-for-your-business-hub)
* The user management and login method for your business hub identified to select the corresponding option when connecting your app. For more information, read the **User management and login method** section of the article [Explore Business Hubs](https://help.cerby.com/setup-and-admin/business-hubs/business-hub-catalog)
* A Business ID. You can find the ID in the address bar by completing the following steps after logging in to Built In:
1. Click your company logo icon at the top right of the page.
2. Select the **Employee Portal** option from the drop-down menu. The **Employee Portal** page is displayed.
3. Click the **Admin** card from the dashboard. The **People with Admin Rights** page is displayed.
4. Copy the ID from the address bar. The ID is displayed in the address bar as part of the URL. For example, **`0123`** in **`https://builtin.com/employer/company-admin?selectedCompanyId=0123`**
***
## Connect a business hub for Built In
To connect a business hub for Built In, you must complete the following main steps from the Cerby web app dashboard:
1. [Add a business hub and connect it to Built In](#id-1.-add-a-business-hub-and-connect-it-to-built-in)
2. [Check for updates to import users and roles to Cerby](#id-2.-check-for-updates-to-import-users-and-roles-to-cerby)
3. [Connect your Built In user account to the business hub](#id-3.-connect-your-built-in-user-account-to-the-business-hub)
4. [Manage unmatched users](#id-4.-manage-unmatched-users)
The following sections describe each main step.
### 1. Add a business hub and connect it to Built In
To add a business hub and connect it to Built In, you must complete the following steps:
1. Log in to your corresponding [Cerby](https://app.cerby.com/) workspace.
2. Select the **Business Hubs** option from the left menu. The **Business Hubs** page is displayed.
3. Click the **Connect Business Hub** button located at the top-right corner of the page. The **Connect your Business Hubs to Cerby** dialog box is displayed. **TIP:** Select the **Don’t show this again** option to skip this step the next time you connect a new business hub.
4. Click the **Get started** button. A wizard is displayed on the **Select app** page.
5. Select **Builtin Hub** from the catalog. The **Enter app details** page is displayed on the wizard.
6. Enter and select your app information in the corresponding fields:
* **Label in Cerby:** It is the name to assign to your business hub in Cerby, and it will be displayed on the business hub card.
* **Business ID:** It is the unique identifier of your business or organization in **Builtin Hub**. For instructions on how to find it, read the [Requirements](#requirements) section.
* **User management and login method:** It is the way your users log in to the app and determines whether they must save their login credentials as a Cerby account connected to the business hub. You must select one of the following methods:
* **Single sign-on (SSO):** Access is managed by your IdP, and users log in with SSO authentication. They are not asked to save their credentials in Cerby.
* **Username and password:** Cerby manages account security and access, and users log in with their credentials after saving them in Cerby.
7. Click the **Next** button. The **Select automation account** page is displayed with a list of existing Built In accounts.
8. Select the automation account you have previously added to Cerby, as described in the [Requirements](#requirements) section. **NOTE:** If you don’t have an automation account, you are prompted to add it. Make sure you read Cerby’s recommendations on how to configure it in the article [Create a service account for your business hub](/setup-and-admin/business-hubs/connecting-your-apps/create-a-service-account-for-your-business-hub). You may need to add the account first and then add the business hub.
9. Click the **Connect app** button. The wizard closes, and a success message box is displayed. The corresponding business hub is also displayed on the **Business Hubs** page.
The next step is [2. Check for updates to import users and roles to Cerby](#id-2.-check-for-updates-to-import-users-and-roles-to-cerby).
### 2. Check for updates to import users and roles to Cerby
To check for updates in your app to identify and import users and roles to Cerby, you must complete the following steps:
1. Select the **Business Hubs** option from the left menu. The **Business Hubs** page is displayed.
2. Click the **More options** (...) icon of the corresponding business hub card. A drop-down menu is displayed.
3. Select the **Settings** option from the menu. The business hub details page is displayed with the **Settings** tab activated.
4. Click the **Check for updates** button located at the top right of the page. A message box is displayed with information about the process. **NOTE:** The check and import process may take a few minutes depending on the number of users, and because Cerby automatically matches users to their corresponding Cerby user account.
5. Confirm that the automated task to check for updates has the “Completed” status by performing any of the following actions:
* Click the **More details** button from the message box.
* Select the **Automation** option from the left menu to open the **Automation** page with a list of automated tasks and their status.
{% hint style="info" %}
**NOTE:** Cerby automatically performs daily checks for updates for all business hubs, but you can trigger them manually, as described in this section. For more instructions, read the article [Sync your app users with your business hub](/setup-and-admin/business-hubs/managing-users-and-assets-via-a-business-hub/sync-your-business-hub-with-your-external-app).
{% endhint %}
The next step is [3. Connect your Built In user account to the business hub](#id-3.-connect-your-built-in-user-account-to-the-business-hub).
### 3. Connect your Built In user account to the business hub
To connect your Built In user account to the business hub so Cerby can manage and protect it, you must complete the following steps:
1. Select the **Accounts** option from the left menu. The **Accounts** page is displayed.
2. Click the **Log in** button of the corresponding Builtin Hub account card. The **Connect your Builtin Hub Account** dialog box is displayed.
3. Enter the login credentials of your **Built In** user account.
4. Click the **Connect account** button. The dialog box closes, and a success message box and a new account card are displayed.
The next step is [4. Manage unmatched users](#id-4.-manage-unmatched-users).
### 4. Manage unmatched users
During a check for updates, Cerby automatically matches app members to the Cerby user accounts that correspond to their email addresses, including existing [guest users](https://help.cerby.com/getting-started/concepts/user-management/guest-users) and [local partners](https://help.cerby.com/getting-started/concepts/user-management/partners#h-7e4add33a2). Manual matching is required when apps don't provide email addresses and for app members using personal or external accounts that couldn’t be identified or are not in the corporate directory.
To view the status of the imported app members, you must complete the following steps:
1. Select the **Business Hubs** option from the left menu. The **Business Hubs** page is displayed.
2. Click the **More options** (...) icon of the corresponding business hub card. A drop-down menu is displayed.
3. Select the **View Members** option from the menu. The business hub details page is displayed with the **Members** tab activated. App members are displayed in the following tabs of the **User Overview** section:
* **Unmatched users:** This tab displays the users who were not automatically matched.
* **Onboarded users:** This tab displays the users matched to their Cerby user account.
* **Guest users:** This tab displays the users who were matched to an existing Cerby user account but it doesn’t exist in the corporate directory, such as external collaborators.
For unmatched users, you can perform one of the following actions:
* [Match users](#match-users)
* [Remove unmatched users](#remove-unmatched-users)
* [Exempt unmatched users](#exempt-unmatched-users)
The following sections describe each action.
#### Match users
To match users, you must complete the following steps from the **Unmatched users** tab of the business hub details page:
1. Click the **Match user** button of the corresponding user. The **Match user** dialog box is displayed.
2. Enter the username or email address of the user you want to match and invite in the **Match with** field. The user is displayed on a list.
3. Select the user from the list.
4. Click the **Next** button. The **Select Cerby role** dialog box is displayed.
5. Select the role to assign to the user on the business hub **Cerby role** drop-down menu:
* **Owner:** This role enables sharing access and managing business hub settings in Cerby.
* **Collaborator:** This role enables only logging in to the app from Cerby.
6. Click the **Match user** button. The dialog box closes, and a success message box is displayed. The user is moved to the **Onboarded users** tab.
#### Remove unmatched users
To remove unmatched users, you must complete the following steps from the **Unmatched users** tab of the business hub details page:
{% hint style="danger" %}
**IMPORTANT:** When removing an unmatched user, Cerby performs an automated task to revoke the user’s seat and permissions in Built In.
{% endhint %}
1. Click the **More options** (...) icon of the corresponding user. A drop-down menu is displayed.
2. Select the **Remove user** option from the menu. The **Remove user?** dialog box is displayed.
3. Click the **Remove user** button. The dialog box closes, and a success message box is displayed. The user is removed from the app via an automated task.
#### Exempt unmatched users
Exempted users keep their user accounts or seats active in your app, but you cannot manage them through Cerby.
To exempt unmatched users, you must complete the following steps from the **Unmatched users** tab of the business hub details page:
1. Click the **More options** (...) icon of the corresponding user. A drop-down menu is displayed.
2. Select the **Exempt user** option from the menu. The exempt user dialog box is displayed.
3. Enter a reason for exempting the user in the **Provide a reason** field.
4. Click the **Exempt member** button. The dialog box closes, and a success message box is displayed. The user is moved to the **Exempted users** tab.
***
## Use your business hub
The following are the supported features of business hubs you can use:
* [Join the external app and set up your business hub access](https://help.cerby.com/cerby-web-app/business-hubs/join-your-external-app-and-set-up-your-business-hub-access)
* [Add users to your app via a business hub](/setup-and-admin/business-hubs/managing-users-and-assets-via-a-business-hub/add-users-and-teams-to-your-apps-via-a-business-hub)
* [Provision users to your apps via an IdP and business hub](/setup-and-admin/business-hubs/managing-users-and-assets-via-a-business-hub/provision-users-to-your-apps-via-an-idp-and-business-hub)
* [Remove users from your app via a business hub](/setup-and-admin/business-hubs/managing-users-and-assets-via-a-business-hub/remove-users-from-your-app-via-a-business-hub)
* [Remove teams from your app via a business hub](/setup-and-admin/business-hubs/managing-users-and-assets-via-a-business-hub/remove-teams-from-your-app-via-a-business-hub)
* [Deprovision users from your apps via an IdP and business hub](/setup-and-admin/business-hubs/managing-users-and-assets-via-a-business-hub/deprovision-users-from-your-apps-via-an-idp-and-business-hub)
* [Update user roles in your app via a business hub](/setup-and-admin/business-hubs/managing-users-and-assets-via-a-business-hub/update-user-roles-in-your-app-via-a-business-hub)
* [Update team member roles in your app via a business hub](/setup-and-admin/business-hubs/managing-users-and-assets-via-a-business-hub/update-team-member-roles-in-your-app-via-a-business-hub)
* [Update user roles in your apps via an IdP and business hub](/setup-and-admin/business-hubs/managing-users-and-assets-via-a-business-hub/update-user-roles-in-your-apps-via-an-idp-and-business-hub)
* [Sync your app users with your business hub](/setup-and-admin/business-hubs/managing-users-and-assets-via-a-business-hub/sync-your-business-hub-with-your-external-app)
* [Log in to your app via a business hub](https://help.cerby.com/cerby-web-app/business-hubs/log-in-to-your-app)
* [Track the activity of business hub users](/setup-and-admin/business-hubs/managing-users-and-assets-via-a-business-hub/track-activity-on-app-members-user-accounts)
* [Remove a business hub](/setup-and-admin/business-hubs/managing-your-business-hubs/remove-a-business-hub)
# Connect a business hub for BuyMe Business
This article describes how to connect a business hub to centrally manage the users of BuyMe Business from Cerby.
{% hint style="info" %}
**Who can use this feature?**
* Workspace **Owners**, **Super Admins**, **Admins**, and **Users**
* Only supported using the Cerby web app
{% endhint %}
As a user with any workspace role in Cerby, except **Guest User** and **Login-Only**, you can connect a business hub integration to centrally manage the users of BuyMe Business.
When you connect the business hub, you become its **Owner**, and you can perform the following user and access management tasks through automated tasks executed by the Cerby agent:
* Check for updates
* Add users
* Remove users
{% hint style="success" %}
**TIP:** For more details about the automated tasks of a business hub, how it works, and the supported apps, read the article [Explore Business Hubs](https://help.cerby.com/setup-and-admin/business-hubs/business-hub-catalog).
{% endhint %}
{% hint style="info" %}
**NOTE:** The automated task to update user roles is not available for this business hub because users can only be assigned the **Members** role in BuyMe Business.
{% endhint %}
{% hint style="danger" %}
**IMPORTANT:** BuyMe Business requires the following additional fields to create user accounts:
* **User's Birth Date**
* **User's Mobile Phone Number**
You must provide both values when adding users to your external app.
{% endhint %}
This article provides instructions on how to connect a business hub for BuyMe Business. For other app-specific articles and videos, review the [Connecting business hubs for your apps](https://help.cerby.com/setup-and-admin/business-hubs/connecting-your-apps) and [Connecting business hubs for your paid social apps](https://help.cerby.com/setup-and-admin/business-hubs/connecting-your-paid-social-apps) collections in the Cerby Help Center.
***
## Requirements
The following are the requirements to connect a business hub:
* A Cerby workspace
* A Cerby user account with the workspace **Owner**, **Super Admin**, **Admin**, or **User** role
* Groups configured in your identity provider (IdP) if you want to leverage automatic user provisioning and deprovisioning from your apps based on group assignment events. For more information, read the articles available in the [Managing users via an IdP and business hub](https://help.cerby.com/setup-and-admin/business-hubs/managing-users-and-assets-via-a-business-hub) collection in the Cerby Help Center
* An automation account, meaning an active user account with a native **Admin** role in BuyMe Business to be used as a service account. For instructions and recommendations on how to create and configure this account, read the article [Create a service account for your business hub](/setup-and-admin/business-hubs/connecting-your-apps/create-a-service-account-for-your-business-hub)
* The user management and login method for your business hub identified to select the corresponding option when connecting your app. For more information, read the **User management and login method** section of the article [Explore Business Hubs](https://help.cerby.com/setup-and-admin/business-hubs/business-hub-catalog)
* A Business unique identifier. You can find the ID in the address bar\*\*\*\* when you are logged in to BuyMe Business. The ID is displayed in the address bar as part of the URL, after the **systems** subfolder\*\*.\*\* For example, \*\*`/org_name#/activity/4/auto/12345` \*\*in **`https://buyme.co/systems/org_name#/activity/4/auto/12345`**. Just copy the value and paste it when connecting the business hub.
***
## Connect a business hub for BuyMe Business
To connect a business hub for BuyMe Business, you must complete the following main steps from the Cerby web app dashboard:
1. [Add a business hub and connect it to BuyMe Business](#id-1.-add-a-business-hub-and-connect-it-to-buyme-business)
2. [Check for updates to import users and roles to Cerby](#id-2.-check-for-updates-to-import-users-and-roles-to-cerby)
3. [Connect your BuyMe Business user account to the business hub](#id-3.-connect-your-buyme-business-user-account-to-the-business-hub)
4. [Manage unmatched users](#id-4.-manage-unmatched-users)
The following sections describe each main step.
### 1. Add a business hub and connect it to BuyMe Business
To add a business hub and connect it to BuyMe Business, you must complete the following steps:
1. Log in to your corresponding [Cerby](https://app.cerby.com/) workspace.
2. Select the **Business Hubs** option from the left menu. The **Business Hubs** page is displayed.
3. Click the **Connect Business Hub** button located at the top-right corner of the page. The **Connect your Business Hubs to Cerby** dialog box is displayed. **TIP:** Select the **Don’t show this again** option to skip this step the next time you connect a new business hub.
4. Click the **Get started** button. A wizard is displayed on the **Select app** page.
5. Select **BuyMe Business Hub** from the catalog. The **Enter app details** page is displayed on the wizard.
6. Enter and select your app information in the corresponding fields:
* **Label in Cerby:** It is the name to assign to your business hub in Cerby, and it will be displayed on the business hub card.
* **Business unique identifier:** It is the unique identifier of your business or organization in **BuyMe Business Hub**. For instructions on how to find it, read the [Requirements](#requirements) section.
* **User management and login method:** It is the way your users log in to the app and determines whether they must save their login credentials as a Cerby account connected to the business hub.
1. Select the **Single sign-on (SSO)** option because access must be managed by your IdP, and users log in with SSO authentication. They are not asked to save their credentials in Cerby.
**IMPORTANT:** BuyMe Business only supports Google SSO via Okta.
7. Click the **Next** button. The **Select automation account** page is displayed with a list of existing BuyMe Business accounts.
8. Select the automation account you have previously added to Cerby, as described in the [Requirements](#requirements) section. **NOTE:** If you don’t have an automation account, you are prompted to add it. Make sure you read Cerby’s recommendations on how to configure it in the article [Create a service account for your business hub](/setup-and-admin/business-hubs/connecting-your-apps/create-a-service-account-for-your-business-hub). You may need to add the account first and then add the business hub.
9. Click the **Connect app** button. The wizard closes, and a success message box is displayed. The corresponding business hub is also displayed on the **Business Hubs** page.
The next step is [2. Check for updates to import users and roles to Cerby](#id-2.-check-for-updates-to-import-users-and-roles-to-cerby).
### 2. Check for updates to import users and roles to Cerby
To check for updates in your app to identify and import users and roles to Cerby, you must complete the following steps:
1. Select the **Business Hubs** option from the left menu. The **Business Hubs** page is displayed.
2. Click the **More options** (...) icon of the corresponding business hub card. A drop-down menu is displayed.
3. Select the **Settings** option from the menu. The business hub details page is displayed with the **Settings** tab activated.
4. Click the **Check for updates** button located at the top right of the page. A message box is displayed with information about the process. **NOTE:** The check and import process may take a few minutes depending on the number of users, and because Cerby automatically matches users to their corresponding Cerby user account.
5. Confirm that the automated task to check for updates has the “Completed” status by performing any of the following actions:
* Click the **More details** button from the message box.
* Select the **Automation** option from the left menu to open the **Automation** page with a list of automated tasks and their status.
{% hint style="info" %}
**NOTE:** Cerby automatically performs daily checks for updates for all business hubs, but you can trigger them manually, as described in this section. For more instructions, read the article [Sync your app users with your business hub](/setup-and-admin/business-hubs/managing-users-and-assets-via-a-business-hub/sync-your-business-hub-with-your-external-app).
{% endhint %}
The next step is [3. Connect your BuyMe Business user account to the business hub](#id-3.-connect-your-buyme-business-user-account-to-the-business-hub).
### 3. Connect your BuyMe Business user account to the business hub
To connect your BuyMe Business user account to the business hub so Cerby can manage and protect it, you must complete the following steps:
1. Select the **Accounts** option from the left menu. The **Accounts** page is displayed.
2. Click the **Log in** button of the corresponding BuyMe Business Hub account card. The **Connect your BuyMe Business Hub Account** dialog box is displayed.
3. Enter the login credentials of your **BuyMe Business** user account.
4. Click the **Connect account** button. The dialog box closes, and a success message box and a new account card are displayed.
The next step is [4. Manage unmatched users](#id-4.-manage-unmatched-users).
### 4. Manage unmatched users
During a check for updates, Cerby automatically matches app members to the Cerby user accounts that correspond to their email addresses, including existing [guest users](https://help.cerby.com/getting-started/concepts/user-management/guest-users) and [local partners](https://help.cerby.com/getting-started/concepts/user-management/partners#h-7e4add33a2). Manual matching is required when apps don't provide email addresses and for app members using personal or external accounts that couldn’t be identified or are not in the corporate directory.
To view the status of the imported app members, you must complete the following steps:
1. Select the **Business Hubs** option from the left menu. The **Business Hubs** page is displayed.
2. Click the **More options** (...) icon of the corresponding business hub card. A drop-down menu is displayed.
3. Select the **View Members** option from the menu. The business hub details page is displayed with the **Members** tab activated. App members are displayed in the following tabs of the **User Overview** section:
* **Unmatched users:** This tab displays the users who were not automatically matched.
* **Onboarded users:** This tab displays the users matched to their Cerby user account.
* **Guest users:** This tab displays the users who were matched to an existing Cerby user account but it doesn’t exist in the corporate directory, such as external collaborators.
For unmatched users, you can perform one of the following actions:
* [Match users](#match-users)
* [Remove unmatched users](#remove-unmatched-users)
* [Exempt unmatched users](#exempt-unmatched-users)
The following sections describe each action.
#### Match users
To match users, you must complete the following steps from the **Unmatched users** tab of the business hub details page:
1. Click the **Match user** button of the corresponding user. The **Match user** dialog box is displayed.
2. Enter the username or email address of the user you want to match and invite in the **Match with** field. The user is displayed on a list.
3. Select the user from the list.
4. Click the **Next** button. The **Select Cerby role** dialog box is displayed.
5. Select the role to assign to the user on the business hub **Cerby role** drop-down menu:
* **Owner:** This role enables sharing access and managing business hub settings in Cerby.
* **Collaborator:** This role enables only logging in to the app from Cerby.
6. Click the **Match user** button. The dialog box closes, and a success message box is displayed. The user is moved to the **Onboarded users** tab.
#### Remove unmatched users
To remove unmatched users, you must complete the following steps from the **Unmatched users** tab of the business hub details page:
{% hint style="danger" %}
**IMPORTANT:** When removing an unmatched user, Cerby performs an automated task to revoke the user’s seat and permissions in BuyMe Business.
{% endhint %}
1. Click the **More options** (...) icon of the corresponding user. A drop-down menu is displayed.
2. Select the **Remove user** option from the menu. The **Remove user?** dialog box is displayed.
3. Click the **Remove user** button. The dialog box closes, and a success message box is displayed. The user is removed from the app via an automated task.
#### Exempt unmatched users
Exempted users keep their user accounts or seats active in your app, but you cannot manage them through Cerby.
To exempt unmatched users, you must complete the following steps from the **Unmatched users** tab of the business hub details page:
1. Click the **More options** (...) icon of the corresponding user. A drop-down menu is displayed.
2. Select the **Exempt user** option from the menu. The exempt user dialog box is displayed.
3. Enter a reason for exempting the user in the **Provide a reason** field.
4. Click the **Exempt member** button. The dialog box closes, and a success message box is displayed. The user is moved to the **Exempted users** tab.
***
## Use your business hub
The following are the supported features of business hubs you can use:
* [Join the external app and set up your business hub access](https://help.cerby.com/cerby-web-app/business-hubs/join-your-external-app-and-set-up-your-business-hub-access)
* [Add users to your app via a business hub](/setup-and-admin/business-hubs/managing-users-and-assets-via-a-business-hub/add-users-and-teams-to-your-apps-via-a-business-hub)
* [Provision users to your apps via an IdP and business hub](/setup-and-admin/business-hubs/managing-users-and-assets-via-a-business-hub/provision-users-to-your-apps-via-an-idp-and-business-hub)
* [Remove users from your app via a business hub](/setup-and-admin/business-hubs/managing-users-and-assets-via-a-business-hub/remove-users-from-your-app-via-a-business-hub)
* [Remove teams from your app via a business hub](/setup-and-admin/business-hubs/managing-users-and-assets-via-a-business-hub/remove-teams-from-your-app-via-a-business-hub)
* [Deprovision users from your apps via an IdP and business hub](/setup-and-admin/business-hubs/managing-users-and-assets-via-a-business-hub/deprovision-users-from-your-apps-via-an-idp-and-business-hub)
* [Sync your app users with your business hub](/setup-and-admin/business-hubs/managing-users-and-assets-via-a-business-hub/sync-your-business-hub-with-your-external-app)
* [Log in to your app via a business hub](https://help.cerby.com/cerby-web-app/business-hubs/log-in-to-your-app)
* [Track the activity of business hub users](/setup-and-admin/business-hubs/managing-users-and-assets-via-a-business-hub/track-activity-on-app-members-user-accounts)
* [Remove a business hub](/setup-and-admin/business-hubs/managing-your-business-hubs/remove-a-business-hub)
# Connect a business hub for BuzzSumo
This article describes how to connect a business hub to centrally manage the users of BuzzSumo from Cerby.
{% hint style="info" %}
**Who can use this feature?**
* Workspace **Owners**, **Super Admins**, **Admins**, and **Users**
* Only supported using the Cerby web app
{% endhint %}
As a user with any workspace role in Cerby, except **Guest User** and **Login-Only**, you can connect a business hub integration to centrally manage the users of BuzzSumo.
When you connect the business hub, you become its **Owner**, and you can perform the following user and access management tasks through automated tasks executed by the Cerby agent:
* Check for updates
* Invite app members
* Update app members’ roles
* Remove app members
{% hint style="success" %}
**TIP:** For more details about the automated tasks of a business hub, how it works, and the supported apps, read the article [Explore Apps](https://help.cerby.com/setup-and-admin/business-hubs/business-hub-catalog).
{% endhint %}
This article provides instructions on how to connect a business hub for BuzzSumo. For other app-specific articles and videos, review the [Connecting your business hubs](https://help.cerby.com/setup-and-admin/business-hubs/connecting-your-apps) collection in the Cerby Help Center.
***
## Requirements
The following are the requirements to connect a business hub:
* A Cerby workspace
* A Cerby user account with the **Owner**, **Super Admin**, **Admin**, or **User** role
* Groups configured in your identity provider (IdP) if you want to leverage automatic user provisioning and deprovisioning from your apps based on group assignment events. For more information, read the article [Provision users to your apps via an IdP and business hub](https://help.cerby.com/setup-and-admin/business-hubs/managing-users-and-assets-via-a-business-hub/provision-users-to-your-apps-via-an-idp-and-business-hub)
* An automation account, meaning an active user account with a native **Full user** role in BuzzSumo to be used as a service account. For instructions and recommendations on how to create and configure this account, read the article [Create a service account for your business hub](https://help.cerby.com/setup-and-admin/business-hubs/connecting-your-apps/create-a-service-account-for-your-business-hub)
***
## Connect a business hub for BuzzSumo
To connect a business hub for BuzzSumo, you must complete the following main steps from the Cerby web app dashboard:
1. [Add a business hub and connect it to BuzzSumo](#id-1.-add-a-business-hub-and-connect-it-to-buzzsumo)
2. [Check for updates to import users and roles to Cerby](#id-2.-check-for-updates-to-import-users-and-roles-to-cerby)
3. [Connect your BuzzSumo user account to the business hub](#id-3.-connect-your-buzzsumo-user-account-to-the-business-hub)
4. [Manage unmatched users](#id-4.-manage-unmatched-users)
The following sections describe each main step.
### 1. Add a business hub and connect it to BuzzSumo
To add a business hub and connect it to BuzzSumo, you must complete the following steps:
1. Log in to your corresponding [Cerby](https://app.cerby.com/) workspace.
2. Select the **Business Hubs** option from the left navigation drawer. The **Business Hubs** page is displayed.
3. Click the **Connect Business Hub** button located at the top-right corner of the page. The **Connect your Business Hubs to Cerby** dialog box is displayed. **TIP:** Select the **Don’t show this again** option to skip this step the next time you connect a new business hub.
4. Click the **Get started** button. A wizard is displayed on the **Select app** page.
5. Select **BuzzSumo Hub** from the catalog. The **Enter app details** page is displayed on the wizard.
6. Enter and select your app information in the corresponding fields:
* **Label in Cerby:** It is the name to assign to your business hub in Cerby, and it will be displayed on the business hub card.
* **Business unique identifier:** It is a unique identifier that differentiates your business hub in Cerby from others for the same app. You can assign an alphanumeric value between 3 and 30 characters without symbols or special characters.
* **User management and login method:** It is the way your users log in to the app and determines whether they must save their login credentials as a Cerby account connected to the business hub. You must select one of the following methods:
* **Username and password:** Cerby manages account security and access, and users log in with their credentials after saving them in Cerby.
{% hint style="warning" %}
**IMPORTANT:** The **Single sign-on (SSO)** option is not supported by BuzzSumo.
{% endhint %}
7. Click the **Next** button. The **Select automation account** page is displayed with a list of existing BuzzSumo accounts.
8. Select the automation account you have previously added to Cerby, as described in the [Requirements](#requirements) section. **NOTE:** If you don’t have an automation account, you are prompted to add it. Make sure you read Cerby’s recommendations on how to configure it in the article [Create a service account for your business hub](https://help.cerby.com/setup-and-admin/business-hubs/connecting-your-apps/create-a-service-account-for-your-business-hub). You may need to add the account first and then add the business hub.
9. Click the **Connect app** button. The wizard closes, and a success message box is displayed. The corresponding business hub is also displayed on the **Business Hubs** page
The next step is [2. Check for updates to import users and roles to Cerby](#id-2.-check-for-updates-to-import-users-and-roles-to-cerby).
### 2. Check for updates to import users and roles to Cerby
To check for updates in your app to identify and import users and roles to Cerby, you must complete the following steps:
1. Select the **Business Hubs** option from the left navigation drawer. The **Business Hubs** page is displayed.
2. Click the **Settings** ( ) icon of the corresponding business hub card. The business hub details page is displayed with the **Settings** tab activated.
3. Click the **Check for updates** button located at the top right of the page. A message box is displayed with information about the process. **NOTE:** The check and import process may take a few minutes depending on the number of users, and because Cerby automatically matches users to their corresponding Cerby user account.
4. Confirm that the automated task to check for updates has the “Completed” status by performing any of the following actions:
* Click the **More details** button from the message box.
* Select the **Automation** option from the left navigation drawer to open the **Automation** page with a list of automated tasks and their status.
{% hint style="info" %}
**NOTE:** Cerby automatically performs daily checks for updates for all business hubs, but you can trigger them manually, as described in this section. When a user is deprovisioned from an IdP and a check for updates is performed, Cerby generates a report and sends business hub **Owners** an email to confirm their removal from the app. For more instructions, read the article [Check for updates in your app and apply report](/setup-and-admin/business-hubs/managing-users-and-assets-via-a-business-hub/sync-your-business-hub-with-your-external-app).
{% endhint %}
The next step is [3. Connect your BuzzSumo user account to the business hub](#id-3.-connect-your-buzzsumo-user-account-to-the-business-hub).
### 3. Connect your BuzzSumo user account to the business hub
To connect your BuzzSumo user account to the business hub so Cerby can manage and protect it, you must complete the following steps:
1. Select the **Accounts** option from the left navigation drawer. The **Accounts** page is displayed.
2. Click the **Log in** button of the corresponding BuzzSumo Hub account card. The **Connect your BuzzSumo Hub Account** dialog box is displayed.
3. Enter the login credentials of your **BuzzSumo** user account.
4. Click the **Connect account** button. The dialog box closes, and a success message box and a new account card are displayed.
The next step is [4. Manage unmatched users](#id-4.-manage-unmatched-users).
### 4. Manage unmatched users
During a check for updates, Cerby automatically matches app members to the Cerby user accounts that correspond to their email addresses, including existing [guest users](https://help.cerby.com/getting-started/concepts/user-management/guest-users) and [local partners](https://help.cerby.com/getting-started/concepts/user-management/partners#h-7e4add33a2). Manual matching is required when apps don't provide email addresses and for app members using personal or external accounts that couldn’t be identified or are not in the corporate directory.
To view the status of the imported app members, you must complete the following steps:
1. Select the **Business Hubs** option from the left navigation drawer. The **Business Hubs** page is displayed.
2. Click the **More options** (...) icon of the corresponding business hub card. A drop-down list is displayed.
3. Select the **View Members** option from the list. The business hub details page is displayed with the **Members** tab activated. App members are displayed in the following tabs of the **User Overview** section:
* **Unmatched users:** This tab displays the users who were not automatically matched.
* **Onboarded users:** This tab displays the users matched to their Cerby user account.
* **Guest users:** This tab displays the users who were matched to an existing Cerby user account but it doesn’t exist in the corporate directory, such as external collaborators.
For unmatched users, you can perform one of the following actions:
* [Match users](#match-users)
* [Remove unmatched users](#remove-unmatched-users)
* [Exempt unmatched users](#exempt-unmatched-users)
The following sections describe each action.
#### Match users
To match users, you must complete the following steps from the **Unmatched users** tab of the business hub details page:
1. Click the **Match user** button of the corresponding user. The **Match user** dialog box is displayed.
2. Enter the username or email address of the user you want to match and invite in the **Match with** field. The user is displayed on a list.
3. Select the user from the list.
4. Click the **Next** button. The **Select Cerby role** dialog box is displayed.
5. Select the role to assign to the user on the business hub **Cerby role** drop-down list:
* **Owner:** This role enables sharing access and managing business hub settings in Cerby.
* **Collaborator:** This role enables only logging in to the app from Cerby.
6. Click the **Match user** button. The dialog box closes, and a success message box is displayed. The user is moved to the **Onboarded users** tab.
#### Remove unmatched users
To remove unmatched users, you must complete the following steps from the **Unmatched users** tab of the business hub details page:
{% hint style="danger" %}
**IMPORTANT:** When removing an unmatched user, Cerby performs an automated task to revoke the user’s seat and permissions in BuzzSumo.
{% endhint %}
1. Click the **More options** (...) icon of the corresponding user. A drop-down list is displayed.
2. Select the **Remove user** option from the list. The **Remove user?** dialog box is displayed.
3. Click the **Remove user** button. The dialog box closes, and a success message box is displayed. The user is removed from the app via an automated task.
#### Exempt unmatched users
Exempted users keep their user accounts or seats active in your app, but you cannot manage them through Cerby.
To exempt unmatched users, you must complete the following steps from the **Unmatched users** tab of the business hub details page:
1. Click the **More options** (...) icon of the corresponding user. A drop-down list is displayed.
2. Select the **Exempt user** option from the list. The exempt user dialog box is displayed.
3. Enter a reason for exempting the user in the **Provide a reason** field.
4. Click the **Exempt member** button. The dialog box closes, and a success message box is displayed. The user is moved to the **Exempted users** tab.
***
## Use your business hub
The following are the supported features of business hubs you can use:
* [Join the App and connect it to Cerby](https://help.cerby.com/cerby-web-app/business-hubs/join-your-external-app-and-set-up-your-business-hub-access)
* [Invite new app members](/setup-and-admin/business-hubs/managing-users-and-assets-via-a-business-hub/add-users-and-teams-to-your-apps-via-a-business-hub)
* [Remove app members](/setup-and-admin/business-hubs/managing-users-and-assets-via-a-business-hub/remove-users-from-your-app-via-a-business-hub)
* [Provision users to your apps via an IdP and business hub](https://help.cerby.com/setup-and-admin/business-hubs/managing-users-and-assets-via-a-business-hub/provision-users-to-your-apps-via-an-idp-and-business-hub)
* [Update the app members’ roles](/setup-and-admin/business-hubs/managing-users-and-assets-via-a-business-hub/update-user-roles-in-your-app-via-a-business-hub)
* [Check for updates in your app and apply report](/setup-and-admin/business-hubs/managing-users-and-assets-via-a-business-hub/sync-your-business-hub-with-your-external-app)
* [Re-assign the app members’ user accounts](https://github.com/cerbyinc/help-center/tree/main/.uncategorized/unpublished-deprecated-re-assign-the-app-members-user-accounts.md)
* [Manage the security of app members’ user accounts](/setup-and-admin/business-hubs/managing-users-and-assets-via-a-business-hub/protect-your-app-user-accounts-via-a-business-hub)
* [Log in to your app](https://help.cerby.com/cerby-web-app/business-hubs/log-in-to-your-app)
* [Track activity on app members’ user accounts](/setup-and-admin/business-hubs/managing-users-and-assets-via-a-business-hub/track-activity-on-app-members-user-accounts)
* [Remove an App](/setup-and-admin/business-hubs/managing-your-business-hubs/remove-a-business-hub)
---
[Next Page](/llms-full.txt/1)
) icon of the corresponding business hub card. The business hub details page is displayed with the **Settings** tab activated.
3. Click the **Check for updates** button located at the top right of the page. A message box is displayed with information about the process. **NOTE:** The check and import process may take a few minutes depending on the number of users, and because Cerby automatically matches users to their corresponding Cerby user account.
4. Confirm that the automated task to check for updates has the “Completed” status by performing any of the following actions:
* Click the **More details** button from the message box.
* Select the **Automation** option from the left navigation drawer to open the **Automation** page with a list of automated tasks and their status.
{% hint style="info" %}
**NOTE:** Cerby automatically performs daily checks for updates for all business hubs, but you can trigger them manually, as described in this section. When a user is deprovisioned from an IdP and a check for updates is performed, Cerby generates a report and sends business hub **Owners** an email to confirm their removal from the app. For more instructions, read the article [Check for updates in your app and apply report](/setup-and-admin/business-hubs/managing-users-and-assets-via-a-business-hub/sync-your-business-hub-with-your-external-app).
{% endhint %}
The next step is [3. Connect your BuzzSumo user account to the business hub](#id-3.-connect-your-buzzsumo-user-account-to-the-business-hub).
### 3. Connect your BuzzSumo user account to the business hub
To connect your BuzzSumo user account to the business hub so Cerby can manage and protect it, you must complete the following steps:
1. Select the **Accounts** option from the left navigation drawer. The **Accounts** page is displayed.
2. Click the **Log in** button of the corresponding BuzzSumo Hub account card. The **Connect your BuzzSumo Hub Account** dialog box is displayed.
3. Enter the login credentials of your **BuzzSumo** user account.
4. Click the **Connect account** button. The dialog box closes, and a success message box and a new account card are displayed.
The next step is [4. Manage unmatched users](#id-4.-manage-unmatched-users).
### 4. Manage unmatched users
During a check for updates, Cerby automatically matches app members to the Cerby user accounts that correspond to their email addresses, including existing [guest users](https://help.cerby.com/getting-started/concepts/user-management/guest-users) and [local partners](https://help.cerby.com/getting-started/concepts/user-management/partners#h-7e4add33a2). Manual matching is required when apps don't provide email addresses and for app members using personal or external accounts that couldn’t be identified or are not in the corporate directory.
To view the status of the imported app members, you must complete the following steps:
1. Select the **Business Hubs** option from the left navigation drawer. The **Business Hubs** page is displayed.
2. Click the **More options** (...) icon of the corresponding business hub card. A drop-down list is displayed.
3. Select the **View Members** option from the list. The business hub details page is displayed with the **Members** tab activated. App members are displayed in the following tabs of the **User Overview** section:
* **Unmatched users:** This tab displays the users who were not automatically matched.
* **Onboarded users:** This tab displays the users matched to their Cerby user account.
* **Guest users:** This tab displays the users who were matched to an existing Cerby user account but it doesn’t exist in the corporate directory, such as external collaborators.
For unmatched users, you can perform one of the following actions:
* [Match users](#match-users)
* [Remove unmatched users](#remove-unmatched-users)
* [Exempt unmatched users](#exempt-unmatched-users)
The following sections describe each action.
#### Match users
To match users, you must complete the following steps from the **Unmatched users** tab of the business hub details page:
1. Click the **Match user** button of the corresponding user. The **Match user** dialog box is displayed.
2. Enter the username or email address of the user you want to match and invite in the **Match with** field. The user is displayed on a list.
3. Select the user from the list.
4. Click the **Next** button. The **Select Cerby role** dialog box is displayed.
5. Select the role to assign to the user on the business hub **Cerby role** drop-down list:
* **Owner:** This role enables sharing access and managing business hub settings in Cerby.
* **Collaborator:** This role enables only logging in to the app from Cerby.
6. Click the **Match user** button. The dialog box closes, and a success message box is displayed. The user is moved to the **Onboarded users** tab.
#### Remove unmatched users
To remove unmatched users, you must complete the following steps from the **Unmatched users** tab of the business hub details page:
{% hint style="danger" %}
**IMPORTANT:** When removing an unmatched user, Cerby performs an automated task to revoke the user’s seat and permissions in BuzzSumo.
{% endhint %}
1. Click the **More options** (...) icon of the corresponding user. A drop-down list is displayed.
2. Select the **Remove user** option from the list. The **Remove user?** dialog box is displayed.
3. Click the **Remove user** button. The dialog box closes, and a success message box is displayed. The user is removed from the app via an automated task.
#### Exempt unmatched users
Exempted users keep their user accounts or seats active in your app, but you cannot manage them through Cerby.
To exempt unmatched users, you must complete the following steps from the **Unmatched users** tab of the business hub details page:
1. Click the **More options** (...) icon of the corresponding user. A drop-down list is displayed.
2. Select the **Exempt user** option from the list. The exempt user dialog box is displayed.
3. Enter a reason for exempting the user in the **Provide a reason** field.
4. Click the **Exempt member** button. The dialog box closes, and a success message box is displayed. The user is moved to the **Exempted users** tab.
***
## Use your business hub
The following are the supported features of business hubs you can use:
* [Join the App and connect it to Cerby](https://help.cerby.com/cerby-web-app/business-hubs/join-your-external-app-and-set-up-your-business-hub-access)
* [Invite new app members](/setup-and-admin/business-hubs/managing-users-and-assets-via-a-business-hub/add-users-and-teams-to-your-apps-via-a-business-hub)
* [Remove app members](/setup-and-admin/business-hubs/managing-users-and-assets-via-a-business-hub/remove-users-from-your-app-via-a-business-hub)
* [Provision users to your apps via an IdP and business hub](https://help.cerby.com/setup-and-admin/business-hubs/managing-users-and-assets-via-a-business-hub/provision-users-to-your-apps-via-an-idp-and-business-hub)
* [Update the app members’ roles](/setup-and-admin/business-hubs/managing-users-and-assets-via-a-business-hub/update-user-roles-in-your-app-via-a-business-hub)
* [Check for updates in your app and apply report](/setup-and-admin/business-hubs/managing-users-and-assets-via-a-business-hub/sync-your-business-hub-with-your-external-app)
* [Re-assign the app members’ user accounts](https://github.com/cerbyinc/help-center/tree/main/.uncategorized/unpublished-deprecated-re-assign-the-app-members-user-accounts.md)
* [Manage the security of app members’ user accounts](/setup-and-admin/business-hubs/managing-users-and-assets-via-a-business-hub/protect-your-app-user-accounts-via-a-business-hub)
* [Log in to your app](https://help.cerby.com/cerby-web-app/business-hubs/log-in-to-your-app)
* [Track activity on app members’ user accounts](/setup-and-admin/business-hubs/managing-users-and-assets-via-a-business-hub/track-activity-on-app-members-user-accounts)
* [Remove an App](/setup-and-admin/business-hubs/managing-your-business-hubs/remove-a-business-hub)
---
[Next Page](/llms-full.txt/1)